


What did you do to your Gen 1 today?


Registered User
Joined: Mar 2008
Posts: 4,389
Likes: 114
From: Orange County, California
Spent some time yesterday and today cleaning up and painting a few parts.
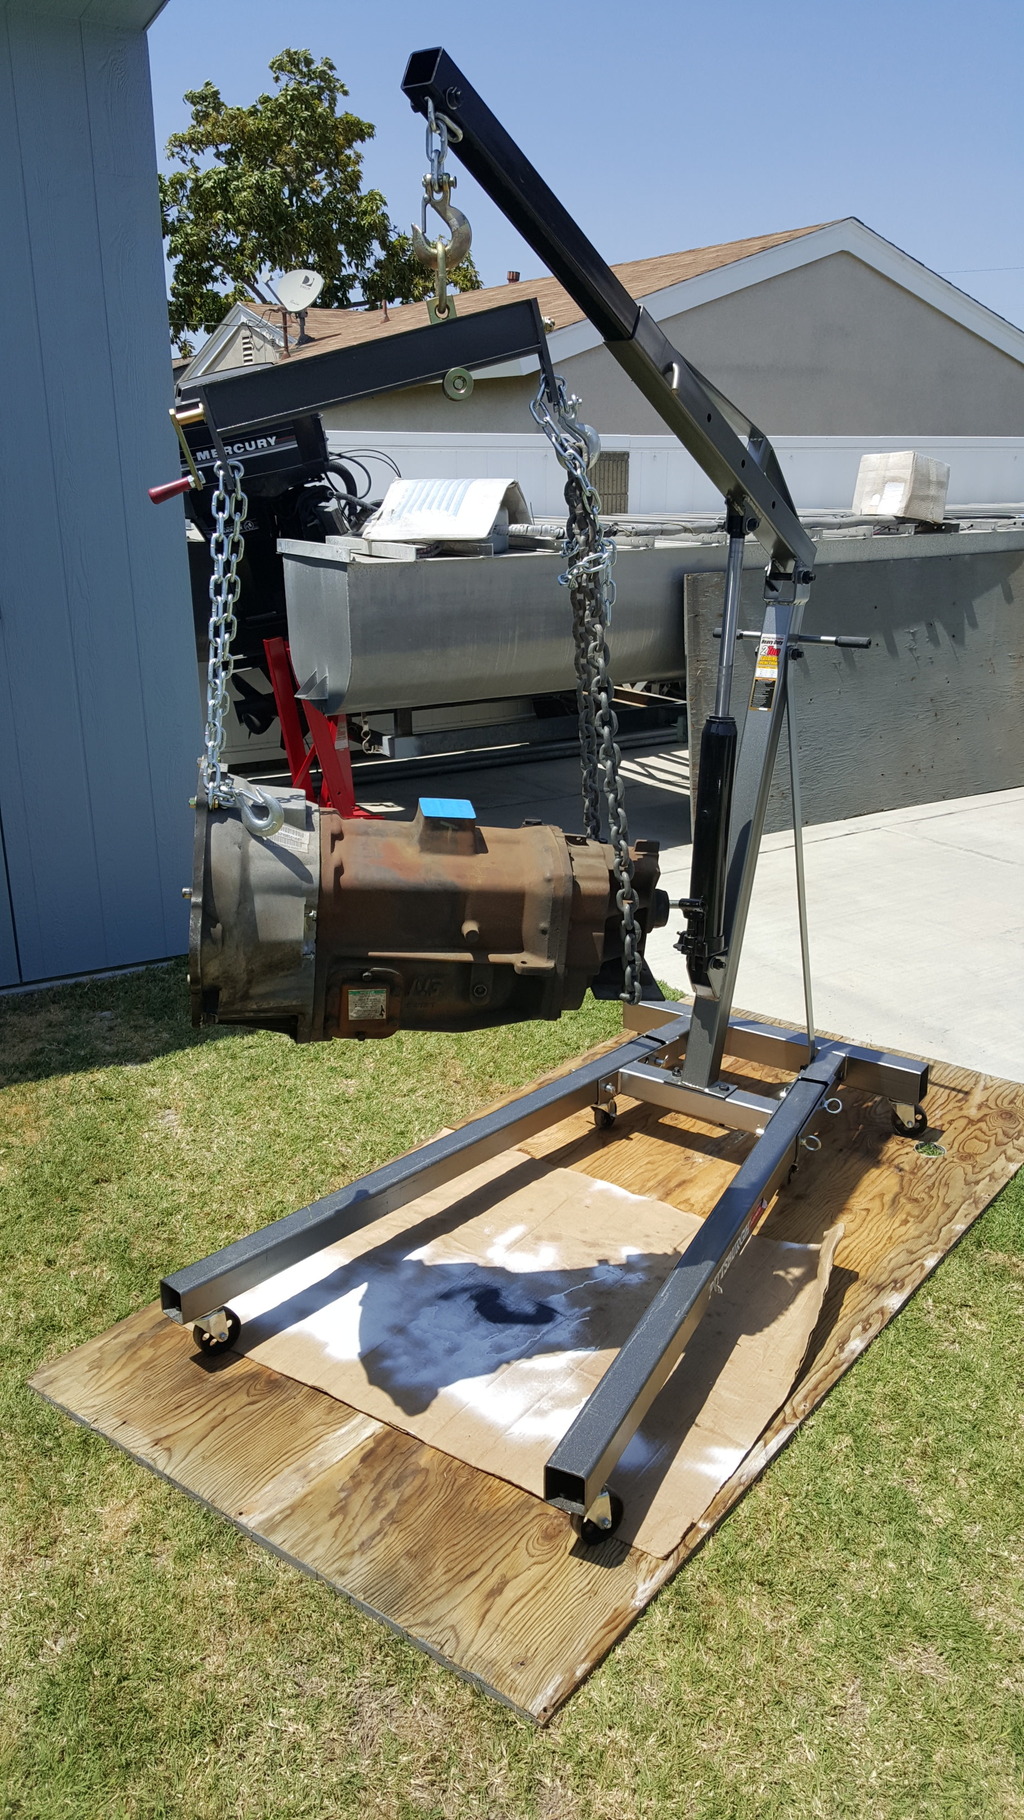
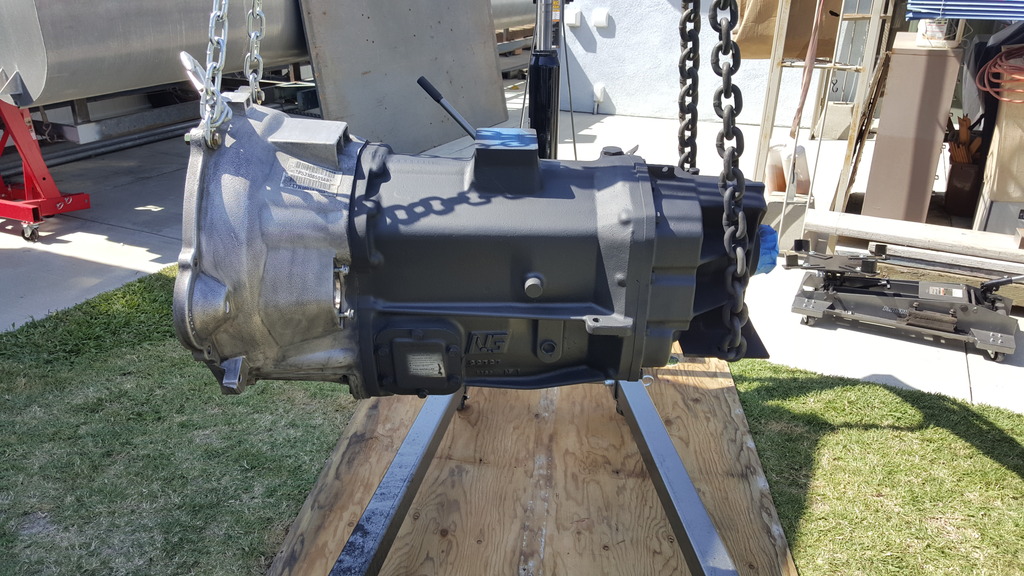

VHT Engine Enamel "Chrysler Hemi Orange." Baked in an oven for 1 hour at 200* for final curing.
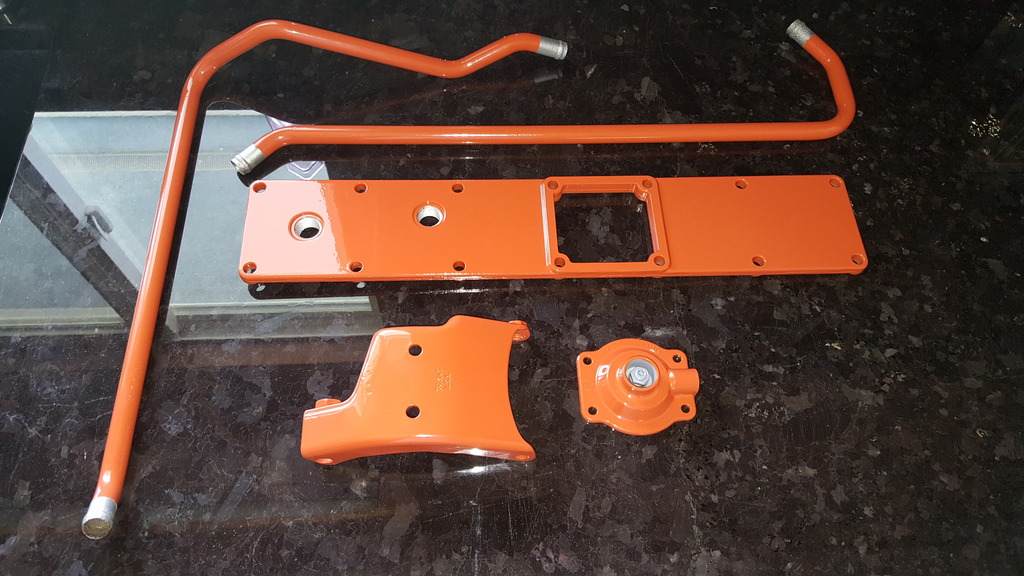
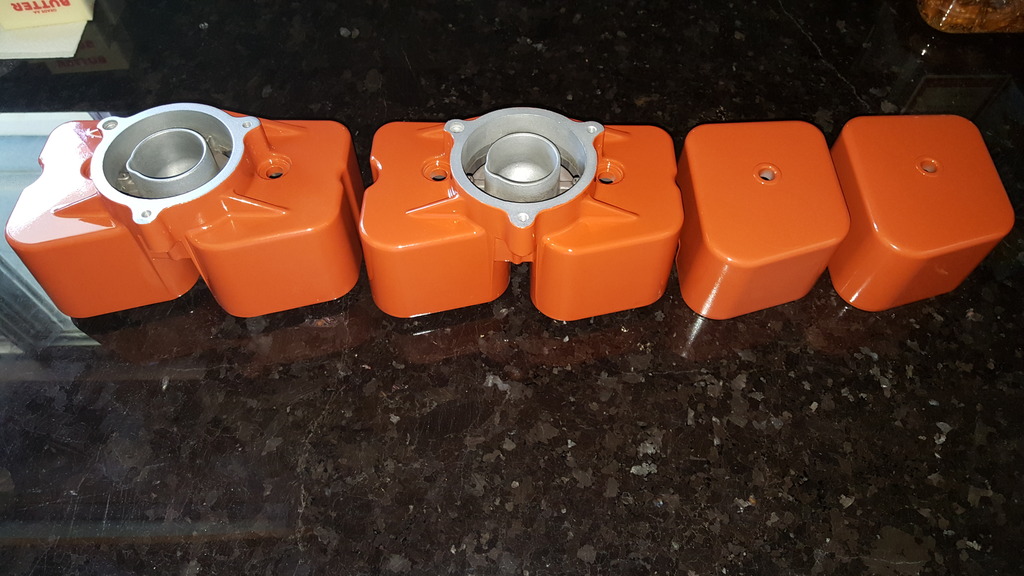
The valve covers go the same treatment and will get baked tomorrow.

Registered User


Joined: Dec 2010
Posts: 6,838
Likes: 1,683
From: Land of the Toxic Avenger


Banned
Joined: Apr 2006
Posts: 529
Likes: 130
From: southern mn
You guys that have a hardware store that has stainless steel hardware on hand are spoiled! For those of us that live a long ways from town and "town" is a community with a population of 600 people we don't just run for anything most things are planned ahead of time.
Registered User
Joined: Mar 2008
Posts: 4,389
Likes: 114
From: Orange County, California
Run the engine around to TDC compression #1. Separate the gear from the pump. Loosen the 3 nuts holding the pump to the timing gear housing. Loosen the bolt at the bottom of the injection pump bracket holding it to its support bracket on the block. Let the pump roll down some as if retarding the timing. Slip the gear on lining up the 'C' on the pump gear to the '0' on the cam gear. Roll the injection pump slightly whichever way necessary to line up the key with the keyway in the gear. You may consider running the lock screw in just to ensure internal timing doesn't slip.
It was pretty easy for me only because my engine's out right now. The only difference was the pump was already out. I slipped the gear in and then fed the pump in. No support bracket or throttle linkage brackets in the way either.

Banned
Joined: Aug 2015
Posts: 884
Likes: 93
From: Jacksonville, FL
It really is quite simple. I had to think it through quite a few times though myself. This is the way I did it and seemingly the easiest.
Run the engine around to TDC compression #1. Separate the gear from the pump. Loosen the 3 nuts holding the pump to the timing gear housing. Loosen the bolt at the bottom of the injection pump bracket holding it to its support bracket on the block. Let the pump roll down some as if retarding the timing. Slip the gear on lining up the 'C' on the pump gear to the '0' on the cam gear. Roll the injection pump slightly whichever way necessary to line up the key with the keyway in the gear. You may consider running the lock screw in just to ensure internal timing doesn't slip.
It was pretty easy for me only because my engine's out right now. The only difference was the pump was already out. I slipped the gear in and then fed the pump in. No support bracket or throttle linkage brackets in the way either.
Run the engine around to TDC compression #1. Separate the gear from the pump. Loosen the 3 nuts holding the pump to the timing gear housing. Loosen the bolt at the bottom of the injection pump bracket holding it to its support bracket on the block. Let the pump roll down some as if retarding the timing. Slip the gear on lining up the 'C' on the pump gear to the '0' on the cam gear. Roll the injection pump slightly whichever way necessary to line up the key with the keyway in the gear. You may consider running the lock screw in just to ensure internal timing doesn't slip.
It was pretty easy for me only because my engine's out right now. The only difference was the pump was already out. I slipped the gear in and then fed the pump in. No support bracket or throttle linkage brackets in the way either.
btw. i've been slowly painting my engine accessories hemi orange over the past year or so. painted the heater tubes orange since this picture


Registered User
Joined: May 2007
Posts: 1,437
Likes: 208
From: Saskatchewan
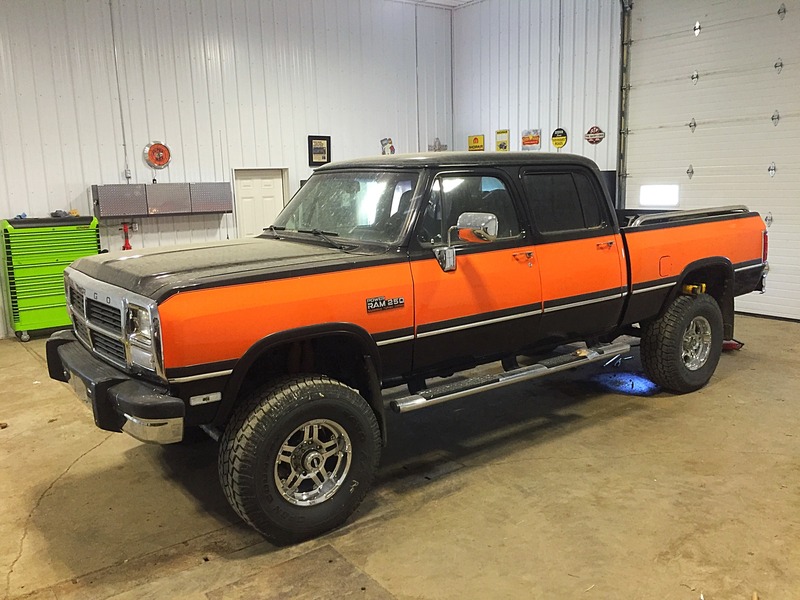
Bent up and installed new rear brake lines, bypassed the RWAL module too. Picked up a hydroboost off a 92 chev 1 ton today so will be tackling that soon. Also have some h4 conversion headlights, redhead steering box, aluminium rad and a few other goodies waiting to go in


Registered User

Joined: Dec 2008
Posts: 7,294
Likes: 2,884
From: vermont
In the past week or two, I took a few days off to wrench on my old Dodges before they come back out on the road for the summer.
I spent most of the time working on the Gauntlet project which is a '89 Ramcharger getting a VE 12V and 4x4 'Rag combo.
I had a couple of friends help me for a few days.
We got the motor sealed back up with a new tappet cover, intake plate gasket, water pump, new turbo and gaskets, oil pan gasket, some VE pump seals, added a return fuel line that was missing and a few other things before test firing it up on the shop floor.
We then got it stuffed between the frame rails after pulling the front clip off.
The front axle was inspected only to find lots of finger tight nuts and missing parts.
The pinion seal was replaced after finding the yoke finger tight.
The wheels where pulled to find only 4 wheel studs on the holding the 2 inch wheel spacers on. We installed new wheel studs and torqued them down properly.
The finger tight hubs where pulled to find that no C-clips where installed on the hubs or axle shaft. I actually found the right C-clips in the dozens of boxes of parts that came with the RC.
Front brakes lines where bolted down with fresh copper washers.
The fuel tank was dropped and inspected for quality of work and all looked good.
I am expecting a South Bend Con -O clutch due here at the shop on Mon.
My good friend is also rebuilding the 'Rag for it before it is installed.
I also had the time to pull out all the rubber floor mat and soaked jut padding out of Poncho, my '91 W-250.
I found one floorboard had some rust so I tried the Evapo-Rust product for the first time.
That worked really well, so I followed it up with a cleaning, and taping it off. Then I primed and painted the floors up followed by adding a nice bench seat out of a '89 W-250 to replace the ripped one that came with it.
After an oil change / filter /lube and swapping the master cylinder brake cap and gasket, it is back on the road. My daughter and I took it out to visit my dad last night for dinner.
Then last on the list was the Vanilla Gorilla, which is my lifted white '85 crew cab. Yes, my daughter and I have a lot of fun naming old Dodge trucks.
It finally got a rebuilt reverse rotation box from Redhead installed.
I will have to order a steering shaft for it now to go from the 'Rag joint to the 3/4 splined end on the box.
I spent most of the time working on the Gauntlet project which is a '89 Ramcharger getting a VE 12V and 4x4 'Rag combo.
I had a couple of friends help me for a few days.
We got the motor sealed back up with a new tappet cover, intake plate gasket, water pump, new turbo and gaskets, oil pan gasket, some VE pump seals, added a return fuel line that was missing and a few other things before test firing it up on the shop floor.
We then got it stuffed between the frame rails after pulling the front clip off.
The front axle was inspected only to find lots of finger tight nuts and missing parts.
The pinion seal was replaced after finding the yoke finger tight.
The wheels where pulled to find only 4 wheel studs on the holding the 2 inch wheel spacers on. We installed new wheel studs and torqued them down properly.
The finger tight hubs where pulled to find that no C-clips where installed on the hubs or axle shaft. I actually found the right C-clips in the dozens of boxes of parts that came with the RC.
Front brakes lines where bolted down with fresh copper washers.
The fuel tank was dropped and inspected for quality of work and all looked good.
I am expecting a South Bend Con -O clutch due here at the shop on Mon.
My good friend is also rebuilding the 'Rag for it before it is installed.
I also had the time to pull out all the rubber floor mat and soaked jut padding out of Poncho, my '91 W-250.
I found one floorboard had some rust so I tried the Evapo-Rust product for the first time.
That worked really well, so I followed it up with a cleaning, and taping it off. Then I primed and painted the floors up followed by adding a nice bench seat out of a '89 W-250 to replace the ripped one that came with it.
After an oil change / filter /lube and swapping the master cylinder brake cap and gasket, it is back on the road. My daughter and I took it out to visit my dad last night for dinner.
Then last on the list was the Vanilla Gorilla, which is my lifted white '85 crew cab. Yes, my daughter and I have a lot of fun naming old Dodge trucks.
It finally got a rebuilt reverse rotation box from Redhead installed.
I will have to order a steering shaft for it now to go from the 'Rag joint to the 3/4 splined end on the box.

Registered User
Joined: Feb 2013
Posts: 406
Likes: 52

Registered User
Joined: Feb 2013
Posts: 406
Likes: 52
I've had that same fan clutch from Napa on mine for 3 years, and the only time I ever hear it kick in is if I'm pullin heavy, or running 75 mph or higher for long periods of time.
Banned
Joined: Aug 2015
Posts: 884
Likes: 93
From: Jacksonville, FL
It really is quite simple. I had to think it through quite a few times though myself. This is the way I did it and seemingly the easiest.
Run the engine around to TDC compression #1. Separate the gear from the pump. Loosen the 3 nuts holding the pump to the timing gear housing. Loosen the bolt at the bottom of the injection pump bracket holding it to its support bracket on the block. Let the pump roll down some as if retarding the timing. Slip the gear on lining up the 'C' on the pump gear to the '0' on the cam gear. Roll the injection pump slightly whichever way necessary to line up the key with the keyway in the gear. You may consider running the lock screw in just to ensure internal timing doesn't slip.
It was pretty easy for me only because my engine's out right now. The only difference was the pump was already out. I slipped the gear in and then fed the pump in. No support bracket or throttle linkage brackets in the way either.
Run the engine around to TDC compression #1. Separate the gear from the pump. Loosen the 3 nuts holding the pump to the timing gear housing. Loosen the bolt at the bottom of the injection pump bracket holding it to its support bracket on the block. Let the pump roll down some as if retarding the timing. Slip the gear on lining up the 'C' on the pump gear to the '0' on the cam gear. Roll the injection pump slightly whichever way necessary to line up the key with the keyway in the gear. You may consider running the lock screw in just to ensure internal timing doesn't slip.
It was pretty easy for me only because my engine's out right now. The only difference was the pump was already out. I slipped the gear in and then fed the pump in. No support bracket or throttle linkage brackets in the way either.
1. line up the "E" and "O" on the gears
2. lock the IP timing by removing the washer from the lock bolt on the side of the pump
3. loosen all the bolts holding the pump in place
4. pull the IP gear
5. re-install IP gear by lining up the "C" and the "O"
am i tracking?