
Crewcab update...


Thread Starter
Registered User


Joined: Mar 2010
Posts: 7,265
Likes: 1,346
From: Prince George, BC
I cleaned up the doors...front and rear. Installed all new seals and window sweeps. Only issue I had with this was with the supplier of the window sweeps.
They supplier was Fairfield I believe. Well they decided to cheap out and replaced the clips that slide into the door to hold them in place with plain metal clips...not the spring steel that they should be. Well you can guess what happened. The darn sweeps would not stay in place., since the clips would bend, and stay bent, when you installed them.
So I fought that for a coupe days. Had to carefully remove the clips from the old sweeps and install them on the new ones. Huge hassle!!
So if you are considering getting sweeps....stay away form the ones manufactured by Fairfield.. The ones I got from JCW years ago were fine. Those actually came out of Mexico.
Thread Starter
Registered User
Joined: Mar 2010
Posts: 7,265
Likes: 1,346
From: Prince George, BC
So that's about it. Truck is basically done!!
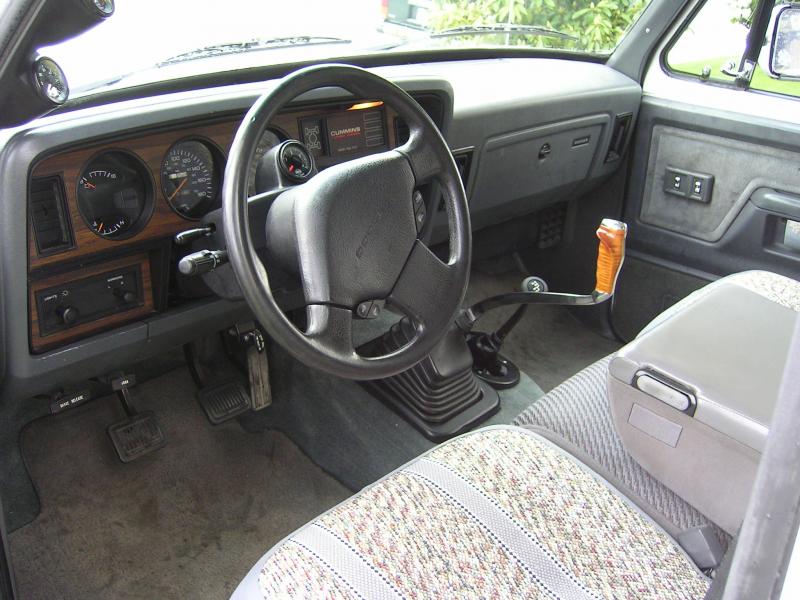
Installed a good set of saddle blanket grey seat covers, front and rear and called the interior finished.
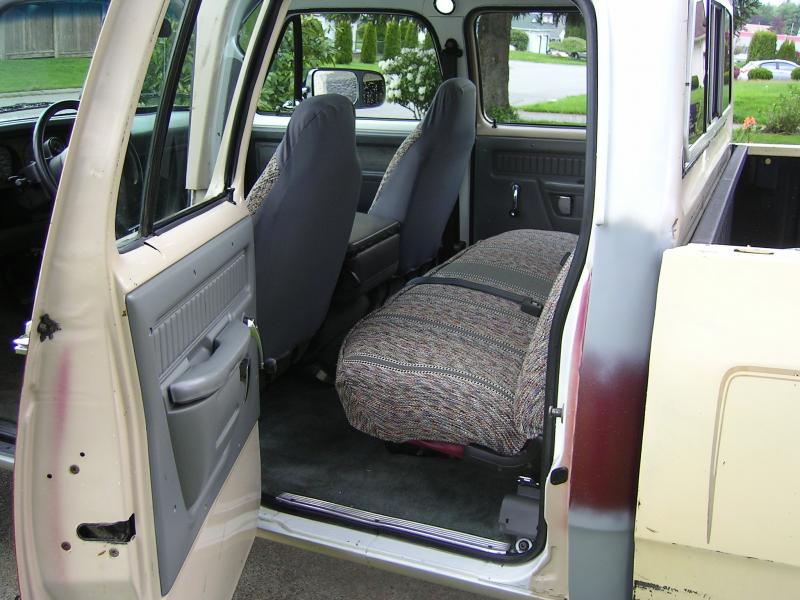
Rear door panels got cleaned, and repainted.
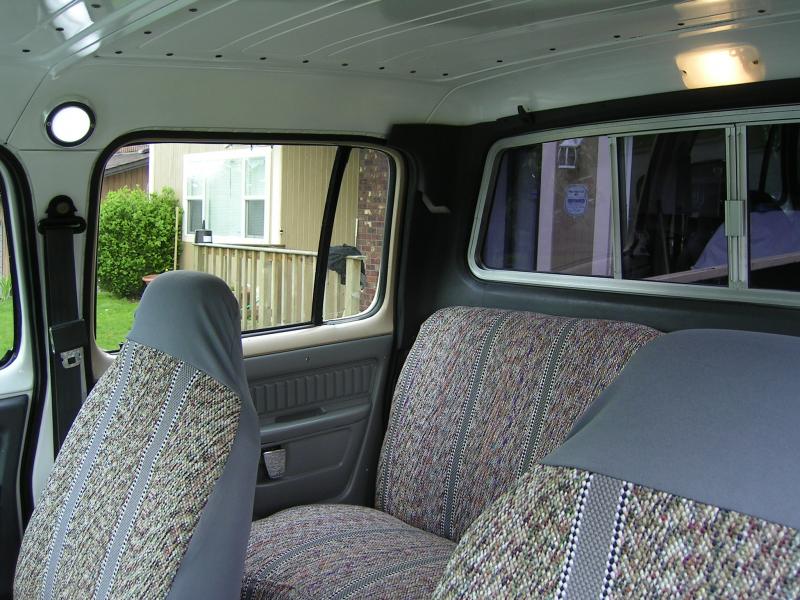
Installed a good set of saddle blanket grey seat covers, front and rear and called the interior finished.


Rear door panels got cleaned, and repainted.

Thread Starter
Registered User
Joined: Mar 2010
Posts: 7,265
Likes: 1,346
From: Prince George, BC
And here it is ready to go....My daughters have dubbed the crewcab "Patches".... They don't want me to paint it....they love it the way it is.
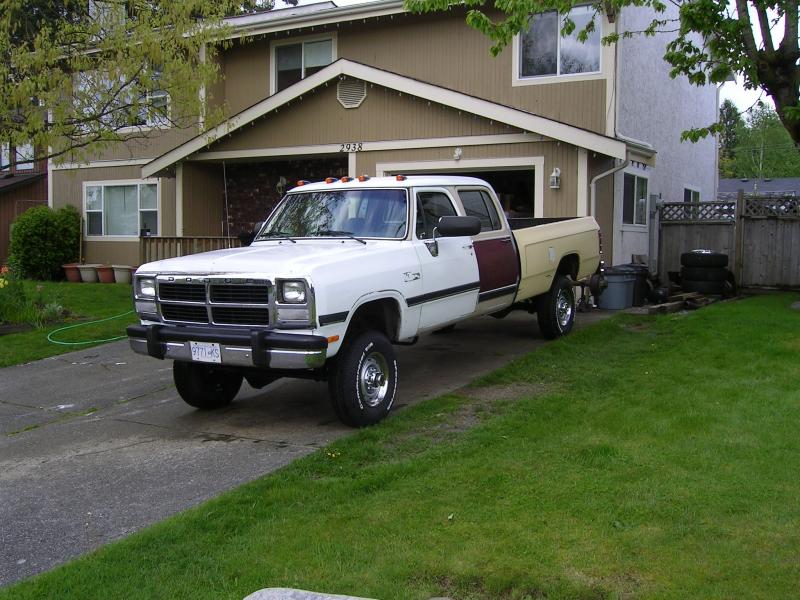

I started driving it the first week of May. Have put on about 1300km's so far. I will go into the few issues I have had to deal with later.
They don't want me to paint it....they love it the way it is.

I started driving it the first week of May. Have put on about 1300km's so far. I will go into the few issues I have had to deal with later.
Registered User
Joined: Dec 2010
Posts: 6,837
Likes: 1,683
From: Land of the Toxic Avenger
TC,
The truck looks great, man.... Glad to hear you're driving it around as well.
Wish mine was a stick. Autos are good for snow plowing, so I guess I'm living with it for now.
Again, ...... great job putting it together.
The truck looks great, man.... Glad to hear you're driving it around as well.
Wish mine was a stick. Autos are good for snow plowing, so I guess I'm living with it for now.
Again, ...... great job putting it together.
Thread Starter
Registered User
Joined: Mar 2010
Posts: 7,265
Likes: 1,346
From: Prince George, BC
Thanks for the compliments guys.
I know it still needs some cosmetics...but at least I can drive it and work the bugs out as I go. And work slowly on the little things.
I know it still needs some cosmetics...but at least I can drive it and work the bugs out as I go. And work slowly on the little things.

Registered User
Joined: Nov 2010
Posts: 268
Likes: 13
From: Bradenton, Fla
TC,Looks Great ! You've done a Hellava nice job on "Patches" She really turned out nice !. 
Let us Crewbies in process know about the "Bugs" you've run into. Other than trying to park at Walmart
Let us Crewbies in process know about the "Bugs" you've run into. Other than trying to park at Walmart
Thread Starter
Registered User
Joined: Mar 2010
Posts: 7,265
Likes: 1,346
From: Prince George, BC
I knew I forgot a couple things.....
There was the seat belts. I had the complete set from the clubcab donor truck...in grey. And I lucked out and got a complete grey set from the wrecker from a regular cab truck.
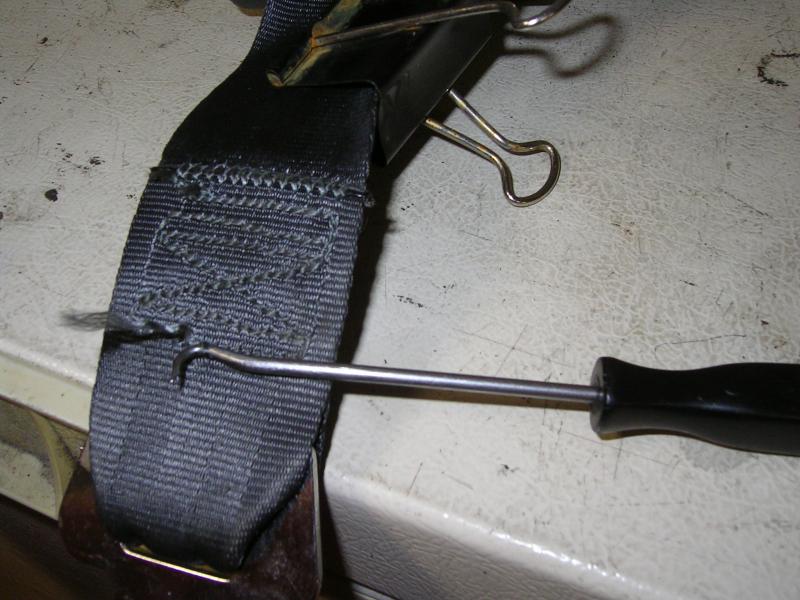
So I cleaned everything up really well. Lots of simple green and a scrub brush to clean all the webbing. If you haven't scrubbed your belts...I highly recommend it. They are nasty things!!
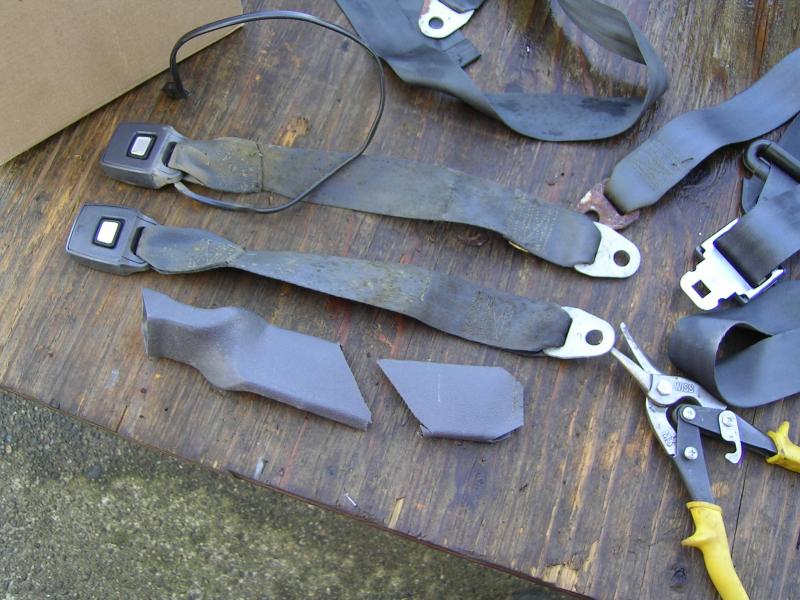
I also didn't like the broken, and sharp plastic sleeves over the belts. So i cut them off as well.
Cleaned up and set out to hang dry.
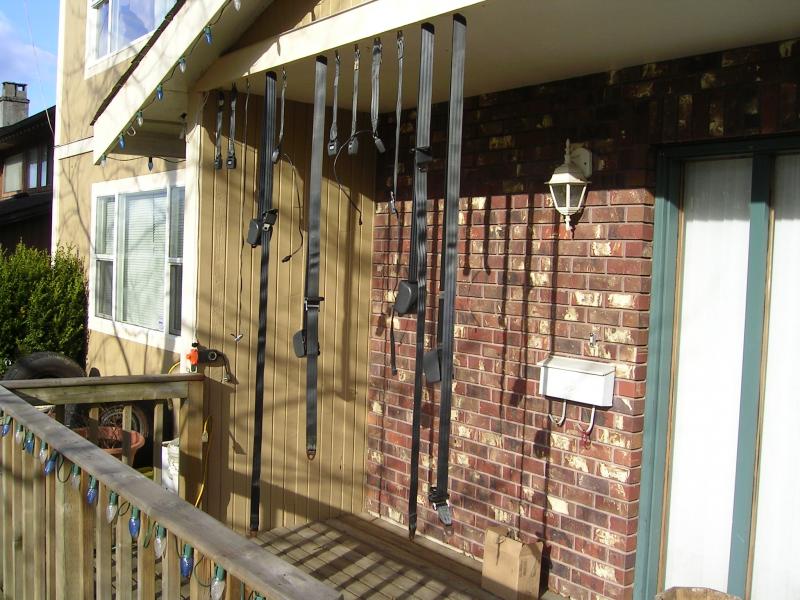
Wonder what the neighbors thoought of my redneck wind chimes.....LOL...
There was the seat belts. I had the complete set from the clubcab donor truck...in grey. And I lucked out and got a complete grey set from the wrecker from a regular cab truck.
So I cleaned everything up really well. Lots of simple green and a scrub brush to clean all the webbing. If you haven't scrubbed your belts...I highly recommend it. They are nasty things!!

I also didn't like the broken, and sharp plastic sleeves over the belts. So i cut them off as well.
Cleaned up and set out to hang dry.

Wonder what the neighbors thoought of my redneck wind chimes.....LOL...
Thread Starter
Registered User
Joined: Mar 2010
Posts: 7,265
Likes: 1,346
From: Prince George, BC
Only thing I had to modify was for the rear seat lap belts. The auto winder ones.
Here is a pic of the original crewcab unit in red, and the rear clubcab unit in grey.
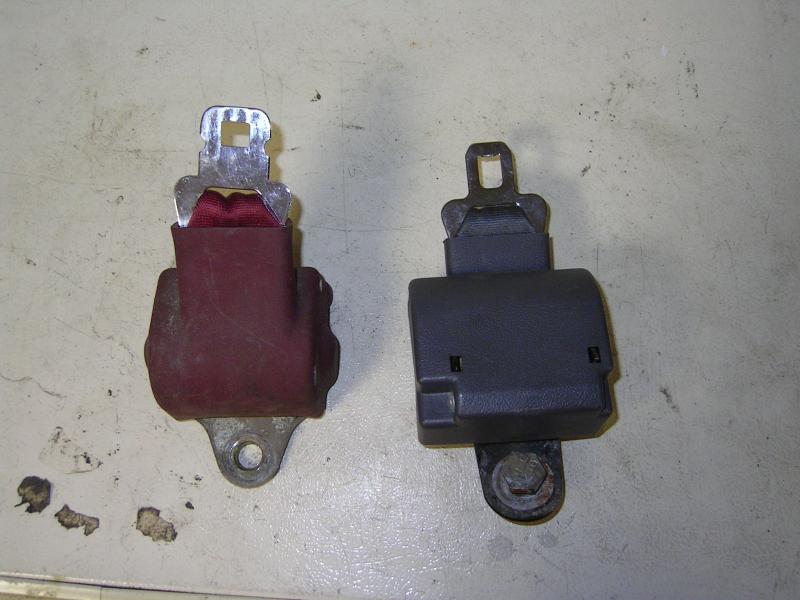
What I wanted was to use the clubcab unit, but the buckle would not work. Seems Ma. Mopar decided to use a different buckle and latch set up for the rear seat belts in the clubcab.
So I decided I would remove the stiching on the grey belts...to get the buckle off cleanly.
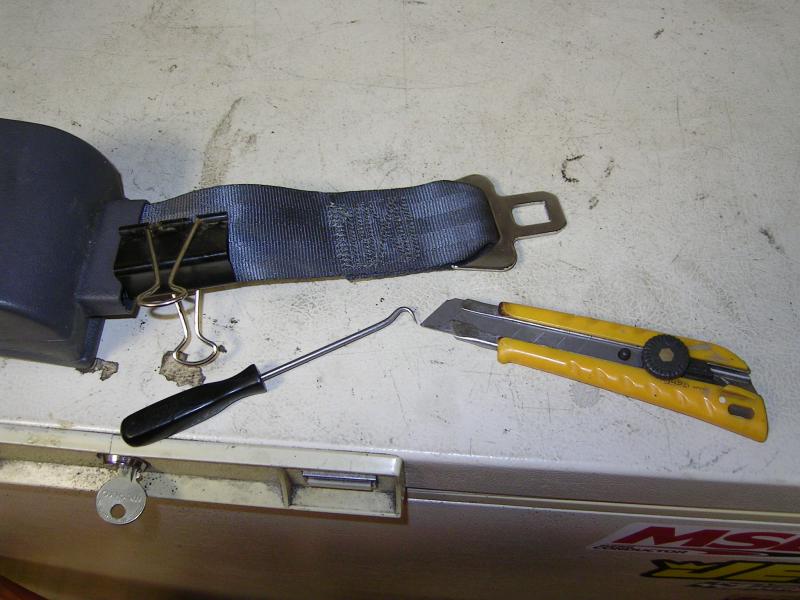
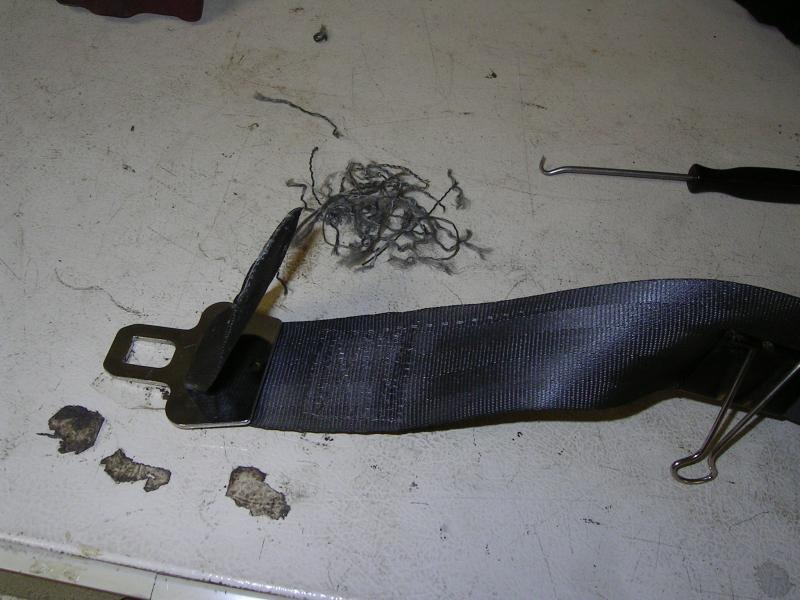
Took a while to work out the old stitching...but eventually got it all out.
Thread Starter
Registered User
Joined: Mar 2010
Posts: 7,265
Likes: 1,346
From: Prince George, BC
Then it was cut the buckle off the red belt, and have the upholstery shop sew them back up.
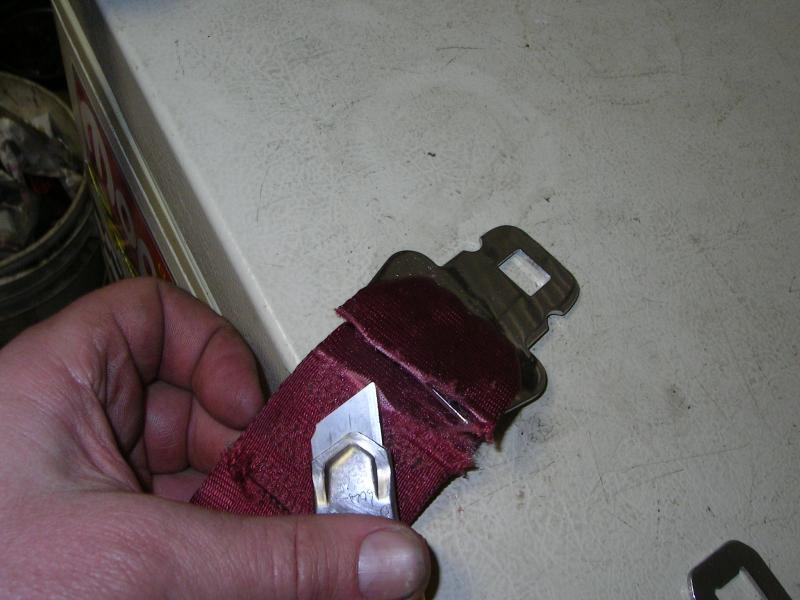
Here you can see the difference in the two buckles....

Ready to get sewn up....

The shop did it for free, since I had already done all the hard work. Took like 2 minutes on their machine.

Here you can see the difference in the two buckles....

Ready to get sewn up....

The shop did it for free, since I had already done all the hard work. Took like 2 minutes on their machine.
Thread Starter
Registered User
Joined: Mar 2010
Posts: 7,265
Likes: 1,346
From: Prince George, BC
And man is this thing a bear to park in the lot. With the lousy stock steering anyway...right hand direction is the worst, and the long wheel base...I have had to back up a few times to get a round a corner.....

Thread Starter
Registered User
Joined: Mar 2010
Posts: 7,265
Likes: 1,346
From: Prince George, BC
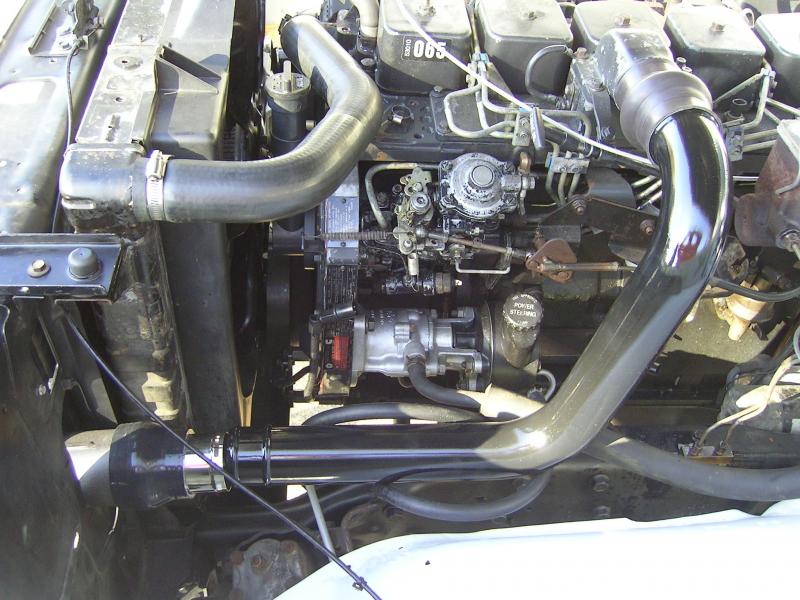
Man another thing I forgot.... The PS IC tube install.
I had wanted to try and re-use the OEM intercooler tubes. The only issue I had with the OEM tubes was that corrosion had got under the powder coating. (This is why I don't like powder coating)

Wire wheeled them clean....

And then painted them gloss black....
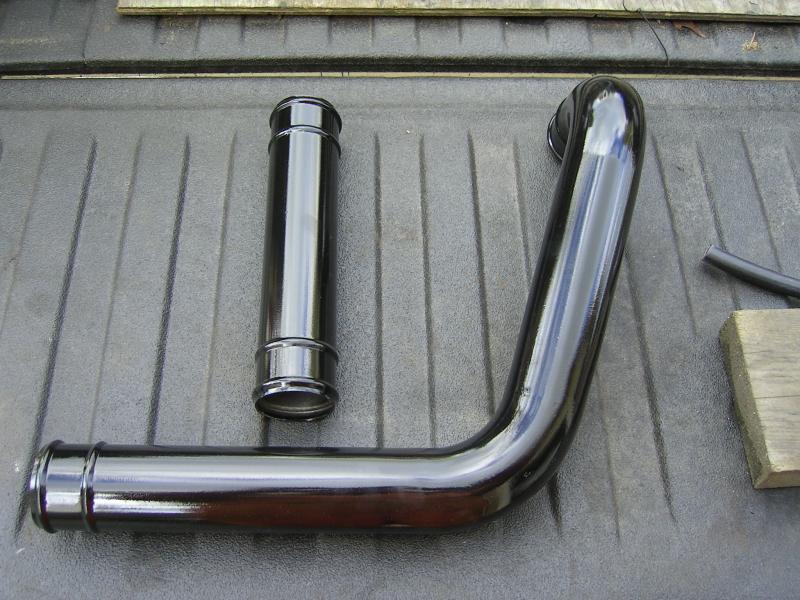
The PS IC tube install. I had wanted to try and re-use the OEM intercooler tubes. The only issue I had with the OEM tubes was that corrosion had got under the powder coating. (This is why I don't like powder coating)

Wire wheeled them clean....

And then painted them gloss black....

Thread Starter
Registered User
Joined: Mar 2010
Posts: 7,265
Likes: 1,346
From: Prince George, BC
I had taken measurements when the OEM intercooler was in place, then after I installed the Power stroke intercooler. And had figured I needed a few parts from Silicone intakes.

And this is what it looked like when I trial fitted things.

A little closer then I had planned on. Turned out the OEM boot was about 5" , and I needed a 3" boot.

And this is what it looked like when I trial fitted things.


A little closer then I had planned on. Turned out the OEM boot was about 5" , and I needed a 3" boot.
Thread Starter
Registered User
Joined: Mar 2010
Posts: 7,265
Likes: 1,346
From: Prince George, BC
So I looked at some aftermarket "Humped" boots...but they were pretty weak in the humped area.
So I decided to use the OEM boots. Just required a little trimming.
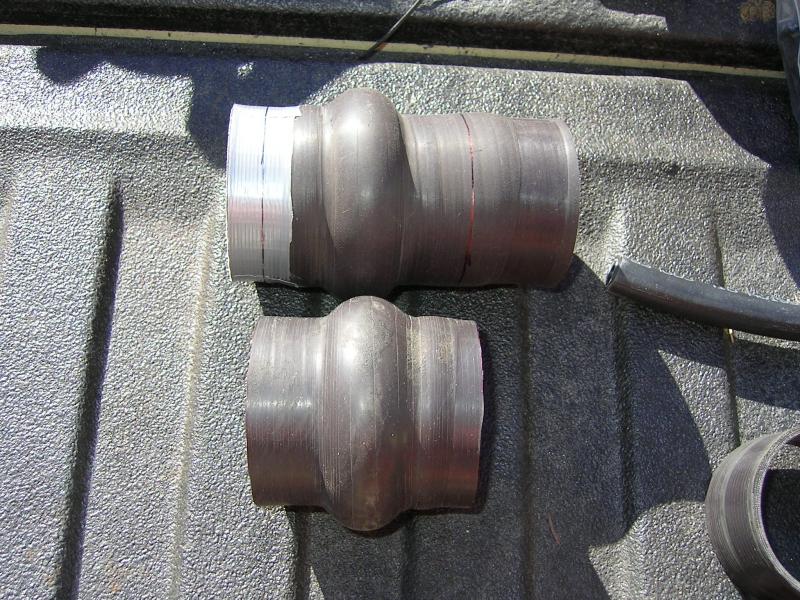
Careful measurements, and even more careful cutting with an exacto knife, netted me a boot that would work perfectly.
All button up....

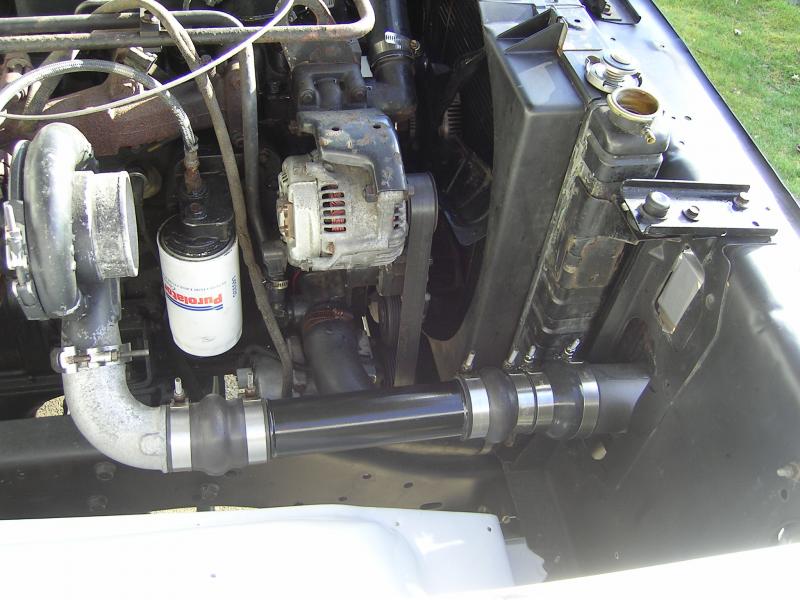
I really like the Silicone intakes website. They have every measurement you could possibly need on their items. Makes it very easy to get the right part the first time.

