
Side Mirror / Tow mirror mash-up....

Thread Starter
Registered User


Joined: Mar 2010
Posts: 7,265
Likes: 1,346
From: Prince George, BC
Side Mirror / Tow mirror mash-up....
Been wanting to change the standard 1st gen chrome power side mirrors on my doors for a while. Didn't want to move the stainless tow mirrors and arms over from my original 84 doors...didn't wan the extra holes in my doors.
So I had been trying to come up with something that would give me better mirrors for towing, and not mess up the current mounting on the door. Well I finally came up with something.
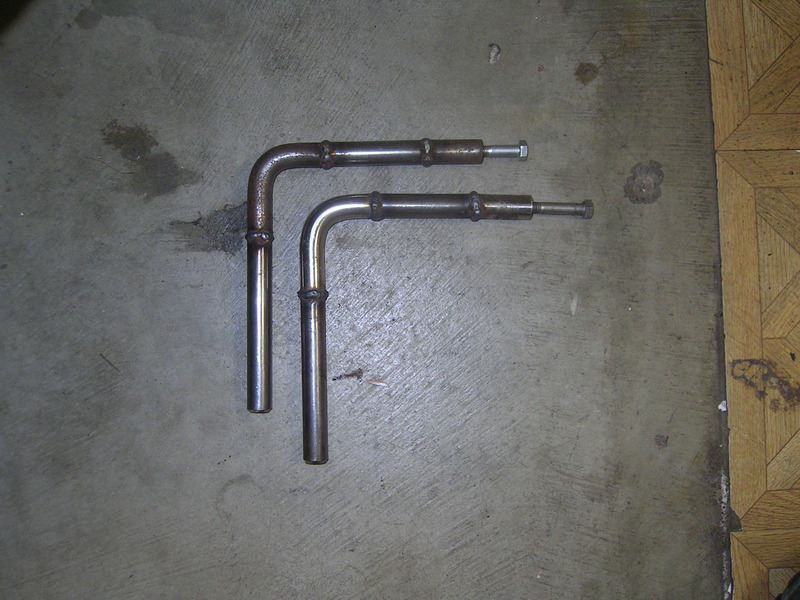
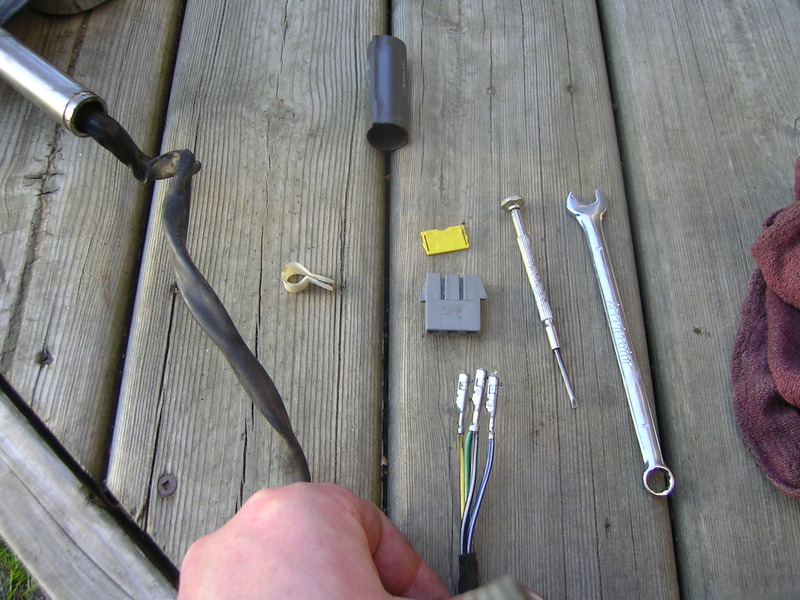
First here is a pic of the OEM side mirror and the new style I wanted to put on.

And the little arms used to hold these onto the stainless tow mirror brackets...
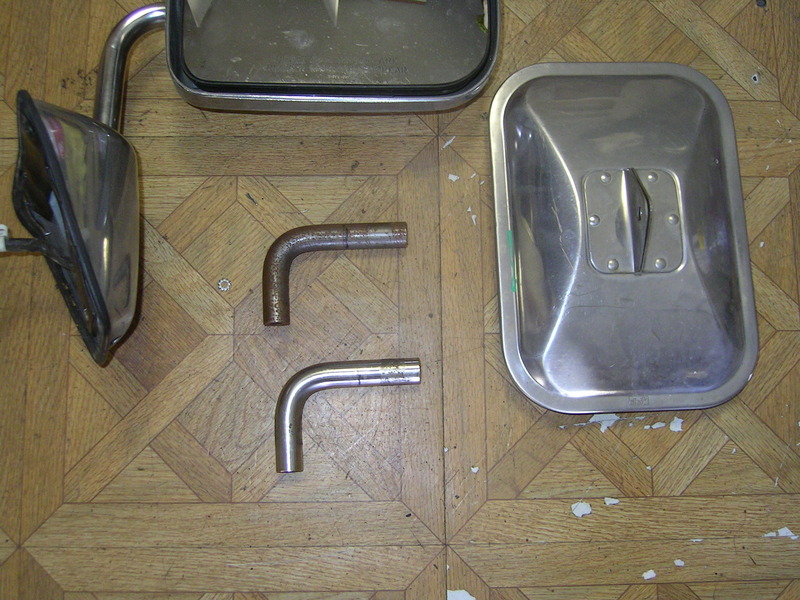
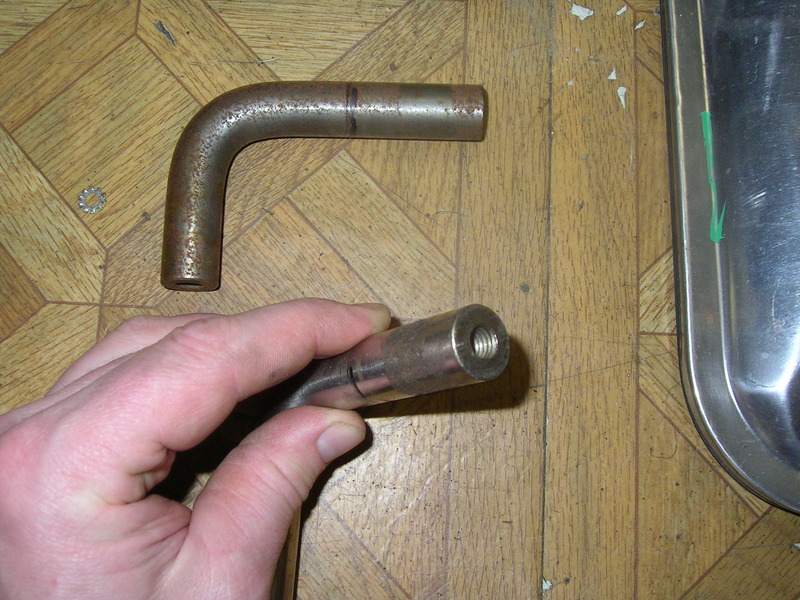
What I found was that the OD of the tow mirror 90* bends, and the OD of the shaft, the chrome mirror uses were the same...Bingo! That was the info I needed.
I tried to come up with something that would be a simple drop in, but couldn't find anything. So went to plan "B"....lets make what we want.
First I measured the depth of the threaded portion on the 90...then gave an extra 1/4" and marked that out....that will be where my cut will go.
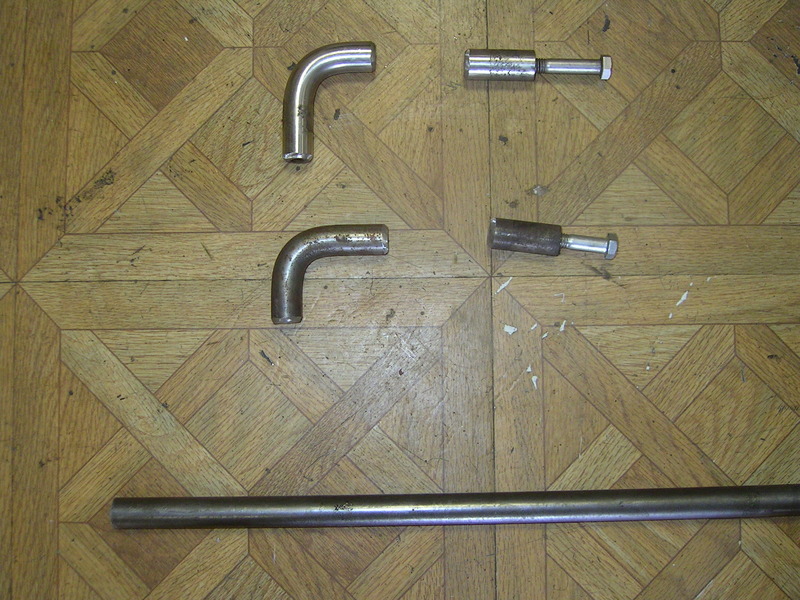
Then a bit of cutting on the chop saw...
So I had been trying to come up with something that would give me better mirrors for towing, and not mess up the current mounting on the door. Well I finally came up with something.
First here is a pic of the OEM side mirror and the new style I wanted to put on.

And the little arms used to hold these onto the stainless tow mirror brackets...

What I found was that the OD of the tow mirror 90* bends, and the OD of the shaft, the chrome mirror uses were the same...Bingo! That was the info I needed.
I tried to come up with something that would be a simple drop in, but couldn't find anything. So went to plan "B"....lets make what we want.
First I measured the depth of the threaded portion on the 90...then gave an extra 1/4" and marked that out....that will be where my cut will go.

Then a bit of cutting on the chop saw...

Thread Starter
Registered User
Joined: Mar 2010
Posts: 7,265
Likes: 1,346
From: Prince George, BC
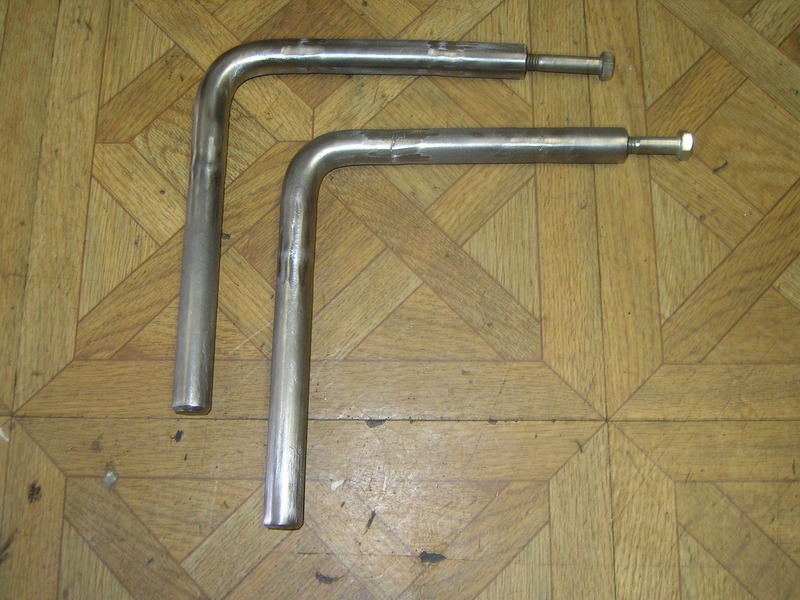
Then I cut some 3/4 round bar...BTW the OD measurement was .75"... I made the top portion of the arm 7" long...had to cut two different size pieces since the 90's were different lengths. And then made the lower section 8".
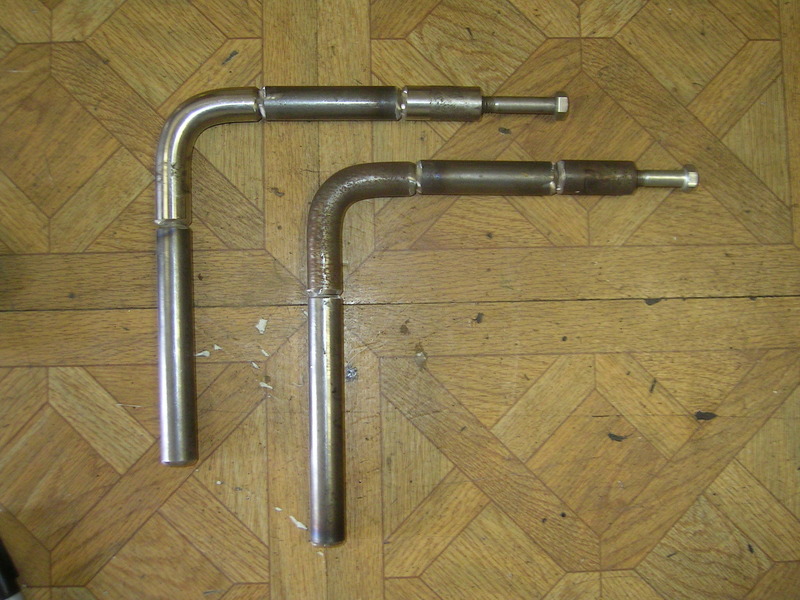
Then off to do some welding...
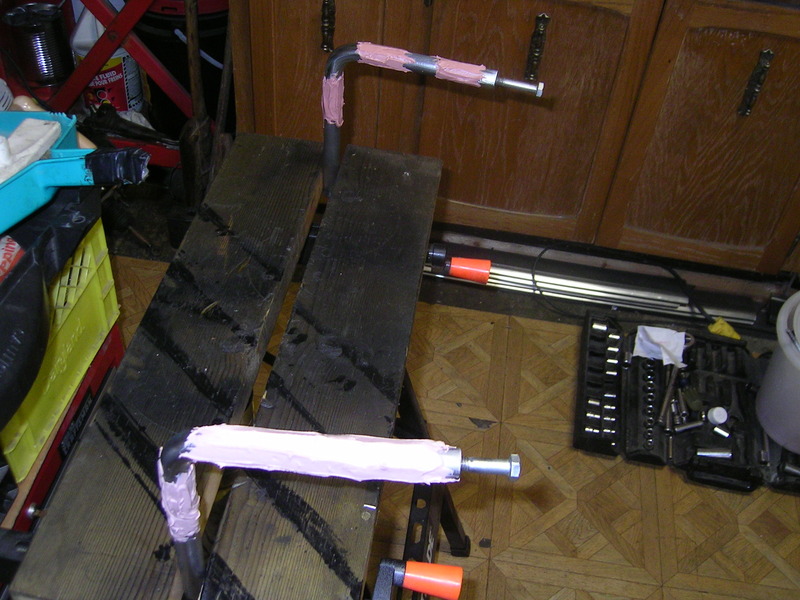
And after some quality time with the flapper disc on the 4.5" angel grinder...Love those flapper discs!!
Then I decided I would smooth out the surface a bit....mixed up some old body filler and gooped it on.
I made the top portion of the arm 7" long...had to cut two different size pieces since the 90's were different lengths. And then made the lower section 8".
Then off to do some welding...

And after some quality time with the flapper disc on the 4.5" angel grinder...Love those flapper discs!!

Then I decided I would smooth out the surface a bit....mixed up some old body filler and gooped it on.

Thread Starter
Registered User
Joined: Mar 2010
Posts: 7,265
Likes: 1,346
From: Prince George, BC
Took some pics of the primer and paint...but pics didn't come through on the camera. Anyway once I smoothed the body filler I gave it a couple coats of sandable primer, then two more coats of satin black paint.
Now the fun part....
You will need to remove your interior door panels so you can unplug the power mirror connection. Once that is done remove the lower screw on the side cover and move the cover up out of the way.

I first thought I could leave the bracket in place, but the wiring for the mirror is bolted to the frame on the back side...bolt is 8mm. The main bracket, and mirror are held on with three 10mm nuts.
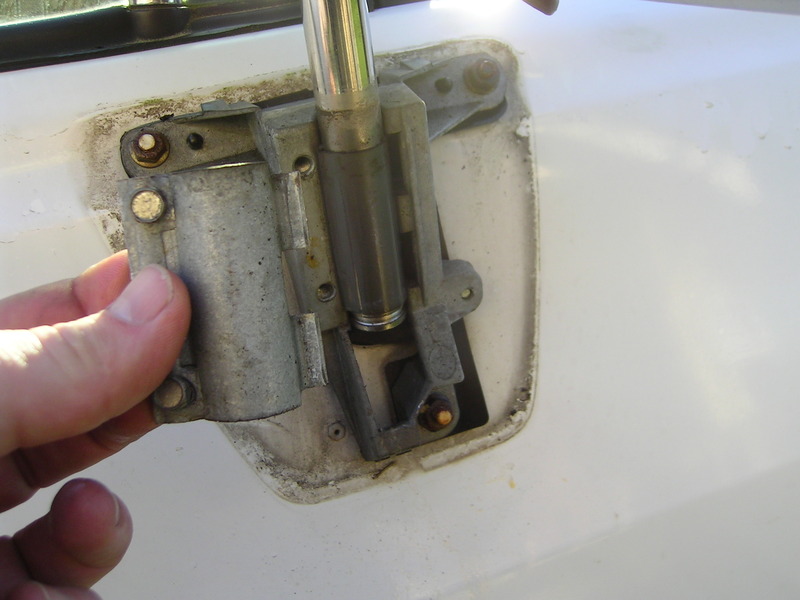
The bolts for the clamp are 8mm as well.
Once the assembly is off the truck take the time to clean the paint under neath...then give it a wax as well. But before you start assembling the new unit you need to get a couple pieces off.
Remove the wiring pins from the plug. Use a small jewelers screw driver to pop out the keeper..mine was yellow...then use the same small screwdriver to lift the tabs on each of the pins and pull them out.
Once the wiring is free remove the plastic shaft liner, and the main chrome body cover.
Then slide the plastic sleeve over the bottom of the arm, and makes sure you bracket is on good shape. There is a small ridge at the bottom of the area the arm sits in....the new arm will hit that and not slide down.
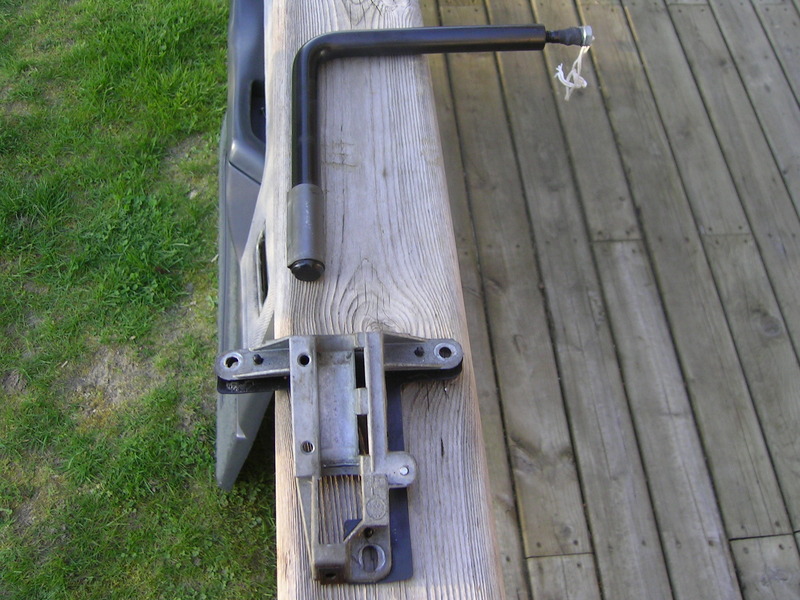
Then install on the truck....
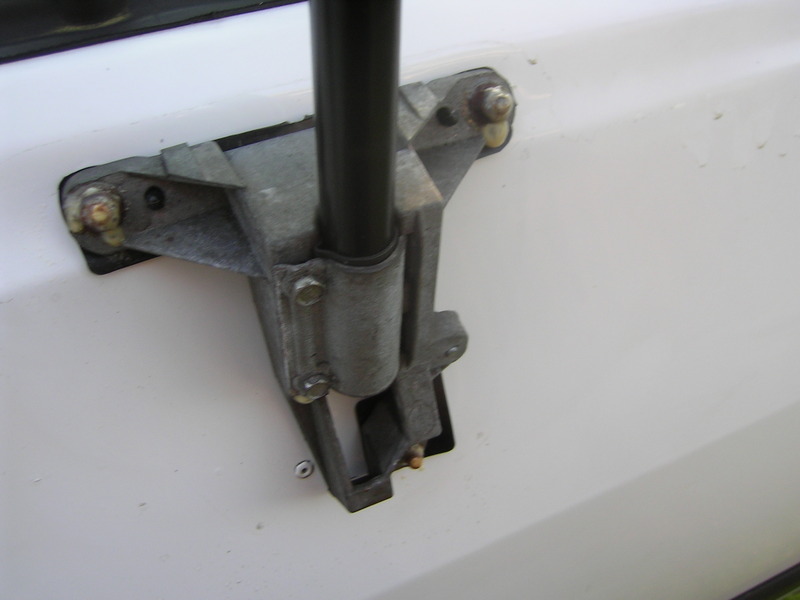
I left the two 8mm bolts just snugged up...so I could adjust the mirror arm easier.
Now the fun part....
You will need to remove your interior door panels so you can unplug the power mirror connection. Once that is done remove the lower screw on the side cover and move the cover up out of the way.

I first thought I could leave the bracket in place, but the wiring for the mirror is bolted to the frame on the back side...bolt is 8mm. The main bracket, and mirror are held on with three 10mm nuts.

The bolts for the clamp are 8mm as well.
Once the assembly is off the truck take the time to clean the paint under neath...then give it a wax as well.
But before you start assembling the new unit you need to get a couple pieces off. Remove the wiring pins from the plug. Use a small jewelers screw driver to pop out the keeper..mine was yellow...then use the same small screwdriver to lift the tabs on each of the pins and pull them out.

Once the wiring is free remove the plastic shaft liner, and the main chrome body cover.
Then slide the plastic sleeve over the bottom of the arm, and makes sure you bracket is on good shape. There is a small ridge at the bottom of the area the arm sits in....the new arm will hit that and not slide down.

Then install on the truck....

I left the two 8mm bolts just snugged up...so I could adjust the mirror arm easier.

Thread Starter
Registered User
Joined: Mar 2010
Posts: 7,265
Likes: 1,346
From: Prince George, BC
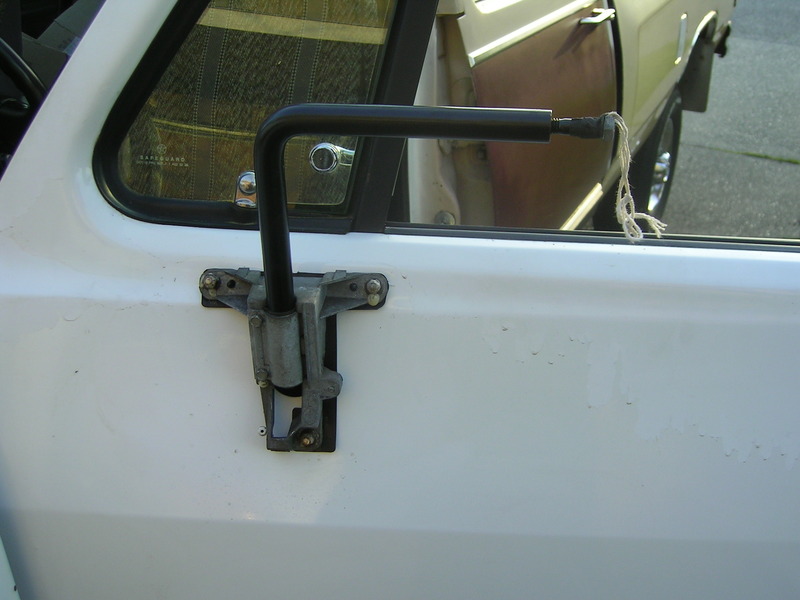
Then I cleaned up the stainless bolts, washers and nylon spacers from the tow mirrors. Gave the mirrors a quick cleaning....and installed. Don't forget the never seize on the bolts.
And all done....
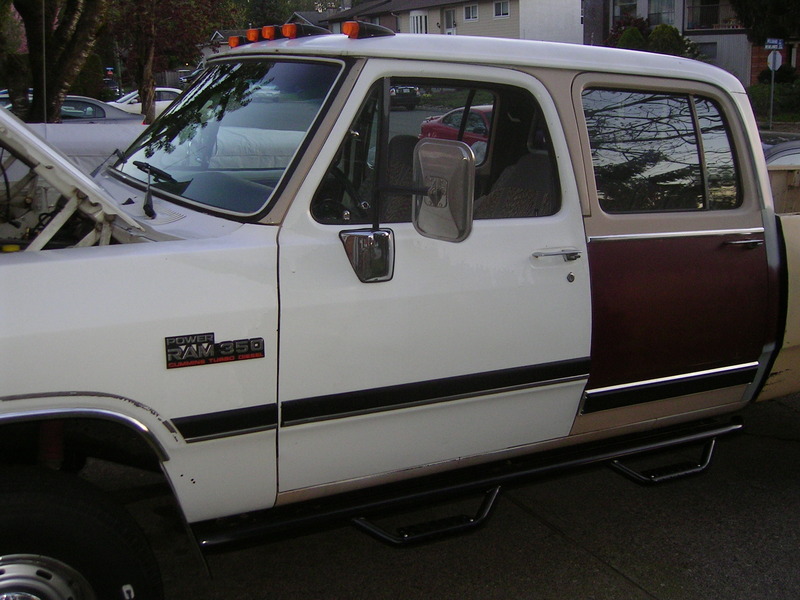
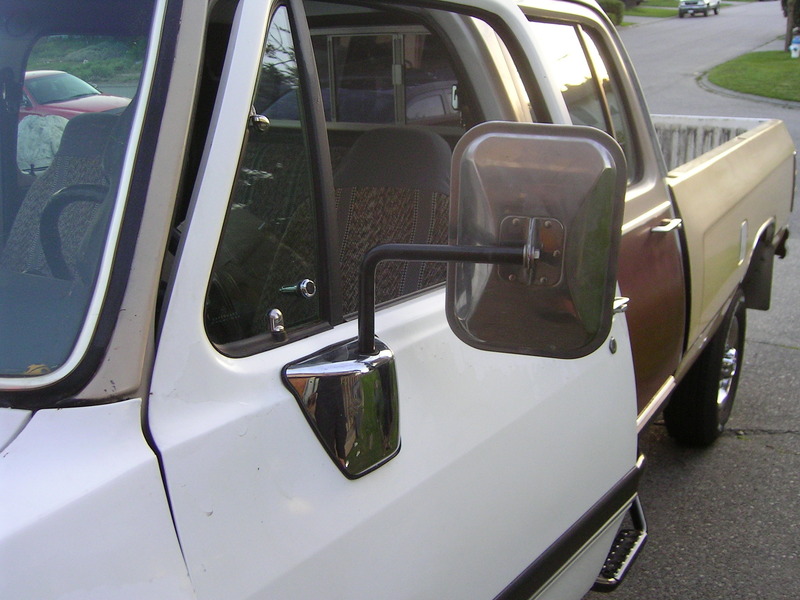


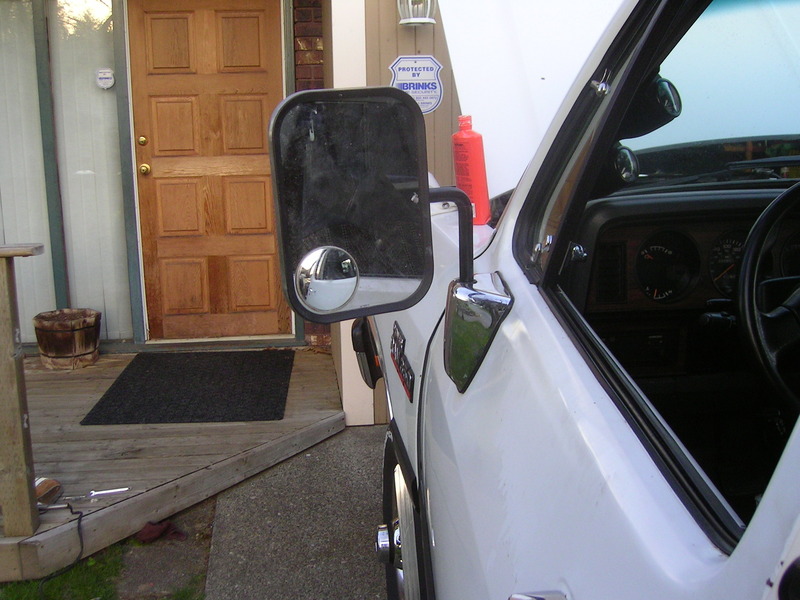
I'm quite happy with the way it turned out, I have much better visibility now.
And all done....


I'm quite happy with the way it turned out, I have much better visibility now.
Thread Starter
Registered User
Joined: Mar 2010
Posts: 7,265
Likes: 1,346
From: Prince George, BC

Trending Topics
 . The stock mirrors leave a lot to be desired for visibility. Looks good
Registered User
Joined: Dec 2010
Posts: 6,838
Likes: 1,683
From: Land of the Toxic Avenger
Nice work, as usual, TC,
I have unheated mirrors like that on my fuso, but a little deicing spray takes care of them in a jiffy...
Now what you need to do is to take those old mirrors, and do what Oliver did. He put them in his bathroom, and used them as his shaving spot.
lol.
I have unheated mirrors like that on my fuso, but a little deicing spray takes care of them in a jiffy...
Now what you need to do is to take those old mirrors, and do what Oliver did. He put them in his bathroom, and used them as his shaving spot.
lol.

Registered User

Joined: Dec 2008
Posts: 7,288
Likes: 2,884
From: vermont
Nice work Brain. They look good.
I think heated mirrors are dumb. They are just something else to break and fix.
Just use a ice scrapper and clean them when you are doing the windshield and door glass.
Heated mirrors belong on lazy people's luxury rides with heated seats, dual climate controlled zones, WiFi hot spots and a fridge in the glove box to keep the bon-bons from melting. That is coming from a guy who lives where winter last for 6 months.
The old mirrors DO make a good bathroom mirror.
Thread Starter
Registered User
Joined: Mar 2010
Posts: 7,265
Likes: 1,346
From: Prince George, BC
Thanks guys. I never used the power mirrors anyway, and have never had a vehicle with heated mirrors...other then the commercial trucks I drive for a living.
I use a jug of hot water to clear my windows and mirrors in the winter. Much quicker then scrapping.
I use a jug of hot water to clear my windows and mirrors in the winter. Much quicker then scrapping.
Registered User
Joined: Mar 2014
Posts: 1,296
Likes: 308
From: PA near Harrisburg
Nice work Brain. They look good.
I think heated mirrors are dumb. They are just something else to break and fix.
Just use a ice scrapper and clean them when you are doing the windshield and door glass.
Heated mirrors belong on lazy people's luxury rides with heated seats, dual climate controlled zones, WiFi hot spots and a fridge in the glove box to keep the bon-bons from melting. That is coming from a guy who lives where winter last for 6 months.
The old mirrors DO make a good bathroom mirror.
I think heated mirrors are dumb. They are just something else to break and fix.
Just use a ice scrapper and clean them when you are doing the windshield and door glass.
Heated mirrors belong on lazy people's luxury rides with heated seats, dual climate controlled zones, WiFi hot spots and a fridge in the glove box to keep the bon-bons from melting. That is coming from a guy who lives where winter last for 6 months.
The old mirrors DO make a good bathroom mirror.
On the minus side its in really nice shape and the interior is really pretty so I can't throw greasy nasty Dodge parts in it and not care.
Nice work on the mirrors TC!! I've been wanting to put better mirrors on my truck but Western type mirrors won't fit through my garage door. This looks like it could be an excellent solution!

