
Hidden trailer electrical connection

Thread Starter
Registered User
Joined: Mar 2008
Posts: 4,389
Likes: 114
From: Orange County, California
Hidden trailer electrical connection
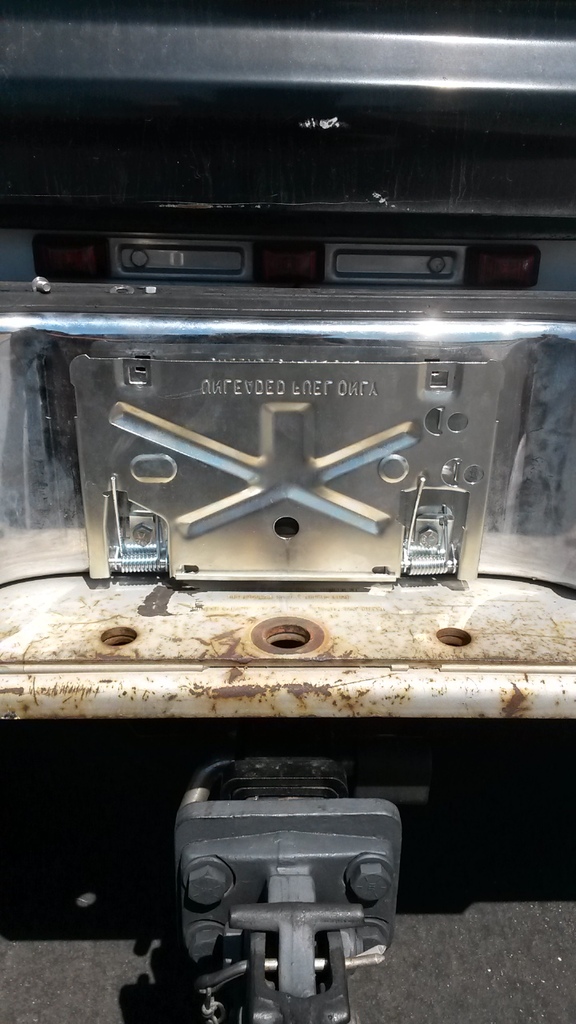
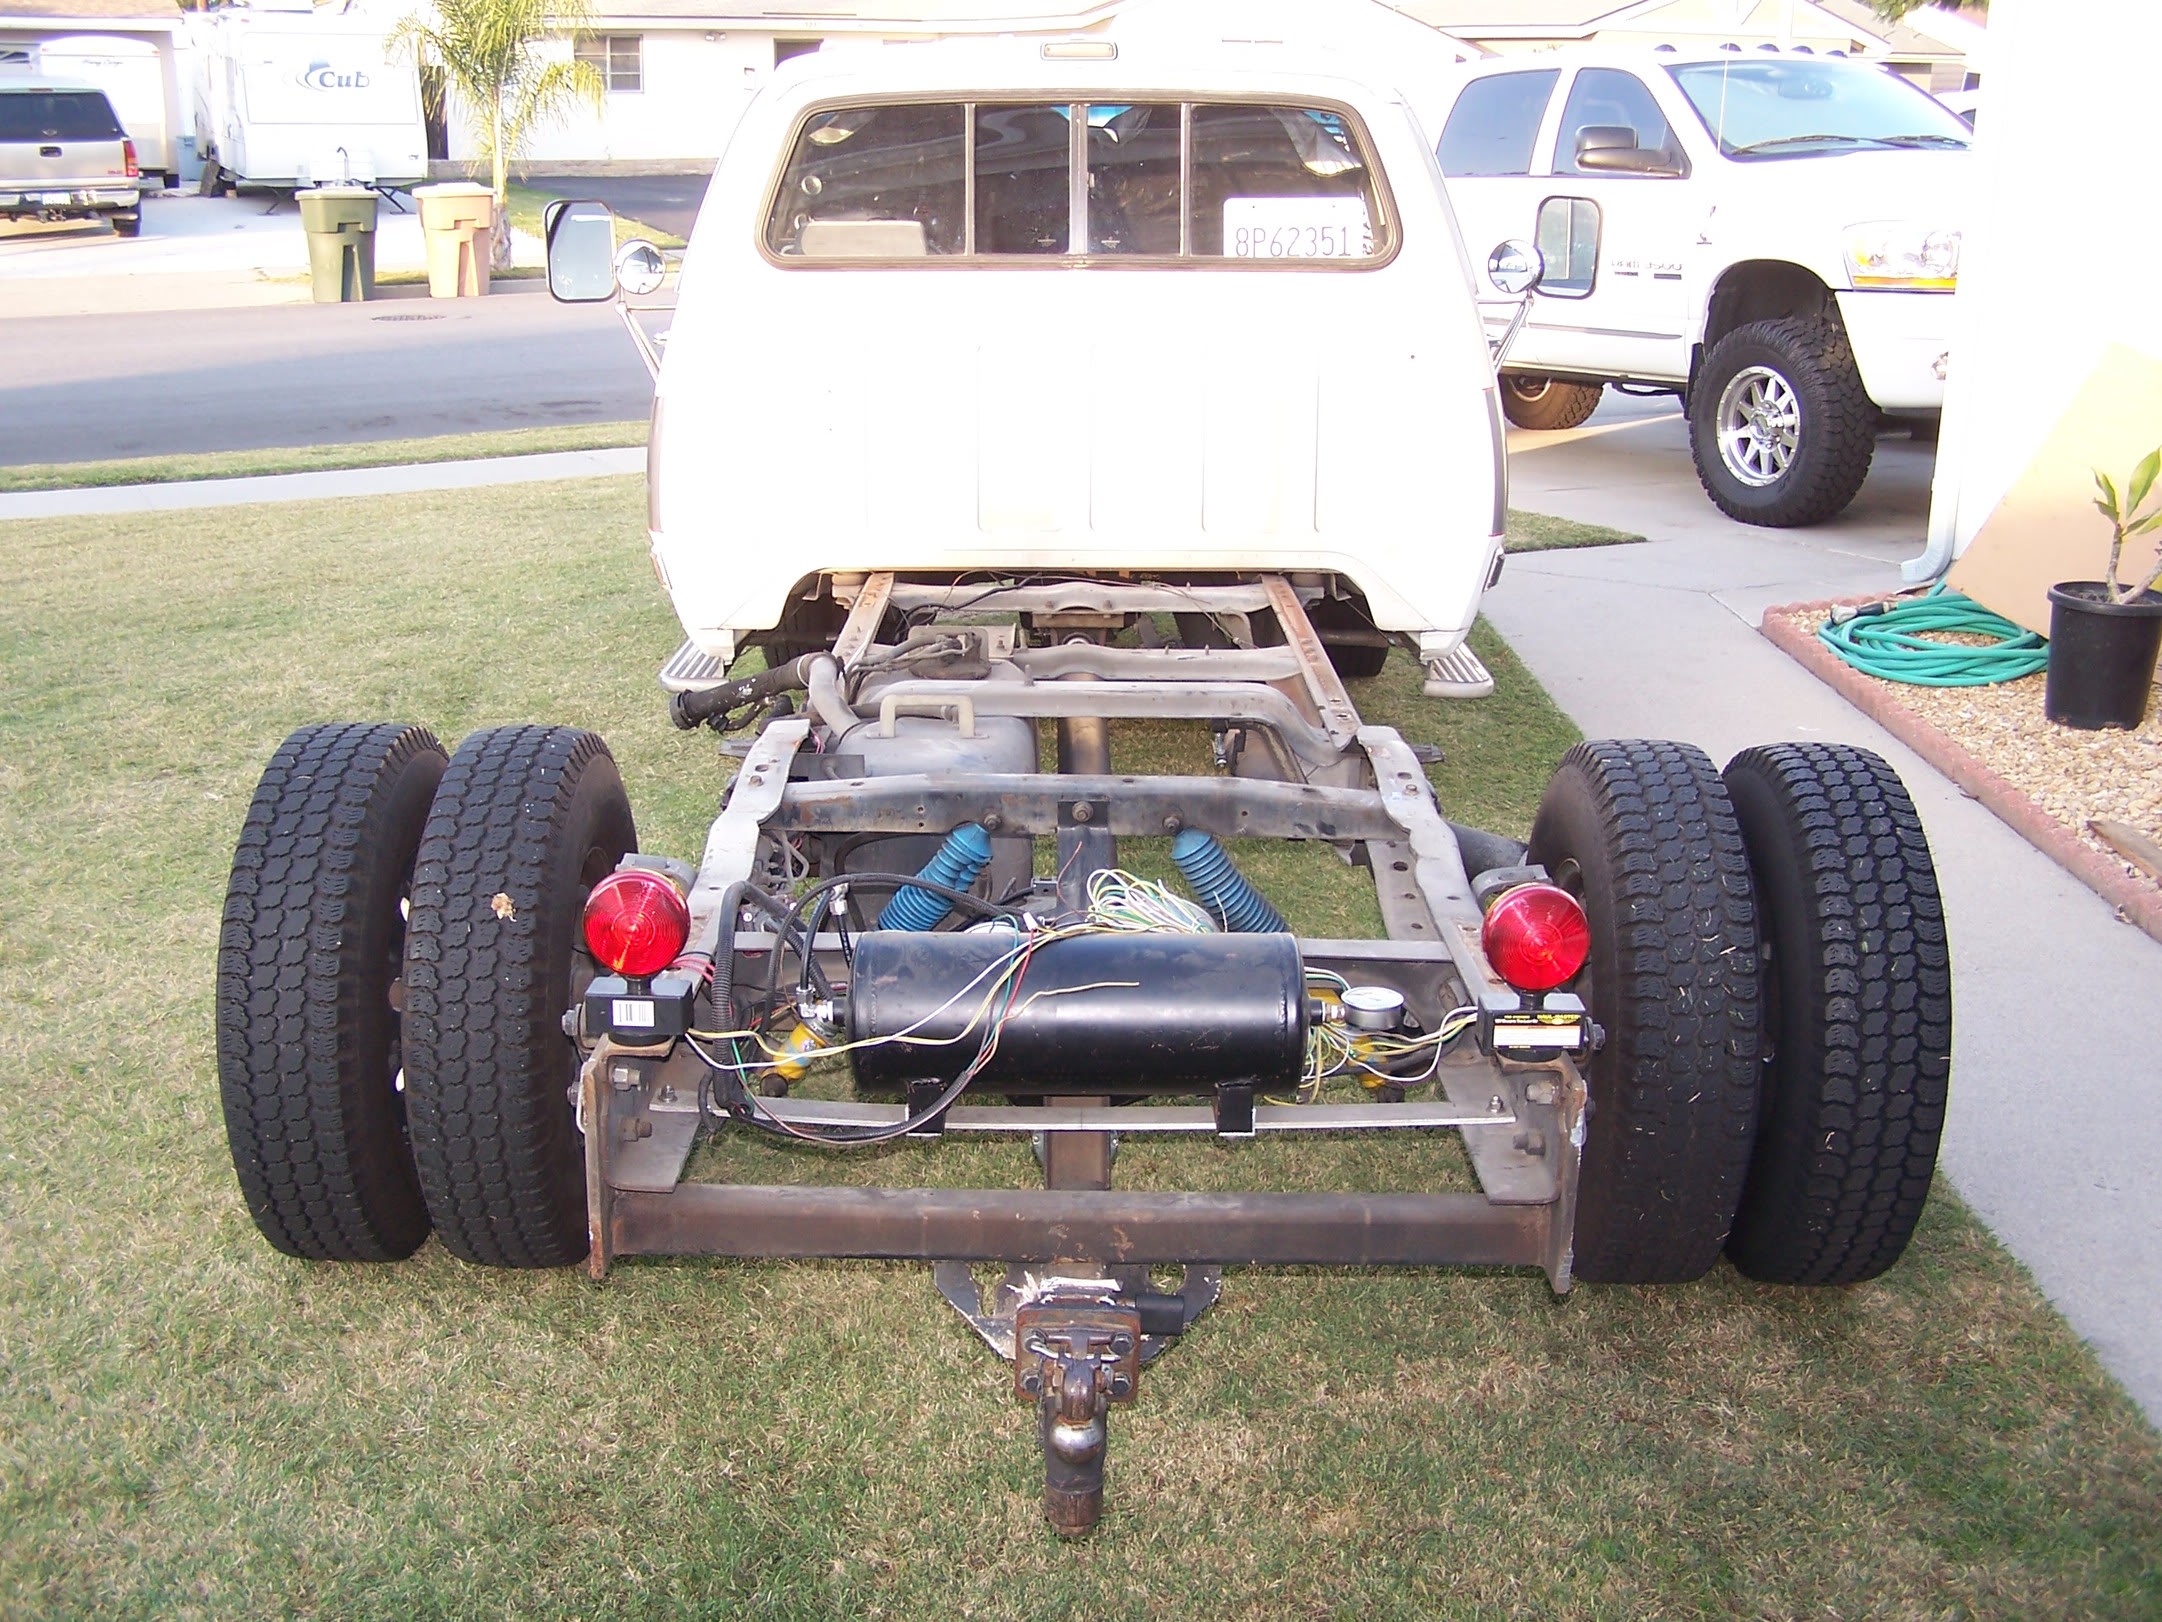
About a month ago, I installed a B&W receiver hitch. Since then, I've been working at building a harness for trailer connections, one inside the bed for a 5th wheel and one at the rear bumper somewhere for a conventional tow. I wanted to find a centralized location near the pivot point of both the truck and trailer. As well as finding a location higher than mounted down on the hitch itself where the possibility of it dragging or catching on something would be greater, potentially tearing out the plug and wiring with it. Also, in the even that I launch a boat, it won't have a chance of being submerged or getting too wet.
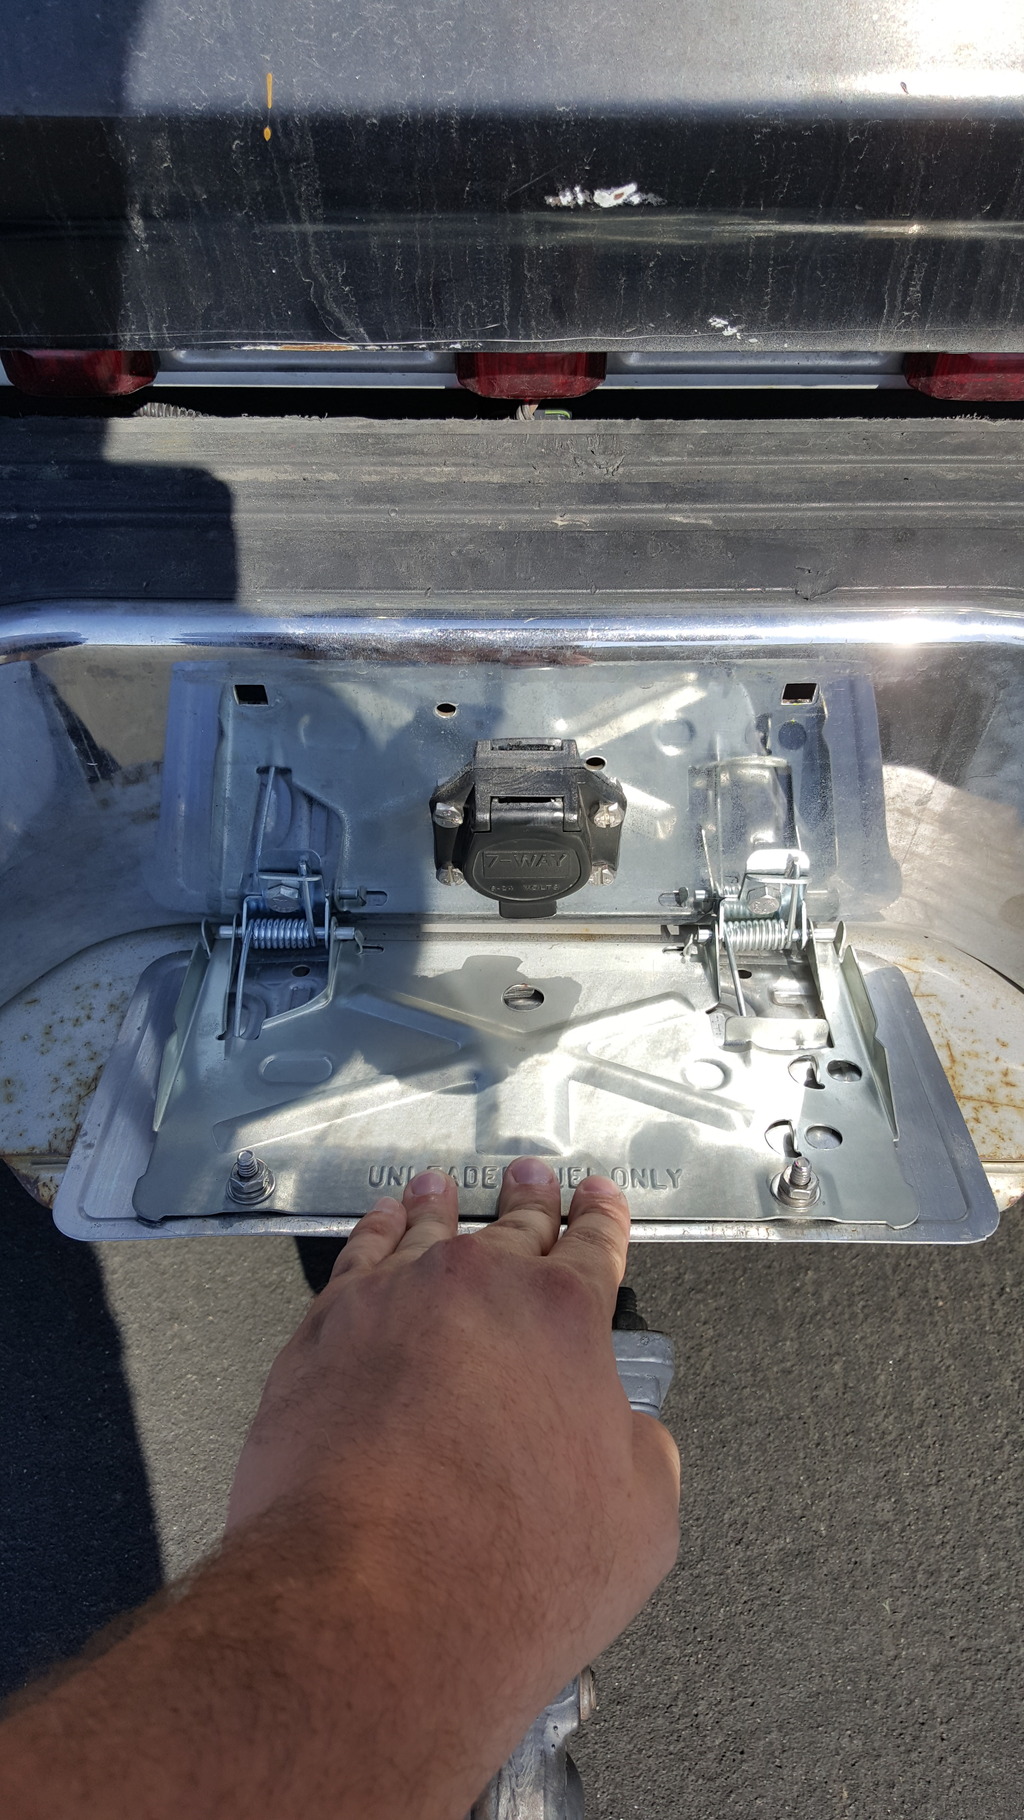
I began my search thinking about the older model cars with fuel tank filler necks behind the rear license plate. After a lot searching, I stumbled across a license plate flip kit for roll pans, made by Pilot.
At the time, it was going for $12. After shipping and taxes, it was $20. I had it in my hands about a week ago. You may already see where I'm going with this. Yesterday, I took some time to figure out how I would install it. I did so with it oriented as a flip down.
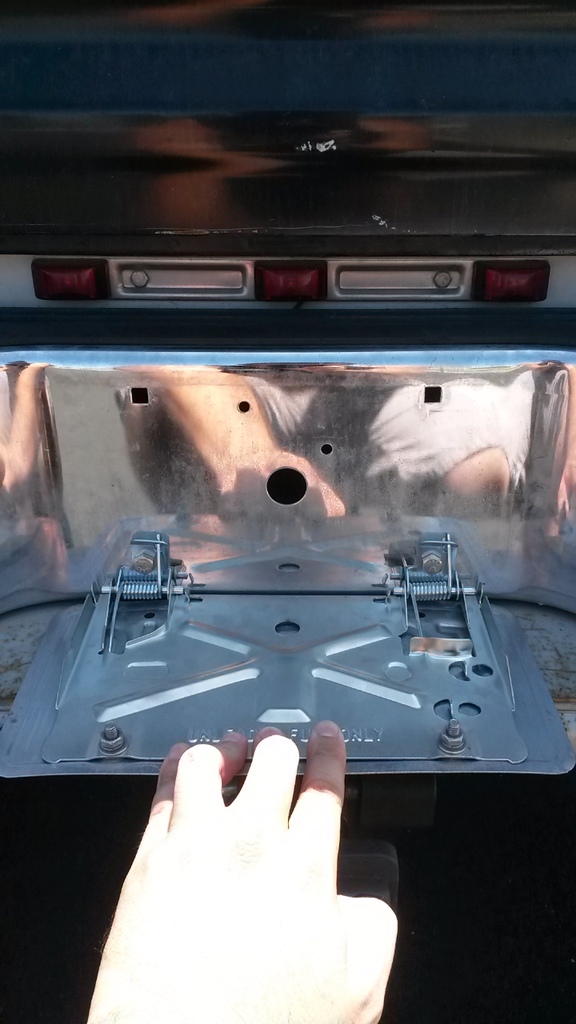
Rather than spending time with a tape measure and attempts to center it horizontally and vertically, I simply put a 3/8" bolt through the "top" squared holes (which would be used to attach the plate) of the bracket and the bumper and tightened them. 3/8" was the exact size of the both sets of holes which allowed for a near perfect positioning of the bracket. With the bracket temporarily in place, I used a 5/16" drift punch to mark the position of the holes for the hinges. I removed the bracket and drilled 2 - 5/16" holes where the drift punch had marked. Deburred and chamfered the holes and mounted the bracket to test it's function.
It works great! I'm curious about removing the springs and removing a couple of coils from both to lighten the tension some but it's not terrible. I'm just thinking of the pressure it might put against a trailer plug and possibly causing intermittent connectivity. No way of knowing until I can test it.
The reason I mounted it in a flip down orientation was because the hinge holes would've been just below and right next to the square holes in the bumper which would've just made them oblong.
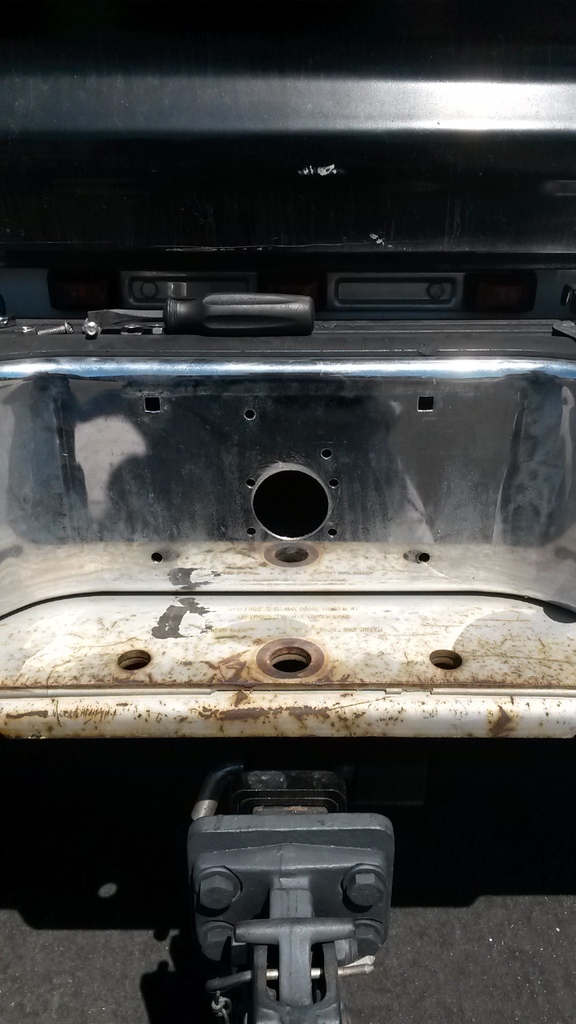
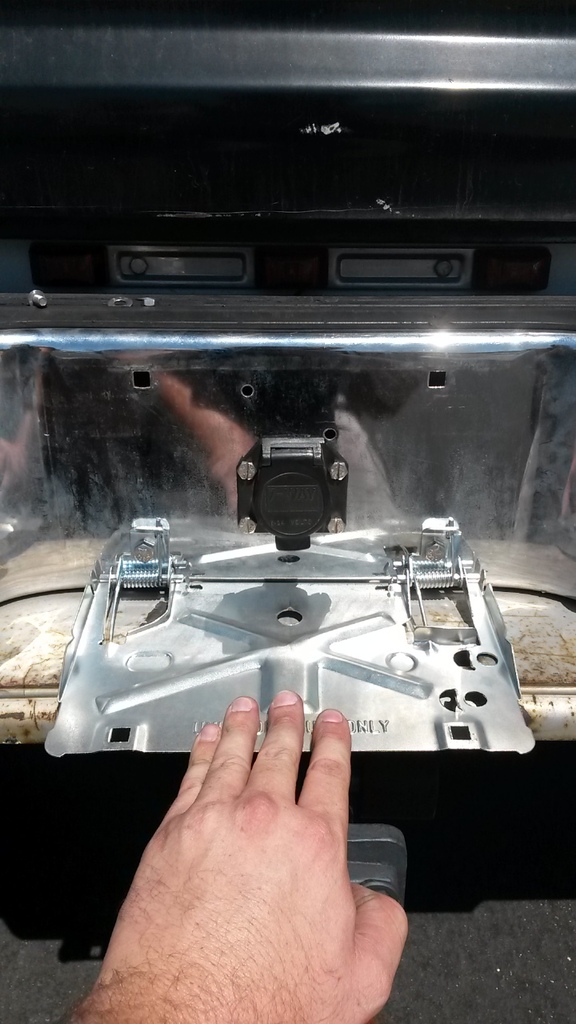
With that done, I used a bracket for a 7-way plug to trace the hole required to be cut. The bracket's opening measured 2 1/8". Lucky me, I only had a 2" and 2 1/2" hole saws. I measured the plug to be used with a set of calipers and came up with a minimum dimension of just over 2". I used the 2" hole saw and assumed it would take some filing to open it up just a bit more to clearance for the plug. Turns out, while drilling, the hole saw walked just enough along its radial axis that it made for a hole sized a touch over what I measured. The plug slipped right in place. I opened the 4 holes in the plug flange to a more common 1/4" size. With the plug held in place, I used a 1/4" drift punch to mark their positions, removed the plug and drilled 4 - 1/4" holes through the bumper. Using 1/4" stainless hardware, I mounted the plug and did the same with the license plate bracket using 5/16" stainless hardware.
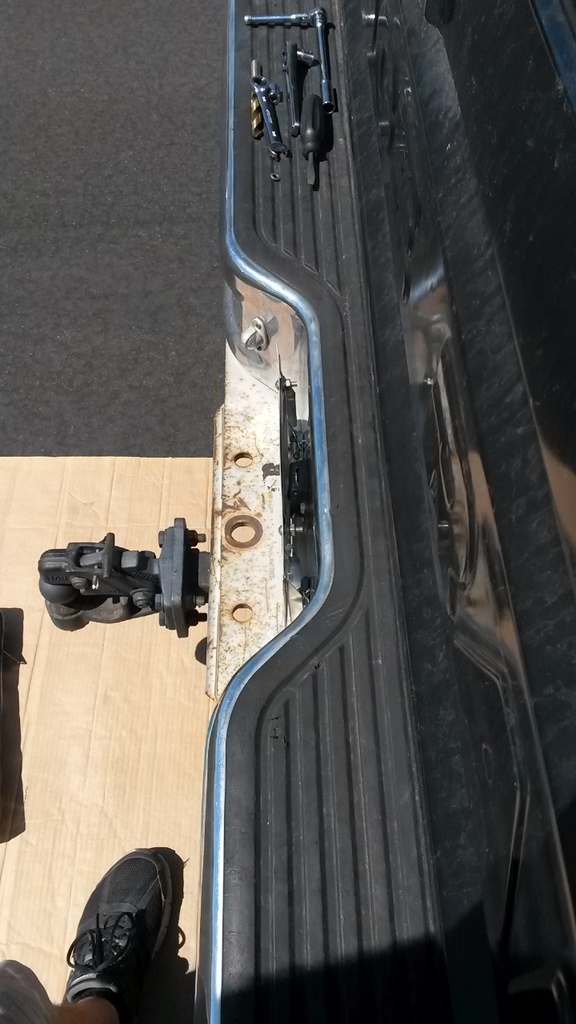
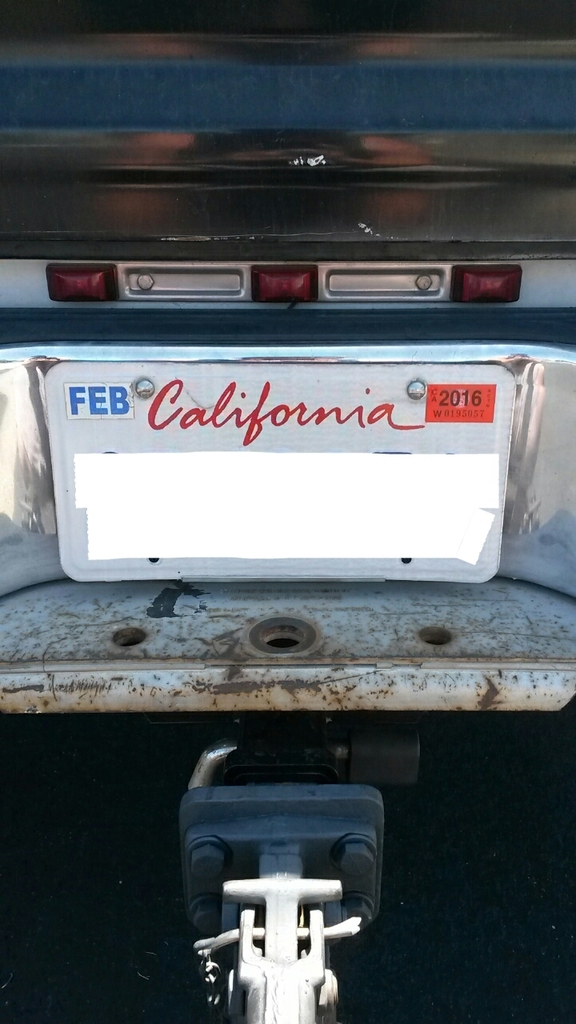
As it sits, I can live with it. The plate doesn't stick out an excessive amount in my opinion. I would like to see if there are any plugs that have a slightly lower profile than the one I used. Another thought that just came to mind is the possibility of building a small recessed box which would allow for the plug's cover to sit flush with the bumper face. There's room for improvements. No complaints though for only having $20 in it.
I began my search thinking about the older model cars with fuel tank filler necks behind the rear license plate. After a lot searching, I stumbled across a license plate flip kit for roll pans, made by Pilot.
At the time, it was going for $12. After shipping and taxes, it was $20. I had it in my hands about a week ago. You may already see where I'm going with this. Yesterday, I took some time to figure out how I would install it. I did so with it oriented as a flip down.
Rather than spending time with a tape measure and attempts to center it horizontally and vertically, I simply put a 3/8" bolt through the "top" squared holes (which would be used to attach the plate) of the bracket and the bumper and tightened them. 3/8" was the exact size of the both sets of holes which allowed for a near perfect positioning of the bracket. With the bracket temporarily in place, I used a 5/16" drift punch to mark the position of the holes for the hinges. I removed the bracket and drilled 2 - 5/16" holes where the drift punch had marked. Deburred and chamfered the holes and mounted the bracket to test it's function.
It works great! I'm curious about removing the springs and removing a couple of coils from both to lighten the tension some but it's not terrible. I'm just thinking of the pressure it might put against a trailer plug and possibly causing intermittent connectivity. No way of knowing until I can test it.
The reason I mounted it in a flip down orientation was because the hinge holes would've been just below and right next to the square holes in the bumper which would've just made them oblong.
With that done, I used a bracket for a 7-way plug to trace the hole required to be cut. The bracket's opening measured 2 1/8". Lucky me, I only had a 2" and 2 1/2" hole saws. I measured the plug to be used with a set of calipers and came up with a minimum dimension of just over 2". I used the 2" hole saw and assumed it would take some filing to open it up just a bit more to clearance for the plug. Turns out, while drilling, the hole saw walked just enough along its radial axis that it made for a hole sized a touch over what I measured. The plug slipped right in place. I opened the 4 holes in the plug flange to a more common 1/4" size. With the plug held in place, I used a 1/4" drift punch to mark their positions, removed the plug and drilled 4 - 1/4" holes through the bumper. Using 1/4" stainless hardware, I mounted the plug and did the same with the license plate bracket using 5/16" stainless hardware.
As it sits, I can live with it. The plate doesn't stick out an excessive amount in my opinion. I would like to see if there are any plugs that have a slightly lower profile than the one I used. Another thought that just came to mind is the possibility of building a small recessed box which would allow for the plug's cover to sit flush with the bumper face. There's room for improvements. No complaints though for only having $20 in it.
Registered User


Joined: Apr 2009
Posts: 3,317
Likes: 485
From: alaska
That gives me an idea. Too bad the previous owner already drilled a hole in my license plate. It would hide the crank hole for my spare.
The only problem I see with your idea is in places where it snows and freezes a lot (not in your case though), it could become quickly unusable.
The only problem I see with your idea is in places where it snows and freezes a lot (not in your case though), it could become quickly unusable.
Registered User
Joined: Mar 2010
Posts: 7,265
Likes: 1,346
From: Prince George, BC
Neat idea Jimbo....only thing I can think of as a potential problem would be the plate not being visible during towing? Not sure if a police officer, or Commercial vehicle inspector would have a problem with that or not?
Thread Starter
Registered User
Joined: Mar 2008
Posts: 4,389
Likes: 114
From: Orange County, California
That was my initial thought, Brian. Maybe I can make up a simple bracket with some flat stock in order to orient it as a flip up. At least that way, it can be seen with a trailer connected. I plan to remove the bracket for paint anyhow. I'll stare at things a bit more then and see if I can make it happen.
Registered User
Joined: Nov 2006
Posts: 807
Likes: 41
From: Englewood, TN
After a lot searching, I stumbled across a license plate flip kit for roll pans, made by Pilot. http://www.amazon.com/gp/product/B00...ilpage_o00_s00
At the time, it was going for $12. After shipping and taxes, it was $20.
At the time, it was going for $12. After shipping and taxes, it was $20.
Thanks to you both for great ideas. Cougar, what sort of spare tire mount are you utilizing?
Thread Starter
Registered User
Joined: Mar 2008
Posts: 4,389
Likes: 114
From: Orange County, California
I finally had a chance to make all of the electrical connections. Both the plug inside the bed and at the rear bumper have been wired in series with each other and each pin in both plugs gets the proper signals as verified by a test light.
I used Delphi Weatherpack connectors at both plugs for ease of removal. I forgot to get a picture of the connectors for the plug in the bedside but it looks the same.
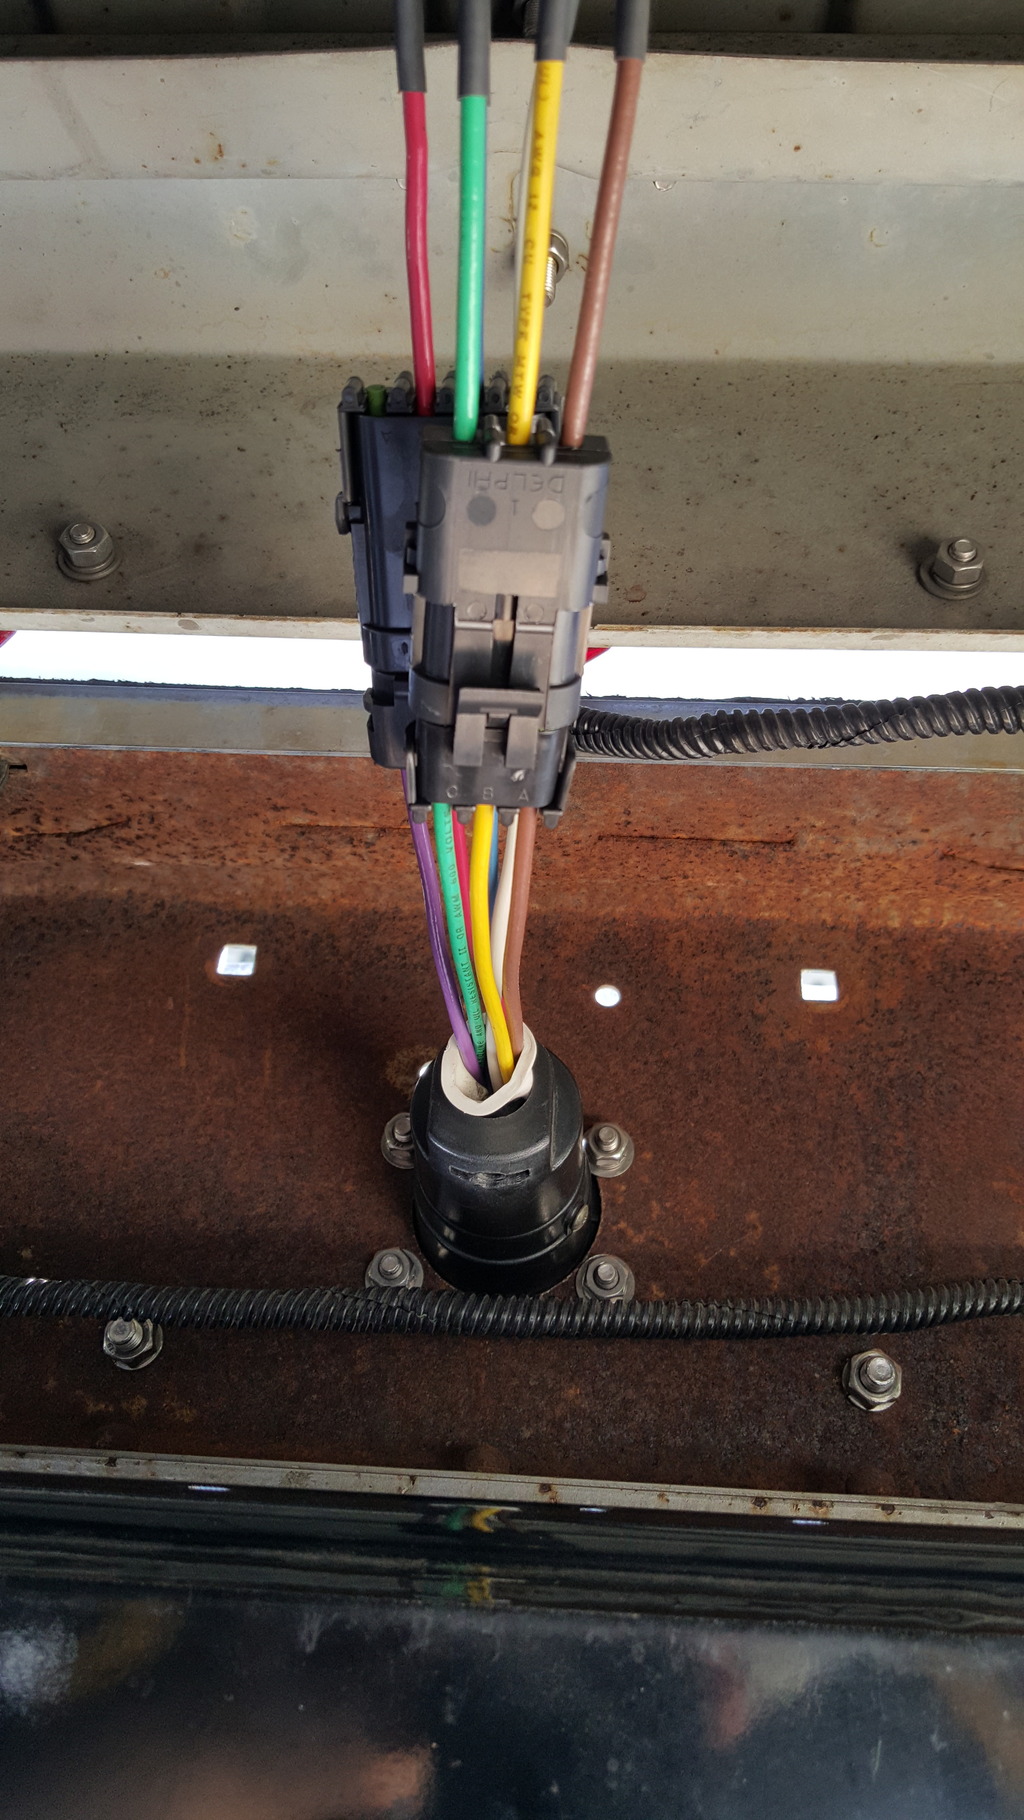
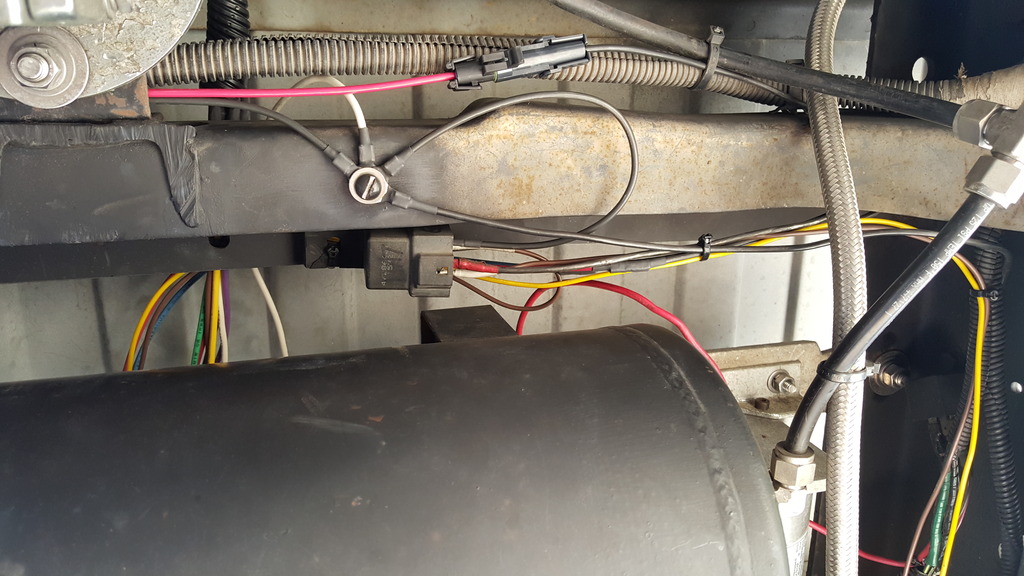
In the following picture, looking forward, you can see the 2 wires becoming one and supplying voltage to the rear plug. One of the 2 wires comes from the Curt T-connectors in left and right rear taillight harnesses. The other of the 2 wires runs forward and up to the plug in the bedside. The standard for RV trailer wiring lists Green = Right turn signal, Yellow = Left turn signal, Brown = Running lights, White = Ground, Red = 12 volts from battery, Blue = signal from the trailer brake controller and Purple = Reverse lights (optional). I've never run across any but it's not often that many trailers have reverse lights so for now, I left it capped until I can tap into the factory 4-way square connector for a reverse light signal.

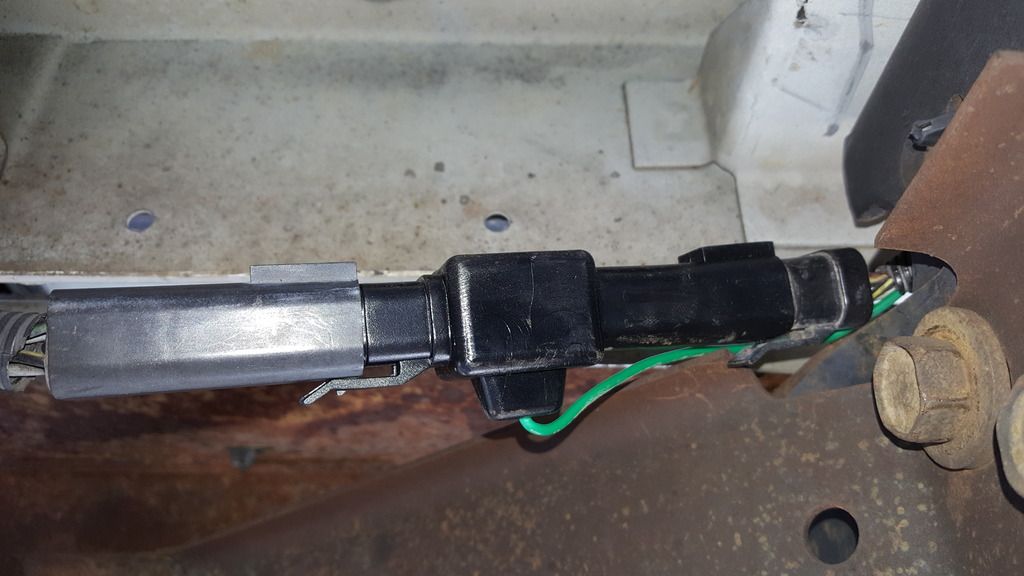
Curt T-connectors #55317 specifically for '86 to '94 Dodge trucks (according to Curts application chart). Passenger/Right side has the green wire for your right turn signal. The Driver/Left side has the brown and yellow wires for your running lights and left turn signal, respectively. I cut the 4-way flat plug off leaving about 6" of wire for future use, if any.
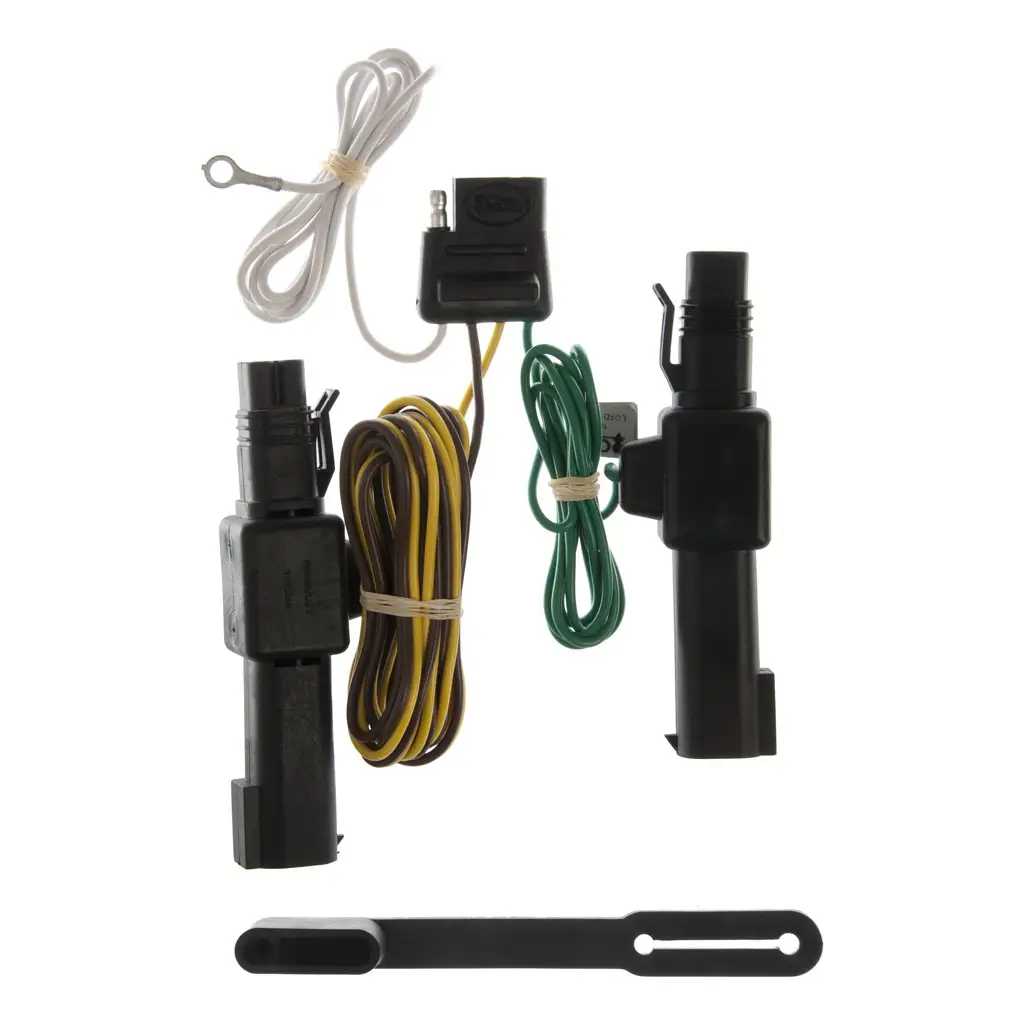
Here is the Passenger/Right side Curt T-connector installed. I didn't take a picture of the Driver/Left side as it looks identical, just with 2 different colored wires for different purposes, of course.
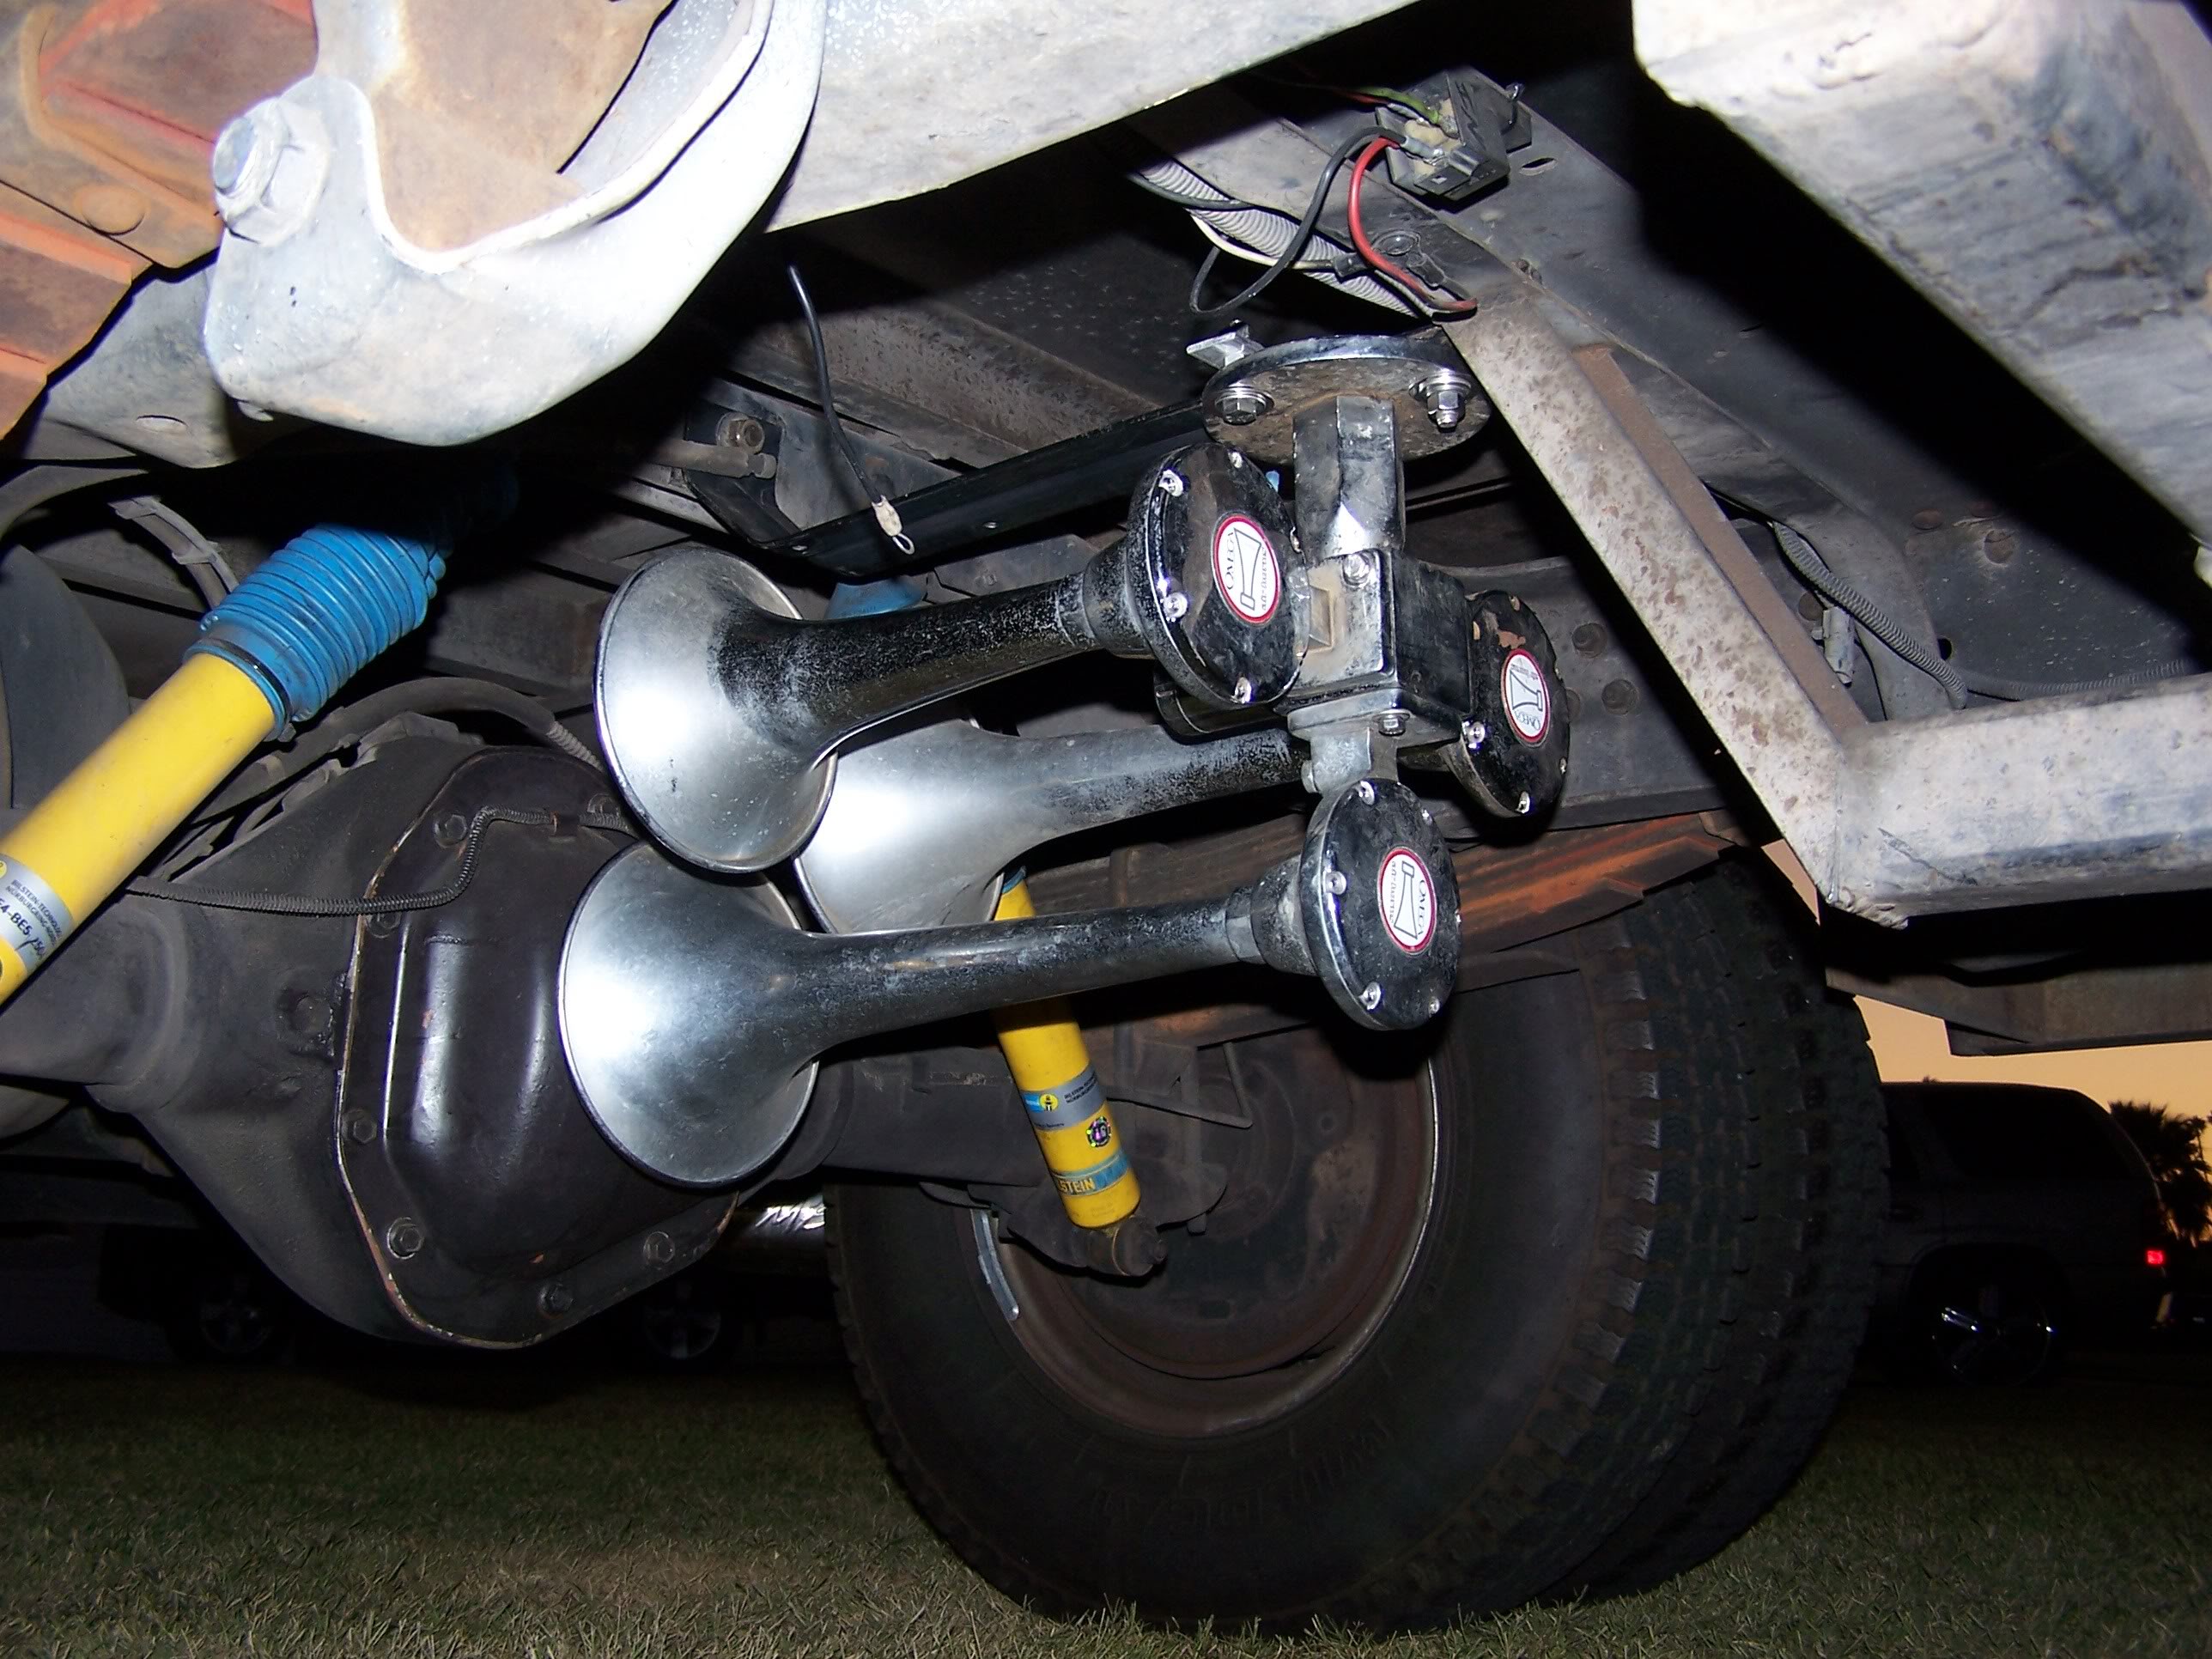
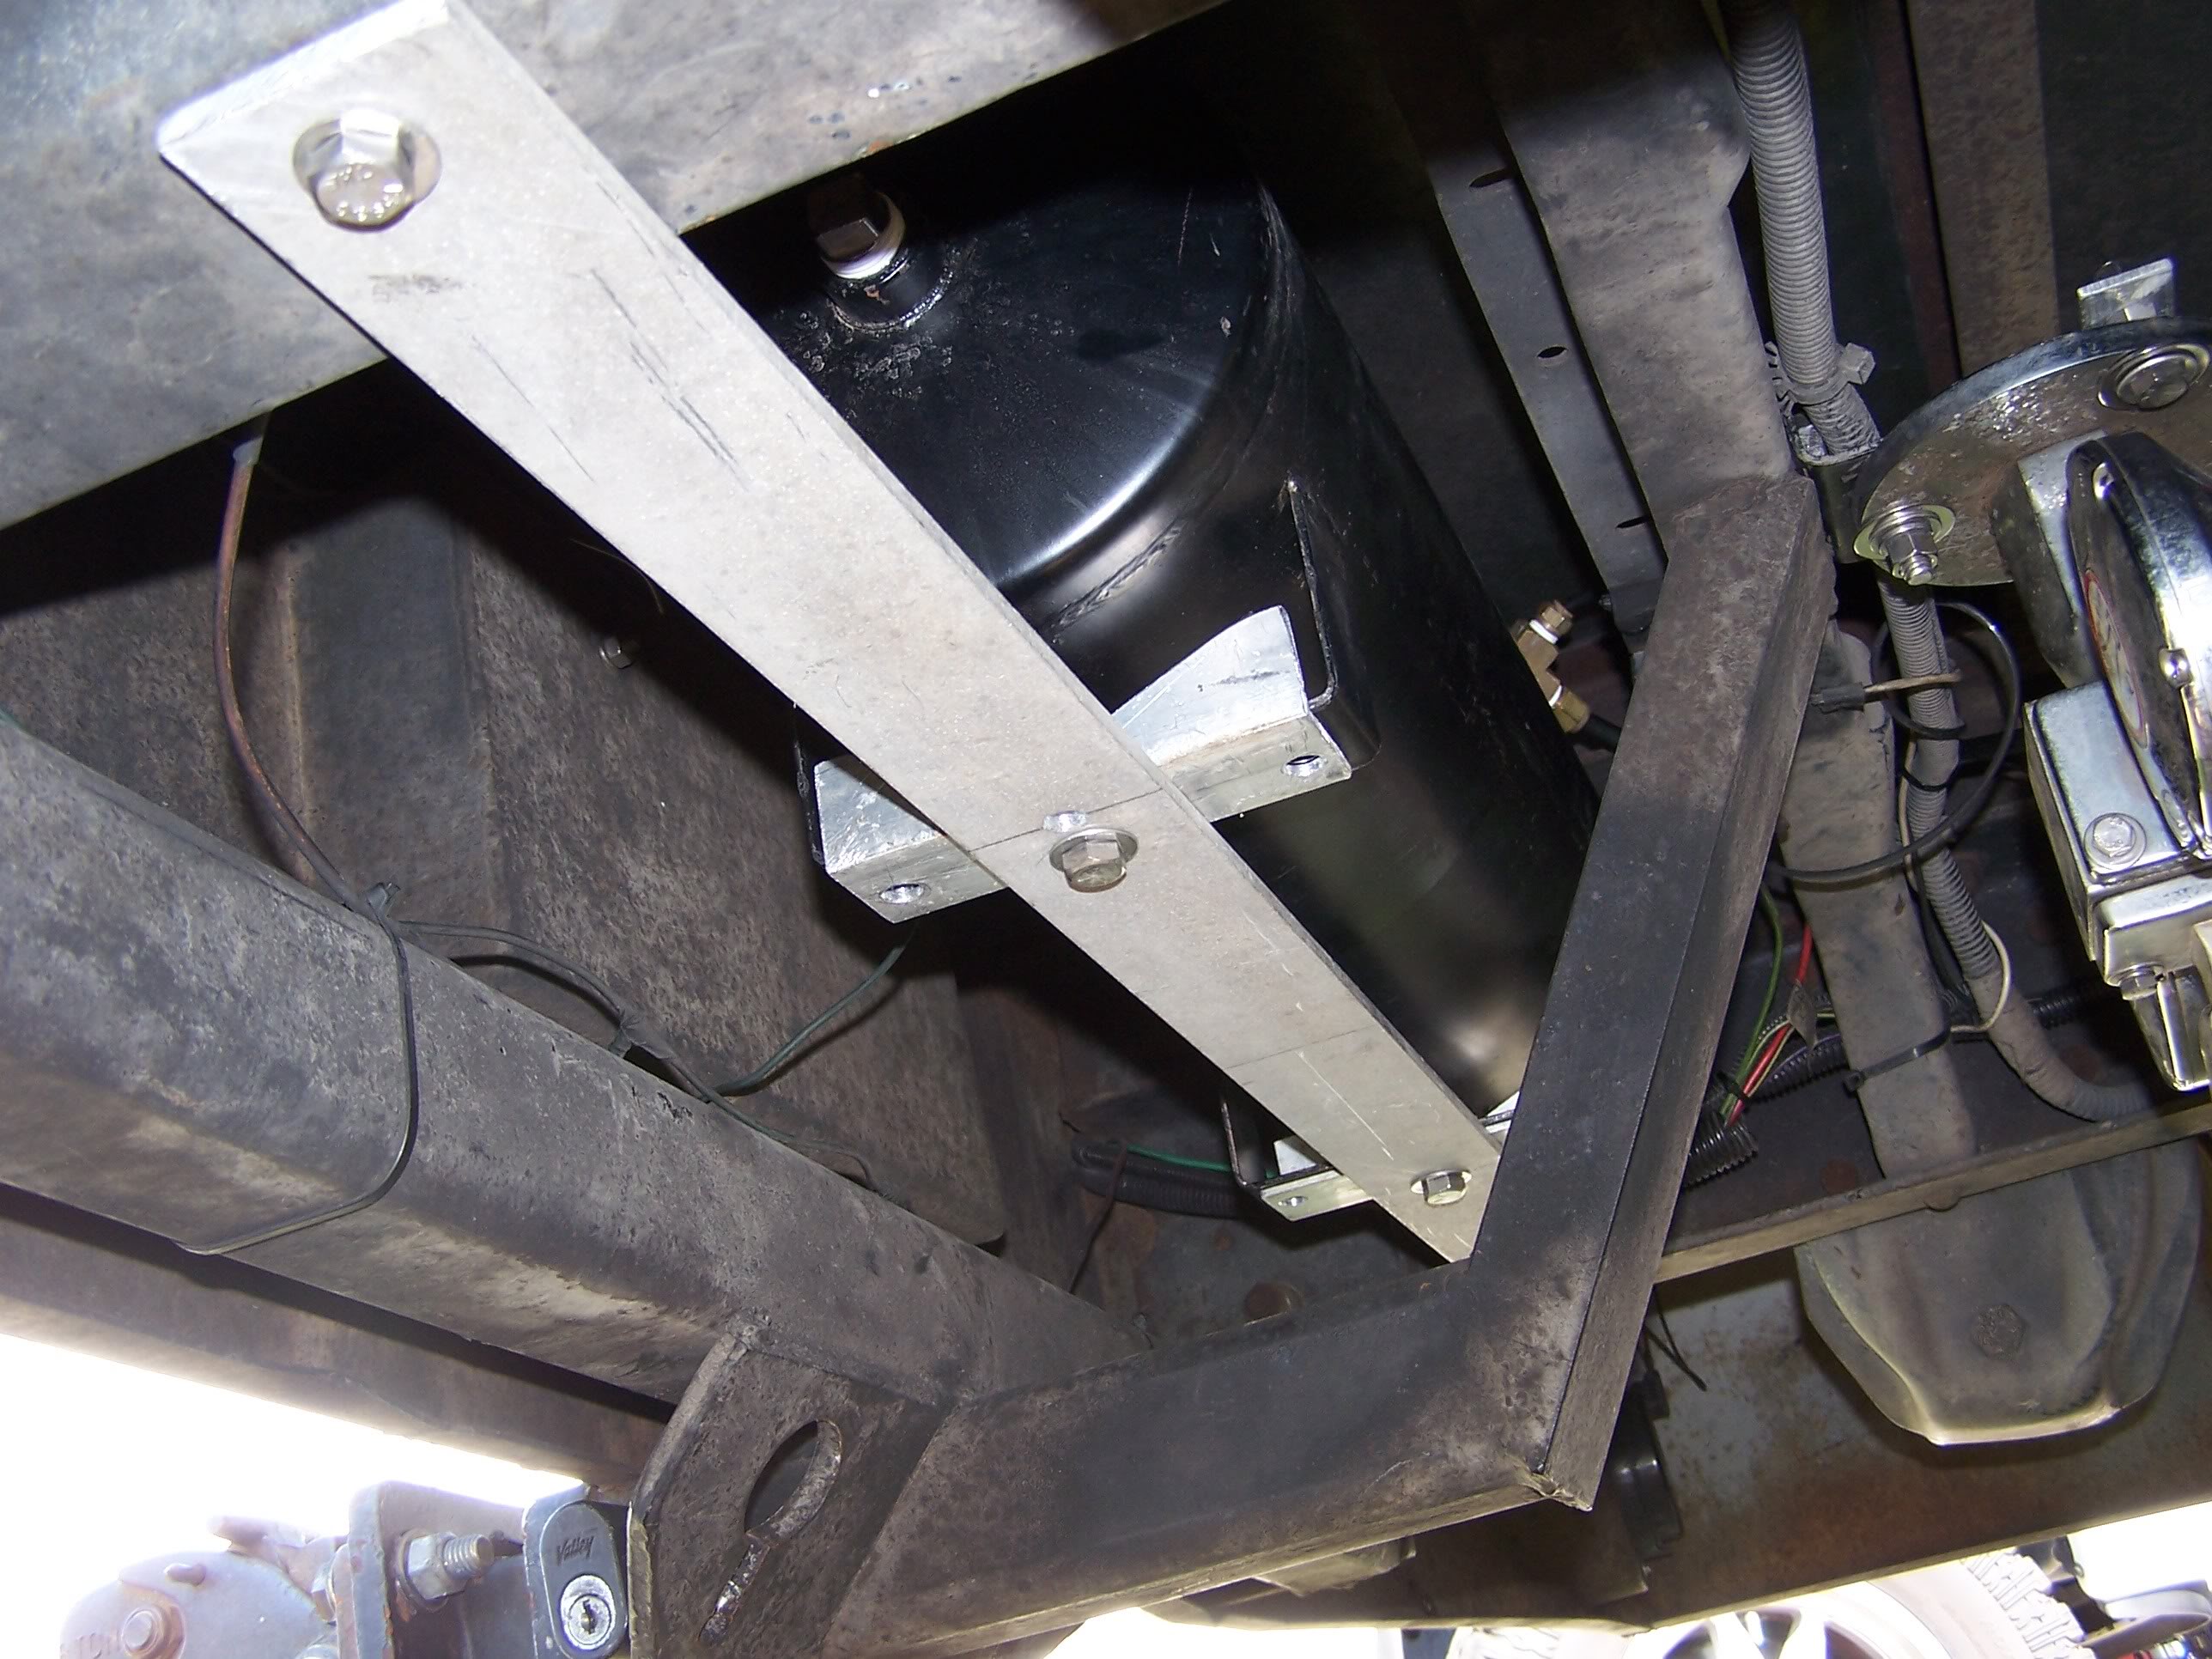
Lastly, looking up at the frame crossmember showing the common ground point (for a few things). From left to right (if it really matters that much): Ground for the solenoid on my air horns, White being a chassis ground for the trailer lighting and accessories, ground for the trailer running light relay, and a ground for the air compressor relay mounted to the inside of the driver side frame rail.
As well as an obvious relay which is specifically for the trailer plugs. Dodge issued a TSB years ago for those who were burning up their headlight switches while towing a trailer. The simple fix and good idea was a relay to relieve the switch of the additional current draw/load from the trailer lights.
Coming in from the lower right corner of the picture, you can see the yellow and brown wires from the Driver/Left Curt T-connector. Yellow being the left turn signal runs over and into the 'Y' which then supplies both 7-way plugs.
The brown wire being for the running lights runs into pin 86 and out from pin 87 (see the loop) and to the 'Y' which then supplies both 7-way plugs. Black (marked with red electrical tape) being constant 12 volts (+) from the battery into pin 30. The looped black wire is from pin 85 to ground.
All I have left to do at this point is wrap everything in split loom cable wrap. I'll use a length of inner tube for the rear plug and wiring having it ziptied tightly to the body of the 7-way plug and wrapped up to the highest point with the hopes of preventing water from getting in and possibly corroding any connections within the plug.
Hopefully this thread can provide some kind of help to anybody wanting to add a trailer plug to their truck or any vehicle, if it hasn't been done already.
I used Delphi Weatherpack connectors at both plugs for ease of removal. I forgot to get a picture of the connectors for the plug in the bedside but it looks the same.
In the following picture, looking forward, you can see the 2 wires becoming one and supplying voltage to the rear plug. One of the 2 wires comes from the Curt T-connectors in left and right rear taillight harnesses. The other of the 2 wires runs forward and up to the plug in the bedside. The standard for RV trailer wiring lists Green = Right turn signal, Yellow = Left turn signal, Brown = Running lights, White = Ground, Red = 12 volts from battery, Blue = signal from the trailer brake controller and Purple = Reverse lights (optional). I've never run across any but it's not often that many trailers have reverse lights so for now, I left it capped until I can tap into the factory 4-way square connector for a reverse light signal.
Curt T-connectors #55317 specifically for '86 to '94 Dodge trucks (according to Curts application chart). Passenger/Right side has the green wire for your right turn signal. The Driver/Left side has the brown and yellow wires for your running lights and left turn signal, respectively. I cut the 4-way flat plug off leaving about 6" of wire for future use, if any.
Here is the Passenger/Right side Curt T-connector installed. I didn't take a picture of the Driver/Left side as it looks identical, just with 2 different colored wires for different purposes, of course.
Lastly, looking up at the frame crossmember showing the common ground point (for a few things). From left to right (if it really matters that much): Ground for the solenoid on my air horns, White being a chassis ground for the trailer lighting and accessories, ground for the trailer running light relay, and a ground for the air compressor relay mounted to the inside of the driver side frame rail.
As well as an obvious relay which is specifically for the trailer plugs. Dodge issued a TSB years ago for those who were burning up their headlight switches while towing a trailer. The simple fix and good idea was a relay to relieve the switch of the additional current draw/load from the trailer lights.
Coming in from the lower right corner of the picture, you can see the yellow and brown wires from the Driver/Left Curt T-connector. Yellow being the left turn signal runs over and into the 'Y' which then supplies both 7-way plugs.
The brown wire being for the running lights runs into pin 86 and out from pin 87 (see the loop) and to the 'Y' which then supplies both 7-way plugs. Black (marked with red electrical tape) being constant 12 volts (+) from the battery into pin 30. The looped black wire is from pin 85 to ground.
All I have left to do at this point is wrap everything in split loom cable wrap. I'll use a length of inner tube for the rear plug and wiring having it ziptied tightly to the body of the 7-way plug and wrapped up to the highest point with the hopes of preventing water from getting in and possibly corroding any connections within the plug.
Hopefully this thread can provide some kind of help to anybody wanting to add a trailer plug to their truck or any vehicle, if it hasn't been done already.
Trending Topics
Registered User
Joined: Dec 2010
Posts: 6,839
Likes: 1,683
From: Land of the Toxic Avenger
Neat idea, although the same issue (cops and license plate) are what I immediately though of living here in the Republic of NJ.
What is / was cut off of your frame in this pic? Something was welded to the frame ?
BTW.. You cali guys with your pristine truck frames.....
What is / was cut off of your frame in this pic? Something was welded to the frame ?
BTW.. You cali guys with your pristine truck frames.....
Thread Starter
Registered User
Joined: Mar 2008
Posts: 4,389
Likes: 114
From: Orange County, California
T man, that was a brace from the previous receiver hitch that was on the truck. It came off shortly after I removed the flat bed that was on the truck when I first got it.
I'm still contemplating turning the license plate mount into a flip up orientation. The holes are so very close to the existing license plate holes in the bumper. I may be able to just elongate them to accept the flip mount.
I'm still contemplating turning the license plate mount into a flip up orientation. The holes are so very close to the existing license plate holes in the bumper. I may be able to just elongate them to accept the flip mount.
Registered User
Joined: Dec 2010
Posts: 6,839
Likes: 1,683
From: Land of the Toxic Avenger
Ah, that explains things.
Pretty cool idea. I guess those license plate flip down things were for the old cars with the fuel filler behind it. (as it says Unleaded fuel only on there).
loved those old big chevys. I worked at a gas station, and when I'd fill one of those cars up, the fuel would blow out all over me and my sneakers, as you had to hold the nozzle in there while filling, otherwise it would shut off.
Good memories.....
Thread Starter
Registered User
Joined: Mar 2008
Posts: 4,389
Likes: 114
From: Orange County, California
The older cars is where the idea stemmed from, I'll bet. That's where I got the idea for this little project. Initially, I started searching based on older vehicles that I knew had those mounts for filling up the fuel tanks. Seeing $40 for some on eBay for specific vehicles, etc. I forget what exactly I searched for when I stumbled upon this but I found one for cheap. These particular flip up/down mounts are used for lowered vehicles with roll-pans to hide the receiver hitches.
Thread Starter
Registered User
Joined: Mar 2008
Posts: 4,389
Likes: 114
From: Orange County, California
I was able to easily change the bracket to a flip-up orientation. All I had to do was widen the original mounting holes for the license plate. A square file had it done in 5 minutes.

Leaving Wednesday morning destined for Payson, AZ to bring home a 1987(?) StarCraft 28ft. pontoon boat.
Leaving Wednesday morning destined for Payson, AZ to bring home a 1987(?) StarCraft 28ft. pontoon boat.
Thread Starter
Registered User
Joined: Mar 2008
Posts: 4,389
Likes: 114
From: Orange County, California
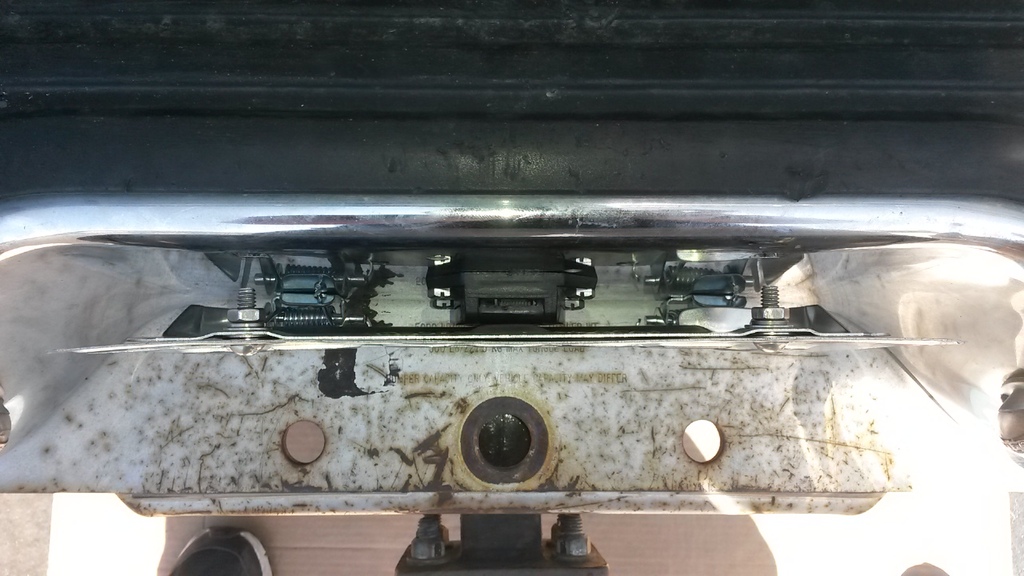
The design worked as planned. Without propping up the license plate, there was absolutely no unnecessary tension against the trailer plug whatsoever. Nothing moved when I lowered the license plate down and let it rest on the hinged cover. Also, I wasn't concerned with the bottom edge of the license plate chaffing or cutting into the wire sheathing as I'll be rewiring the entire trailer. I'll still glue a length of small diameter fuel line to the bottom edge though.
Nearly 60ft cruising down the highway. Truck pulled great!
Nearly 60ft cruising down the highway. Truck pulled great!

Thread
Thread Starter
Forum
Replies
Last Post
TJE
1st Gen. Ram - All Topics
12
Sep 17, 2008 01:00 AM