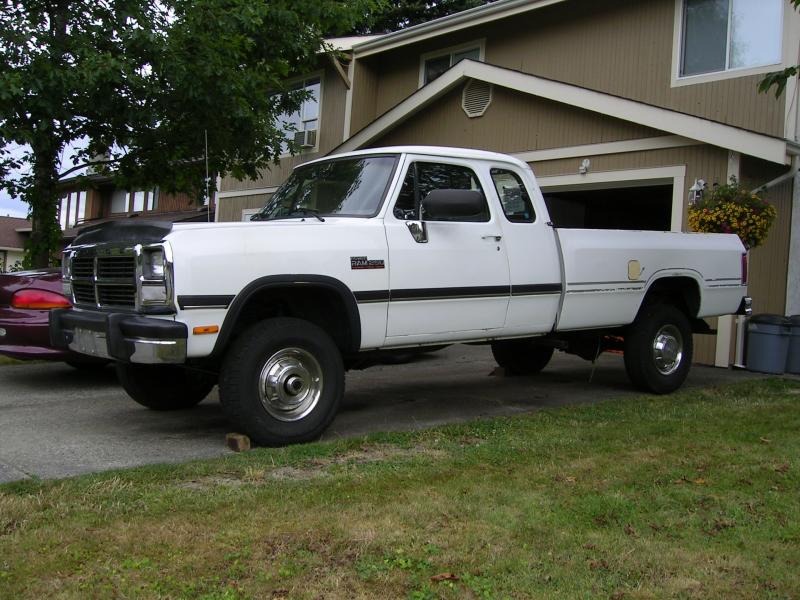
Crewcab update...

Thread Starter
Registered User


Joined: Mar 2010
Posts: 7,265
Likes: 1,346
From: Prince George, BC
Can't tell you how many hours I spent cleaning and repainting all the parts. But I got everyting back together a couple weeks ago and all seems good.
Few after pics..

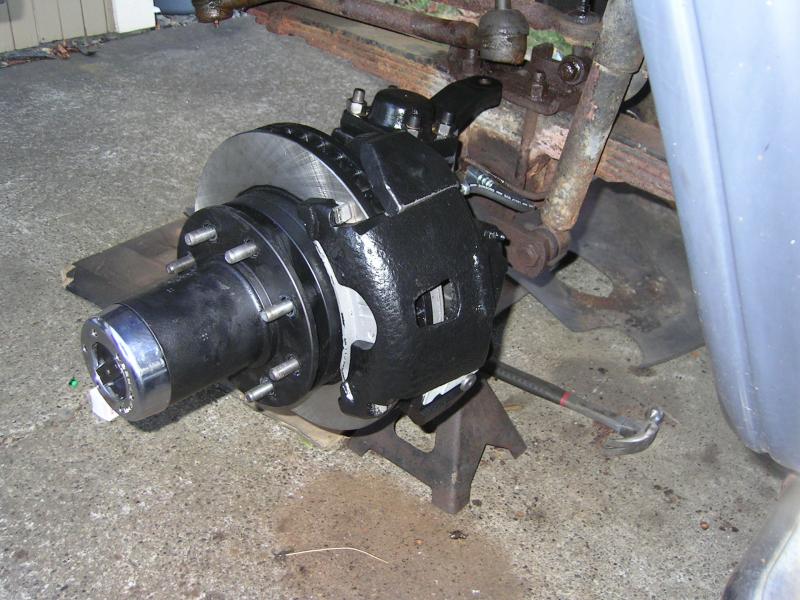
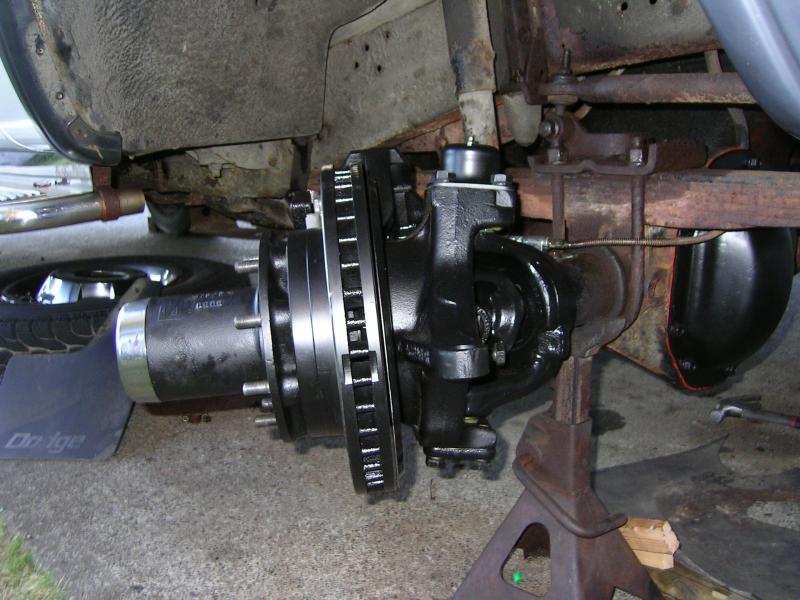
Few after pics..


Thread Starter
Registered User
Joined: Mar 2010
Posts: 7,265
Likes: 1,346
From: Prince George, BC
And just last weekend I pulled the injection pump one evening. Then next day I tore it right down and resealed everything...and installed my M&H timing spacer too. Will swap the 3200 spring out of the IP on my Non-IC motor once it's all swapped out. Then a few hours on the third day and it was back in and running.
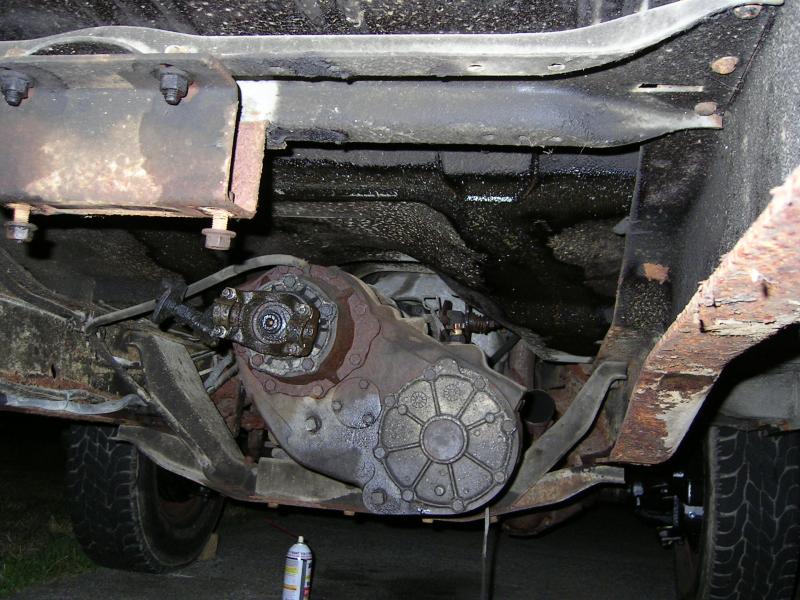
And that's about where I am now. Just re/re'd the rear diff fluid the other night, and had to replace the long brake line since in wiggling it during getting the diff cover off it sprang a pin hole leak. Also cleaned out the axle vent.
And that's about where I am now. Just re/re'd the rear diff fluid the other night, and had to replace the long brake line since in wiggling it during getting the diff cover off it sprang a pin hole leak. Also cleaned out the axle vent.
Thread Starter
Registered User
Joined: Mar 2010
Posts: 7,265
Likes: 1,346
From: Prince George, BC
Today I had to replace the input shaft seals on the steering box on the crewcab. I replaced the leaking high pressure hose last week and then the input shaft seal started leaking. Cost $7 for the re-seal kit, and about 2 hours to Re/Re everything. I did it with the box still hooked up...just removed the wheel and go at it.


Thread Starter
Registered User
Joined: Mar 2010
Posts: 7,265
Likes: 1,346
From: Prince George, BC
Well the tear down of the donor 93 is under way. Yesterday I got the running boards off....they fought me on every bolt and screw....they were pretty corroded.
And off...makes the truck look a lot higher.
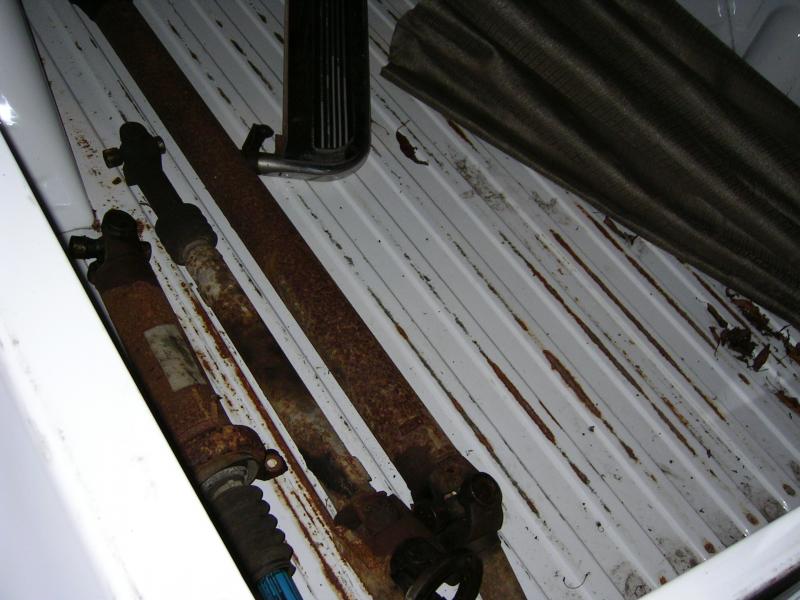
Then it was time to get the exhaust off and the drive shafts out. Again fought me on every bolt, nut and clamp. A lot of heat and PB Balster once again.
Start...

Exhaust and driveshafts out....

And off...makes the truck look a lot higher.

Then it was time to get the exhaust off and the drive shafts out. Again fought me on every bolt, nut and clamp. A lot of heat and PB Balster once again.
Start...

Exhaust and driveshafts out....


Thread Starter
Registered User
Joined: Mar 2010
Posts: 7,265
Likes: 1,346
From: Prince George, BC
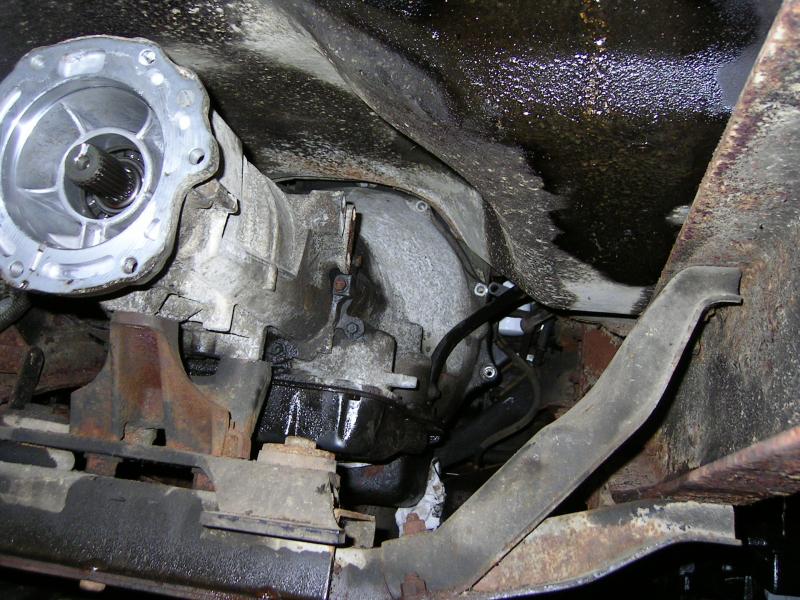
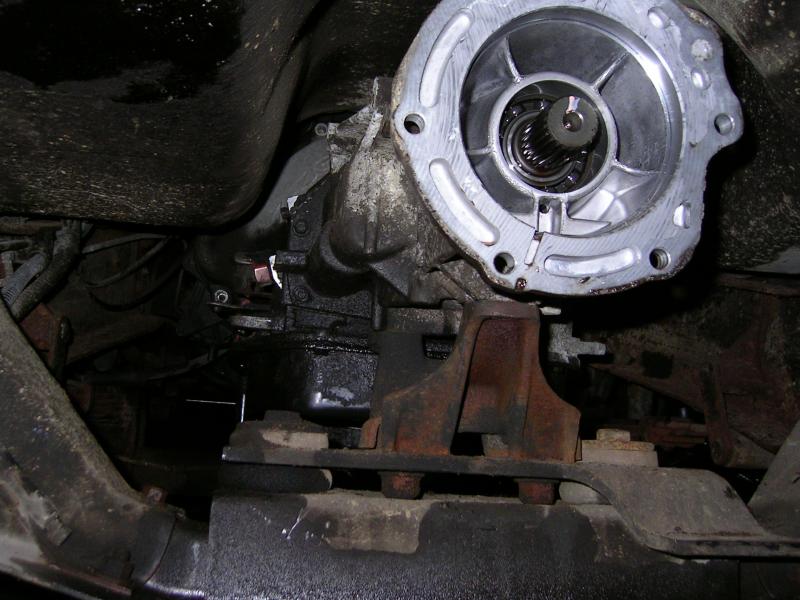
Then I spent about 2 hours removing the 6 nuts from the studs that held the transfer case to the tranny. Once again the rust and corrosion monster was in attendance.
Ready to come out....
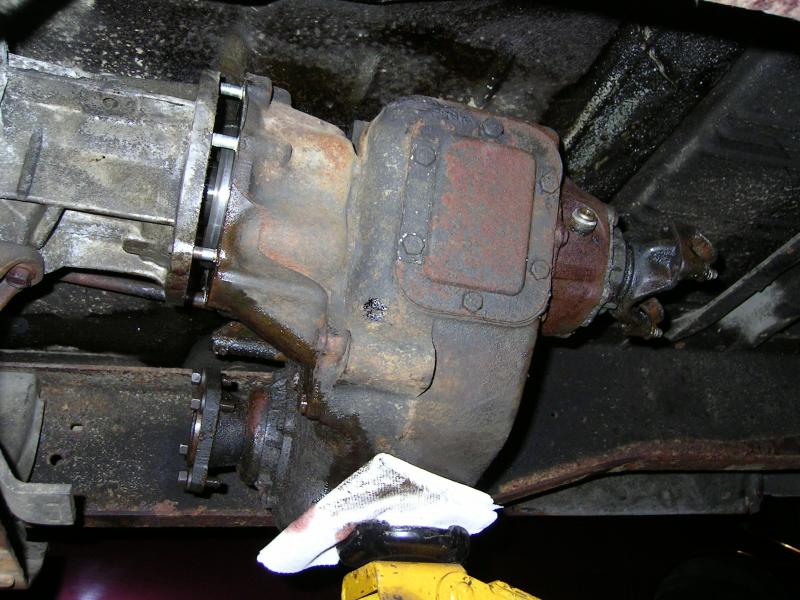
And out....

You can see the fluid in the adapter. There was no seal on the transmission tail shaft, only on the main shaft of the transfer case. So there was a lot of tranny fluid in there.
Ready to come out....

And out....

You can see the fluid in the adapter. There was no seal on the transmission tail shaft, only on the main shaft of the transfer case. So there was a lot of tranny fluid in there.
Thread Starter
Registered User
Joined: Mar 2010
Posts: 7,265
Likes: 1,346
From: Prince George, BC
And then today I spent most of the day working on removing all the tranny cooler lines, linkage and getting the torque converter and bell housing bolts out, and dropped the 4x4 shifter. Again much heat and PB Blaster to make all this happen. Took me most of the day to get all this done. And once again I HATE Ma Mopar for mot putting a friggin drain plug in the tranny pan!!
Tomorrow the tranny comes down and out.


Tomorrow the tranny comes down and out.
Thread Starter
Registered User
Joined: Mar 2010
Posts: 7,265
Likes: 1,346
From: Prince George, BC
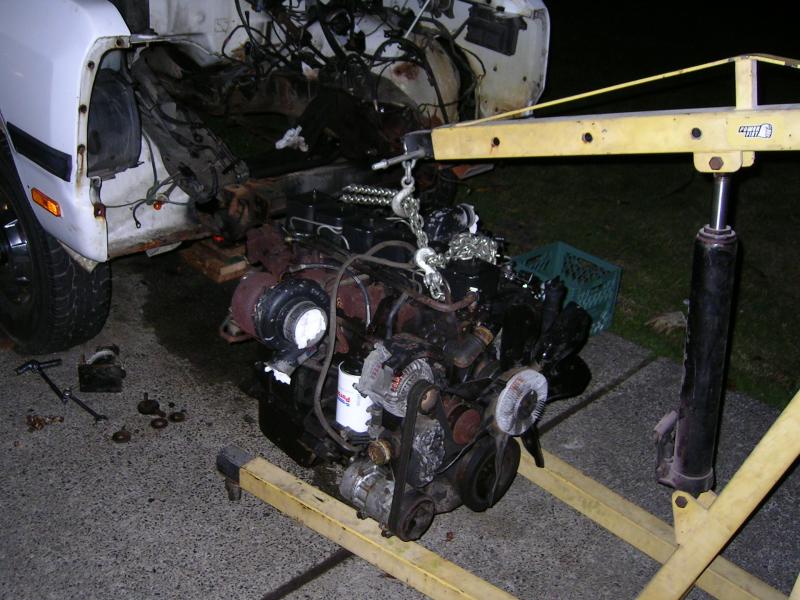
Well have slowly been tearing the rest of the drive train out. Got the tranny out about a week ago, and tonight got the motor out.
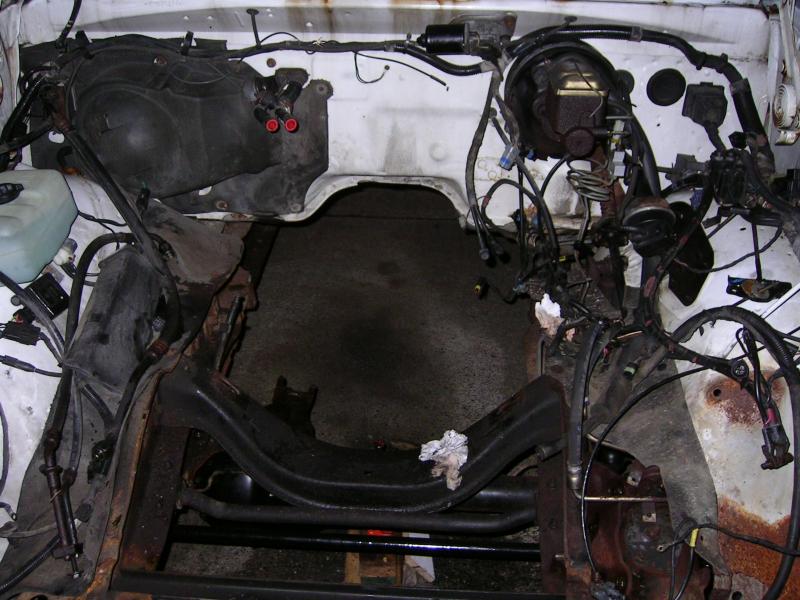
Will continue tearing it apart. Hope to get to pounding out rivets soon.


Will continue tearing it apart. Hope to get to pounding out rivets soon.
Thread Starter
Registered User
Joined: Mar 2010
Posts: 7,265
Likes: 1,346
From: Prince George, BC
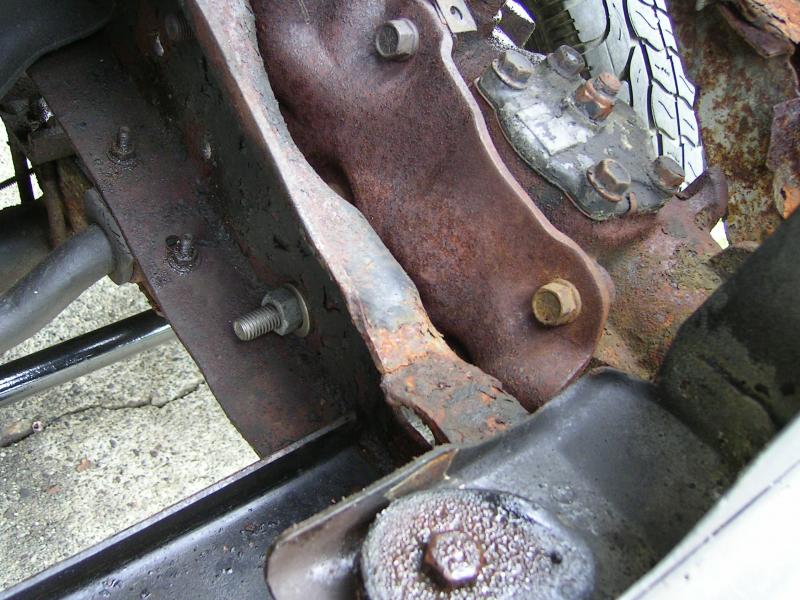
The power steering bracket was loose on the frame, and the frame had been welded a coupe times....still cracked again. Doesn't apear that the bracket is cracked...I hope.
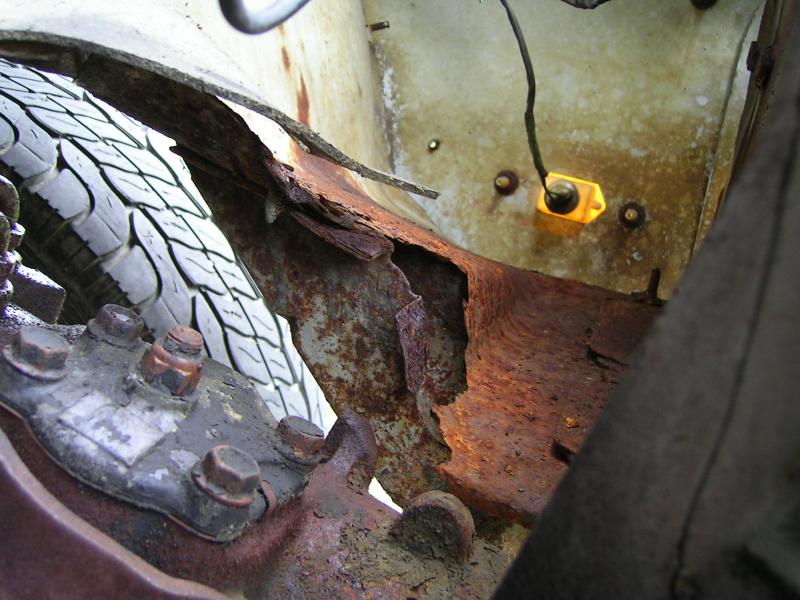
And the inner fender is rusted pretty badly right under the battery.
Haven't decided is I will try and repair this one, or just use the nice rust free one from the crewcab.

And the inner fender is rusted pretty badly right under the battery.

Haven't decided is I will try and repair this one, or just use the nice rust free one from the crewcab.
Thread Starter
Registered User
Joined: Mar 2010
Posts: 7,265
Likes: 1,346
From: Prince George, BC
Anyone tell me what these brackets are for? The one in the red box. There is one on each lower front of the inner fenders.
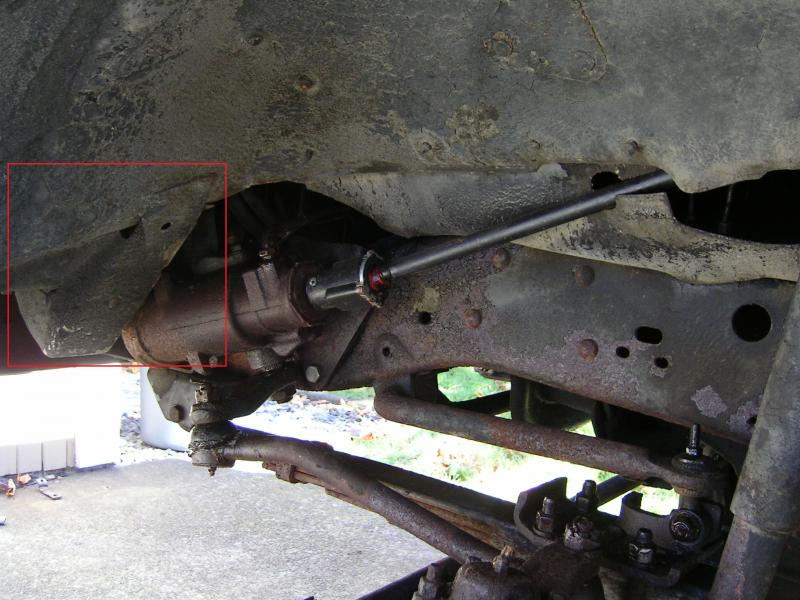
I suspect it might have something to do with the factory snow plow set-ups?

I suspect it might have something to do with the factory snow plow set-ups?
Thread Starter
Registered User
Joined: Mar 2010
Posts: 7,265
Likes: 1,346
From: Prince George, BC
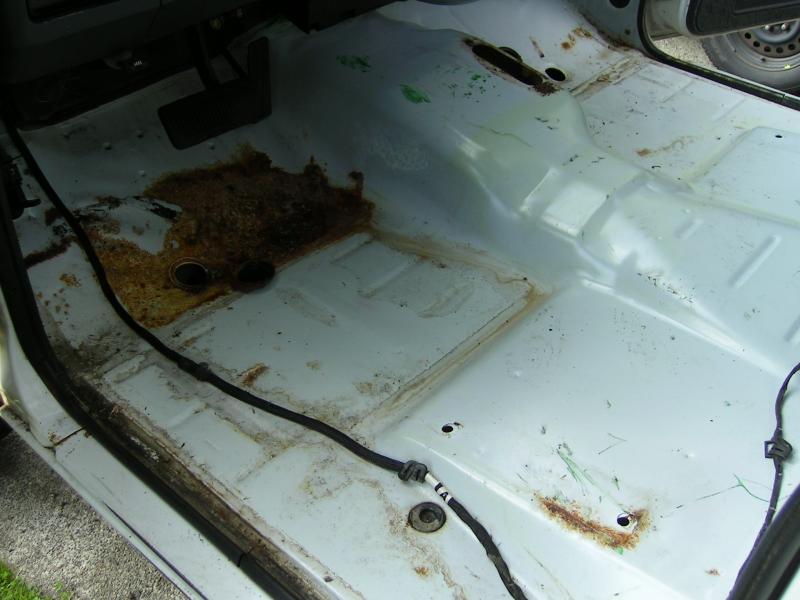
The tear down of the donor 93 continues.....Got most of the interior stripped out. My friend who's getting the cab will be so happy with how clean it is. Just a little surface rust on the drivers side floor...that's it!! A little wire wheel work, and a couple coats of tremclad paint and that floors good for another 20 years.