
Crewcab update...

Thread Starter
Registered User


Joined: Mar 2010
Posts: 7,265
Likes: 1,346
From: Prince George, BC
And then, Yes, I will be re-using the original block on top of the axle. Keeping it all stock...for now...


Registered User
Joined: Aug 2013
Posts: 4,918
Likes: 603
From: Tulsa, OK
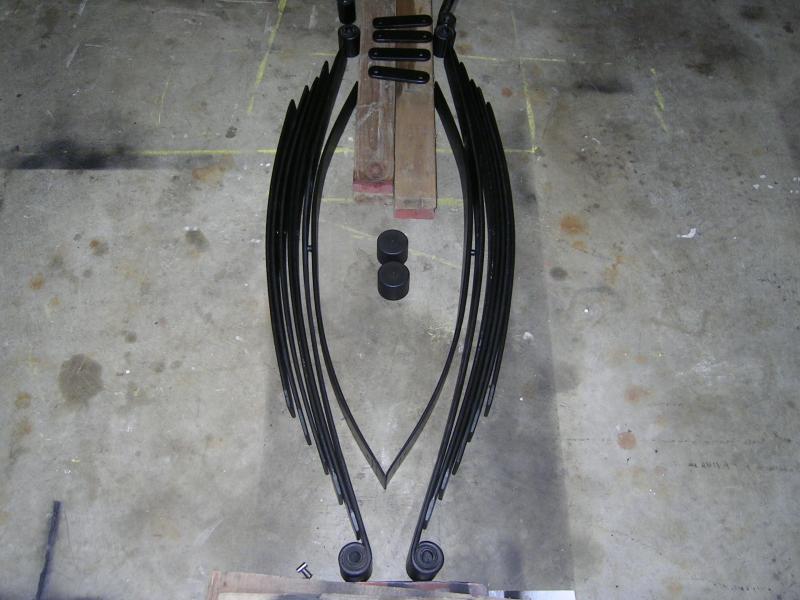
The old 84 Gasser springs are toast. I have pulled apart the springs from the Donor 93...had them sand blasted, new bushings installed, smoothed and painted, and now will be drilling the tips for the wear pads. Hope to have them assembled by this weekend.
And then, Yes, I will be re-using the original block on top of the axle. Keeping it all stock...for now...
And then, Yes, I will be re-using the original block on top of the axle. Keeping it all stock...for now...
anything to make the springs movements smoother is a good thing.
Thread Starter
Registered User
Joined: Mar 2010
Posts: 7,265
Likes: 1,346
From: Prince George, BC
Nut and Bolt saga continues.....
So I open my E-mail this morning and there is a bill/receipt from McMaster - Carr....***? I look at it and it clearly states..."Canada Export - **DO NOT SHIP**" Then at the bottom there is a UPS tracking number. So I check the tracking...shipped the same day I received the E-mail stating that they would not sell me the nuts and bolts, and was en-route to be delivered to my US shipping address today...again ***!!
I go back to the first E-mail I received from them, and called the guy who sent it...no answer only voice mail. Leave a long rambling message. Then I get on the phone to Visa...see if I can put a stop payment on it...nope hasn't cleared yet. Then I decided to go to the McMaster-Carr website and see if they have a customer service number.
I then call their Help line and explain everything that has been going on. And how I have already found bolts locally. The guy said that they clearly F'd up and that they would refund me the cost of the nuts and bolts. I asked if they wanted them back...he told me to just keep them.
Now I needed to call Napa and tell them what has happened and that I now do not need the nuts and bolts they were bringing in for me.
So at the end of the day I finally have my nuts and bolts...at no cost to me...and I can finally get the cross members and brackets in tomorrow!!
What a friggin ordeal!!
Thread Starter
Registered User
Joined: Mar 2010
Posts: 7,265
Likes: 1,346
From: Prince George, BC
Update in progress...
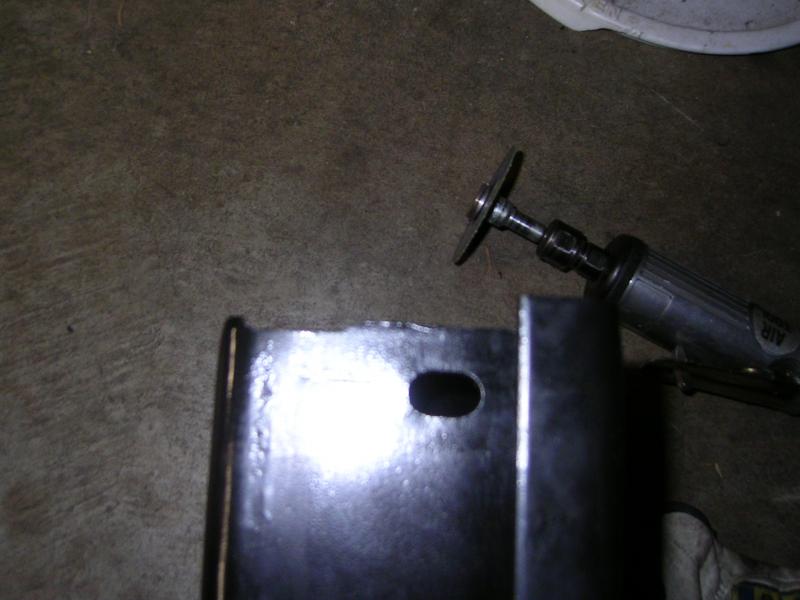
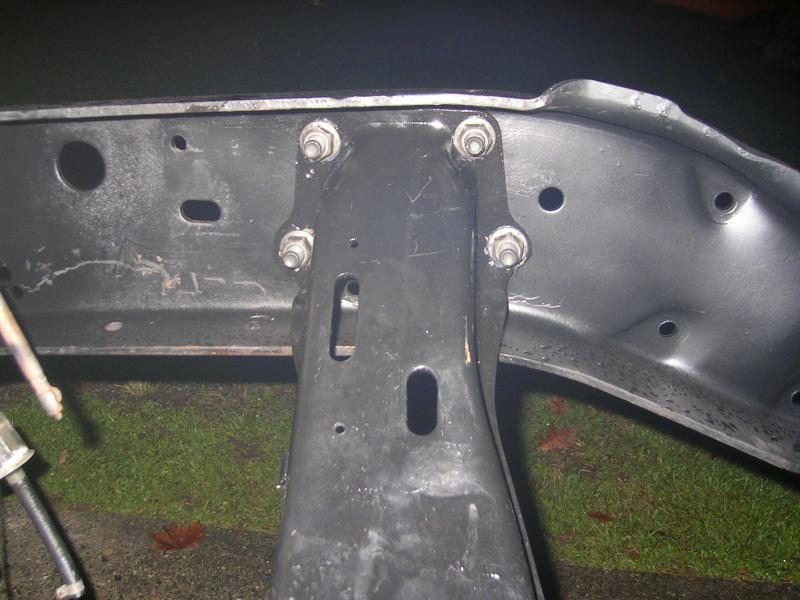
I made a couple templates and got the rear spring mount holes punched, and drilled.
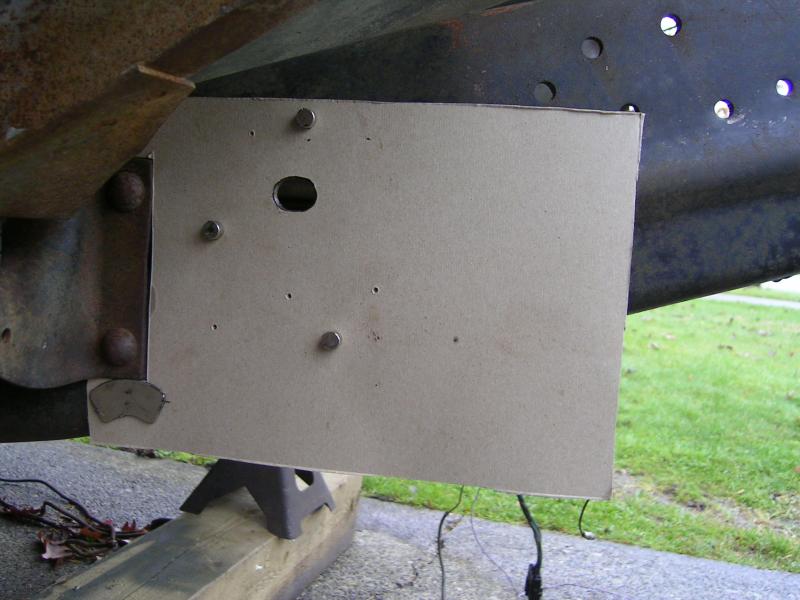
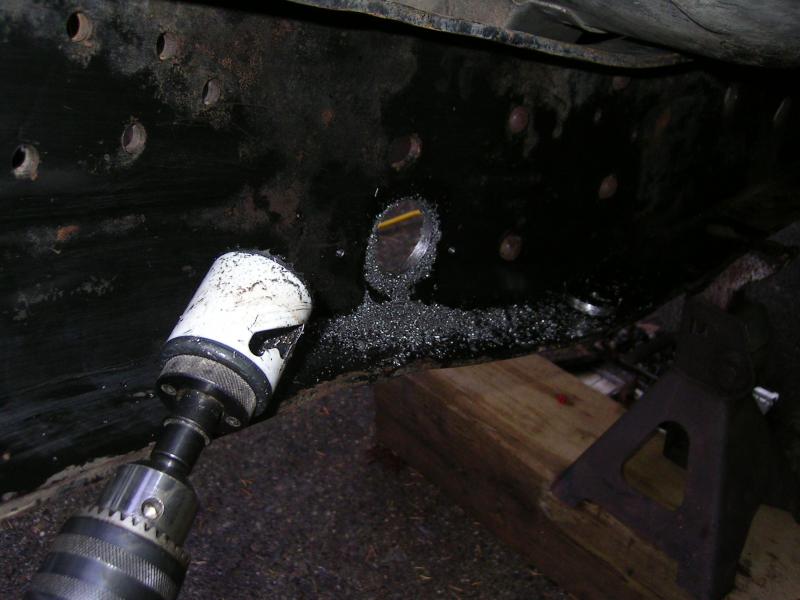
Bought a decent 1 3/4" hoke say to make the big hole in the frame. I used tons of cutting fluid, and then only cut in 10-15 second intervals before adding more cutting fluid. Took a good 5 minutes or so to, each side, to cut through the frame, but my hole saw still looks almost new.
I made a couple templates and got the rear spring mount holes punched, and drilled.

Bought a decent 1 3/4" hoke say to make the big hole in the frame. I used tons of cutting fluid, and then only cut in 10-15 second intervals before adding more cutting fluid. Took a good 5 minutes or so to, each side, to cut through the frame, but my hole saw still looks almost new.

Thread Starter
Registered User
Joined: Mar 2010
Posts: 7,265
Likes: 1,346
From: Prince George, BC
Got all new bushings installed in my springs. Got them all smoothed out with the 60 grit flapper discs, and then painted. Now I just need to drill all the tips for the poly wear pads and reassemble.

Thread Starter
Registered User
Joined: Mar 2010
Posts: 7,265
Likes: 1,346
From: Prince George, BC
And since it wasn't raining today, and was a balmy 6*c (45*F) I spent all day today with a heat gun and a can of paint working on the frame rails.
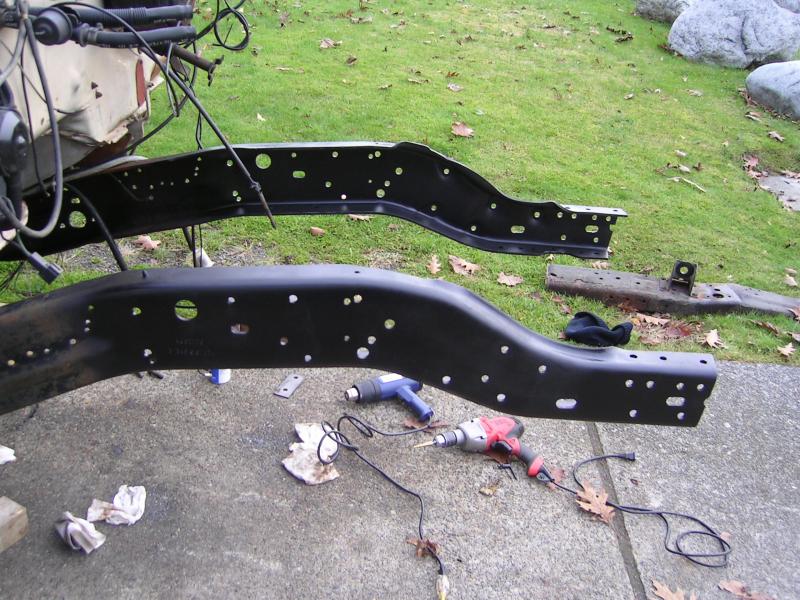
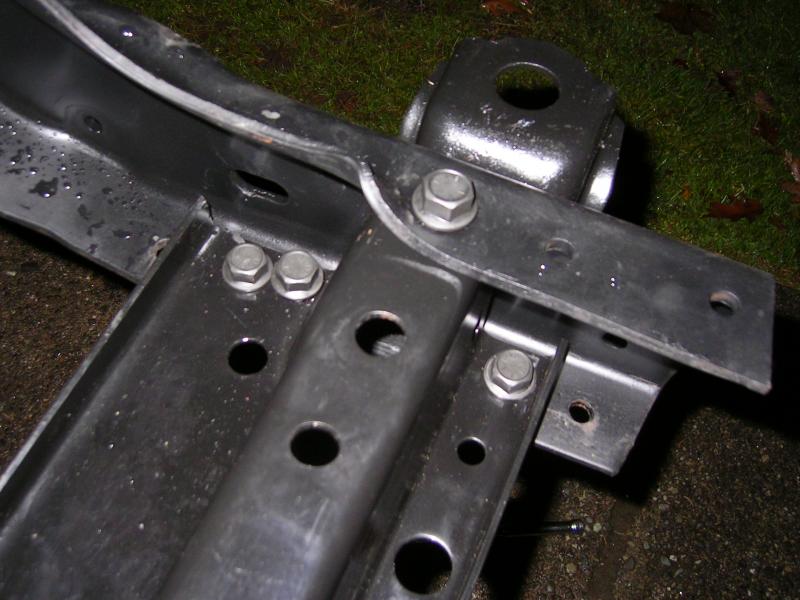
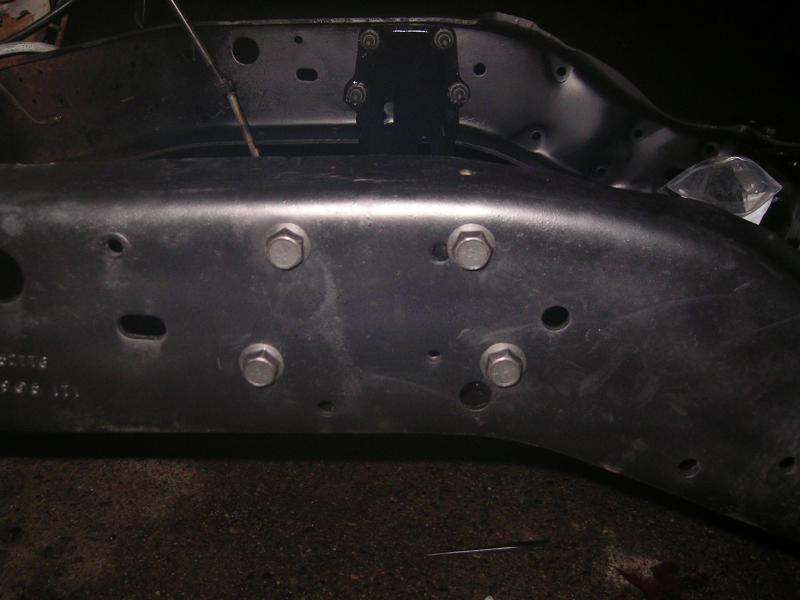
And with my flange head nuts and bolts in hand I couldn't wait until tomorrow to start assembling the frame. Got the rear spring hangers in first, Loctite 242'd and torqued. Then it was slide the center cross member in place and then start on the front cross member.
First thing I discovered was that things have to be assembled in a certain pattern. The three bolt that are behind the cross member have to go in first. I discovered that I needed to notch the cross member to clear the head on the upper/forward bolt head.
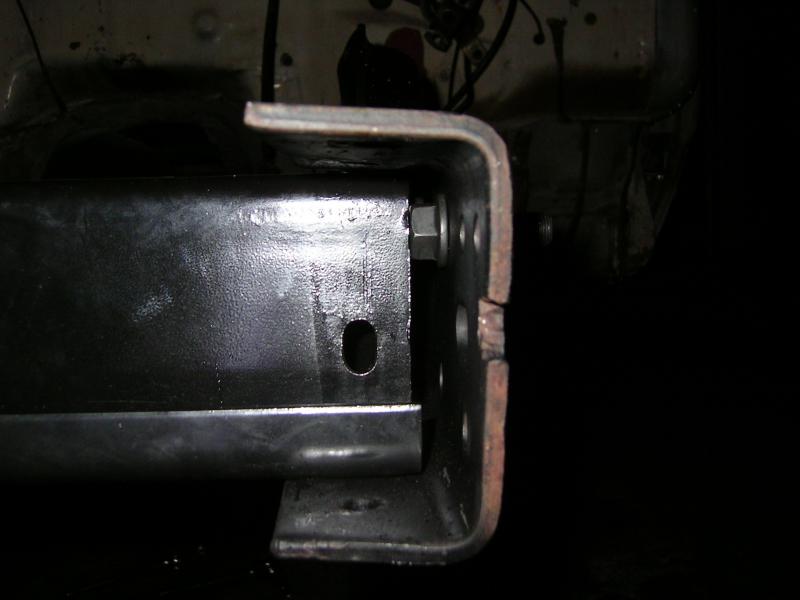
Few minutes with the die grinder and I had lots of clearance.

And with my flange head nuts and bolts in hand I couldn't wait until tomorrow to start assembling the frame.
Got the rear spring hangers in first, Loctite 242'd and torqued. Then it was slide the center cross member in place and then start on the front cross member.First thing I discovered was that things have to be assembled in a certain pattern. The three bolt that are behind the cross member have to go in first. I discovered that I needed to notch the cross member to clear the head on the upper/forward bolt head.

Few minutes with the die grinder and I had lots of clearance.


Thread Starter
Registered User
Joined: Mar 2010
Posts: 7,265
Likes: 1,346
From: Prince George, BC
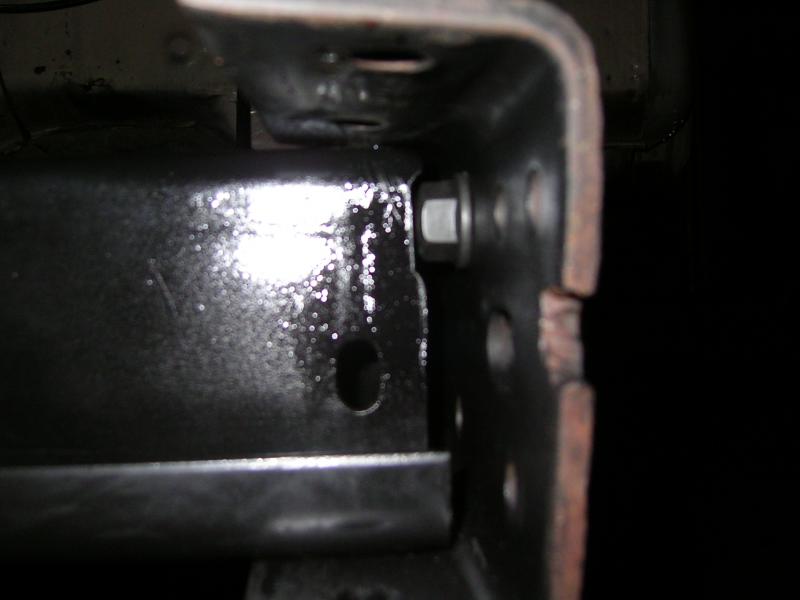
Then it was the front spring brackets that need to go on next. Slip it over the 3 bolts and then down under the frame rail.
To get it to suck up tight(er) under the frame and align with the holes through the cross member and frame, I installed a nut and washer on the lower bolt.
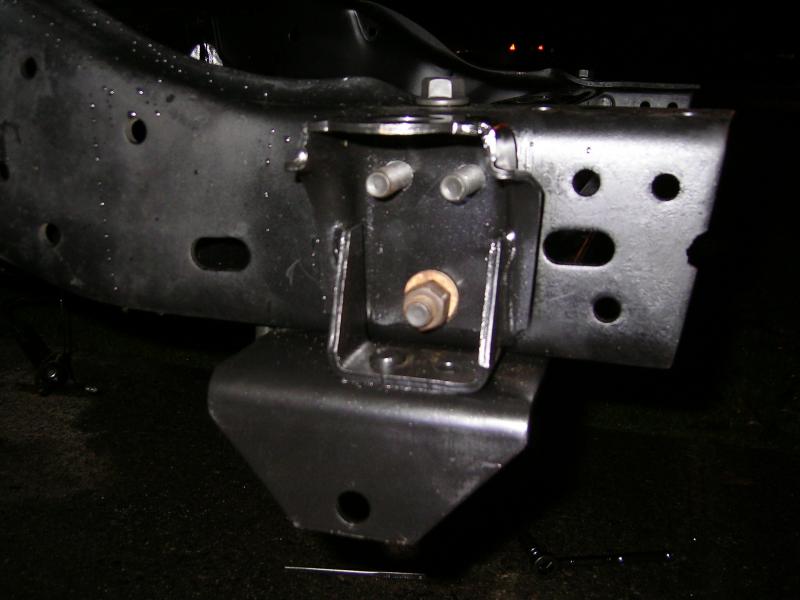
This got things "close" but it was still a lot of banging with the rubber mallet, and prying with a tapered round pry bar to try and allign all the pieces to get the bolts through.
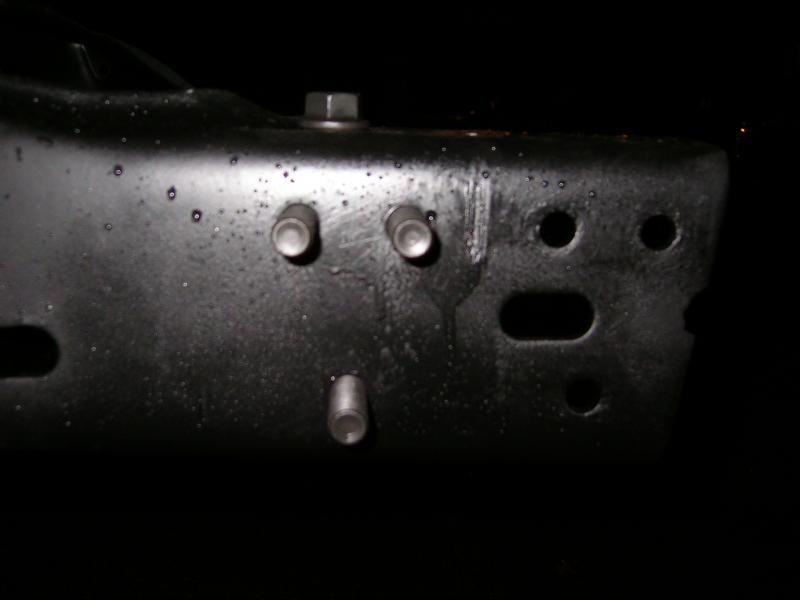
Didn't install the nuts on the front cross member this evening though. But I did do the main center cross member.
It was after 9pm, and my back was killing me so I called it a night.

To get it to suck up tight(er) under the frame and align with the holes through the cross member and frame, I installed a nut and washer on the lower bolt.

This got things "close" but it was still a lot of banging with the rubber mallet, and prying with a tapered round pry bar to try and allign all the pieces to get the bolts through.

Didn't install the nuts on the front cross member this evening though. But I did do the main center cross member.


It was after 9pm, and my back was killing me so I called it a night.
 Lots of progress in a short amount of time.

Registered User
Joined: Dec 2010
Posts: 6,837
Likes: 1,683
From: Land of the Toxic Avenger
Coming along nice ! Free bolts to make up for all the crapola you had to deal with.... Sounds good !
If your back hurts, you must be over 18 years old.....
 Welcome to my world....Mentally, I'm still 18, but my body says 46+
Thread Starter
Registered User
Joined: Mar 2010
Posts: 7,265
Likes: 1,346
From: Prince George, BC
I would probably run small "Cummins turbo Diesel" emblems instead of the power wagon ones. I'll be 40 in about 6 months.

 get Got you Dog Gone Youngin's
 Registered User
Joined: Aug 2013
Posts: 96
Likes: 0
From: WI
I'm just a few days away from 17 and already have back problems and it would take me a life and a half to complete a crewcab resto. Maybe thats just because I'm young and don't have all the knowledge that you guys do.

