
Old Blue, W-350 Crew Cummins Project

Thread Starter
Registered User
Joined: Mar 2010
Posts: 416
Likes: 7
From: Monmouth, Oregon
I would pull the windshield to check for corrosion and then re-install with a new gasket. I would probably paint the windshield channel with the new paint before installation. While the windshield is out, I'd swap out the dash.
Or better yet, pull the windshield and leave it out until the truck is painted. I've never liked the results of taping around a gasketed glass.
.
Or better yet, pull the windshield and leave it out until the truck is painted. I've never liked the results of taping around a gasketed glass.
.
Registered User


Joined: Mar 2010
Posts: 7,265
Likes: 1,346
From: Prince George, BC
Looks like a nice project!
My 84 crew CTD conversion...done by someone else, uses a 89 motor and wiring harness. The 91 you have is it the 91.5, the pre-IC? Is the dash speedo driven from a cable or sensor? If you have a pre 91.5 then I'd use the cable driven set-up and wiring harness. The later 91.5-93 seem to have a fair amount of issues pertaining to the speedo and such.
I don't know what mounts were used on my crew, but from all I've read I think you'd be better off going rubber mounts, not poly. I have seen a fair amount of guys complaining that there poly mounts have split and cracked. I'm not a huge fan of poly, the only place I like to use poly is on sway bars, the rest get rubber.
Someone told me you can get the dash out even with the windshield in place. You just need to cut out triangles in the windshield gasket above each bolt. I have not tried this, nor do I know if it will truly work, but if you do plan on replacing the windshield gasket later then I would maybe consider giving it a try.
I grad-u-ated frum Claudes skool of tpying....
Joined: Jan 2009
Posts: 467
Likes: 1
From: white trash junction
How about hockey pucks for mounting? a decent price and if one gets screwed up it's not a big whoop ,it's what i used and i'm happy with'em ....On the dash i took the windsheld out ,becouse i was stripping the wrecked cab of my 93 to put the guts into my 88.
Thread Starter
Registered User
Joined: Mar 2010
Posts: 416
Likes: 7
From: Monmouth, Oregon
It is a 91 1/2 with intercooler, but it does have the mechanical speedo. I have yet to find rubber mounts and I have heard a pretty even 50/50 split of opinions. As far as hockey pucks, I am a bit skeptical.
Registered User
Joined: Mar 2010
Posts: 7,265
Likes: 1,346
From: Prince George, BC
Only way I would consider hockey pucks would be with a retaining ring around the outside, and a bushing down the middle. But then maybe the same set-up could help the poly ones live longer?
Thread Starter
Registered User
Joined: Mar 2010
Posts: 416
Likes: 7
From: Monmouth, Oregon
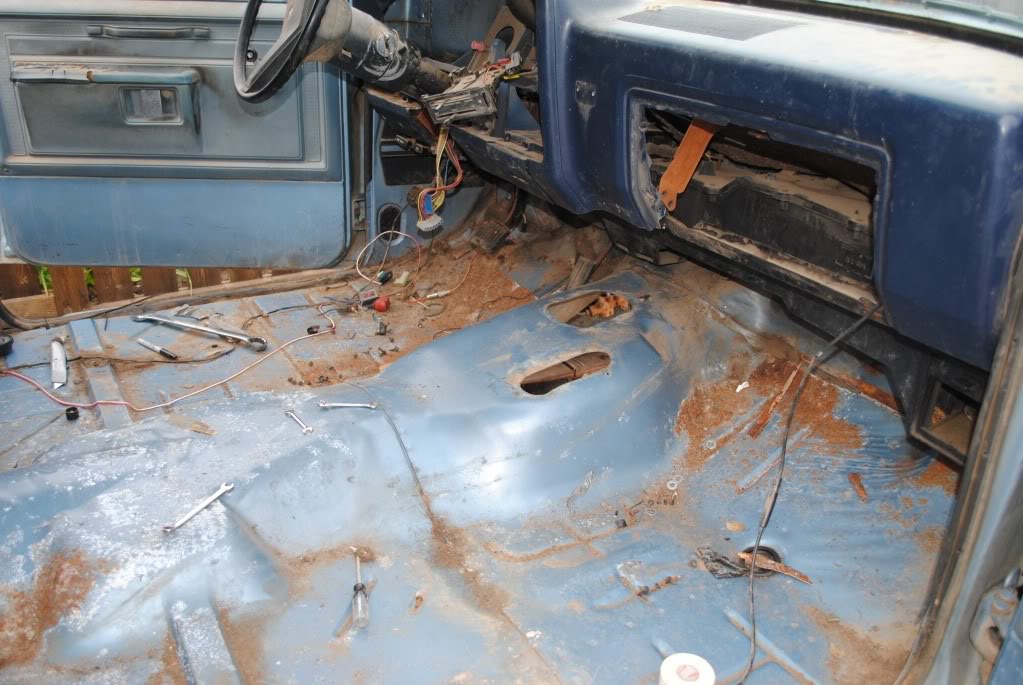
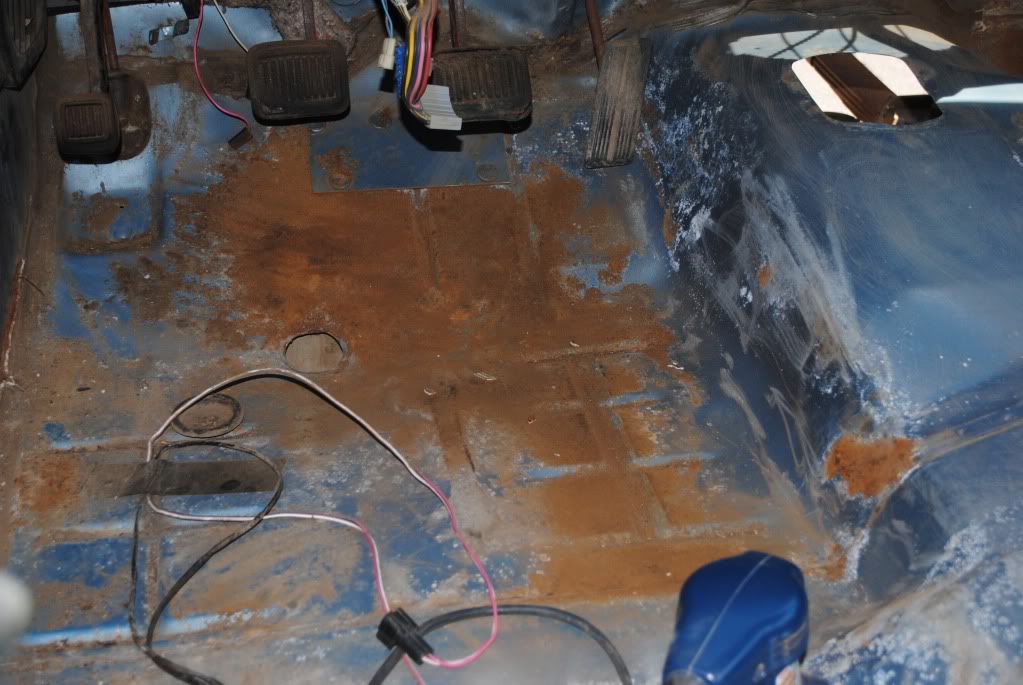
Good Floorboards
I have the interior stripped and the engine bay nearly empty. So far I have found good floor boards and only a bit of surface rust from the floor mat. I have also pulled the interior and exterior wiring harnesses, I didn't label a thing (planning on using 91.5 harness); hopefully, this won't bite me. Tomorrow I am going to drop the fuel tank and pull out the gas lines. Also going to remove much of the braking system. I was hoping to re-use the brake lines, but after popping the cap on the master cylinder I am skeptical they are good. Is there anyway to flush and salvage the lines without removing them all? The exterior of the lines are great, but not sure on the interior. Well here are a couple of pics for now: 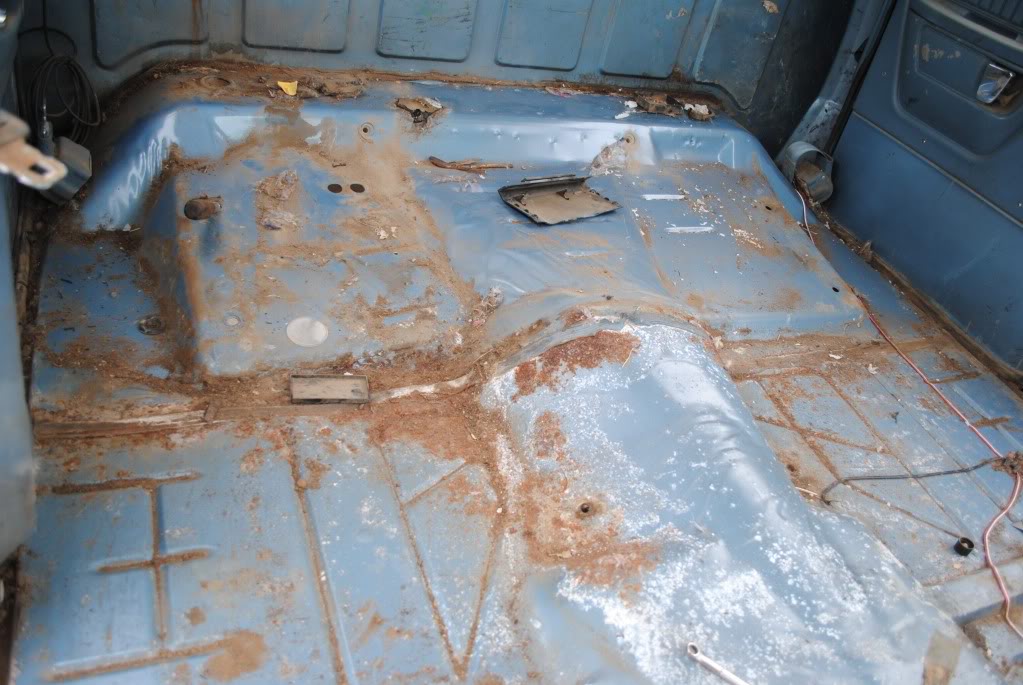
Registered User
Joined: Mar 2007
Posts: 890
Likes: 4
From: Salem, OR
Looking good. Sorry to hear about the jobs. I spent the evening helping/watching, mostly watching, alwaysworking on his cc project. I haven't touched mine yet, but I am closer to getting my shop cleaned up. I love these old crewcabs. I am glad another one is going to see some more miles.
Thread Starter
Registered User
Joined: Mar 2010
Posts: 416
Likes: 7
From: Monmouth, Oregon
Crew cab is no longer a gas rig. Tank and fuel lines are all out. Old wiring is completely removed. Just need to get the old bumper off and then get to work on the cab mounts, as well as, painting and undercoating the chassis.
I got a letter from my district saying they should be able to employ me for next school year, and my wife picked up a new job last Friday. This makes the build get a little more funding.
I got a letter from my district saying they should be able to employ me for next school year, and my wife picked up a new job last Friday. This makes the build get a little more funding.
Registered User
Joined: Mar 2010
Posts: 7,265
Likes: 1,346
From: Prince George, BC
As for your previous question about cleaning the brake lines...just buy a gallon of DOT 3 brake fluid and start pumping it through the system. I use an old water bottle, a long piece of vacuum hose, and then pumch a hole in the lid of the water bottle, feed the hose into the bottle, punch another small hole in the side of the bottle, near the top, and viola...your own one man brake bleeding system.
Here's a pic of mine....

I've been using this method for years and have never had a problem yet. Just start at the pass. rear, the the driver rear, the pass. front and finally the drivers front. once you have clear fluid flowing into the bottle I let the system gravity bleed for about 5 minutes before closing up the bleeder screw.
I know you just want to clean the system, but you'll need to bleed it eventually...


Registered User
Joined: Feb 2008
Posts: 194
Likes: 1
From: Louisiana, U.S.
Right on!! Glad you have job prospects!!
As for your previous question about cleaning the brake lines...just buy a gallon of DOT 3 brake fluid and start pumping it through the system. I use an old water bottle, a long piece of vacuum hose, and then pumch a hole in the lid of the water bottle, feed the hose into the bottle, punch another small hole in the side of the bottle, near the top, and viola...your own one man brake bleeding system.
Here's a pic of mine....

I've been using this method for years and have never had a problem yet. Just start at the pass. rear, the the driver rear, the pass. front and finally the drivers front. once you have clear fluid flowing into the bottle I let the system gravity bleed for about 5 minutes before closing up the bleeder screw.
I know you just want to clean the system, but you'll need to bleed it eventually...
As for your previous question about cleaning the brake lines...just buy a gallon of DOT 3 brake fluid and start pumping it through the system. I use an old water bottle, a long piece of vacuum hose, and then pumch a hole in the lid of the water bottle, feed the hose into the bottle, punch another small hole in the side of the bottle, near the top, and viola...your own one man brake bleeding system.
Here's a pic of mine....
I've been using this method for years and have never had a problem yet. Just start at the pass. rear, the the driver rear, the pass. front and finally the drivers front. once you have clear fluid flowing into the bottle I let the system gravity bleed for about 5 minutes before closing up the bleeder screw.
I know you just want to clean the system, but you'll need to bleed it eventually...
.
Thread Starter
Registered User
Joined: Mar 2010
Posts: 416
Likes: 7
From: Monmouth, Oregon

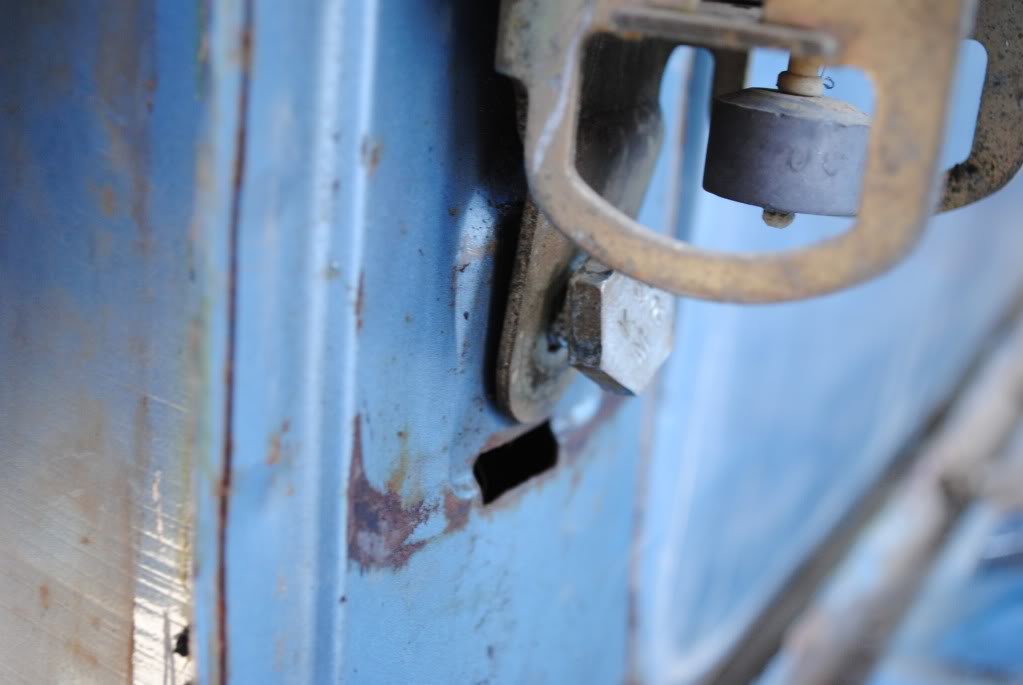
The weld broke and it wasn't even rusted. Don't know what to do with this.
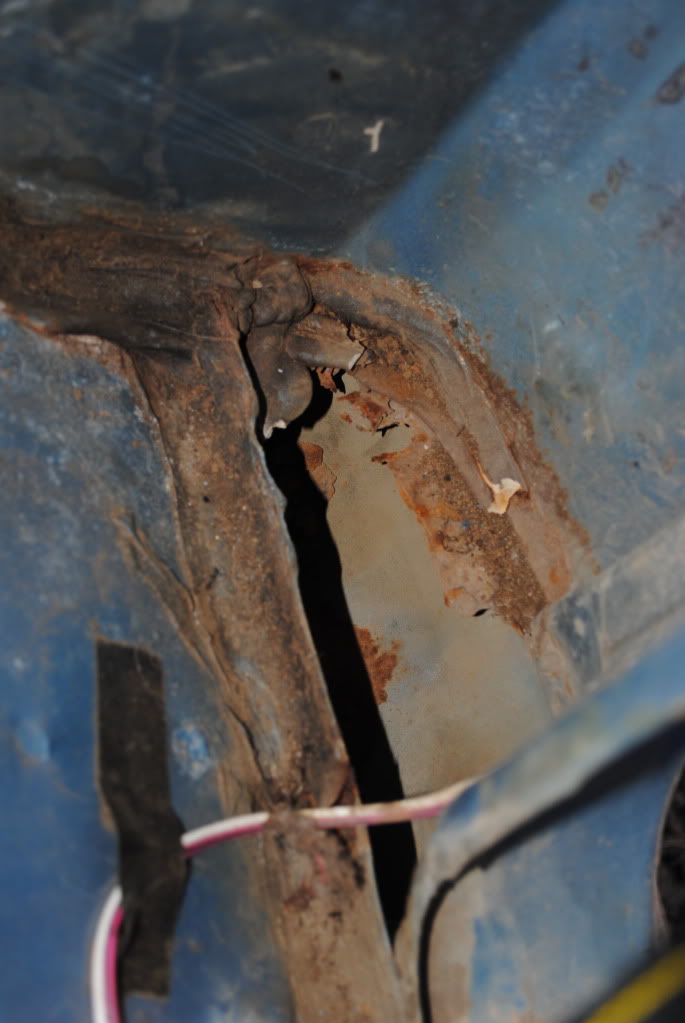
Also found some of the sheet metal rusted out in the corners of the cab. It appears to just be a piece to keep crud from falling down, I don't know if it will need to be replaced or not.
As far as the surface rust on the floor boards I was thinking of spraying with Eastwood's Rust Encapsulator. Have any of you ever used it?

Registered User
Joined: Aug 2003
Posts: 2,021
Likes: 7
From: Cochrane Alberta
I built a brake pressure bleeder using an old hand pump weed sprayer. You'll need a spare cap for your master cylinder. Drill a hole in it and tap it to accept a barbed hose fitting.
Cut the wand off of the hose sprayer and shove the cut end of the hose over the barbed fitting. Fill the weed sprayer with Dot3 and install the modified cap onto the master cylinder.
Pump up the sprayer and crack all the bleed screws. Fluid should run freely from all screws. Just keep the pressure up on the sprayer until you see new fluid at all points.
If you can't get an extra cap for your truck you could pull the fitting back out and put a plug in.
Registered User
Joined: Mar 2010
Posts: 7,265
Likes: 1,346
From: Prince George, BC
I have never used the eastwoods rust encapsulator, but I know a lot of people use the POR 15 stuff, with great success.
Personally I would clean it up the best I could then hit it with some brush on tremclad, (this is the canadian brand) the US stuff is called....Ummmm can't recall right now. I use it all the time and it works great for me.
Personally I would clean it up the best I could then hit it with some brush on tremclad, (this is the canadian brand) the US stuff is called....Ummmm can't recall right now. I use it all the time and it works great for me.