
What did you do to your Gen 1 today?


Registered User


Joined: Mar 2010
Posts: 1,860
Likes: 425
From: BC
As a quick fix, abandon and cap off the faulty line at the junction block. The plugs were $1 or something from the store... or you can weld up the old flare nut.
Registered User
Joined: Mar 2010
Posts: 7,265
Likes: 1,346
From: Prince George, BC
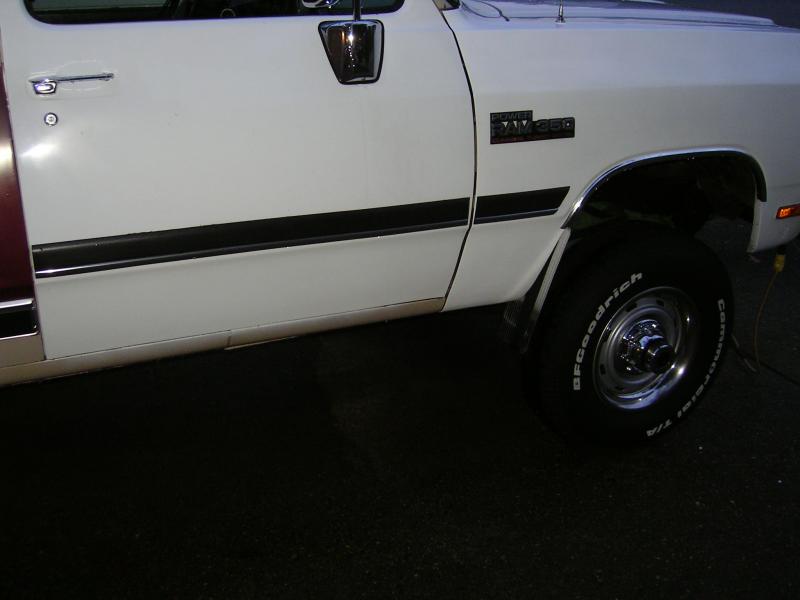
Yesterday I installed the aluminum upper wheel opening mouldings from the 84 side trim. I have been debating if I should run the 91-93 big black wheel opening flares. But after my last junk yard run and seeing the dodge rams and dakota with front and rear wheel rot due to these types of flairs, I couldn't justify putting them back on. Especially since this is my daily drivers.
I also installed my aluminum mud flaps. And today I gave Ol' Patch's a bath and some fixes hear and there, mostly where water was leaking in, and some surface rust had started.

I also installed my aluminum mud flaps. And today I gave Ol' Patch's a bath and some fixes hear and there, mostly where water was leaking in, and some surface rust had started.


Registered User
Joined: Aug 2013
Posts: 4,918
Likes: 603
From: Tulsa, OK
Yesterday I installed the aluminum upper wheel opening mouldings from the 84 side trim. I have been debating if I should run the 91-93 big black wheel opening flares. But after my last junk yard run and seeing the dodge rams and dakota with front and rear wheel rot due to these types of flairs, I couldn't justify putting them back on. Especially since this is my daily drivers.<br>
<br>
I also installed my aluminum mud flaps. And today I gave Ol' Patch's a bath and some fixes hear and there, mostly where water was leaking in, and some surface rust had started.<br>
<br>
<a href="http://s697.photobucket.com/user/thrashingcows/media/84%20Crewcab/November%202014/PICT0423_zps2c21d5ad.jpg.html" target="_blank"><img alt="" src="http://i697.photobucket.com/albums/vv340/thrashingcows/84%20Crewcab/November%202014/PICT0423_zps2c21d5ad.jpg" border="0"></a><br>
<br>
<a href="http://s697.photobucket.com/user/thrashingcows/media/84%20Crewcab/November%202014/PICT0424_zps3ee6d9b6.jpg.html" target="_blank"><img alt="" src="http://i697.photobucket.com/albums/vv340/thrashingcows/84%20Crewcab/November%202014/PICT0424_zps3ee6d9b6.jpg" border="0"></a>
<br>
I also installed my aluminum mud flaps. And today I gave Ol' Patch's a bath and some fixes hear and there, mostly where water was leaking in, and some surface rust had started.<br>
<br>
<a href="http://s697.photobucket.com/user/thrashingcows/media/84%20Crewcab/November%202014/PICT0423_zps2c21d5ad.jpg.html" target="_blank"><img alt="" src="http://i697.photobucket.com/albums/vv340/thrashingcows/84%20Crewcab/November%202014/PICT0423_zps2c21d5ad.jpg" border="0"></a><br>
<br>
<a href="http://s697.photobucket.com/user/thrashingcows/media/84%20Crewcab/November%202014/PICT0424_zps3ee6d9b6.jpg.html" target="_blank"><img alt="" src="http://i697.photobucket.com/albums/vv340/thrashingcows/84%20Crewcab/November%202014/PICT0424_zps3ee6d9b6.jpg" border="0"></a>
I like those better anyway.<br>
Registered User
Joined: Mar 2010
Posts: 7,265
Likes: 1,346
From: Prince George, BC
Registered User
Joined: Aug 2013
Posts: 4,918
Likes: 603
From: Tulsa, OK
Funny you mentioned that as I am looking for a photo hosting website for my other hobby. photography.
Registered User
Joined: Aug 2013
Posts: 4,918
Likes: 603
From: Tulsa, OK
For some reason it has to do with the emoticons. maybe some conflict from her games. that has happened before.
Registered User
Joined: Oct 2014
Posts: 199
Likes: 1
From: Virginia
Went out this morning and finally replaced the cone air filter. Used a 91' filter and OEM air box cover. A 3-1/2" aluminum flex hose and some ducting insulation and tape. IMO, came out pretty good. Also noticed the fuel separator dripping from the bottom sensor. I cleaned up the electrical connector and my wtr in fuel light went out. Pushed (cycled) up on the "drain"? and it stopped leaking. Looked like a little fuel came out put that was it. Doesn't look like it is leaking now.


