


What did you do to your Gen 1 today?


Registered User
Joined: May 2005
Posts: 2,867
Likes: 536

Now, JMartin, the mess you hate when removing that oil filter. What I'm about to suggest may require me to put my flame suit on, but here goes anyway: I've done this to all my vehicles, including the wife's Honda. Once the oil is starting to drain out upon removal of the plug, I hop in the vehicle and start it up and let it idle for no more than 8 seconds. Gone 10 a couple of times on the Dodge. Then, when I yank out that oil filter, no oil spewing out. The filter is either empty, or 3/4 empty. Never had problems with that at all, and I've been doing it for years. I've even done it an hour later when all the oil has drained out of the pan. Those times I only a 5 second count.
Anyone here look into that oil drain system that Genos Garage carries? The one where you never have to remove a drain plug; you just thread on a hose that pushes up onto a check valve type deal that permanently replaces your drain plug? Been using that for years, also. Have that system on all my rigs. That system is slick, especially when you decide to take oil samplings for an oil analysis. No wrenching, rounded off drain plugs, thread stripping, nothing. Whoever came up with that design is

I know someone will comment on the magnet benefit of a drain plug. Well, to adjust for that, I found filter wraps that have earth magnet strips on them. They wrap around your oil filters and trap any metal type particles in the filter. They are built well. Can't remember where I got those. Have those on both trucks, at every filter.


Registered User
Joined: May 2005
Posts: 2,867
Likes: 536
JFonder, I Haven't forgot about your PM to me about the front grille emblem dimensions for placement. I am currently in pack up mode, to head back down south for work starting Monday. About the only thing on my mind, other than the feelings of uncertainty by being off for 10 weeks, is if any critters got into my trailer and left a trail of turds. Hopefully no tree branches punctured the top, either.
Once I'm situated, sometime next week, I'll get that sketch finalized and I'll post it on the normal forums, that way all can benefit.
Sure am going to miss sleeping in my own bed. Been nice being home with the woman and my 2 Shepards, watching antennae TV.
Once I'm situated, sometime next week, I'll get that sketch finalized and I'll post it on the normal forums, that way all can benefit.
Sure am going to miss sleeping in my own bed. Been nice being home with the woman and my 2 Shepards, watching antennae TV.

Banned
Joined: Aug 2015
Posts: 884
Likes: 93
From: Jacksonville, FL
JFonder, I Haven't forgot about your PM to me about the front grille emblem dimensions for placement. I am currently in pack up mode, to head back down south for work starting Monday. About the only thing on my mind, other than the feelings of uncertainty by being off for 10 weeks, is if any critters got into my trailer and left a trail of turds. Hopefully no tree branches punctured the top, either.
Once I'm situated, sometime next week, I'll get that sketch finalized and I'll post it on the normal forums, that way all can benefit.
Sure am going to miss sleeping in my own bed. Been nice being home with the woman and my 2 Shepards, watching antennae TV.
Once I'm situated, sometime next week, I'll get that sketch finalized and I'll post it on the normal forums, that way all can benefit.
Sure am going to miss sleeping in my own bed. Been nice being home with the woman and my 2 Shepards, watching antennae TV.


Registered User


Joined: Dec 2008
Posts: 7,293
Likes: 2,884
From: vermont
The vertical oil filter on the 12V seem really easy to remove and then replace with an almost full new filter cleanly to me.
I usually only make a few drops on the newspaper I lay on the floor if things go as they should.
I usually only make a few drops on the newspaper I lay on the floor if things go as they should.

Registered User
Joined: Nov 2011
Posts: 4,479
Likes: 211
From: Isanti, MN
I wrench the filter just loose enough so I can turn it by hand. Then I pull a zip lock bag over it and turn it out. All the spill is in the bag.
I fill the new one with oil before I spin it on.
I fill the new one with oil before I spin it on.

Registered User
Joined: Jan 2015
Posts: 410
Likes: 7
From: Rogers TX
I also use a 5 gallon bucket. Just have to drive up in some ramps and level the back out with a floor jack and jack stands. It's a hassle but we all have our preferences. The crew will be easy though to make up for the D350. I'll be able to just slide it under there. Love your way of taking of the filter Mr. Martin. I will remember that next time.

Registered User
Joined: Mar 2008
Posts: 4,389
Likes: 114
From: Orange County, California
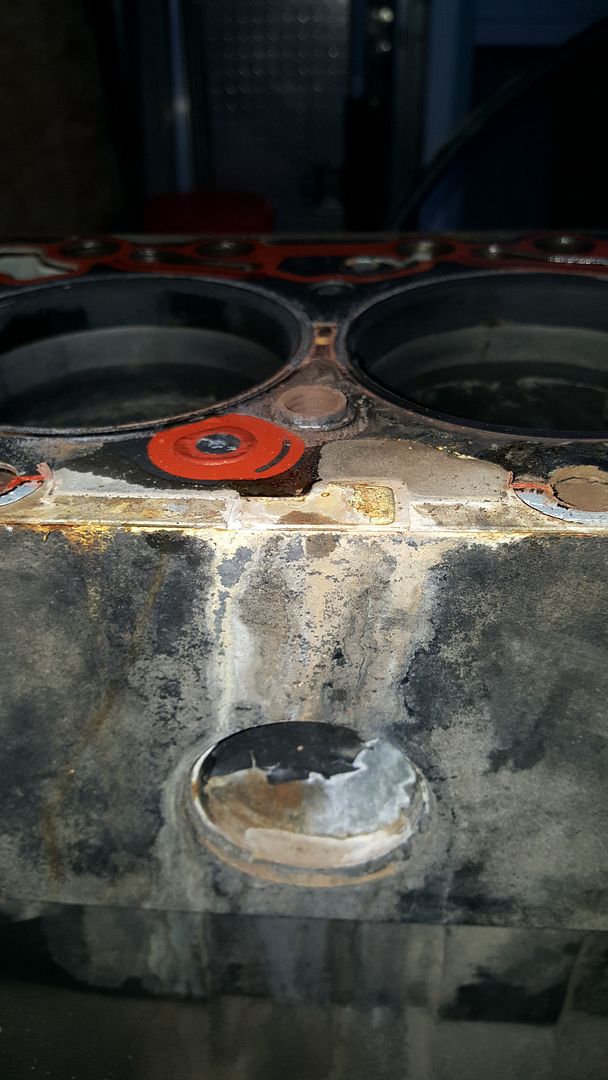
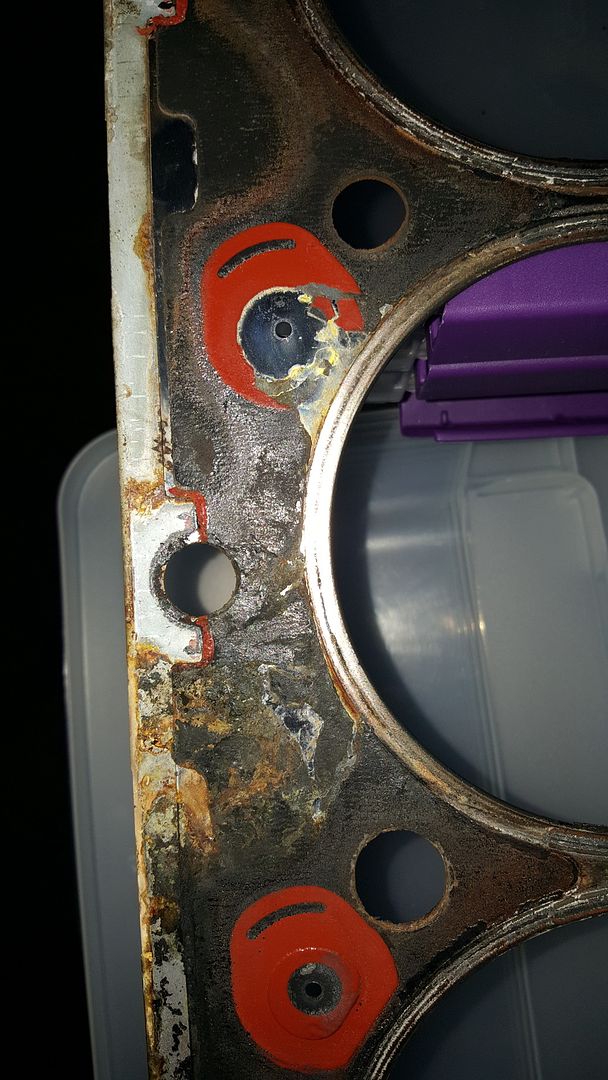
I've been working on disassembly of my engine for the past few days. From what I can see, the head gasket didn't fail from excess boost pressure or advanced timing. It appears to be just a failure from a coolant passage seal next to cylinder #5 on the exhaust side.
Between #5 and #6 is where the leak made itself known.
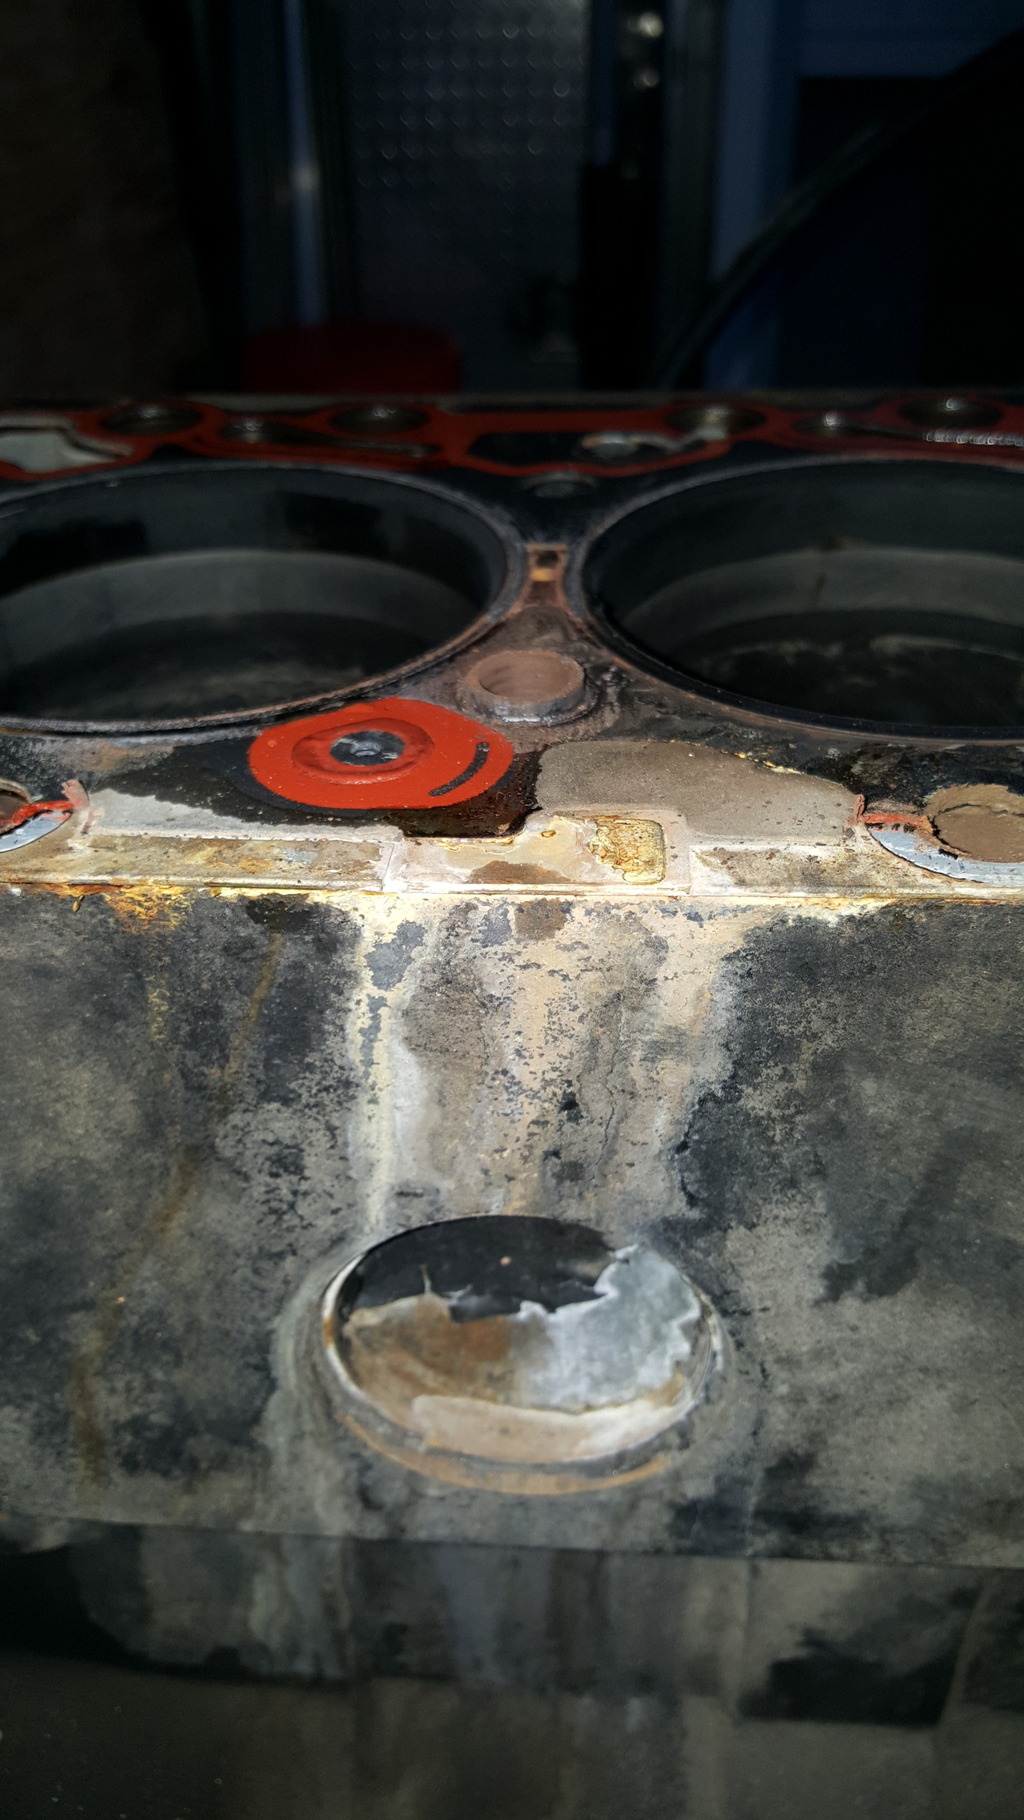
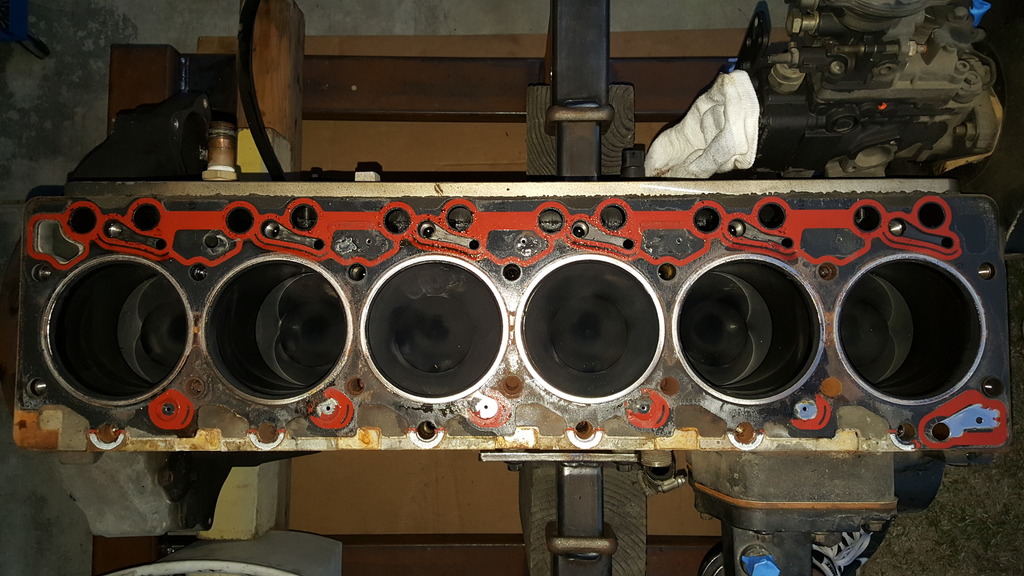
The suspected coolant passage next to #5.
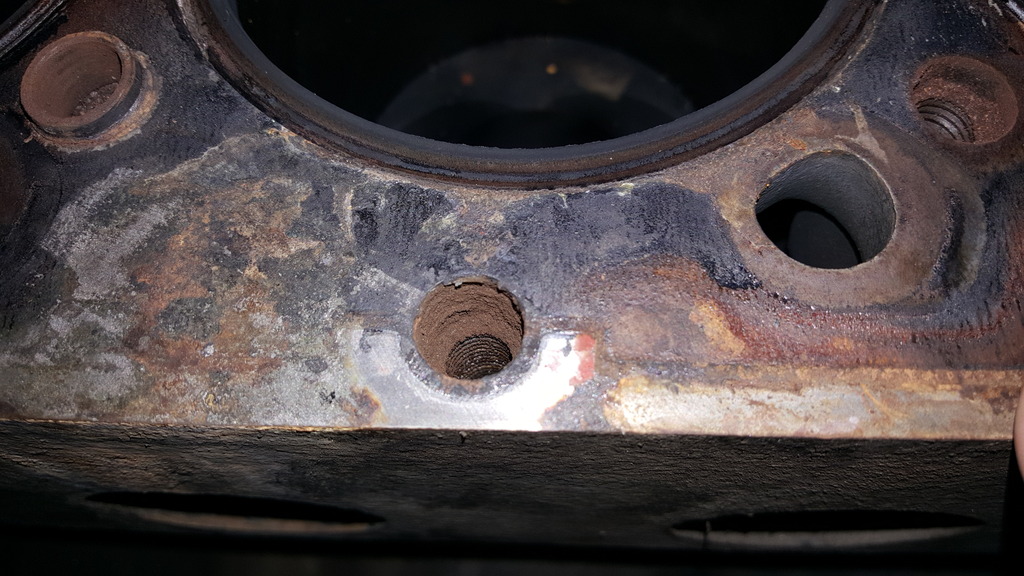
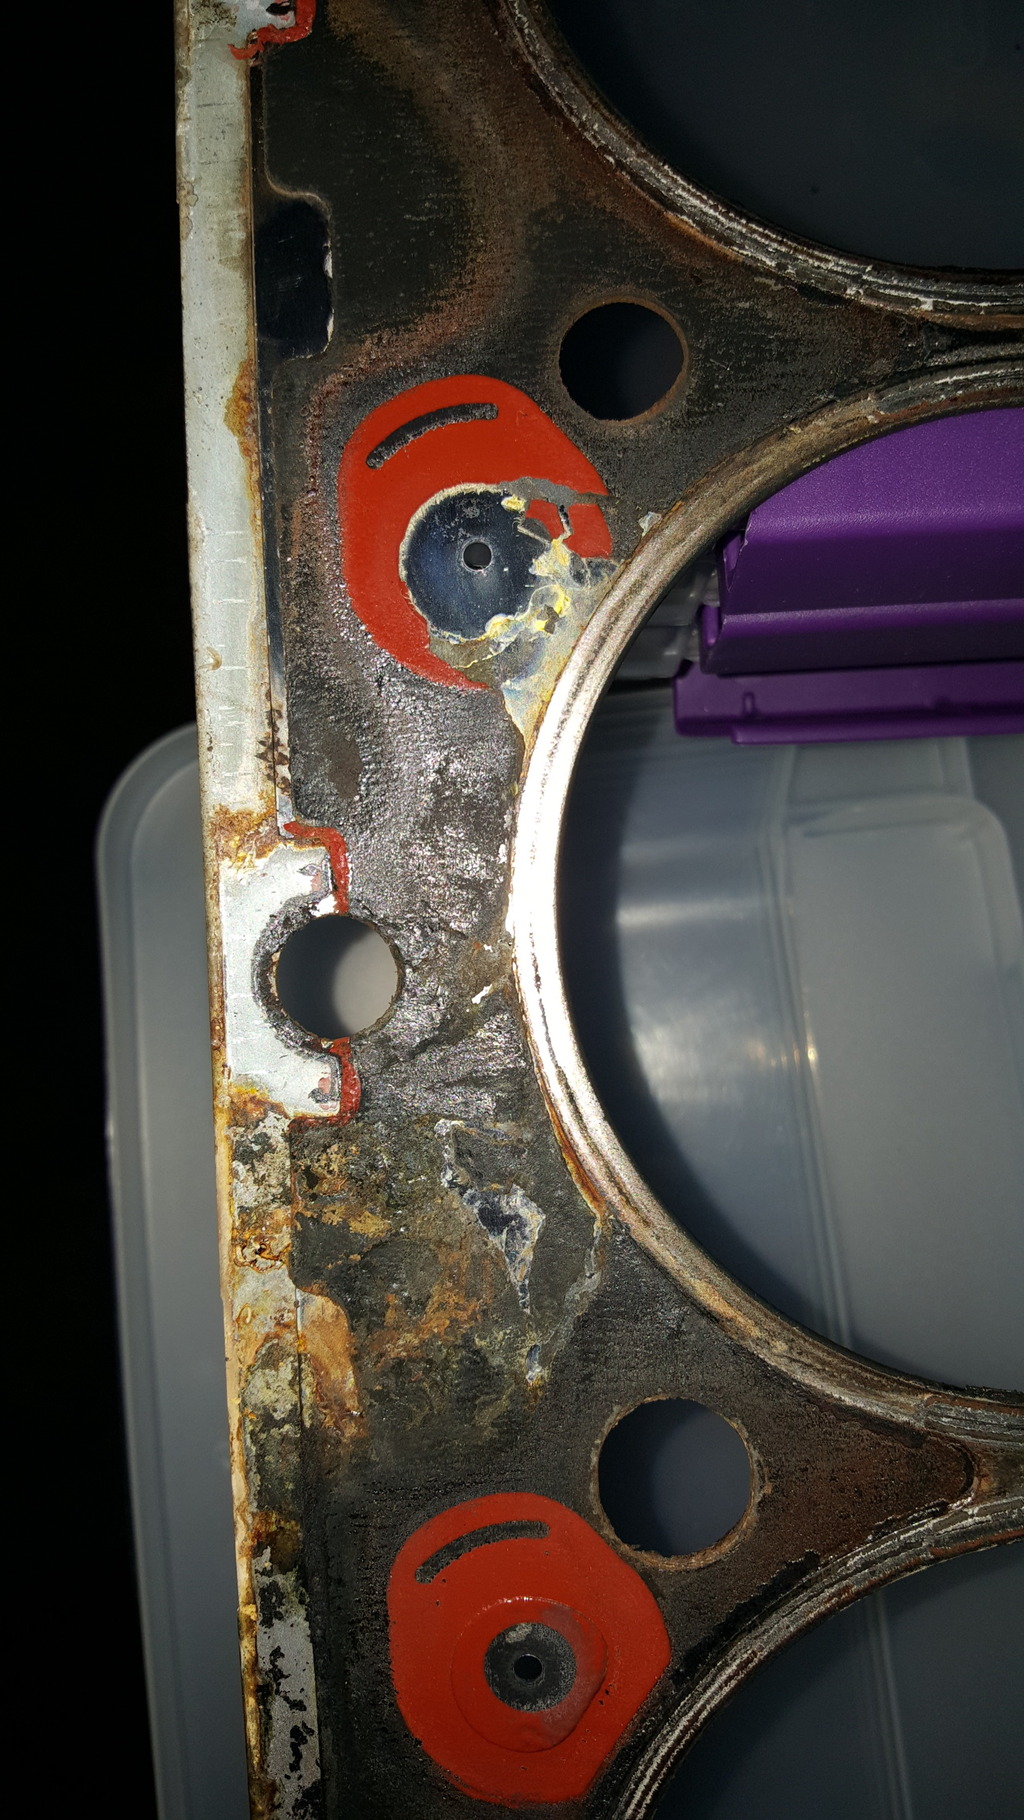
Block or bottom side of the gasket. It looks as though the coolant pushed out towards the rear and followed the fire ring around before going external below the exhaust runner. I guess some of the seal material missing would explain why I've occasionally seen small orange flakes in the coolant in the overflow bottle.
Flywheel, clutch disc and pressure plate assemblies removed along with the transmission adapter.
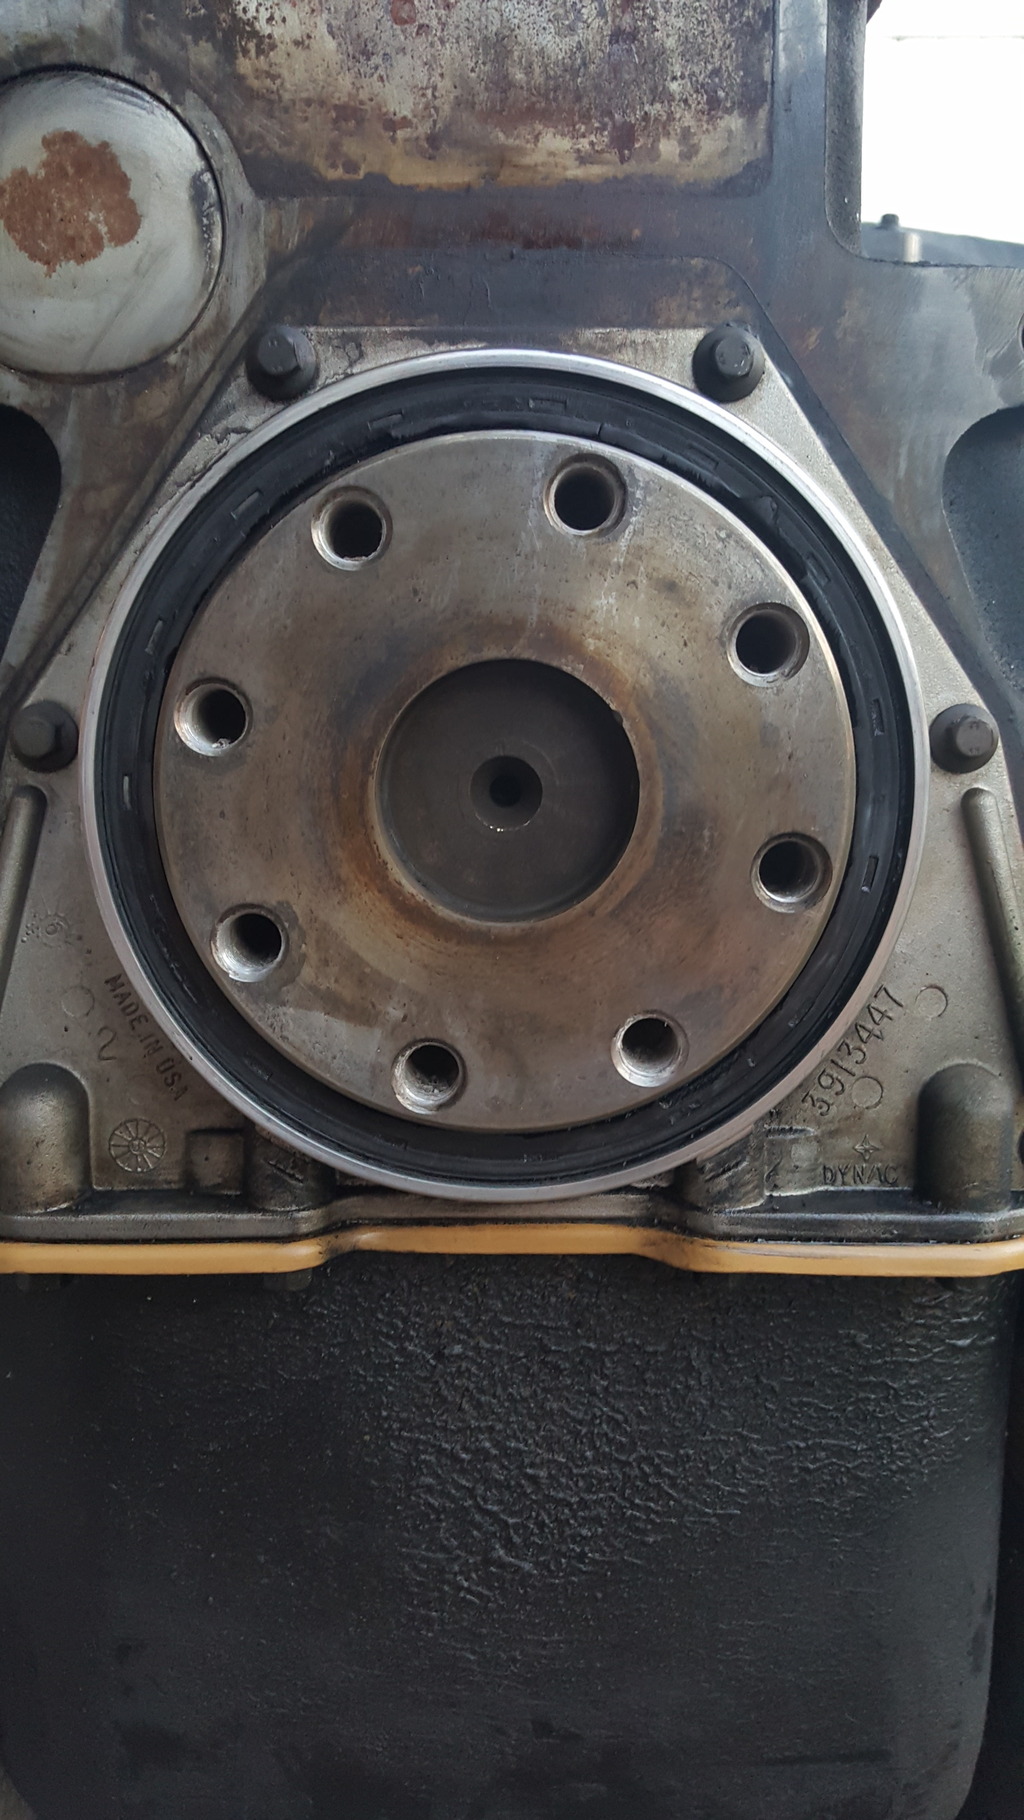
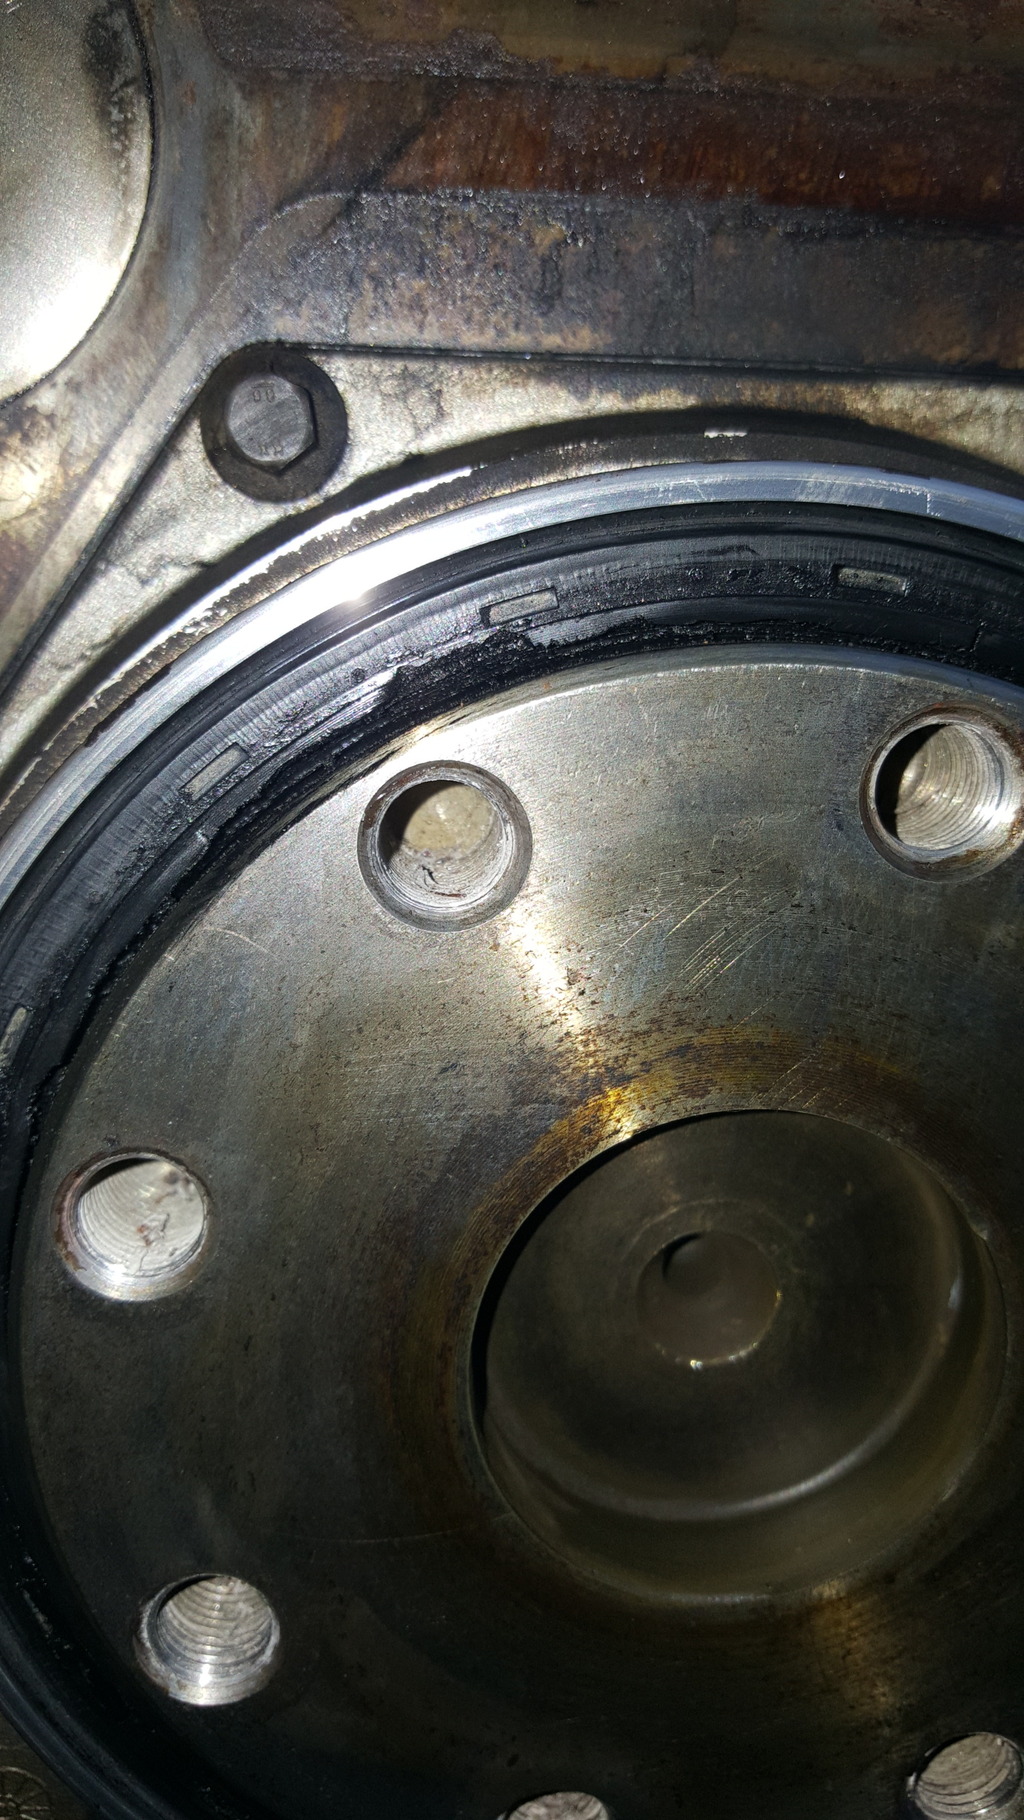
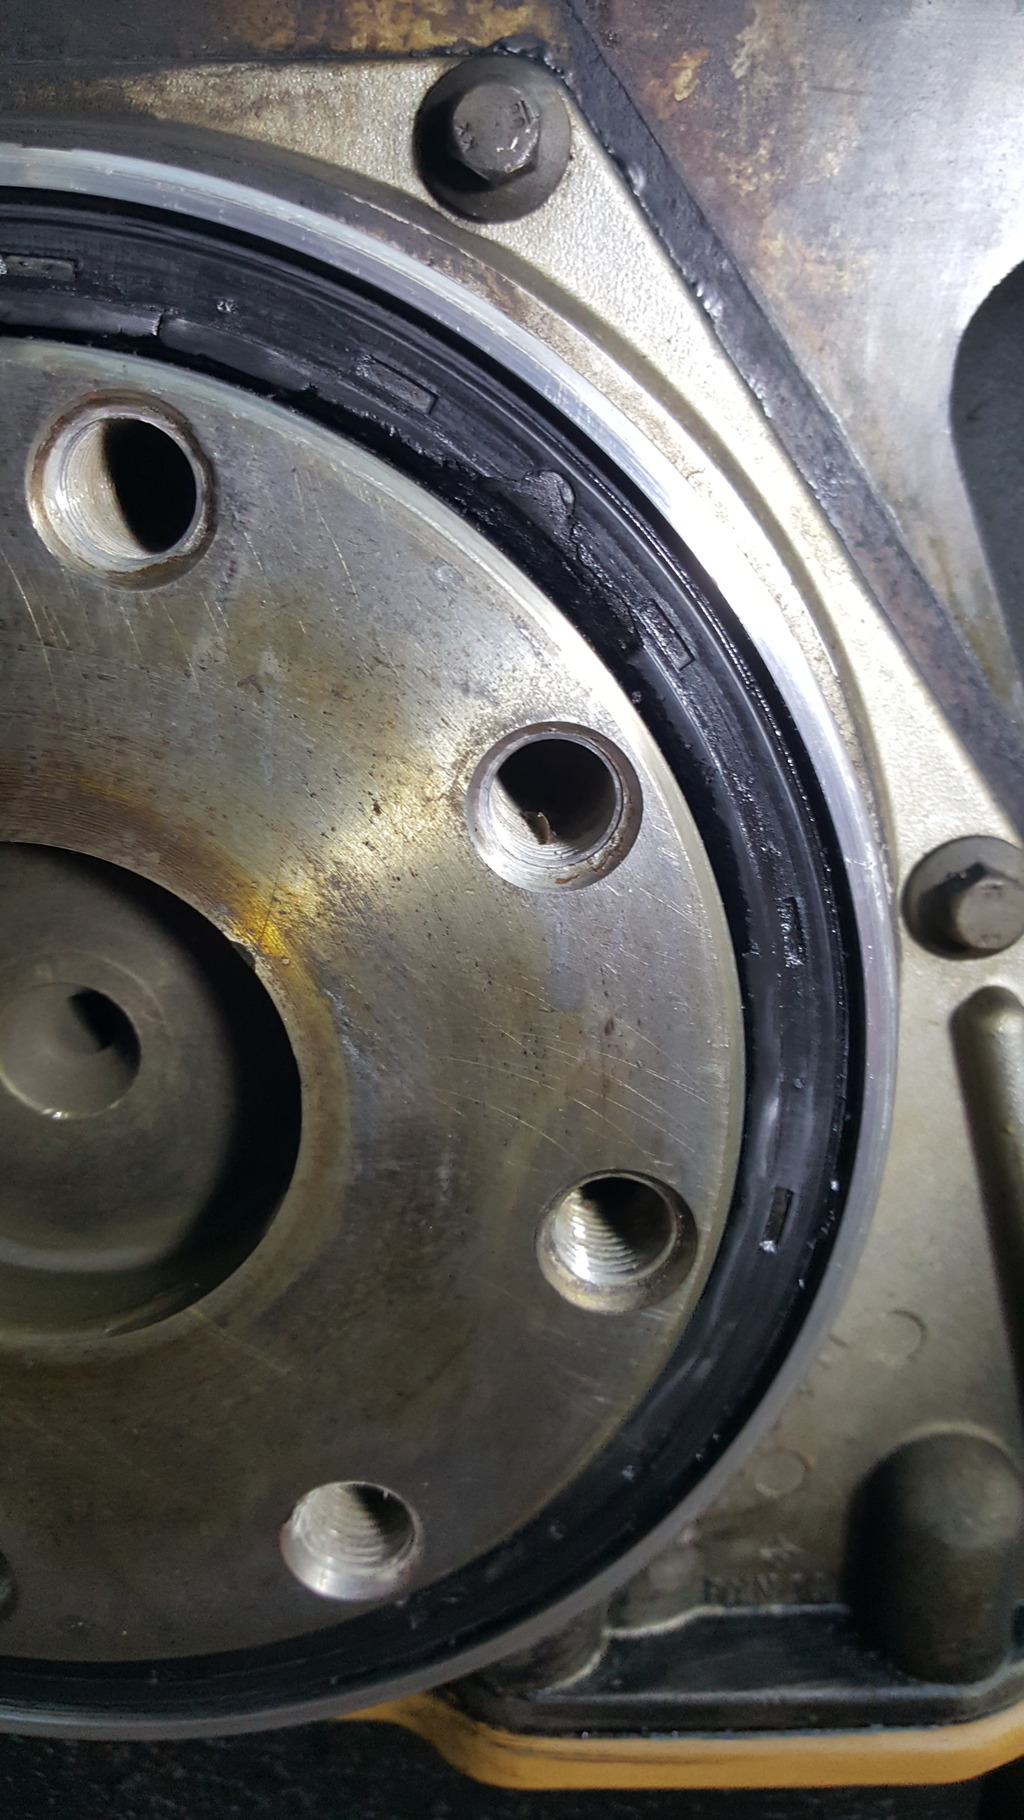
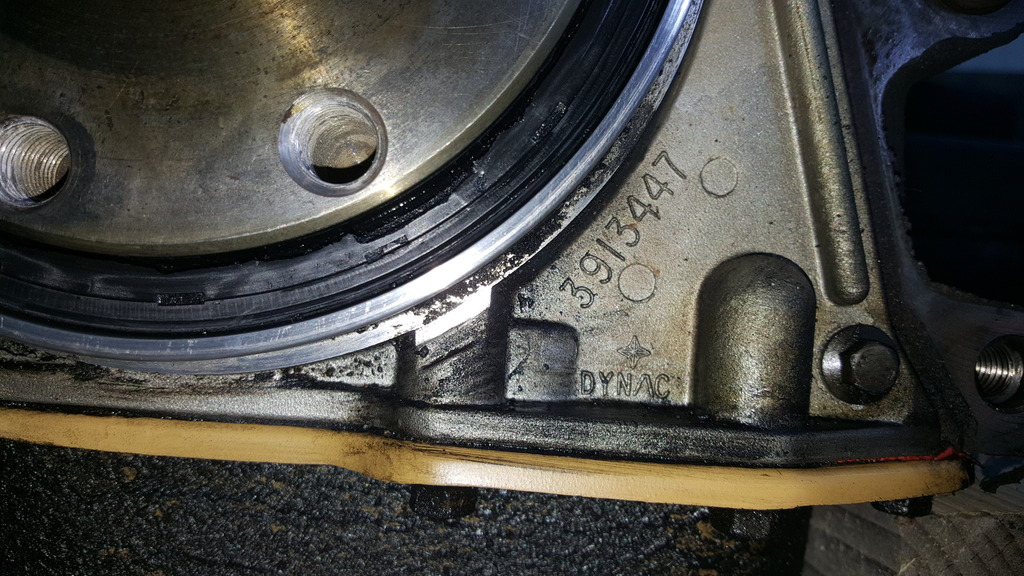
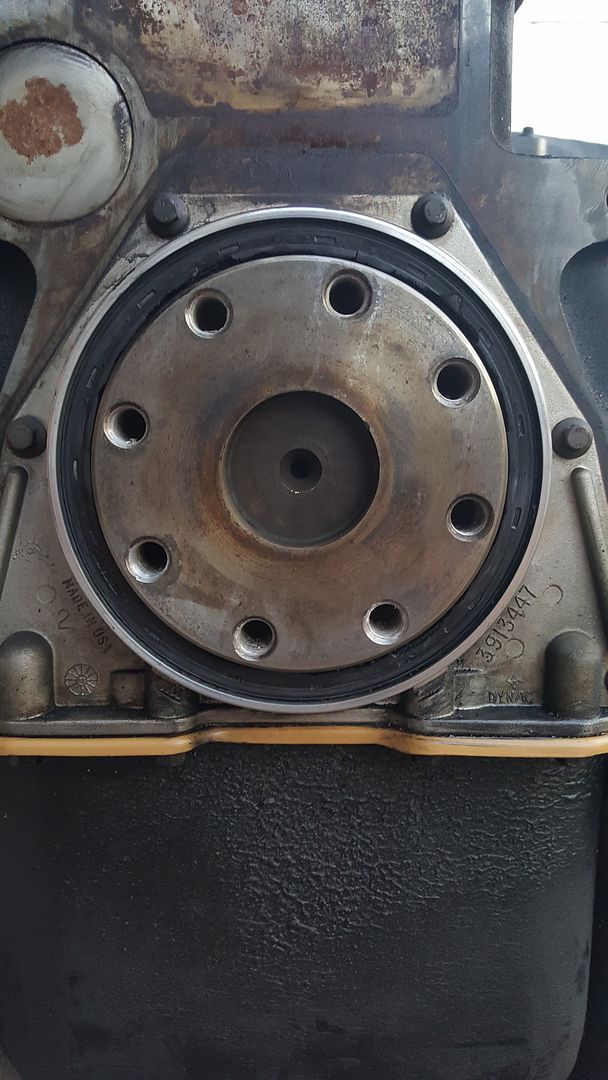
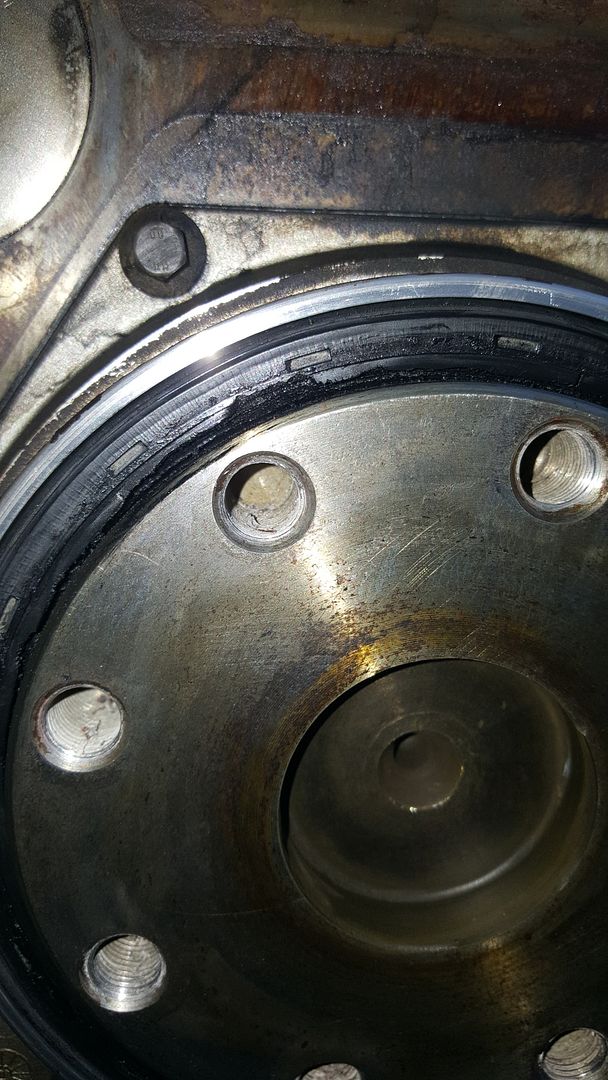
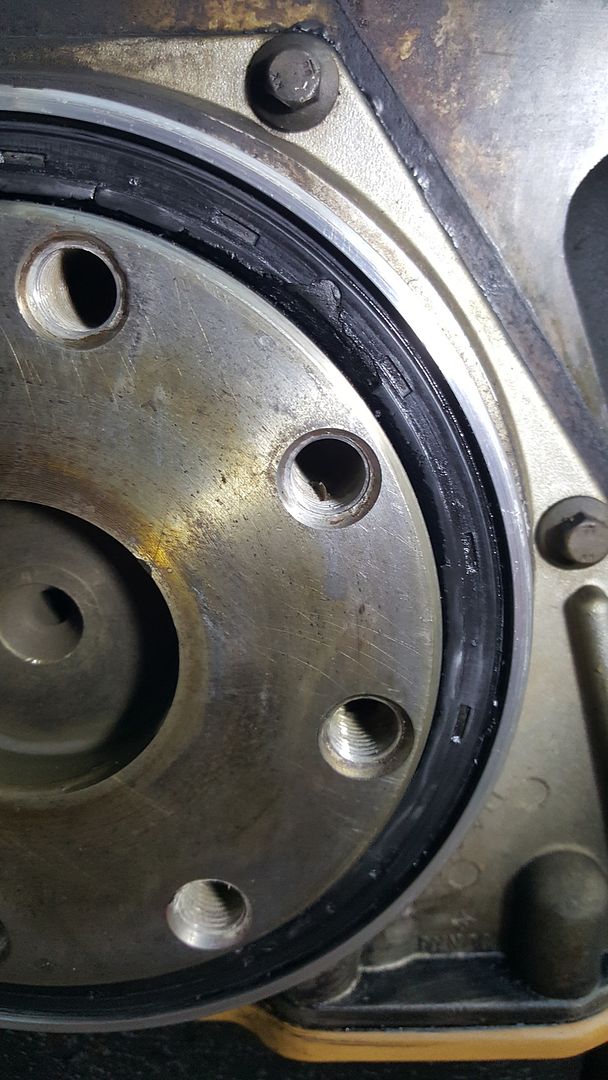
Strange finding the rear main seal with some pieces missing. However, it didn't leak.
Between #5 and #6 is where the leak made itself known.
The suspected coolant passage next to #5.
Block or bottom side of the gasket. It looks as though the coolant pushed out towards the rear and followed the fire ring around before going external below the exhaust runner. I guess some of the seal material missing would explain why I've occasionally seen small orange flakes in the coolant in the overflow bottle.
Flywheel, clutch disc and pressure plate assemblies removed along with the transmission adapter.
Strange finding the rear main seal with some pieces missing. However, it didn't leak.
Registered User
Joined: Mar 2008
Posts: 4,389
Likes: 114
From: Orange County, California
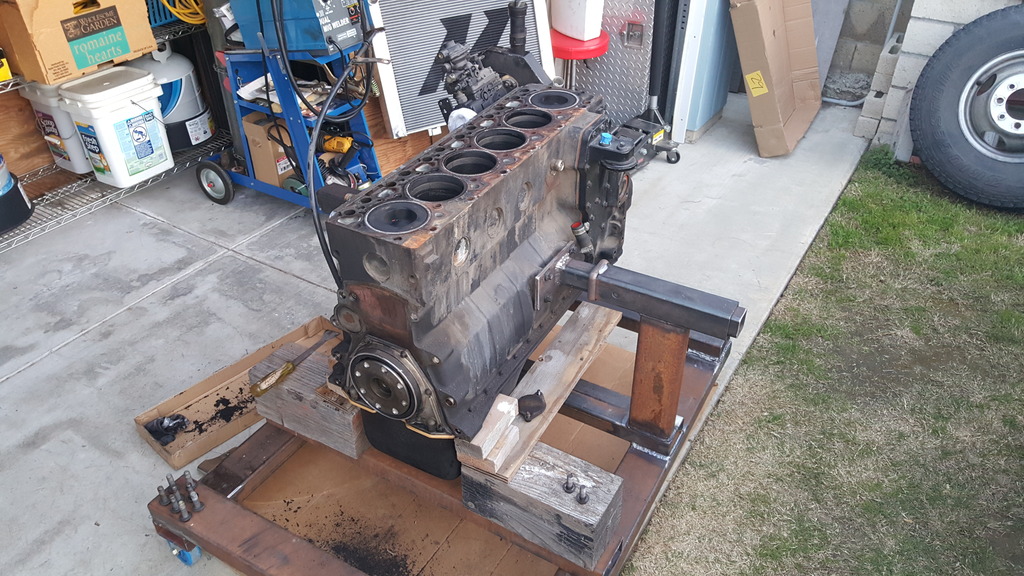
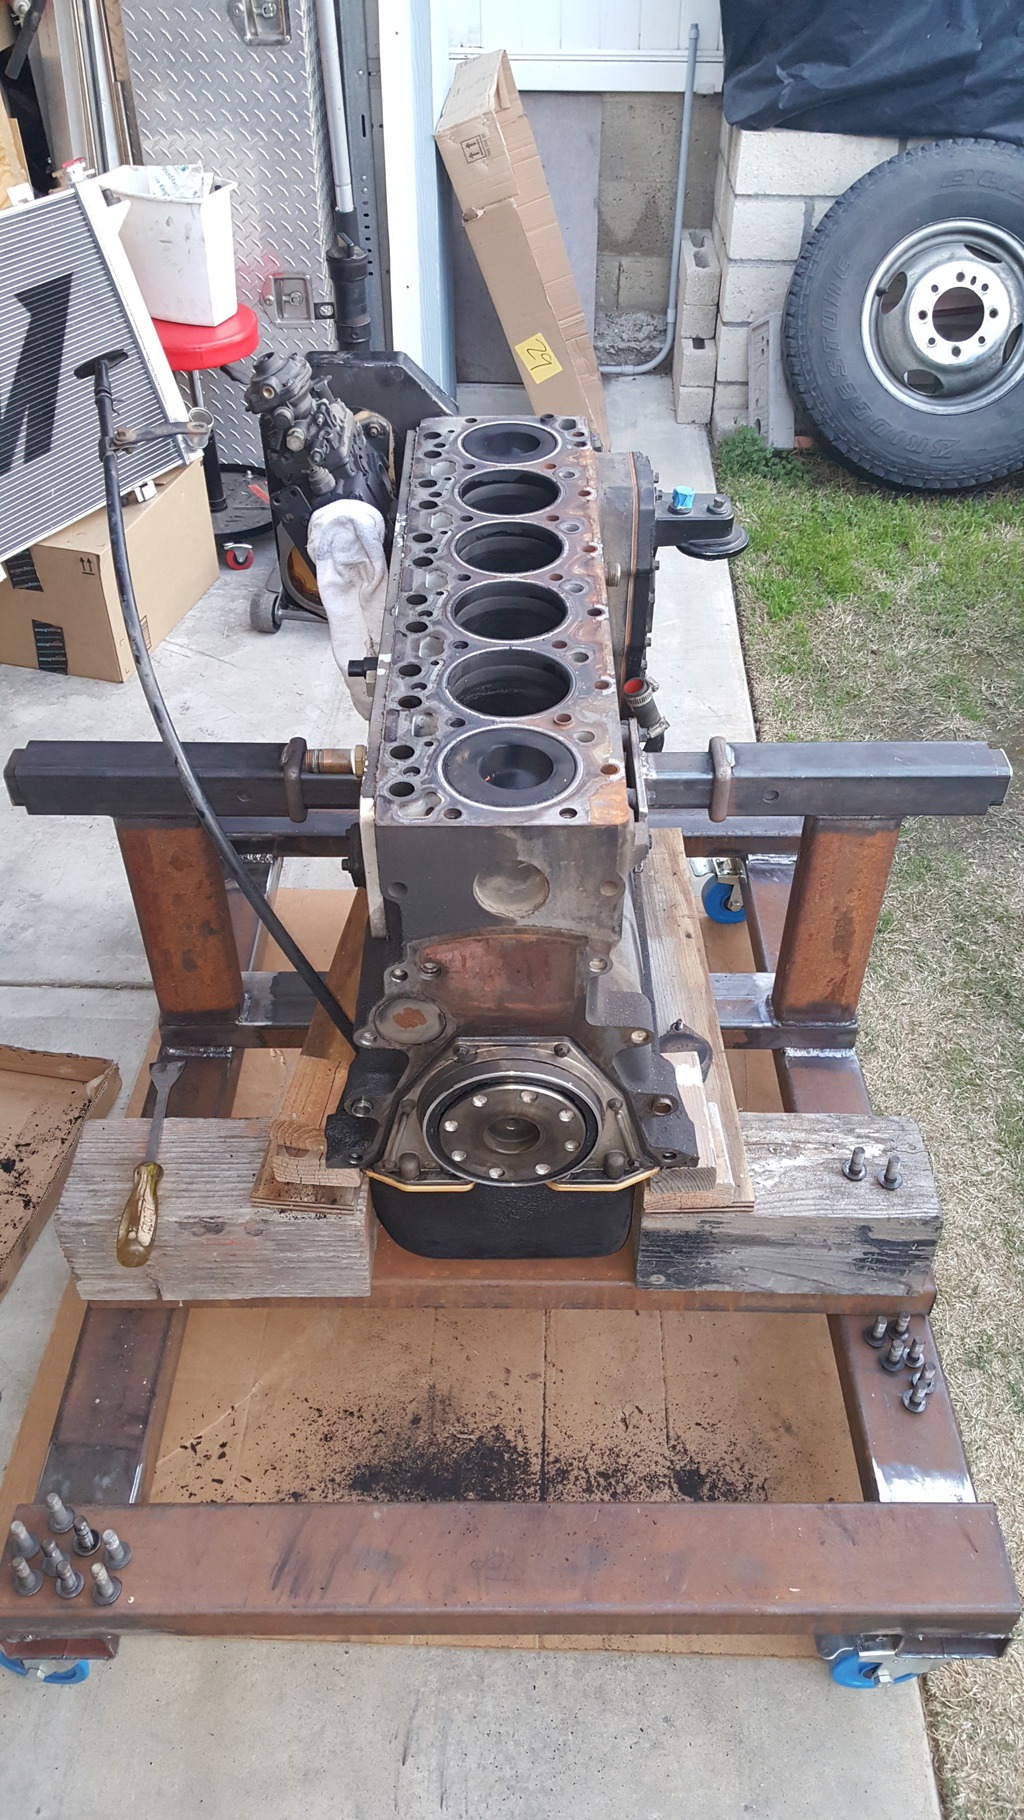
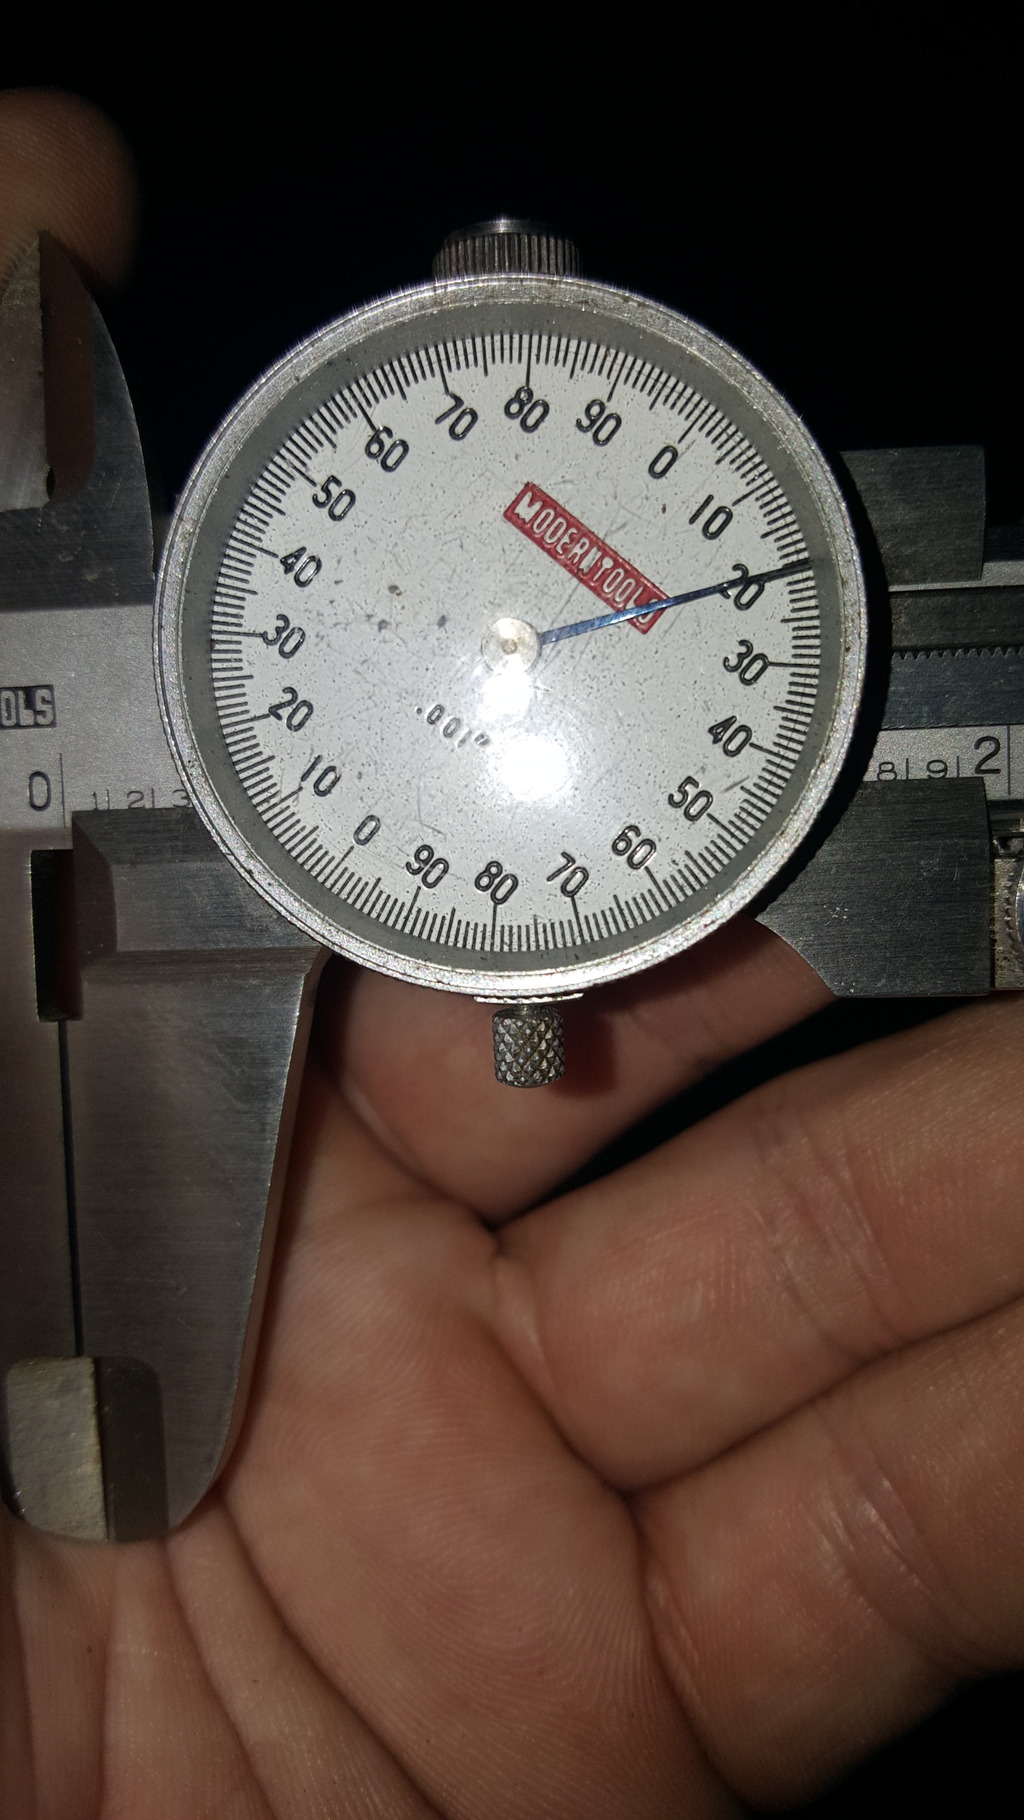
While not the proper way to check piston protrusion but it gives an estimate. Hamilton says for their cams to be truly bolt-in, piston protrusion cannot exceed .018". I'll lay a straight edge across the piston crown and check protrusion with feeler gauges to get a closer estimate.

Registered User

Joined: Dec 2003
Posts: 1,518
Likes: 11
From: Boerne, TX
I've been working on disassembly of my engine for the past few days. From what I can see, the head gasket didn't fail from excess boost pressure or advanced timing. It appears to be just a failure from a coolant passage seal next to cylinder #5 on the exhaust side.
Between #5 and #6 is where the leak made itself known.
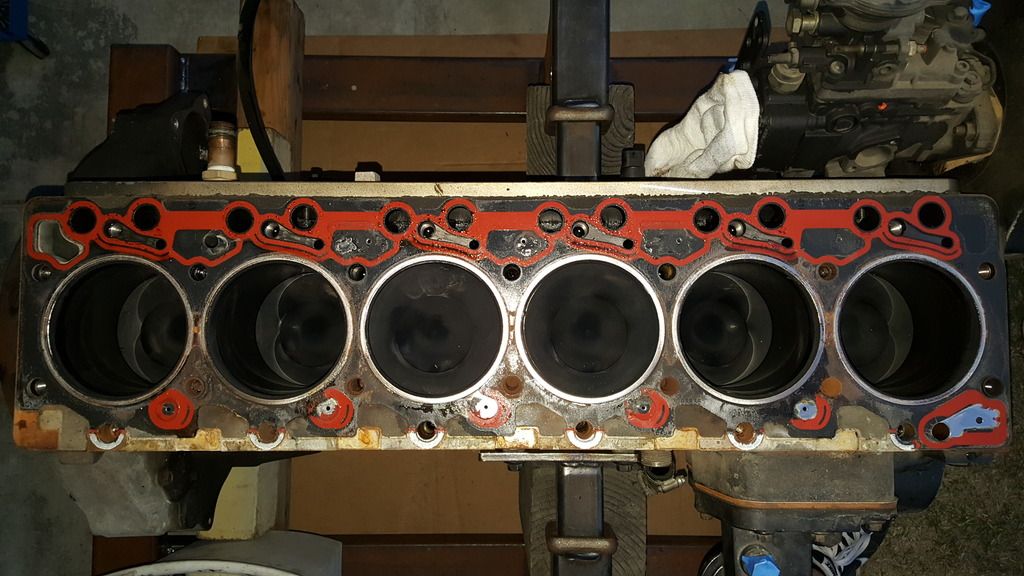
The suspected coolant passage next to #5.
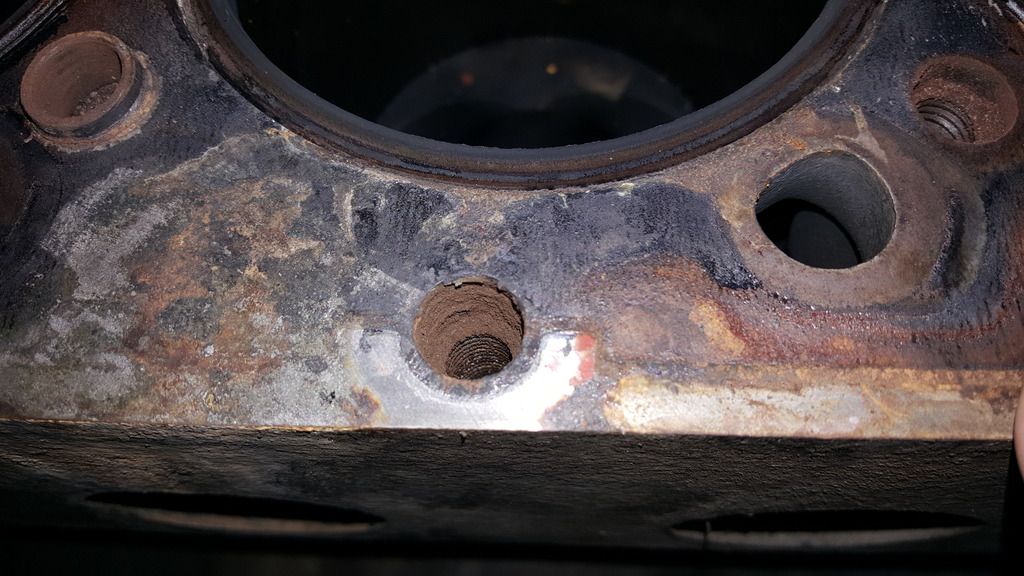
Block or bottom side of the gasket. It looks as though the coolant pushed out towards the rear and followed the fire ring around before going external below the exhaust runner. I guess some of the seal material missing would explain why I've occasionally seen small orange flakes in the coolant in the overflow bottle.
Flywheel, clutch disc and pressure plate assemblies removed along with the transmission adapter.
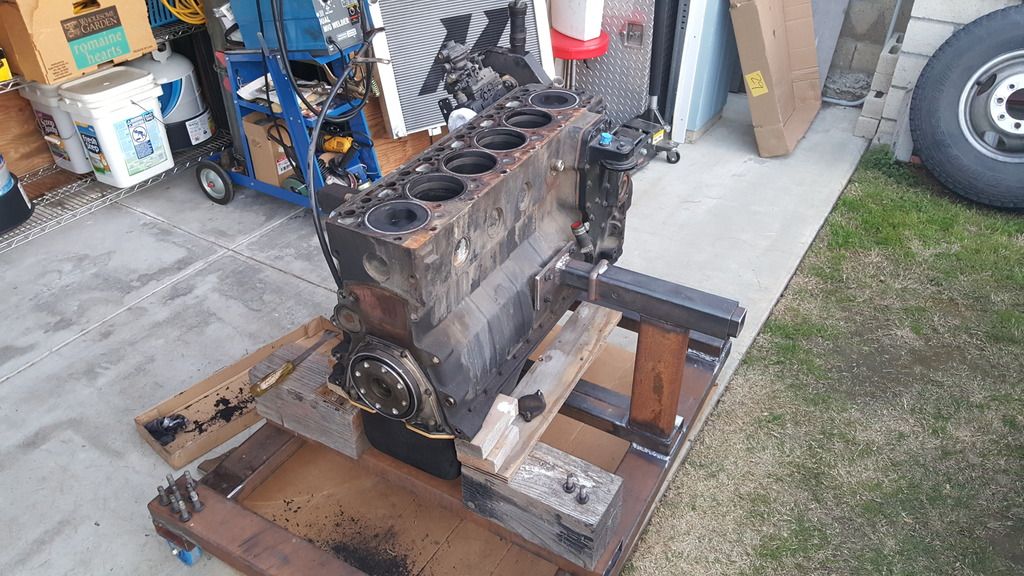
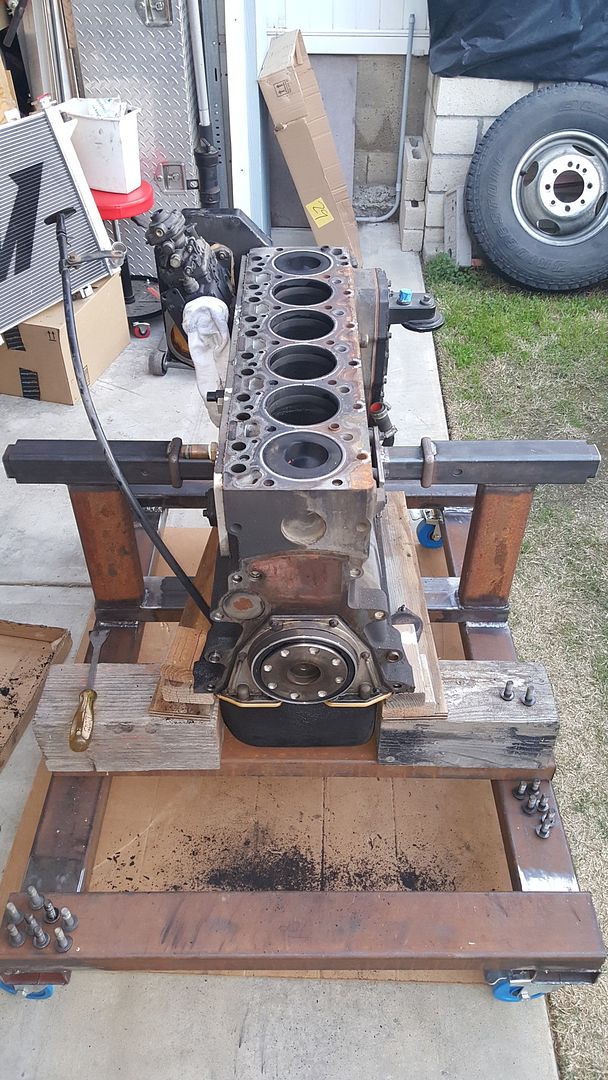
Strange finding the rear main seal with some pieces missing. However, it didn't leak.
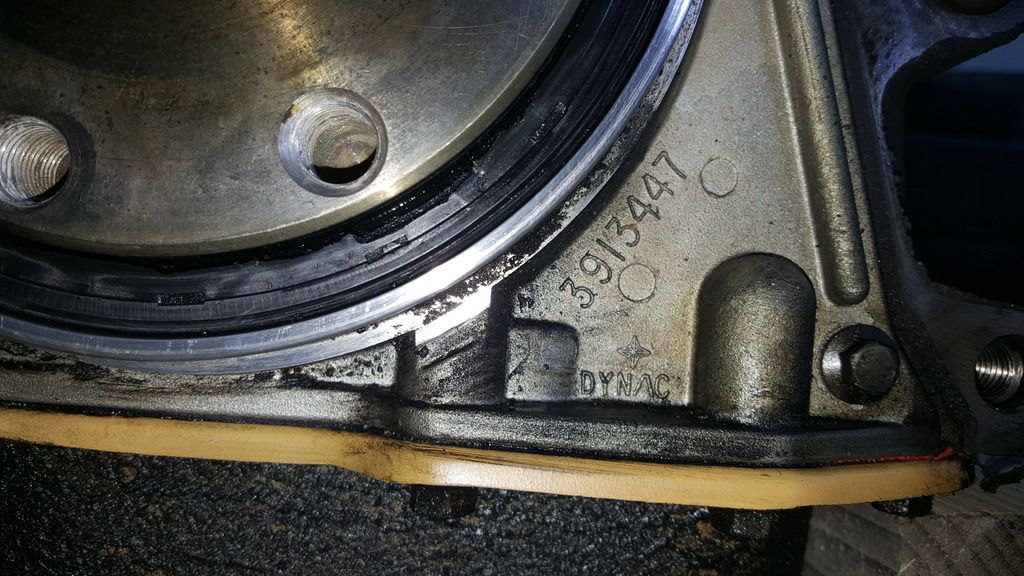
Between #5 and #6 is where the leak made itself known.
The suspected coolant passage next to #5.
Block or bottom side of the gasket. It looks as though the coolant pushed out towards the rear and followed the fire ring around before going external below the exhaust runner. I guess some of the seal material missing would explain why I've occasionally seen small orange flakes in the coolant in the overflow bottle.
Flywheel, clutch disc and pressure plate assemblies removed along with the transmission adapter.
Strange finding the rear main seal with some pieces missing. However, it didn't leak.
few years ago I took the starter out of mine to replace the contacts and found the lip of the RMS sitting on the starter nose lol, mine did leak though.

Registered User

Joined: Dec 2010
Posts: 6,838
Likes: 1,683
From: Land of the Toxic Avenger
This isn't February weather...

