
New Radiator overflow system

Thread Starter
Registered User


Joined: Mar 2010
Posts: 7,265
Likes: 1,346
From: Prince George, BC
New Radiator overflow system
Well since I'm retrofitting my A/C system...all new, no factory parts under the hood other then the compressor...will do a thread when complete. 
Anyway I needed to use the space where the radiator overflow tank is currently placed. Also I will be running the tubes for the IC one day through this area as well, and the BHAF too.
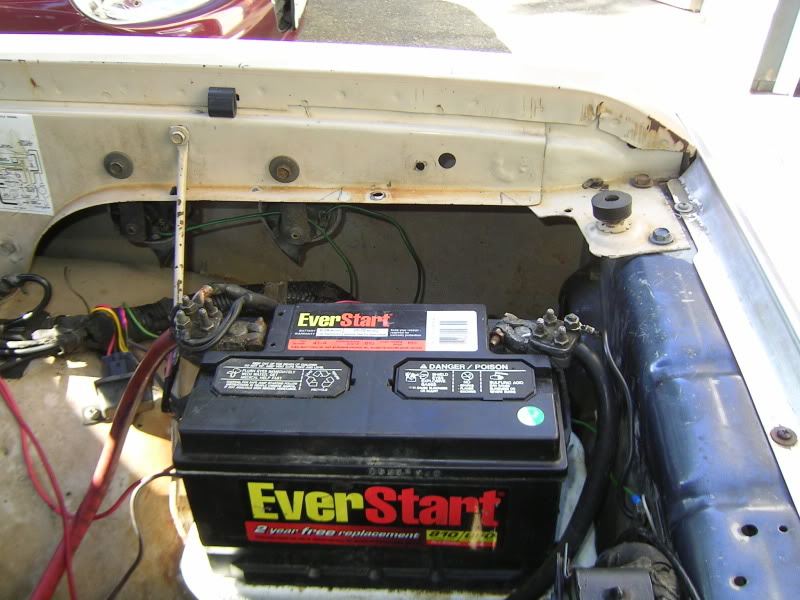
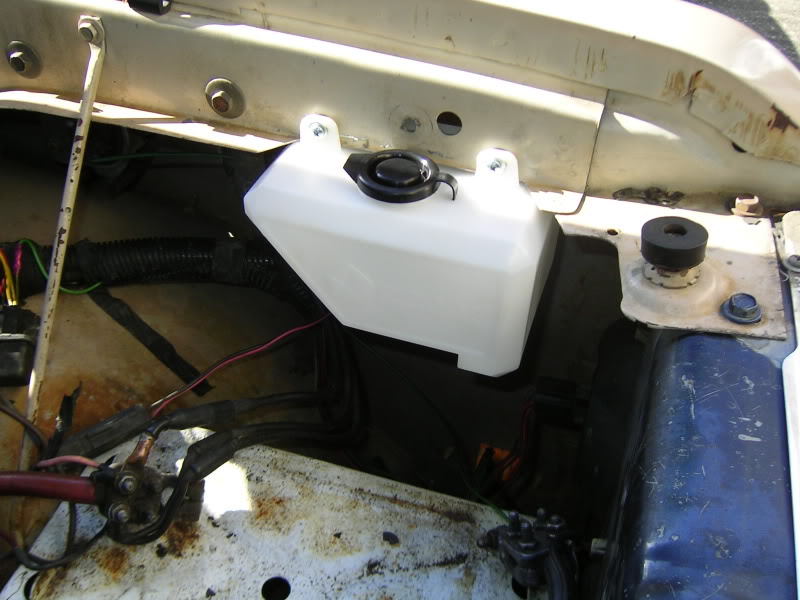
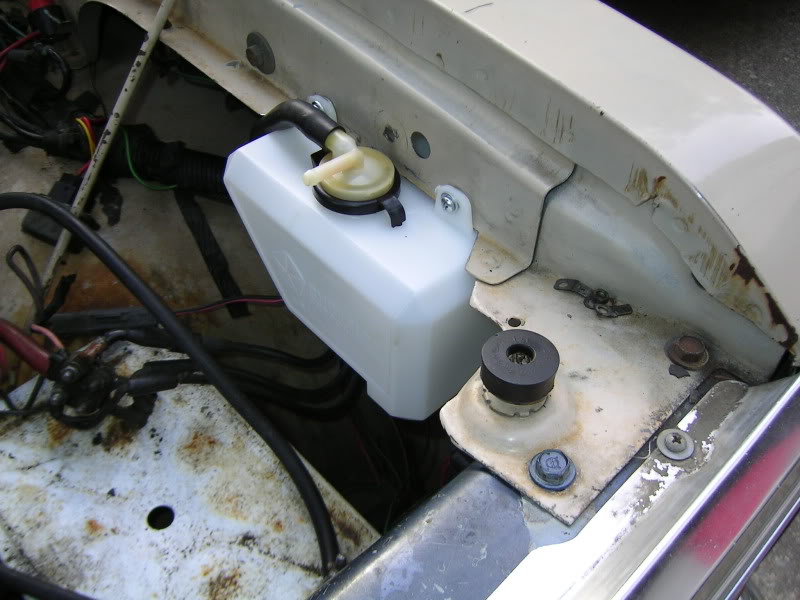
So this is the factory set-up...

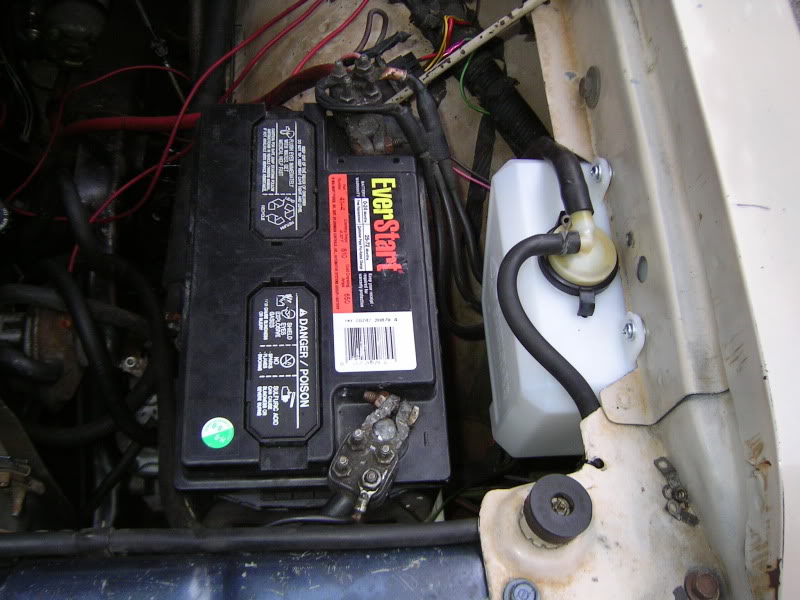
And this is where I decided to put the new overflow tank, behind the battery.
Anyway I needed to use the space where the radiator overflow tank is currently placed. Also I will be running the tubes for the IC one day through this area as well, and the BHAF too.
So this is the factory set-up...
And this is where I decided to put the new overflow tank, behind the battery.
Thread Starter
Registered User
Joined: Mar 2010
Posts: 7,265
Likes: 1,346
From: Prince George, BC
But before I could do any of this I had to figure out what kind of tank I was going to use. I spent a couple days in the wrecking yard and couldn't find anything that would work. SO one evening I was sitting thinking about things when it occurred to me that I already had the perfect unit, it was on my 68 Chrysler T/C wagon...but it is a washer fluid reservoir, not an over flow tank, but I can make it work.
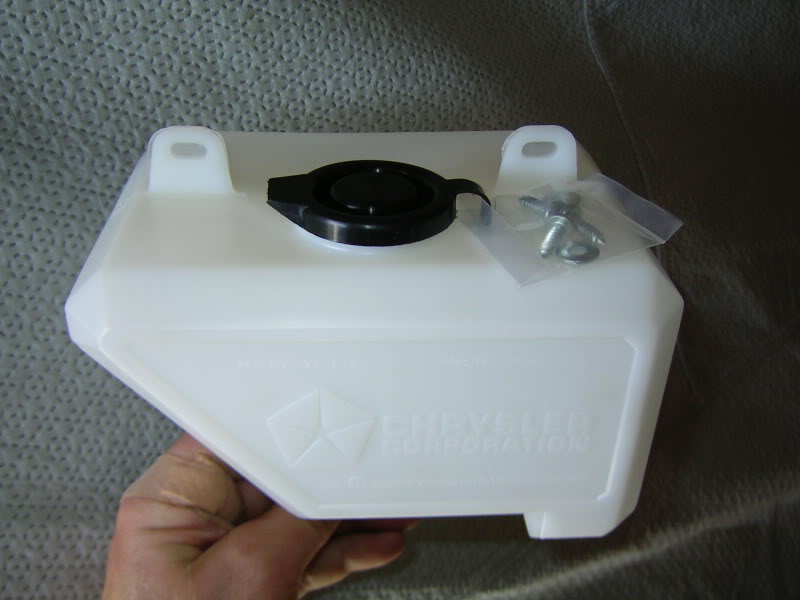
So onto E-bay I went and found a tank for a 65/66 C-body (Newport, New yorker, Monaco, Polara) This tank is slightly different then the one on my wagon, since the pump is not attached to the tank, it's a remote unit. So therefore the tank just has a small spigot, not the big hole to mount a washer fluid pump. Much better for my plans.
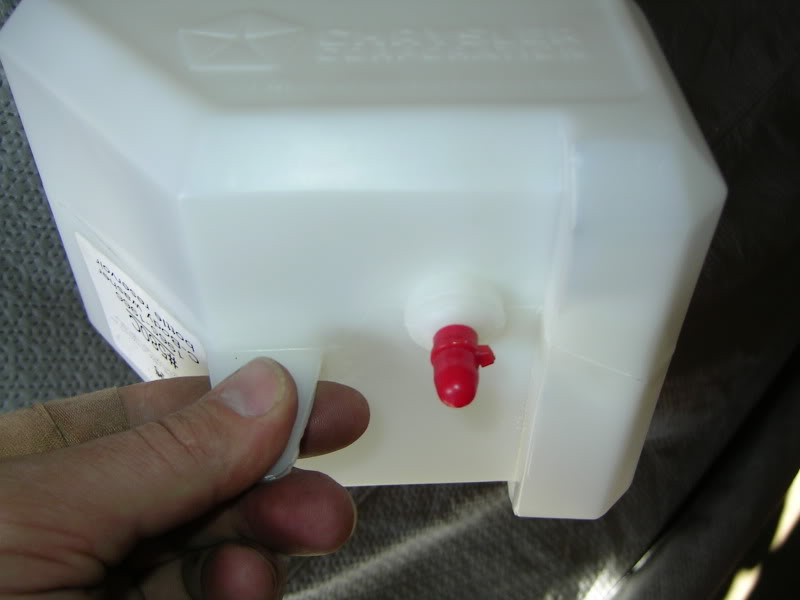
I just used a vacuum plug and a small zip strap to secure it nice and tight.
So onto E-bay I went and found a tank for a 65/66 C-body (Newport, New yorker, Monaco, Polara) This tank is slightly different then the one on my wagon, since the pump is not attached to the tank, it's a remote unit. So therefore the tank just has a small spigot, not the big hole to mount a washer fluid pump. Much better for my plans.
I just used a vacuum plug and a small zip strap to secure it nice and tight.
Thread Starter
Registered User
Joined: Mar 2010
Posts: 7,265
Likes: 1,346
From: Prince George, BC
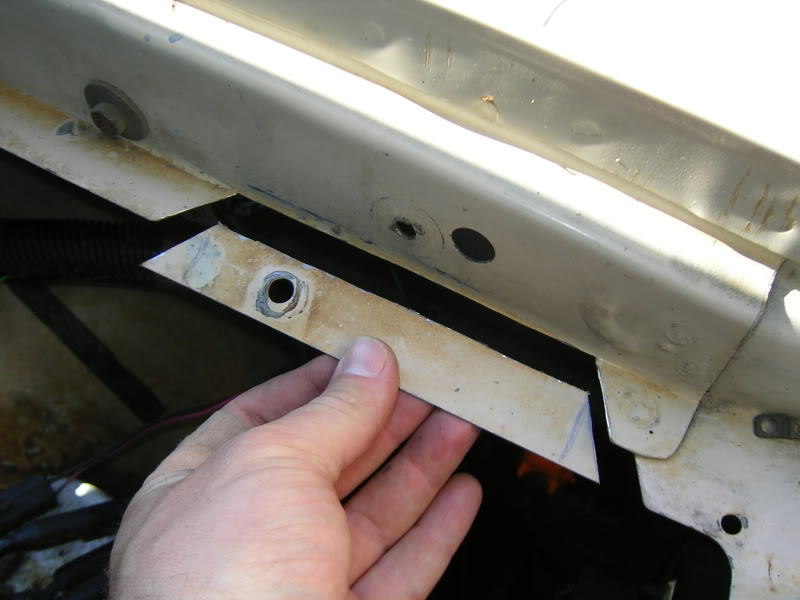
Now came the positioning of the tank. Since it needs to mount on a flush surface I decide to cut a notch out of the inside of the fender. But first I had to relocate one of the horns just down the way.
I lined up the tank then marked off the area I needed to cut out. Used my handy dandy dremel and a few cut off blades and out it came. Dressed up the sharp edges with a fine flat file
Then I used a pencil to mark where I needed to drill the mounting holes. Had to use a fat washer behind the mounting area since I didn't get my cut perfectly flush...not a biggie.
Thread Starter
Registered User
Joined: Mar 2010
Posts: 7,265
Likes: 1,346
From: Prince George, BC
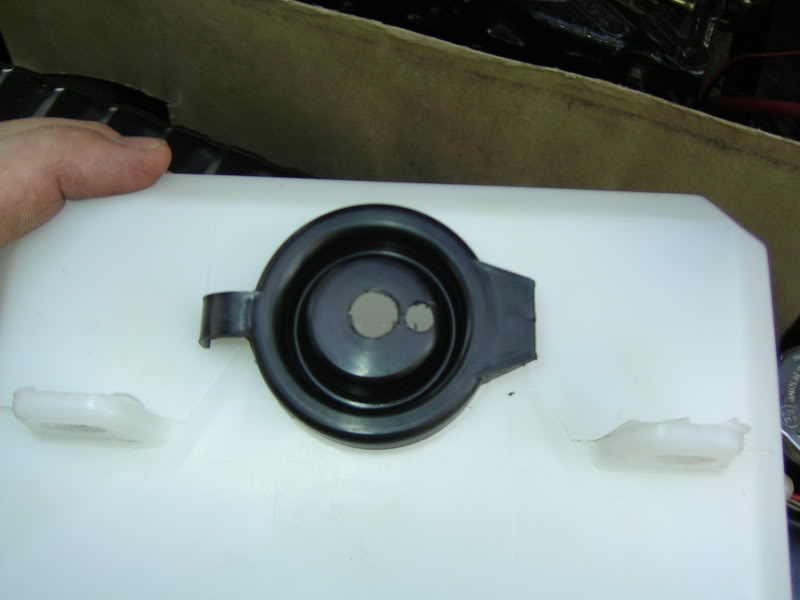
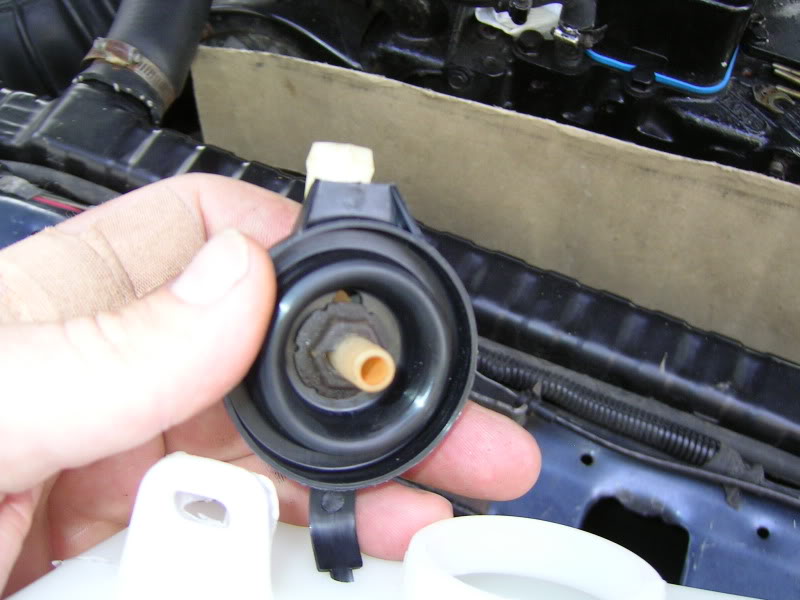
Now came the fun part. Since this was a washer fluid unit it obviously doesn't have the overflow design built into it. I over came this with another wrecking yard run and an overflow cap from a late 90's Plymouth Sundance I think?
Unfortunately the cap was too small to fit the new tank so I had to get creative. So I looked at the design and figured I could make it fit on top of the factory cap.
So first I needed to drill a big hole for the main line going into the tank, then I drilled a smaller hole just to the side for the over flow.
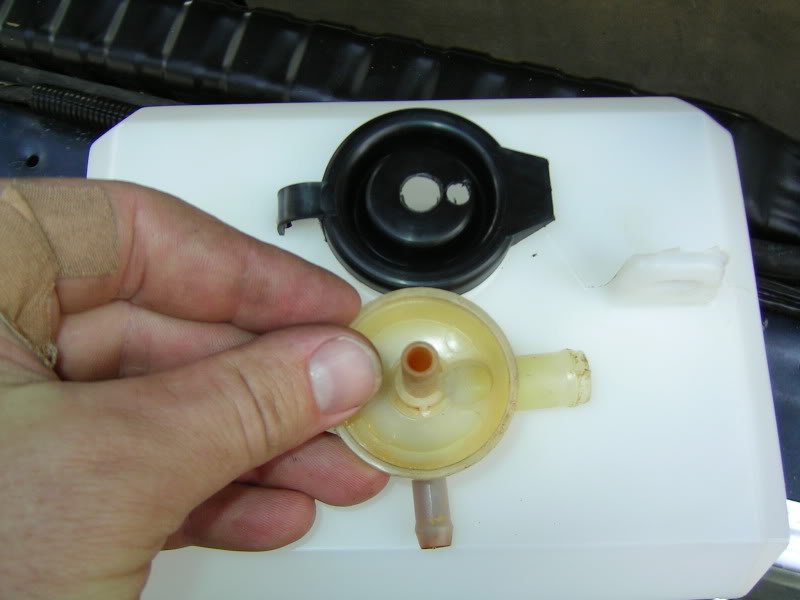
I then secured the over flow cap, with it's original gasket as well, to the new cap with a pal/speed nut. I found this in my tin of speed/pal nuts for cars I parted over the years. But I'm sure you could find one at the parts store.
Unfortunately the cap was too small to fit the new tank so I had to get creative. So I looked at the design and figured I could make it fit on top of the factory cap.
So first I needed to drill a big hole for the main line going into the tank, then I drilled a smaller hole just to the side for the over flow.
I then secured the over flow cap, with it's original gasket as well, to the new cap with a pal/speed nut. I found this in my tin of speed/pal nuts for cars I parted over the years. But I'm sure you could find one at the parts store.
Thread Starter
Registered User
Joined: Mar 2010
Posts: 7,265
Likes: 1,346
From: Prince George, BC
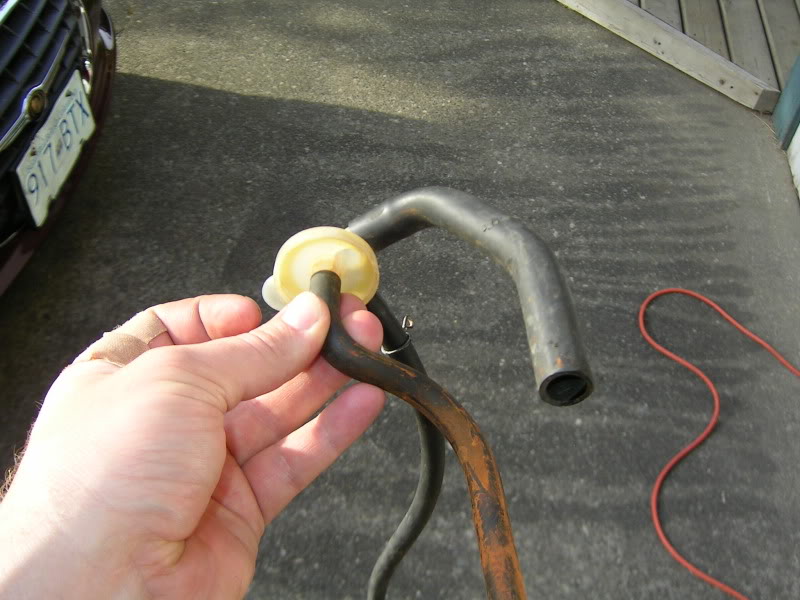
Now I had to run the hoses. The one inside the tank was shaped perfect, just had to cut off about 3-4" and with the S-curve in the hose it dropped over perfectly to the deepest side of the tank. The outflow hose tucked up nicely to the side. The hardest part was trying to get the hose connected to the rad since the nipple off the rad points in the opposite direction.
I managed to make an old vacuum fitting work, I needed a 180* unit and didn't have time to run up to the parts store and see if they had one or not. So once I got that sorted out I secured the main hose with a couple zip straps and an old wire holder. I think it turned out OK, and I still have lots of room for my big 1000 crank amp battery I have in there now.

I hope this helps out others here on the DTR....Since so many have helped me.
I managed to make an old vacuum fitting work, I needed a 180* unit and didn't have time to run up to the parts store and see if they had one or not. So once I got that sorted out I secured the main hose with a couple zip straps and an old wire holder. I think it turned out OK, and I still have lots of room for my big 1000 crank amp battery I have in there now.
I hope this helps out others here on the DTR....Since so many have helped me.

Trending Topics

Thread Starter
Registered User
Joined: Mar 2010
Posts: 7,265
Likes: 1,346
From: Prince George, BC
I hope to have it up and running soon, but the whole VE pump not working has thrown a kink in my time line. Lets just say the only original pieces used will be the under dash stuff and the compressor. Will do an in depth thread when complete, to help out others on the board.

Thread
Thread Starter
Forum
Replies
Last Post
8liter
1st Gen. Ram - All Topics
10
Sep 22, 2012 10:19 AM
jbham
3rd Gen Engine and Drivetrain -> 2003-2007
6
Aug 23, 2011 10:51 PM