
Crewcab update...

Thread Starter
Registered User


Joined: Mar 2010
Posts: 7,265
Likes: 1,346
From: Prince George, BC
Back on Saturday I did this...
Tried a couple projects today...drained some coolant and went to install a temporary Temp sensor in the blind plug on top of the T-stat area on the head....seems that the temp probe is too long, so that didn't work out.
Then I thought I would get the spare tire holder, and spare tire installed up under the back of the truck. Cut some redi-rod and made a J-hook and rolled the tire under and onto the holder. Then I tried several times to lift the tire and holder, up into place...tire kept falling off onto me. What a horrible design! So think I will look for one of the cable driven spare tire holders and have it so that pulls the tire up into place, then the holder can be installed easily.
Then I adjusted my valves, been a couple years. Few were out a little, mostly on the exhaust side...but not bad.
And did a little work on my custom mirrors...more to come on those when i finish the project.
Thread Starter
Registered User
Joined: Mar 2010
Posts: 7,265
Likes: 1,346
From: Prince George, BC
When I finished up my 4wd conversion a couple years ago I installed some cheap 194 style LED bulbs in the dash. Well after a few weeks one or two started flickering on/off. It has been progressively getting worse, to the point that by dash looked like a disco light show!
Well I finally bit the bullet and ordered some better quality LED's. I purchased 2 - 10pks of Yorkim brand 194 LED's. I swapped them in this evening...looks so much better with steady lighting. Hope they hold up better.
Well I finally bit the bullet and ordered some better quality LED's. I purchased 2 - 10pks of Yorkim brand 194 LED's. I swapped them in this evening...looks so much better with steady lighting. Hope they hold up better.


Thread Starter
Registered User
Joined: Mar 2010
Posts: 7,265
Likes: 1,346
From: Prince George, BC
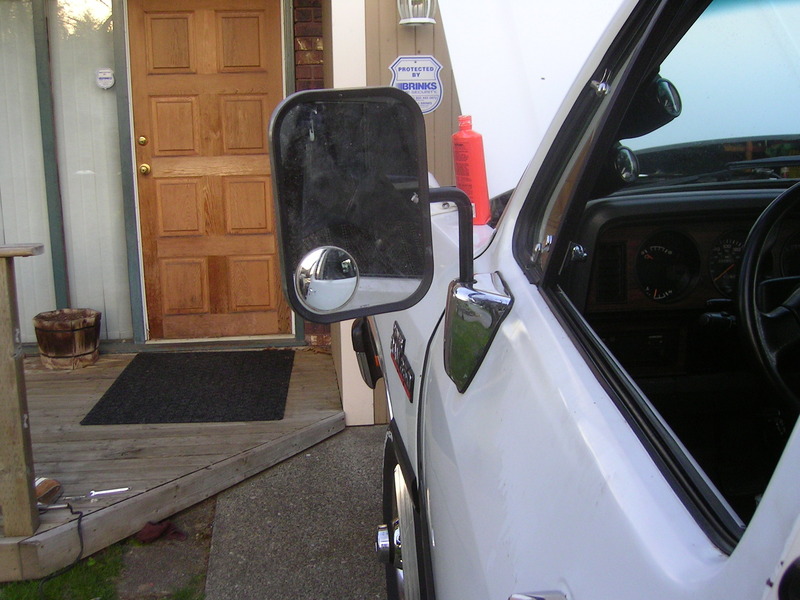
Been wanting to change the standard 1st gen chrome power side mirrors on my doors for a while. Didn't want to move the stainless tow mirrors and arms over from my original 84 doors...didn't wan the extra holes in my doors.
So I had been trying to come up with something that would give me better mirrors for towing, and not mess up the current mounting on the door. Well I finally came up with something.
First here is a pic of the OEM side mirror and the new style I wanted to put on.
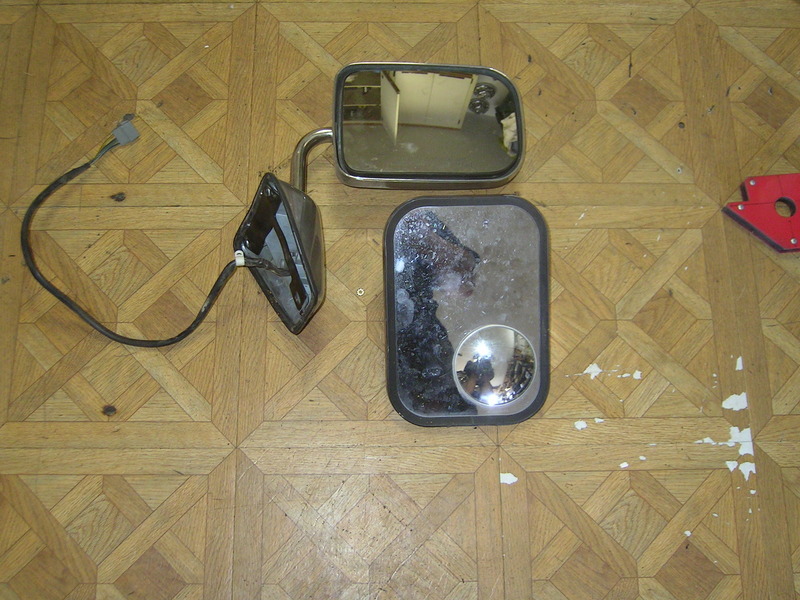
And the little arms used to hold these onto the stainless tow mirror brackets...
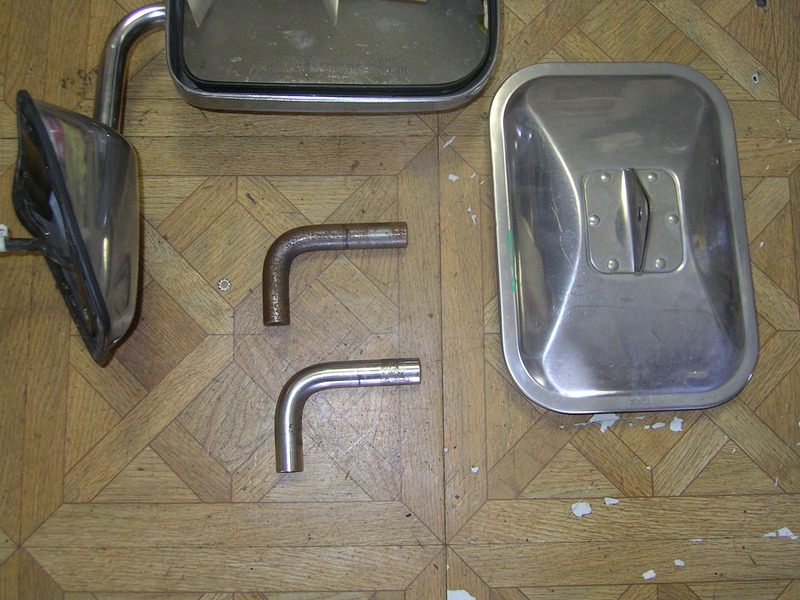
What I found was that the OD of the tow mirror 90* bends, and the OD of the shaft, the chrome mirror uses were the same...Bingo! That was the info I needed.
I tried to come up with something that would be a simple drop in, but couldn't find anything. So went to plan "B"....lets make what we want.
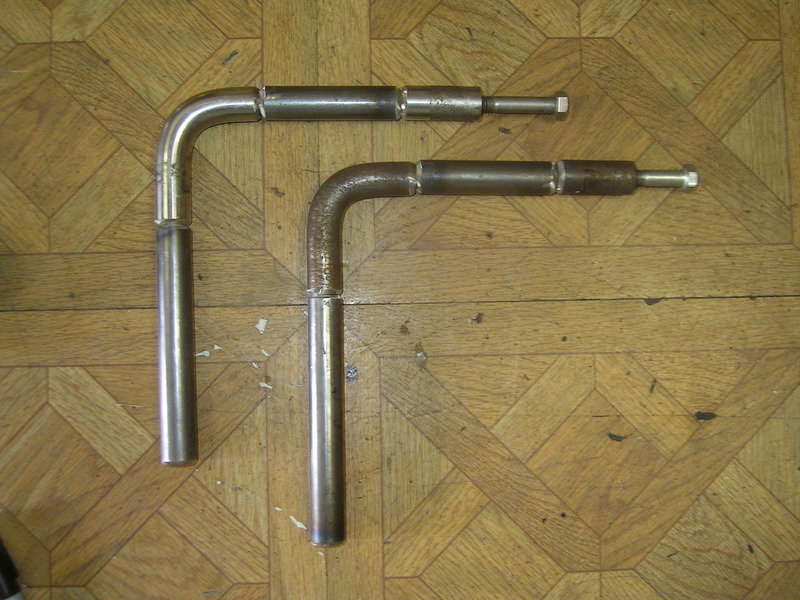
First I measured the depth of the threaded portion on the 90...then gave an extra 1/4" and marked that out....that will be where my cut will go.
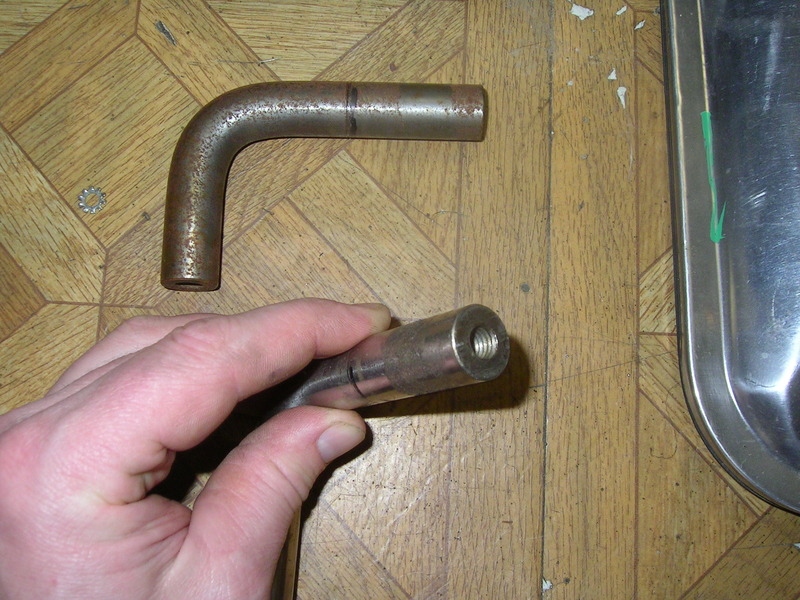
Then a bit of cutting on the chop saw...
So I had been trying to come up with something that would give me better mirrors for towing, and not mess up the current mounting on the door. Well I finally came up with something.
First here is a pic of the OEM side mirror and the new style I wanted to put on.

And the little arms used to hold these onto the stainless tow mirror brackets...

What I found was that the OD of the tow mirror 90* bends, and the OD of the shaft, the chrome mirror uses were the same...Bingo! That was the info I needed.
I tried to come up with something that would be a simple drop in, but couldn't find anything. So went to plan "B"....lets make what we want.
First I measured the depth of the threaded portion on the 90...then gave an extra 1/4" and marked that out....that will be where my cut will go.

Then a bit of cutting on the chop saw...

Thread Starter
Registered User
Joined: Mar 2010
Posts: 7,265
Likes: 1,346
From: Prince George, BC
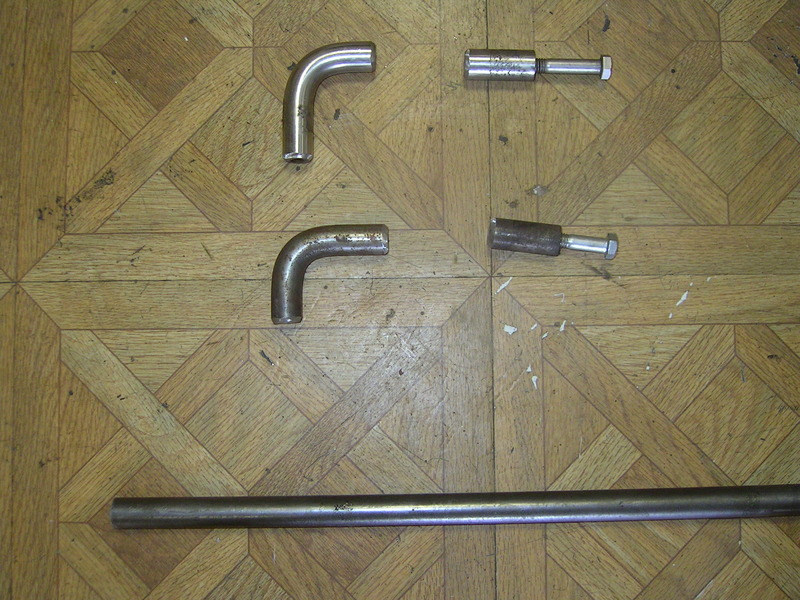
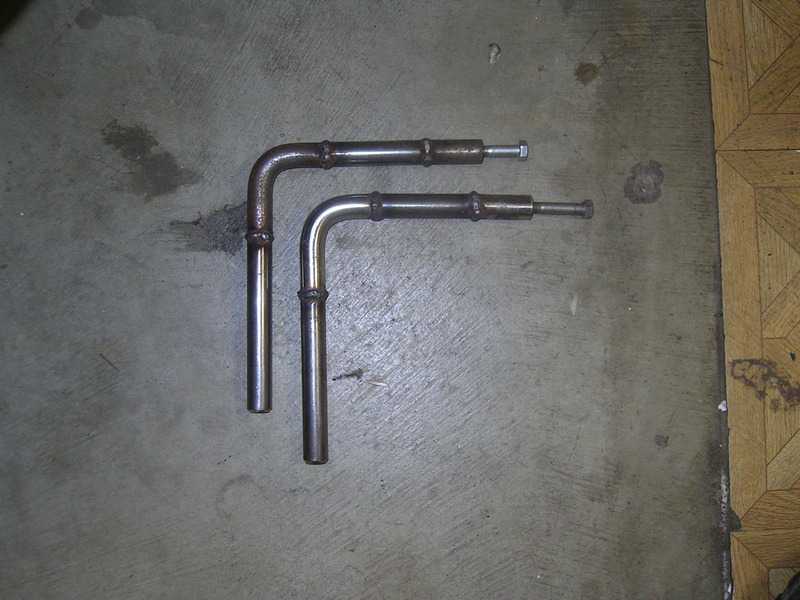
Then I cut some 3/4 round bar...BTW the OD measurement was .75"... I made the top portion of the arm 7" long...had to cut two different size pieces since the 90's were different lengths. And then made the lower section 8".
Then off to do some welding...
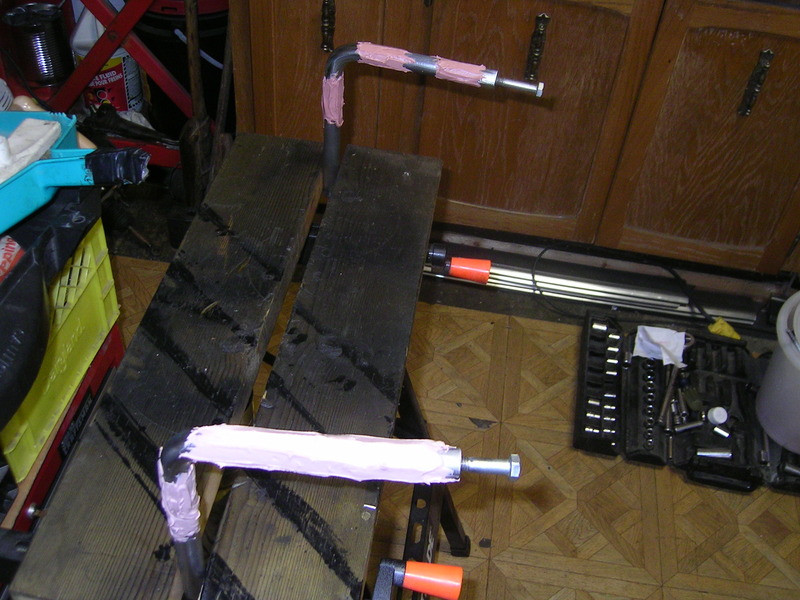
And after some quality time with the flapper disc on the 4.5" angel grinder...Love those flapper discs!!

Then I decided I would smooth out the surface a bit....mixed up some old body filler and gooped it on.
I made the top portion of the arm 7" long...had to cut two different size pieces since the 90's were different lengths. And then made the lower section 8".
Then off to do some welding...

And after some quality time with the flapper disc on the 4.5" angel grinder...Love those flapper discs!!

Then I decided I would smooth out the surface a bit....mixed up some old body filler and gooped it on.

Thread Starter
Registered User
Joined: Mar 2010
Posts: 7,265
Likes: 1,346
From: Prince George, BC
Took some pics of the primer and paint...but pics didn't come through on the camera. Anyway once I smoothed the body filler I gave it a couple coats of sandable primer, then two more coats of satin black paint.
Now the fun part....
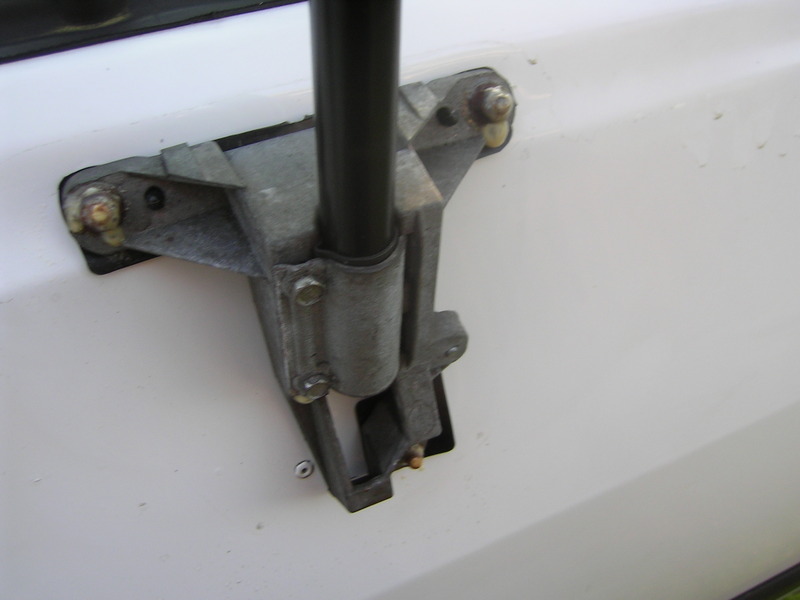
You will need to remove your interior door panels so you can unplug the power mirror connection. Once that is done remove the lower screw on the side cover and move the cover up out of the way.
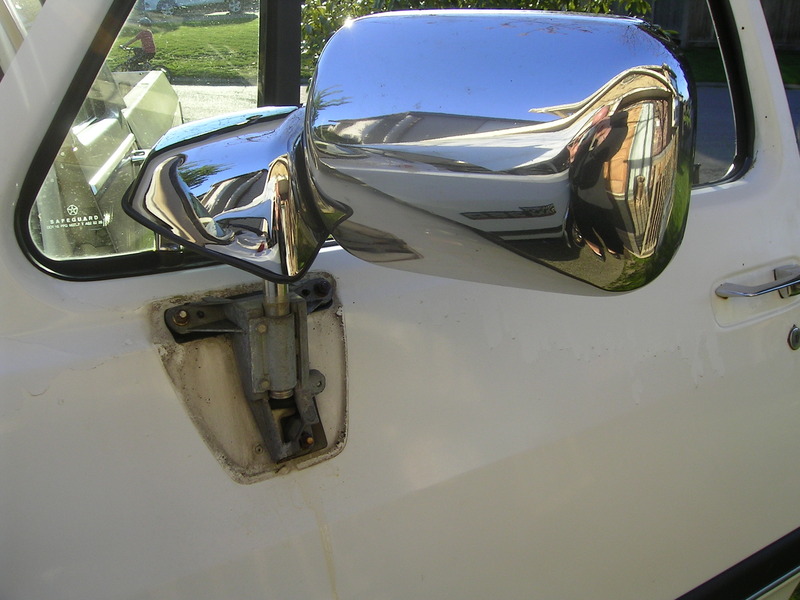
I first thought I could leave the bracket in place, but the wiring for the mirror is bolted to the frame on the back side...bolt is 8mm. The main bracket, and mirror are held on with three 10mm nuts.
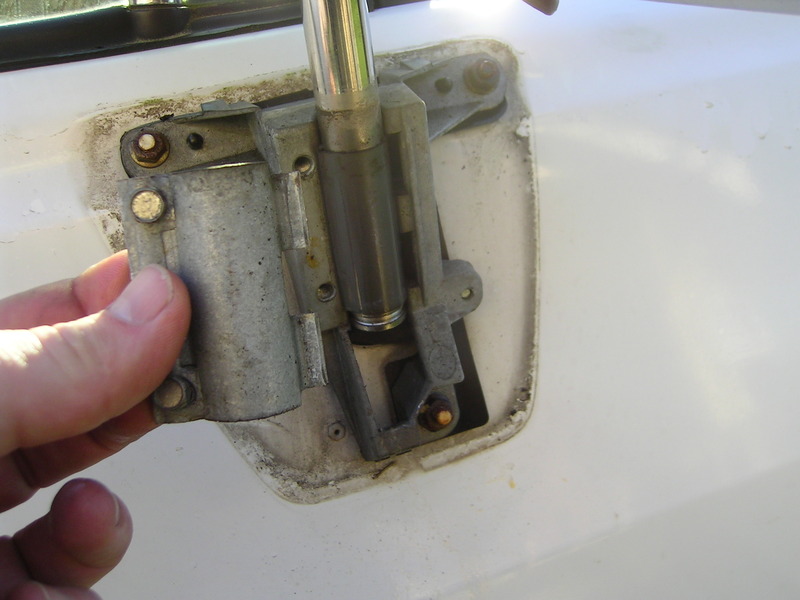
The bolts for the clamp are 8mm as well.
Once the assembly is off the truck take the time to clean the paint under neath...then give it a wax as well. But before you start assembling the new unit you need to get a couple pieces off.
Remove the wiring pins from the plug. Use a small jewelers screw driver to pop out the keeper..mine was yellow...then use the same small screwdriver to lift the tabs on each of the pins and pull them out.
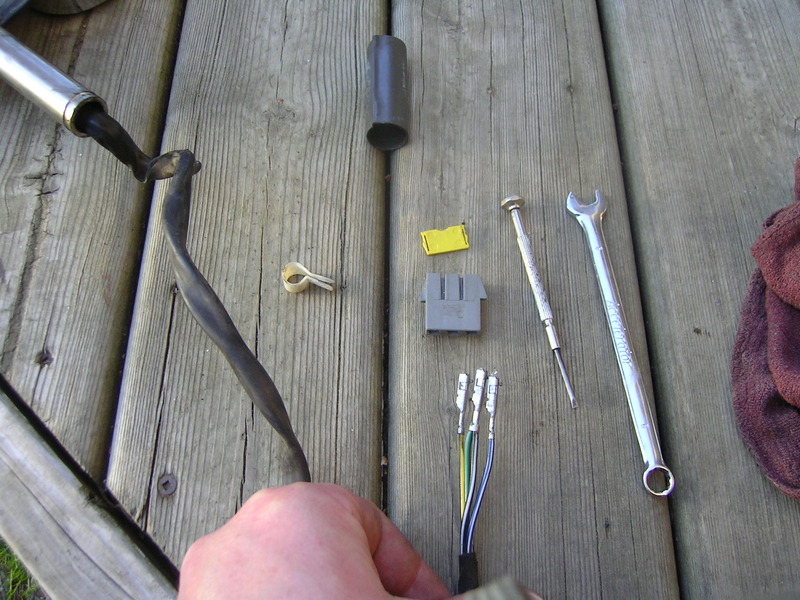
Once the wiring is free remove the plastic shaft liner, and the main chrome body cover.
Then slide the plastic sleeve over the bottom of the arm, and makes sure you bracket is on good shape. There is a small ridge at the bottom of the area the arm sits in....the new arm will hit that and not slide down.
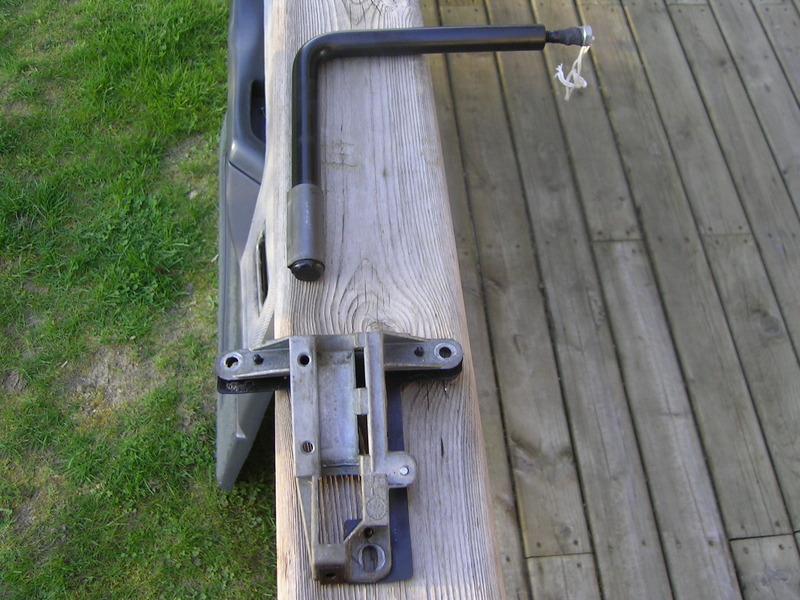
Then install on the truck....
I left the two 8mm bolts just snugged up...so I could adjust the mirror arm easier.
Now the fun part....
You will need to remove your interior door panels so you can unplug the power mirror connection. Once that is done remove the lower screw on the side cover and move the cover up out of the way.

I first thought I could leave the bracket in place, but the wiring for the mirror is bolted to the frame on the back side...bolt is 8mm. The main bracket, and mirror are held on with three 10mm nuts.

The bolts for the clamp are 8mm as well.
Once the assembly is off the truck take the time to clean the paint under neath...then give it a wax as well.
But before you start assembling the new unit you need to get a couple pieces off. Remove the wiring pins from the plug. Use a small jewelers screw driver to pop out the keeper..mine was yellow...then use the same small screwdriver to lift the tabs on each of the pins and pull them out.

Once the wiring is free remove the plastic shaft liner, and the main chrome body cover.
Then slide the plastic sleeve over the bottom of the arm, and makes sure you bracket is on good shape. There is a small ridge at the bottom of the area the arm sits in....the new arm will hit that and not slide down.

Then install on the truck....

I left the two 8mm bolts just snugged up...so I could adjust the mirror arm easier.

Thread Starter
Registered User
Joined: Mar 2010
Posts: 7,265
Likes: 1,346
From: Prince George, BC
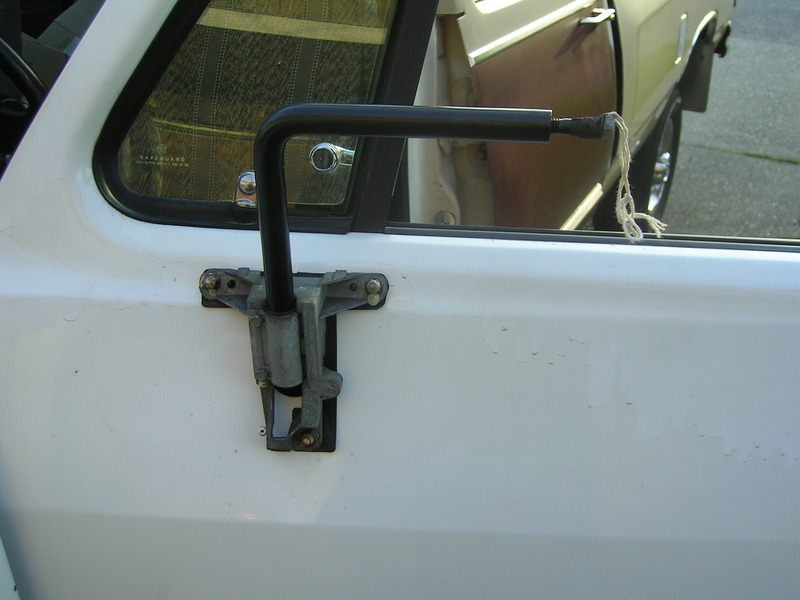
Then I cleaned up the stainless bolts, washers and nylon spacers from the tow mirrors. Gave the mirrors a quick cleaning....and installed. Don't forget the never seize on the bolts.
And all done....
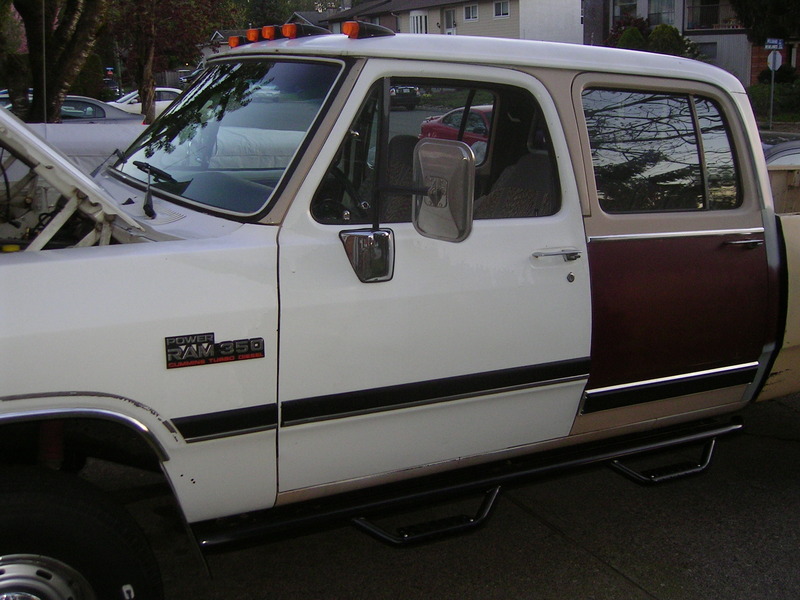
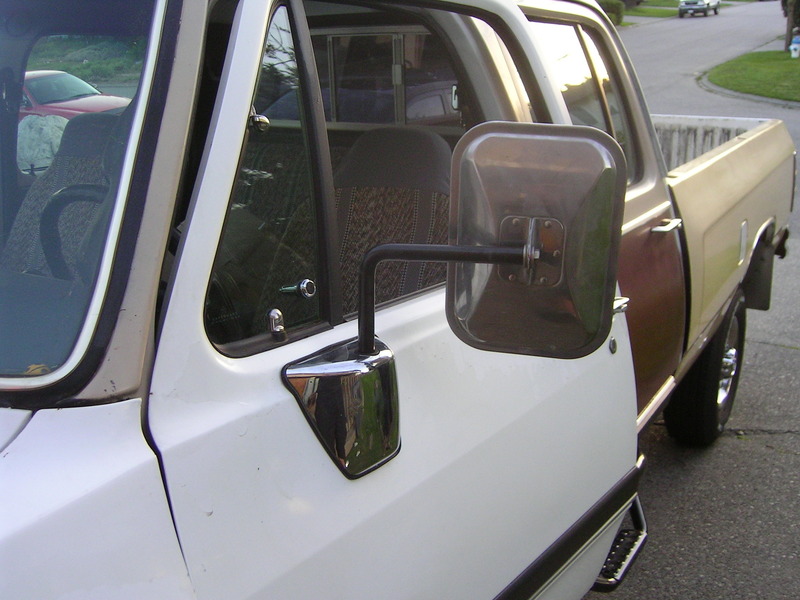

I'm quite happy with the way it turned out, I have much better visibility now.
And all done....


I'm quite happy with the way it turned out, I have much better visibility now.


Banned
Joined: Aug 2015
Posts: 884
Likes: 93
From: Jacksonville, FL
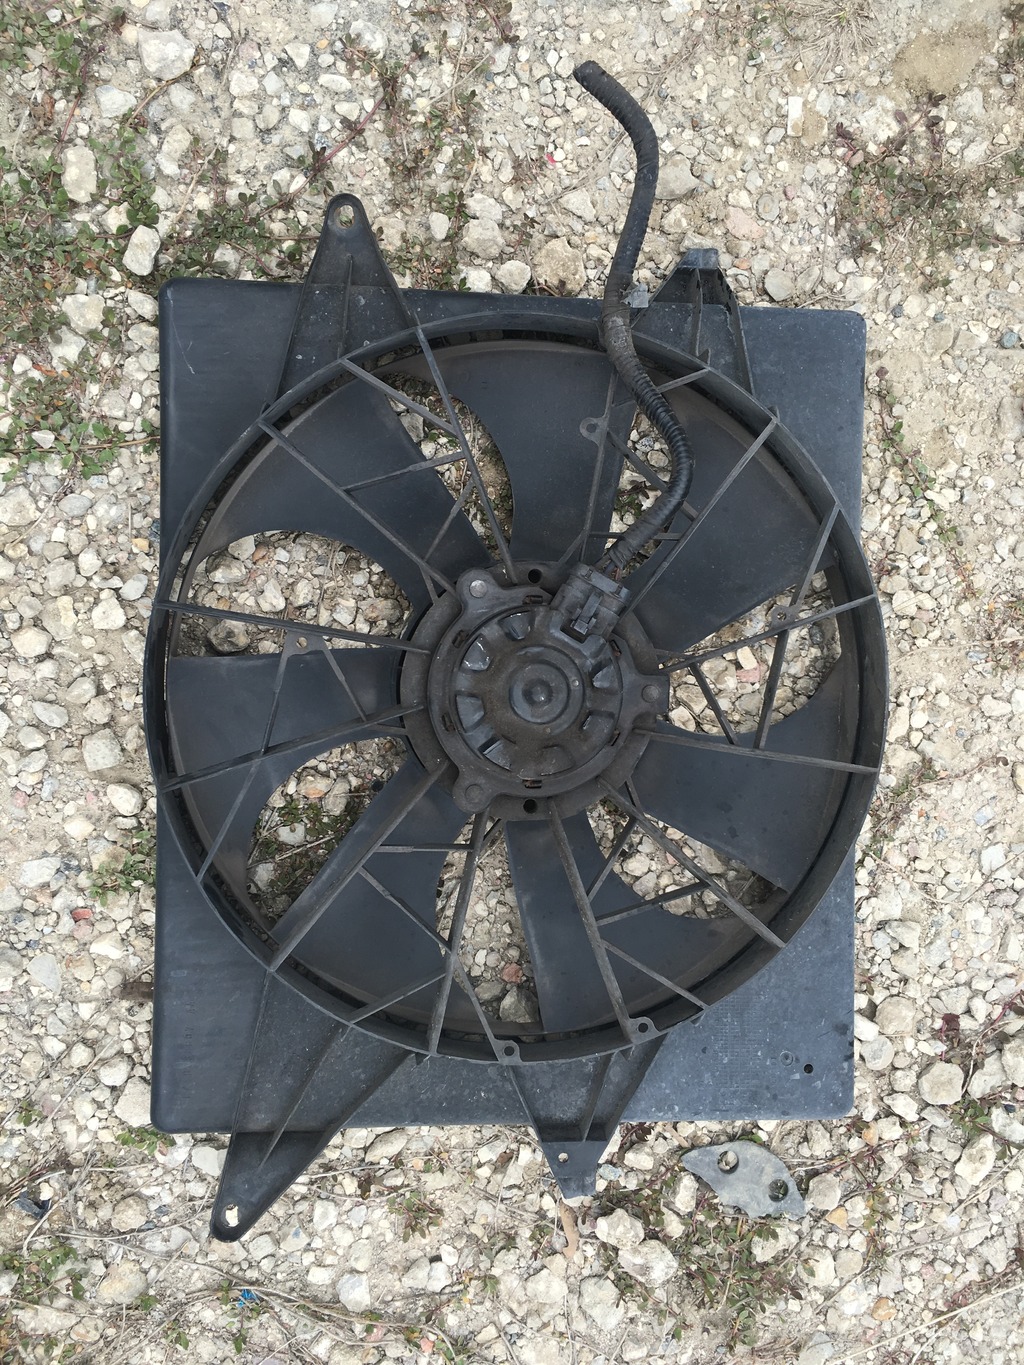
hey tcows, so i was reading on your electric fan install and doing some searching on the interwebs for what fan to use in my little '03 1500 cummins swap project. The radiator is offset in that truck and the cummins clutch fan won't match up with the gasser fan shroud, so it would be less than optimal cooling. after talking with another fella that has done a swap like mine, he's put 30k miles on his in the south texas heat with no problems whatsoever and used this fan. it's from a 1997 Ford thunderbird. it's an 18" 2 speed fan that, according to google, flows 2500 CFM on low and 4000 CFM on high! i plan on wiring the HIGH speed to a temp switch as you did and then the LOW speed to a toggle switch in the cab. this way if i'm sitting in traffic or something(hot florida), i can manually turn it on to keep the fan from kicking on and off with the temp switch. anyhoo, just thought i'd share this in case you are less than pleased with the aftermarket unit you installed. i just picked this one from a junk yard for $25 with a 1 year warranty.

Registered User
Joined: Nov 2011
Posts: 4,479
Likes: 211
From: Isanti, MN
hey tcows, so i was reading on your electric fan install and doing some searching on the interwebs for what fan to use in my little '03 1500 cummins swap project. The radiator is offset in that truck and the cummins clutch fan won't match up with the gasser fan shroud, so it would be less than optimal cooling. after talking with another fella that has done a swap like mine, he's put 30k miles on his in the south texas heat with no problems whatsoever and used this fan. it's from a 1997 Ford thunderbird. it's an 18" 2 speed fan that, according to google, flows 2500 CFM on low and 4000 CFM on high! i plan on wiring the HIGH speed to a temp switch as you did and then the LOW speed to a toggle switch in the cab. this way if i'm sitting in traffic or something(hot florida), i can manually turn it on to keep the fan from kicking on and off with the temp switch. anyhoo, just thought i'd share this in case you are less than pleased with the aftermarket unit you installed. i just picked this one from a junk yard for $25 with a 1 year warranty.

Banned
Joined: Aug 2015
Posts: 884
Likes: 93
From: Jacksonville, FL
i also read about a twin fan setup that comes on ford windstar vans. i saw one in the yard as well but looked to be a PITA to pull, so i passed on it.
Registered User
Joined: Dec 2015
Posts: 8
Likes: 0
Do you think its better to have the dual fan setup (like tcows) or or the bigger single fan (justin)? Im wanting to do electric fans but I can't decide if ones better than the other. BTW I'm on CF as well under GatorGuy75
Banned
Joined: Aug 2015
Posts: 884
Likes: 93
From: Jacksonville, FL
Whichever one moves more air. Also, the design of the shroud to ensure you're only moving cool radiator air. OEM fans are generally better than aftermarket. Have to wait on Brian to chime in on what his fans were rated at