Crewcab update...
 03-07-2016, 06:54 AM
#1096
Registered User
Join Date: Dec 2010
Location: Land of the Toxic Avenger
Posts: 6,770
Received 1,637 Likes
on
1,112 Posts
And figured since I had the rad out I would use T-mans idea on flushing the rad.
Post #1197
https://www.dieseltruckresource.com/...0/#post3281488
Couldn't find any oxalic Acid (Wood Bleach), so decided to try some CLR type cleaner. Boiled a gallon of hot water and mixed the jug in 50/50...thinking now I should have gone full strength?
Cores Before...

Then Neutralize with pool PH up...

And after...


Not much of an improvement.

I had to go to ACE Hardware to find it here, although it is available from Amazon

The following users liked this post:
thrashingcows (03-07-2016)
03-07-2016, 01:15 PM
#1097
Registered User
Thread Starter
Well had to go out for some errands this morning...seems the T-stat is back to working properly. Must have been a small air pocket in/around the T-stat...or something?
03-07-2016, 02:19 PM
#1098
Registered User
 d!
d!We had a guy hose his new GM rad out, turned it rock solid. Some chemical reaction to the chlorine in the water. Wonder if this stuff works on that?
03-07-2016, 03:26 PM
#1099
Registered User
Can't think of what that would be, but if some scofflaw dumped a hand full of sodium silicate in the radiator when he wasn't looking, I could see this happening.
03-07-2016, 06:53 PM
#1100
Registered User
Join Date: Dec 2010
Location: Land of the Toxic Avenger
Posts: 6,770
Received 1,637 Likes
on
1,112 Posts
 03-13-2016, 10:36 PM
#1102
Registered User
Thread Starter
Built this today for my electric fan conversion that is coming.....eventually. 
Don't like drilling, or cutting holes in my factory dash, or related parts, so thought I could use the ashtray...since I don't smoke, nor does anyone who rides in my truck (regardless if they smoke or not....
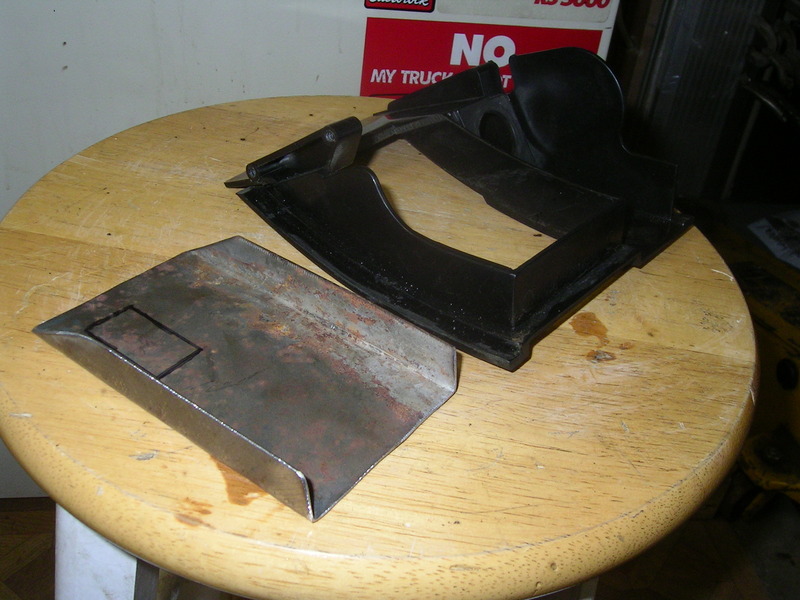
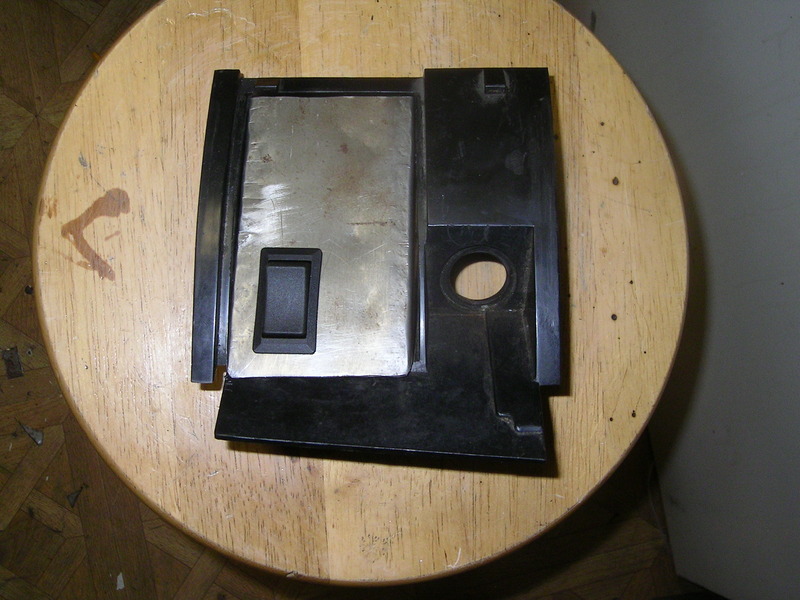
So I grabbed one of my spare ashtray assemblies and started getting to work.
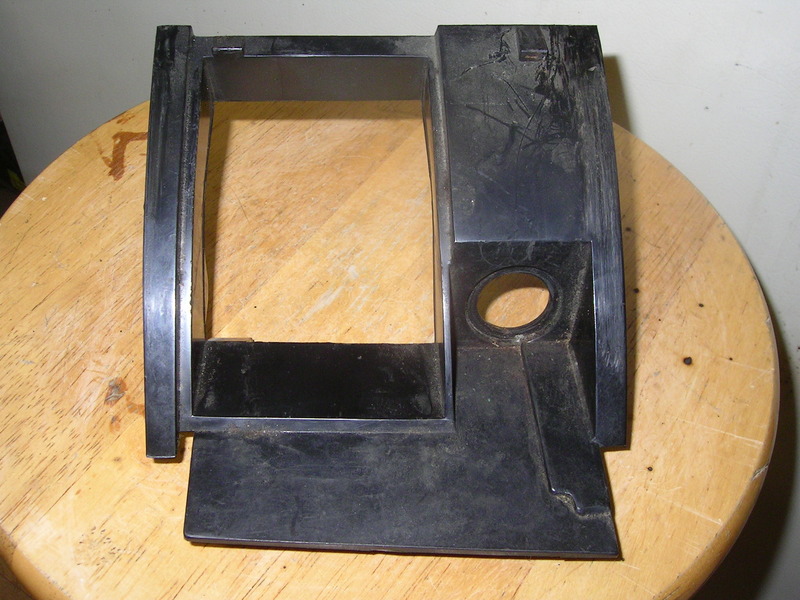
I first cut out a bit of the plastic to make a bit more room, and allow the switch to be close to the opening.
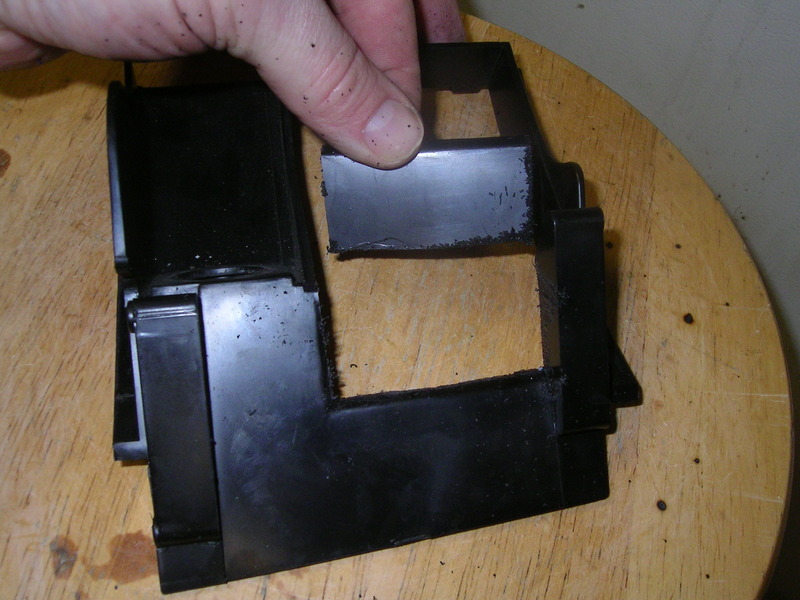
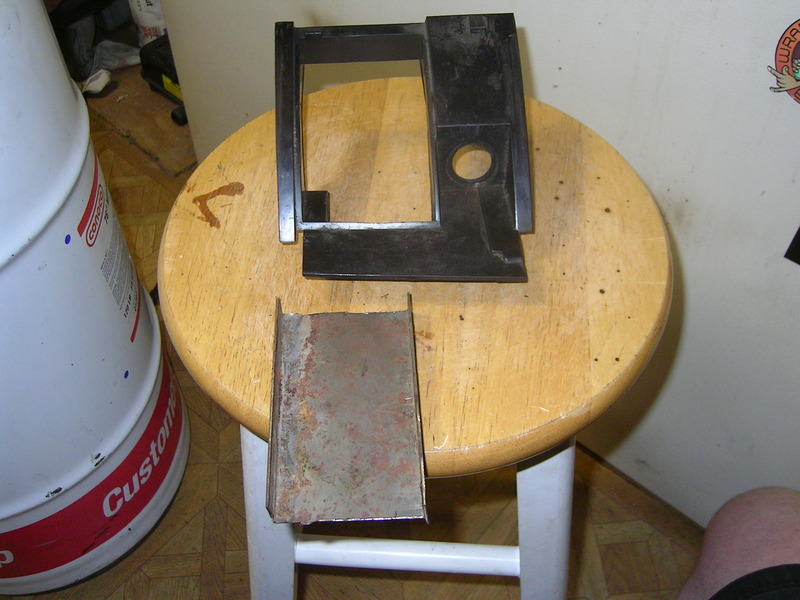
Then I made a template out of cardboard, then measured, and transferred the dimensions to some sheet metal. Then hammered it into shape in the vice.
Don't like drilling, or cutting holes in my factory dash, or related parts, so thought I could use the ashtray...since I don't smoke, nor does anyone who rides in my truck (regardless if they smoke or not...
.So I grabbed one of my spare ashtray assemblies and started getting to work.

I first cut out a bit of the plastic to make a bit more room, and allow the switch to be close to the opening.

Then I made a template out of cardboard, then measured, and transferred the dimensions to some sheet metal. Then hammered it into shape in the vice.

 03-13-2016, 10:44 PM
#1103
Registered User
Thread Starter
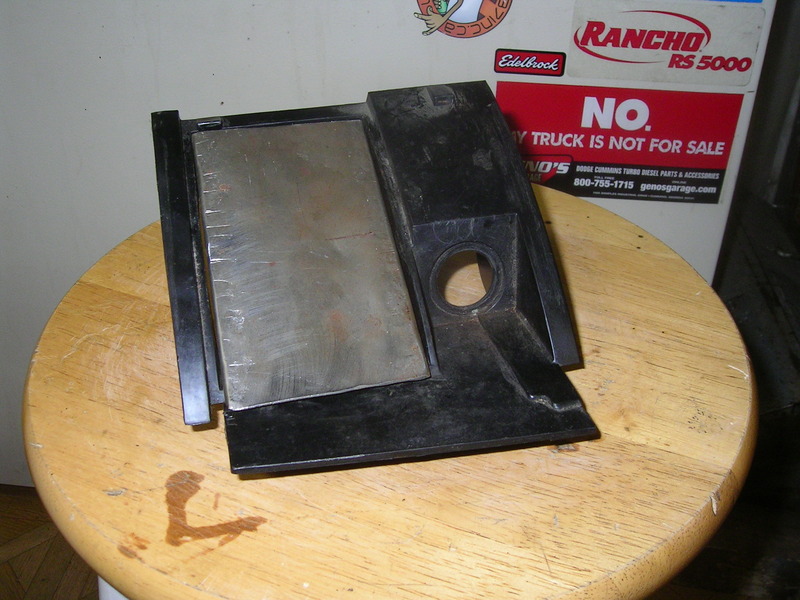
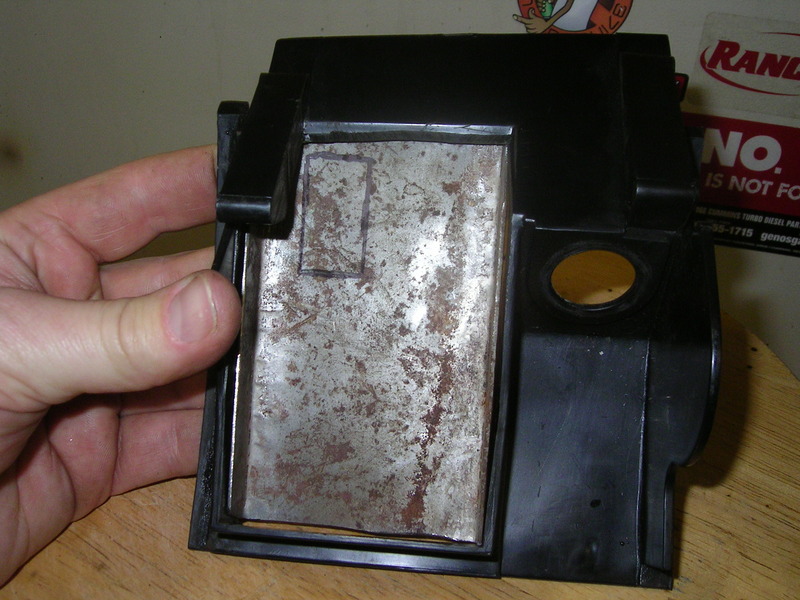
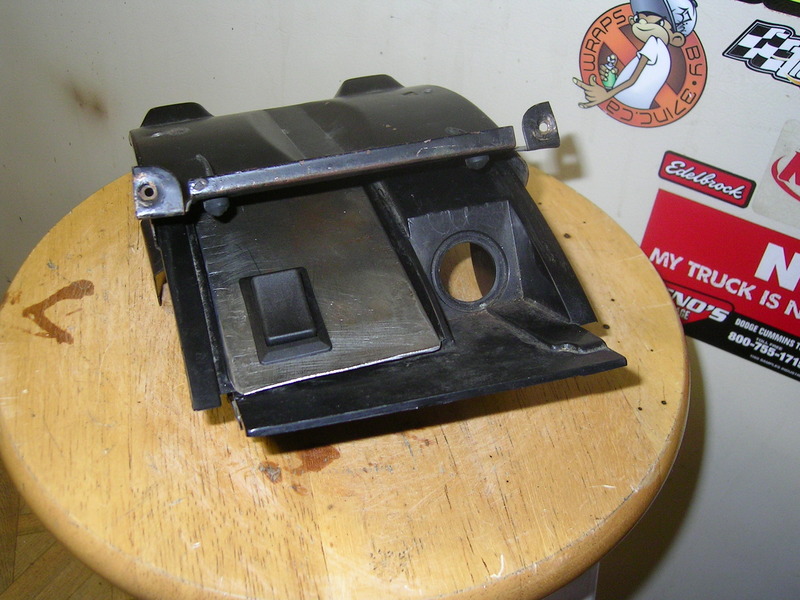
Then I had to finesse the new plate a little to clear and fit nicer...love the flapper disc on my 4.5" angle grinder!
And marked out where the switch will go...
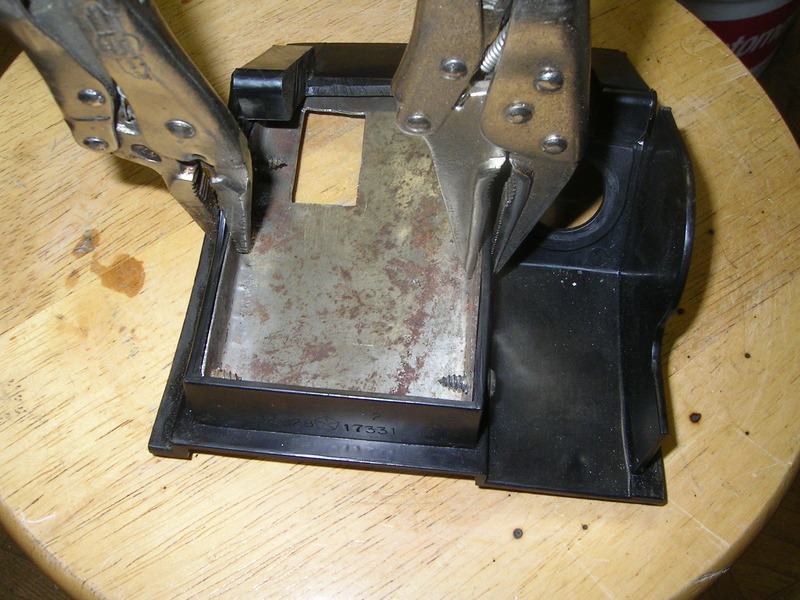
Then rough cut the hole for the switch with the cutting wheel, finished cutting it with a hacksaw, then hand filed the opening to the right dimensions.
Held in place while I drilled holes for the 3 screws I used to hold it in place.
And pretty much all done and ready to go...

And marked out where the switch will go...

Then rough cut the hole for the switch with the cutting wheel, finished cutting it with a hacksaw, then hand filed the opening to the right dimensions.
Held in place while I drilled holes for the 3 screws I used to hold it in place.


And pretty much all done and ready to go...
 03-13-2016, 10:49 PM
#1104
Registered User
Thread Starter
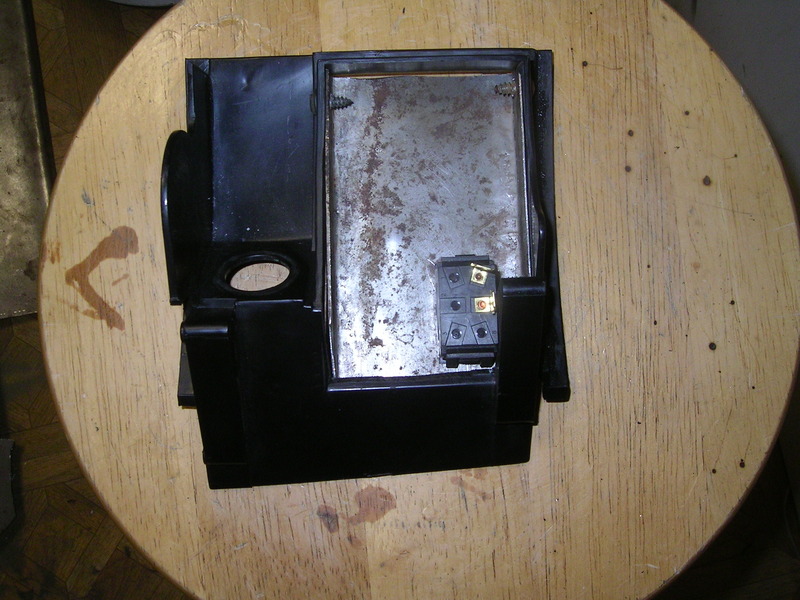
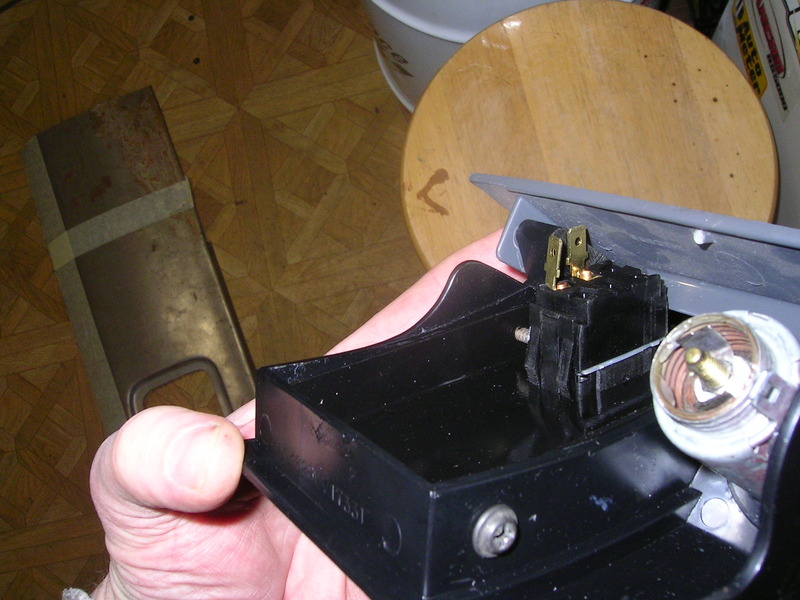
Just placed it in the old Ashtray housing so you can see what it will look like.
The electrical connections are a bit tight against the front of the ashtray. Actually had to flip the switch around or it would hit the front trim piece....so the switch now will work backwards....forward for off, backwards for on.
I painted up the new bracket and got it in the truck, but was dark and stormy so I didn't grab a pic this evening.

The electrical connections are a bit tight against the front of the ashtray. Actually had to flip the switch around or it would hit the front trim piece....so the switch now will work backwards....forward for off, backwards for on.

I painted up the new bracket and got it in the truck, but was dark and stormy so I didn't grab a pic this evening.
03-13-2016, 10:57 PM
#1105
Registered User
Join Date: Dec 2010
Location: Land of the Toxic Avenger
Posts: 6,770
Received 1,637 Likes
on
1,112 Posts
Cool idea, T.C.
The only thing I would do different is to Pop Rivet the sheetmetal in place, and paint it, because I'm that ****.... Of course, that would have made it very difficult to modify down the line, but that's the way I ride. lol...
Got to love making cool things out of the ordinary....
The only thing I would do different is to Pop Rivet the sheetmetal in place, and paint it, because I'm that ****.... Of course, that would have made it very difficult to modify down the line, but that's the way I ride. lol...
Got to love making cool things out of the ordinary....
The following users liked this post:
thrashingcows (03-13-2016)
03-13-2016, 11:11 PM
#1106
Registered User
Thread Starter
Thanks!
I have had to have the insert out at least a half dozen times so far...so rivets would not be very handy IMO. It is painted....you can see it from the back side in the last pic of it. 
I have had to have the insert out at least a half dozen times so far...so rivets would not be very handy IMO.
It is painted....you can see it from the back side in the last pic of it.
03-14-2016, 07:41 AM
#1107
Registered User

Now that's really cool.
The following users liked this post:
thrashingcows (03-14-2016)
03-14-2016, 02:19 PM
#1108
Registered User
Join Date: Dec 2010
Location: Land of the Toxic Avenger
Posts: 6,770
Received 1,637 Likes
on
1,112 Posts
Yeah....
I can't wait till TC installs that ejection seat on the passenger side of Patches. With that new switch location, it's perfect for fooling that passenger into being calm and relaxed as TC opens up the ashtray, pretending to light a smoke, presses that hidden switch, and "BOOM"... Passenger gets shot out the roof of the truck...
Woo Hoo.... Great Youtube IDEA !!!
03-14-2016, 05:08 PM
#1109
Registered User
Yeah....
I can't wait till TC installs that ejection seat on the passenger side of Patches. With that new switch location, it's perfect for fooling that passenger into being calm and relaxed as TC opens up the ashtray, pretending to light a smoke, presses that hidden switch, and "BOOM"... Passenger gets shot out the roof of the truck...
Woo Hoo.... Great Youtube IDEA !!!
 03-14-2016, 10:49 PM
#1110
Registered User
Thread Starter
So today I spent a few hours putting the electric fans in....finally. I have only been planing this for at least 4 months.... The plan is to run the fans in the fall to spring, when max cooling is not required, and I am interested to see if there is any MPG to be gained by this.
OK so here what I did.
First I was going to run a fan from the Junkyard. I grabbed a fan from a 3.8L Ford Taurus, but when I tried to put it on the radiator I did not have enough room...thank my Fluid damper for that.
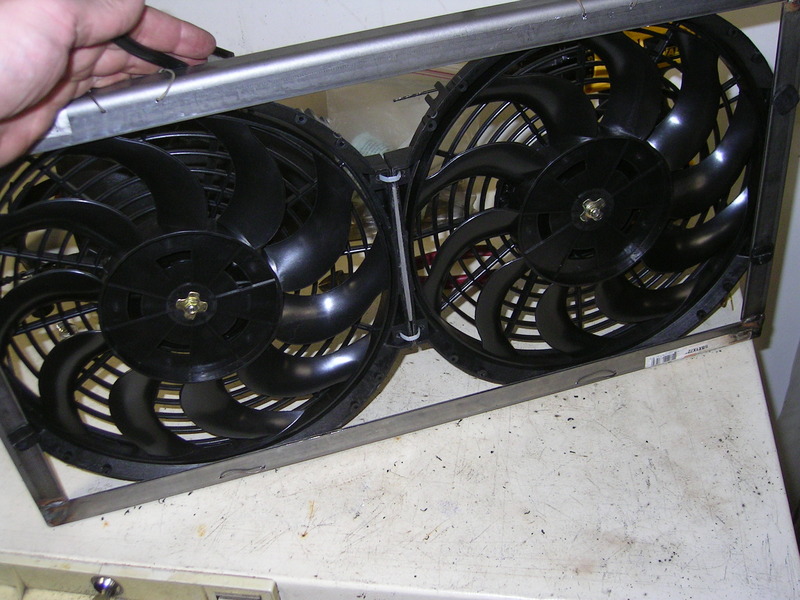
So I measured how much room I had...about 3.5" from the face of the rad, before I hit the engine accessories. So next I was going to run a single 16" electric fan...slim design...they are about 2.5" deep. But I couldn't find one I liked, nor the CFM I wanted. So eventually I did some measurements and figured I could make two 12" electric fans work.
After ordering the electric fans I first thought of making a plate tight shroud that would use the factory mounting points. But after a bit of math I found that the amount of open surface area for the air to move through was significantly less then the opening in the factory shroud.
Next idea was to make a frame work from 1" angle iron and still use the factory mounting points. This seemed to be the way to go.
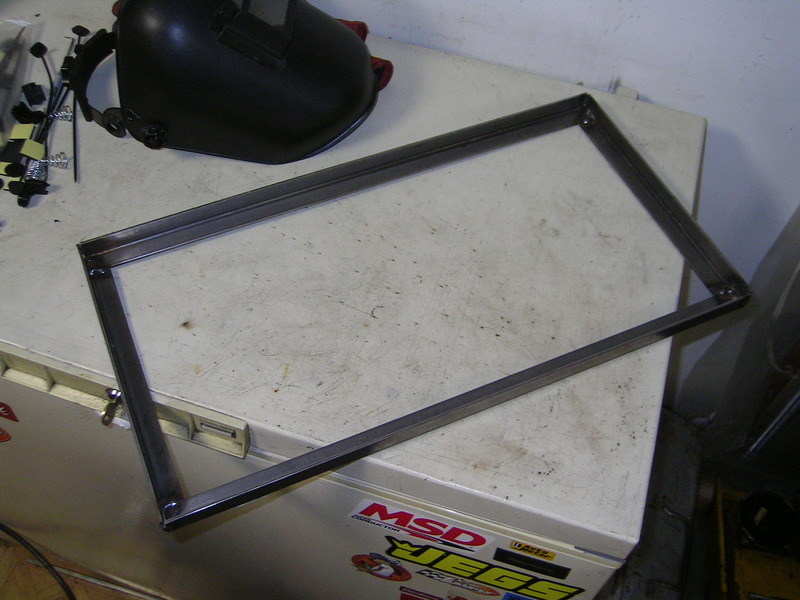
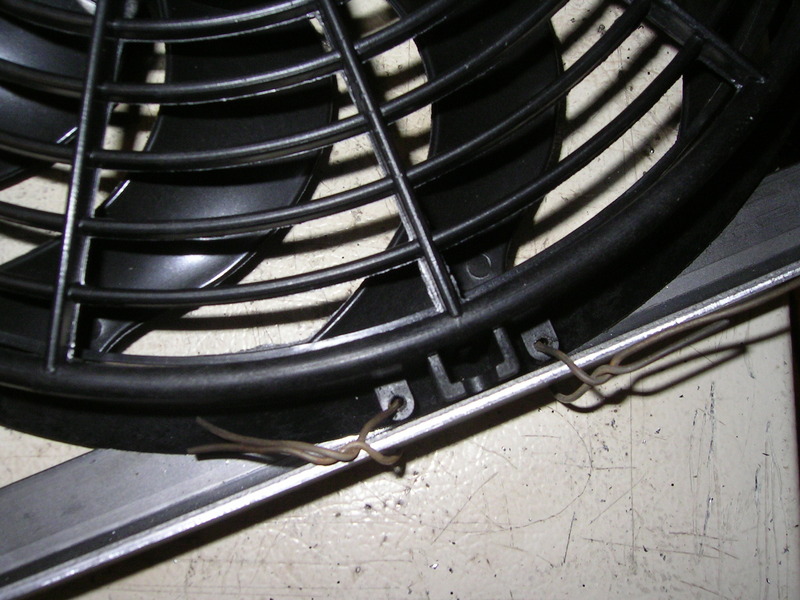
Once the fans were in place I used a very small drill bit to make holes through the fan mounting points...they were already there just didn't go all the way through. Then through the frame and secure with a bit of wire.
Mounted up....
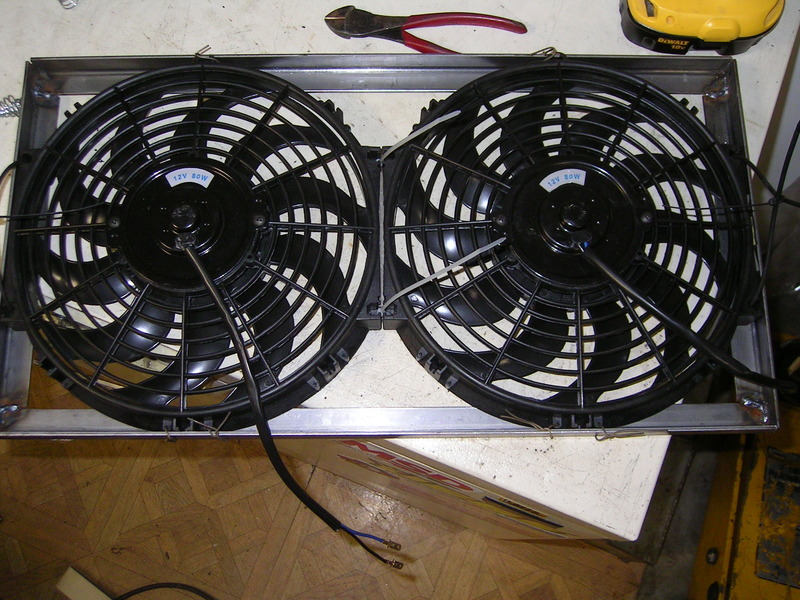
I used 4 screws and nuts on the outside edges...2 on each side...to secure the fans. (never grabbed a pic of this, but you can see them in later pics). I also positioned the frame on the rad, and cut 4 legs so that I could mount it in factory shroud location.
The plan is to run the fans in the fall to spring, when max cooling is not required, and I am interested to see if there is any MPG to be gained by this. OK so here what I did.
First I was going to run a fan from the Junkyard. I grabbed a fan from a 3.8L Ford Taurus, but when I tried to put it on the radiator I did not have enough room...thank my Fluid damper for that.
So I measured how much room I had...about 3.5" from the face of the rad, before I hit the engine accessories. So next I was going to run a single 16" electric fan...slim design...they are about 2.5" deep. But I couldn't find one I liked, nor the CFM I wanted. So eventually I did some measurements and figured I could make two 12" electric fans work.
After ordering the electric fans I first thought of making a plate tight shroud that would use the factory mounting points. But after a bit of math I found that the amount of open surface area for the air to move through was significantly less then the opening in the factory shroud.
Next idea was to make a frame work from 1" angle iron and still use the factory mounting points. This seemed to be the way to go.

Once the fans were in place I used a very small drill bit to make holes through the fan mounting points...they were already there just didn't go all the way through. Then through the frame and secure with a bit of wire.

Mounted up....


I used 4 screws and nuts on the outside edges...2 on each side...to secure the fans. (never grabbed a pic of this, but you can see them in later pics). I also positioned the frame on the rad, and cut 4 legs so that I could mount it in factory shroud location.