Crewcab update...


 02-07-2014, 02:25 AM
#512
Registered User
Thread Starter
Thought I had a fix for the E-brake system. The axle cables from the 93 are a lot longer then the 84 cables....where they come through the bracket on the driver side.
I swapped over the 93 clubcab e-brake assembly and main cable, but was still about 14" short. So I thought I would just add an extension to the threaded end of the E-brake cable.
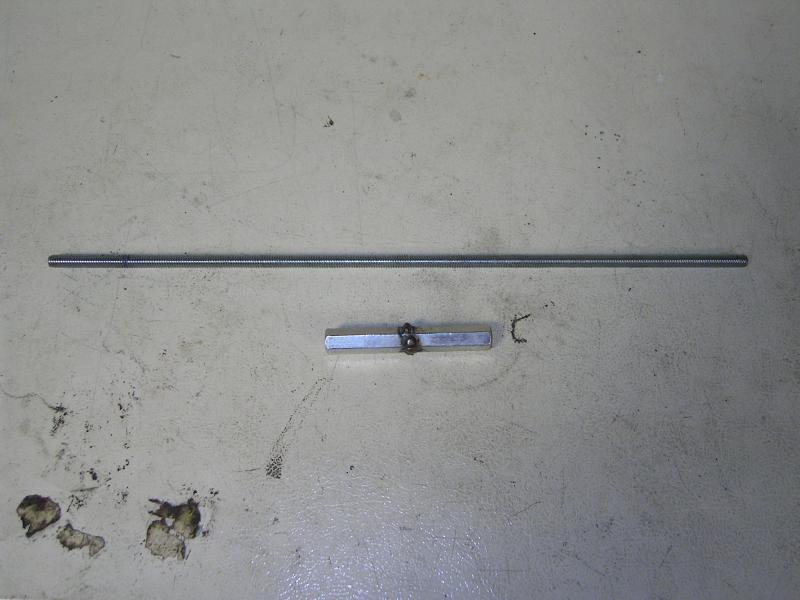
I got some ready-rod, and a couple threaded couplers that I welded together. Viola I thought I had it!
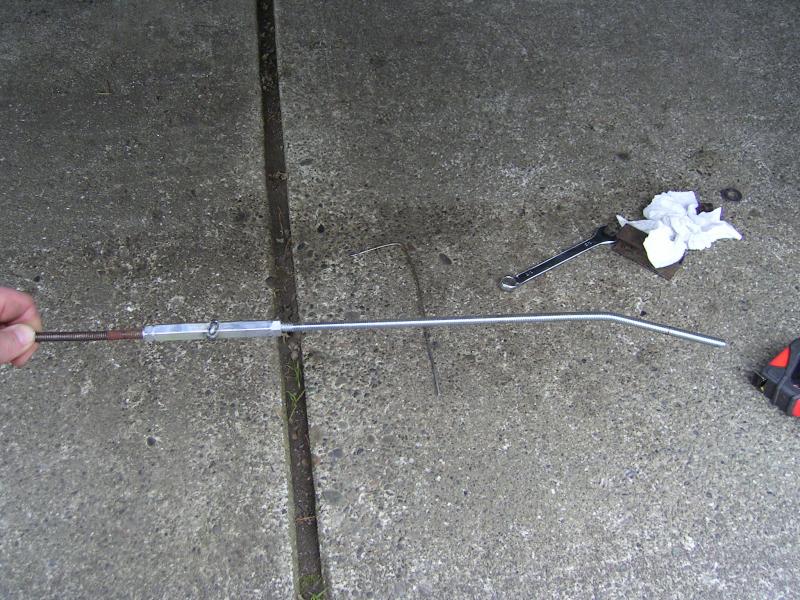
Turns out that the axle cables don't pull the same length. So the bracket twists and bent the ready-rod.
Guess I'll be swapping the E-brake cables from the 84 Dana 60 over the 93 Dana 70.
I swapped over the 93 clubcab e-brake assembly and main cable, but was still about 14" short. So I thought I would just add an extension to the threaded end of the E-brake cable.
I got some ready-rod, and a couple threaded couplers that I welded together. Viola I thought I had it!

Turns out that the axle cables don't pull the same length. So the bracket twists and bent the ready-rod.

Guess I'll be swapping the E-brake cables from the 84 Dana 60 over the 93 Dana 70.
02-07-2014, 02:39 AM
#513
Registered User
Thread Starter
I also ran into an issue with the flex line from the rear axle, up to the frame. Originally the flex line ran up to the bracket with the female threaded end pointing towards the front of the truck. But with the RWAL valve, this required the brake line to do a tight 180* turn.
So to make things easier I had decided to install the flex line pointing towards the back of the truck. Thus eliminating the 180* brake line bend. But what happened with this is that once the fuel tank was installed it was hitting the flex line.
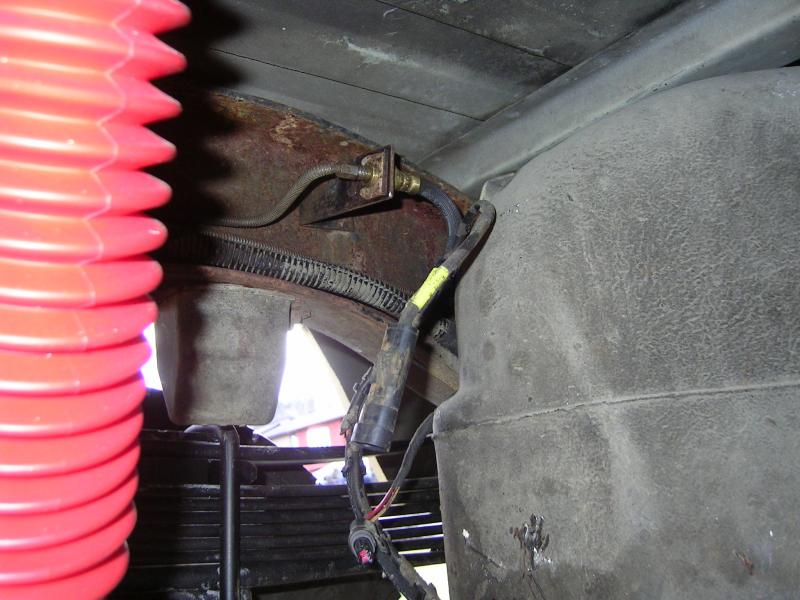
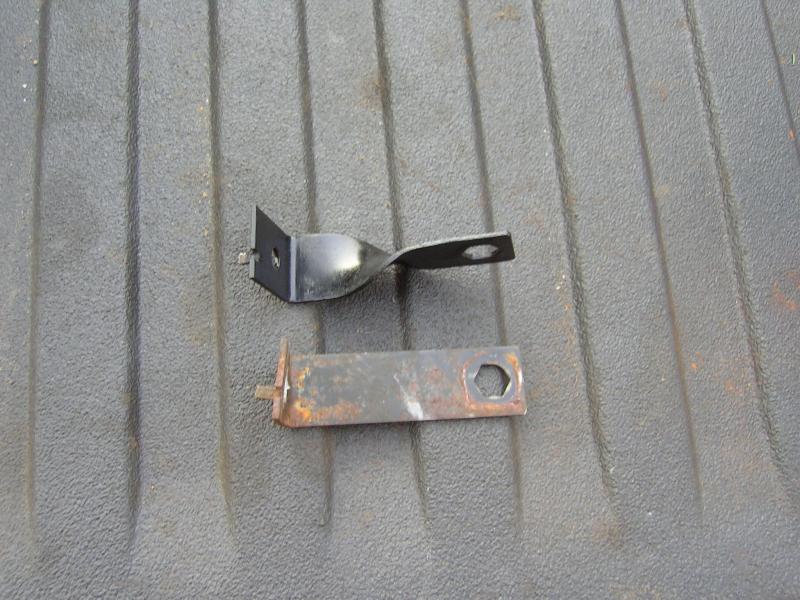
I had been thinking about how to fix this, without bending new lines. I finally was able to find a short 90* brake line fitting...or should I say a Tee...with a plug.

Then I bent a spare bracket I had 90* so that the flex line would now be coming straight up.
And installed...
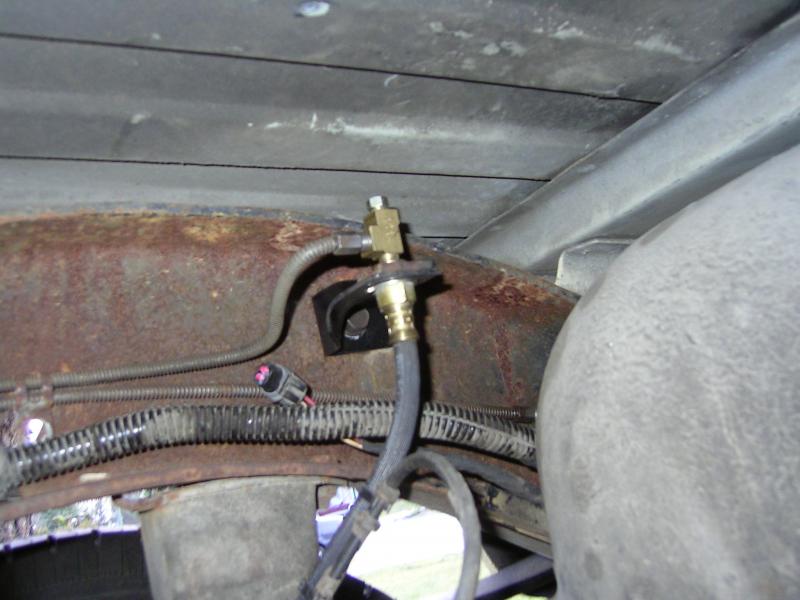
The only thing I'd change is the tee. If the male tube flare had been in the center port of the tee, then it would have been easier to get the brake line lined up. And not have had to crank the begeezis out of the fitting I used to get it to line up.
Hopefully I don't have any leaks.
So to make things easier I had decided to install the flex line pointing towards the back of the truck. Thus eliminating the 180* brake line bend. But what happened with this is that once the fuel tank was installed it was hitting the flex line.

I had been thinking about how to fix this, without bending new lines. I finally was able to find a short 90* brake line fitting...or should I say a Tee...with a plug.

Then I bent a spare bracket I had 90* so that the flex line would now be coming straight up.

And installed...

The only thing I'd change is the tee. If the male tube flare had been in the center port of the tee, then it would have been easier to get the brake line lined up. And not have had to crank the begeezis out of the fitting I used to get it to line up.
Hopefully I don't have any leaks.
 02-07-2014, 10:21 AM
#516
Registered User
Thread Starter

I did remember that the fan does flex under load. There is about 1/8" to 3/8" clearance now. I pulled on the fan blades to see how much "flex" I could get....as of right now it does not appear that it will hit.
But that does not mean that under high heat, and massive load situation it will be different. If that happens then electric fans might be in the future.
02-19-2014, 08:18 AM
#517
Registered User

Man it's the little stuff that takes the most time. You are getting there though
03-01-2014, 01:47 AM
#518
Registered User
Thread Starter
Firewall repairs
I know I have not been updating regularly...trying to get the crewcab done ASAP. I'm starting to jones hard on not driving my cummins.....
I will try and update a bit over the next week or so...when I find time.
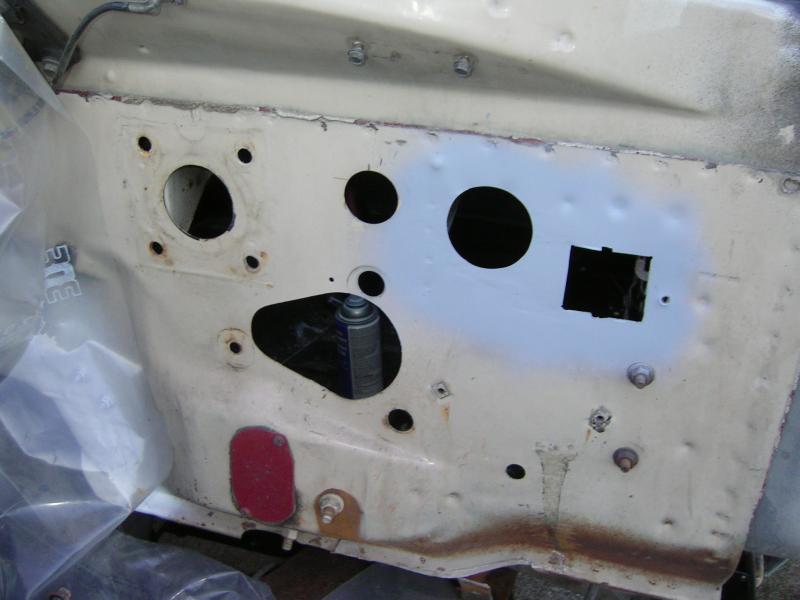
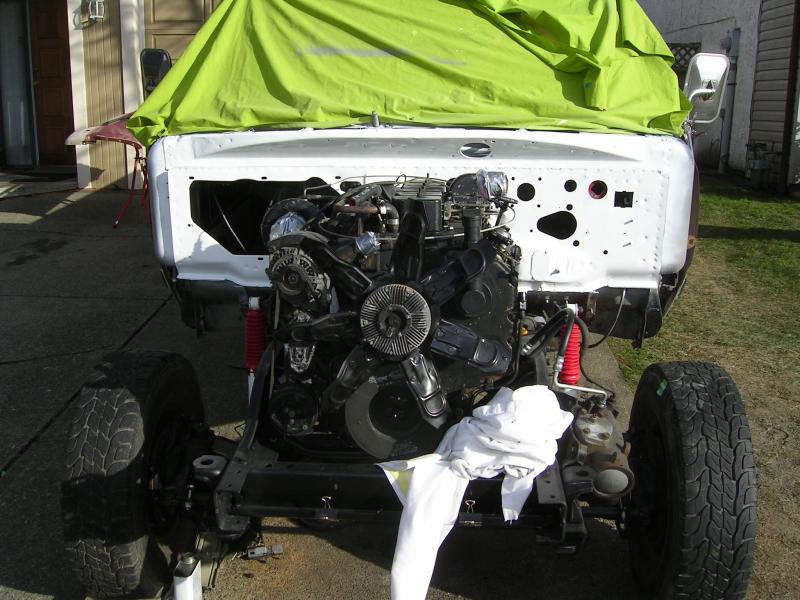
I stripped out the firewall and got the dash out of the truck...without having to pull the windshield...Woohooo!!
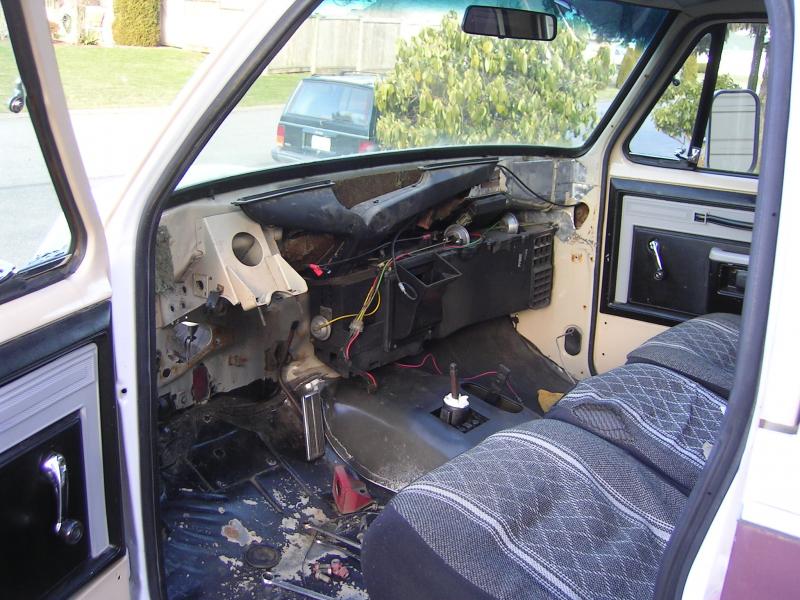
And you can see some of the butcher job they did installing the clutch bracket, and the hole in the firewall.....

I will try and update a bit over the next week or so...when I find time.
I stripped out the firewall and got the dash out of the truck...without having to pull the windshield...Woohooo!!

And you can see some of the butcher job they did installing the clutch bracket, and the hole in the firewall.....

 03-01-2014, 01:51 AM
#519
Registered User
Thread Starter
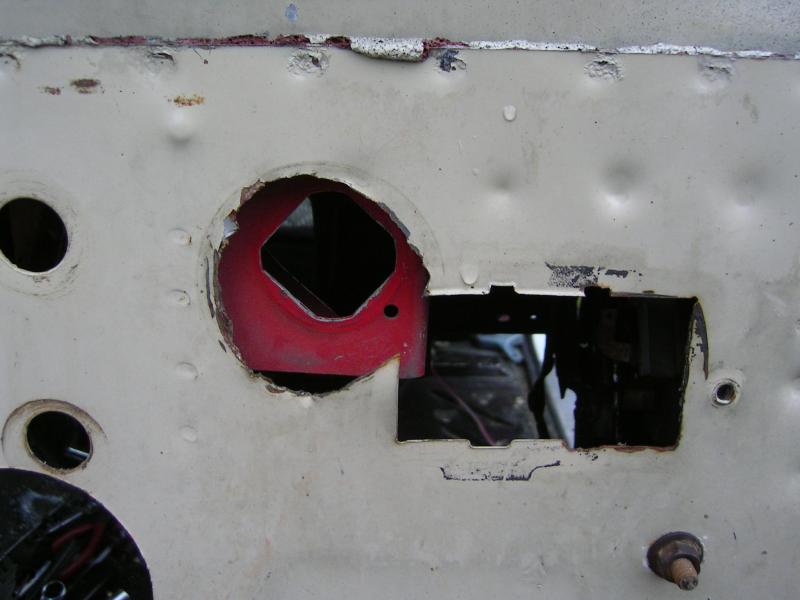
So since I couldn't live with the butcher job, I decided to weld in some patches and then I could redo it properly.
I made up a one piece patch and welded it in.
But after some measuring I noticed I needed a bit more material on one side. So welded in another patch.
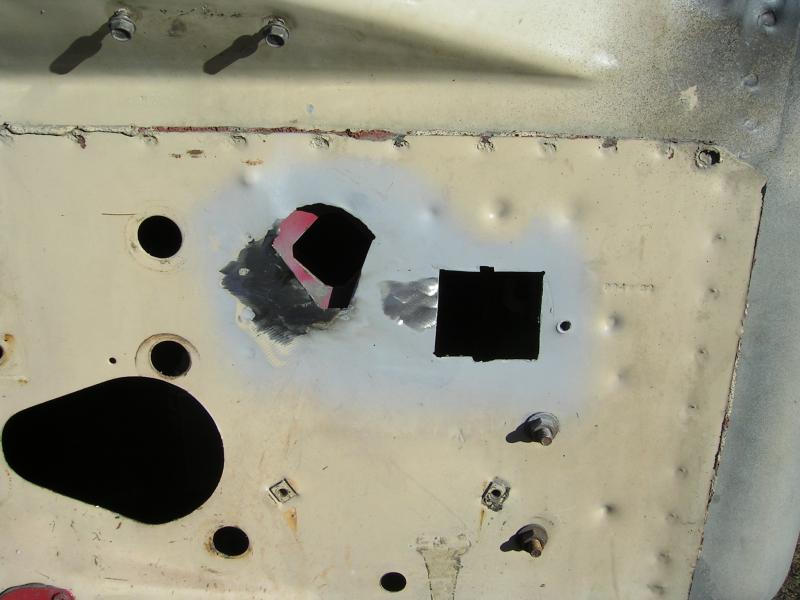
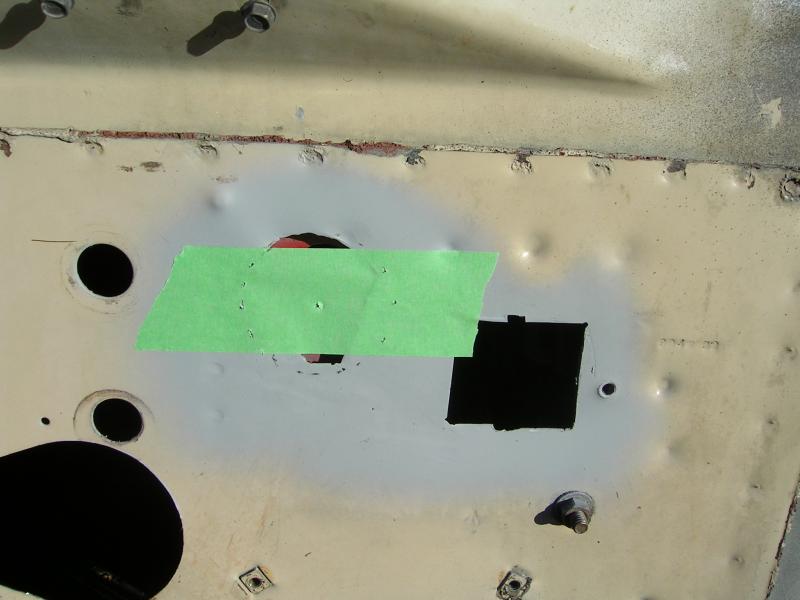
Now I needed to mark out the new hole. Little thinking outside the box got me what I needed.
I made up a one piece patch and welded it in.

But after some measuring I noticed I needed a bit more material on one side. So welded in another patch.

Now I needed to mark out the new hole. Little thinking outside the box got me what I needed.
 03-01-2014, 01:58 AM
#520
Registered User
Thread Starter
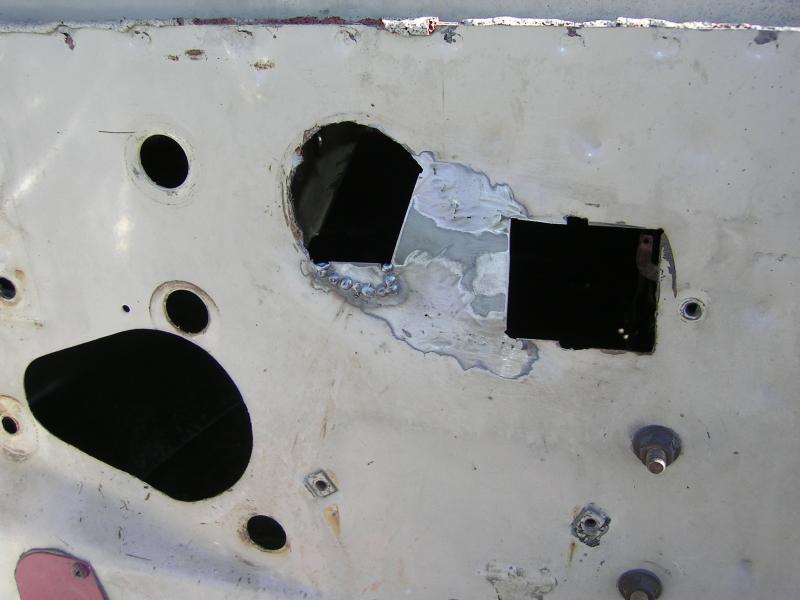
Used a couple different size flapper discs on the die grinder to slowly open up the hole.
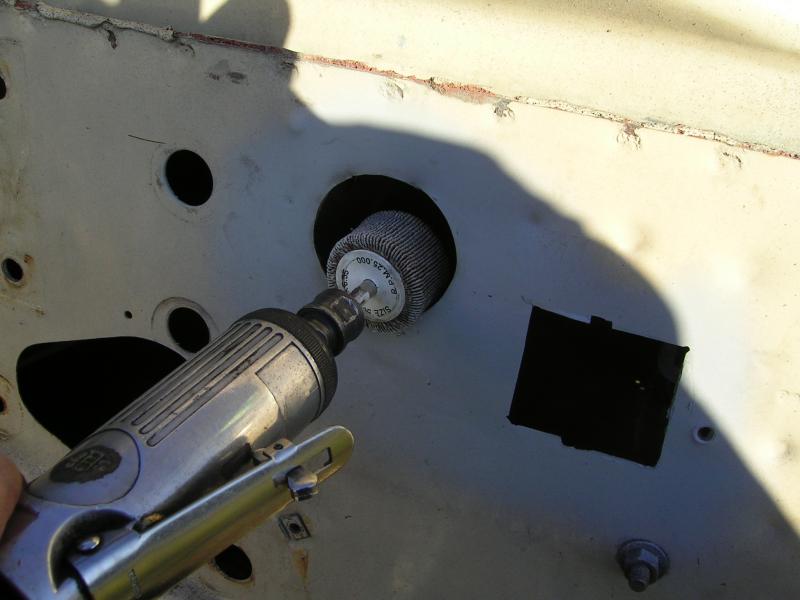
And then a little rat file work on the wiring bulkhead area to get it into shape. All done and ready for paint.
And all painted up...
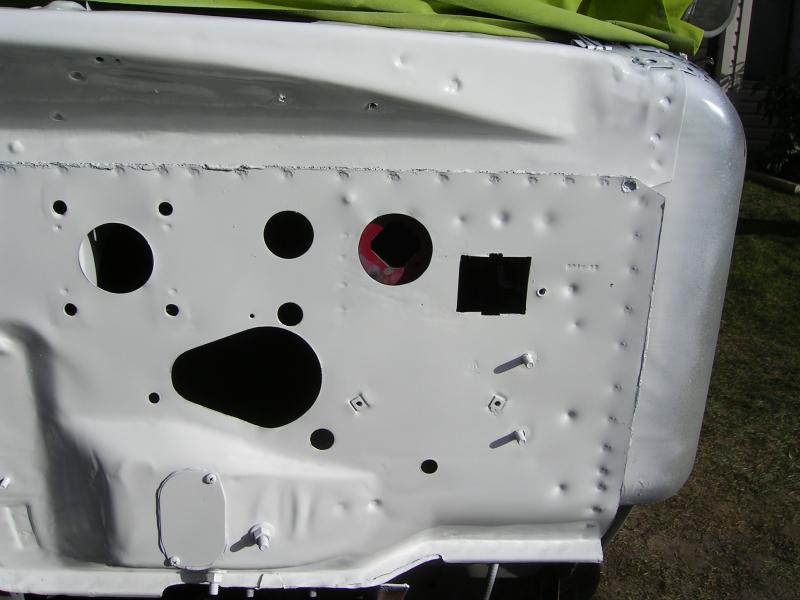
Just a rattle can paint job...but much happier now that the firewall is repaired, and painted.

And then a little rat file work on the wiring bulkhead area to get it into shape. All done and ready for paint.

And all painted up...


Just a rattle can paint job...but much happier now that the firewall is repaired, and painted.
03-01-2014, 06:53 AM
#521
Registered User
Join Date: Dec 2010
Location: Land of the Toxic Avenger
Posts: 6,770
Received 1,637 Likes
on
1,112 Posts
Wow !
You've come a long way, and the thousands of small tasks required to do so. Not as easy as I thought it would have been. Awesome job !
How do you have green grass there ? Winter has left brown straw, partially covered in snow and ice in my yard....and I'm a lot further south than you are.
You've come a long way, and the thousands of small tasks required to do so. Not as easy as I thought it would have been. Awesome job !
How do you have green grass there ? Winter has left brown straw, partially covered in snow and ice in my yard....and I'm a lot further south than you are.
03-01-2014, 08:30 AM
#522
Registered User
Looking Good! I have been watching for an update. yours is one of my favorite builds. We have quite a few first gens and old Dodges around here but I have only seen one crew cab. I used to see one the Air Force had with an ejection seat mounted in the bed facing backwards.
03-01-2014, 09:18 AM
#523
Registered User
Looks great! Where you have the plate covering the mechanical clutch hole, I put the clutch rod rubber boot in there and ran all my extra wiring through. Pyro, boost lines, all that stuff. Sealed with a zip tie after. Just a idea for you if you have any extra stuff in your truck
He lives in a pretty mild area of Canada. Last time I was there in mid winter the bugs were flying an everything was nice and green. I would love to move there! -36 here right now lol
He lives in a pretty mild area of Canada. Last time I was there in mid winter the bugs were flying an everything was nice and green. I would love to move there! -36 here right now lol
03-01-2014, 09:47 AM
#524
Registered User
Thread Starter
Wow !
You've come a long way, and the thousands of small tasks required to do so. Not as easy as I thought it would have been. Awesome job !
How do you have green grass there ? Winter has left brown straw, partially covered in snow and ice in my yard....and I'm a lot further south than you are.
You've come a long way, and the thousands of small tasks required to do so. Not as easy as I thought it would have been. Awesome job !
How do you have green grass there ? Winter has left brown straw, partially covered in snow and ice in my yard....and I'm a lot further south than you are.
Looking Good! I have been watching for an update. yours is one of my favorite builds. We have quite a few first gens and old Dodges around here but I have only seen one crew cab. I used to see one the Air Force had with an ejection seat mounted in the bed facing backwards.
Looks great! Where you have the plate covering the mechanical clutch hole, I put the clutch rod rubber boot in there and ran all my extra wiring through. Pyro, boost lines, all that stuff. Sealed with a zip tie after. Just a idea for you if you have any extra stuff in your truck
He lives in a pretty mild area of Canada. Last time I was there in mid winter the bugs were flying an everything was nice and green. I would love to move there! -36 here right now lol
He lives in a pretty mild area of Canada. Last time I was there in mid winter the bugs were flying an everything was nice and green. I would love to move there! -36 here right now lol
That might be a good solution to my extra wiring issues. Never thought of using the manual clutch hole, with a new boot. Thanks for the heads up on that!!
03-01-2014, 10:01 AM
#525
Registered User
Like Gyman98 did, I ran boost, pyro and other lines through my old clutch pedal boot in the fire wall after my swap.
That is a clean looking firewall now, after fixing the butch job!
That is a clean looking firewall now, after fixing the butch job!