
Crewcab update...

Registered User
Joined: Sep 2013
Posts: 167
Likes: 7
From: Gilbert, AZ
MAN! I agree with this guy ^^^^^^ Looking fantastic!!!! GREAT-JOB
 !
!
Thread Starter
Registered User


Joined: Mar 2010
Posts: 7,265
Likes: 1,346
From: Prince George, BC
Thanks again everyone...appreciate the kind words!! 
And KRB...Yes it's my 68 Chrysler Town and Country wagon. Tossed into daily driver duty until the crews back on the road. The big 440 sure don't get the fuel mileage the cummins does....
mknittle....I try and post clear and informative pics, to try and help the next person out on their project. Lord knows I have scoured many threads, here and on the net, looking for info and pics.
And KRB...Yes it's my 68 Chrysler Town and Country wagon. Tossed into daily driver duty until the crews back on the road.
The big 440 sure don't get the fuel mileage the cummins does....mknittle....I try and post clear and informative pics, to try and help the next person out on their project. Lord knows I have scoured many threads, here and on the net, looking for info and pics.
Registered User
Joined: Dec 2010
Posts: 6,837
Likes: 1,683
From: Land of the Toxic Avenger
Thanks !
Thread Starter
Registered User
Joined: Mar 2010
Posts: 7,265
Likes: 1,346
From: Prince George, BC
Been working on getting the rear springs all back together.
I thought my neighbors drill press had a slow slow setting...but ti would only go down to 800rpm. I drilled 3/8 pilot holes at that speed first using some areo space drill bits I picked up at a swap meet...worked really well.
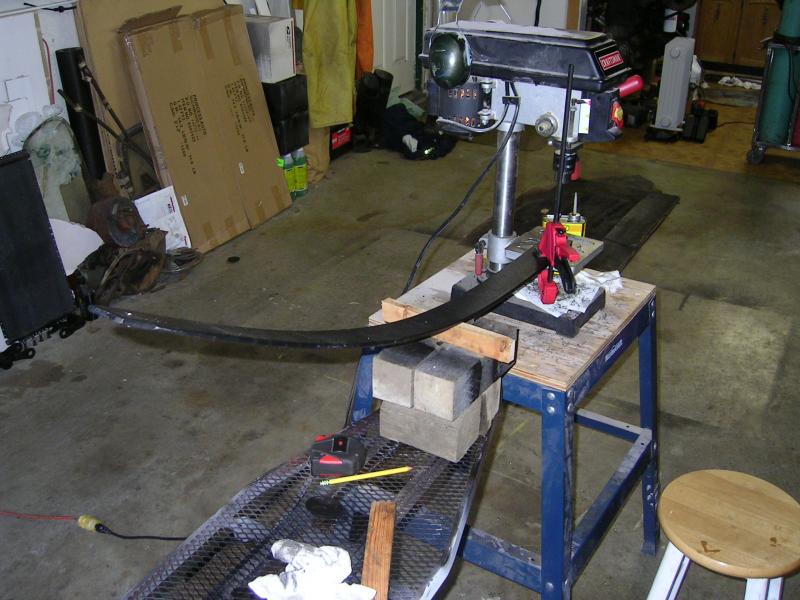
Once the small holes were drilled it was on to the big 7/16 bit. Couldn't find any decent cobalt bits...so went with some bits designed for Stainless Steel. Worked pretty good. Slow speeds and lots of cutting fluid. But since the drill press wasn't slow enough I had to do all the big holes with the hand drill.
That sucked...legs and back hurt a lot.
I thought my neighbors drill press had a slow slow setting...but ti would only go down to 800rpm. I drilled 3/8 pilot holes at that speed first using some areo space drill bits I picked up at a swap meet...worked really well.

Once the small holes were drilled it was on to the big 7/16 bit. Couldn't find any decent cobalt bits...so went with some bits designed for Stainless Steel. Worked pretty good. Slow speeds and lots of cutting fluid. But since the drill press wasn't slow enough I had to do all the big holes with the hand drill.

That sucked...legs and back hurt a lot.
Thread Starter
Registered User
Joined: Mar 2010
Posts: 7,265
Likes: 1,346
From: Prince George, BC
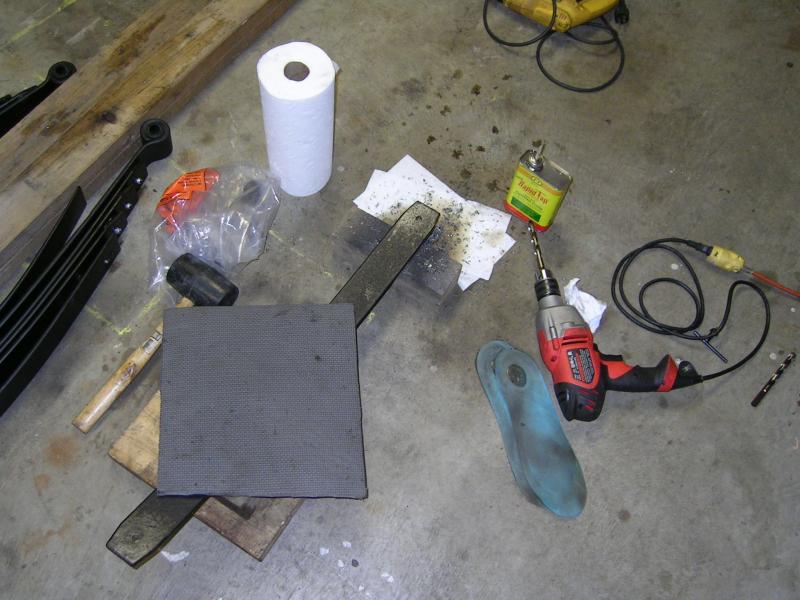
I had bought some wear tip pads on-line...thought they would do the job. Went to install them and they just wouldn't sit nice and snug. Even though they said they were for 7/16" hole. So I went down to my spring shop and bought some of the ones they use...nice and long...and work in 7/16 - 1/2" holes.
These are the ones I originally bought....

And the here are the ones I got from the spring shop...

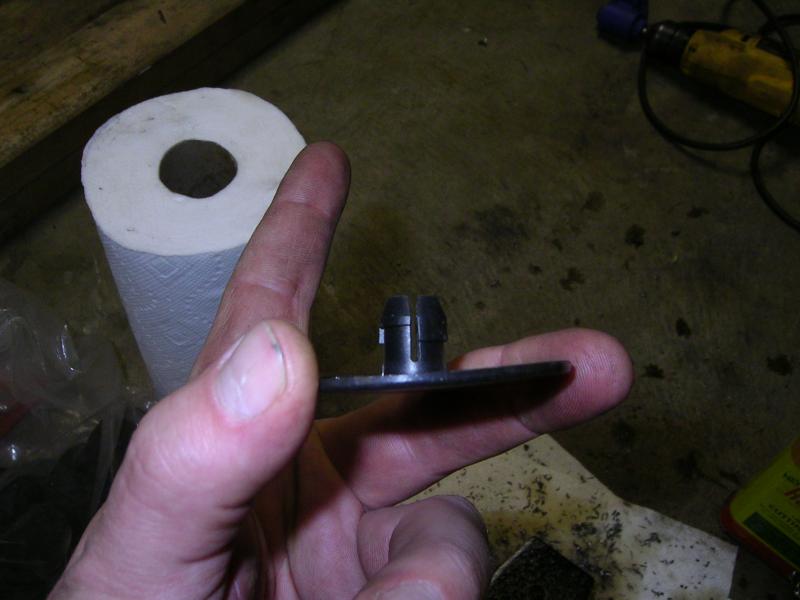
Got everything drilled...new wear tips installed, and then bolted them back together. I re-used the old Zinc liners since they were in decent shape. Once I had the spring packs together I had to take them back down to the spring shop to get the pack clamp brackets (???) installed.
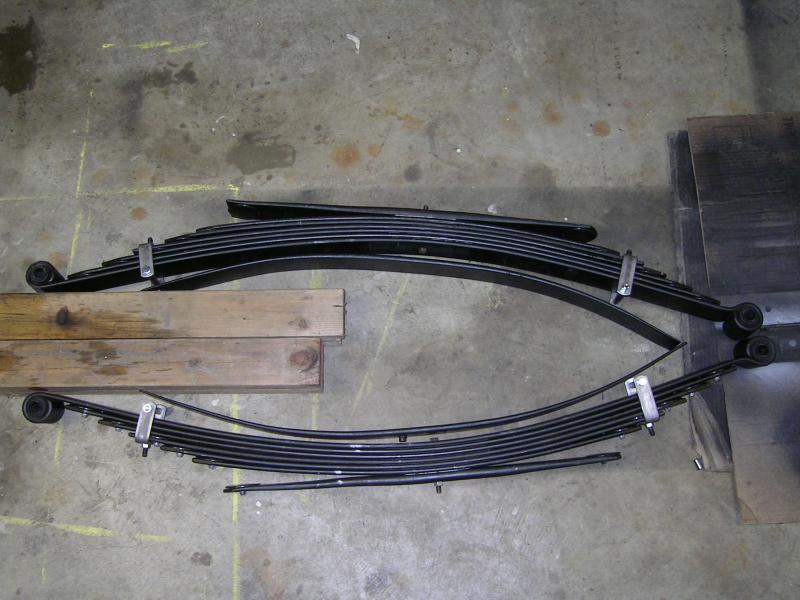
Just need to paint he brackets and they are ready to go in.
These are the ones I originally bought....
And the here are the ones I got from the spring shop...


Got everything drilled...new wear tips installed, and then bolted them back together. I re-used the old Zinc liners since they were in decent shape. Once I had the spring packs together I had to take them back down to the spring shop to get the pack clamp brackets (???) installed.

Just need to paint he brackets and they are ready to go in.

Registered User
Joined: Aug 2011
Posts: 128
Likes: 0
From: Kamloops
Wow! That's pretty spectacular glad to hear you are getting a work out from it 
While you are putting the suspension components together is there anything specific you do to prevent the parts from rusting in the future? Aside to the paint that is.
While you are putting the suspension components together is there anything specific you do to prevent the parts from rusting in the future? Aside to the paint that is.
Thread Starter
Registered User
Joined: Mar 2010
Posts: 7,265
Likes: 1,346
From: Prince George, BC
Since the springs are now done I decided to attack the last thing to remove on the NV4500. It is the input shaft bearing retainer race. I thought I would just slowly cut through with the dremel in two places and then tap it out.

Seemed like a good idea in theory....but I guess with all my banging and hammering to try and free up the old race and get it out of the way I ended up cracking the bearing retainer...
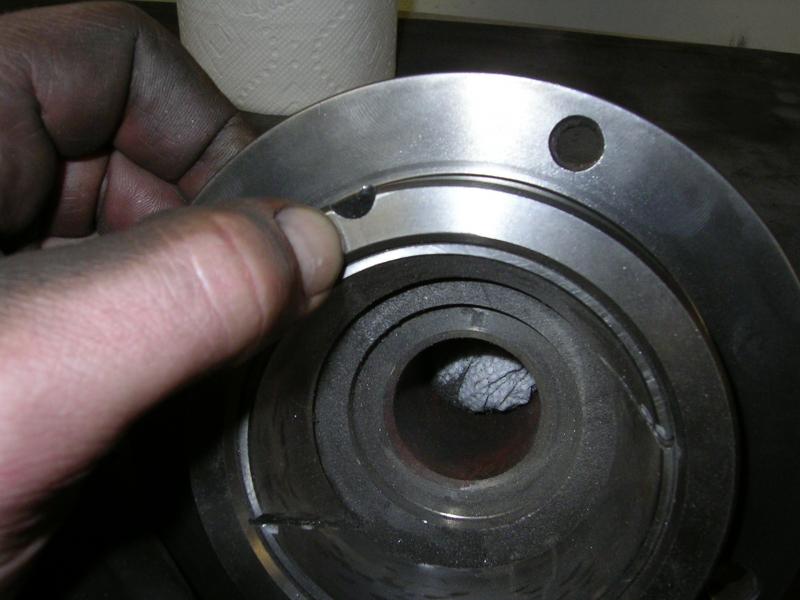
Cracked at the oil feed hole. I'm assuming that the bearing retainer is toast now? Anyone have any thoughts on this?
I don't want to half a$$ things...if it has the potential to fail and cause me grief I'd just as soon replace it.
Thread Starter
Registered User
Joined: Mar 2010
Posts: 7,265
Likes: 1,346
From: Prince George, BC
Just waiting on my machinist to finish making up new top blocks for the spring packs. The cast block that sits on top of the spring pack and then the over load spring(s) sit on. Since my top spring was so rusty under that cast block, with it's big voids that trap moisture, my spring shop recommended new solid blocks be made up.
They said the slightly longer solid blocks would help spread the load over a larger area, and help keep that rusted out top springs from cracking.
They said the slightly longer solid blocks would help spread the load over a larger area, and help keep that rusted out top springs from cracking.
Thread Starter
Registered User
Joined: Mar 2010
Posts: 7,265
Likes: 1,346
From: Prince George, BC
No I just use the anti-rust type paint from princess auto. Then make sure you pressure wash and clean things every so often. Getting all that road debris out of all the nooks and crannies is the best thing you can do IMO.

Thread Starter
Registered User
Joined: Mar 2010
Posts: 7,265
Likes: 1,346
From: Prince George, BC

Thread Starter
Registered User
Joined: Mar 2010
Posts: 7,265
Likes: 1,346
From: Prince George, BC
I was searching out new bearing retainers last night...The price on them is very reasonable. I was also looking at the outer surface where the throw out bearing rides....looks pretty worn, and I can feel slight depressions. SO I think this crack is a good thing, as those depressions could be why the old throw out bearing would hang up from time to time.


Thread Starter
Registered User
Joined: Mar 2010
Posts: 7,265
Likes: 1,346
From: Prince George, BC
Been sick the last couple days... So only doing a little puttering on the truck. I decided to start welding up some of the cowl area cracks, since the wind and rain had stopped for a little while. I still need to finish them off, and then make a couple reinforcement plates as well.

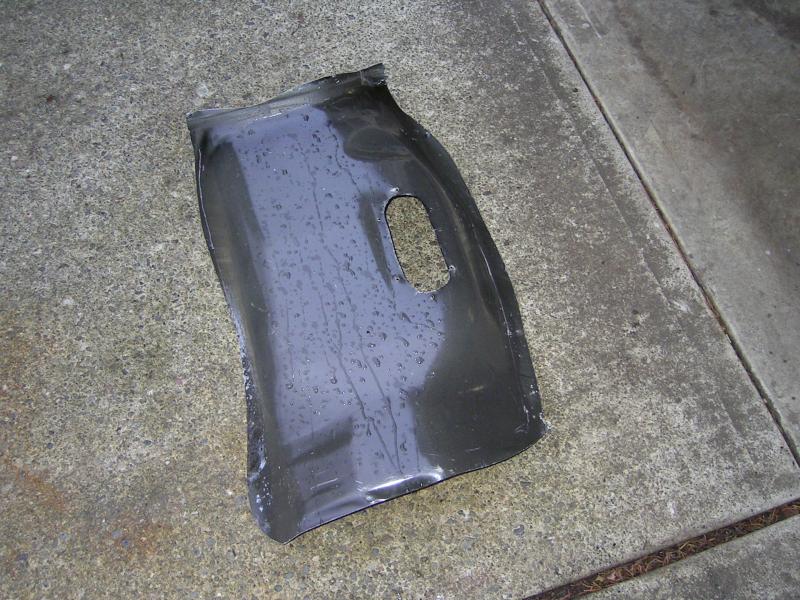
I also trimmed down the tranny tunnel so it would cover up the ugly hole hacked in the floor. Will make it a removable panel just in case I ever need to get at the top of the tranny.
This is what I'll be covering....

And the new panel...before trimming....
And after...

So only doing a little puttering on the truck. I decided to start welding up some of the cowl area cracks, since the wind and rain had stopped for a little while. I still need to finish them off, and then make a couple reinforcement plates as well.
I also trimmed down the tranny tunnel so it would cover up the ugly hole hacked in the floor. Will make it a removable panel just in case I ever need to get at the top of the tranny.
This is what I'll be covering....

And the new panel...before trimming....

And after...


