
Crewcab update...

Thread Starter
Registered User


Joined: Mar 2010
Posts: 7,265
Likes: 1,346
From: Prince George, BC
Now the fun part. Install the brackets and try and get all the measurement s to line up... I spent a couple hours running back and for to the computer to check all the measurements. I eventuallt got it all blocked up and in position.
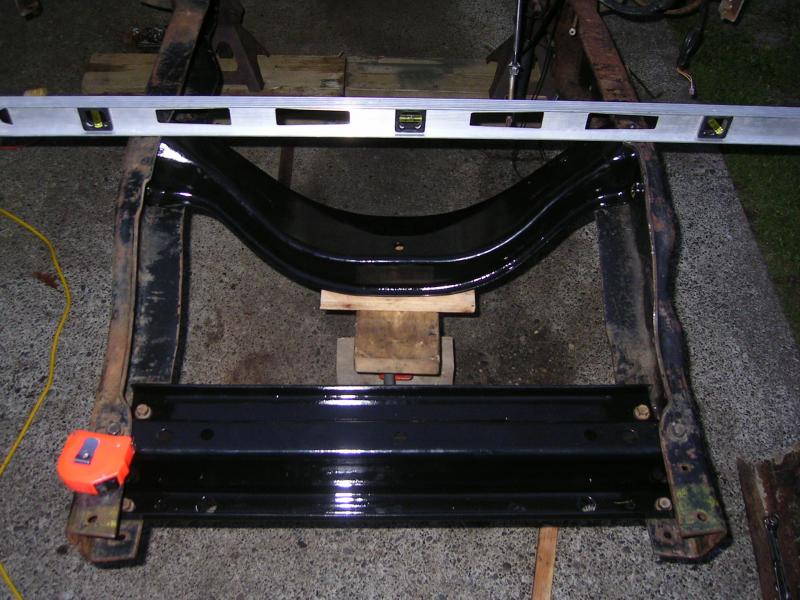
I then noticed that the Driver side rear most upper hole in the bracket lined up almost perfectly with the center hole left by a rivet I pounded out.
The passenger side was off just a little....
I decided to install bolts and see where my measurements would fall.

So with the main center cross member bolted in using those two holes, All my measurements are within a 1/16th to 1/8th...and some are dead on. Think I can live with those measurements. So tomorrow I will double check the measurements one last time, then start drilling.
I spent a couple hours running back and for to the computer to check all the measurements. I eventuallt got it all blocked up and in position. 
I then noticed that the Driver side rear most upper hole in the bracket lined up almost perfectly with the center hole left by a rivet I pounded out.

The passenger side was off just a little....

I decided to install bolts and see where my measurements would fall.

So with the main center cross member bolted in using those two holes, All my measurements are within a 1/16th to 1/8th...and some are dead on. Think I can live with those measurements. So tomorrow I will double check the measurements one last time, then start drilling.


Registered User
Joined: Aug 2013
Posts: 4,918
Likes: 603
From: Tulsa, OK
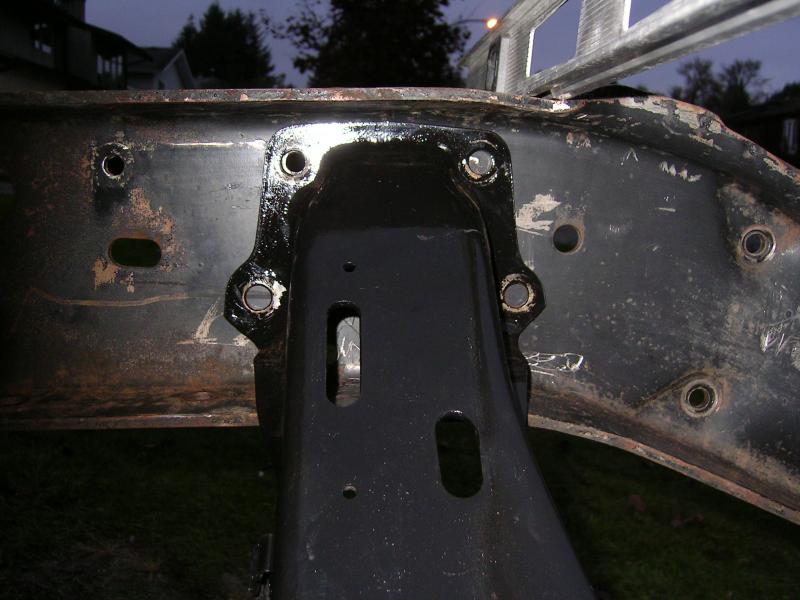
Once I took a few dozen measurements I disassembled everything and re-installed the forward cross member in the 84 frame. But before I got too far into that I decided to mount, and drill the needed hole for the steering box brace.
Installed....and punched

Drilled out to about 3/8"....

And then the final drilling was done with a step drill...worked like a charm!

Installed....and punched

Drilled out to about 3/8"....

And then the final drilling was done with a step drill...worked like a charm!

Thread Starter
Registered User
Joined: Mar 2010
Posts: 7,265
Likes: 1,346
From: Prince George, BC
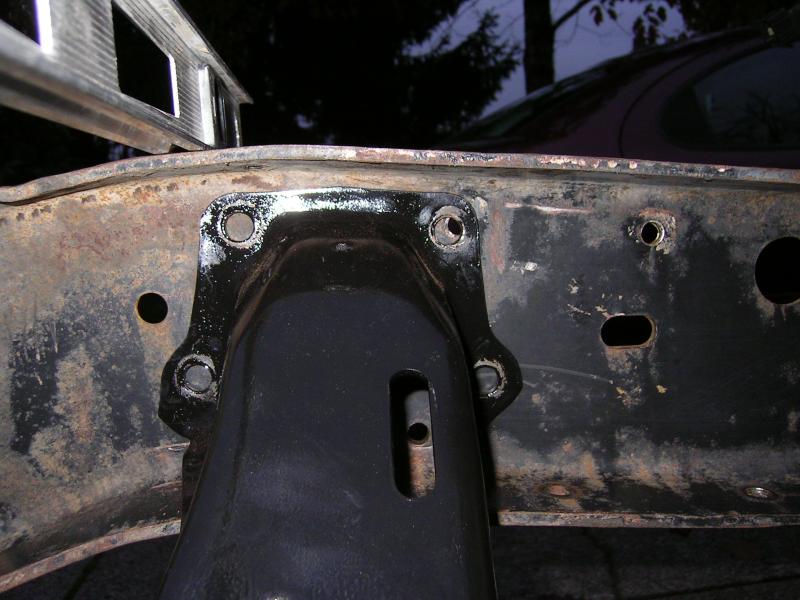
Yes that's a steering box brace. They were never really that common.
There was a company that used to reproduce them, but they are currently out of stock, and they have no plans to make another run on them.
I was lucky and found an original one off a Ramcharger on E-bay.
There was a company that used to reproduce them, but they are currently out of stock, and they have no plans to make another run on them.
I was lucky and found an original one off a Ramcharger on E-bay.
Thread Starter
Registered User
Joined: Mar 2010
Posts: 7,265
Likes: 1,346
From: Prince George, BC

Thread Starter
Registered User
Joined: Mar 2010
Posts: 7,265
Likes: 1,346
From: Prince George, BC
So I've been tearing apart my NV4500 the last couple nights. Found a couple issues.
One was with the 5th gear that I ordered from Quad4x4. I decided to see how it fit on the new 4wd main shaft but it would only go up to the threads for the nut. Not over and onto the splines...***!! Turns out I got the right package, but the wrong part inside. I have to say though Roy down at Quad4x4 has been more then helpful in fixing this issue, and quickly!!
Second issue is when I got my 5th gear clutch and gear assembly off the counter shaft, a couple teeth fell off the inside of the clutch!
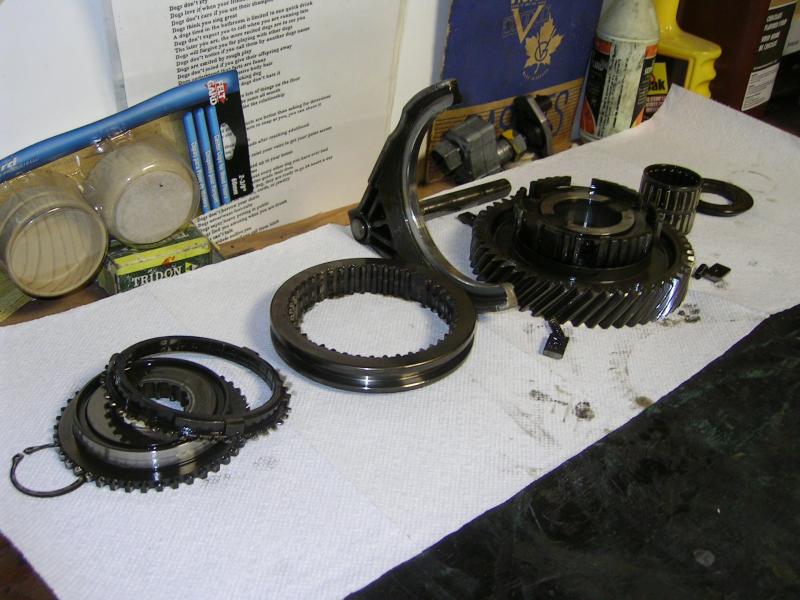
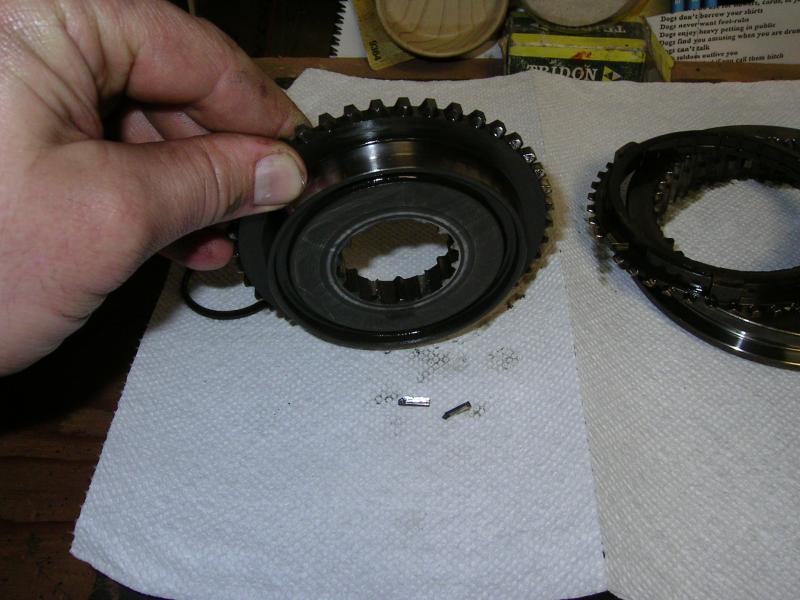
So looks like I will be needing a new clutch/cone assembly for 5th gear. I see there are aftermarket units...anyone run one of these? How do they stand up?
I can get an NOS OEM unit from Quad4x4...but they are 4x's the price of the aftermarket units!! I personally think I will go with the aftermarket unit. Since I will never be turning up my motor to make crazy HP or Torque. And I drive, and shift very easy.
Thread Starter
Registered User
Joined: Mar 2010
Posts: 7,265
Likes: 1,346
From: Prince George, BC
Next problem I'm having is with removing the bearings. Anyone who's done this in there shop/garage have any tricks to share?
I had to putt the cage and rollers off the counter shaft bearing so I could swing it up and out of the case.
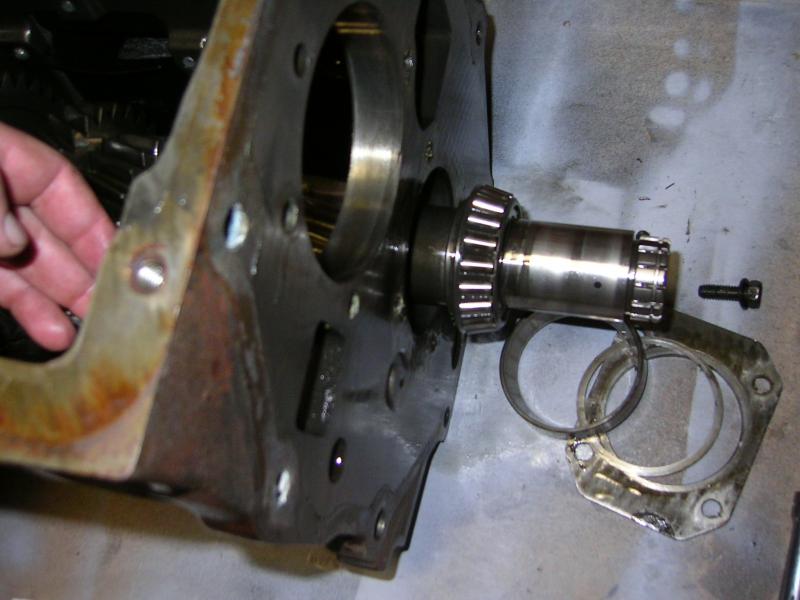

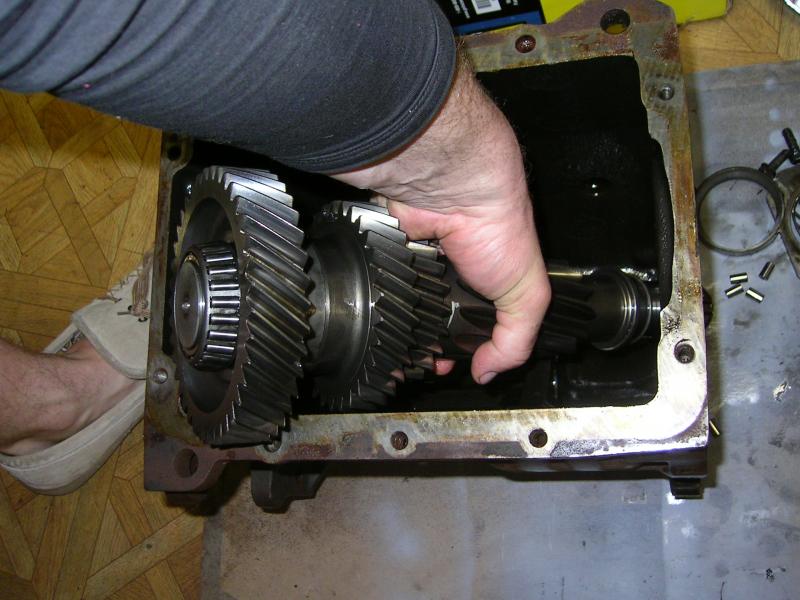
I don't care about the 2wd main shaft...it's toast anyway due to the 5th gear failing. So I was just going to cut them off. But the counter shaft front bearing is sunk down within the gear...not sure how I'm going to get that one out?
You can see it in the pic as I'm lifting the the cluster out.
I had to putt the cage and rollers off the counter shaft bearing so I could swing it up and out of the case.


I don't care about the 2wd main shaft...it's toast anyway due to the 5th gear failing. So I was just going to cut them off. But the counter shaft front bearing is sunk down within the gear...not sure how I'm going to get that one out?
You can see it in the pic as I'm lifting the the cluster out.
Thread Starter
Registered User
Joined: Mar 2010
Posts: 7,265
Likes: 1,346
From: Prince George, BC
Another question to guys who have done this 2wd to 4wd conversion, and swapped all the mounts and brackets. What size bolts did you use to re-attach everything? 7/16 or 1/2 grade 8 bolts, nuts and washers?
Registered User
Joined: Aug 2013
Posts: 4,918
Likes: 603
From: Tulsa, OK
Yes that's a steering box brace. They were never really that common.
There was a company that used to reproduce them, but they are currently out of stock, and they have no plans to make another run on them.
I was lucky and found an original one off a Ramcharger on E-bay.
There was a company that used to reproduce them, but they are currently out of stock, and they have no plans to make another run on them.
I was lucky and found an original one off a Ramcharger on E-bay.
"They have no plans to make another run on them"
 . That's ok I think I know somebody that can make one.
Registered User
Joined: Aug 2013
Posts: 4,918
Likes: 603
From: Tulsa, OK
The stock crossmember bolts are 7/16 grade 5. but I bought all 1/2 grade 8 for the whole shooting match. I get them by the pound nuts washers and bolts.
Thread Starter
Registered User
Joined: Mar 2010
Posts: 7,265
Likes: 1,346
From: Prince George, BC
Not sure what the rating is on the cold rivets. But they are a 7/16. If I go 7/16 - Grade 8 with hardened washers? I will check with my commercial truck tech/ inspector friend of mine on this one.
Registered User
Joined: Aug 2013
Posts: 4,918
Likes: 603
From: Tulsa, OK
Next problem I'm having is with removing the bearings. Anyone who's done this in there shop/garage have any tricks to share?
I had to putt the cage and rollers off the counter shaft bearing so I could swing it up and out of the case.


I don't care about the 2wd main shaft...it's toast anyway due to the 5th gear failing. So I was just going to cut them off. But the counter shaft front bearing is sunk down within the gear...not sure how I'm going to get that one out?
You can see it in the pic as I'm lifting the the cluster out.
I had to putt the cage and rollers off the counter shaft bearing so I could swing it up and out of the case.
I don't care about the 2wd main shaft...it's toast anyway due to the 5th gear failing. So I was just going to cut them off. But the counter shaft front bearing is sunk down within the gear...not sure how I'm going to get that one out?
You can see it in the pic as I'm lifting the the cluster out.