
Inside our doors.


Thread Starter
Administrator


Joined: Nov 2004
Posts: 4,084
Likes: 235
From: Southern California
Part-1
Lets see what is inside our door.
My truck is a 1991 D-350 LE edition so it will have all of the fancy extras.
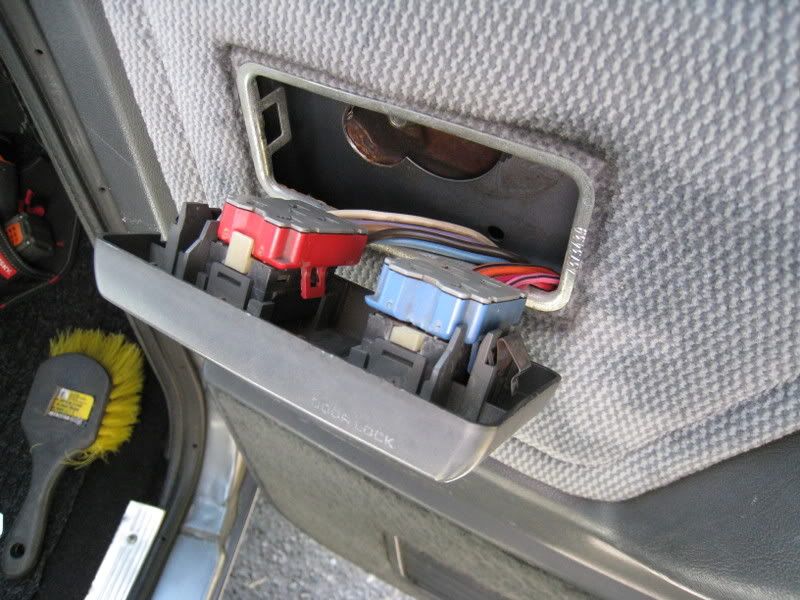
Here you can see the wiring harness for the power windows, door locks and power mirror.
The extra holes in the upper left were cut to easily access the window lift motor. This is covered in the Sticky under Window Motor Repair.
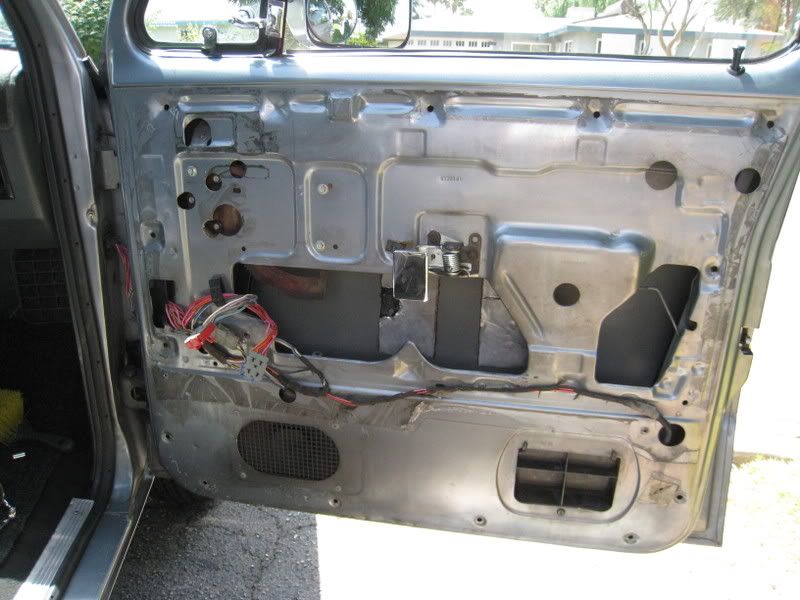
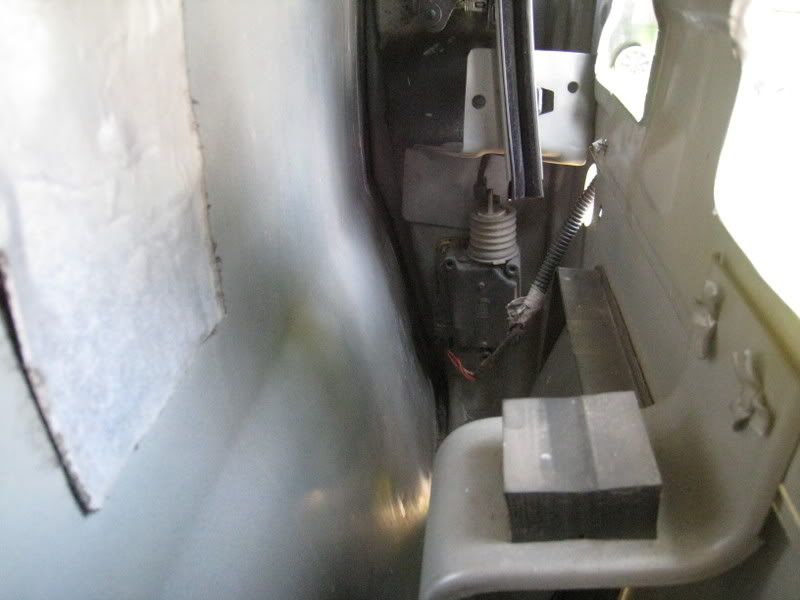
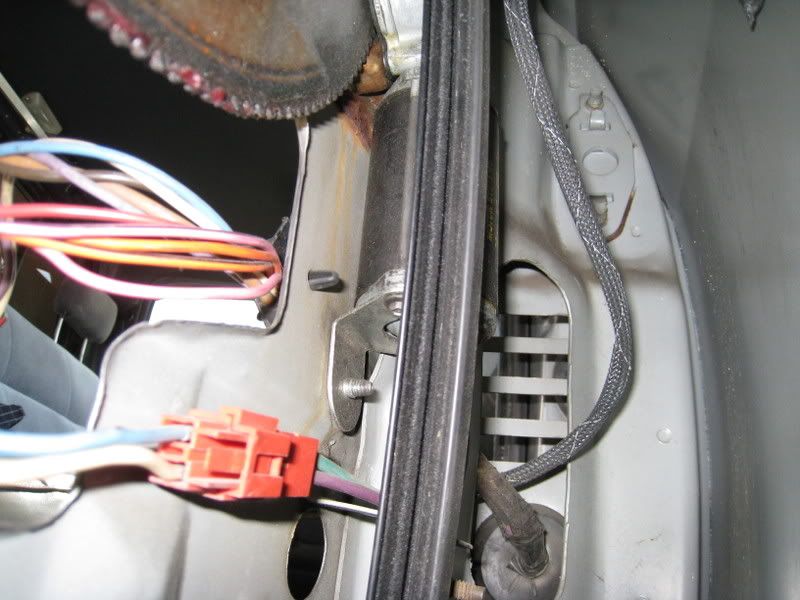
This is a view of the Power Lock actuator.
Notice the square patch on the left side of the door; this is how the factory deadens the sheet metal.
This is where you would want to install some deadening medium like DynaMat or some form of Tar board
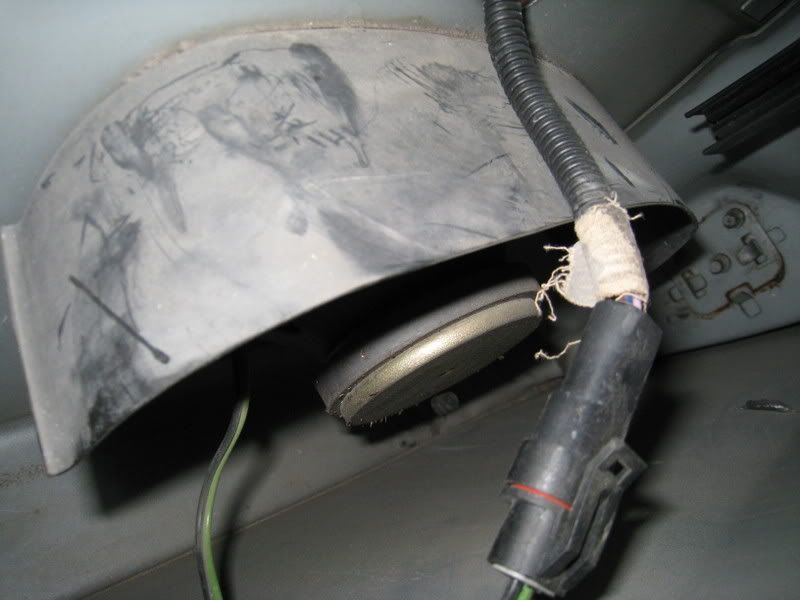
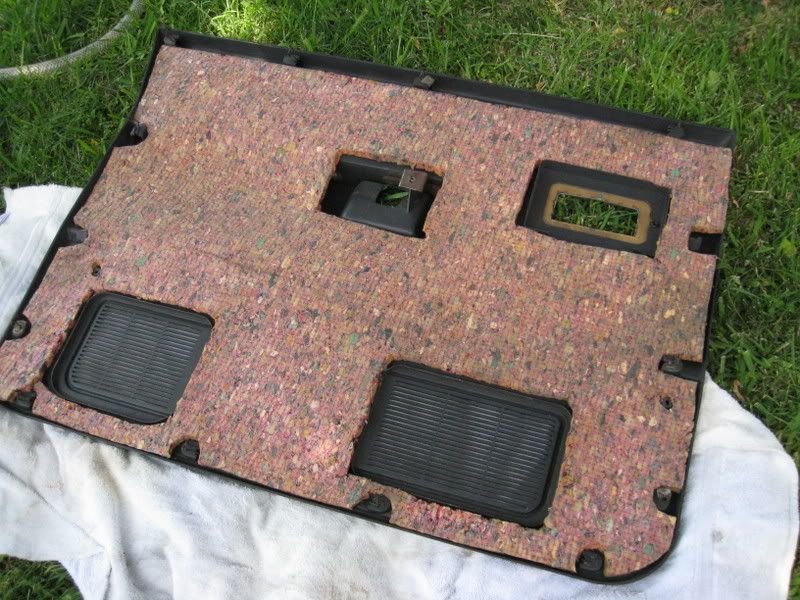
Inside of the lower hinge and the door speaker and connection.
Speaker and the weather shield.
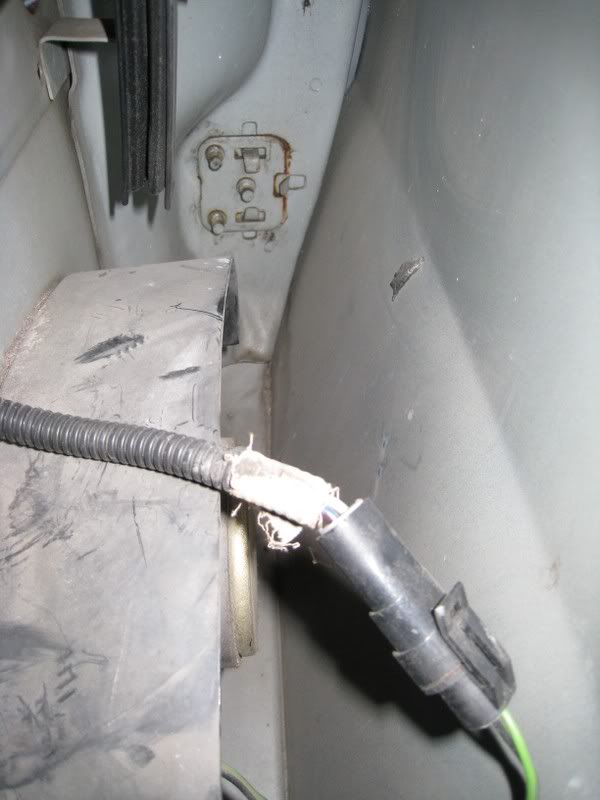
Harness as it enters the door; the harness going up is to the Power Mirror.
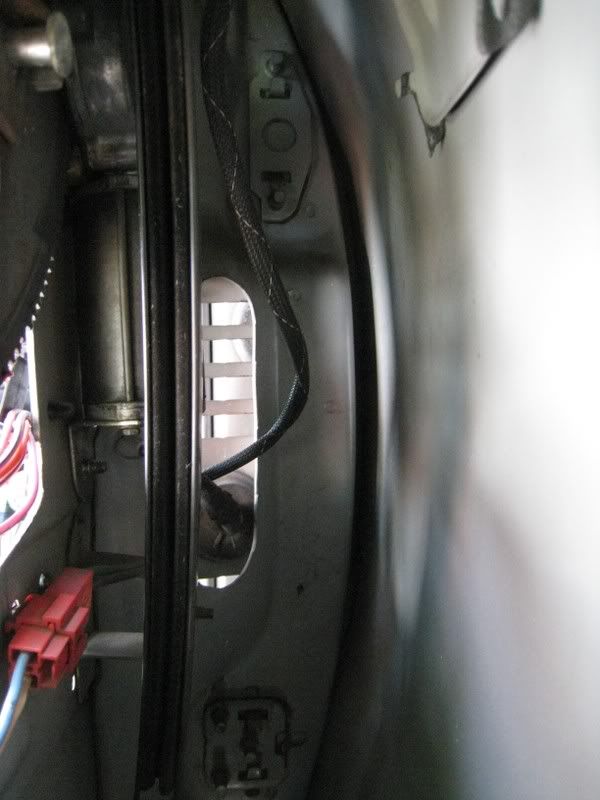
Bottom of the lift motor and it�s connection.
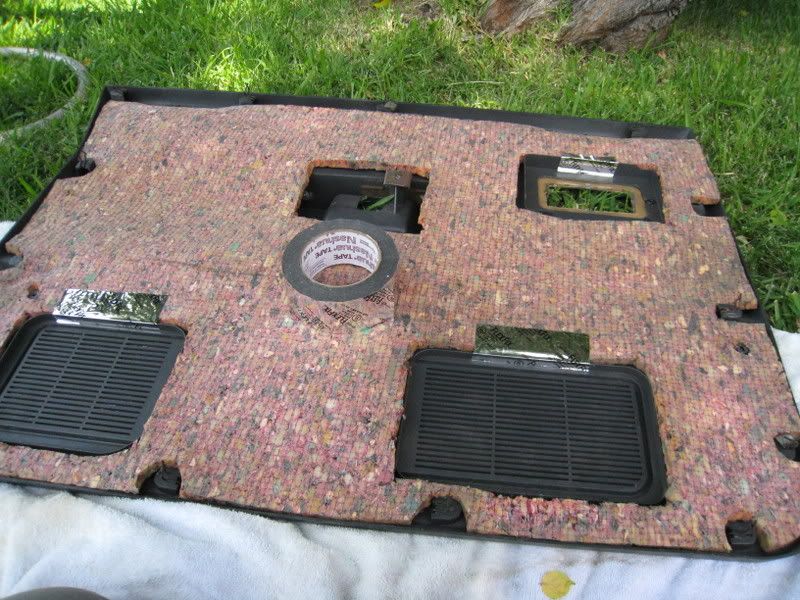
Here is how I quieted the interior of the door with carpet padding, also make sure that all of the spring clips are installed on the door panel.
This is how I keep it in place, Mylar HVAC tape.
Passengers side control panel.
I also inserted some foam insulation behind the switches to contact the door sheet metal to keep everything nice and tight.
Lets see what is inside our door.
My truck is a 1991 D-350 LE edition so it will have all of the fancy extras.
Here you can see the wiring harness for the power windows, door locks and power mirror.
The extra holes in the upper left were cut to easily access the window lift motor. This is covered in the Sticky under Window Motor Repair.
This is a view of the Power Lock actuator.
Notice the square patch on the left side of the door; this is how the factory deadens the sheet metal.
This is where you would want to install some deadening medium like DynaMat or some form of Tar board
Inside of the lower hinge and the door speaker and connection.
Speaker and the weather shield.
Harness as it enters the door; the harness going up is to the Power Mirror.
Bottom of the lift motor and it�s connection.
Here is how I quieted the interior of the door with carpet padding, also make sure that all of the spring clips are installed on the door panel.
This is how I keep it in place, Mylar HVAC tape.
Passengers side control panel.
I also inserted some foam insulation behind the switches to contact the door sheet metal to keep everything nice and tight.
Thread Starter
Administrator
Joined: Nov 2004
Posts: 4,084
Likes: 235
From: Southern California
Part-2
This is what the door latch assembly looks like.
It was really grungy looking so I cleaned it off using a good Carbonated Carburetor Cleaner and used compressed air to blow it dry. I then re-greased all of the moving parts with good quality grease.
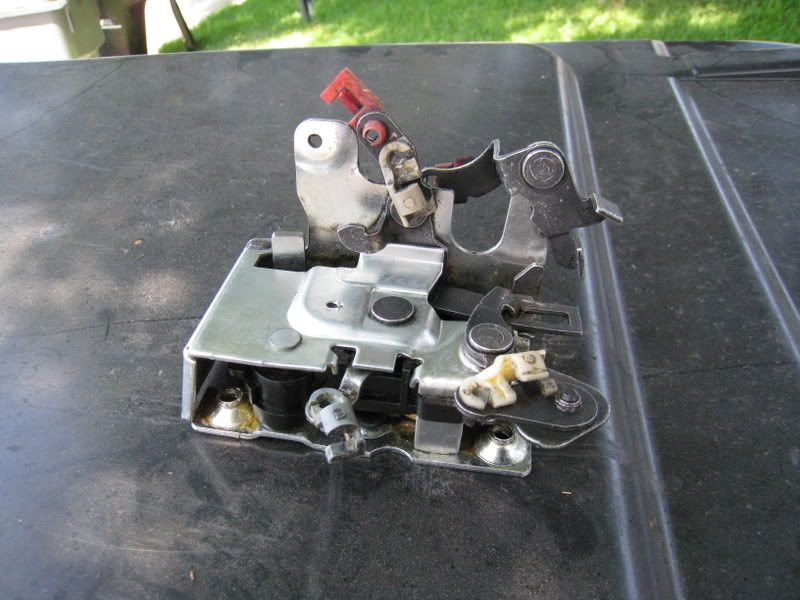
Just another view.
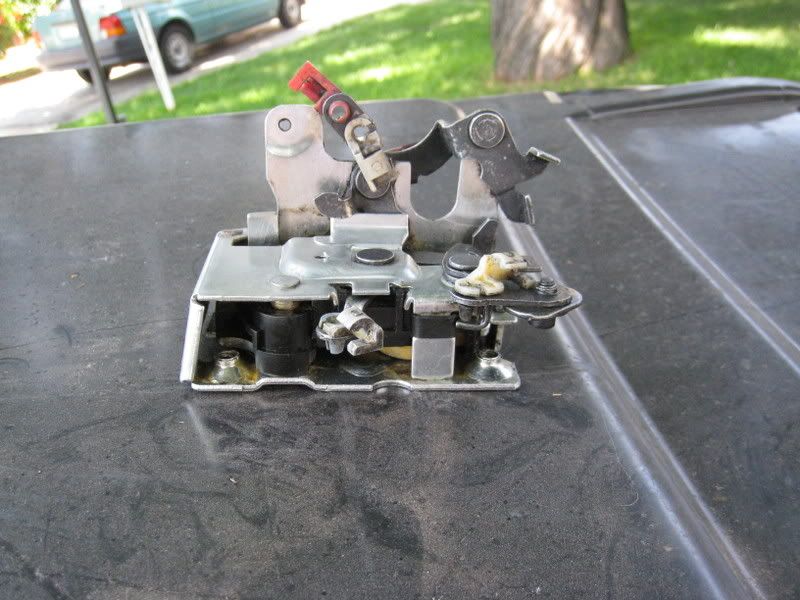
And another.
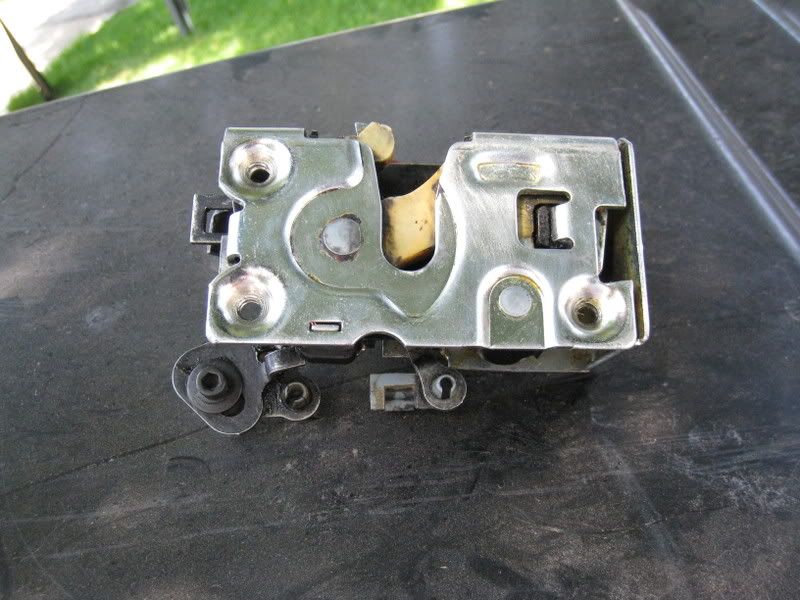
Afterwards I reinstalled it into the door and reconnected all of the linkages to the lock actuator and the lock button.
I hope this trip inside our door will be of some help to someone.
Jim
Dave,
Maybe we can save this for future reference.
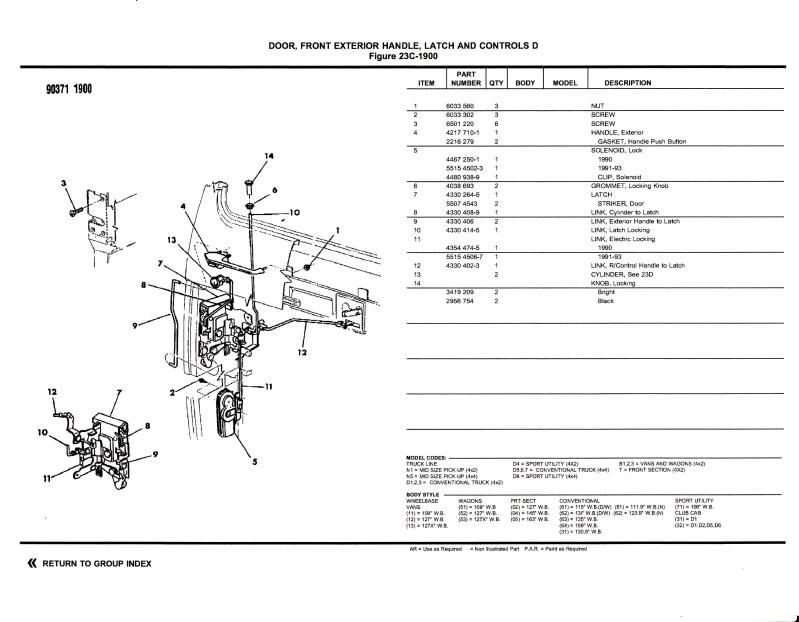
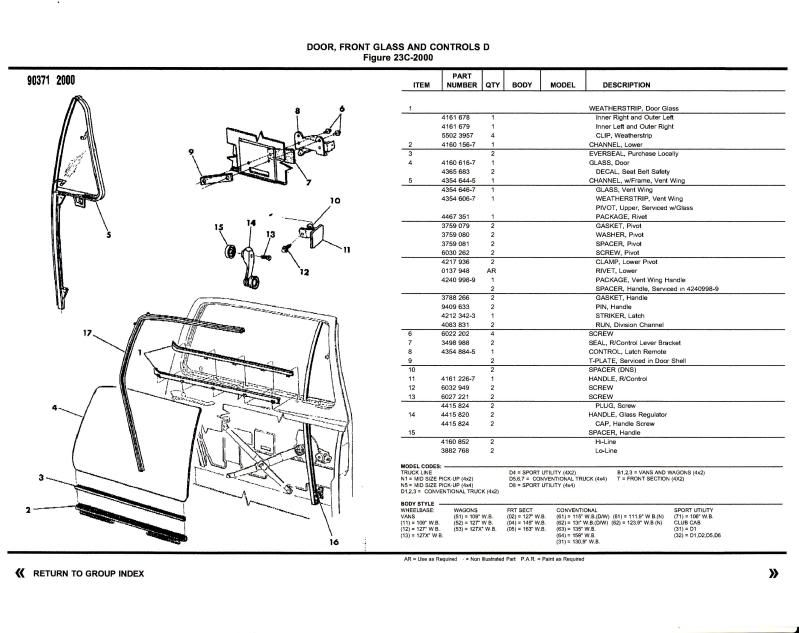
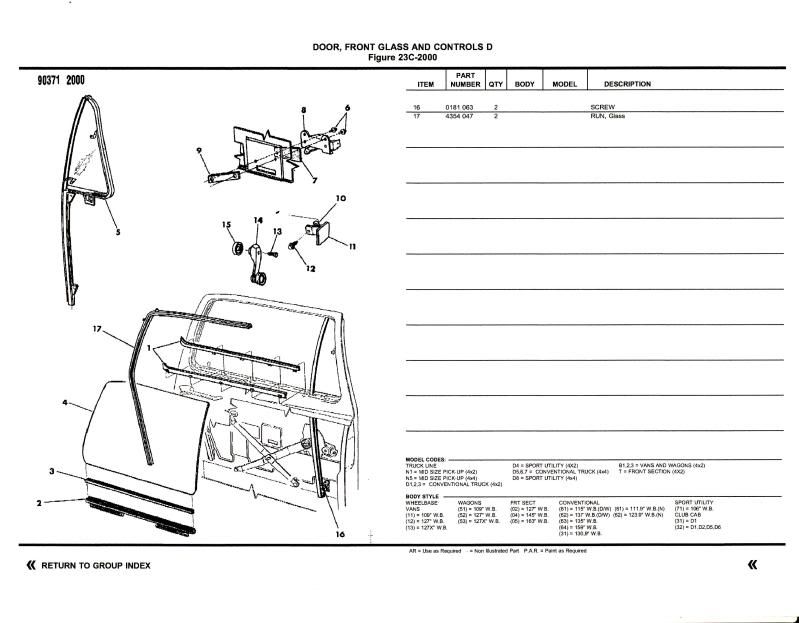
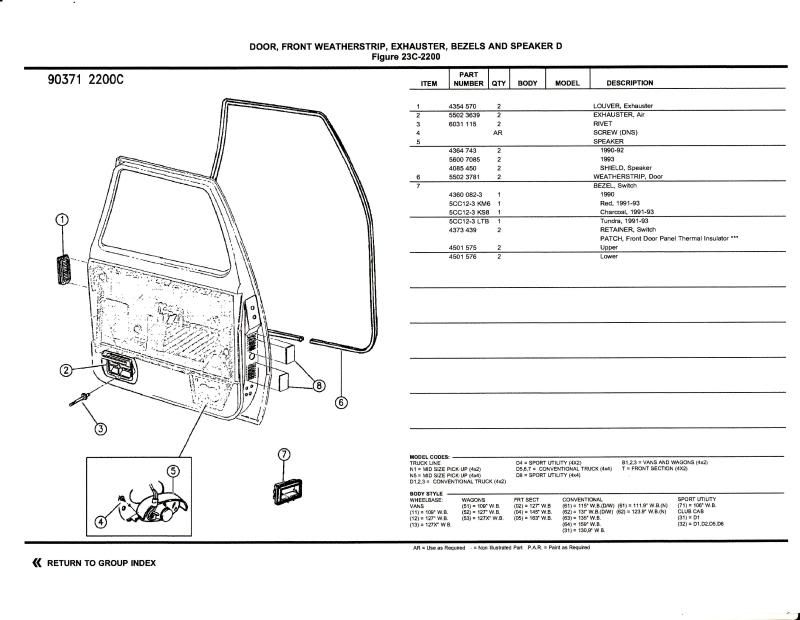
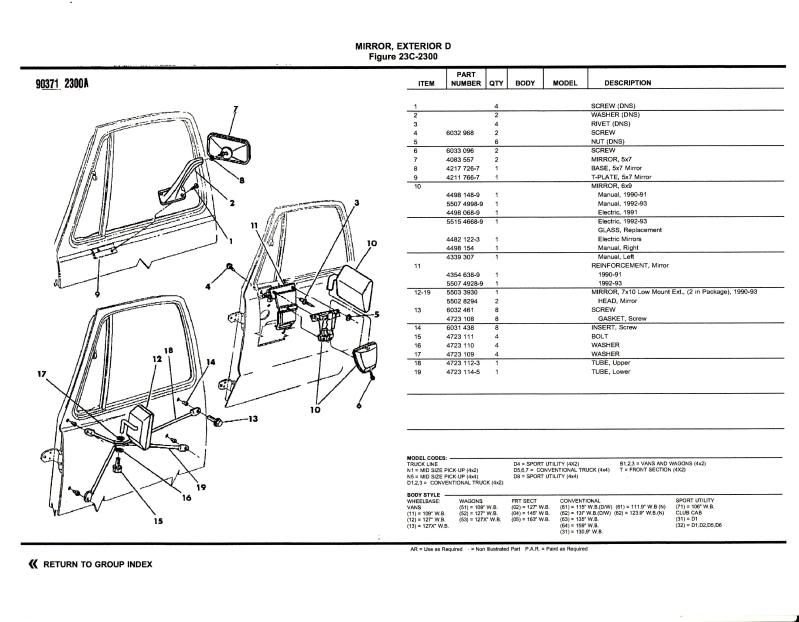
Here are some drawings and Part Numbers:

This is what the door latch assembly looks like.
It was really grungy looking so I cleaned it off using a good Carbonated Carburetor Cleaner and used compressed air to blow it dry. I then re-greased all of the moving parts with good quality grease.
Just another view.
And another.
Afterwards I reinstalled it into the door and reconnected all of the linkages to the lock actuator and the lock button.
I hope this trip inside our door will be of some help to someone.
Jim
Dave,
Maybe we can save this for future reference.
Here are some drawings and Part Numbers:
Last edited by Jim Lane; Dec 23, 2010 at 06:11 AM. Reason: To Add Part Numbers
Registered User
Joined: Dec 2007
Posts: 1,341
Likes: 1
From: Richmond, MI
let me tell you that you are the man, I really needed a pic of how the wiring ran, I forgot if it ran along the outside of the door and swept in to the plugs.. But this little write up you did sure helped... I just changed all the guts in both doors with some modifications... Because my new doors were way different than the old ones.. But nice write up and I'm sure it should go straight to the stick for a future referance..
Registered User
Joined: Jan 2005
Posts: 236
Likes: 0
From: Plant City FL
Jim I also really appreciate all of your write ups and the great pics along with them. I have'nt been able to do much to my truck lately but when I look at youre posts and write ups I get totally Inspired so thanks and keep it up!!!

Trending Topics

Thread Starter
Administrator
Joined: Nov 2004
Posts: 4,084
Likes: 235
From: Southern California
Thanks for the complements,
It stays so clean first because it is a California truck and it has never seen a salted road or mud up to the headlights and every time I wash the truck the engine also gets washed and dried with compressed air it get it also gets washed under the hood and wheel wells.
When I had the door panels off I wiped down the insides of the doors but I did miss a little on the speaker shield I see, Oops.
When I had my dash apart to repair the instrument cluster that gave me the opportunity to really do a good cleaning under the dash.
Whenever I work on anything I will always clean it out first so I don't get dirty, every time I get out of my truck I have a brush that I keep next to the door that I use to sweep out the floor several times a day and always at the end of the night and yes I have been told I have OCD.
I am glad you guys liked it.
Jim
Thread Starter
Administrator
Joined: Nov 2004
Posts: 4,084
Likes: 235
From: Southern California
Yes it did help quite a bit, before when I closed the door there would always be a rattle from all of the parts hitting each other but now there is just a solid clunk.
It also cut down on the noise from the outside by allot, if you look you�ll see the doors are a big acoustic chamber.
The padding is I think was 7/8" so I cut out the relief so it would sit flat on the door. I also made sure that all of the spring clips were there and installed into the holes in the door properly for a nice tight fit.
I am looking for a deadener to install onto the inside if the door shell to cut down on all of the sound, I have to look at the duct liner used in HVAC when I go the supply house, I could install it in a few sections through the access holes.
My goal is to be able to slap the outside of the door shell and have it not resonate at all, just a clunk.
Jim

Registered User
Joined: Mar 2013
Posts: 38
Likes: 1
From: Central California
Jim, unfortunately photobucket appears to have intentionally blurred all of the wonderful photos in this sticky. 
The new owners of photobucket now want to be paid so they have watermarked all the images. https://prnt.sc/p71hi1
The new owners of photobucket now want to be paid so they have watermarked all the images. https://prnt.sc/p71hi1

Thread
Thread Starter
Forum
Replies
Last Post
6.7L MegaCab
4th Gen Ram -Non Drivetrain- 2010 and Up
5
Nov 5, 2017 03:43 PM
cbrahs
3rd Gen High Performance and Accessories (5.9L Only)
69
Aug 8, 2007 10:40 AM