
How To Remove The HVAC Box

Thread Starter
Registered User
Joined: Feb 2005
Posts: 792
Likes: 30
From: Ontario, CANADA
How To Remove The HVAC Box
Here are the steps needed to remove your HVAC box from the vehicle
to be able to change your heater and evaporator coils or clean-out
the box.
FROM UNDER THE HOOD
1- Disconnect negative battery cable
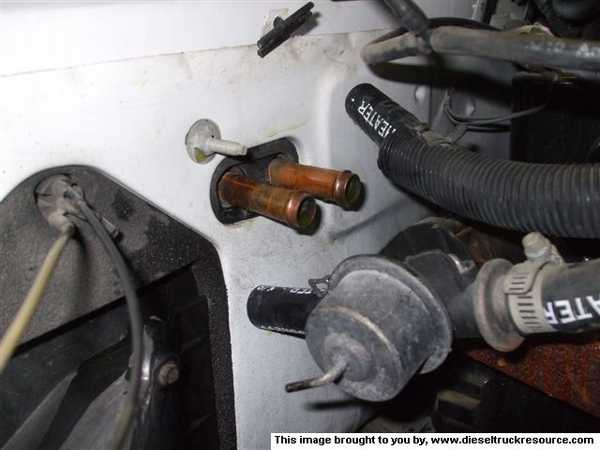
2-Disconnect heater hoses at firewall
3-Remove isulation cover from firewall
4-Remove condensation drain tube
5-Evacuate the freon from the AC system
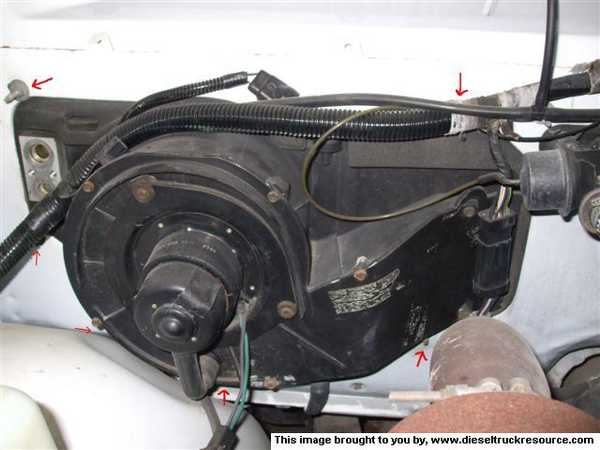
6-Remove Blower Motor
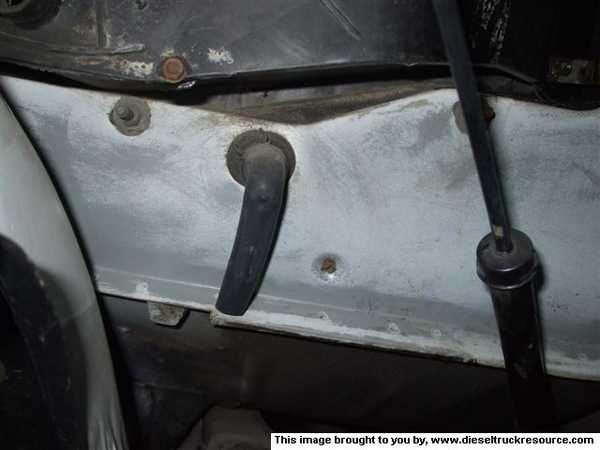
7-Unplug vacuum lines from brake booster and heater shutoff valve
8-Push vacuum line firewall grommet to cab side
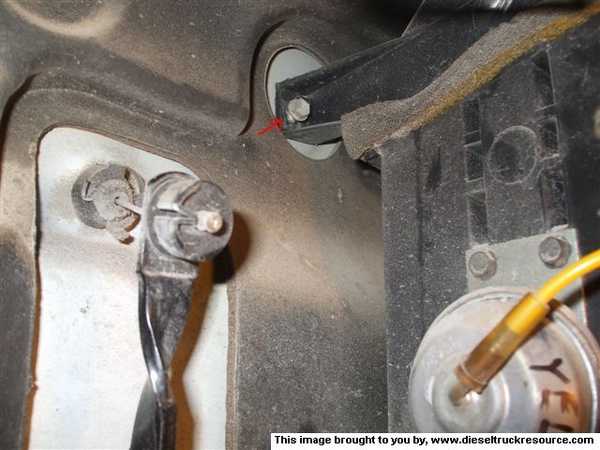
9-Remove freon lines and H-block valve
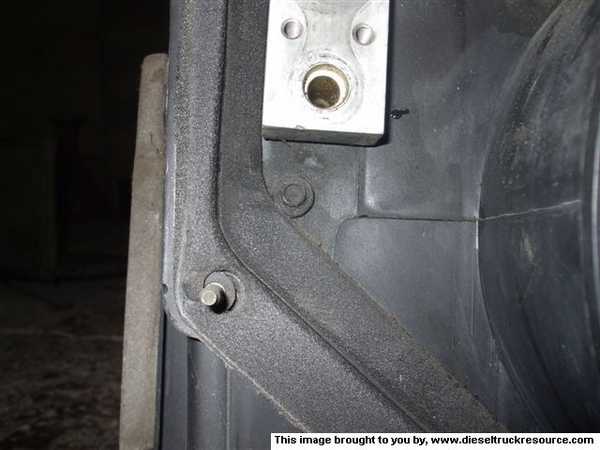
10- remove nuts that hold heater box to firewall
FROM ISIDE THE CAB
11-remove glove box door
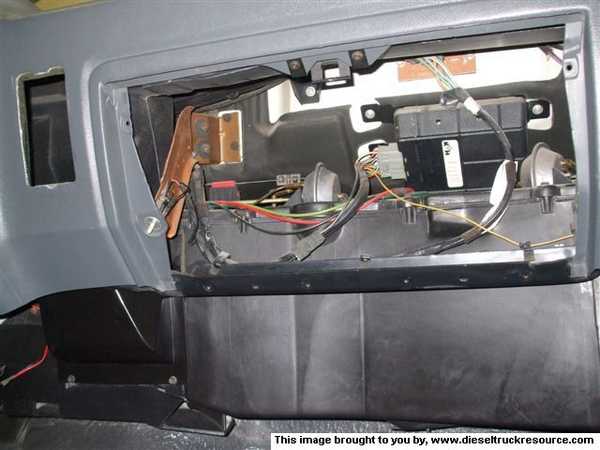
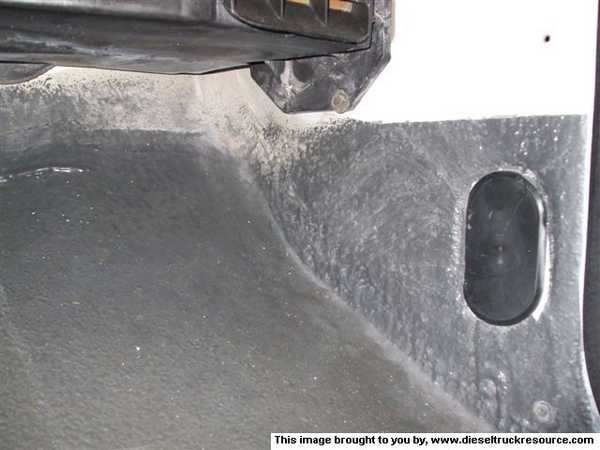
12-Remove lower right kick panel
13- Remove fuse block cover, let the fuse block hang down
remove shift indicator tab from column
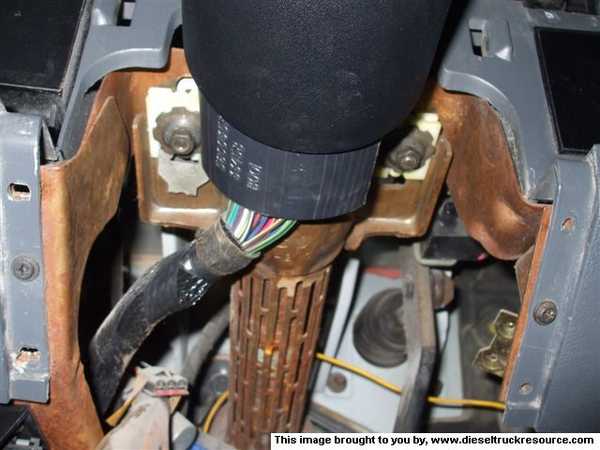
14- Loosen steering coloumn support nuts to the bottom of the studs
(this makes removing the instrument panel bezel easier)
15- Remove instrument panel bezel and message center display
(removing these parts makes your dash more flexible whe the time comes
to flex the dash)
16- Remove instrument panel display and radio
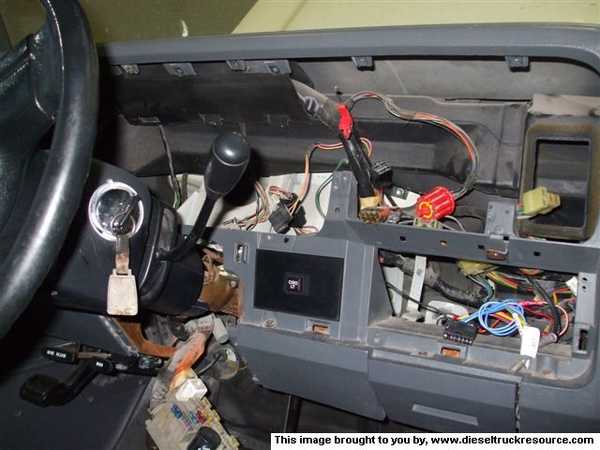
17- remove ashtray and it's support
18-Remove the heater control unit
19-Remove the ABS control unit
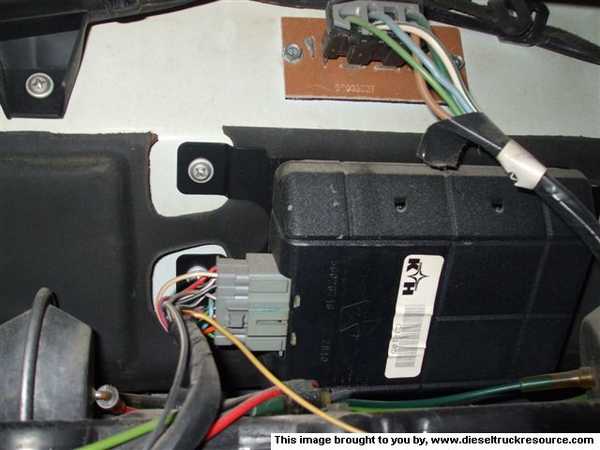
20-Disconnect the temperature blend cable from the heater box
(push in red tab and lift up)
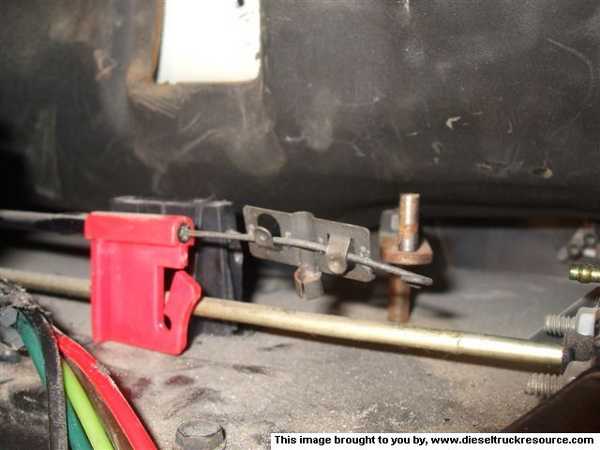
21- Disconnect electrical connections from HVAC box
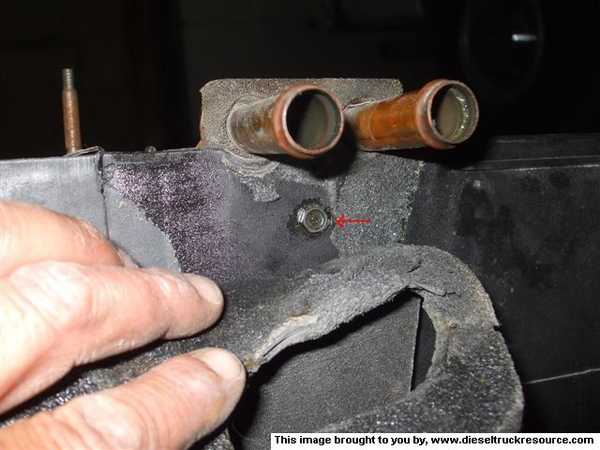
22- Disconnect vacuum lines from HVAC box (mark the colors)
23- Unscrew and remove the duct vent duct
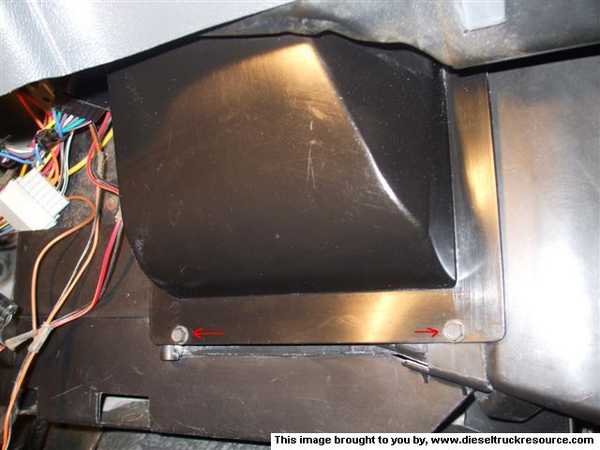
24- Unscrew and remove the floor delfector
Continued on How To Remove The HVAC Box, PART 2
to be able to change your heater and evaporator coils or clean-out
the box.
FROM UNDER THE HOOD
1- Disconnect negative battery cable
2-Disconnect heater hoses at firewall
3-Remove isulation cover from firewall
4-Remove condensation drain tube
5-Evacuate the freon from the AC system
6-Remove Blower Motor
7-Unplug vacuum lines from brake booster and heater shutoff valve
8-Push vacuum line firewall grommet to cab side
9-Remove freon lines and H-block valve
10- remove nuts that hold heater box to firewall
FROM ISIDE THE CAB
11-remove glove box door
12-Remove lower right kick panel
13- Remove fuse block cover, let the fuse block hang down
remove shift indicator tab from column
14- Loosen steering coloumn support nuts to the bottom of the studs
(this makes removing the instrument panel bezel easier)
15- Remove instrument panel bezel and message center display
(removing these parts makes your dash more flexible whe the time comes
to flex the dash)
16- Remove instrument panel display and radio
17- remove ashtray and it's support
18-Remove the heater control unit
19-Remove the ABS control unit
20-Disconnect the temperature blend cable from the heater box
(push in red tab and lift up)
21- Disconnect electrical connections from HVAC box
22- Disconnect vacuum lines from HVAC box (mark the colors)
23- Unscrew and remove the duct vent duct
24- Unscrew and remove the floor delfector
Continued on How To Remove The HVAC Box, PART 2
Thread Starter
Registered User
Joined: Feb 2005
Posts: 792
Likes: 30
From: Ontario, CANADA
How To Remove The HVAC Box, PART 2
25-Remove the floor air deflector
26-Remove dash brace left side of glove box
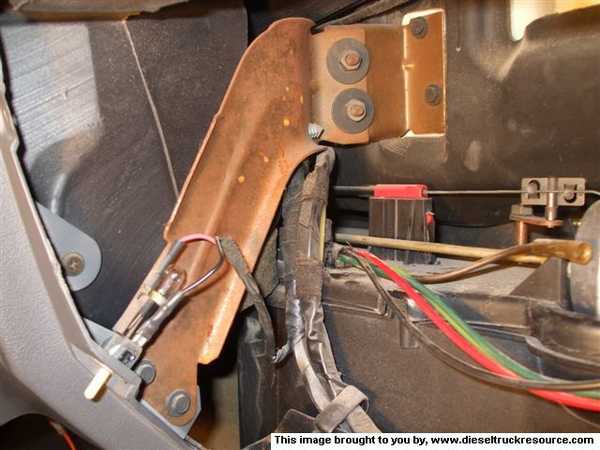
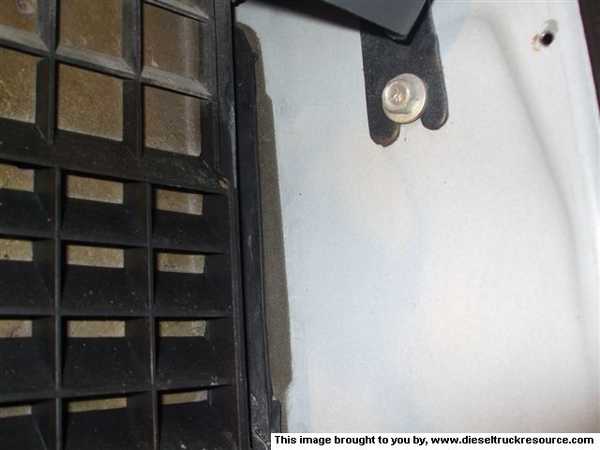
27- Remove brace bolts above ashtray support
28- Remove screw above accelerator pedal
29- Remove support screw from right kick panel area
30-Remove right side dash support bolt
31- Pull on right side lower dash, hook support bracket onto door edge
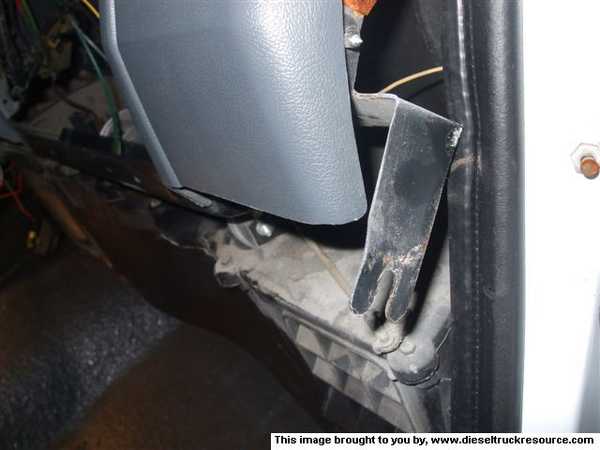
32- Pull heater box away from firewall, lower from under dash while turning
firewall side towards floor. HVAC box should now slide out.
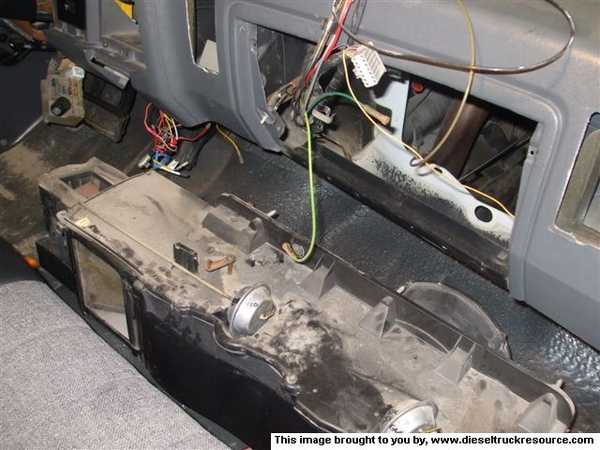
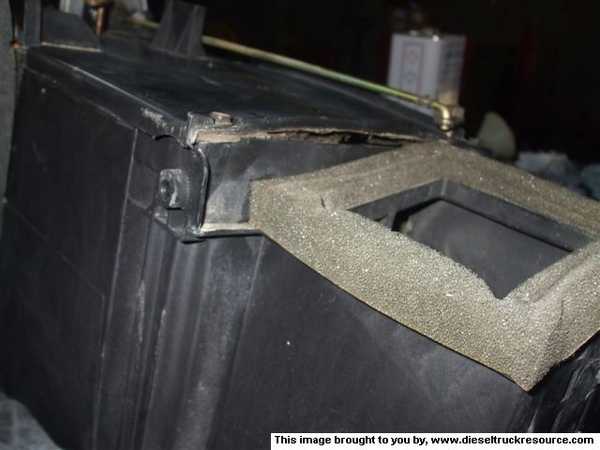
33- Remove top cover screws and lever arms to open HVAC box
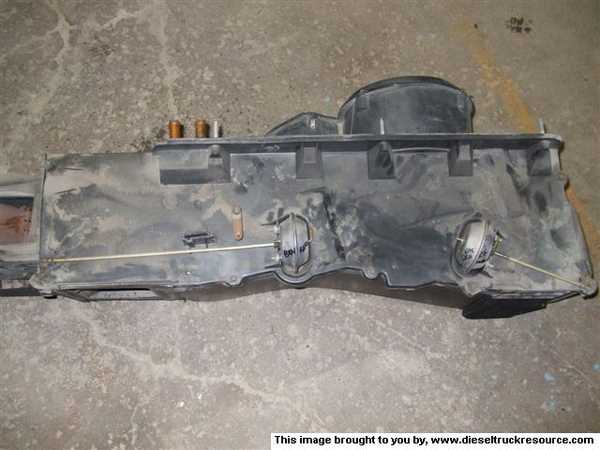
34- watch for hidden screws
Continued on How To Remove The HVAC Box, PART 3
26-Remove dash brace left side of glove box
27- Remove brace bolts above ashtray support
28- Remove screw above accelerator pedal
29- Remove support screw from right kick panel area
30-Remove right side dash support bolt
31- Pull on right side lower dash, hook support bracket onto door edge
32- Pull heater box away from firewall, lower from under dash while turning
firewall side towards floor. HVAC box should now slide out.
33- Remove top cover screws and lever arms to open HVAC box
34- watch for hidden screws
Continued on How To Remove The HVAC Box, PART 3
Thread Starter
Registered User
Joined: Feb 2005
Posts: 792
Likes: 30
From: Ontario, CANADA
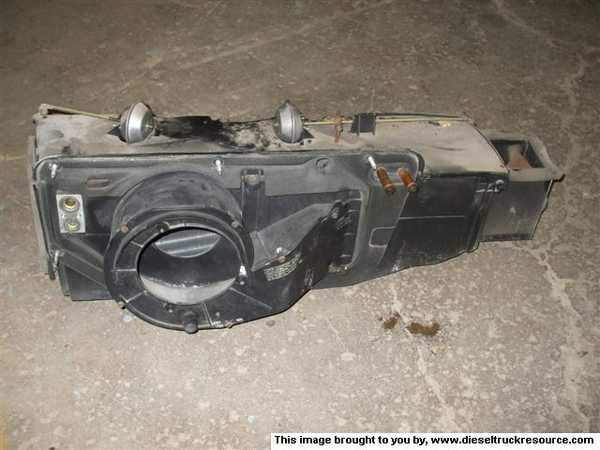
How To Remove The HVAC Box, PART 3
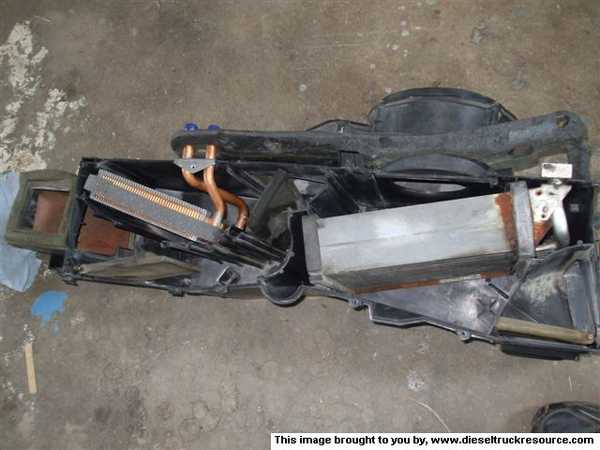
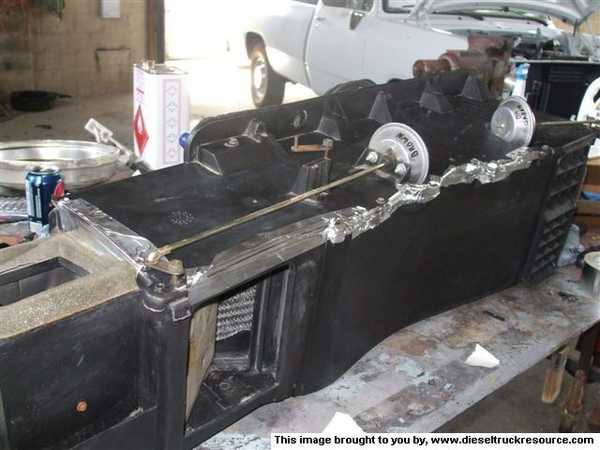
35- Once you have the top cover removed you can see the evaporator coil and the heater coil along with all the debris.
Here is your heater core
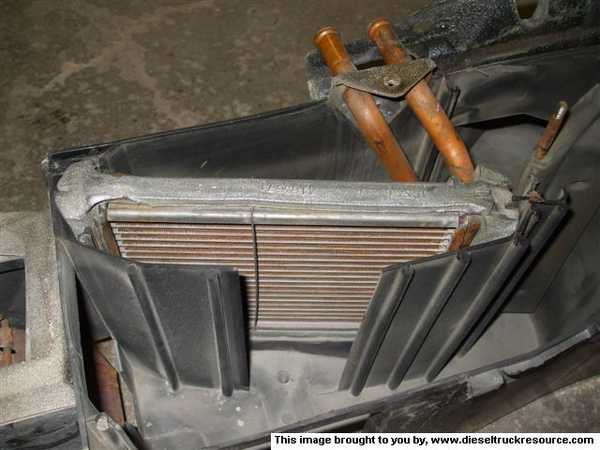
Here is your evaporator coil
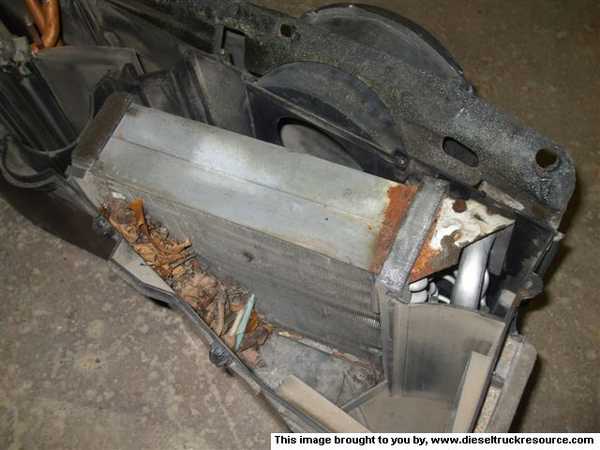
36- Take out your coils and then give your HVAC box a good washout with soap and water
37-Here is a shot of the old and new heater cores together

38- Wrap the new heater core with the foam insulator supplied with the core

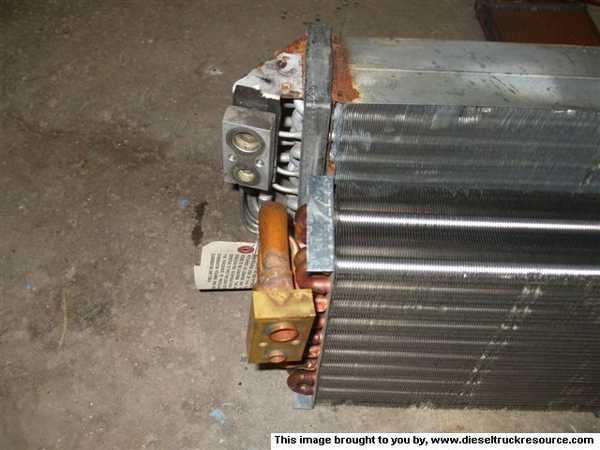
39- I cleaned the evap core and re-used it. The replacement coils weren't
fitting good. Notice the angle of the new core's ports
40- I flushed my evap core by filling it with laquer thinner, let it sit
about 15 minuites then blowing out with shop air. Did it twice and blew
through both ports. I made a trigger lock for my blowgun and set it
for 40psi. Let i blow down for half an hour to thoroughly dry it out.

41- Replace the flushed coil back into the HVAC box
42- Check that the internal doors work smoothly on their pivots,
dab the hinge pins with grease during re-assembly
43- Re-install the top cover of the HVAC box, if your box does not seal well because of warpage then use some foil tape to seal the warped areas

44- Check the vacuum servos for proper operation.
Re-install HVAC box to vehicle
Here is your heater core
Here is your evaporator coil
36- Take out your coils and then give your HVAC box a good washout with soap and water
37-Here is a shot of the old and new heater cores together
38- Wrap the new heater core with the foam insulator supplied with the core
39- I cleaned the evap core and re-used it. The replacement coils weren't
fitting good. Notice the angle of the new core's ports
40- I flushed my evap core by filling it with laquer thinner, let it sit
about 15 minuites then blowing out with shop air. Did it twice and blew
through both ports. I made a trigger lock for my blowgun and set it
for 40psi. Let i blow down for half an hour to thoroughly dry it out.
41- Replace the flushed coil back into the HVAC box
42- Check that the internal doors work smoothly on their pivots,
dab the hinge pins with grease during re-assembly
43- Re-install the top cover of the HVAC box, if your box does not seal well because of warpage then use some foil tape to seal the warped areas
44- Check the vacuum servos for proper operation.
Re-install HVAC box to vehicle


Trending Topics

Thread Starter
Registered User
Joined: Feb 2005
Posts: 792
Likes: 30
From: Ontario, CANADA
Thanks,
I cut the heater box on my blue work truck to clean out the box,
I couldn't bear to do that to my play truck, did it the hard way instead.
It really isn't that difficult of a job if you know the steps.
For my next trick I'll be changing the intake manifold gaskets
on the wife's chevy 3.1
I cut the heater box on my blue work truck to clean out the box,
I couldn't bear to do that to my play truck, did it the hard way instead.
It really isn't that difficult of a job if you know the steps.
For my next trick I'll be changing the intake manifold gaskets
on the wife's chevy 3.1

 my dad has one and its indestructible


Thread Starter
Registered User
Joined: Feb 2005
Posts: 792
Likes: 30
From: Ontario, CANADA
I think it was "Four Seasons".
I returned the coil, my parts store brought in another and its ports were out of alignment just as bad, so I cleaned out my original and reused it.
I returned the coil, my parts store brought in another and its ports were out of alignment just as bad, so I cleaned out my original and reused it.

