
How To Remove The HVAC Box


Thread Starter
Registered User
Joined: Feb 2005
Posts: 792
Likes: 30
From: Ontario, CANADA
I made some sheet metal covers to replace the rubber grommets covering the cab mount access holes, plastered the exposed threads of the cab mount bolts
with antsieze in case i ever needed to get them out in the future.
I used some bodyfiller to level out some of the grooves in the floor.
I re routed the seat belt wires that run under the carpet to run under the sill plate.
with antsieze in case i ever needed to get them out in the future.
I used some bodyfiller to level out some of the grooves in the floor.
I re routed the seat belt wires that run under the carpet to run under the sill plate.

Registered User

Joined: May 2006
Posts: 722
Likes: 0
From: Brighton CO and Cheyenne WY
The NAPA part number for a heater core with A/C for a 1992 is 660 3343. The parts guys could not find a Diesel listed for this year so we went with a gas engine 5.9 which seems to be the same. Factory core is a thin single core; new one is a thick two core.
There is not near enough foam supplied with new core to fill in the voids in the bottom corners to seal it up tight inside the box.
I recommend buying some extra.
Out of the three nuts that hold the rod linkage to the flapper doors, two of mine were completely loose. Check these also.
I cut the end of my old core off to see what was inside and found just a bunch of fuzz looking stuff. No hard cruddy stuff like I was expecting.
I used my mouth to blow through the factory core and took about 2-2.5 seconds. The new one takes about one. Definately will flow more.
Registered User
Joined: Nov 2006
Posts: 807
Likes: 41
From: Englewood, TN
And does NAPA also offer an evaporator coil with proper fitment?
Registered User
Joined: May 2006
Posts: 722
Likes: 0
From: Brighton CO and Cheyenne WY
I did not look into this since I had no plans to change the evap coil.
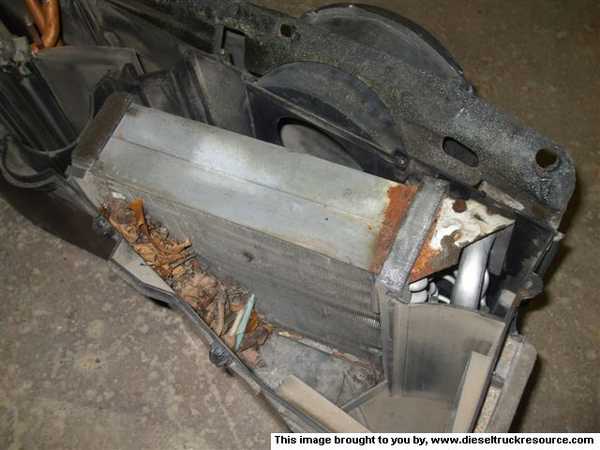
My evap. coil had about the same amount of leaves and needles inside as the previous pictures show (post #3). About 20% blocked.
My evap. coil had about the same amount of leaves and needles inside as the previous pictures show (post #3). About 20% blocked.
Registered User
Joined: Mar 2011
Posts: 22
Likes: 0
From: Texas
Does anyone know where I can get the vacuum servo check valves? Mine has defaulted to defrost and my research and experience leads me to believe its a vacuum leak. Does anyone have the part number for these? Do I have to remove the whole unit to change them out? I am hoping for a easier swap than to pull the entire HVAC.
OR...does anyone else have any insight on this. Maybe a vacuum leak in a line? Its going to be hot soon and I'd like to get this fixed.
Thanks
Shawn
OR...does anyone else have any insight on this. Maybe a vacuum leak in a line? Its going to be hot soon and I'd like to get this fixed.
Thanks
Shawn

Registered User
Joined: Dec 2005
Posts: 234
Likes: 0
From: gainesville, florida
I picked up one of the heater cores at NAPA part #6603343. they must have changed them it is all aluminum hear is a picture. has anyone used the newer aluminum ones? or should I look for a copper one?

Registered User
Joined: Jul 2012
Posts: 12
Likes: 0
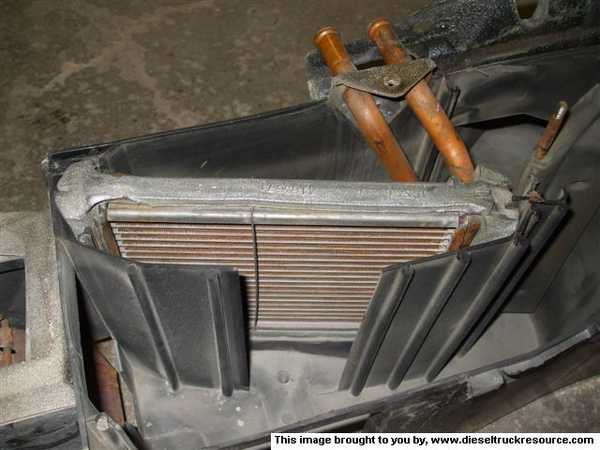
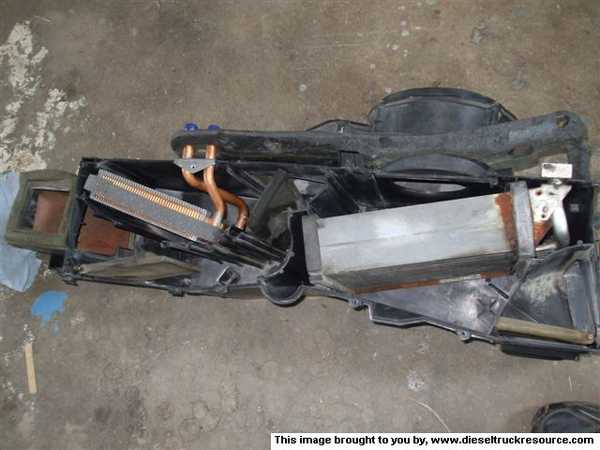
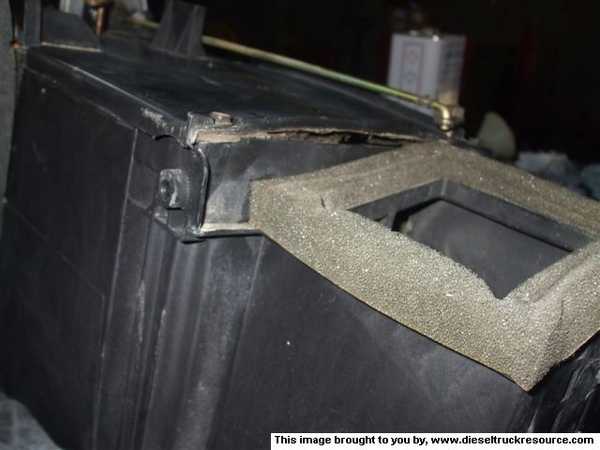
35- Once you have the top cover removed you can see the evaporator coil and the heater coil along with all the debris.
Here is your heater core
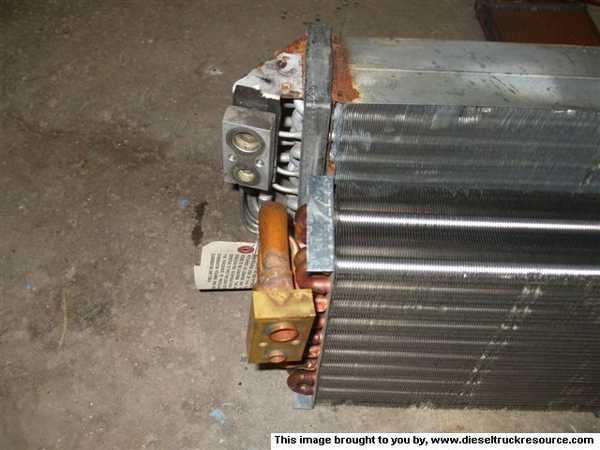
Here is your evaporator coil
36- Take out your coils and then give your HVAC box a good washout with soap and water
37-Here is a shot of the old and new heater cores together

38- Wrap the new heater core with the foam insulator supplied with the core

39- I cleaned the evap core and re-used it. The replacement coils weren't
fitting good. Notice the angle of the new core's ports
40- I flushed my evap core by filling it with laquer thinner, let it sit
about 15 minuites then blowing out with shop air. Did it twice and blew
through both ports. I made a trigger lock for my blowgun and set it
for 40psi. Let i blow down for half an hour to thoroughly dry it out.

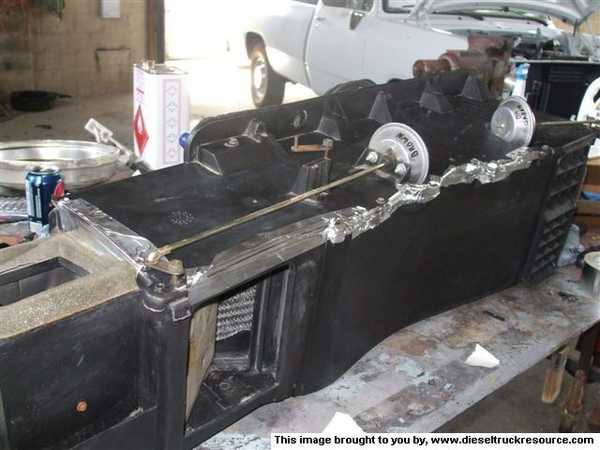
41- Replace the flushed coil back into the HVAC box
42- Check that the internal doors work smoothly on their pivots,
dab the hinge pins with grease during re-assembly
43- Re-install the top cover of the HVAC box, if your box does not seal well because of warpage then use some foil tape to seal the warped areas

44- Check the vacuum servos for proper operation.
Re-install HVAC box to vehicle
Here is your heater core
Here is your evaporator coil
36- Take out your coils and then give your HVAC box a good washout with soap and water
37-Here is a shot of the old and new heater cores together
38- Wrap the new heater core with the foam insulator supplied with the core
39- I cleaned the evap core and re-used it. The replacement coils weren't
fitting good. Notice the angle of the new core's ports
40- I flushed my evap core by filling it with laquer thinner, let it sit
about 15 minuites then blowing out with shop air. Did it twice and blew
through both ports. I made a trigger lock for my blowgun and set it
for 40psi. Let i blow down for half an hour to thoroughly dry it out.
41- Replace the flushed coil back into the HVAC box
42- Check that the internal doors work smoothly on their pivots,
dab the hinge pins with grease during re-assembly
43- Re-install the top cover of the HVAC box, if your box does not seal well because of warpage then use some foil tape to seal the warped areas
44- Check the vacuum servos for proper operation.
Re-install HVAC box to vehicle
How exactly do you check the vacuum servos for proper operation? I do know that my heat only blows from the floor so I guess the servos may be bad? Figured I might was well do all of this right the first time since I dont wanna have to take this thing out twice.
Anything else to do while the box is out?
Thanks!
Thread Starter
Registered User
Joined: Feb 2005
Posts: 792
Likes: 30
From: Ontario, CANADA
You could use a vacuum hand pump, or you could just stick a piece of hose
on the servo and draw vacuum with your mouth.
Check that the moving door inside aren't siezed on the hinges.
on the servo and draw vacuum with your mouth.
Check that the moving door inside aren't siezed on the hinges.
Registered User
Joined: Feb 2005
Posts: 2,658
Likes: 85
Make sure you have hooked up the vacuum feed properly and that one of the little nipples on the vacuum firewall junction didn't rip or tear upon removal. If it did, then it will leak and not drive the motors. Luckily you have a few extra pass-throughs on that junction block to use in this case. Worth a try anyway. Mine tore when I disconnected it.
On a side note this job took me about 3 hours as well. I had been putting it off all summer. Nice pics and instructions, thanks Jim.
On a side note this job took me about 3 hours as well. I had been putting it off all summer. Nice pics and instructions, thanks Jim.
Registered User
Joined: Dec 2007
Posts: 155
Likes: 1
Is it possible to pull the dash and leave the the HVAC box, and just pull the lid to change the heater core? I don't want to disconnect my A/C, its still R12 and it works great. Its also about $130 per lb to get R12 put back in my system. Local shop said it would take 2 to 2-1/2 lbs. Thanks.


Registered User
Joined: Nov 2007
Posts: 780
Likes: 42
Anyone have a good brand on evaporator cores?
The napa one uses the same picture as 4-seasons shown on rockautoparts...
For heater core I notice dodge still sells one for $232 from parts.com(list $330).
Michael
The napa one uses the same picture as 4-seasons shown on rockautoparts...
For heater core I notice dodge still sells one for $232 from parts.com(list $330).
Michael

Thread
Thread Starter
Forum
Replies
Last Post
RoadDiesel
12 Valve Engine and Drivetrain
2
Aug 7, 2012 06:06 PM
JasonblkZ06
2nd Gen. Dodge Ram - No Drivetrain
2
May 11, 2007 05:46 PM
Dodgezilla
3rd Gen Engine and Drivetrain -> 2003-2007
4
Jul 17, 2004 05:24 AM