
Crew Cab Project has Started


Thread Starter
Registered User
Joined: Nov 2010
Posts: 268
Likes: 13
From: Bradenton, Fla
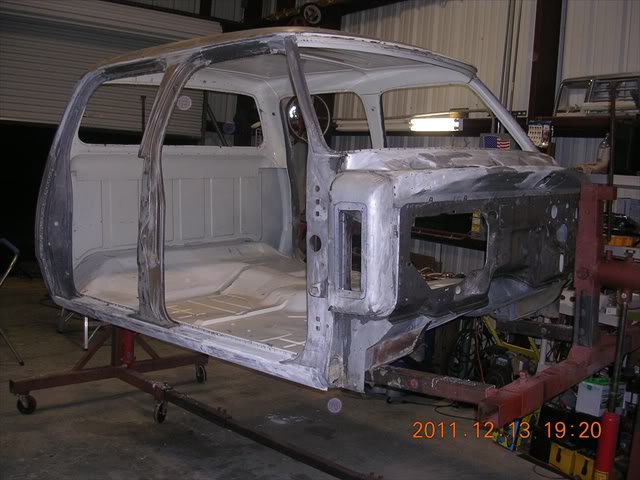
Hi, Thanks for the positive feedback. She's an automatic. So far only minor repairs are needed. I've removed all the seam sealer on all the door jamb joints, the exterior roof seam, cab corners and the roof drip rail. The interior seam sealer is in excellent shape so I won't remove any of it. It does have a dent on both sides of the cab corners from a topper, but their minor. Some holes in the firewall and a couple on the floor to weld up from an aftermarket cruise control from the gasser that was in it. The cowl has cacked on the passenger side but not the drivers side. But I'll be welding them both up to reinforce them. Sure is nice to work with a rust free body though. It really was worth the effort to drive to Arizona to get this truck!
By the way anyone that's going to mess with removing the seam sealer. After trial and error I've found that using a heat gun and craftsman tools pick tools work the best removing the old crappy stuff. I'll post pic's of the picks I use tommorrow.
By the way anyone that's going to mess with removing the seam sealer. After trial and error I've found that using a heat gun and craftsman tools pick tools work the best removing the old crappy stuff. I'll post pic's of the picks I use tommorrow.
Thread Starter
Registered User
Joined: Nov 2010
Posts: 268
Likes: 13
From: Bradenton, Fla
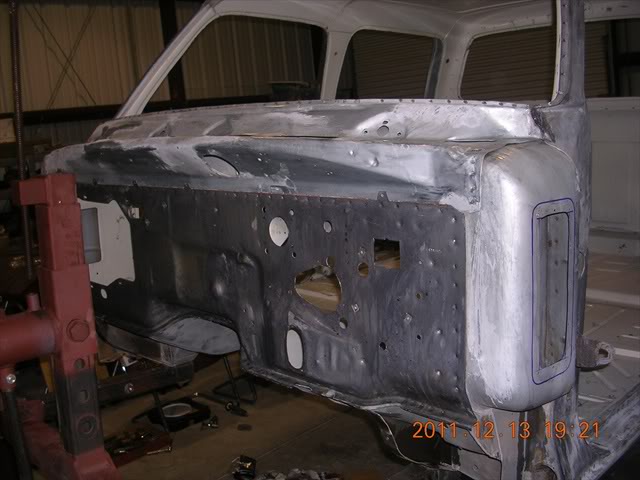
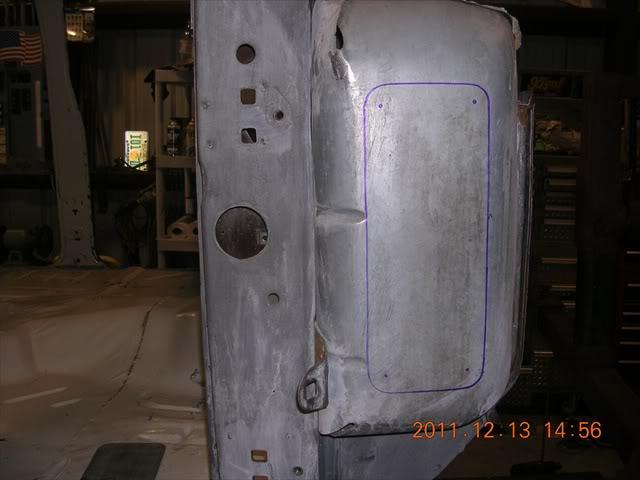
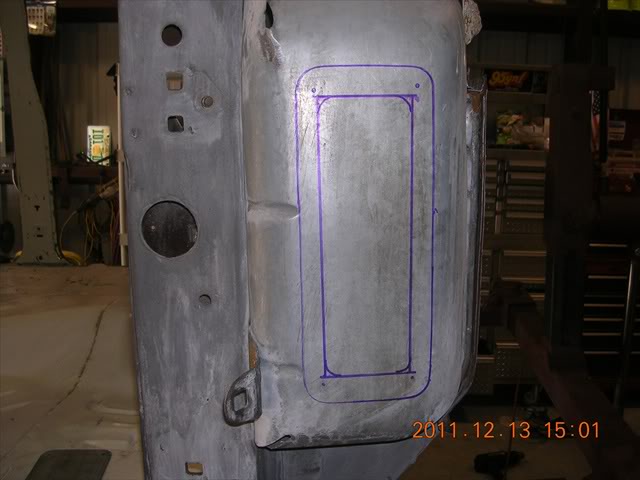
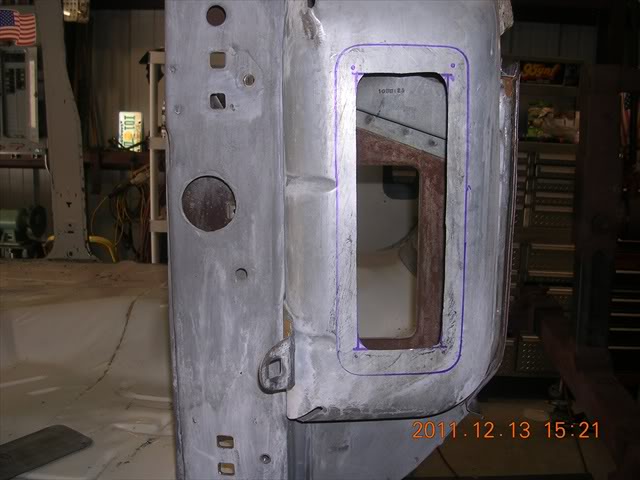
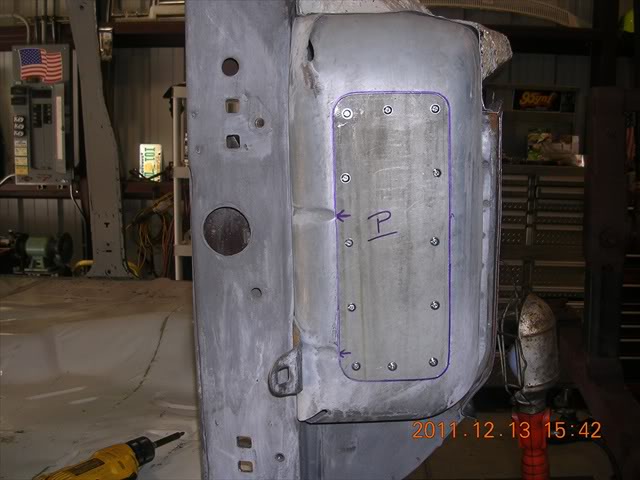
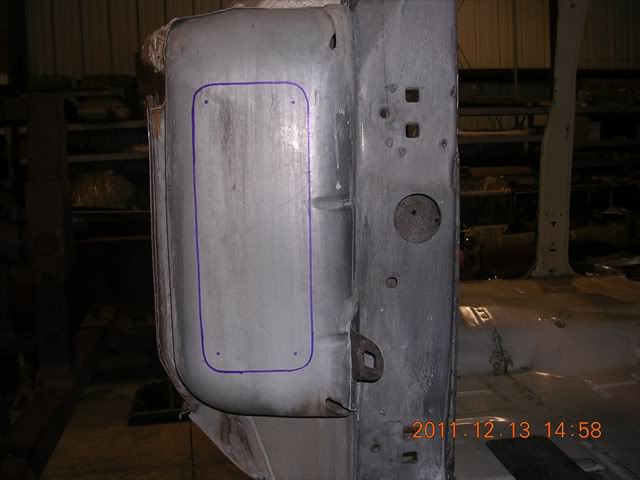
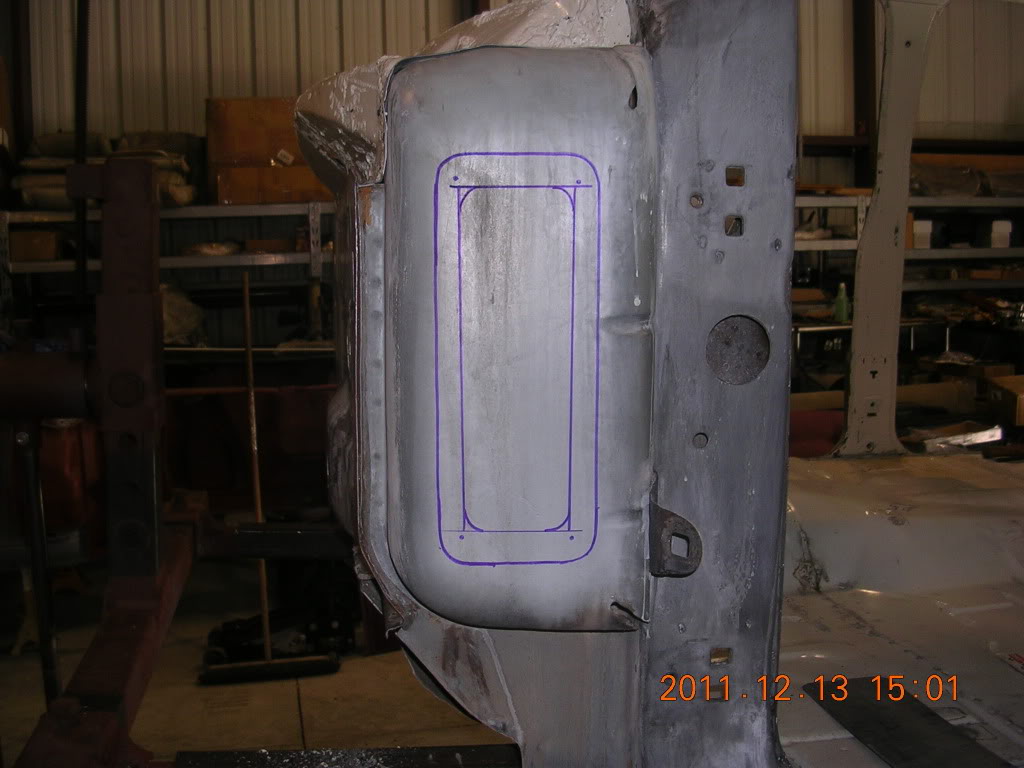
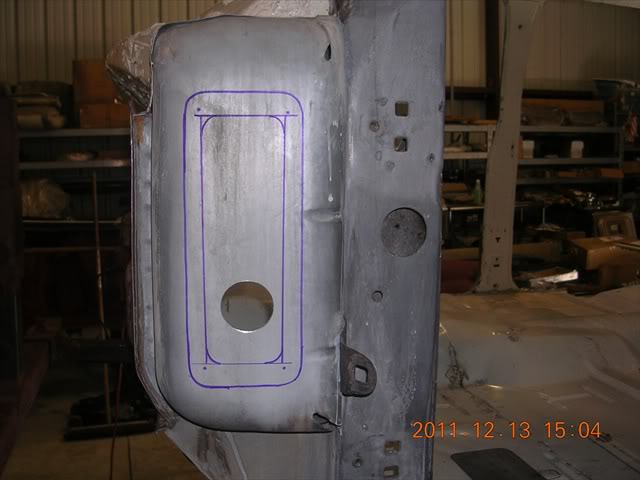
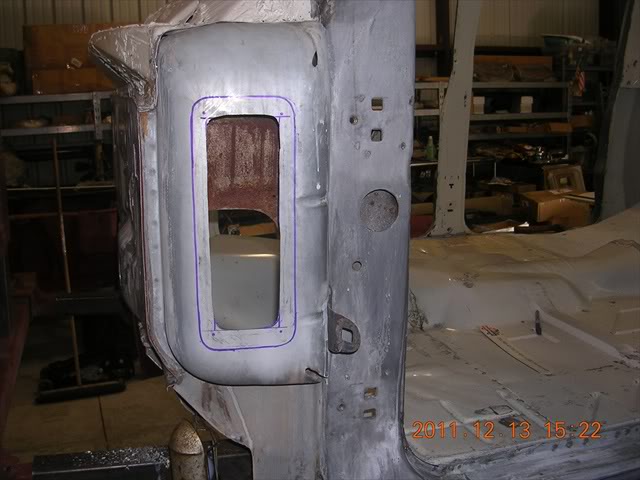
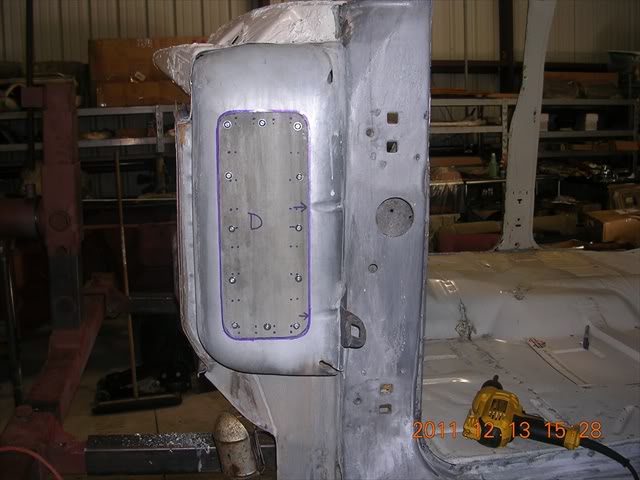
Wanted to gain access to the inside of the cowls. So the first thing I did was went to the u-pull-it and cut out some original cowls and trimmed them down for panel covers for the big holes I cut out.
This is how it turned out.
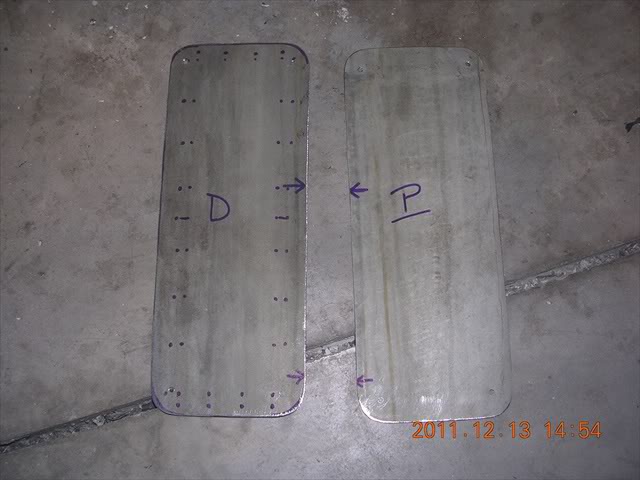
The passenger side first.

This is how it turned out.
The passenger side first.
 :
:
Thread Starter
Registered User
Joined: Nov 2010
Posts: 268
Likes: 13
From: Bradenton, Fla
Hi Bryson, Yeah it's a boatload of sheetmetal to prep isn't it.......... I'm doing more of a resto than an all out wild conversion. I like the classic look of these trucks.
My stereo is a clarion CD system that thumps pretty good but nothing exotic.
I planned on some dynomatt for the inside. But I have an idea for the oil canning of the roof that I'll be sharing in a couple of days.
My stereo is a clarion CD system that thumps pretty good but nothing exotic.
I planned on some dynomatt for the inside. But I have an idea for the oil canning of the roof that I'll be sharing in a couple of days.
Thread Starter
Registered User
Joined: Nov 2010
Posts: 268
Likes: 13
From: Bradenton, Fla
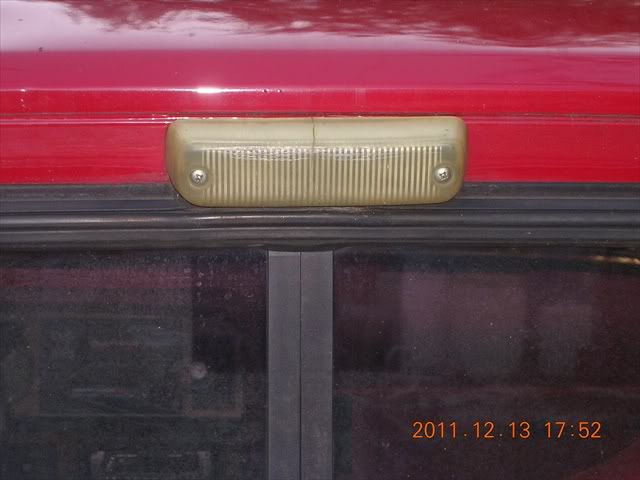
Seen it's better days.
So here's my solution. First off I wanted to add a new cSargo light but I also wanted to add a third brake light. So this is what I did.
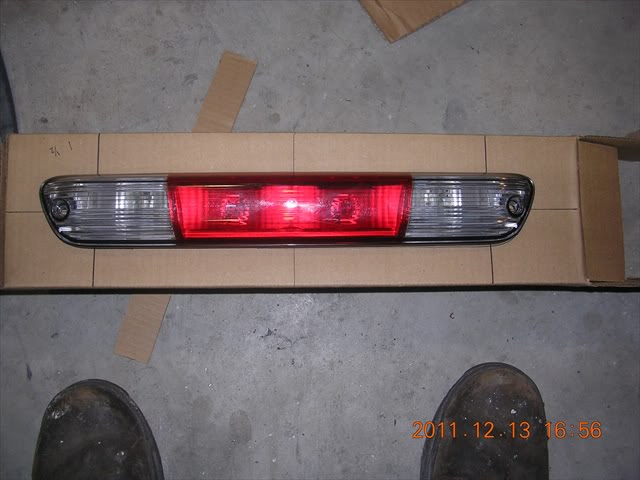
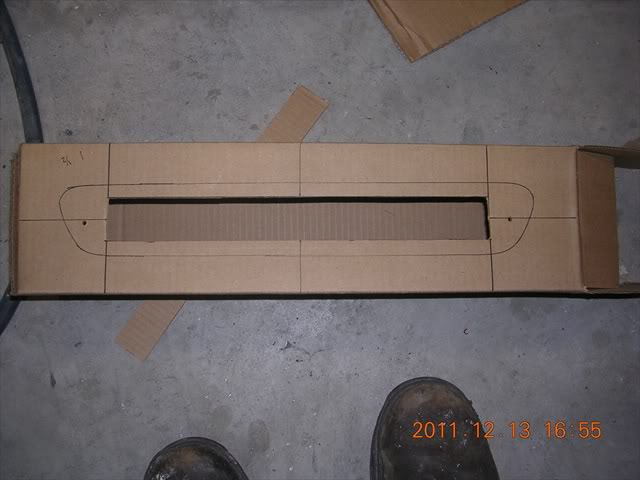
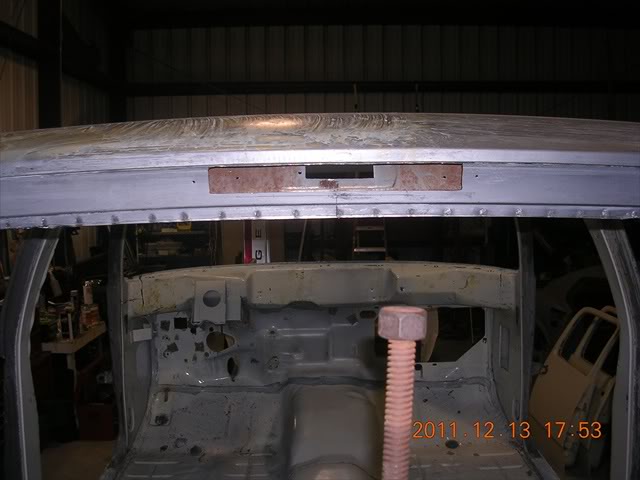
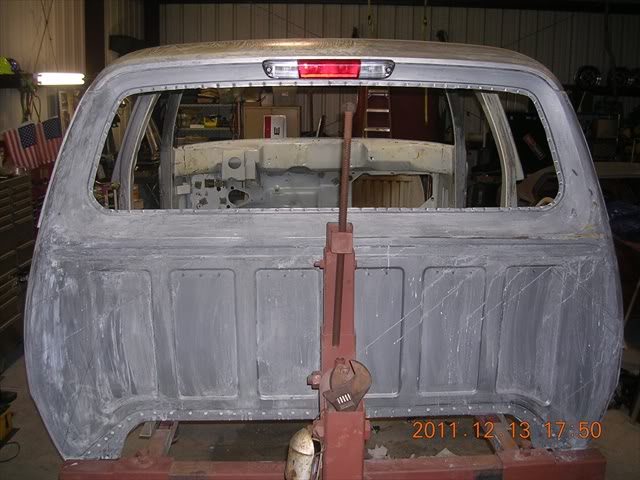
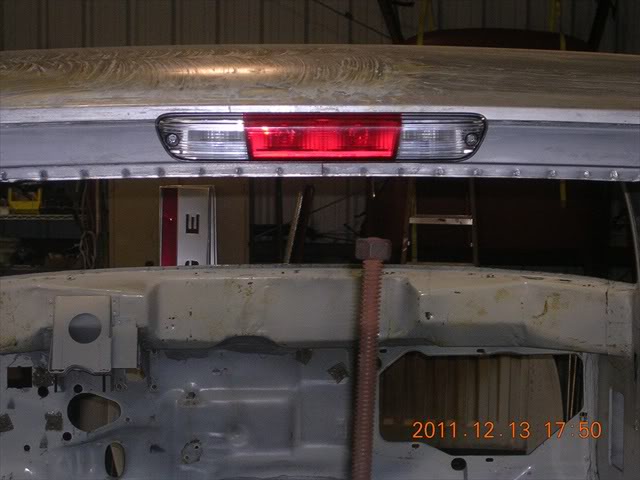
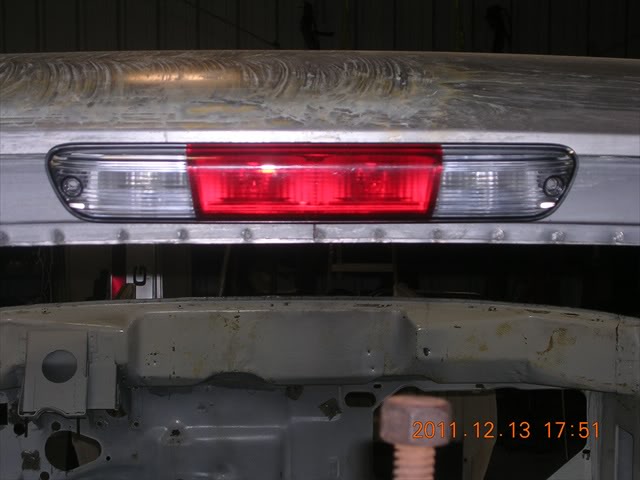
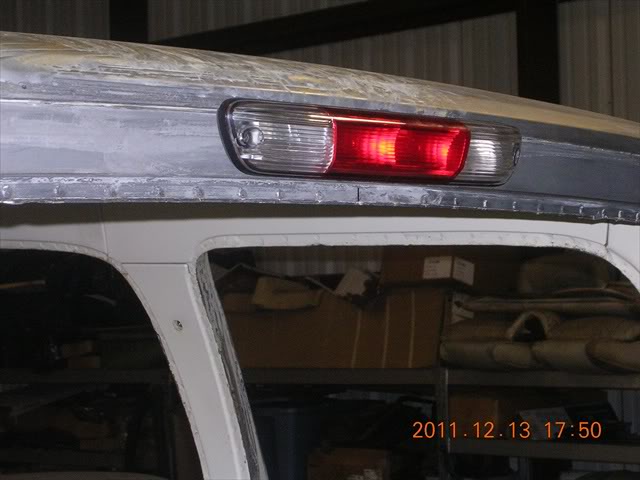

Watcha think ? I mounted it a littl low becaose I didn't want to cut the body line sandwich seam of the roof. I'll just trim the back slider weatherstrip to accomodate that it's a little low. I think it looks good.
So here's my solution. First off I wanted to add a new cSargo light but I also wanted to add a third brake light. So this is what I did.
Watcha think ? I mounted it a littl low becaose I didn't want to cut the body line sandwich seam of the roof. I'll just trim the back slider weatherstrip to accomodate that it's a little low. I think it looks good.
Registered User
Joined: Jun 2011
Posts: 549
Likes: 1
Hi Bryson, Yeah it's a boatload of sheetmetal to prep isn't it.......... I'm doing more of a resto than an all out wild conversion. I like the classic look of these trucks.
My stereo is a clarion CD system that thumps pretty good but nothing exotic.
I planned on some dynomatt for the inside. But I have an idea for the oil canning of the roof that I'll be sharing in a couple of days.
My stereo is a clarion CD system that thumps pretty good but nothing exotic.
I planned on some dynomatt for the inside. But I have an idea for the oil canning of the roof that I'll be sharing in a couple of days.
Sent from my DROID2 using Tapatalk