1st Gen. Ram - All Topics Discussion for all Dodge Rams prior to 1994. This includes engine, drivetrain and non-drivetrain discussions. Anything prior to 1994 should go in here.

Crew Cab Project has Started

Thread Tools
 
Search this Thread
 
Old Nov 25, 2011 | 10:54 AM
  #16  
simplysmn's Avatar
Banned
 
Joined: Jun 2007
Posts: 2,273
Likes: 2
From: Apple Valley Ca.
Looking Good your about a day ahead of me on mine good looking job thou I should have my frontend under mine tomorrow .and this time i won't forget the camera.
Reply
Old Nov 25, 2011 | 06:39 PM
  #17  
brcron007's Avatar
Thread Starter
Registered User
 
Joined: Nov 2010
Posts: 268
Likes: 13
From: Bradenton, Fla
The Race continues......

Are you painting the body before you put it all back together ? Any other detailing ? Just curious.

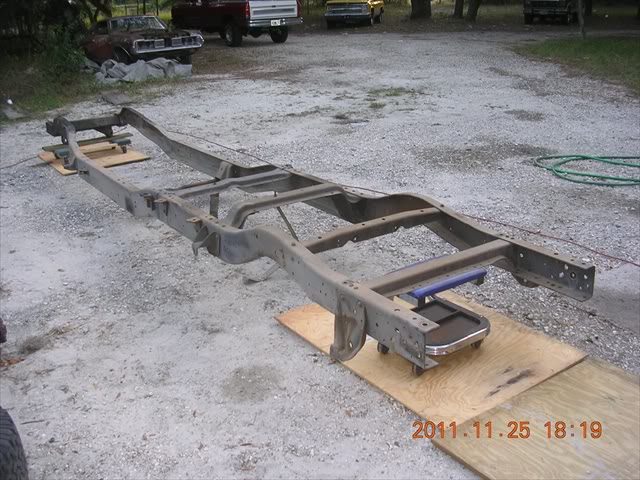
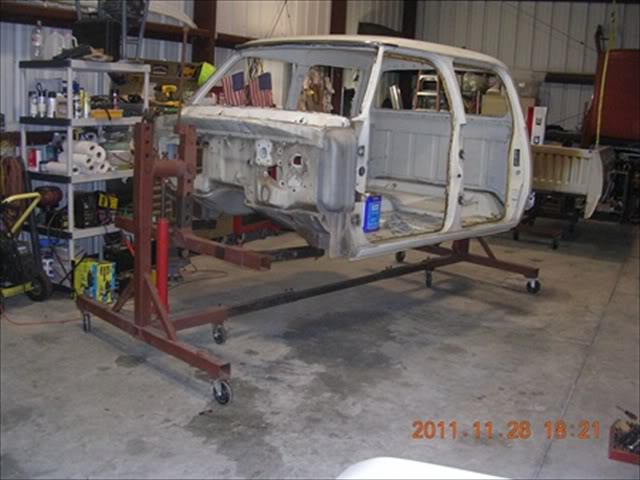
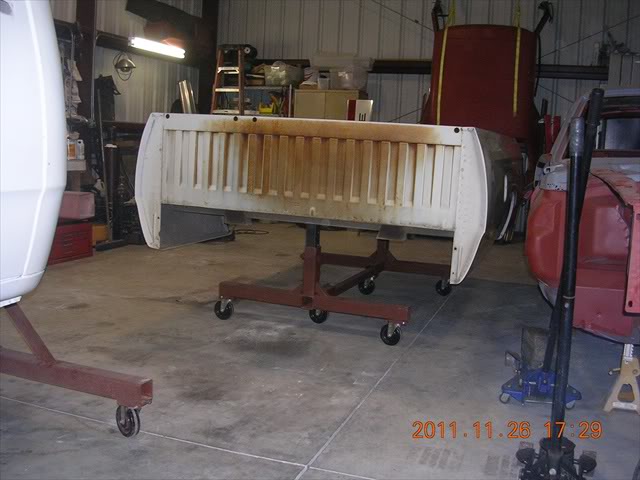
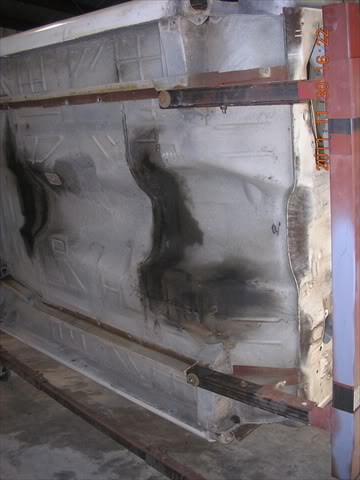
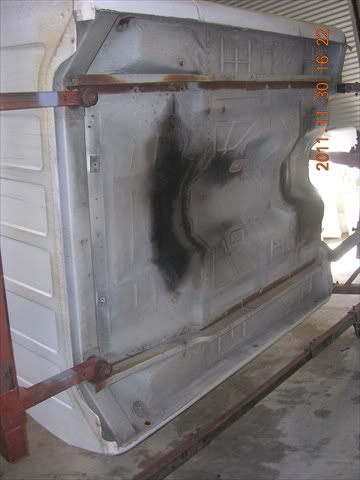
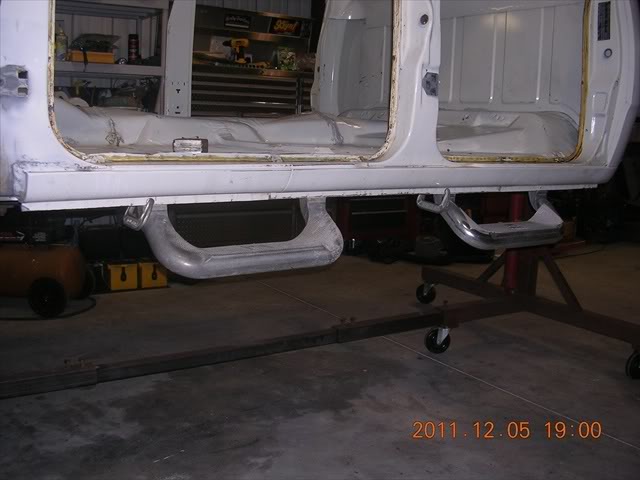
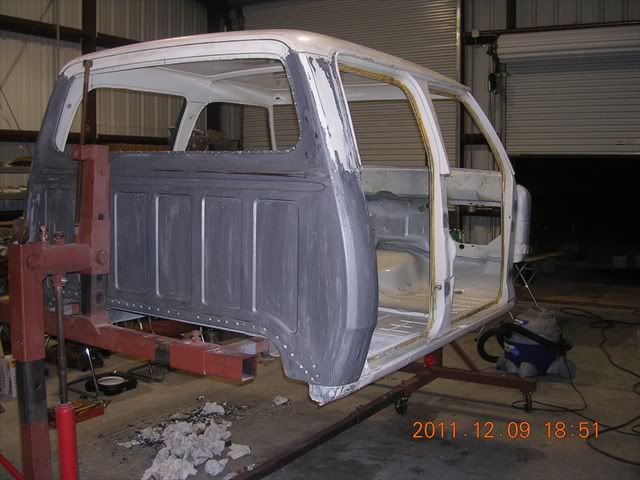
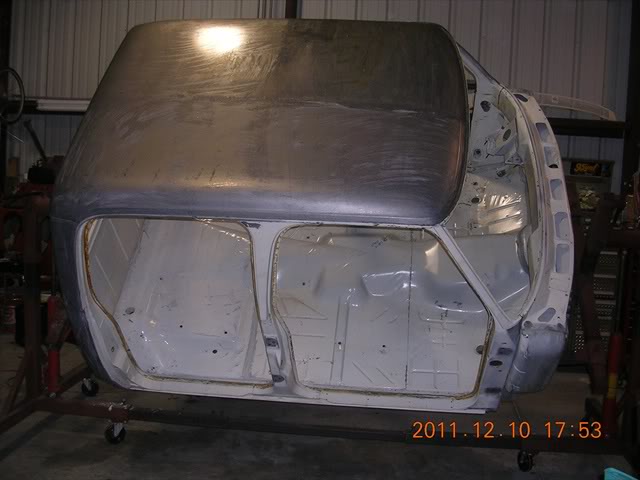
Here's todays progress on the Crew.

Name:  DSCN0269.jpg
Views: 322
Size:  53.0 KB


Name:  dscn0268.jpg
Views: 315
Size:  58.2 KB

Name:  DSCN0271.jpg
Views: 323
Size:  62.3 KB

Name:  DSCN0282.jpg
Views: 333
Size:  60.6 KB

Name:  DSCN0284.jpg
Views: 325
Size:  58.2 KB

Name:  DSCN0285.jpg
Views: 317
Size:  58.2 KB

Name:  DSCN0287.jpg
Views: 312
Size:  39.7 KB

Name:  DSCN0288.jpg
Views: 306
Size:  38.5 KB

Name:  DSCN0289.jpg
Views: 269
Size:  50.3 KB

Name:  DSCN0290.jpg
Views: 353
Size:  97.3 KB


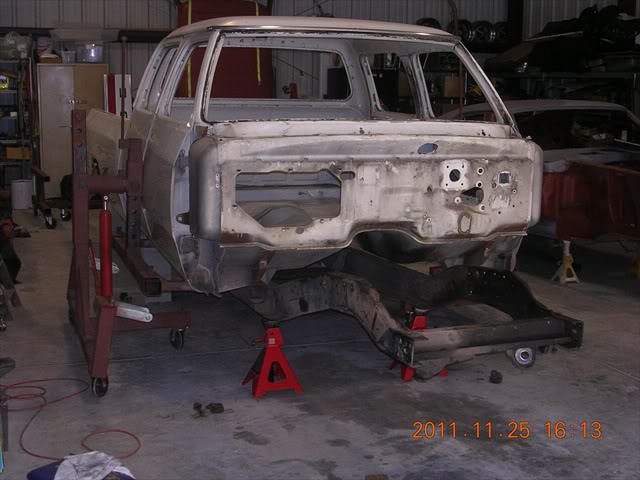
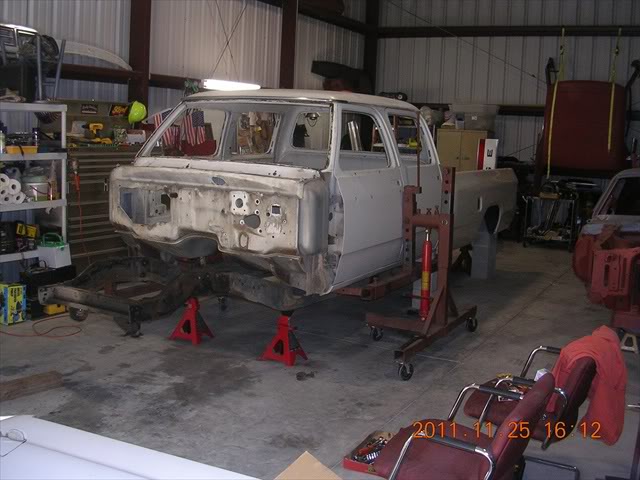
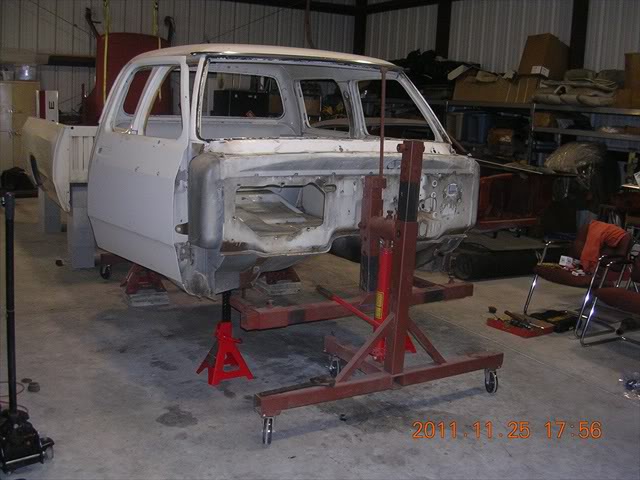
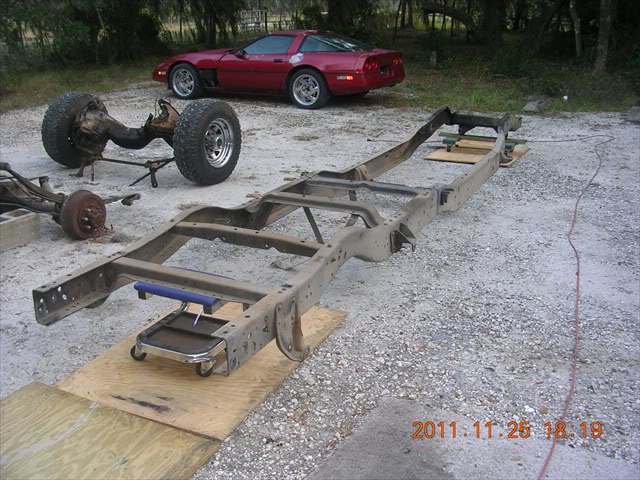
Almost ready to start cleaning and prepping for paint......Progress continues
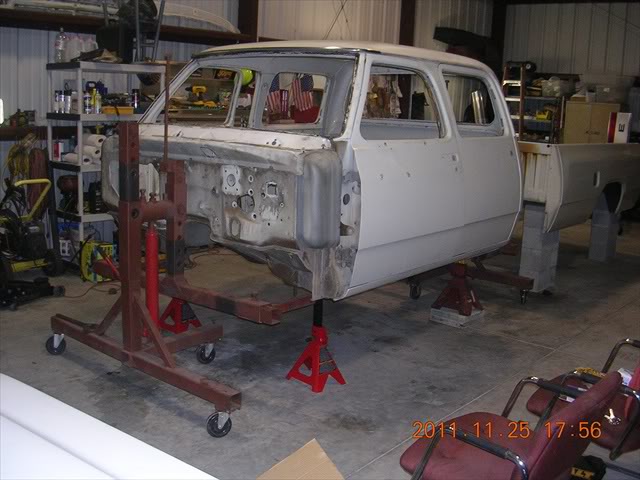
Reply
Old Nov 25, 2011 | 06:46 PM
  #18  
simplysmn's Avatar
Banned
 
Joined: Jun 2007
Posts: 2,273
Likes: 2
From: Apple Valley Ca.
Mine is suck a shock the back is dusty n that's it I am going to paint the frame I can get to and as for body work after I get it together it goes to my Buddy's shop for paint n any body work needed I know it's going to be a Blue color just not sure what yet I was thinking a patroit Blue like my 08 was or somewhere along thoses lines Good thing is Body n paint are paid for with favor's Plus I have to build him a ladder so he can reach the Top of the truck but I guess that;s what I get for having a Short guy for a body man Your going frame off ? look's good so far shoot me a Message if you need any idea's on stuff .
Reply
Old Nov 25, 2011 | 06:48 PM
  #19  
brcron007's Avatar
Thread Starter
Registered User
 
Joined: Nov 2010
Posts: 268
Likes: 13
From: Bradenton, Fla
More pics of the frame.

Name:  DSCN0291.jpg
Views: 326
Size:  87.4 KB

Name:  DSCN0292.jpg
Views: 345
Size:  97.8 KB

Name:  DSCN0293.jpg
Views: 330
Size:  91.7 KB

I'll be needing some advice and direction on correctly putting the upturn bend in the frame for the exahust on the passenger side. Thanks, Ron
Reply
Old Nov 25, 2011 | 06:51 PM
  #20  
simplysmn's Avatar
Banned
 
Joined: Jun 2007
Posts: 2,273
Likes: 2
From: Apple Valley Ca.
Exahust should fit with no problem's goes right between t case and frame I had 4 in on the last truck this 1 is going to be different thou as I will have Dual tank's word to wise look into a 2 in body lift trust me makes thing's Alot Easier and won't hurt anything .
Reply
Old Nov 26, 2011 | 06:02 AM
  #21  
Trebor's Avatar
Registered User
 
Joined: Mar 2005
Posts: 1,167
Likes: 2
From: SW Pennsylvania - Greene County
The only exhaust relief that I found was the indentation on the passenger side of the crossmember brace as shown on this picture:

Reply
Old Nov 26, 2011 | 08:38 PM
  #22  
brcron007's Avatar
Thread Starter
Registered User
 
Joined: Nov 2010
Posts: 268
Likes: 13
From: Bradenton, Fla
Hi Thanx. For some reason I thought the top pass side of the frame up by the firewall was slightly bent up to give slightly more clearance for the exhaust. Guess I was mistaken. Thanks...

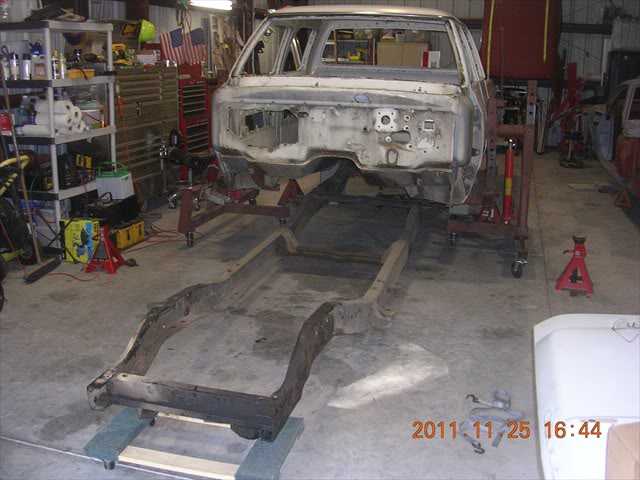
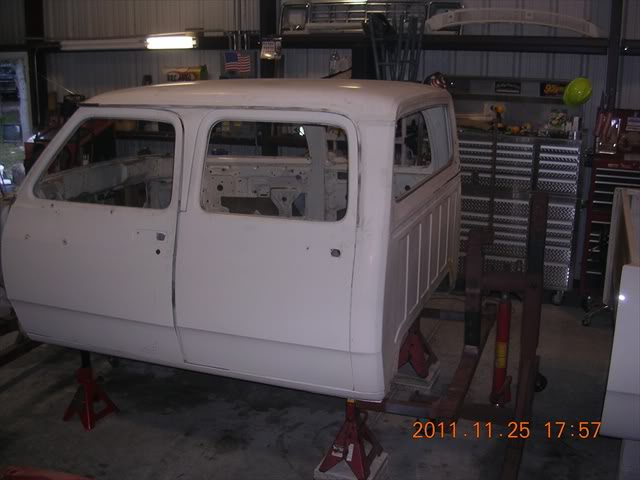
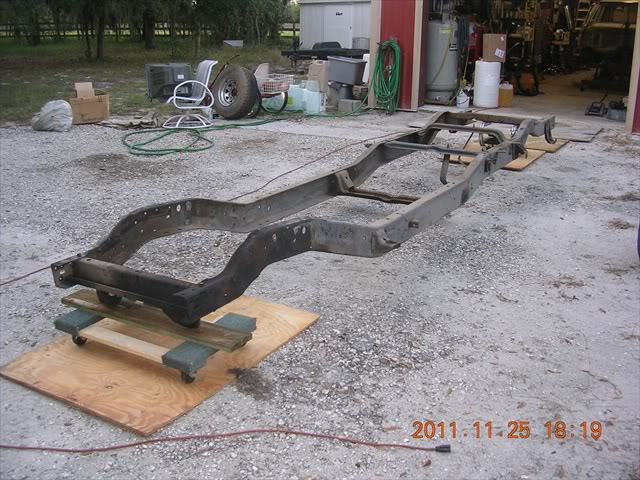
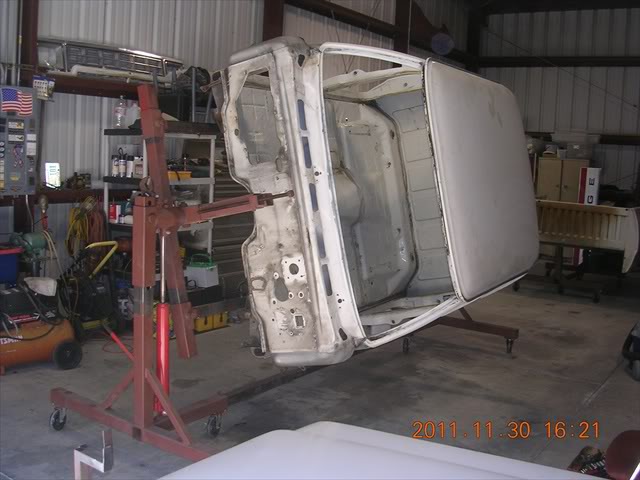
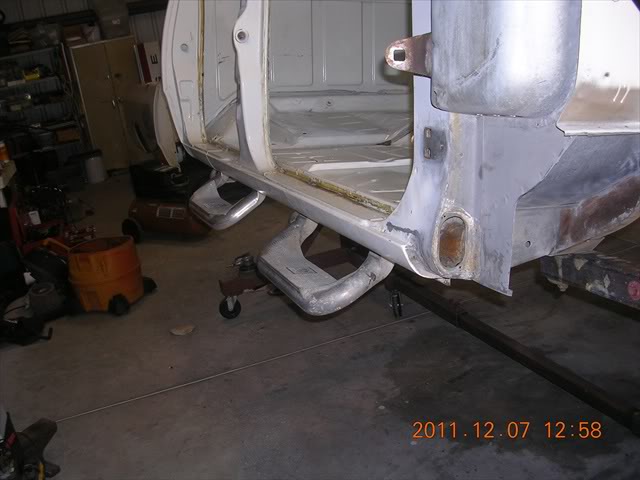
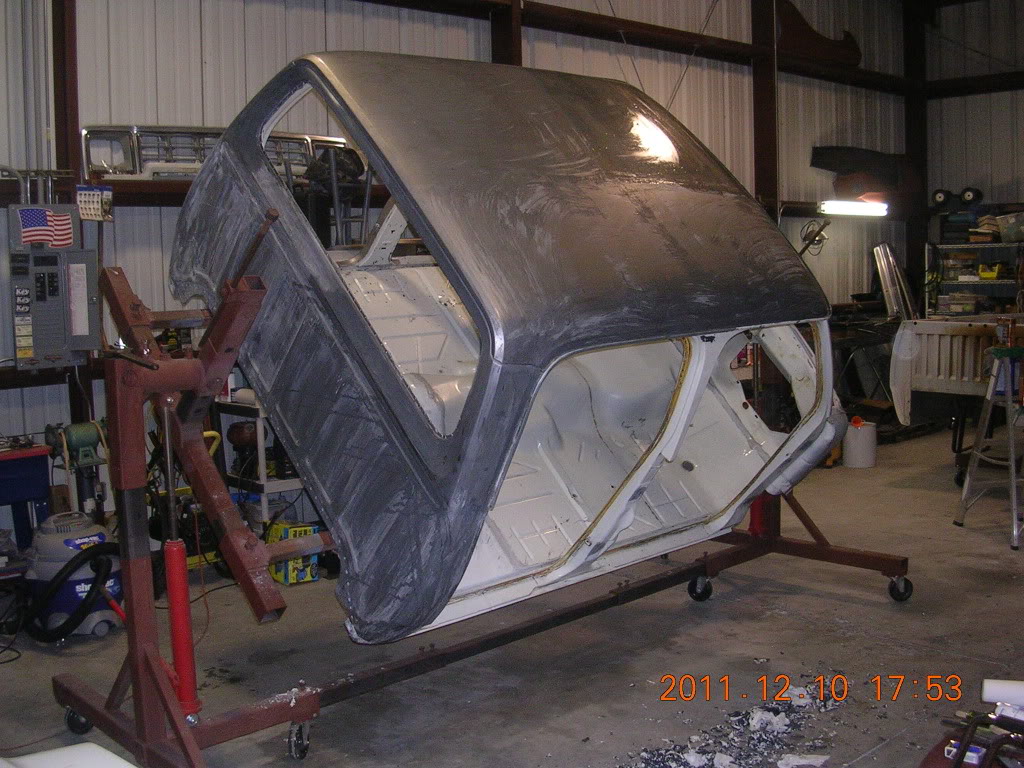
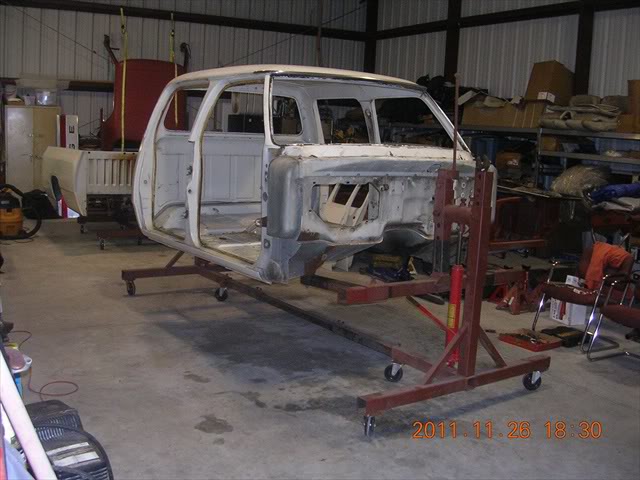
Here's todays progress.

Name:  DSCN0295.jpg
Views: 379
Size:  47.0 KB

Name:  DSCN0302.jpg
Views: 324
Size:  57.9 KB

Name:  DSCN0304.jpg
Views: 302
Size:  39.6 KB

Name:  DSCN0303.jpg
Views: 320
Size:  55.6 KB


Name:  dscn0294.jpg
Views: 288
Size:  49.4 KB
Reply
Old Nov 30, 2011 | 09:50 PM
  #23  
brcron007's Avatar
Thread Starter
Registered User
 
Joined: Nov 2010
Posts: 268
Likes: 13
From: Bradenton, Fla
Some more progress

Hi All Just a bit more progress. Got the rotisserie situated and removed alot of dried out seamsealer.

Name:  DSCN0312.jpg
Views: 306
Size:  52.5 KB

Name:  DSCN0314.jpg
Views: 302
Size:  57.4 KB

Name:  DSCN0313.jpg
Views: 303
Size:  56.9 KB

Name:  DSCN0316.jpg
Views: 284
Size:  28.0 KB

Name:  DSCN0315.jpg
Views: 290
Size:  26.3 KB
Reply
Old Dec 1, 2011 | 02:14 PM
  #24  
wheelieking71's Avatar
Banned
 
Joined: Feb 2011
Posts: 221
Likes: 0
From: Gilbert, AZ
i am sooooooo jealous! of both your truck (both of them), and your shop!!!!!
Reply
Old Dec 1, 2011 | 04:52 PM
  #25  
brcron007's Avatar
Thread Starter
Registered User
 
Joined: Nov 2010
Posts: 268
Likes: 13
From: Bradenton, Fla
Thanks, Took along time to save for the shop. I bought my truck when she was 2 years old and wouldn't trade it for anything except a rebirth into a crew and a facelift. Best part is everythings paid for....
Reply
Old Dec 12, 2011 | 08:35 AM
  #26  
brcron007's Avatar
Thread Starter
Registered User
 
Joined: Nov 2010
Posts: 268
Likes: 13
From: Bradenton, Fla
More Progress

Hi all. Here's some more progress on the Crew. Got the floor pan degreased.

Name:  DSCN1739.jpg
Views: 314
Size:  87.9 KB

Name:  DSCN1740.jpg
Views: 315
Size:  75.0 KB

Also predrilled the mounting holes for the stirrups.

Name:  DSCN1746.jpg
Views: 317
Size:  41.4 KB


Name:  DSCN1758.jpg
Views: 306
Size:  42.3 KB
Reply
Old Dec 12, 2011 | 08:43 AM
  #27  
brcron007's Avatar
Thread Starter
Registered User
 
Joined: Nov 2010
Posts: 268
Likes: 13
From: Bradenton, Fla
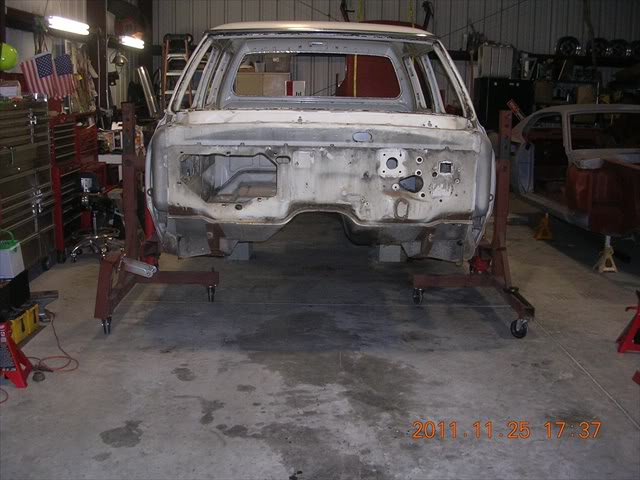
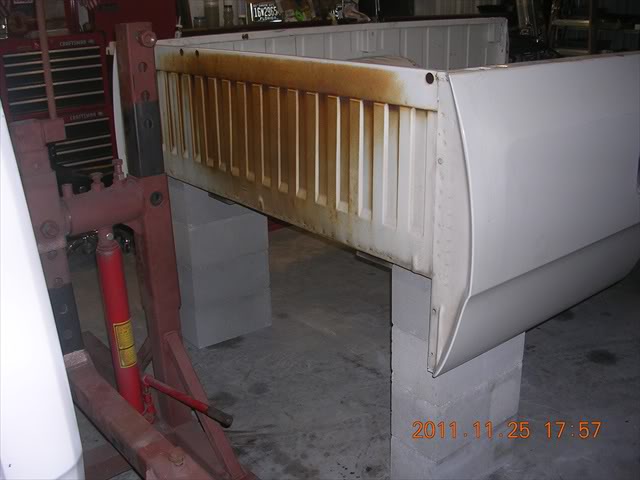
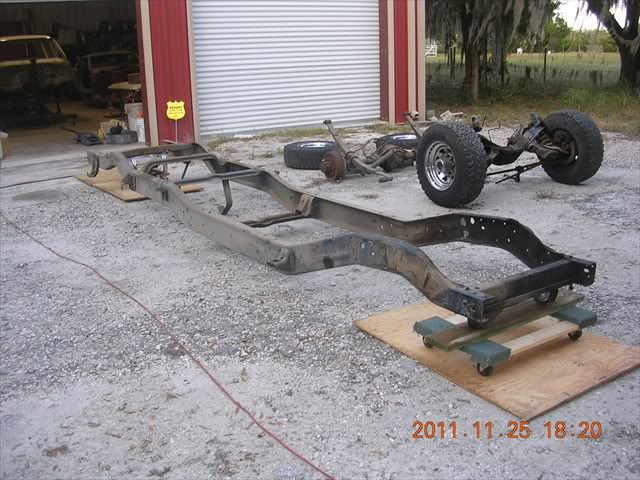
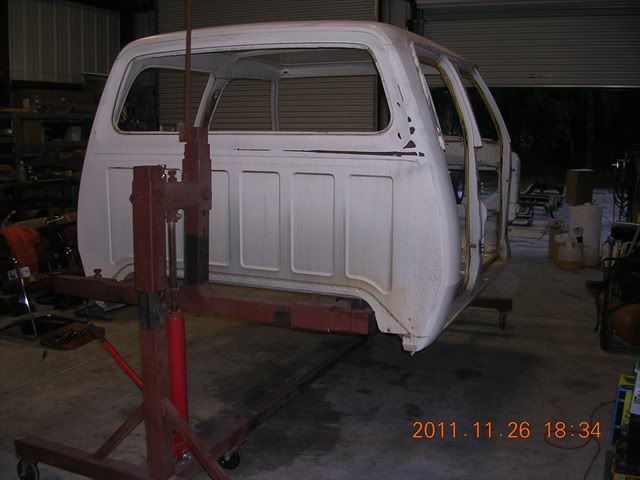
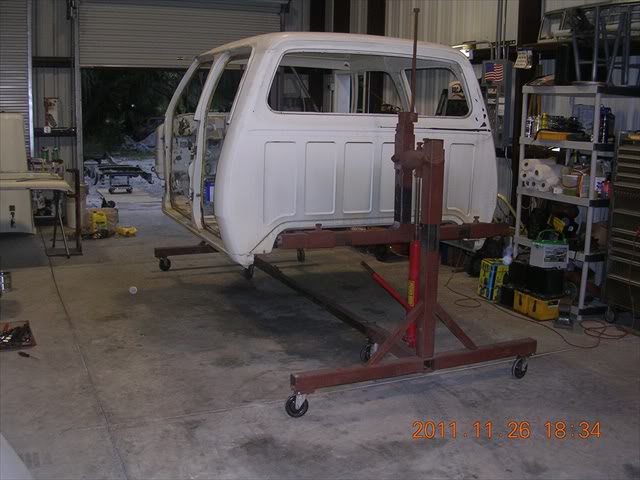
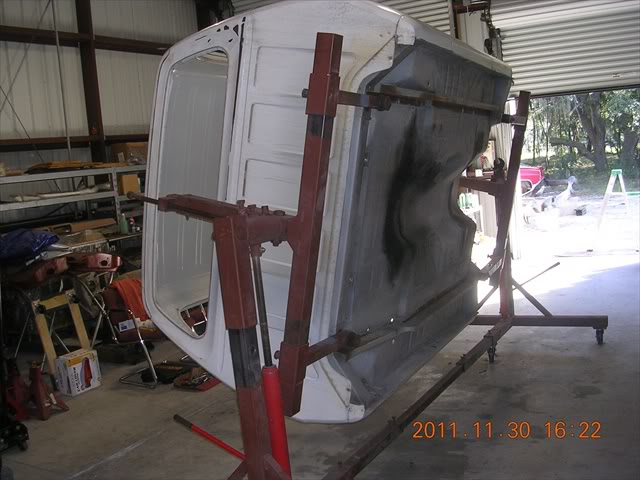
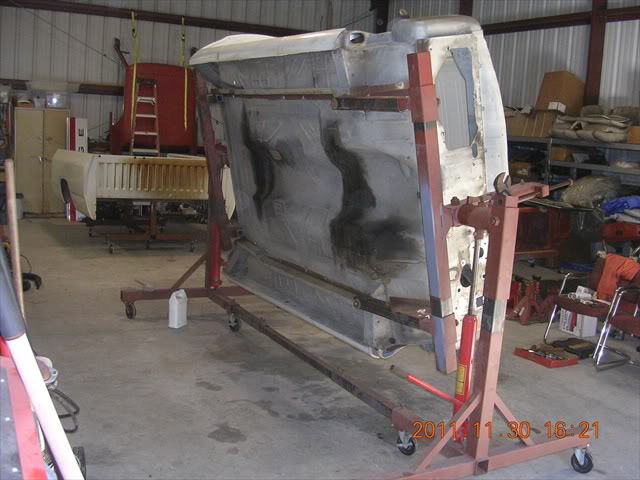
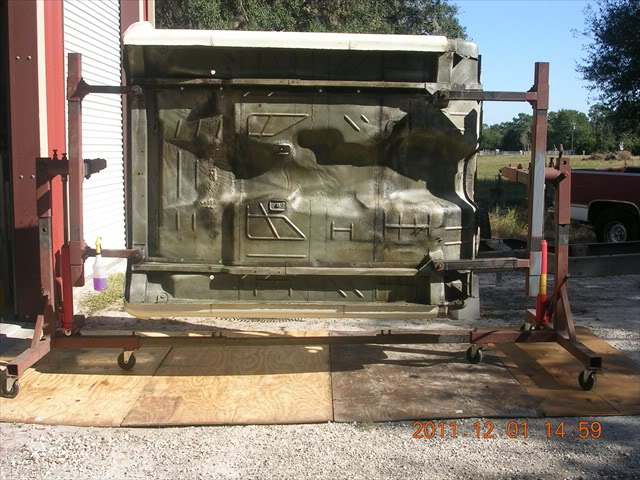
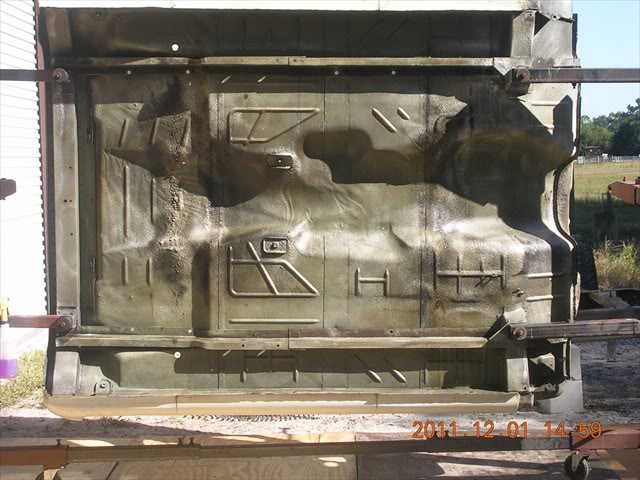
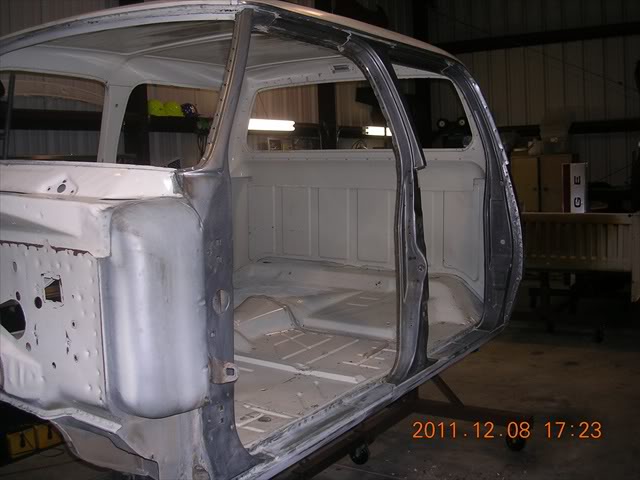
Getting Ready for primer

Almost have the old 27 year old paint all off. Getting real close to putting her in Primer.
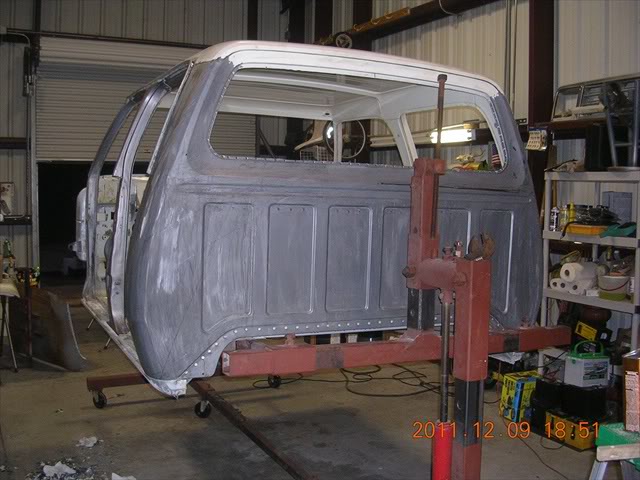
I treated all the bare metal after I stripped it with a product my brother turned me on to called Pickle X 20. It's a product similar to Oshpo but 10X's better. Gets down to the microscopic level and neutralizes any existing rust and will prevent any future rust. I used it on my 69 Mustang MACH 1 restoration and it works great.


Name:  DSCN1766.jpg
Views: 318
Size:  46.9 KB

Name:  DSCN1776.jpg
Views: 312
Size:  62.8 KB

Name:  DSCN1777.jpg
Views: 298
Size:  57.4 KB

Name:  DSCN1783.jpg
Views: 309
Size:  41.8 KB

Name:  DSCN1784.jpg
Views: 309
Size:  177.8 KB
Reply
Old Dec 12, 2011 | 08:47 AM
  #28  
brcron007's Avatar
Thread Starter
Registered User
 
Joined: Nov 2010
Posts: 268
Likes: 13
From: Bradenton, Fla
Name:  DSCN1786-1.jpg
Views: 314
Size:  54.8 KB
Reply
Old Dec 12, 2011 | 03:50 PM
  #29  
CE_TX's Avatar
Registered User
 
Joined: Aug 2007
Posts: 373
Likes: 2
From: Longview, Texas
Very nice job.
Reply
Old Dec 12, 2011 | 03:59 PM
  #30  
Trebor's Avatar
Registered User
 
Joined: Mar 2005
Posts: 1,167
Likes: 2
From: SW Pennsylvania - Greene County
Is this going to be a 5 speed or an automatic truck? If a 5 speed then now is the time to move the firewall electrical connector hole to the right and to drill and mount the clutch master cylinder bracket to the steering column brace.
Reply


All times are GMT -5. The time now is 05:47 PM.