
Fluidampr intall 93 5.9 Cummins

Thread Starter
Registered User


Joined: Mar 2010
Posts: 7,265
Likes: 1,346
From: Prince George, BC
Fluidampr intall 93 5.9 Cummins
Since I could not find a definitive thread on how to install a fluidamper, and CPS relocation kit anywhere on-line for a 1st Gen. I thought I'd do one up.
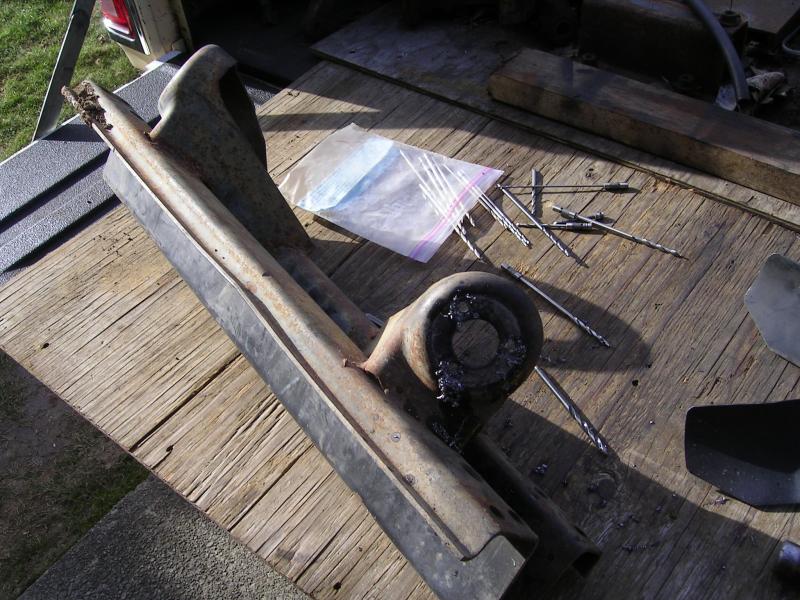
Once the timing case cover crank seal has been replaced, and the cover is back in place, you can install the fluidampr with the 4 - 15mm crank bolts. Then remove the two bolts on the lower LH side of the motor. The instructions that came with the CPS relocation kit were not very clear here. These are the ones you need to remove.
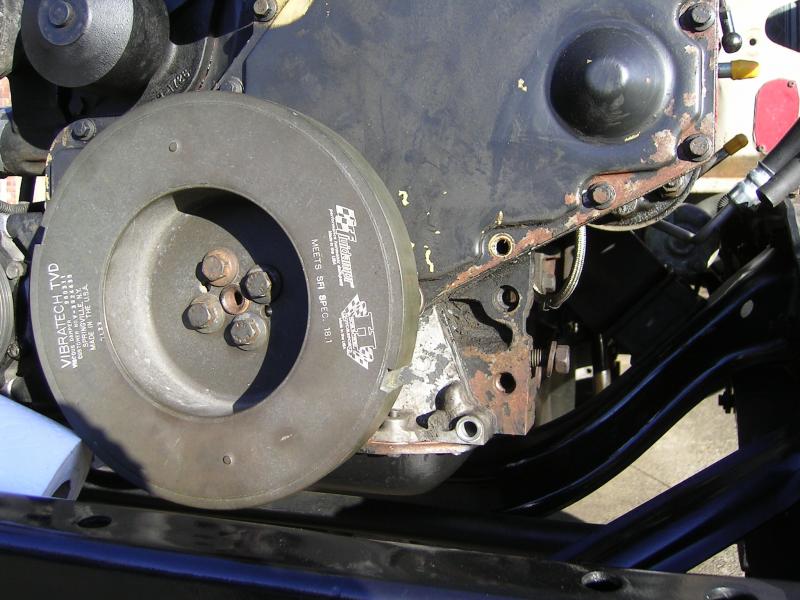
Then install the new spacer/bolts. These are 19mm.
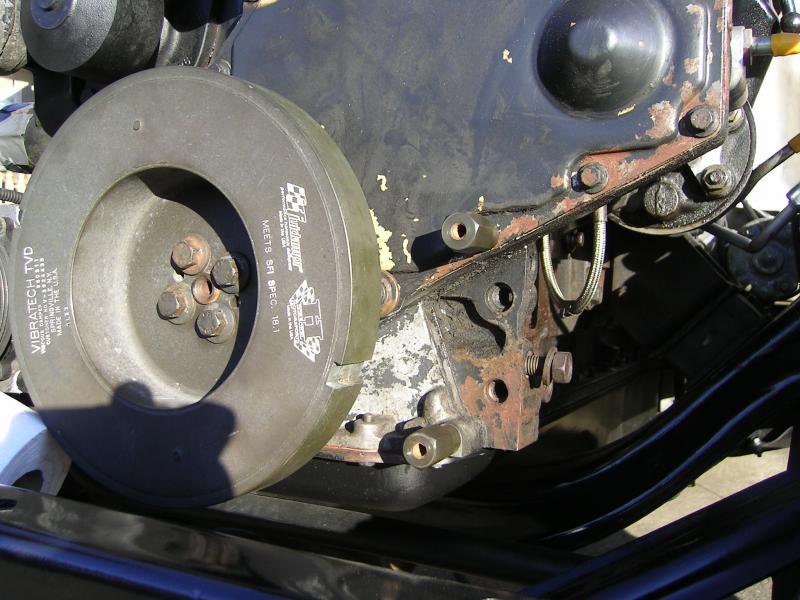
And now the main bracket.

Thread Starter
Registered User
Joined: Mar 2010
Posts: 7,265
Likes: 1,346
From: Prince George, BC
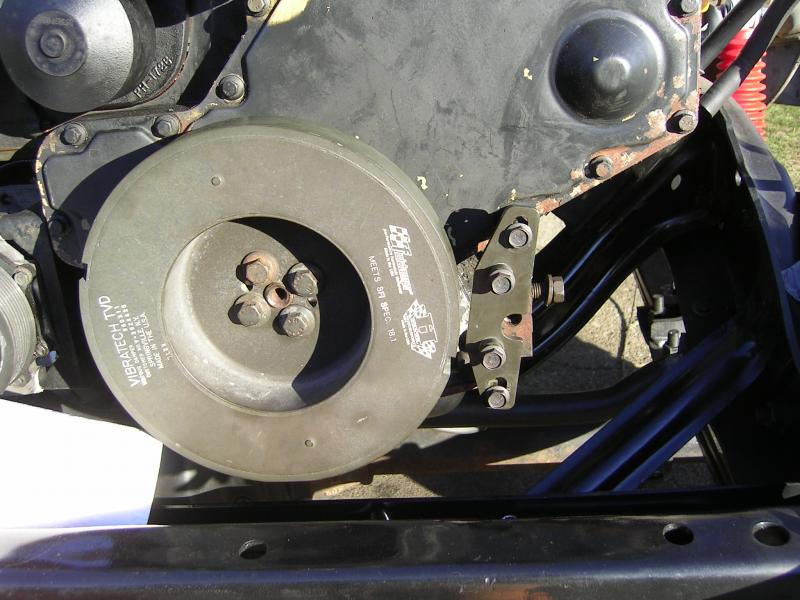
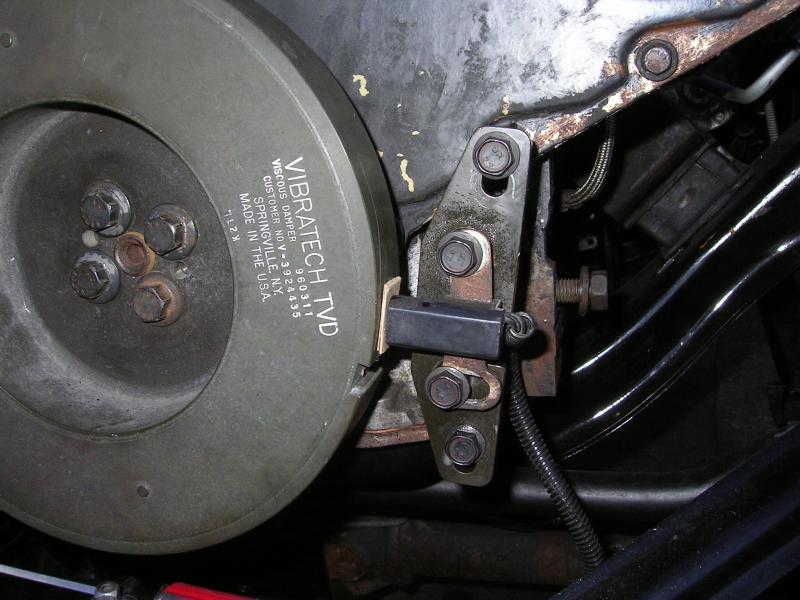
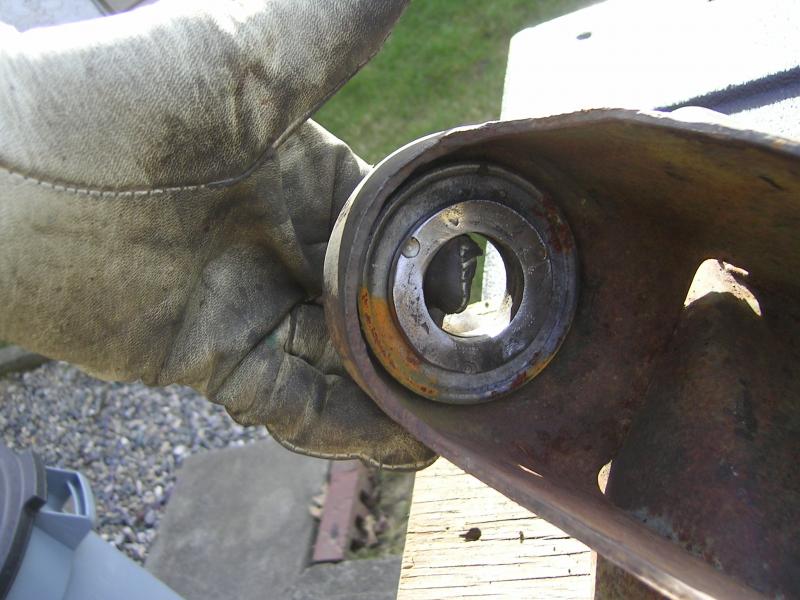
Now it should have been easy and just re-install the Crank Postion Sensor (CPS) and adjust the gap... 0.049 to 0.051, and your done. Nope not for me!
Turned out the CPS I have on my motor is a little different. I tried every way possible to get things to line up. I was just not able to get any clearance between the CPS and the fluidampr.
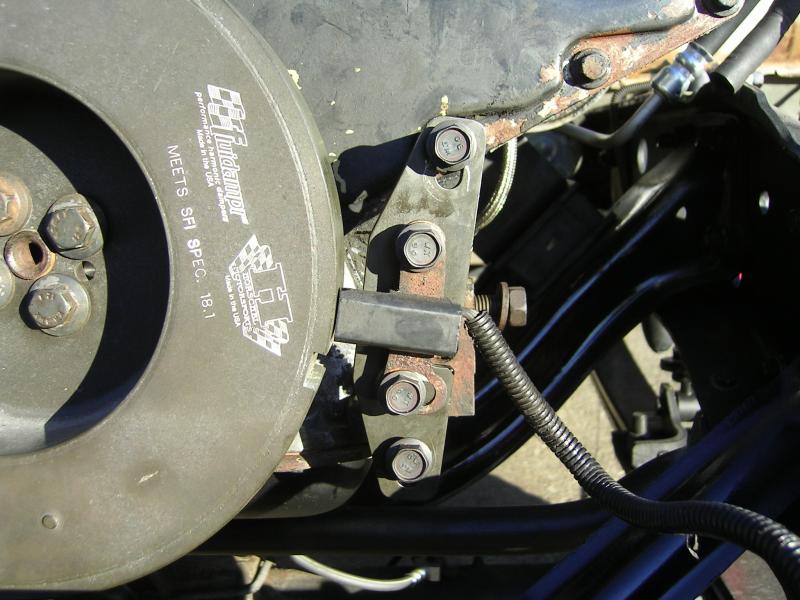
Turned out that after searching pics on-line I think the mounting bracket changed at some point.
Here's my CPS and bracket....after my modification with the rat file.

And I was finally able to get my .050" air gap.

Thread Starter
Registered User
Joined: Mar 2010
Posts: 7,265
Likes: 1,346
From: Prince George, BC
If your installing a fluidampr on a non-IC motor (89, 90, early 91) then you should be OK with fan blade clearance, but double check first. On the 91.5 to 93 motors you are more then likely going to have clearance issues between the fan and fluidampr.
I had a new fan from a 2nd Gen on my 89 motor, with a new clutch assembly. I decided to compare it to the original assembly I pulled off the 93 motor. Turned out the fans are the same, but the clutches are a bit different.
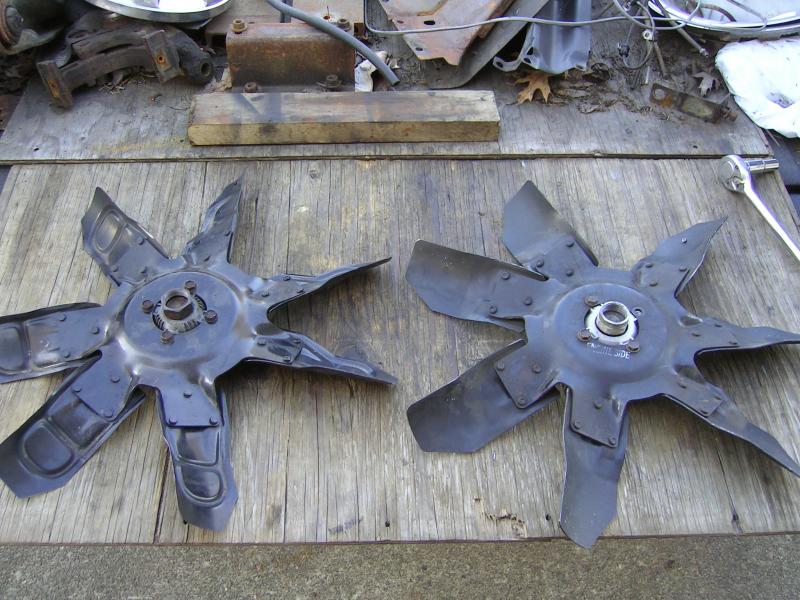
but the distance between the end of the clutch bolt, and the body of the fan was different. The OEM 93 unit was a tad longer then the 2nd Gen fan and new clutch. The difference was about 0.20" longer for the 93 clutch.
So I swapped the fans around and used the OEM 93 clutch.
I had a new fan from a 2nd Gen on my 89 motor, with a new clutch assembly. I decided to compare it to the original assembly I pulled off the 93 motor. Turned out the fans are the same, but the clutches are a bit different.

but the distance between the end of the clutch bolt, and the body of the fan was different. The OEM 93 unit was a tad longer then the 2nd Gen fan and new clutch. The difference was about 0.20" longer for the 93 clutch.

So I swapped the fans around and used the OEM 93 clutch.
Thread Starter
Registered User
Joined: Mar 2010
Posts: 7,265
Likes: 1,346
From: Prince George, BC
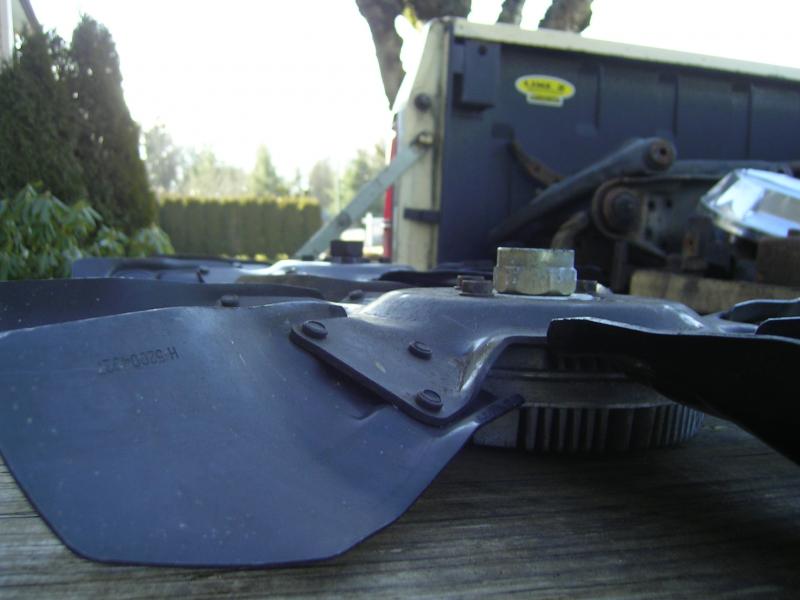
So I first modified a washer that was about 0.125" thick. Wish I had a milling machine...I had to resort to rat files, and drum sand discs, and round flapper discs.
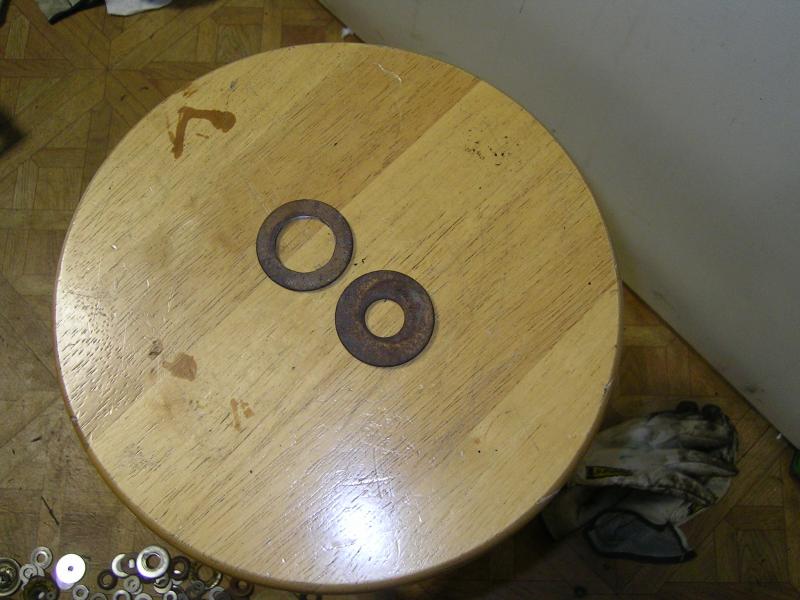
Once installed the fan was just kissing the fluidampr. So I needed a thicker washer. I found one spot welded to the old 2wd front cross member from the crewcab. Had to drill out 3 spot welds.
Then used a 60 grit flapper disc on my 4.5" grinder to slowly turn down the outside diameter....You can see it was a fair amount!!
This washer was about 0.20"...and was perfect!!

Once installed the fan was just kissing the fluidampr. So I needed a thicker washer. I found one spot welded to the old 2wd front cross member from the crewcab. Had to drill out 3 spot welds.

Then used a 60 grit flapper disc on my 4.5" grinder to slowly turn down the outside diameter....You can see it was a fair amount!!

This washer was about 0.20"...and was perfect!!


Trending Topics
Thread Starter
Registered User
Joined: Mar 2010
Posts: 7,265
Likes: 1,346
From: Prince George, BC
1st Generation Admin
Joined: Jan 2005
Posts: 4,601
Likes: 118
From: Buies Creek, NC
My install the the Fluidampr was the same. Seems I recall having to mod the sensor mount as well.
Had the same fan clearance issue and did the same washer fix.
- Since then I've learned some folks simplify things by using the appropriate thickness washer, but Small Enough to fit Inside the clutch hub.
- Seems I recall somebody made/makes a short extension for the threaded stump thingy to address the clearance issue.
Works great otherwise.
Nice write-up. Stuck.
Thread Starter
Registered User
Joined: Mar 2010
Posts: 7,265
Likes: 1,346
From: Prince George, BC
My install the the Fluidampr was the same. Seems I recall having to mod the sensor mount as well.
Had the same fan clearance issue and did the same washer fix.
- Since then I've learned some folks simplify things by using the appropriate thickness washer, but Small Enough to fit Inside the clutch hub.
- Seems I recall somebody made/makes a short extension for the threaded stump thingy to address the clearance issue.
Works great otherwise.
Nice write-up. Stuck.
Had the same fan clearance issue and did the same washer fix.
- Since then I've learned some folks simplify things by using the appropriate thickness washer, but Small Enough to fit Inside the clutch hub.
- Seems I recall somebody made/makes a short extension for the threaded stump thingy to address the clearance issue.
Works great otherwise.
Nice write-up. Stuck.
 .....
.....
Registered User
Joined: Mar 2008
Posts: 4,389
Likes: 114
From: Orange County, California
My '90 required an 1/8" spacer as well. I happened to have a washer of the proper thickness in my collection of hardware with just the right outside diameter to fit inside the pulley bolts. As for the inner diameter, as been said already, I filed it until it slipped over the hub's snout.

Thread Starter
Registered User
Joined: Mar 2010
Posts: 7,265
Likes: 1,346
From: Prince George, BC
My thinking is that if you can eliminate a bit more of the shake, vibration and harmonics, then your bearings, and motor might just last a bit longer.
