
How to ( BALL JOINTS )


Thread Starter
Registered User
Joined: Jan 2003
Posts: 401
Likes: 0
From: RALEIGH NC
How to ( BALL JOINTS )
This is a big write up with a lot of pictures but I thought it would help some people.
I know a lot of people have been having problems with ball joints so when I did mine I took pictures and used only hand tools because a lot of people talk about how hard it is and what tools you must have. The ball joints were about $75-$80 or so each. The job took about 3 hrs or so on each side for me doing it with hand tools and not having help. The press with with cups for many axles was $250 and the other tools I had. I was told around $1100 $1300 to do it and if they had problems with the rotor or bearing it would go up. Sounded like if it would not come off to start they just beat it off and charge you for a new one.
If the Mods don't want this post just let me know, if it is to big I can cut it down.
I just hear people that talk of working on the motor and doing lots of other stuff but when it comes to working on a big axle like this and you bring in the word Ball Joint, they farm it out. No need it's not that hard.
The one thing that I did not get into was the size of all the nuts bolts and sockets needed. Maybe at a later date I can add that and put the TQ numbers for everything. As I look in the shop book and other shop books plus the spec for the bolts of that size the TQ is all over the place, so get it good and tight and use lock tite. The TQ don't give a wet or dry number and most of the lock tite we can get is a wet, you will get higher numbers, then the dry, that they used from the factory. That is why I did not cover it.
Break loose and removal of axle nut. You may want to hit it with penatrator oil the night before or early that day.
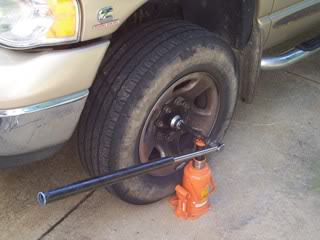
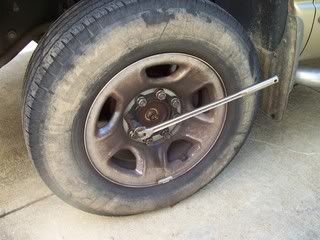
break lug nuts loose
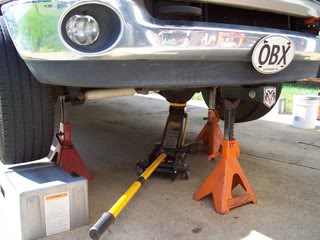
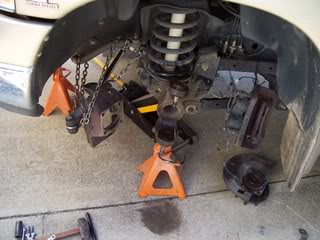
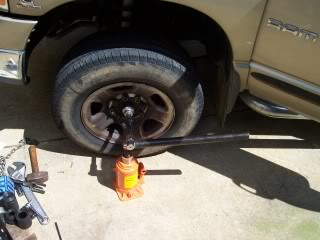
I drove up on ramps to make it easy to lift. only had to lift it a few inches.
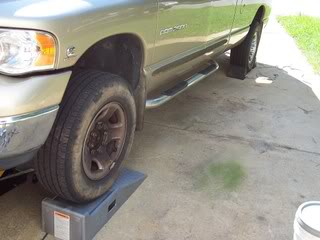
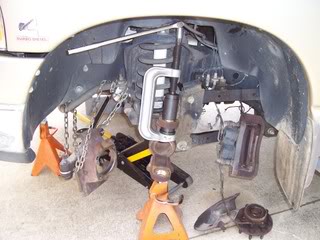
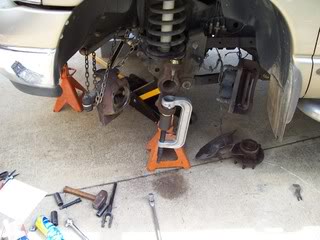
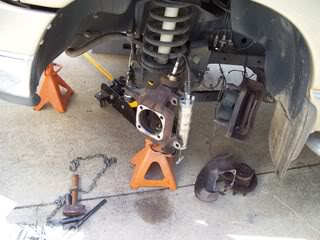
Block the rear tires front and rear as you will be starting the motor and moving the front around a lot.
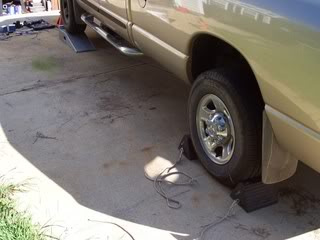
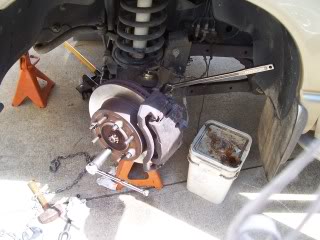
I used three jack stands and left the floor jack under as a safety just because you are moving a lot of stuff around and starting the motor. I have a front hitch that I used for the center. If you lift the side you are working on higher the oil will not run out and no need to do anything with the diff. In this case the drivers side is about three inches higher.
After removing the tire and wheel you have some retainers to pull off, this is a good time to hit the hub with a penatrator oil.
In this step you can give a little room for the pads, and it will let it drop on easy. If you don't do this you will need to get a pad pusher or C clamp and can damage you pads. That's why I did it on the truck it will just drop back on IF YOU DON'T TOUCH THE BRAKES WHEN YOU START THE TRUCK LATER.
Next take out the two caliper bracket bolts. Take the caliper and bracket off as one, no reason to break it down. Then tie it out of the way with some 550 cord.
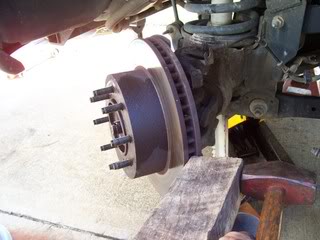
Next use a wood block and a SFH and maybe a BFH... Never hit the rotor with steel. Tap, tap, tap all the way around several times.
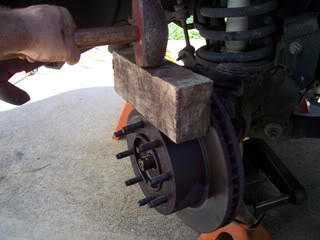
Then move the wood block the the area between the cooling fins and tap,tap a few more times all the way around. It takes time but will come off. Don't go hitting it hard or with steel, it will damage the rotor or the bearing.
I know a lot of people have been having problems with ball joints so when I did mine I took pictures and used only hand tools because a lot of people talk about how hard it is and what tools you must have. The ball joints were about $75-$80 or so each. The job took about 3 hrs or so on each side for me doing it with hand tools and not having help. The press with with cups for many axles was $250 and the other tools I had. I was told around $1100 $1300 to do it and if they had problems with the rotor or bearing it would go up. Sounded like if it would not come off to start they just beat it off and charge you for a new one.
If the Mods don't want this post just let me know, if it is to big I can cut it down.
I just hear people that talk of working on the motor and doing lots of other stuff but when it comes to working on a big axle like this and you bring in the word Ball Joint, they farm it out. No need it's not that hard.
The one thing that I did not get into was the size of all the nuts bolts and sockets needed. Maybe at a later date I can add that and put the TQ numbers for everything. As I look in the shop book and other shop books plus the spec for the bolts of that size the TQ is all over the place, so get it good and tight and use lock tite. The TQ don't give a wet or dry number and most of the lock tite we can get is a wet, you will get higher numbers, then the dry, that they used from the factory. That is why I did not cover it.
Break loose and removal of axle nut. You may want to hit it with penatrator oil the night before or early that day.
break lug nuts loose
I drove up on ramps to make it easy to lift. only had to lift it a few inches.
Block the rear tires front and rear as you will be starting the motor and moving the front around a lot.
I used three jack stands and left the floor jack under as a safety just because you are moving a lot of stuff around and starting the motor. I have a front hitch that I used for the center. If you lift the side you are working on higher the oil will not run out and no need to do anything with the diff. In this case the drivers side is about three inches higher.
After removing the tire and wheel you have some retainers to pull off, this is a good time to hit the hub with a penatrator oil.
In this step you can give a little room for the pads, and it will let it drop on easy. If you don't do this you will need to get a pad pusher or C clamp and can damage you pads. That's why I did it on the truck it will just drop back on IF YOU DON'T TOUCH THE BRAKES WHEN YOU START THE TRUCK LATER.
Next take out the two caliper bracket bolts. Take the caliper and bracket off as one, no reason to break it down. Then tie it out of the way with some 550 cord.
Next use a wood block and a SFH and maybe a BFH... Never hit the rotor with steel. Tap, tap, tap all the way around several times.
Then move the wood block the the area between the cooling fins and tap,tap a few more times all the way around. It takes time but will come off. Don't go hitting it hard or with steel, it will damage the rotor or the bearing.
Thread Starter
Registered User
Joined: Jan 2003
Posts: 401
Likes: 0
From: RALEIGH NC
How to ( Ball joint 2 )
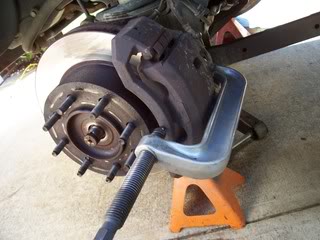
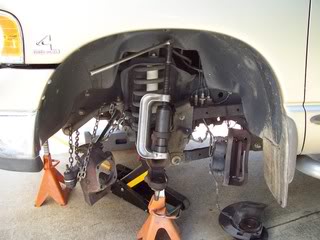
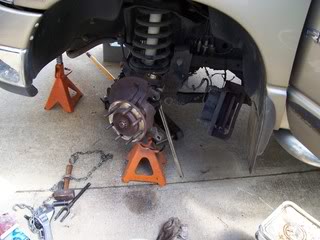
Next back the four bolts out a little over 50% that hold the bearing on.
The front are harder to get to then the back.
This step is when you need to start the truck and then use a socket and ext to go from the bolt head to the axle tube and brackets. If you have someone help you remember take it slow and watch the hands the power steer is under a lot of pressure and you can bust stuff or that person.
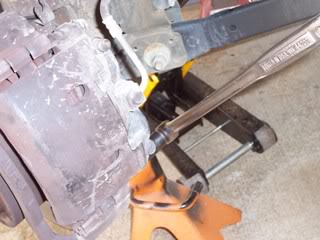
Just take it slow and move 1/4" at a time side to side. Back the bolts out more and keep going. You want it to come out square...
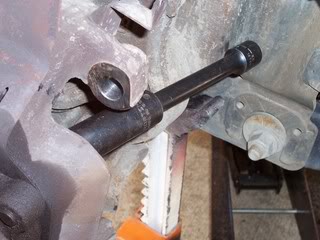
The front works better with two sockets, the other side of the axle can be done with the socket and ext.
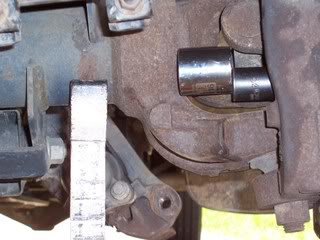
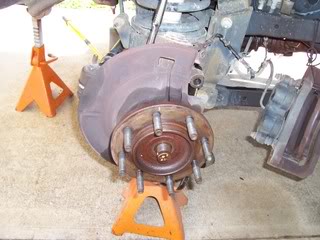
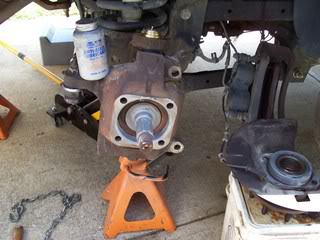
So the hub comes out and shows why it is so hard, lots of rust...
Close up of the bearing and some of the rust.
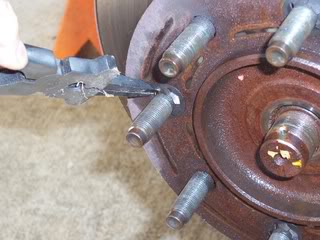
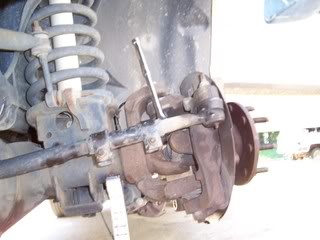
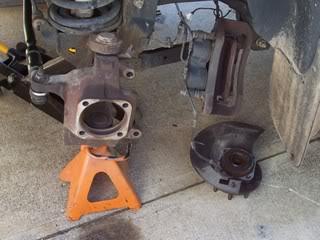
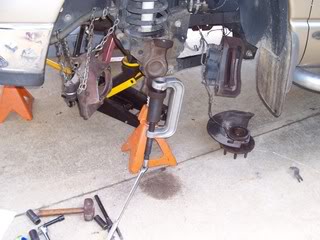
After the bearing has been pulled then you can pull the axle shaft. It shows more rust and also the circle clip on the Ball Joint you need to remember to remove. Now is a good time.

After removing the nuts on the ball joint the outer will fall off and you can just chain it and the tie rod out of the way. If you need to use a pickle fork leave one nut on some, if not the thing will jump off and get you. Its heavy.
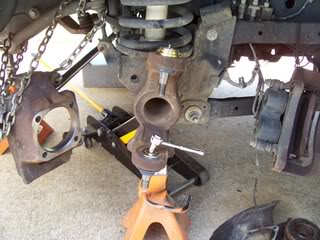
Now its time for the ball joints the upper old is coming out.
The lowed ball joint is coming out.
The front are harder to get to then the back.
This step is when you need to start the truck and then use a socket and ext to go from the bolt head to the axle tube and brackets. If you have someone help you remember take it slow and watch the hands the power steer is under a lot of pressure and you can bust stuff or that person.
Just take it slow and move 1/4" at a time side to side. Back the bolts out more and keep going. You want it to come out square...
The front works better with two sockets, the other side of the axle can be done with the socket and ext.
So the hub comes out and shows why it is so hard, lots of rust...
Close up of the bearing and some of the rust.
After the bearing has been pulled then you can pull the axle shaft. It shows more rust and also the circle clip on the Ball Joint you need to remember to remove. Now is a good time.
After removing the nuts on the ball joint the outer will fall off and you can just chain it and the tie rod out of the way. If you need to use a pickle fork leave one nut on some, if not the thing will jump off and get you. Its heavy.
Now its time for the ball joints the upper old is coming out.
The lowed ball joint is coming out.
Thread Starter
Registered User
Joined: Jan 2003
Posts: 401
Likes: 0
From: RALEIGH NC
How to ( Ball joint 3 )
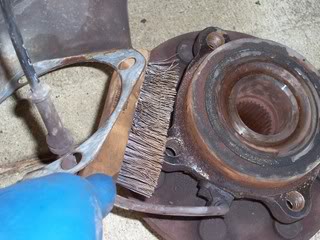
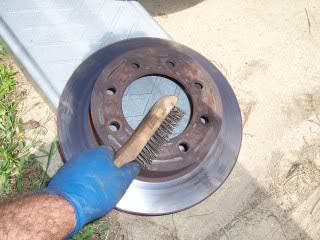
Clean up of the outer, wire brush and file to get all the rust off.
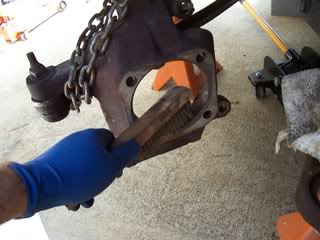
Clean up of the bearing to get all the rust off.
Put the new upper ball joint in.
Put the new lower ball joint in.
Put both the grease fittings in, something the old ones should have had.
Put the outer on and get the nuts tight. This is what you can grease the joints and put the flat plug in the bottom joint.
Put the axle back in and put a good coat of never seize on it so if you ever need to pull the hub it will be easy. Put it on the axle spline and flange of the bearing.
Install the bearing and the four bolts that hold it and put lock tite on them.
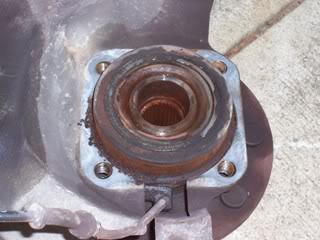
Wire brush the face of the bearing so the disk will fit without using the BFH.
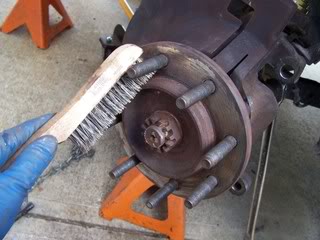
Its a good time to clean and look over you disks to see how they are and clean them up, wire brush out all the rust from the flange area.
Clean up of the bearing to get all the rust off.
Put the new upper ball joint in.
Put the new lower ball joint in.
Put both the grease fittings in, something the old ones should have had.
Put the outer on and get the nuts tight. This is what you can grease the joints and put the flat plug in the bottom joint.
Put the axle back in and put a good coat of never seize on it so if you ever need to pull the hub it will be easy. Put it on the axle spline and flange of the bearing.
Install the bearing and the four bolts that hold it and put lock tite on them.
Wire brush the face of the bearing so the disk will fit without using the BFH.
Its a good time to clean and look over you disks to see how they are and clean them up, wire brush out all the rust from the flange area.
Thread Starter
Registered User
Joined: Jan 2003
Posts: 401
Likes: 0
From: RALEIGH NC
How to ( Ball joint 4 )
Install the brake caliper and mounting bracket with the two bolts and use lock tite. Add 4 lug nuts to hold the disk in place and seat it on the hub. Push your brakes by hand or foot to make sure the pads close up like they should and you will feel and should hear them some.
Put the tire and wheel back on and take it off the jack stand.
This is when you need to put what you got to get the big nut tight.
The center cap goes on and off for a ride.
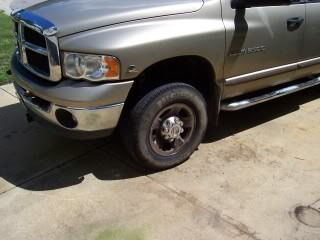
And that be it time for some Beer.....
Put the tire and wheel back on and take it off the jack stand.
This is when you need to put what you got to get the big nut tight.
The center cap goes on and off for a ride.
And that be it time for some Beer.....
Trending Topics


Registered User
Joined: Jun 2008
Posts: 793
Likes: 0
From: Edmonton, AB
Very good writeup, makes me feel a lot better about doing them myself. Only question is did you also replace U-joints at same time? Seems like a lot of people say to do both at once as they are easy to get at when doing ball joints?
Thread Starter
Registered User
Joined: Jan 2003
Posts: 401
Likes: 0
From: RALEIGH NC
I had plan on doing them, I had them in hand and would say to anyone that is going to do the ball joints, get the U joints, you may need them. I was thinking about doing them anyway but its hot down here and when I pulled the shaft out the seals were 100% and the joints were the same, not a problem with them at all. Most of my 4x4ing is on the road and moving my big trailer and camping. The old truck they were shot at 75k miles but that one was in mud and sand, the seals were shot and two cups had no rollers in it. I did extra cleanup so as the next time I do brakes I will do the joints and it should go fast to pull the hubs off.
If I was 20 years younger the heat would not get me and I would have done it all. As you get older you do stuff that only takes 3-4 hours in the sun.
If I was 20 years younger the heat would not get me and I would have done it all. As you get older you do stuff that only takes 3-4 hours in the sun.

Registered User

Joined: Jan 2004
Posts: 3,528
Likes: 16
From: Oregon
Thank you for the write up.
I wonder if a person with the Harbor Freight ball joint press has to buy the kit of extra cups?
The other tool I don't have in my garage I suppose would be 3/4 drive ratchet set and a torque wrench that goes high enough for the axle nut...
Anyhow thanks for the great write up. I will book mark it.
I wonder if a person with the Harbor Freight ball joint press has to buy the kit of extra cups?
The other tool I don't have in my garage I suppose would be 3/4 drive ratchet set and a torque wrench that goes high enough for the axle nut...
Anyhow thanks for the great write up. I will book mark it.
