


Update 1st. Gen to the 21st century


Thread Starter
Administrator


Joined: Nov 2004
Posts: 4,084
Likes: 235
From: Southern California
Update 1st. Gen to the 21st century
04/22/2006
Well it all started when I got my order from Lu’s Lighthouse. I got my new LED marker lights to replace the boring ones on my 1991 D-350 Dually.
The ones I have on right now were replaced last year and already the lens are crazed and a couple of them fill up with water when it rains.
So if some of you haven’t thought about replacing yours then maybe this will help convince you to do so.
First thing I did was lay out a big towel on the cab so my tools would stop rolling off, and of course protect the paint.
I set the new ones on the cab to get a feel of how I wanted to place them although the way the old ones were installed limits the possibilities because of the big hole they made.
[IMG]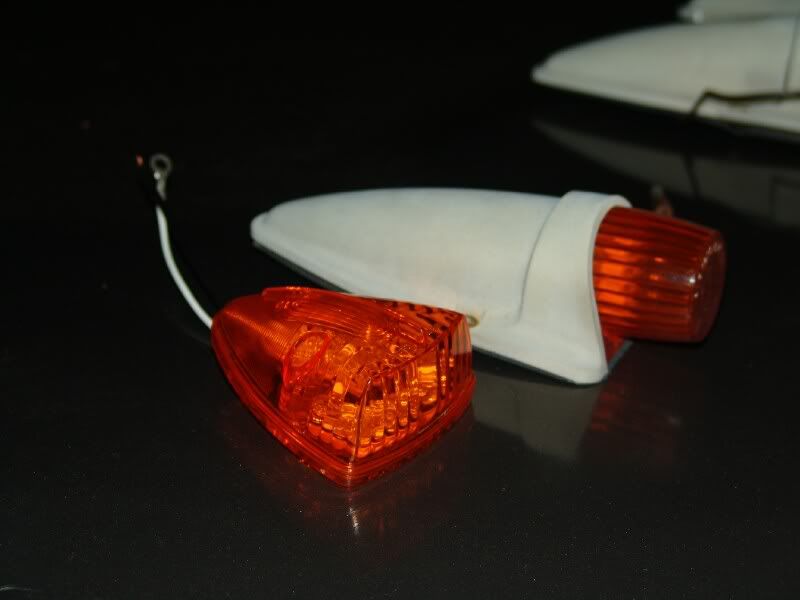 [/IMG]
The new ones have to sit back about an inch or so because these are so short.
I removed the stock lights and set them aside then cleaned up the yuck and old gasket material left behind on the paint. I used 3M Finesse-it II to polish out the marks and scratches. ( I could not get out the deep scratches but I am getting the cab re-painted in a few weeks anyways)
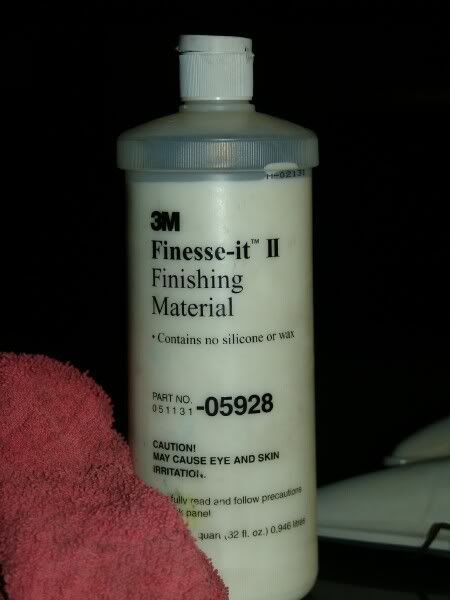
This stuff works great although it is a bit expensive cost around $40.00 for a quart bottle but it goes a long way.
Next I just had to fix the trick the manufacture pulled to save wire and not run a separate ground wire to each light, so I pulled a 16 gauge wire along the same path as the power wire and created a ground for each light so they do not have to depend on the screw to make them blink.
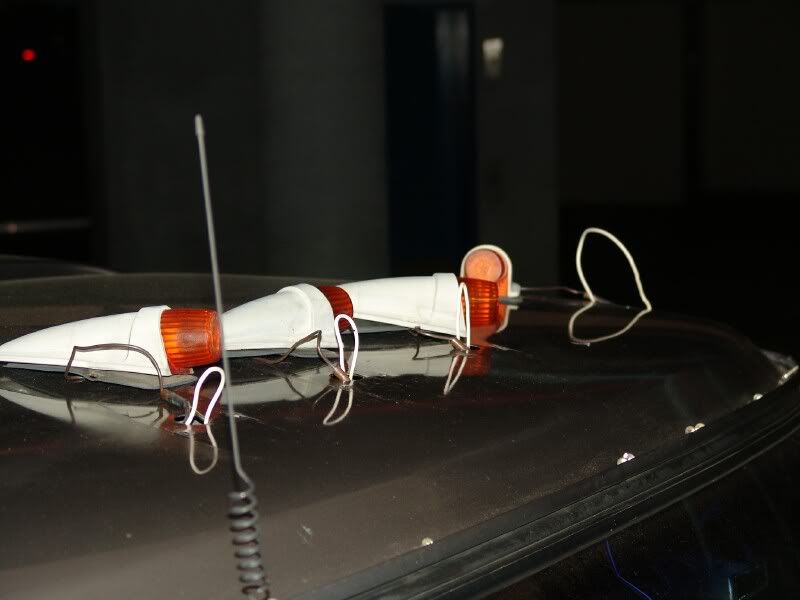
I terminated each ground node into a female bullet connector and ty-rap both + & -- together. The end of this wire went down the driver’s side pillar along with the power and is grounded behind the kick panel.
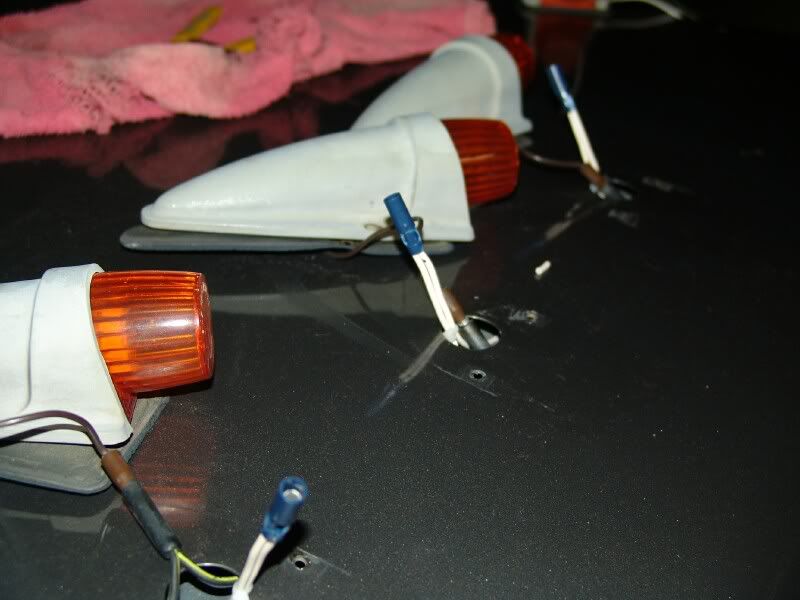
Then after a few trial and error fits I found the place the lights would work the best and cut out a heavy cardboard template the same size as the new foam gasket where by I placed it on the old gasket and marked the location of the holes for the screws and for the wire.
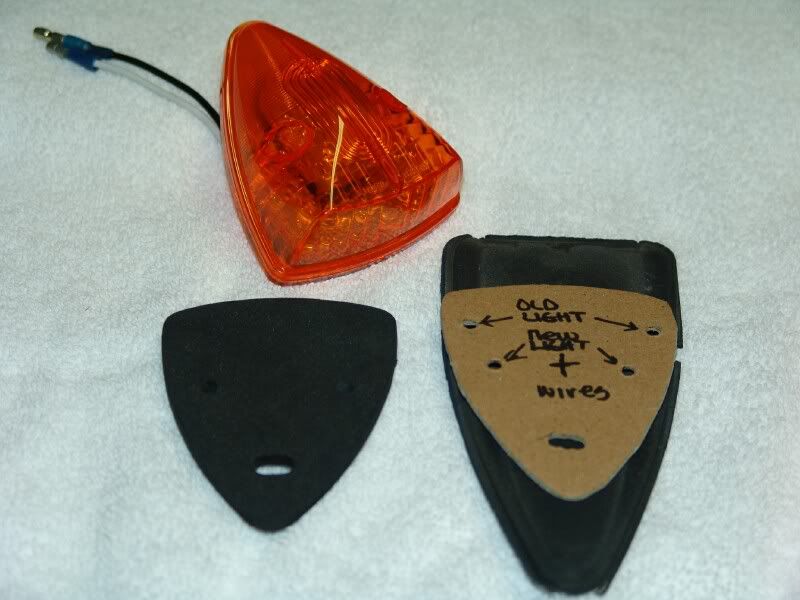
I used a hand punch and cut out the holes on the template so each light will be placed exactly like the last.
Then using the old screws I mounted the template to the cab and then marked the location for the new holes for each of the lights.
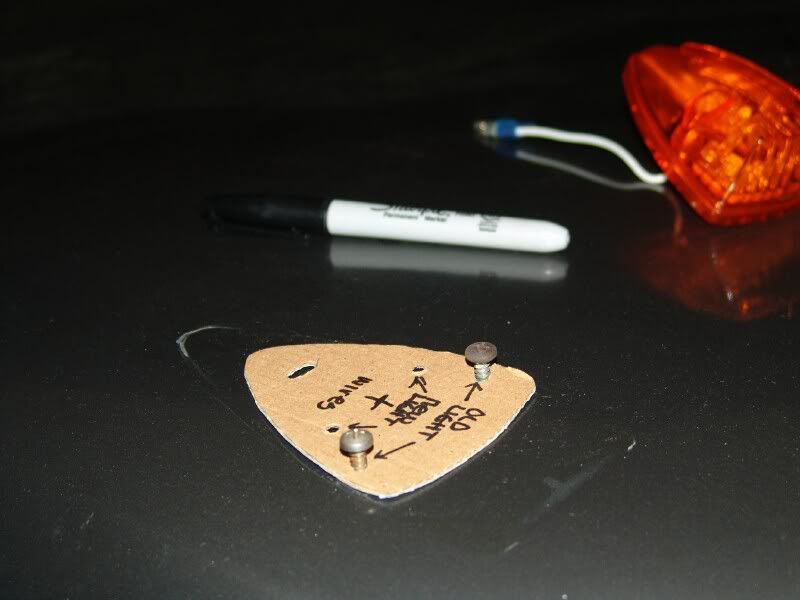
I checked it a few more times, took a drink, a breath and then drilled the holes while laying across the cab to steady the drill, first place a small rare earth magnet next to the hole you are going to drill.
I drilled it in 2 steps first being 3/32 drill and then a 7/64 drill. Be careful when you drill that you go easy and keep it level, our trucks have a double wall cab so you wont drill through your headliner (well I guess you could) but you might break the small drill bitts because the liner is not parallel to the cab. (See the reason for the strong magnet was to catch all of the filings from the drill so it does not fall down the hole and rust inside the cab and also keeps them from scratching the paint.
Now with all of the holes drilled and the chips cleaned up it is time to prep the new lights, I cut off the ground lug from the white wire and crimped on a male bullet connector then the black wire which is the positive I also mated a bullet connector that has a shrink sleeve and heated it with my heat gun into a solid connection.
Getting to the rewarding part now, Lay the lights out on the cab and then
Connect the light terminals and turn on the lights to make sure nothing got cross connected remember, or maybe you did not know that LED’s have a polarity and while you can’t usually blow them out, they just wont work if connected backwards.
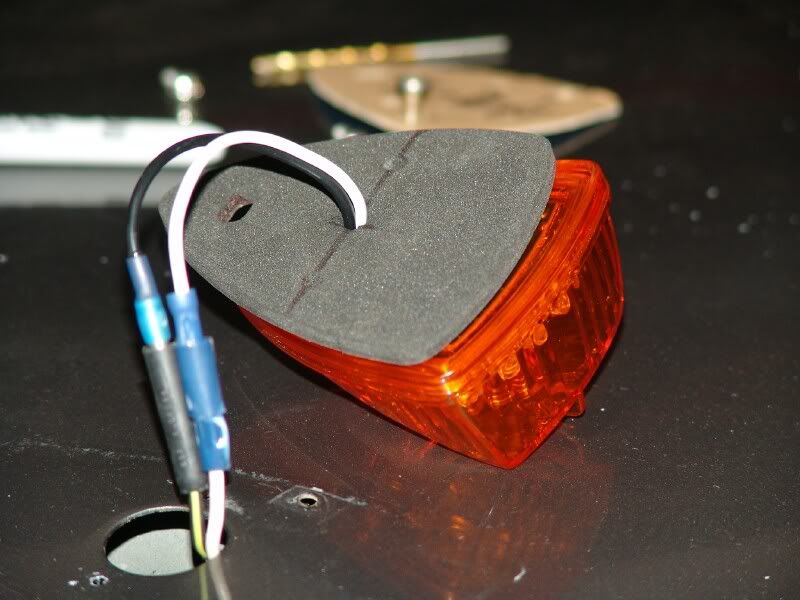
If you did it right, you will have light, lots of light..
Install them into the cab (I used #8 x 1” Stainless Steel Pan Head Phillips sheet metal screws) I bought 12 because usually when you install then at night or on a weekend you always loose ONE.
Mount them all on the cab and cinch the lights down till the gasket squishes down and seals all of the holes for a watertight seal.
Clean up your tools and by now it should be dark,
Call everyone out and have them stand in front of your truck a good distance away, have someone pull the light switch and then stand there in awe with a big smile on your face knowing that you made that happen.
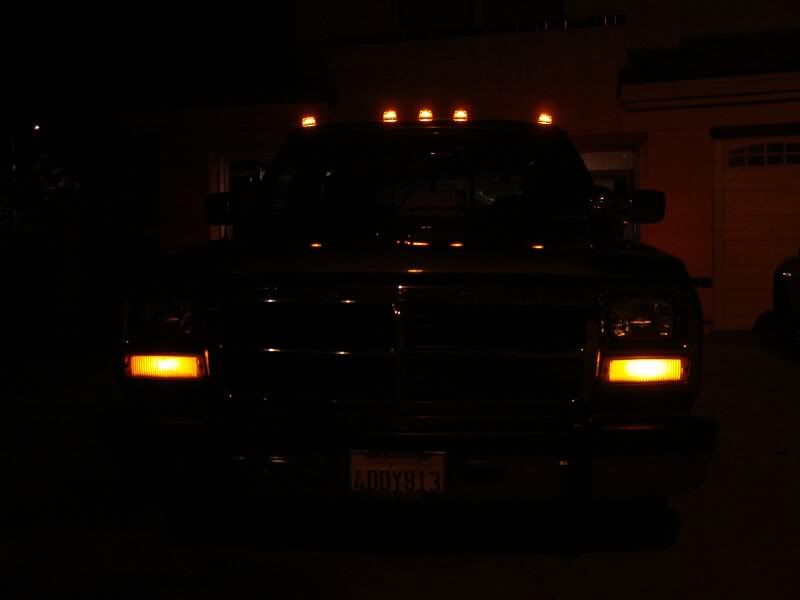
I am quite happy with my lights and the new ones next to the old ones reveal how ugly the old ones really were.
These things are really bright there are 11 high output LED’s in each of these lights and they can be seen from all directions including on top.
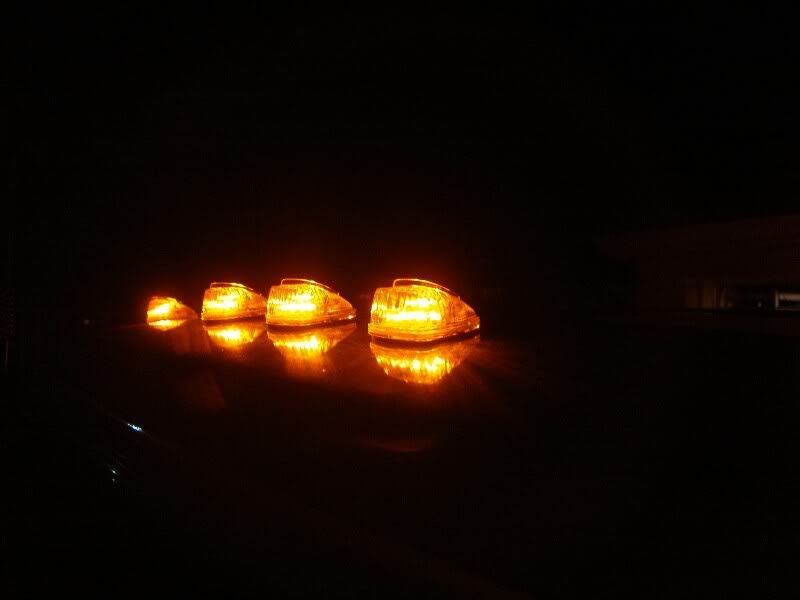
They even light up on the top!
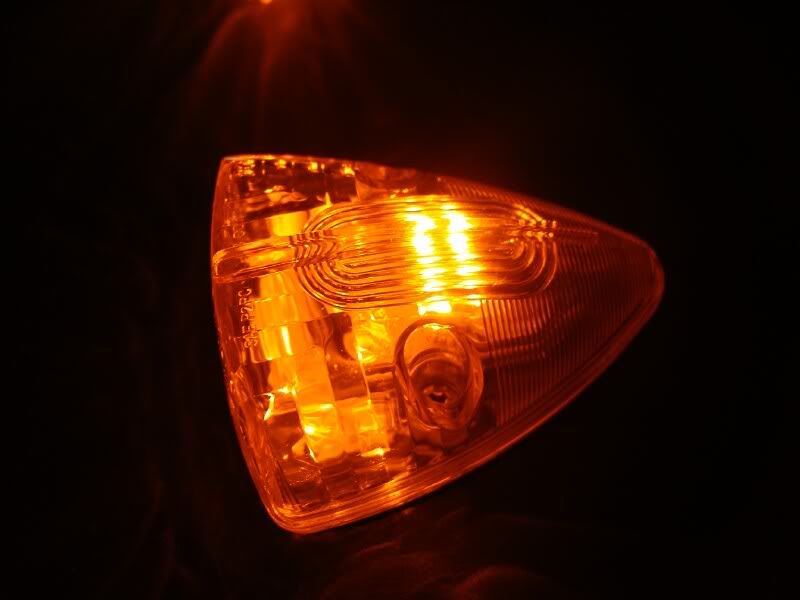
The lights I used are made by Grote and the part # G5053
They are around $12.00 to $15.00 each depending on where you get them although I got them for $7.00 apiece.
Most heavy truck parts or better Truck Stops {like TA} should have them.
In our town there is a big Church that is all mirrored glass and I like to drive by it and see my truck’s reflection with all of the lights on.
Oh come on, you know you do that too.
Thanks for letting me share my adventure.
Jim
Well... So what do you think?
Well it all started when I got my order from Lu’s Lighthouse. I got my new LED marker lights to replace the boring ones on my 1991 D-350 Dually.
The ones I have on right now were replaced last year and already the lens are crazed and a couple of them fill up with water when it rains.
So if some of you haven’t thought about replacing yours then maybe this will help convince you to do so.
First thing I did was lay out a big towel on the cab so my tools would stop rolling off, and of course protect the paint.
I set the new ones on the cab to get a feel of how I wanted to place them although the way the old ones were installed limits the possibilities because of the big hole they made.
[IMG]
[/IMG] The new ones have to sit back about an inch or so because these are so short.
I removed the stock lights and set them aside then cleaned up the yuck and old gasket material left behind on the paint. I used 3M Finesse-it II to polish out the marks and scratches. ( I could not get out the deep scratches but I am getting the cab re-painted in a few weeks anyways)
This stuff works great although it is a bit expensive cost around $40.00 for a quart bottle but it goes a long way.
Next I just had to fix the trick the manufacture pulled to save wire and not run a separate ground wire to each light, so I pulled a 16 gauge wire along the same path as the power wire and created a ground for each light so they do not have to depend on the screw to make them blink.
I terminated each ground node into a female bullet connector and ty-rap both + & -- together. The end of this wire went down the driver’s side pillar along with the power and is grounded behind the kick panel.
Then after a few trial and error fits I found the place the lights would work the best and cut out a heavy cardboard template the same size as the new foam gasket where by I placed it on the old gasket and marked the location of the holes for the screws and for the wire.
I used a hand punch and cut out the holes on the template so each light will be placed exactly like the last.
Then using the old screws I mounted the template to the cab and then marked the location for the new holes for each of the lights.
I checked it a few more times, took a drink, a breath and then drilled the holes while laying across the cab to steady the drill, first place a small rare earth magnet next to the hole you are going to drill.
I drilled it in 2 steps first being 3/32 drill and then a 7/64 drill. Be careful when you drill that you go easy and keep it level, our trucks have a double wall cab so you wont drill through your headliner (well I guess you could) but you might break the small drill bitts because the liner is not parallel to the cab. (See the reason for the strong magnet was to catch all of the filings from the drill so it does not fall down the hole and rust inside the cab and also keeps them from scratching the paint.
Now with all of the holes drilled and the chips cleaned up it is time to prep the new lights, I cut off the ground lug from the white wire and crimped on a male bullet connector then the black wire which is the positive I also mated a bullet connector that has a shrink sleeve and heated it with my heat gun into a solid connection.
Getting to the rewarding part now, Lay the lights out on the cab and then
Connect the light terminals and turn on the lights to make sure nothing got cross connected remember, or maybe you did not know that LED’s have a polarity and while you can’t usually blow them out, they just wont work if connected backwards.
If you did it right, you will have light, lots of light..
Install them into the cab (I used #8 x 1” Stainless Steel Pan Head Phillips sheet metal screws) I bought 12 because usually when you install then at night or on a weekend you always loose ONE.
Mount them all on the cab and cinch the lights down till the gasket squishes down and seals all of the holes for a watertight seal.
Clean up your tools and by now it should be dark,
Call everyone out and have them stand in front of your truck a good distance away, have someone pull the light switch and then stand there in awe with a big smile on your face knowing that you made that happen.
I am quite happy with my lights and the new ones next to the old ones reveal how ugly the old ones really were.
These things are really bright there are 11 high output LED’s in each of these lights and they can be seen from all directions including on top.
They even light up on the top!
The lights I used are made by Grote and the part # G5053
They are around $12.00 to $15.00 each depending on where you get them although I got them for $7.00 apiece.
Most heavy truck parts or better Truck Stops {like TA} should have them.
In our town there is a big Church that is all mirrored glass and I like to drive by it and see my truck’s reflection with all of the lights on.
Oh come on, you know you do that too.
Thanks for letting me share my adventure.
Jim
Well... So what do you think?


Registered User
Joined: Sep 2004
Posts: 787
Likes: 0
From: INWOOD, West 'BY GOD' Virginia
Jim, It's things like this that make your truck so sweet, and you deserve another TOM. I wish I had half your skill. Keep up the great work and writeups, it makes me think that I could almost do something nice, for a change.
Michael
Michael


 .
.
Trending Topics


 ), this would be the shizzle.

Registered User
Joined: Oct 2004
Posts: 384
Likes: 0
From: In the shadow of Mt. Rainier
My friend just got a 92 4wd Ctd and saw your thread here and decided he's also going to do this mod on his truck. They were off when he got it as it had been hit by a small tree and was undergoing body/paint prep work so he needed to do something with them anyway. Me?? I have my marker lights built in to my visor (do a google on Lund MoonVisor for more info) so I kind of lucked out there. Plus I nevcer really liked those topedo looking things anyways.... Thanks for your GREAT threads on repairs made EASY(ER). Your camera work really adds to these posts too! Chuck


Registered User
Joined: Mar 2006
Posts: 111
Likes: 0
From: Mitchellville, IA
they do make LED bulbs to replace stock bulbs like the ones in your turn signals and dash. look on ebay. i have found them for like $3 for 2. but those do look pretty friggin sweet. nice job!!!!!!!!
Thread Starter
Administrator
Joined: Nov 2004
Posts: 4,084
Likes: 235
From: Southern California
Cab Maker Lights
Some of you have been asking for the dimension for the installation of the cab marker lights.
Here are the dimensions for the lights that are on my truck.
This will be the center of the hole for the wiring which looks to be about 1/2" dia.
If you look in the pictures for my installation of LED lights you will see how they are installed.
Here is my picture drawn with a Sharpie
Hey.. I never said I was an artist.
Later Jim
* Admin, is there any you can tie this to the "Update 1st. Gen to the 21st century" post?
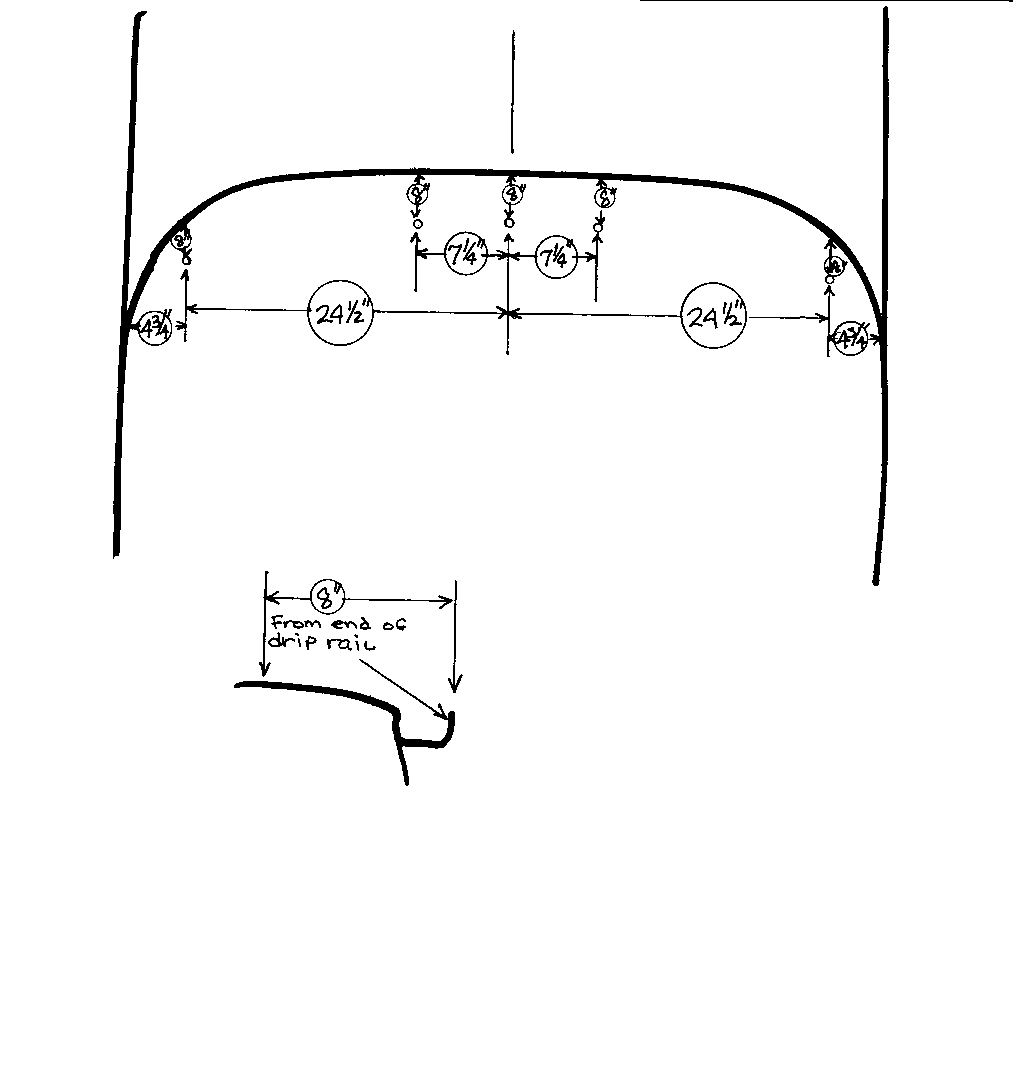
Here are the dimensions for the lights that are on my truck.
This will be the center of the hole for the wiring which looks to be about 1/2" dia.
If you look in the pictures for my installation of LED lights you will see how they are installed.
Here is my picture drawn with a Sharpie
Hey.. I never said I was an artist.
Later Jim
* Admin, is there any you can tie this to the "Update 1st. Gen to the 21st century" post?


Registered User
Joined: Nov 2006
Posts: 351
Likes: 0
From: Botha,Alberta,Canada
Jim,sorry to revive this old thread but I've got a question that's a little off topic.
I put LED lamps into my front turn signal/marker lamp buckets.Now,with the head lights on,the signals have that faint glow that says there's a burnt bulb.
Is there a way to deal with this glow?Some kind of resistor,or?????
Thanks in advance,
I put LED lamps into my front turn signal/marker lamp buckets.Now,with the head lights on,the signals have that faint glow that says there's a burnt bulb.
Is there a way to deal with this glow?Some kind of resistor,or?????
Thanks in advance,

