
Spring Liners for a Soother Ride


Registered User
Joined: Oct 2014
Posts: 3
Likes: 0
Polishing spring ends
Part-1
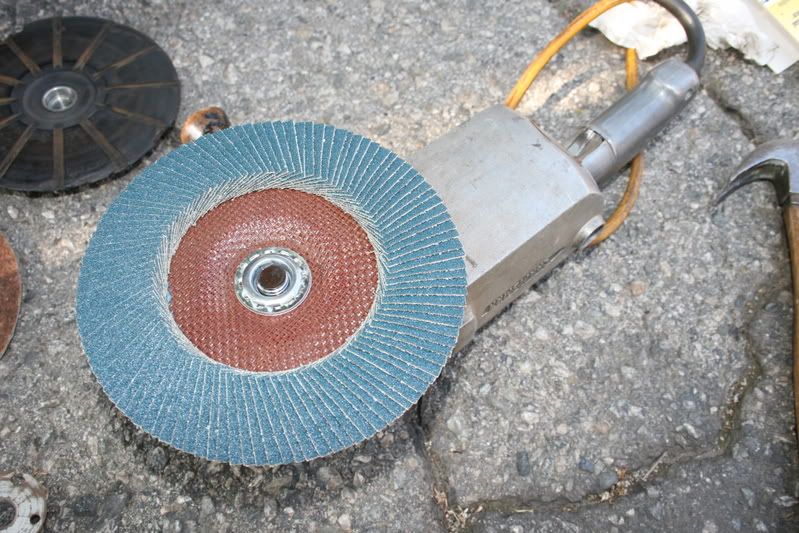
This is the tool that we will be using to make a custom set of smooth riding springs.
If you have not used this before, it is a flap style grinder disk made up of many individual pieces of bonded abrasive.
After it grinds down all of the rust and imperfections and then it will polish the steel to a smooth finish all in the same operation.
I got this at Home Depot and it cast about $10.00 and will fit any standard grinder.
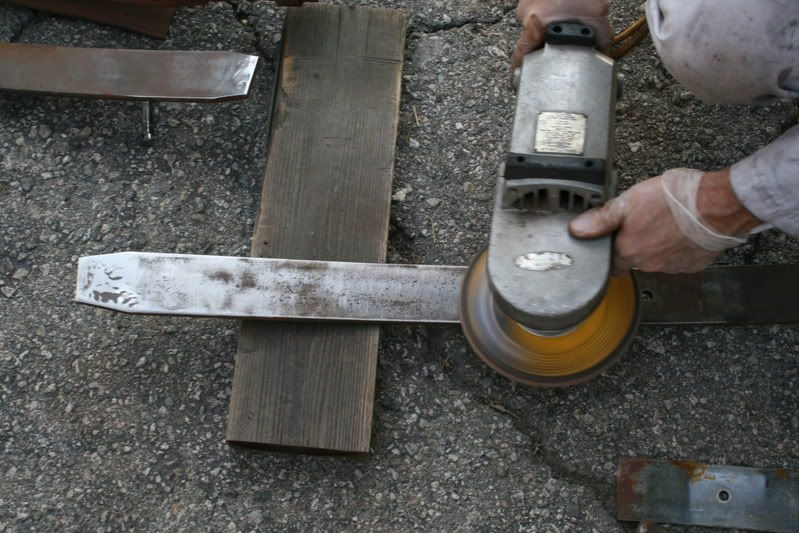
Support each leaf between 2 blocks of wood and then while standing on it simply run the grinder flat across the width of each spring leaf until they are flat, keep the grinder moving as to not to build up too much heat and to weaken the spring action in the leaf but don�t worry too much because they have to get pretty hot.
You will get the feel once you do the first one, then flip it over and do the other side then do the same for all of them.
Then hit the ends of them and break down all of the sharp edges and leave a chamfer. (This is important)
When you are finished the spring will be flat and smooth as silk.
Now crawl under the truck and look up at the ends of the main leaf, you will see some pretty deep gouges in the spring.
Here is where I used a small air powered Die Grinder with an abrasive wheel and I carefully smoothened out all of the damage.
The idea is not to leave sharp edges anywhere the leaves come together.

Do the same at both ends of the leaf, polish them smooth and you want to then clean all the rust from the bottom of the leaf.

This is the tool that we will be using to make a custom set of smooth riding springs.
If you have not used this before, it is a flap style grinder disk made up of many individual pieces of bonded abrasive.
After it grinds down all of the rust and imperfections and then it will polish the steel to a smooth finish all in the same operation.
I got this at Home Depot and it cast about $10.00 and will fit any standard grinder.
Support each leaf between 2 blocks of wood and then while standing on it simply run the grinder flat across the width of each spring leaf until they are flat, keep the grinder moving as to not to build up too much heat and to weaken the spring action in the leaf but don�t worry too much because they have to get pretty hot.
You will get the feel once you do the first one, then flip it over and do the other side then do the same for all of them.
Then hit the ends of them and break down all of the sharp edges and leave a chamfer. (This is important)
When you are finished the spring will be flat and smooth as silk.
Now crawl under the truck and look up at the ends of the main leaf, you will see some pretty deep gouges in the spring.
Here is where I used a small air powered Die Grinder with an abrasive wheel and I carefully smoothened out all of the damage.
The idea is not to leave sharp edges anywhere the leaves come together.
Do the same at both ends of the leaf, polish them smooth and you want to then clean all the rust from the bottom of the leaf.
I am curious what grit sandpaper was on the flapper wheel you used.

Thread Starter
Administrator


Joined: Nov 2004
Posts: 4,084
Likes: 235
From: Southern California
Here you go,
Norton 60-Grit Coarse Flap Disk
Size: 7"X5/8"X11
I bought them at Home Depot
BTW anybody local to SoCal there are a set of carefully used rear springs that would love to sit under a Gen-One again.
PM me.
Jim
Norton 60-Grit Coarse Flap Disk
Size: 7"X5/8"X11
I bought them at Home Depot
BTW anybody local to SoCal there are a set of carefully used rear springs that would love to sit under a Gen-One again.
PM me.
Jim

Thread
Thread Starter
Forum
Replies
Last Post
Rushford
3rd Generation Ram - Non Drivetrain - All Years
23
Aug 26, 2007 07:21 PM