
Spring Liners for a Soother Ride


Thread Starter
Administrator


Joined: Nov 2004
Posts: 4,084
Likes: 235
From: Southern California
Part-1
I finally found the reason why our trucks ride so rough and here is how we can repair them.
Anyone who owns a Dually knows just how harsh the ride can be; along with the poorly built and maintained highways for me my ride has become a not so enjoyable task.
On the freeway the truck would hit the dips in the roadbed so hard it would shake things off the seat an as nice as my truck is it would literally shake you to death on long rides.
Having tried to soften the ride by installing Firestone Air Bags and removing springs from the pack it helped a lot but it was not the answer so while laying under the truck I studied the suspension and how the springs acted when the truck was bounced and I came up with the simple answer of why the truck rides so rough.
So I calling the spring shops and asking them questions and they basically had no clue what I was asking for so I searched the World Wide Web and after a lot of dead ends I found what I needed.
To see the reason the truck rides so rough we need to look at the leaf springs.
I will show you the answer in a bit but to fix the problem first we need to remove the leaf springs.
Assuming you have the required skill and knowledge to perform this repair you should have no problems doing it yourself but a helper is advisable.
If you do not have the skills then you could print out these instructions and take it to someone who can.
FIRST find a place you can work on the truck that is flat and level as possible, this is important for safety also find a place where you can be safe from people walking around you last thing you would want is for some kids to get hurt or your wife or GF bump your truck off the jack with you under it.
Safety First, Chock the front wheels.
Now I did both sides at the same time but I would suggest only one at a time so the will have a sample if something goes wrong.
You will need a good floor jack and a set of 6 Ton Jack Stands that will support the weight of the back of the truck safely.
Although it might be tempting, Never, Never, Never use Cinder Blocks to support anything you are going to get underneath.
Jack up the truck by the frame as high as you can get it and support the frame in front of the rear axle is preferred but you can also support it at the rear of the frame.
Then lower the jack and then shake the truck a bit to make sure it is secured.
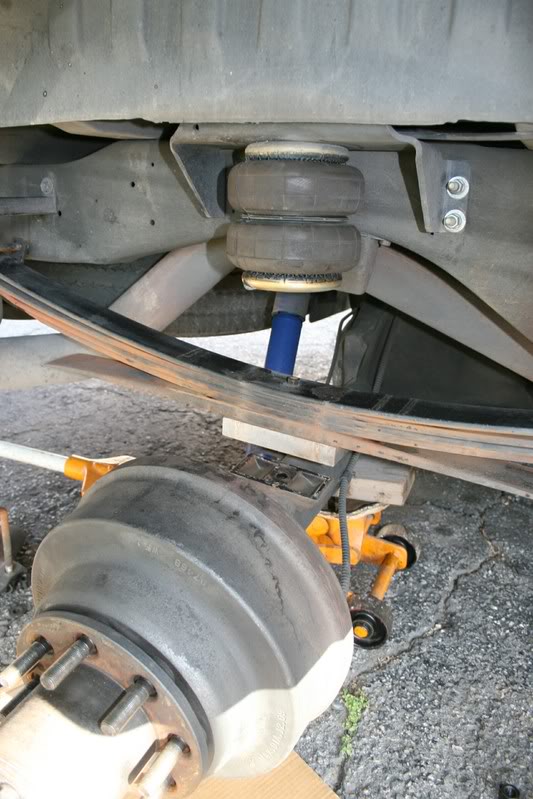
Then using your floor jack from the rear support the axle tubes at either side of the differential (I used a block of 2X4 on the cradle of the jack) Remove both rear tires and get then safely out of the way.
Leave the jack under the axle with the wheels remove and then slowly jack up the axle until it is not hanging from the spring.
Remove the bottom Shock absorber nut and washer and remove the shock from the lower mount. If you have Gas Charged Shocks like I do keep clear of the extending end.
Use a wire brush and clean the threads of the 4 ends of the U-Bolts and then spray a penetrating lubricant (WD-40, PB Blaster) on the threads and in top of the nuts.
Use an impact and a deep socket slowly remove the nuts from the U-Bolts and you will see the bottom plate come free from the spring pack.
Use caution when you remove the nuts that you do not gall the threads and pull the threads out, go slow or use a ratchet wrench by hand, you can easily mess up the threads and you will be looking for new one.
It might be a good idea to get a pair of new ones if yours look rusted or dinged.
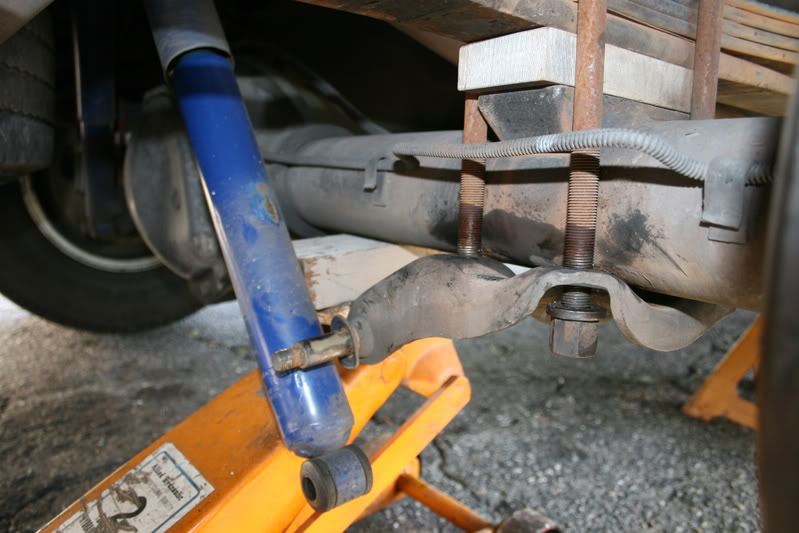
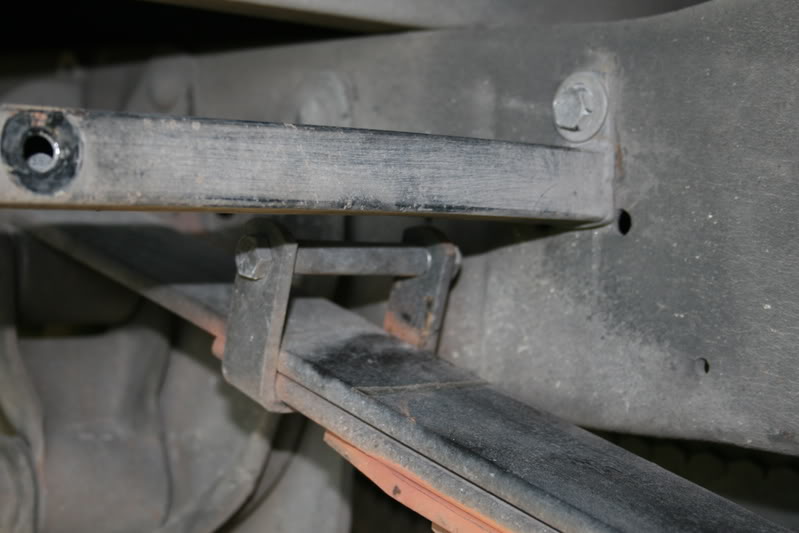
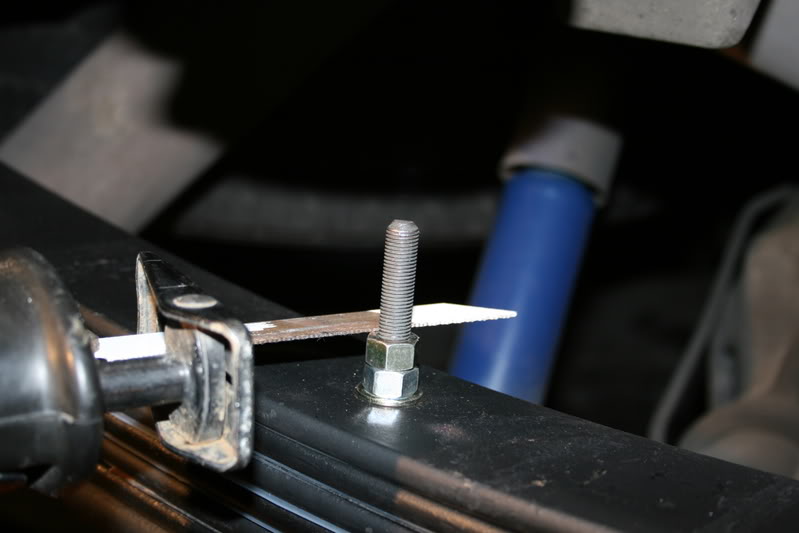
At each end of the spring pack there will be a clamp with a 3/8 � bolt and sleeve securing the leaves, remove the nut and leave the bolts in place for now.
Carefully lower the axle down and away from the bottom of the spring pack, it may be stuck and require a rap from a sledge, when it is free then lower it down about 6 inches.
In the center if the springs you will see a 3/8� center bolt that needs to be removed.
This is very important, this retains the springs and depending on their present condition and arch, without first retaining the leaves this could release literally THOUSANDS of pounds of lethal force and very easily kill you if your head were in the way. I have seen this happen!
You need to clamp the springs near the center with a big C-Clamp or a pair of Pony adjustable clamps you can get from Home Depot. Leave yourself enough thread to let it open up about 1�.
Then slowly remove the 9/19 � nut and release the leaves, you might need a pair of Vise Grips for the bottom of the bolt as there is no head.
I chose to work on the spring pack by leaving the main leaf still attached the chassis, it is a lot easier than trying to remove the front and rear pivot bolts.
There will be work required to this leaf but it is easily accomplished with the tools we will use.
You see that now that the center bolt has been removed the leaves will easily separate and remove, most of the pack will still be retained by the two end clamps.
Put on your gloves,
Now go ahead and remove the pack from the axle, here is where 2 people will come in handy because they are a bit heavy and unruly once the bolt has been removed.
Just be careful and watch your step.
Have a pair of 2x4�s about 24� long waiting to receive them.
After you have them on the ground, then break them apart and lay them out across the boards.
If yours were anything like mine then there will be a bit of rust.
This was a bit of a mystery because my truck has always been here in hot sunny Southern California and I can only imagine what they would look like if it had spent it�s life in the snow.
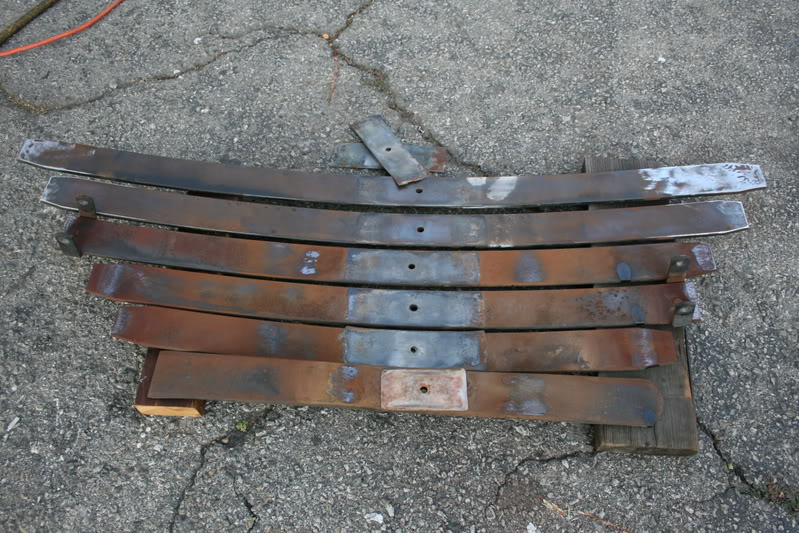
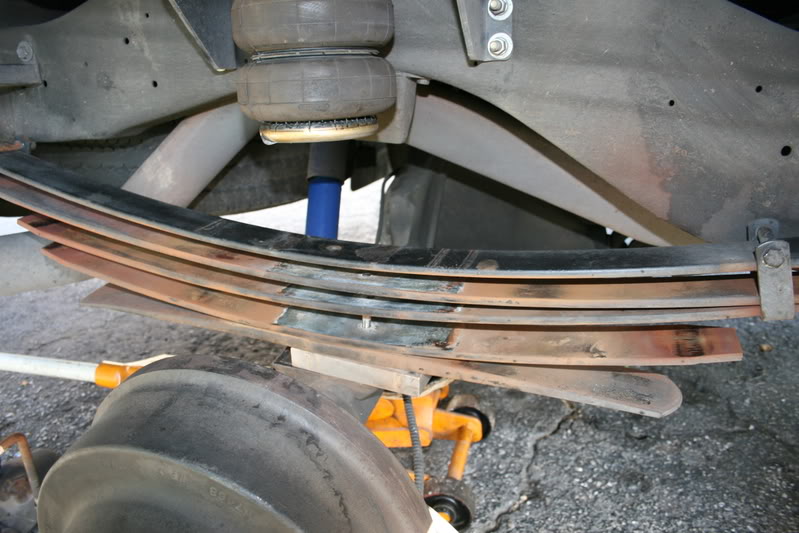
OK now here is where I am going to show you just why our trucks ride so terrible.
If you look here you will see the working end of the spring leaf, If you will look at the shape of the spring you will see it is in a big arch, then you will see that how it is bolted up to the next one and on and on.
Well because the length of each leaf is progressively longer, the arc will change so the ends of one then fall a few inches inward of the next.
And because it is being tried to be flattened out by the weight of the truck the ends of the leaf are being pushed against the next leaf.
Now here is where the problem is, as the trucks suspension is being worked and the spring compress and rebound the physical length of the leaves are constantly lengthening and contracting.
So looking again at the arch the only thing they can do is rub back and fourth against each other continuously as the truck moves down the road.
Springs are made of very hard spring steel, and looking at every one of the ends of the leaves you can see that the manufacturer left the ends with a very sharp square corner which is acting like a hardened tool bit constantly grinding away at the spring it contacts.
Instead of all of the springs flexing and contacting over a wide area all of the weight of the truck is being sprung by a few inches of grinding tool steel.
So we have a rough noisy ride.
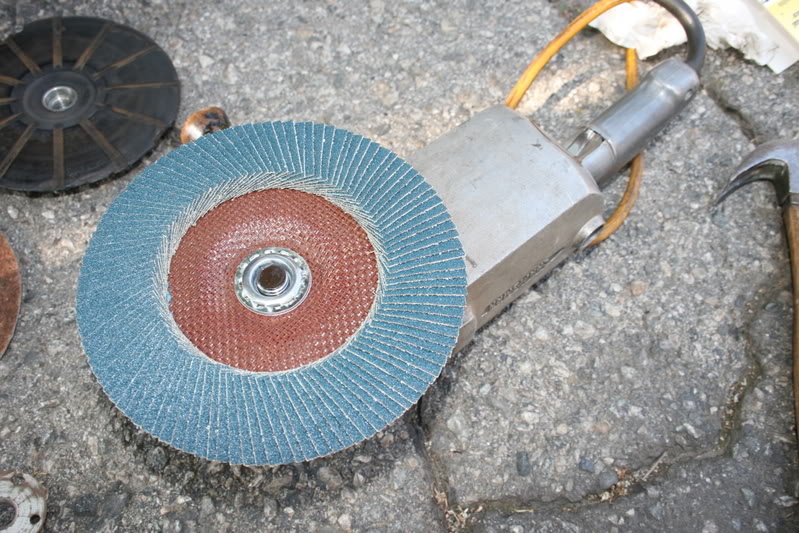
This is the tool that we will be using to make a custom set of smooth riding springs.
If you have not used this before, it is a flap style grinder disk made up of many individual pieces of bonded abrasive.
After it grinds down all of the rust and imperfections and then it will polish the steel to a smooth finish all in the same operation.
I got this at Home Depot and it cast about $10.00 and will fit any standard grinder.
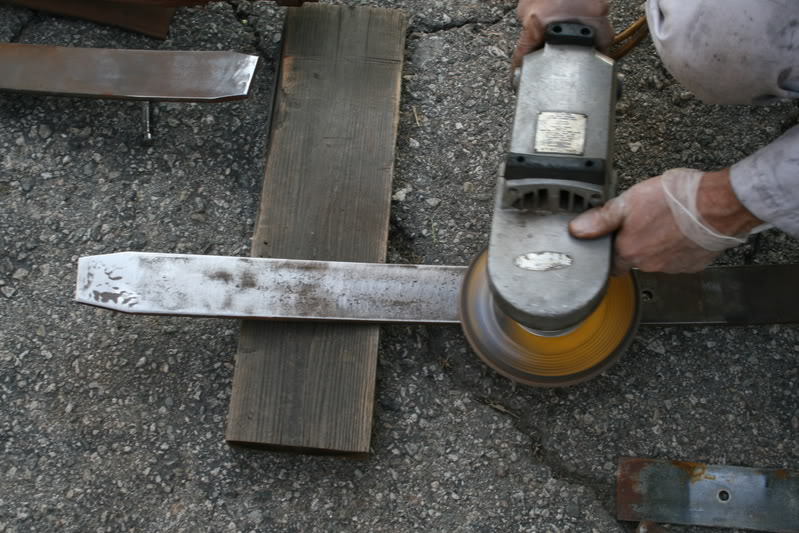
Support each leaf between 2 blocks of wood and then while standing on it simply run the grinder flat across the width of each spring leaf until they are flat, keep the grinder moving as to not to build up too much heat and to weaken the spring action in the leaf but don�t worry too much because they have to get pretty hot.
You will get the feel once you do the first one, then flip it over and do the other side then do the same for all of them.
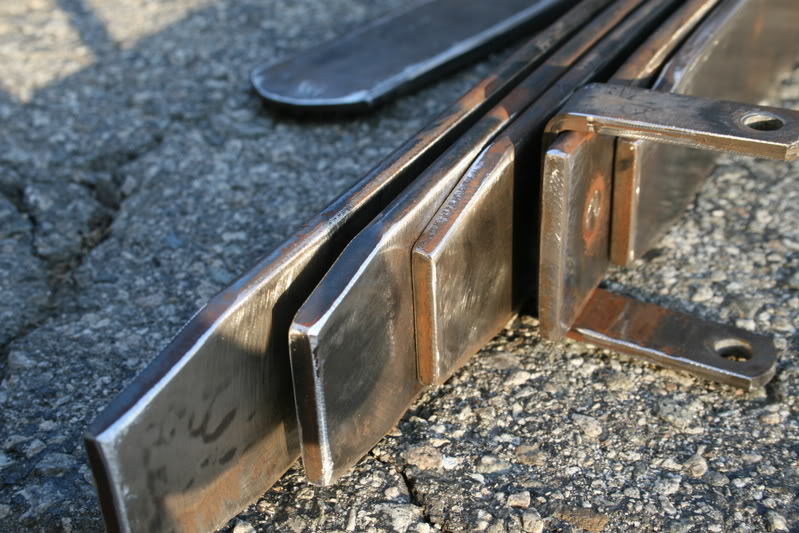
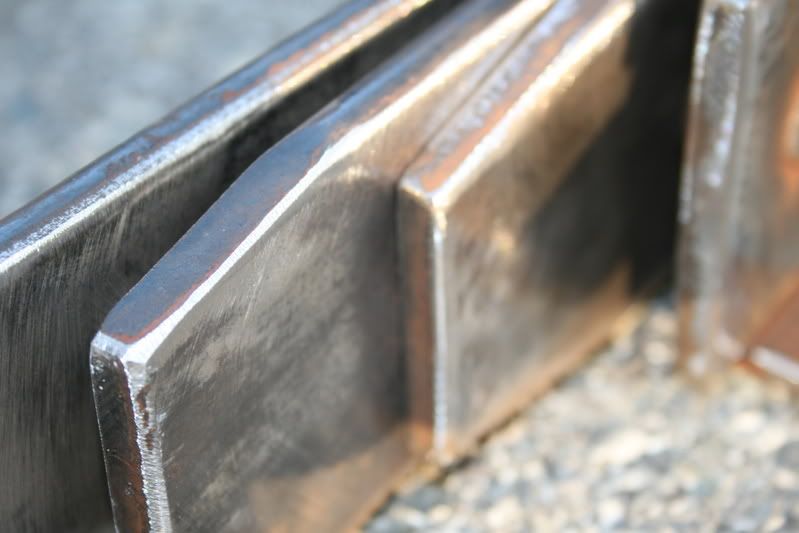
Then hit the ends of them and break down all of the sharp edges and leave a chamfer. (This is important)
When you are finished the spring will be flat and smooth as silk.
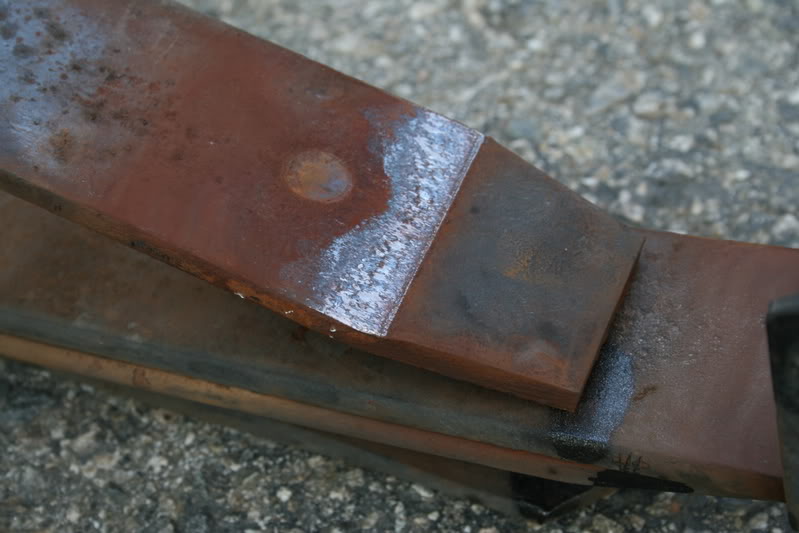
Now crawl under the truck and look up at the ends of the main leaf, you will see some pretty deep gouges in the spring.
Here is where I used a small air powered Die Grinder with an abrasive wheel and I carefully smoothened out all of the damage.
The idea is not to leave sharp edges anywhere the leaves come together.
Do the same at both ends of the leaf, polish them smooth and you want to then clean all the rust from the bottom of the leaf.
I finally found the reason why our trucks ride so rough and here is how we can repair them.
Anyone who owns a Dually knows just how harsh the ride can be; along with the poorly built and maintained highways for me my ride has become a not so enjoyable task.
On the freeway the truck would hit the dips in the roadbed so hard it would shake things off the seat an as nice as my truck is it would literally shake you to death on long rides.
Having tried to soften the ride by installing Firestone Air Bags and removing springs from the pack it helped a lot but it was not the answer so while laying under the truck I studied the suspension and how the springs acted when the truck was bounced and I came up with the simple answer of why the truck rides so rough.
So I calling the spring shops and asking them questions and they basically had no clue what I was asking for so I searched the World Wide Web and after a lot of dead ends I found what I needed.
To see the reason the truck rides so rough we need to look at the leaf springs.
I will show you the answer in a bit but to fix the problem first we need to remove the leaf springs.
Assuming you have the required skill and knowledge to perform this repair you should have no problems doing it yourself but a helper is advisable.
If you do not have the skills then you could print out these instructions and take it to someone who can.
FIRST find a place you can work on the truck that is flat and level as possible, this is important for safety also find a place where you can be safe from people walking around you last thing you would want is for some kids to get hurt or your wife or GF bump your truck off the jack with you under it.
Safety First, Chock the front wheels.
Now I did both sides at the same time but I would suggest only one at a time so the will have a sample if something goes wrong.
You will need a good floor jack and a set of 6 Ton Jack Stands that will support the weight of the back of the truck safely.
Although it might be tempting, Never, Never, Never use Cinder Blocks to support anything you are going to get underneath.
Jack up the truck by the frame as high as you can get it and support the frame in front of the rear axle is preferred but you can also support it at the rear of the frame.
Then lower the jack and then shake the truck a bit to make sure it is secured.
Then using your floor jack from the rear support the axle tubes at either side of the differential (I used a block of 2X4 on the cradle of the jack) Remove both rear tires and get then safely out of the way.
Leave the jack under the axle with the wheels remove and then slowly jack up the axle until it is not hanging from the spring.
Remove the bottom Shock absorber nut and washer and remove the shock from the lower mount. If you have Gas Charged Shocks like I do keep clear of the extending end.
Use a wire brush and clean the threads of the 4 ends of the U-Bolts and then spray a penetrating lubricant (WD-40, PB Blaster) on the threads and in top of the nuts.
Use an impact and a deep socket slowly remove the nuts from the U-Bolts and you will see the bottom plate come free from the spring pack.
Use caution when you remove the nuts that you do not gall the threads and pull the threads out, go slow or use a ratchet wrench by hand, you can easily mess up the threads and you will be looking for new one.
It might be a good idea to get a pair of new ones if yours look rusted or dinged.
At each end of the spring pack there will be a clamp with a 3/8 � bolt and sleeve securing the leaves, remove the nut and leave the bolts in place for now.
Carefully lower the axle down and away from the bottom of the spring pack, it may be stuck and require a rap from a sledge, when it is free then lower it down about 6 inches.
In the center if the springs you will see a 3/8� center bolt that needs to be removed.
This is very important, this retains the springs and depending on their present condition and arch, without first retaining the leaves this could release literally THOUSANDS of pounds of lethal force and very easily kill you if your head were in the way. I have seen this happen!
You need to clamp the springs near the center with a big C-Clamp or a pair of Pony adjustable clamps you can get from Home Depot. Leave yourself enough thread to let it open up about 1�.
Then slowly remove the 9/19 � nut and release the leaves, you might need a pair of Vise Grips for the bottom of the bolt as there is no head.
I chose to work on the spring pack by leaving the main leaf still attached the chassis, it is a lot easier than trying to remove the front and rear pivot bolts.
There will be work required to this leaf but it is easily accomplished with the tools we will use.
You see that now that the center bolt has been removed the leaves will easily separate and remove, most of the pack will still be retained by the two end clamps.
Put on your gloves,
Now go ahead and remove the pack from the axle, here is where 2 people will come in handy because they are a bit heavy and unruly once the bolt has been removed.
Just be careful and watch your step.
Have a pair of 2x4�s about 24� long waiting to receive them.
After you have them on the ground, then break them apart and lay them out across the boards.
If yours were anything like mine then there will be a bit of rust.
This was a bit of a mystery because my truck has always been here in hot sunny Southern California and I can only imagine what they would look like if it had spent it�s life in the snow.
OK now here is where I am going to show you just why our trucks ride so terrible.
If you look here you will see the working end of the spring leaf, If you will look at the shape of the spring you will see it is in a big arch, then you will see that how it is bolted up to the next one and on and on.
Well because the length of each leaf is progressively longer, the arc will change so the ends of one then fall a few inches inward of the next.
And because it is being tried to be flattened out by the weight of the truck the ends of the leaf are being pushed against the next leaf.
Now here is where the problem is, as the trucks suspension is being worked and the spring compress and rebound the physical length of the leaves are constantly lengthening and contracting.
So looking again at the arch the only thing they can do is rub back and fourth against each other continuously as the truck moves down the road.
Springs are made of very hard spring steel, and looking at every one of the ends of the leaves you can see that the manufacturer left the ends with a very sharp square corner which is acting like a hardened tool bit constantly grinding away at the spring it contacts.
Instead of all of the springs flexing and contacting over a wide area all of the weight of the truck is being sprung by a few inches of grinding tool steel.
So we have a rough noisy ride.
This is the tool that we will be using to make a custom set of smooth riding springs.
If you have not used this before, it is a flap style grinder disk made up of many individual pieces of bonded abrasive.
After it grinds down all of the rust and imperfections and then it will polish the steel to a smooth finish all in the same operation.
I got this at Home Depot and it cast about $10.00 and will fit any standard grinder.
Support each leaf between 2 blocks of wood and then while standing on it simply run the grinder flat across the width of each spring leaf until they are flat, keep the grinder moving as to not to build up too much heat and to weaken the spring action in the leaf but don�t worry too much because they have to get pretty hot.
You will get the feel once you do the first one, then flip it over and do the other side then do the same for all of them.
Then hit the ends of them and break down all of the sharp edges and leave a chamfer. (This is important)
When you are finished the spring will be flat and smooth as silk.
Now crawl under the truck and look up at the ends of the main leaf, you will see some pretty deep gouges in the spring.
Here is where I used a small air powered Die Grinder with an abrasive wheel and I carefully smoothened out all of the damage.
The idea is not to leave sharp edges anywhere the leaves come together.
Do the same at both ends of the leaf, polish them smooth and you want to then clean all the rust from the bottom of the leaf.
Thread Starter
Administrator
Joined: Nov 2004
Posts: 4,084
Likes: 235
From: Southern California
Part-2
Here you can see better how am smoothening out all of the rough edges of the leaves.
This was just the rough cut I did with the grinder and did a test fit, I then went over each leaf my hands and fixed anything I might have missed using my air Die Grinder until I gad a very smooth finish.
As I was grinding the surface of each leaf I noticed they were not flat but most of the edges were raised, probably happened when they were formed into the arch so when you grind them holding the flap wheel flat on the spring it cleans up all of these imperfections and leaves you with a nice flat surface.
When using this grinder you can hold it flat on the surface and it will cut flat all 360* around it.
You hold it on the spring leaf and move it side to side across the surface.
This is another close-up of the pack, see how I am breaking all of the sharp edges, it then will be polished to a smooth finish.
After they are all ground smooth I wiped them all down with lacquer thinner and them applies several good coats of Rust Oleum Rust Reformer in Satin Black making sure all of the edges and ends were covered.
You do not see them here but we will also be reusing the small rectangular spacers that were between each leaf. Clean and sand them and then also coat them with paint.
The trick is we want NO bare metal.
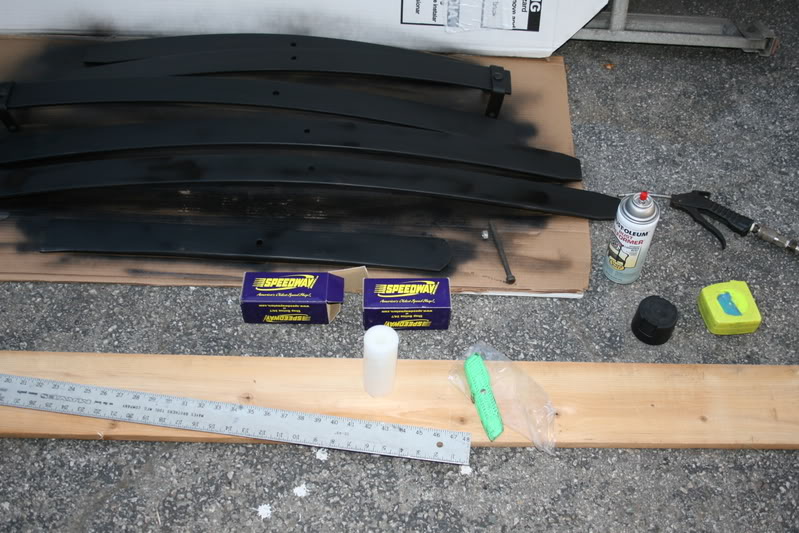
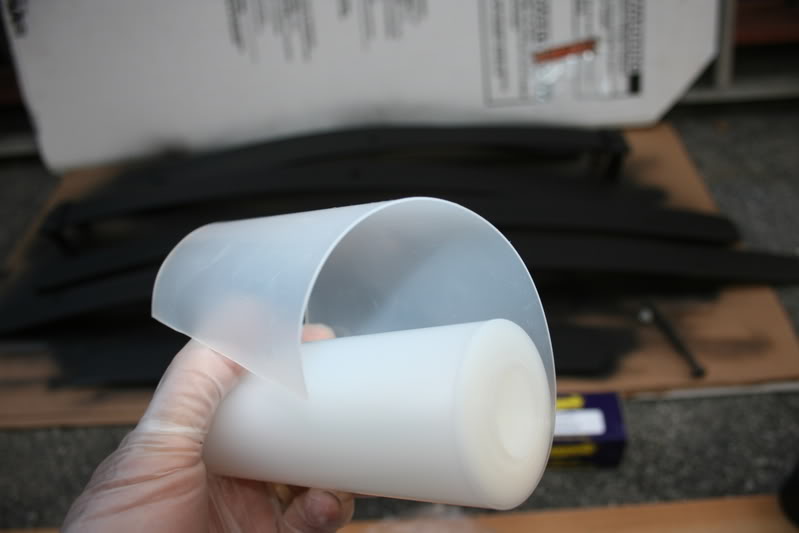
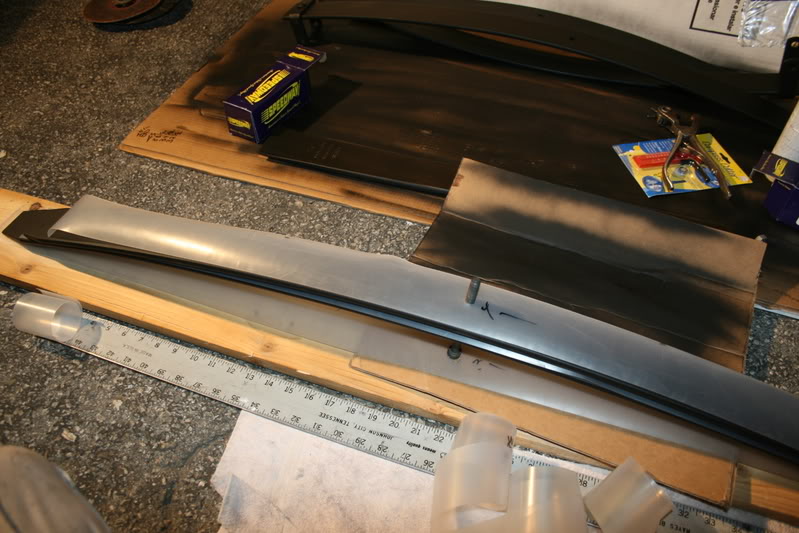
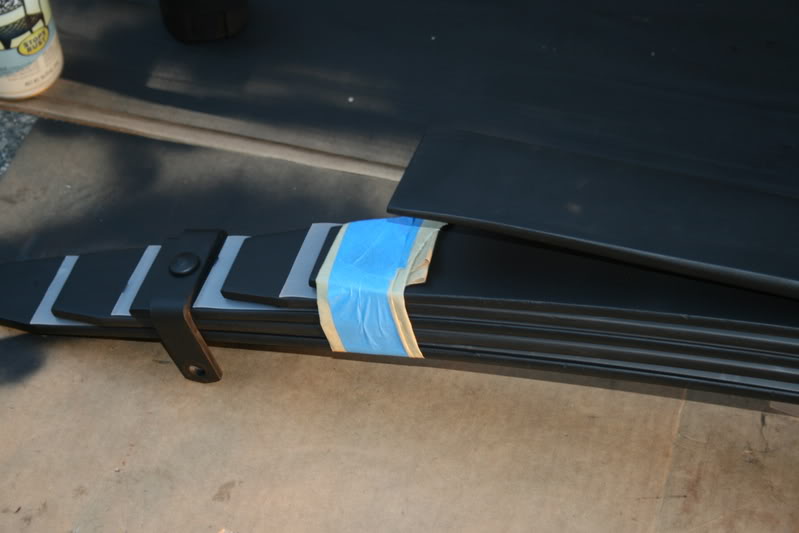
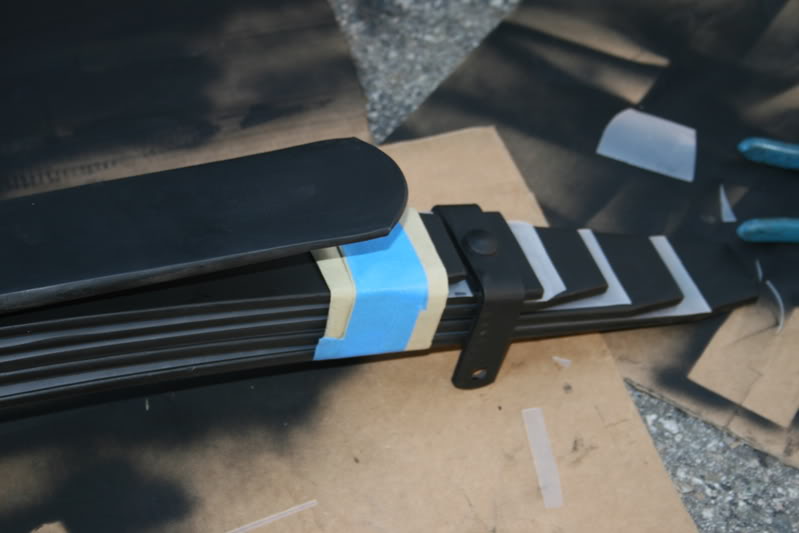
Here is how we are going to fix out rough ride, this is a Spring Liner material #910-33035
I bought from Speedway Motors.Com. I searched for days on the Internet and this is the only place that I could find this stuff. I talked to the guy who worked there for about 30 minuets as he told me about all of their products.
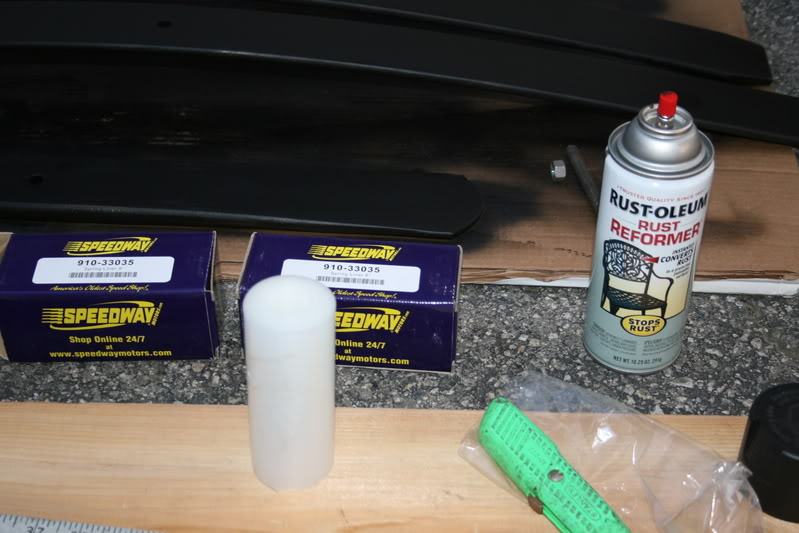
This comes in a roll 8� long and is just under 5� wide and our springs are 2 � � wide so to use it on our springs it will have to be sliced down the center dividing it into 2 equal pieces. I used a total 3 rolls to do my springs as my truck has a 6 leaf pack + overload.
The easiest way is to lay it out onto a piece of 1x 6 lumber and using a metal straight edge simply and carefully cut it with a utility knife with a new blade.
It doesn�t have to be perfectly cut in half.
Now that we have the liner cut into strips, take each of the leaves and measure out a piece of liner for each spring leaving at least a �� of liner extending beyond each end.
This liner is cut for the leaf that is the next one shorter; it looks confusing but once you start it goes real fast. After you get it cut for each leaf then mark the center bolt hole with a sharpie marker and ID it with the leaf number.
When you have them all cut, punch out all of the center holes and then we start to build the pack.
It is difficult to see but under this leaf is the liner that will go in-between it and the main leaf still in the truck. Don�t forget to cut this one.
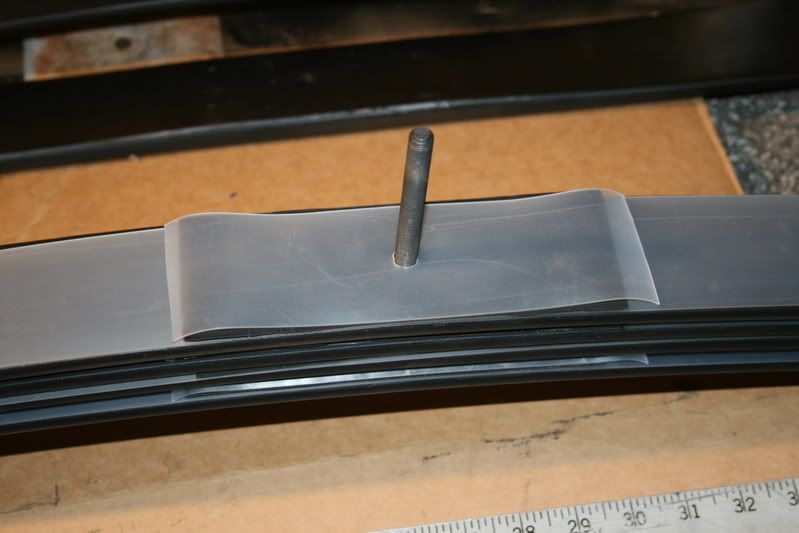
Lay the longest leaf on a piece of cardboard and temporarily insert the center bolt facing up, remember this is the second because the main leaf is still on the truck.
When you lay down the liners it is important to lay them with the way they curl facing downwards into the next spring.
Look and you can see the way they try to curl under.
Then onto the first leaf lay down the first liner and be sure it is oriented correctly and then install the spacer.
To the top of the spacer you will cut a piece of liner to cover its entirety.
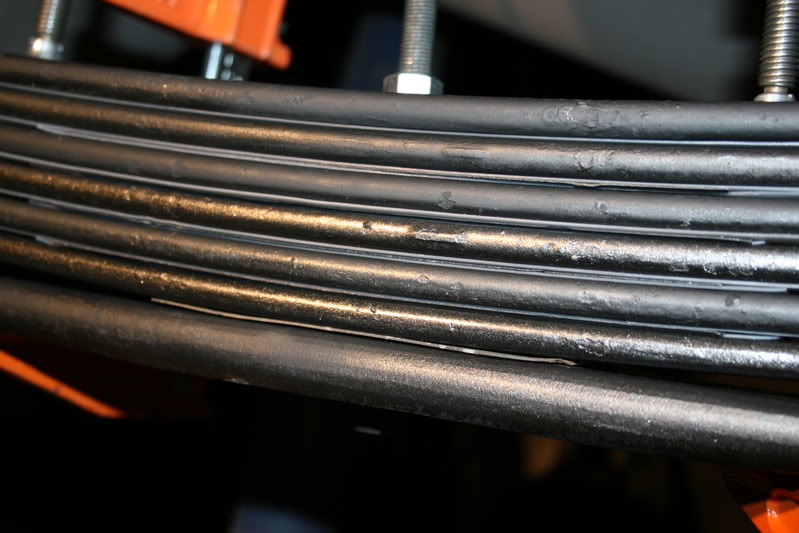
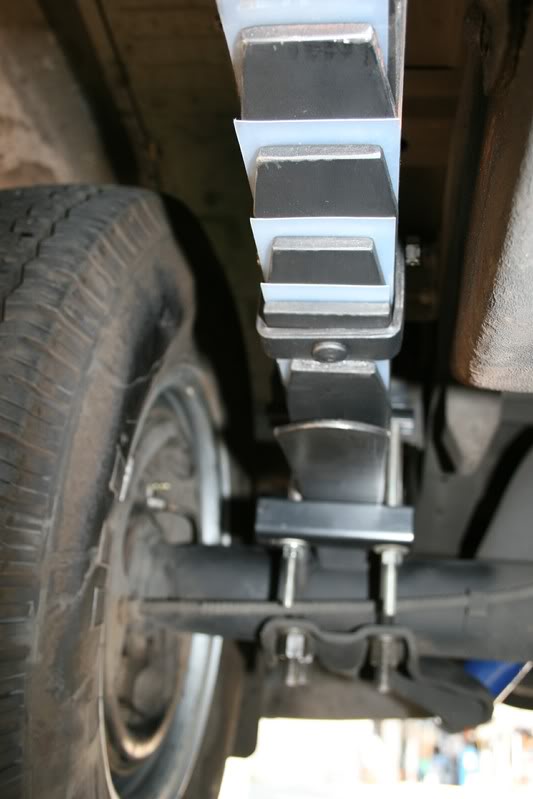
This is how the ends of the leaves should look, do you see that each spring is now sliding against its mate instead of grinding its was through the leaf as the pack will be compressed.
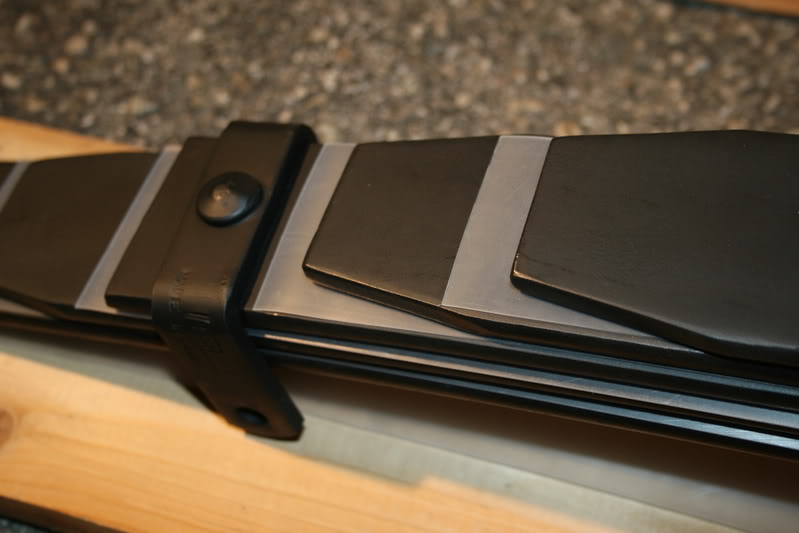
You will reassemble the entire pack piece by piece until you get to the overload.
This is how your pack should look when you are finished, there should be no metal-to-metal contact when you are finished.
Do you think by now your truck is going to ride any smoother?
Here you can see better how am smoothening out all of the rough edges of the leaves.
This was just the rough cut I did with the grinder and did a test fit, I then went over each leaf my hands and fixed anything I might have missed using my air Die Grinder until I gad a very smooth finish.
As I was grinding the surface of each leaf I noticed they were not flat but most of the edges were raised, probably happened when they were formed into the arch so when you grind them holding the flap wheel flat on the spring it cleans up all of these imperfections and leaves you with a nice flat surface.
When using this grinder you can hold it flat on the surface and it will cut flat all 360* around it.
You hold it on the spring leaf and move it side to side across the surface.
This is another close-up of the pack, see how I am breaking all of the sharp edges, it then will be polished to a smooth finish.
After they are all ground smooth I wiped them all down with lacquer thinner and them applies several good coats of Rust Oleum Rust Reformer in Satin Black making sure all of the edges and ends were covered.
You do not see them here but we will also be reusing the small rectangular spacers that were between each leaf. Clean and sand them and then also coat them with paint.
The trick is we want NO bare metal.
Here is how we are going to fix out rough ride, this is a Spring Liner material #910-33035
I bought from Speedway Motors.Com. I searched for days on the Internet and this is the only place that I could find this stuff. I talked to the guy who worked there for about 30 minuets as he told me about all of their products.
This comes in a roll 8� long and is just under 5� wide and our springs are 2 � � wide so to use it on our springs it will have to be sliced down the center dividing it into 2 equal pieces. I used a total 3 rolls to do my springs as my truck has a 6 leaf pack + overload.
The easiest way is to lay it out onto a piece of 1x 6 lumber and using a metal straight edge simply and carefully cut it with a utility knife with a new blade.
It doesn�t have to be perfectly cut in half.
Now that we have the liner cut into strips, take each of the leaves and measure out a piece of liner for each spring leaving at least a �� of liner extending beyond each end.
This liner is cut for the leaf that is the next one shorter; it looks confusing but once you start it goes real fast. After you get it cut for each leaf then mark the center bolt hole with a sharpie marker and ID it with the leaf number.
When you have them all cut, punch out all of the center holes and then we start to build the pack.
It is difficult to see but under this leaf is the liner that will go in-between it and the main leaf still in the truck. Don�t forget to cut this one.
Lay the longest leaf on a piece of cardboard and temporarily insert the center bolt facing up, remember this is the second because the main leaf is still on the truck.
When you lay down the liners it is important to lay them with the way they curl facing downwards into the next spring.
Look and you can see the way they try to curl under.
Then onto the first leaf lay down the first liner and be sure it is oriented correctly and then install the spacer.
To the top of the spacer you will cut a piece of liner to cover its entirety.
This is how the ends of the leaves should look, do you see that each spring is now sliding against its mate instead of grinding its was through the leaf as the pack will be compressed.
You will reassemble the entire pack piece by piece until you get to the overload.
This is how your pack should look when you are finished, there should be no metal-to-metal contact when you are finished.
Do you think by now your truck is going to ride any smoother?
Thread Starter
Administrator
Joined: Nov 2004
Posts: 4,084
Likes: 235
From: Southern California
Part-3
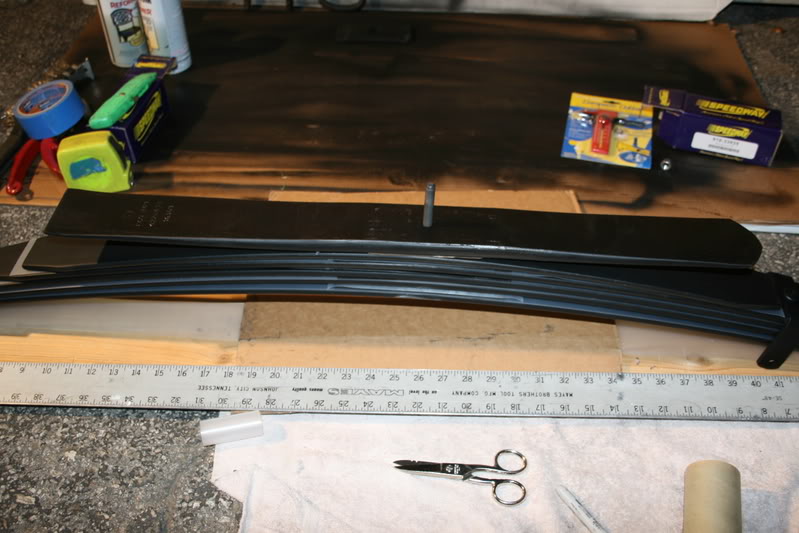
Now that we have the pack all built, then what I did was to take some masking paper about 18� long and folded it onto itself and then wrap it tightly around all of the leaves and secure it with tape.
I did this at the opposite end as well and taped it securely. This will now retain the pack so I can remove the center bolt and reinstall it from the opposite side with the head of the bolt next to the overload.
You still need to handle the pack carefully even though it is wrapped.
Here is what you should be seeing when you are finished, everything should have a even chamfer to it, and have a good coat of paint.

Now with your helper return it to your truck being careful not to drop or break the pack open.
You then need to flip the pack over and lift it up to the main spring straddling the main leaf with the fore and aft clamps.
Lift the front and then temporarily insert the bolt to hold it and then raise it up and insert the other one, it should be hanging freely now.
Next if needed carefully lower the axle to get enough room to lower the center bolt down enough so you can pass it through the hole in the main leaf.
At this time you can install the metal sleeves over the clamp bolts at both ends of the pack and tighten the bolt.
Touch with paint if needed.
Once you have that I dropped on a Grade-8 washer and then a Grade-8 nut.
After I got all of the leaves lined up and made sure everything was in place I tightened the nut on the center bolt and at this time carefully cut the paper holding the leaves together.
I torqued this nut to 60-foot pounds, then I threaded on another nut against the first one.
Then using my Sawzall I slowly cut the bolt off at the top of the last nut.
Go slowly as this is a hardened bolt, if you try to cut it with the saw in High, you will burn up the blade and melt the teeth off.
I then removed the second nut and carefully using a flat file clean up the remaining threads.
When I was done with that then I punched a piece of masking paper over the bolt and nut and then liberally sprayed the bolt and nut with clear urethane to seal it.
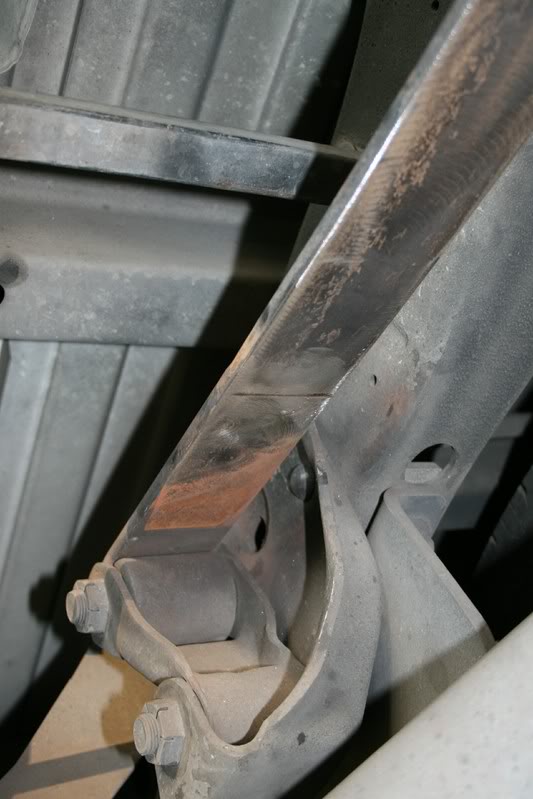
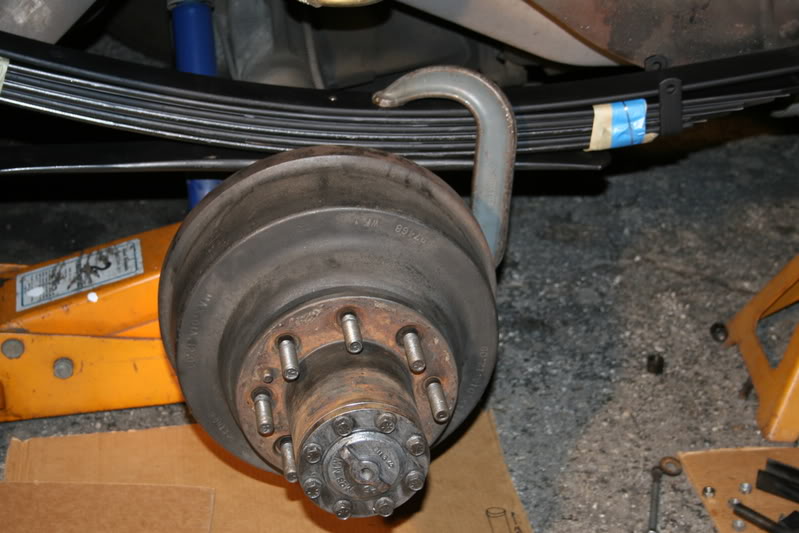
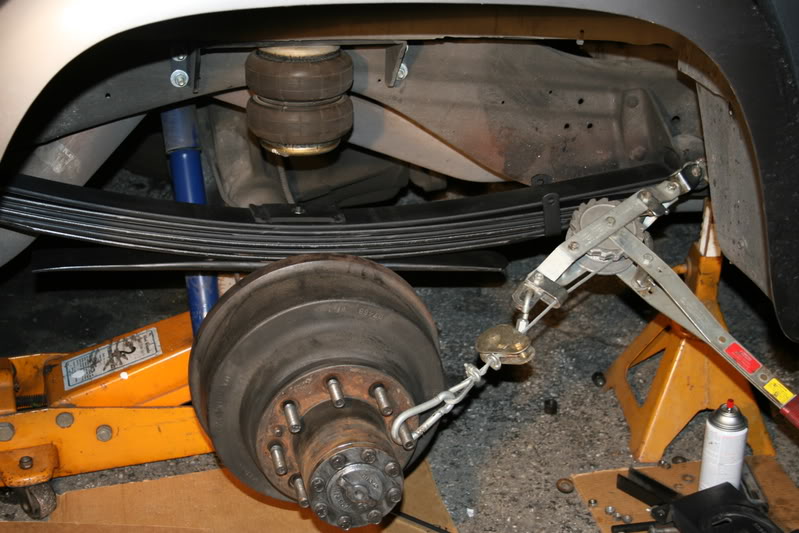
Since everything has moved and our pack is actually taller now you will have to carefully get the end of the center bolt to drop into the pilot hole in the center of the spring perch so using an old Come Along I easily pulled the rear axle back into place and with a gentle nudge with my boot it dropped into place.
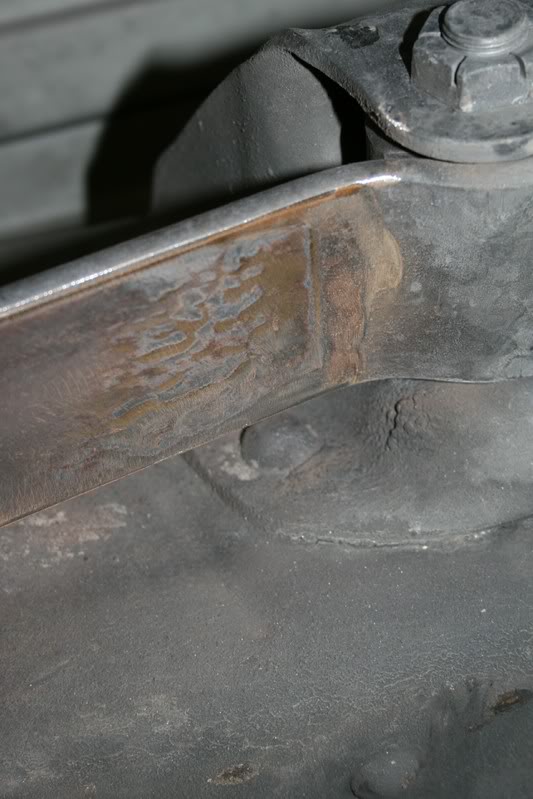
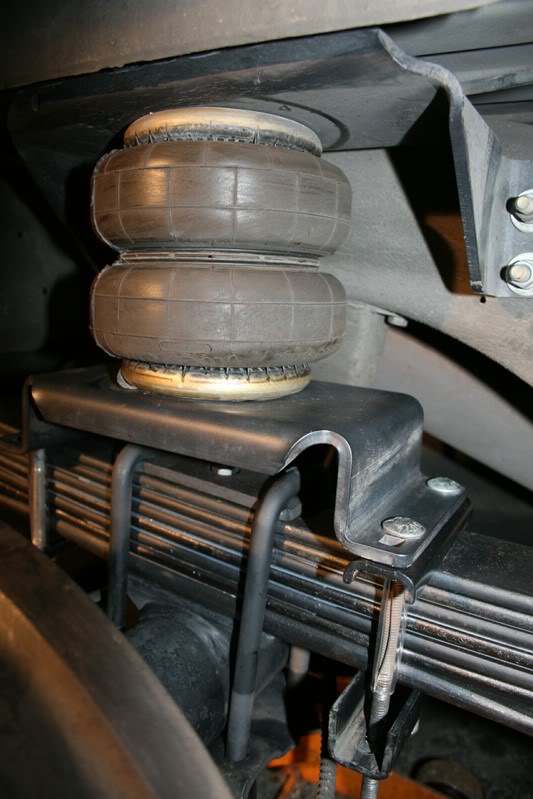
Also from this view you can see the importance of paying particular attention to your Air Bags anytime you have to jack up the back end of your truck as overextending the bag in this situation could damage them and render them useless.
I carry a short length of chain with a hook on one end that I can bind the axle to the frame rail just for this instance. (I just need to remember to use it.)
You need to particularly watch out for tow truck drivers and when you get your tires replaced.
From here it is simply reinstalling the U-bolts around the springs and into the bottom bracket.
I took all four of the nuts and cleaned them out and then wiped the insides with some Silver Anti-Seize and then installed them after the washers onto the ends of the U-bolts.
After carefully running them up the bolts and making sure they are even using the impact I then torqued them to 100-foot pounds.
I then had to reinstall the brackets for my Airbags and all of its associated hardware.
Almost complete, looking from underneath this is what you should see; using small surgical scissors I trimmed up anything that wasn�t perfect.
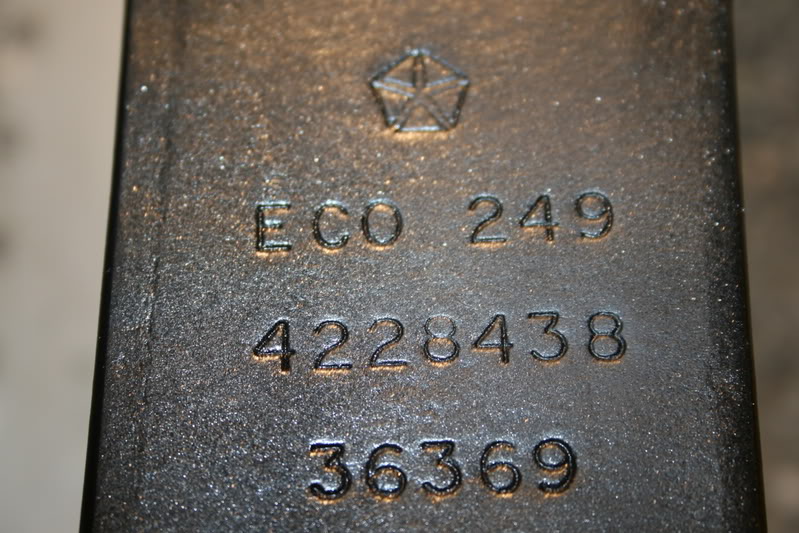
I found this number on the bottom of the spring under all of the old paint.
This shows how to repair and to reinstall the leaf spring pack for one side of the truck doing the other side should take less time.
As I said I did everything at the same time with the truck in the air with the axle flat on the ground but I have the experience, I did this over the last weekend at the same time I replaced all of the wheel cylinders and brake lining.
You should retorque the nuts on the U-Bolts at least 2 times starting in about 1 week, as the plastic will compress.
Next I am going to replace the front calipers, rotors, pads and hardware and check out the suspension at that time.
The only cost I am going to have will be the turning of the rotors.
Last year I replaced all of the front bearings with Timken Roller Bearings only to find out I already had them.
Now for the final test.
By the time I got the tires back on it was about 2:00 A.M. so I did not have the time to make a good road test so I made a quick trip for some food and came home.
I had a big grin on my face when I came in the house.
So the next day we had about a 60-mile trip, as we were driving down the city streets getting to the freeway there was a BIG difference in the way the truck rode, before whenever you hit the intersections you would feel it hard but crossing over the Metro Link tracks the truck would usually shudder hard enough to make you try and slow down before you crossed them but now I could sail over them at 50 MPH and the truck was solid and did not jar your teeth loose.
We got onto the freeway and we could feel the ride was Soooo much better you felt like you were gliding along on plastic instead of the truck shaking violently as you hit the buckles in the roadbed.
The truck also responded better as you changed lanes the traffic was moving good so I took it up to about 75 MPH for about 20 minuets on my way into Orange County and the truck still rode like it has never rode since I have owned it. Honest truth.
So as I am driving along and everyone was commenting about how much better it was I then suddenly realized that I could now HEAR what they were saying, the sound level in the cab was so much lower that I could actually hear my phone ring.
Oh it is still loud inside the cab but it is much lower from all of the road noise not being pounded into the cab from the steel-to-steel contact of the old springs.
I am just so thrilled about the ride, of all the ride modifications I have made to this truck; this has done the most good.
I think there was a problem when the springs were manufactured because of the way they left such a sharp edge because of the way they had ground into the opposing leaf.
The truck probably drove harsh when it was new and then after time the ride quality degraded to the point to where it I now, miserable.
I am not going to tell you that this will make your truck ride like a newer one but it improved the ride on my truck by probably 75% and my family will agree to that.
I think that anyone with a 1st. Gen would benefit by doing this modification to their trucks springs weither it be a Dually, SRW or a 4X4, anything with a leaf spring.
Tools Needed:
Floor Jack
Axle Stands Heavy Duty
Angle Grinder
Usual hand and air tools required to remove parts.
Anti Seize for the nuts on the U-Bolts, or at least use good grease.
Materials needed:
For a 6 leaf pack.
3 Rolls of Spring Liner #910-33035 @6.99 each. Speedway Motors
3 cans of Rust Oleum Rust Reformer Satin Black Paint Home Depot
1 60 Grit Flap Disk grinding wheel. Norton #03206 Home Depot
2 Center bolt for springs 3/8� X 4� cut to fit. Dorman
I bought the Spring Liners from Speedway Motors
This is the only place I could find this product, they are in Lincoln Ne.
I talked to Brian, he is the nicest person to talk to, tell him how many leaves in your pack and he can sell you the right amount.
www.speedwaymotors.com
Liners:
http://www.speedwaymotors.com/GmSear...itleDescr=True
I do hope you will consider doing this to your truck, as you will not be disappointed.
The entire repair cost about $50.00 and took about 10 hours to complete but I took my time and went a bit excessive on the polishing.
If you have any questions about how I did something please feel free to ask.
Jim
Let me know what you think.
Now that we have the pack all built, then what I did was to take some masking paper about 18� long and folded it onto itself and then wrap it tightly around all of the leaves and secure it with tape.
I did this at the opposite end as well and taped it securely. This will now retain the pack so I can remove the center bolt and reinstall it from the opposite side with the head of the bolt next to the overload.
You still need to handle the pack carefully even though it is wrapped.
Here is what you should be seeing when you are finished, everything should have a even chamfer to it, and have a good coat of paint.
Now with your helper return it to your truck being careful not to drop or break the pack open.
You then need to flip the pack over and lift it up to the main spring straddling the main leaf with the fore and aft clamps.
Lift the front and then temporarily insert the bolt to hold it and then raise it up and insert the other one, it should be hanging freely now.
Next if needed carefully lower the axle to get enough room to lower the center bolt down enough so you can pass it through the hole in the main leaf.
At this time you can install the metal sleeves over the clamp bolts at both ends of the pack and tighten the bolt.
Touch with paint if needed.
Once you have that I dropped on a Grade-8 washer and then a Grade-8 nut.
After I got all of the leaves lined up and made sure everything was in place I tightened the nut on the center bolt and at this time carefully cut the paper holding the leaves together.
I torqued this nut to 60-foot pounds, then I threaded on another nut against the first one.
Then using my Sawzall I slowly cut the bolt off at the top of the last nut.
Go slowly as this is a hardened bolt, if you try to cut it with the saw in High, you will burn up the blade and melt the teeth off.
I then removed the second nut and carefully using a flat file clean up the remaining threads.
When I was done with that then I punched a piece of masking paper over the bolt and nut and then liberally sprayed the bolt and nut with clear urethane to seal it.
Since everything has moved and our pack is actually taller now you will have to carefully get the end of the center bolt to drop into the pilot hole in the center of the spring perch so using an old Come Along I easily pulled the rear axle back into place and with a gentle nudge with my boot it dropped into place.
Also from this view you can see the importance of paying particular attention to your Air Bags anytime you have to jack up the back end of your truck as overextending the bag in this situation could damage them and render them useless.
I carry a short length of chain with a hook on one end that I can bind the axle to the frame rail just for this instance. (I just need to remember to use it.)
You need to particularly watch out for tow truck drivers and when you get your tires replaced.
From here it is simply reinstalling the U-bolts around the springs and into the bottom bracket.
I took all four of the nuts and cleaned them out and then wiped the insides with some Silver Anti-Seize and then installed them after the washers onto the ends of the U-bolts.
After carefully running them up the bolts and making sure they are even using the impact I then torqued them to 100-foot pounds.
I then had to reinstall the brackets for my Airbags and all of its associated hardware.
Almost complete, looking from underneath this is what you should see; using small surgical scissors I trimmed up anything that wasn�t perfect.
I found this number on the bottom of the spring under all of the old paint.
This shows how to repair and to reinstall the leaf spring pack for one side of the truck doing the other side should take less time.
As I said I did everything at the same time with the truck in the air with the axle flat on the ground but I have the experience, I did this over the last weekend at the same time I replaced all of the wheel cylinders and brake lining.
You should retorque the nuts on the U-Bolts at least 2 times starting in about 1 week, as the plastic will compress.
Next I am going to replace the front calipers, rotors, pads and hardware and check out the suspension at that time.
The only cost I am going to have will be the turning of the rotors.
Last year I replaced all of the front bearings with Timken Roller Bearings only to find out I already had them.
Now for the final test.
By the time I got the tires back on it was about 2:00 A.M. so I did not have the time to make a good road test so I made a quick trip for some food and came home.
I had a big grin on my face when I came in the house.
So the next day we had about a 60-mile trip, as we were driving down the city streets getting to the freeway there was a BIG difference in the way the truck rode, before whenever you hit the intersections you would feel it hard but crossing over the Metro Link tracks the truck would usually shudder hard enough to make you try and slow down before you crossed them but now I could sail over them at 50 MPH and the truck was solid and did not jar your teeth loose.
We got onto the freeway and we could feel the ride was Soooo much better you felt like you were gliding along on plastic instead of the truck shaking violently as you hit the buckles in the roadbed.
The truck also responded better as you changed lanes the traffic was moving good so I took it up to about 75 MPH for about 20 minuets on my way into Orange County and the truck still rode like it has never rode since I have owned it. Honest truth.
So as I am driving along and everyone was commenting about how much better it was I then suddenly realized that I could now HEAR what they were saying, the sound level in the cab was so much lower that I could actually hear my phone ring.
Oh it is still loud inside the cab but it is much lower from all of the road noise not being pounded into the cab from the steel-to-steel contact of the old springs.
I am just so thrilled about the ride, of all the ride modifications I have made to this truck; this has done the most good.
I think there was a problem when the springs were manufactured because of the way they left such a sharp edge because of the way they had ground into the opposing leaf.
The truck probably drove harsh when it was new and then after time the ride quality degraded to the point to where it I now, miserable.
I am not going to tell you that this will make your truck ride like a newer one but it improved the ride on my truck by probably 75% and my family will agree to that.
I think that anyone with a 1st. Gen would benefit by doing this modification to their trucks springs weither it be a Dually, SRW or a 4X4, anything with a leaf spring.
Tools Needed:
Floor Jack
Axle Stands Heavy Duty
Angle Grinder
Usual hand and air tools required to remove parts.
Anti Seize for the nuts on the U-Bolts, or at least use good grease.
Materials needed:
For a 6 leaf pack.
3 Rolls of Spring Liner #910-33035 @6.99 each. Speedway Motors
3 cans of Rust Oleum Rust Reformer Satin Black Paint Home Depot
1 60 Grit Flap Disk grinding wheel. Norton #03206 Home Depot
2 Center bolt for springs 3/8� X 4� cut to fit. Dorman
I bought the Spring Liners from Speedway Motors
This is the only place I could find this product, they are in Lincoln Ne.
I talked to Brian, he is the nicest person to talk to, tell him how many leaves in your pack and he can sell you the right amount.
www.speedwaymotors.com
Liners:
http://www.speedwaymotors.com/GmSear...itleDescr=True
I do hope you will consider doing this to your truck, as you will not be disappointed.
The entire repair cost about $50.00 and took about 10 hours to complete but I took my time and went a bit excessive on the polishing.
If you have any questions about how I did something please feel free to ask.
Jim
Let me know what you think.
Registered User
Joined: Jan 2004
Posts: 995
Likes: 2
From: East Central OK
Part-3
Also from this view you can see the importance of paying particular attention to your Air Bags anytime you have to jack up the back end of your truck as overextending the bag in this situation could damage them and render them useless.
I carry a short length of chain with a hook on one end that I can bind the axle to the frame rail just for this instance. (I just need to remember to use it.)
Sounds like I may need to refub that spare set of springs laying out back and do a swap-out eventually.

Registered User
Joined: Jul 2007
Posts: 166
Likes: 0
From: Hurricane, Utah
Good idea. Right after I bought my truck I drove it at 75-80 for 4-5 hours and I thought I was going to die the next day. I can't believe how fatigued I was. I even wore earplugs the whole time. The 6" lift doesn't help, but I bet the springs are in pretty bad shape.
Trending Topics
 awesome work guess i'm gonna have to try it to my truck
Thread Starter
Administrator
Joined: Nov 2004
Posts: 4,084
Likes: 235
From: Southern California
Great write-up Jim, as usual. Are you still planning to add limiting straps to your rear axle eventually or just use the chain on an as-needed basis? I just added the Ride-Rite bags on my D250 and have been trying to decide how best to create limit straps.
Sounds like I may need to refub that spare set of springs laying out back and do a swap-out eventually.
Sounds like I may need to refub that spare set of springs laying out back and do a swap-out eventually.
For the straps check the places that cater to Jeeps and such, I have seen straps that are made of the same webbing used in recovery straps.
Or you could make something out of Seat Belt Webbing maybe about 3 or 4 thickness and sewn over a D ring, you can take it to a shoe repair and they can sew it with Kevlar thread. I have done this for other uses.
Quote:
Awesome work, Jim.
Did you consider spray graphite to cover the springs? Might not be necassary with the plastic liner??? It seems to me fairly durable.
No I haven�t thought of that but I was thinking of some Teflon
Spray I have used before, But I think the liners will take care of the friction problem.
Another option I was going to use was to drill the ends of the leaves the insert Nylon slipper buttons where they contact the adjoining leaf.
I have seen these on a Corvette suspension. But I would have to buy a drill press.
I thing the whole trick was to have a slick finish for them to slide instead of gouge.
I do not have one but I bet a 4X4 would especially benefit from this.
Jim
Adminstrator-ess
Joined: Mar 2003
Posts: 22,594
Likes: 19
From: New Holland, PA
It'll be interesting to see how long the liner material lasts. With the edges of the springs broken I'd imagine it will hold up for a few years at least.
I will have to get new spring clips if I try this on mine - somebody WELDED the front clips to the lower leaf. I would like to do it, mine is cushy out front but then the rear axle gives you a kick in the pants with every bump.
I will have to get new spring clips if I try this on mine - somebody WELDED the front clips to the lower leaf.
I would like to do it, mine is cushy out front but then the rear axle gives you a kick in the pants with every bump.
Thread Starter
Administrator
Joined: Nov 2004
Posts: 4,084
Likes: 235
From: Southern California
It'll be interesting to see how long the liner material lasts. With the edges of the springs broken I'd imagine it will hold up for a few years at least.
I will have to get new spring clips if I try this on mine - somebody WELDED the front clips to the lower leaf. I would like to do it, mine is cushy out front but then the rear axle gives you a kick in the pants with every bump.
I will have to get new spring clips if I try this on mine - somebody WELDED the front clips to the lower leaf.
I would like to do it, mine is cushy out front but then the rear axle gives you a kick in the pants with every bump.That is what mine would do even if you took the bump slow it would toss everything I had in the back up in the air.
I have had some spring shops bend over the clamp and then weld it shut, it seems some of the people working there would just be dangerous with a hammer.
I would cut through it with a cutoff wheel and replace it with a spring clamp you can get at most performance shops however the original idea was not to clamp all of the springs together but to just capture them so they did not shift.
When I talked to the guy where I bought the spring liners I told him I was going to polish the spring and he said the liner should last for years and years.
I think the main idea is to keep them clean so nothing abrasive gets in between the leaves like sand or rust.
I could actually think of a way to enclose them inside a flexible cover to keep them sealed from the elements. But there I go thinking again.
They use these liners on the springs when they build custom Hot Rods.
If you get a chance check out the rest of the items on his website, sure brings back memories for me.
Having a flashback..Years ago,
I used to work on big trucks 1700 Internationals and the drivers would back up and keep hitting the curb hard with one wheel when they unloaded the load and they would drive it home with truck taking up 1 � lanes, they would either shear off the center bolt or fold up the main leaf and the axle would move foreword about 10 inches causing it to dog-track like a dog. Also screwed up the driveline.
Sure don�t miss those days.
Jim
Registered User
Joined: Feb 2006
Posts: 326
Likes: 0
From: West Jordan, UT
Been thinking about this post all day. I agree with Jim in that if you keep the springs clean, that material would last a long time. I am considering it because:
1. D350 (2wd Cab and Chassis)
2. Flatbed - when empty bounces
3. The worst driving conditions I hit are some dirt/gravel roads leading to where I drop off the ATV's
This intriques me as when I pulled the bed and sleeper a couple years ago, I painted the frame as well as the axle and spring pack on the rear. The springs shed their paint relatively quickly.
Thanks Jim for the research...

Registered User
Joined: Dec 2007
Posts: 1,341
Likes: 1
From: Richmond, MI
This was Jim's first attempt. Search for poly spring tip install. They are more like the newer spring setups. They work decent, I did them after I seen Jim do his. I'm still on the fence if the work was worth the reward.
Thread Starter
Administrator
Joined: Nov 2004
Posts: 4,084
Likes: 235
From: Southern California
Yes this was my first attempt but I found something much better, I drilled the spring tips and installed urethane bushings and the ride is much smoother.
A few months ago while under the truck something didn't look just right and I found that I lost the rear half on a spring but I am sure that has nothing to do with anything.
I had lost one of the bushings so I simply snapped a new one in, and as far as how bad they are wearing down, the raised lettering has not yet worn down on the face of the bushing.
The smooth surface of the spring is the way they were when I did them.
It is still not the magic cure but I would defiantly recommend this for a smoother ride.
If you look at the way that a leaf spring works as it flexes it has to slide across the face of the opposing leaf so if you lessen the friction it has to work easier.
https://www.dieseltruckresource.com/...d.php?t=224332
Jim