


Show & Tell ~ New Custom Intercooler


Thread Starter
1st Generation Admin
Joined: Jan 2005
Posts: 4,601
Likes: 118
From: Buies Creek, NC
 Show & Tell ~ New Custom Intercooler
Hey folks. Some of you might remember that with completing the recent upgrade to a conservative set of twins, and therefore causing my newly bombed transmission to slip, out of frustration I said: "That's it, I'm done bombing the heap".
Yeah, well, . . . . I lied.
- Fast forwarding, I installed some Schied 6x.016" EDMs. Even with a bunch of tuning, the mess smoked more than I cared for. So, gotta add more air . .. . . .
- In the midst of installing a Hamilton 181/210 cam and other stuff, I got side-tracked . . . . .
- Maybe four or so years ago now, I installed a Banks IC that was really meant to be in a non-IC'ed truck. At the moment, I thought it would still be a step up from the factory/OEM unit . . . yadda, yadda . . .
- I wanted an IC that would take best advantage of the cooling air available, and offer the least pressure drop on the charge-air side. Further, I wanted it to fit such that I could have the AC condenser coil up front where it would work the best with minimal trimming of the front valance and grill.
OK.
Removing the front of the truck shows what I had to work with . . . .
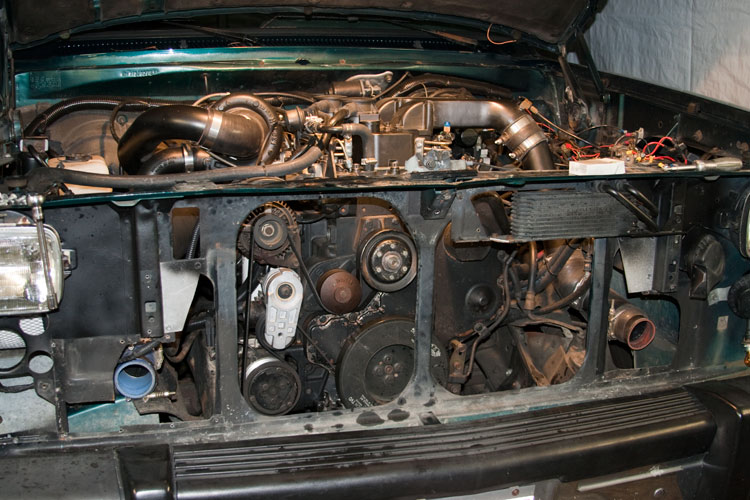
I started out by filling all the holes in the radiator support that I cut to accommodate the earlier Banks unit. Painting all that satin black shows the two large openings that allow the cooling air to pass through to the radiator. I wanted to fill that completely with an IC . . . .
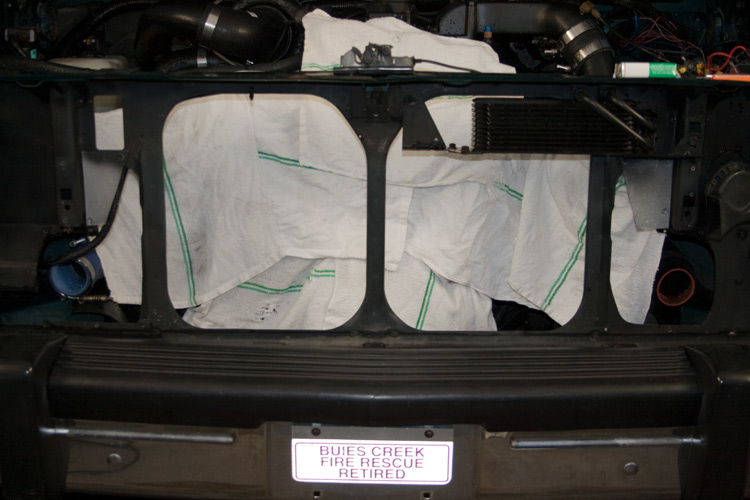
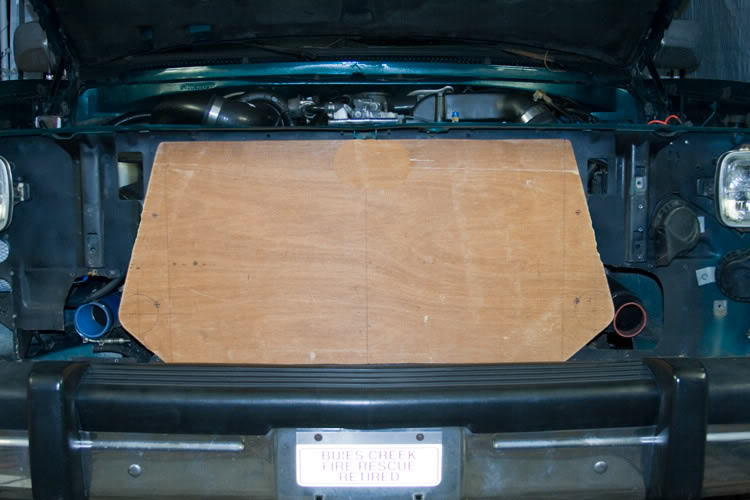
OK, fine. So I did a bunch of cyper'in and took measurements, put it all on paper and made a prototype to verify proper fitment . . .
Then I made a phone call to Joe Hellman of Hellman Performance. He built me one based on my dimensions such that it's guaranteed to 100psig. This is it next to the Banks unit that was removed. The core section of the Banks unit is roughly the same size as the factory original . . .
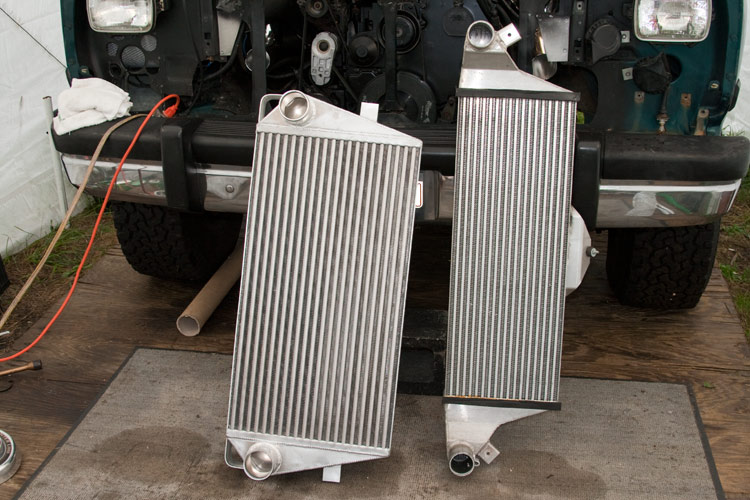
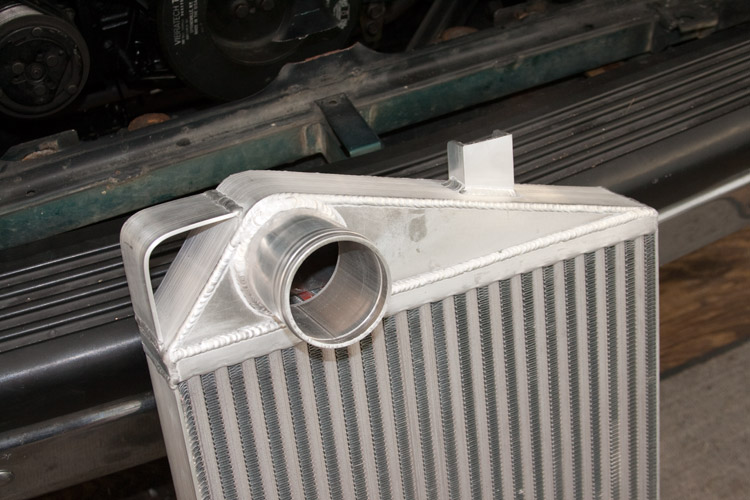
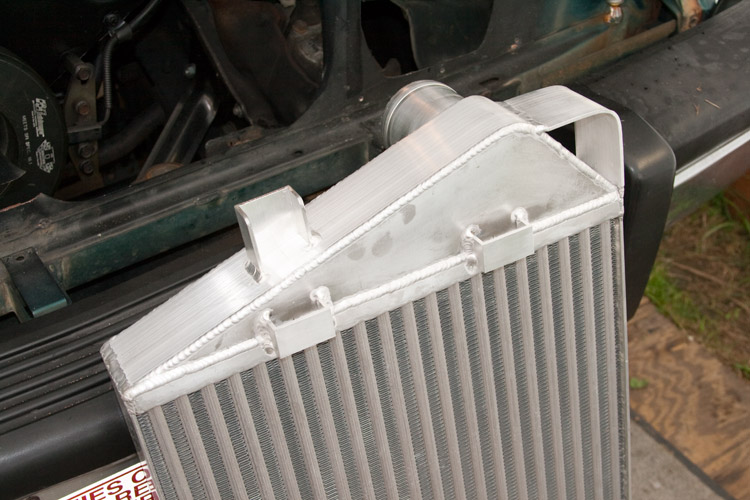
I had it made with 3" in/out charge-air pipes, lower mounts that would allow me to use the factory original lower mounts as well as upper mounts similar the the factory original . . . .
I had Joe include mounts for the AC condenser coil in the original locations . . . .
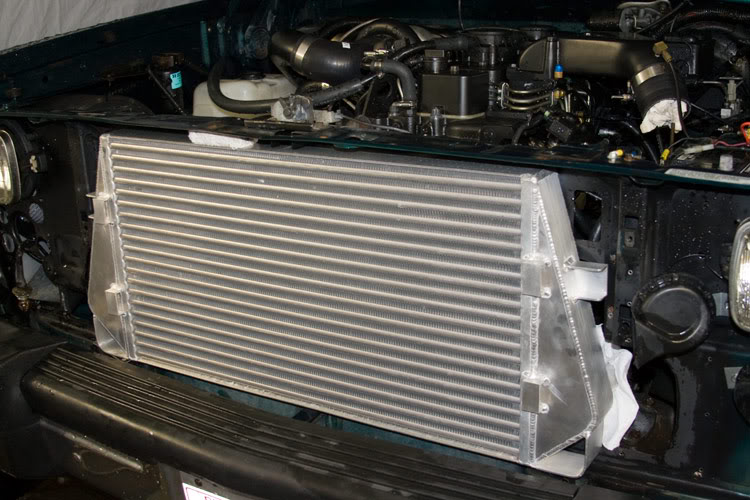
I had to remove the stock/OEM transmission cooler and modify the center support bracket to make room up top . . . . .
Yeah, well, . . . . I lied.
- Fast forwarding, I installed some Schied 6x.016" EDMs. Even with a bunch of tuning, the mess smoked more than I cared for. So, gotta add more air . .. . . .
- In the midst of installing a Hamilton 181/210 cam and other stuff, I got side-tracked . . . . .
- Maybe four or so years ago now, I installed a Banks IC that was really meant to be in a non-IC'ed truck. At the moment, I thought it would still be a step up from the factory/OEM unit . . . yadda, yadda . . .
- I wanted an IC that would take best advantage of the cooling air available, and offer the least pressure drop on the charge-air side. Further, I wanted it to fit such that I could have the AC condenser coil up front where it would work the best with minimal trimming of the front valance and grill.
OK.
Removing the front of the truck shows what I had to work with . . . .
I started out by filling all the holes in the radiator support that I cut to accommodate the earlier Banks unit. Painting all that satin black shows the two large openings that allow the cooling air to pass through to the radiator. I wanted to fill that completely with an IC . . . .
OK, fine. So I did a bunch of cyper'in and took measurements, put it all on paper and made a prototype to verify proper fitment . . .
Then I made a phone call to Joe Hellman of Hellman Performance. He built me one based on my dimensions such that it's guaranteed to 100psig. This is it next to the Banks unit that was removed. The core section of the Banks unit is roughly the same size as the factory original . . .
I had it made with 3" in/out charge-air pipes, lower mounts that would allow me to use the factory original lower mounts as well as upper mounts similar the the factory original . . . .
I had Joe include mounts for the AC condenser coil in the original locations . . . .
I had to remove the stock/OEM transmission cooler and modify the center support bracket to make room up top . . . . .
Thread Starter
1st Generation Admin
Joined: Jan 2005
Posts: 4,601
Likes: 118
From: Buies Creek, NC
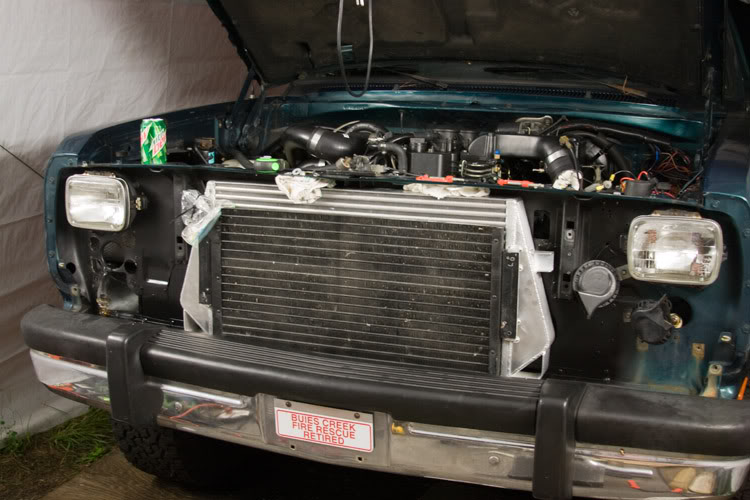
With completing the mounting of the new IC, I then mounted the AC condenser coil .. . .
From there, I modified a new transmission cooler to fit the space available up top of the AC coil . . . .
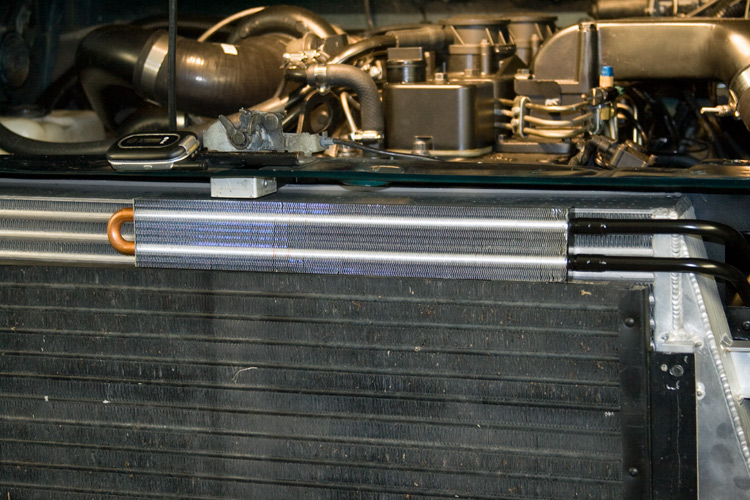
I modified the new trans oil cooler such that the in/out pipes went to the factory original location for connection to that line-set. Notice the rubber isolation mounts similar to the stock/OEM units used for the new IC . . . .
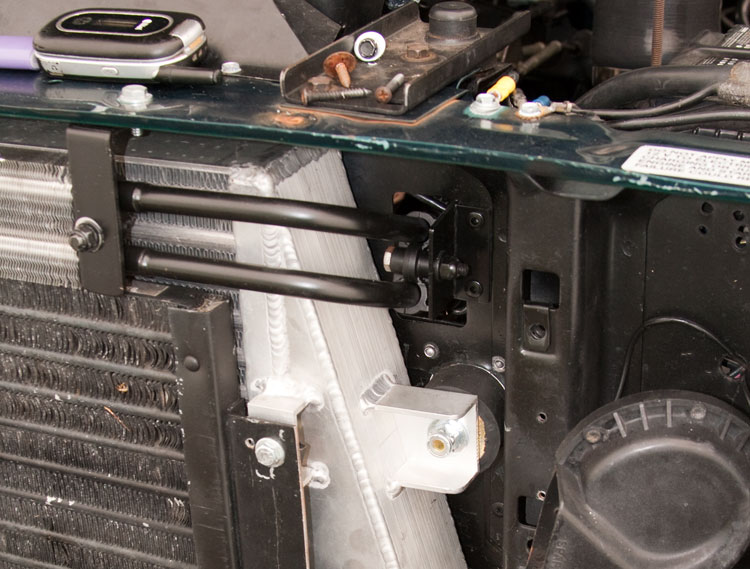
The AC refrigerant line-set proved long enough that they fit without modifying . .. .
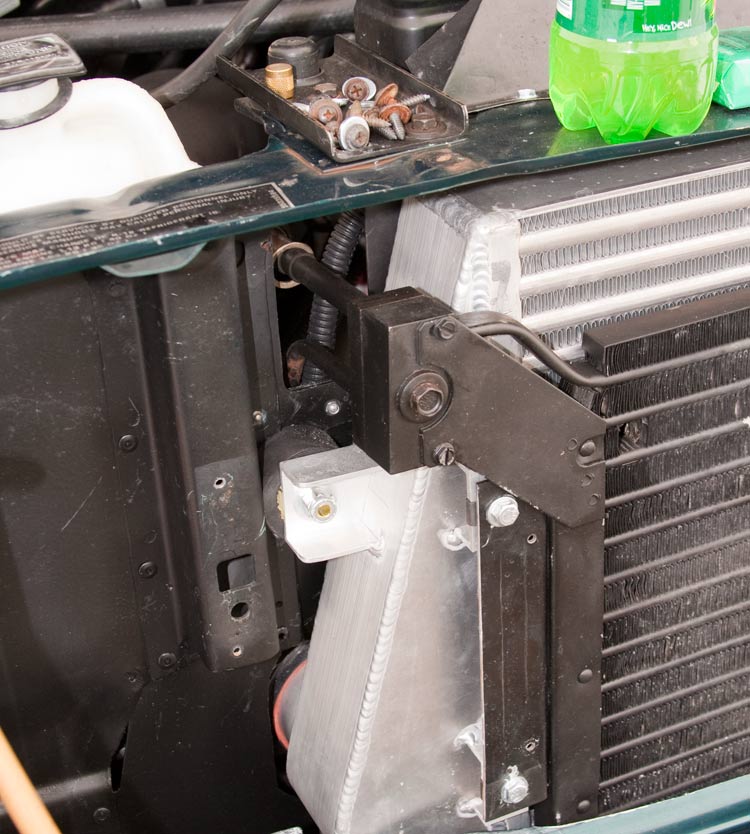
The now thicker stack of IC and AC coil necessitated modding the center grill support thing. So starting at the top included a new bracket that attaches to the now trimmed radiator support brace . . . .
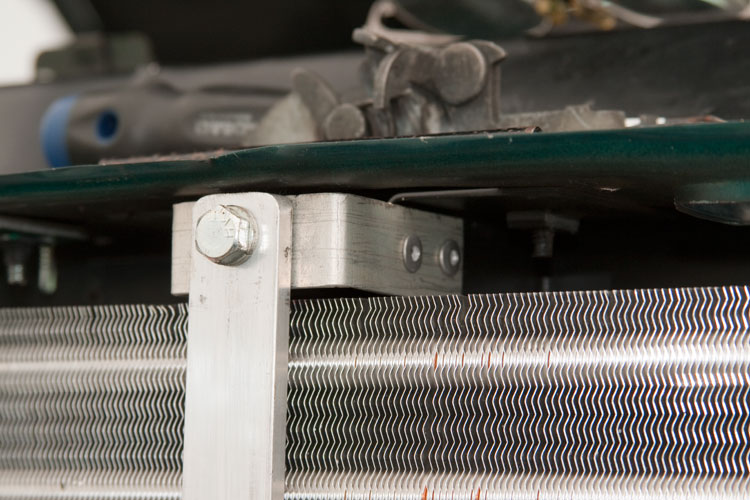
From there the new support runs down nicely in front to the AC coil and picks up the lower valance as it should . . . .
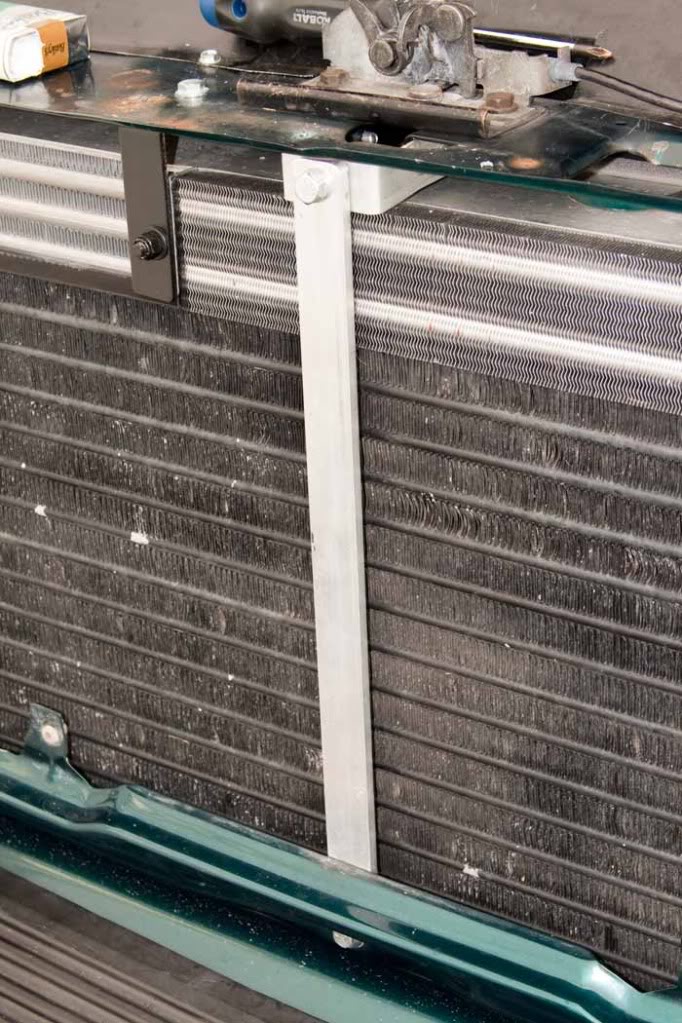
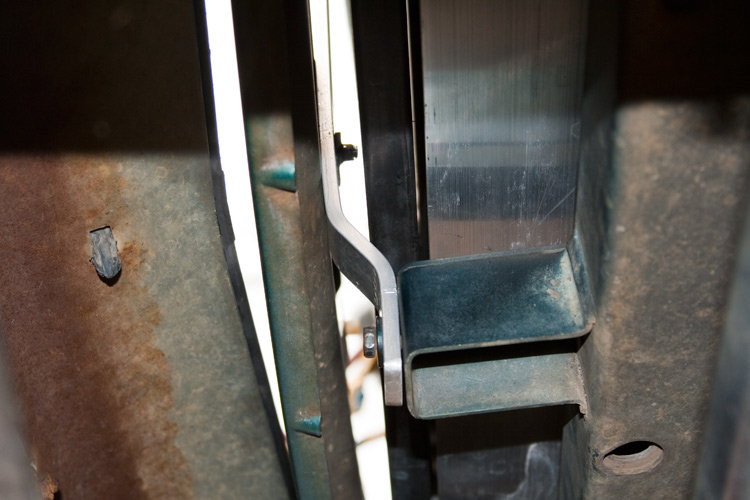
And finally, it bends back to the original lower mount . . . .
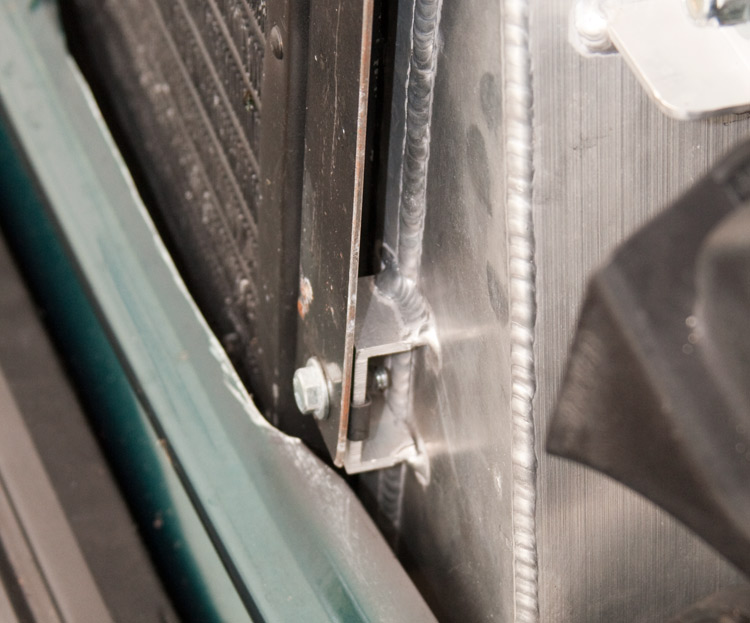
Even with a custom fit IC, I still had to trim the valance right there where it passes in front of the AC coil . . . .
From there, I modified a new transmission cooler to fit the space available up top of the AC coil . . . .
I modified the new trans oil cooler such that the in/out pipes went to the factory original location for connection to that line-set. Notice the rubber isolation mounts similar to the stock/OEM units used for the new IC . . . .
The AC refrigerant line-set proved long enough that they fit without modifying . .. .
The now thicker stack of IC and AC coil necessitated modding the center grill support thing. So starting at the top included a new bracket that attaches to the now trimmed radiator support brace . . . .
From there the new support runs down nicely in front to the AC coil and picks up the lower valance as it should . . . .
And finally, it bends back to the original lower mount . . . .
Even with a custom fit IC, I still had to trim the valance right there where it passes in front of the AC coil . . . .
Thread Starter
1st Generation Admin
Joined: Jan 2005
Posts: 4,601
Likes: 118
From: Buies Creek, NC
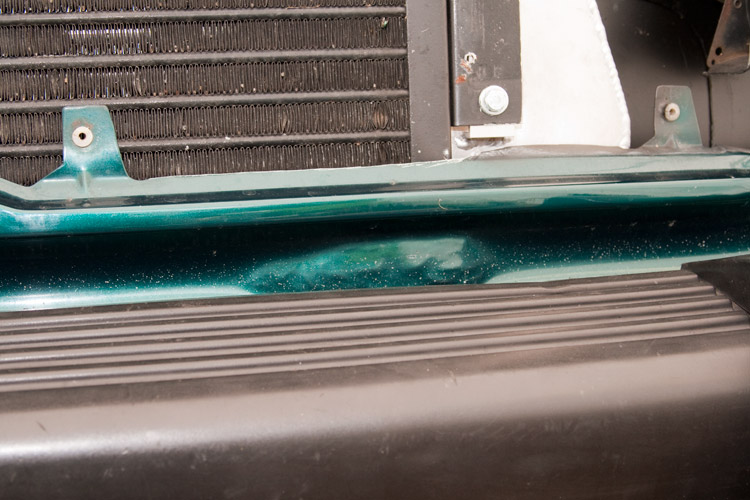
And dimple the valance again where it passes over the AC coil . . . .
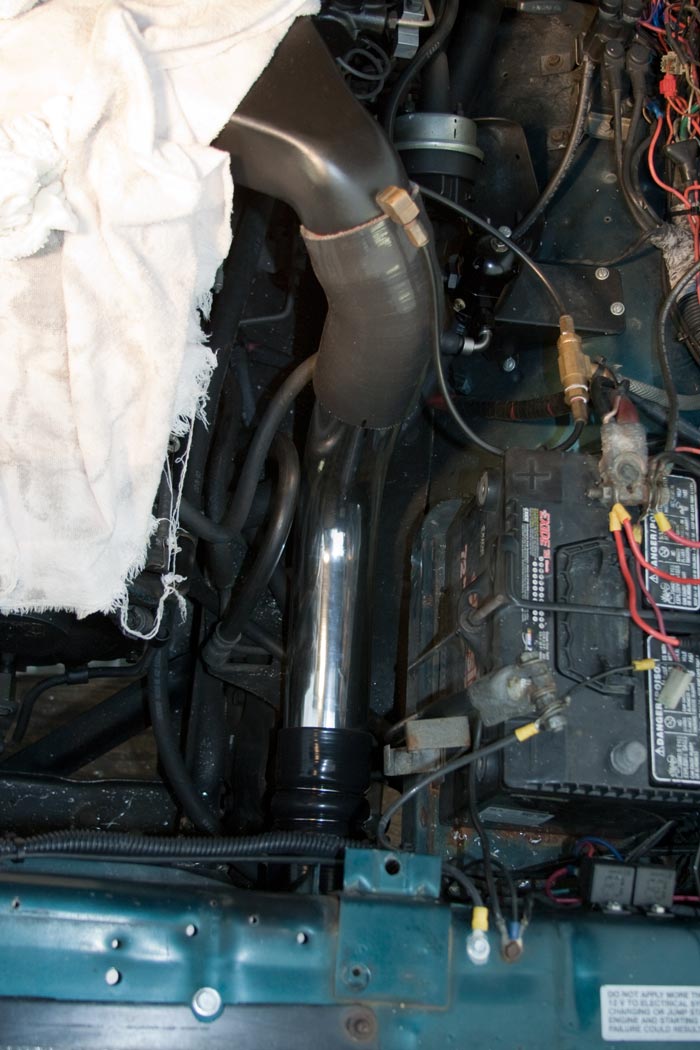
The new IC was built using 3" charge-air in/out pipes. With that, I was able to upgrade all the charge-air plumbing starting at the secondary turbocharger. On the hot-side of the plumbing, I used reinforced high temperature boots . . . .
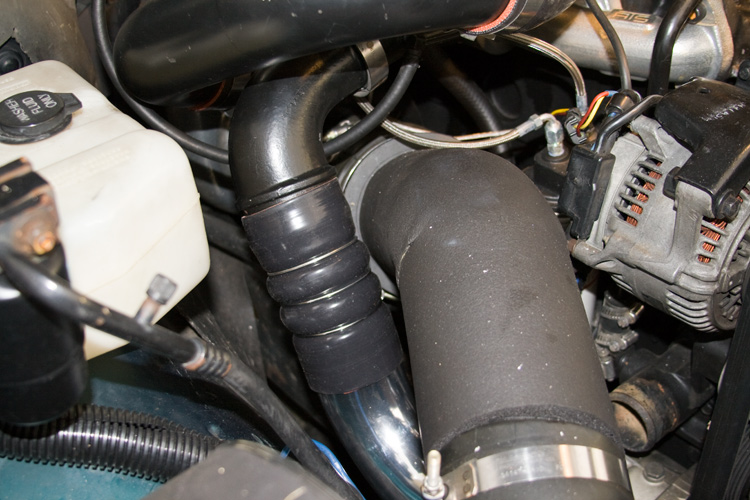
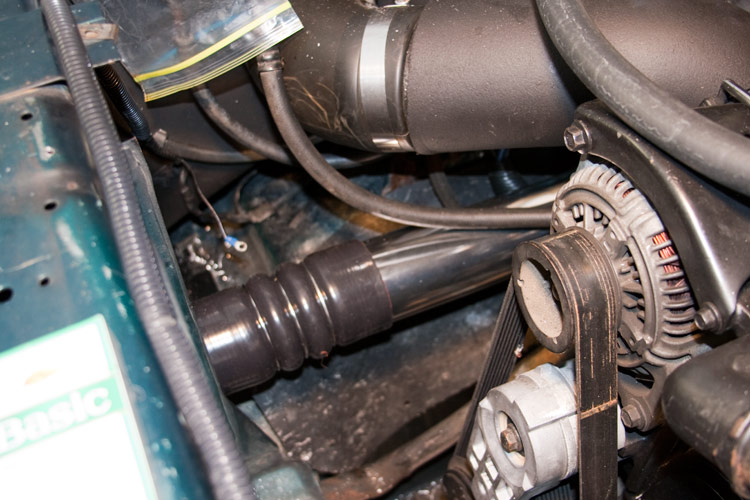
With a custom built unit, you can run the pipes where YOU want them for the best fit . . .
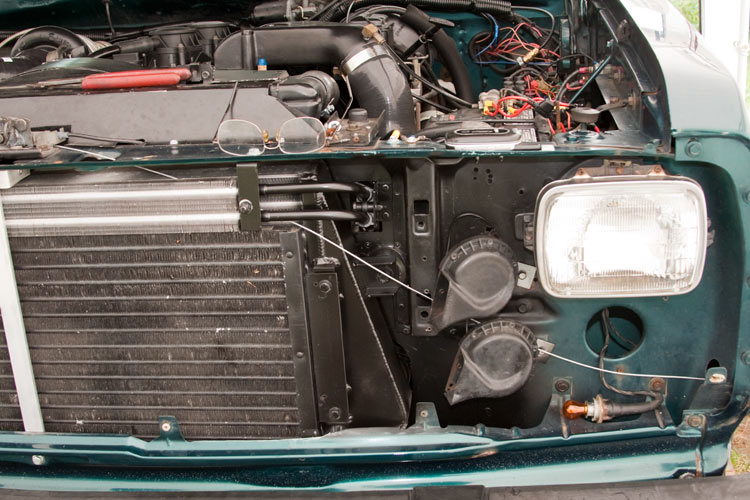
Before I closed up the front, I went ahead and got some small diameter aviation cable with the crimp-type splices . . . . .
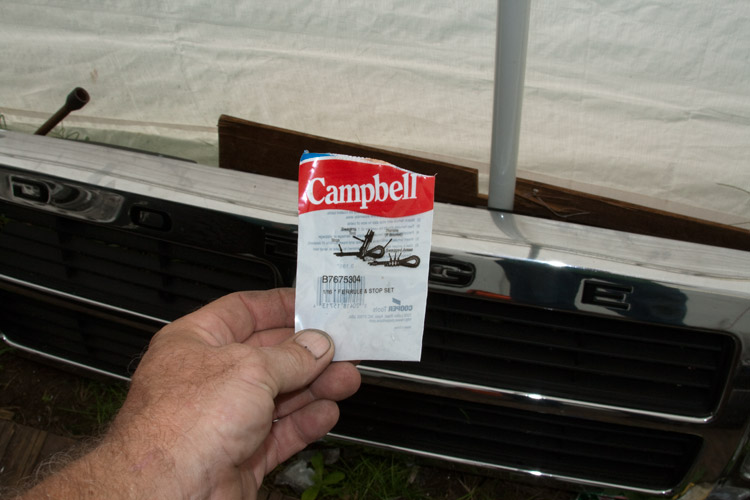
And fabricated an emergency hood latch cable . . .
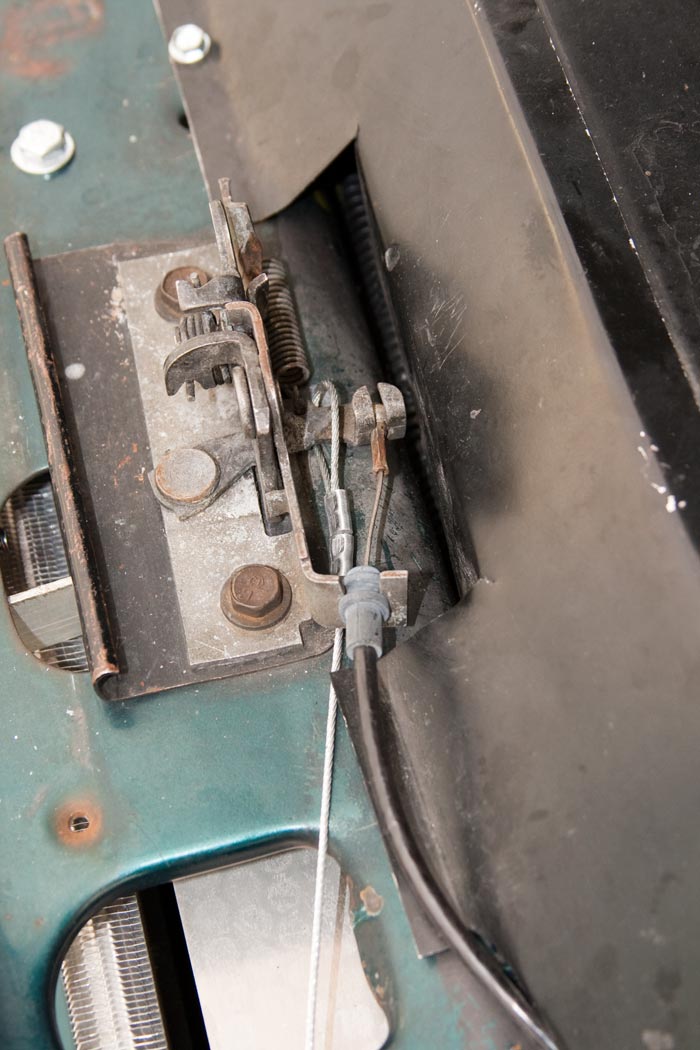
I routed the cable such that it's right there behind the driver's turn signal lamp bucket should it ever be needed . . . .
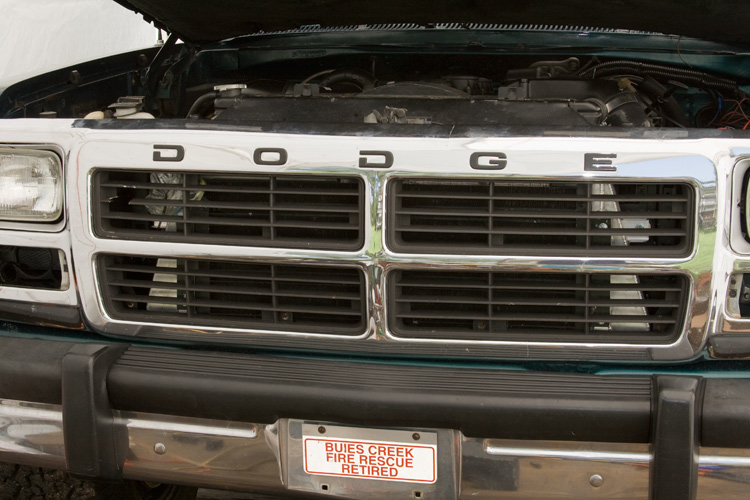
I didn't care for the raw aluminum of the new IC shining through the grill . . .
The new IC was built using 3" charge-air in/out pipes. With that, I was able to upgrade all the charge-air plumbing starting at the secondary turbocharger. On the hot-side of the plumbing, I used reinforced high temperature boots . . . .
With a custom built unit, you can run the pipes where YOU want them for the best fit . . .
Before I closed up the front, I went ahead and got some small diameter aviation cable with the crimp-type splices . . . . .
And fabricated an emergency hood latch cable . . .
I routed the cable such that it's right there behind the driver's turn signal lamp bucket should it ever be needed . . . .
I didn't care for the raw aluminum of the new IC shining through the grill . . .
Thread Starter
1st Generation Admin
Joined: Jan 2005
Posts: 4,601
Likes: 118
From: Buies Creek, NC
So I painted the IC's end-tanks satin black to match everything else .. .
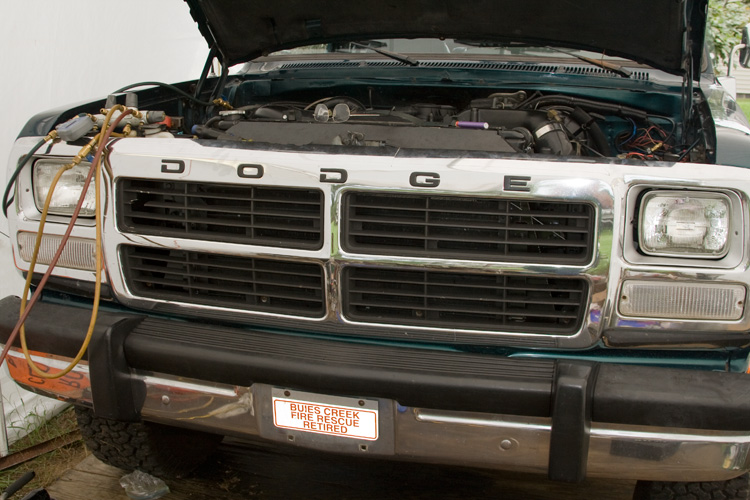
I'm still in the midst of tuning the engine to the new cam & IC so I don't have definitive results on the EGT drop. The new cam makes it hard to say specifically what the IC alone did, but overall the EGTs and more pointedly, the smoke is way down.
BC.
I'm still in the midst of tuning the engine to the new cam & IC so I don't have definitive results on the EGT drop. The new cam makes it hard to say specifically what the IC alone did, but overall the EGTs and more pointedly, the smoke is way down.
BC.


Trending Topics

Registered User
Joined: Jan 2008
Posts: 517
Likes: 0
From: Colorado
Dude, this should be stickied just because of the detail of the install... Awesome job sir my stacks off to you*
And instead of incriminating yourself with a price how about the dimensions you took on the open grille space?
*once I get some that is...
And instead of incriminating yourself with a price how about the dimensions you took on the open grille space?
*once I get some that is...

Registered User
Joined: May 2004
Posts: 2,867
Likes: 0
From: Golden, Colorado
I believe Joe kept the dimensions, there is one other person who got one also, so if you called him i'm sure he would be happy to make one for you. Also I believe the price is about the same as any other aftermarket IC for say a 2nd gen, maybe a little less.


Registered User
Joined: Jan 2008
Posts: 7,547
Likes: 2
From: Quinton, New Jersey (middle of nowhere)
IIRC he said somewhere around 1200, But idk
And ''GHLS'' has this intercooler too (maybe not the exact one) so Joe definely has the measurements saved and knows what a 1st gen is,
It looks great david, i bet that thing runs even better now with the cam and stuff , hows that tranny now
Do you have a part number for that trans cooler ????
And ''GHLS'' has this intercooler too (maybe not the exact one) so Joe definely has the measurements saved and knows what a 1st gen is,
It looks great david, i bet that thing runs even better now with the cam and stuff
, hows that tranny now Do you have a part number for that trans cooler ????


Registered User
Joined: Oct 2009
Posts: 1,830
Likes: 1
From: Claymont, Del and Horsham, PA
I attempted at upgrading my trans cooler the other night and was upset to find that the 1/2" cooler was reducted to 3/8 at the inlet/outlet and i am now on a hunt for another one.


Registered User
Joined: Jun 2008
Posts: 673
Likes: 1
From: Santa Rosa, Ca
very nice. that intercooler looks like a factory unit. where did you get your couplers? im in the market for them and could use some nice ones like those. you said the IC has 3" ports, what size piping did you use