
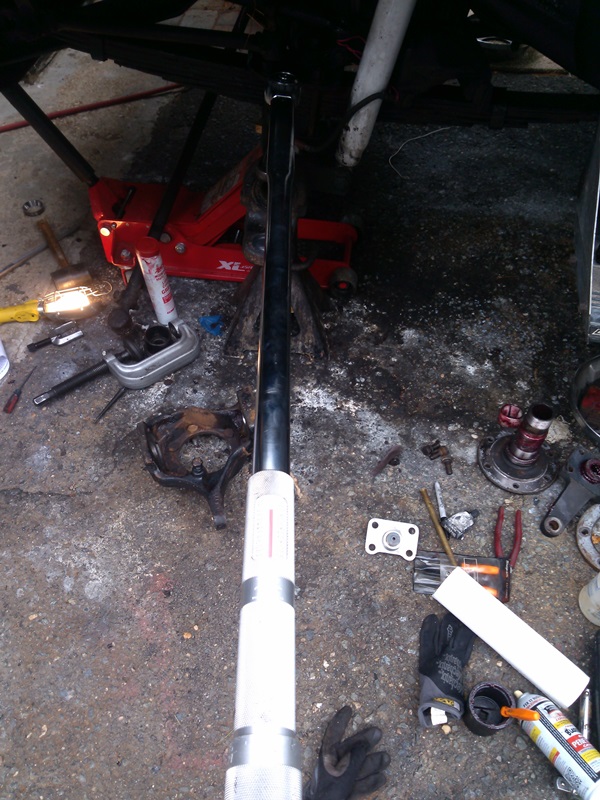
Ok, lets do our dana 60 4x4 king pins


Registered User
Joined: Oct 2010
Posts: 162
Likes: 7
From: langley bc
awesome job and pics,just a little tip for others when I use the old race to drive the new race in , I take a bit off the od of the old race with the bench grinder so it just fits in. works for pinion bearings ,hubs etc.
Registered User
Joined: Nov 2007
Posts: 1,816
Likes: 0
From: Maine
Funny you say that. I just did the same thing 2 days ago... no pounding the old race out with vise grips/hammer!
Thread Starter
Administrator
Joined: Jul 2009
Posts: 5,311
Likes: 566
From: Phoenix AZ

Thread Starter
Administrator
Joined: Jul 2009
Posts: 5,311
Likes: 566
From: Phoenix AZ
No problem. Now that this is resurrected, I may as well give a report. The death wobble has not returned, so it seems that it was the king pins causing it. Between the disk brake conversion and the front end work, she rides and steers like a dream. Oh yeah!! And stops too. I am leaving for Mexico on Tuesday and she is out there snortin' and rarin' to go...Mark (me too!)
Registered User


Joined: Dec 2010
Posts: 6,838
Likes: 1,683
From: Land of the Toxic Avenger
Mark,
I would like to know the size of the allen headed socket you used to remove the upper king pin cone.
Is it 7/8" hex ? like this one ?
Since I don't have my kits yet from Ebay, I cannot measure them yet.
Mucho appreciated-o Amigo.
I would like to know the size of the allen headed socket you used to remove the upper king pin cone.
Is it 7/8" hex ? like this one ?
Since I don't have my kits yet from Ebay, I cannot measure them yet.
Mucho appreciated-o Amigo.
Registered User
Joined: Apr 2006
Posts: 840
Likes: 1
From: granite falls washington
Thread Starter
Administrator
Joined: Jul 2009
Posts: 5,311
Likes: 566
From: Phoenix AZ
Mark,
I would like to know the size of the allen headed socket you used to remove the upper king pin cone.
Is it 7/8" hex ? like this one ?
Sunex 45062 3/4-Inch Drive 7/8-Inch Hex Driver Impact Socket - Amazon.com
Since I don't have my kits yet from Ebay, I cannot measure them yet.
Mucho appreciated-o Amigo.
Registered User
Joined: Dec 2010
Posts: 6,838
Likes: 1,683
From: Land of the Toxic Avenger
Thanks Mark,
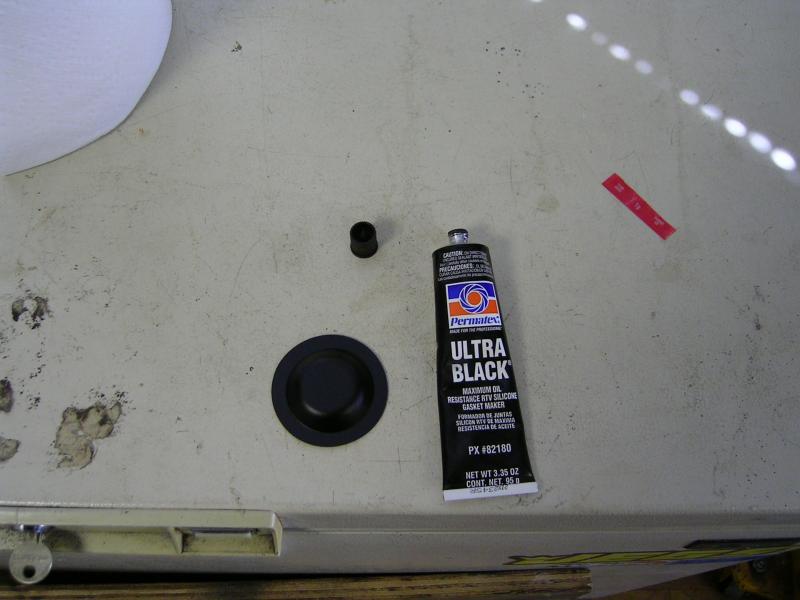
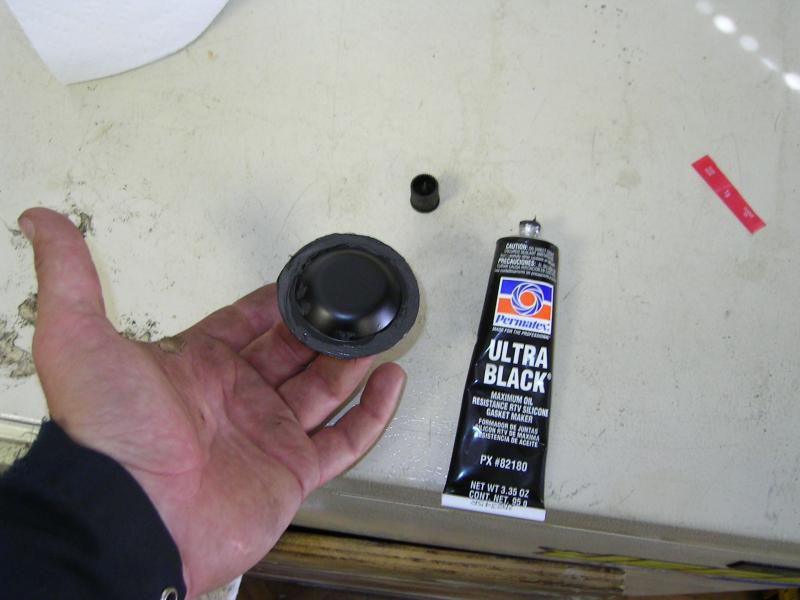
Your writeup was an excellent way of familiarizing myself with this project. Mine varied in only a minor way, as where the FSM says you're supposed to put a bead of sealant on the lower bearing cap so that when it's pressed UP into the housing, it seals against and prevents water intrusion from above where you see the cap through the hole. I used FIPG in there, and it worked great.
I will say that the process of removal is a piece of cake. I have the 3/4" breaker bar, and a 5' long piece of fence pipe. Even with that bar, to loosen the upper king pin cone wasn't easy. I weigh 236 and even with all my weight, it still took quite a bit of effort to crack it loose. Once cracked, it easily threaded out. The bearing cup was easy to remove, but installation was a real PITA as if it isn't perfectly symmetrical in the housing, it doesn't move up into the hole. I spent more time installing the two lower bearing cups than I did the entire job, as my bearing / balljoint installer didn't work right as it wasn't angled to make up for the housing pitch on the upper side of the lower king pin arm. Live and learn...
I finally got to use my HD torque wrench on this truck. I locktited those cones, and torqued them down. In all honesty, you don't need a torque wrench, as anyone with a 4' bar on that socket could simply pull the bar as hard as they could and get the same results. I was amazed at how much effort it took to achieve the 600 Ft lbs of torque on that wrench. Easy way to throw out your back, I might add..
So here is the real culprit of the job.
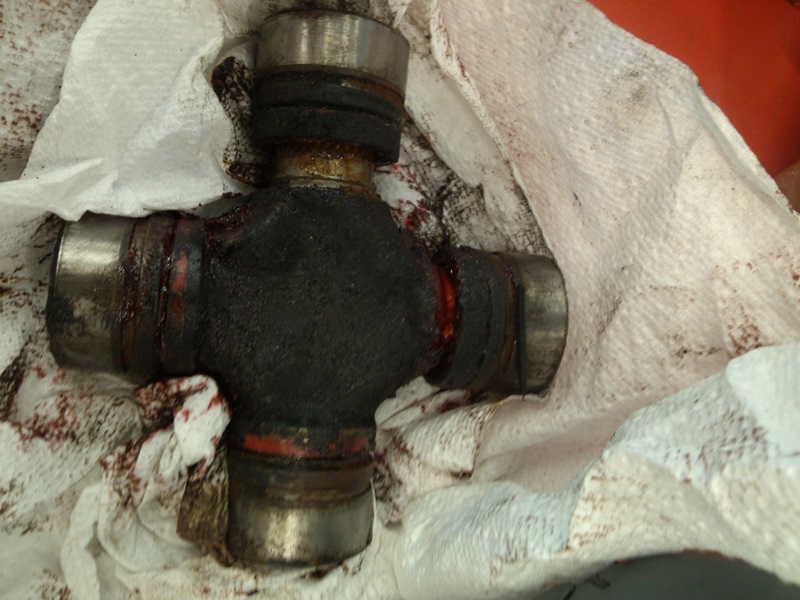
THe grease NEVER went into two of the 4 caps. The Original grease they were packed with was yellow. My grease is Amsoil Synthetic Red. When I disassembled the U-joints, I realized that although I grease my truck minimum 4 times a year, the u-joints never took the grease into two opposing caps and bearings. This happened on BOTH AXLE JOINTS. The drivers side was Seized on the caps that didn't get the grease, and the passenger side was about to do the exact same thing..
I found my receipts and took them back to Autozone. I installed the U-joints exactly 2 years ago on August 16th. The warranty on these axle joints is exactly 2 years, so I made my warranty within 8 days, and paid nothing for the new ones. Talk about timing.
Most appreciated as your writeup made it as if I had done it before.
EDIT:
End result ?
Truck steering is much tighter, even though both king pin lower bearings looked brand new when I took them out. The races looked as though a bearing had never been in them, and the bearing roller surfaces were identical to that. The upper cones were worn, but not terrible. I had changed out the plastic cups and springs last year when BobVA suggested I do so. Nothing was cracked or broken in there. I guess I really didn't need to do these at all, but who knew ?
I did also notice that the "bang" that I normally would hear in a certain pothole near my home doesn't sound as loud any longer, so I guess the installation of new king pins was worth it in the end.
Your writeup was an excellent way of familiarizing myself with this project. Mine varied in only a minor way, as where the FSM says you're supposed to put a bead of sealant on the lower bearing cap so that when it's pressed UP into the housing, it seals against and prevents water intrusion from above where you see the cap through the hole. I used FIPG in there, and it worked great.
I will say that the process of removal is a piece of cake. I have the 3/4" breaker bar, and a 5' long piece of fence pipe. Even with that bar, to loosen the upper king pin cone wasn't easy. I weigh 236 and even with all my weight, it still took quite a bit of effort to crack it loose. Once cracked, it easily threaded out. The bearing cup was easy to remove, but installation was a real PITA as if it isn't perfectly symmetrical in the housing, it doesn't move up into the hole. I spent more time installing the two lower bearing cups than I did the entire job, as my bearing / balljoint installer didn't work right as it wasn't angled to make up for the housing pitch on the upper side of the lower king pin arm. Live and learn...
I finally got to use my HD torque wrench on this truck. I locktited those cones, and torqued them down. In all honesty, you don't need a torque wrench, as anyone with a 4' bar on that socket could simply pull the bar as hard as they could and get the same results. I was amazed at how much effort it took to achieve the 600 Ft lbs of torque on that wrench. Easy way to throw out your back, I might add..

So here is the real culprit of the job.

THe grease NEVER went into two of the 4 caps. The Original grease they were packed with was yellow. My grease is Amsoil Synthetic Red. When I disassembled the U-joints, I realized that although I grease my truck minimum 4 times a year, the u-joints never took the grease into two opposing caps and bearings. This happened on BOTH AXLE JOINTS. The drivers side was Seized on the caps that didn't get the grease, and the passenger side was about to do the exact same thing..
I found my receipts and took them back to Autozone. I installed the U-joints exactly 2 years ago on August 16th. The warranty on these axle joints is exactly 2 years, so I made my warranty within 8 days, and paid nothing for the new ones. Talk about timing.
Most appreciated as your writeup made it as if I had done it before.
EDIT:
End result ?
Truck steering is much tighter, even though both king pin lower bearings looked brand new when I took them out. The races looked as though a bearing had never been in them, and the bearing roller surfaces were identical to that. The upper cones were worn, but not terrible. I had changed out the plastic cups and springs last year when BobVA suggested I do so. Nothing was cracked or broken in there. I guess I really didn't need to do these at all, but who knew ?
I did also notice that the "bang" that I normally would hear in a certain pothole near my home doesn't sound as loud any longer, so I guess the installation of new king pins was worth it in the end.
Thread Starter
Administrator
Joined: Jul 2009
Posts: 5,311
Likes: 566
From: Phoenix AZ
Good job T...Glad I could help. When I removed my drivers side king pin, my Fairlane was about 18" in front of my knuckles as I was trying to break it free. All that I could think of was the pain I was about to feel as they crush into the beautiful grill on my Ford. Fortunately, I avoided that outcome. I just tightened those babies with all my weight on the 8' bar. Why weren't the u-joints taking the grease?...Mark
Registered User
Joined: Nov 2006
Posts: 807
Likes: 41
From: Englewood, TN
1. Would Spicer or other high-quality brand of U-Joint obviate this problem? (Noter that the OEM Mopar U-joints on my truck have no grease fittings!)
2. Mark -- your link in Post #14 of this thread no longer leads to anything?
A great thread; thanks.
2. Mark -- your link in Post #14 of this thread no longer leads to anything?
A great thread; thanks.
Thread Starter
Administrator
Joined: Jul 2009
Posts: 5,311
Likes: 566
From: Phoenix AZ
where to get lower king pins dana part #37299
You are right, they don't seem to carry them any more. Here is one. I searched dana 37299, the correct part #. Amazon has them also...Mark
Registered User
Joined: Mar 2010
Posts: 7,265
Likes: 1,346
From: Prince George, BC
I have to thank you too for this write up Mark....It made life so much easier being able to come in and check that I was doing things properly from time to time. 
And I too added the sealant to the lower cup. Not because I followed my FSM..but because there was residue on the cup, and in the casting. Plus the location simply screams water infiltration. I also painted mine to cut down on corrosion.
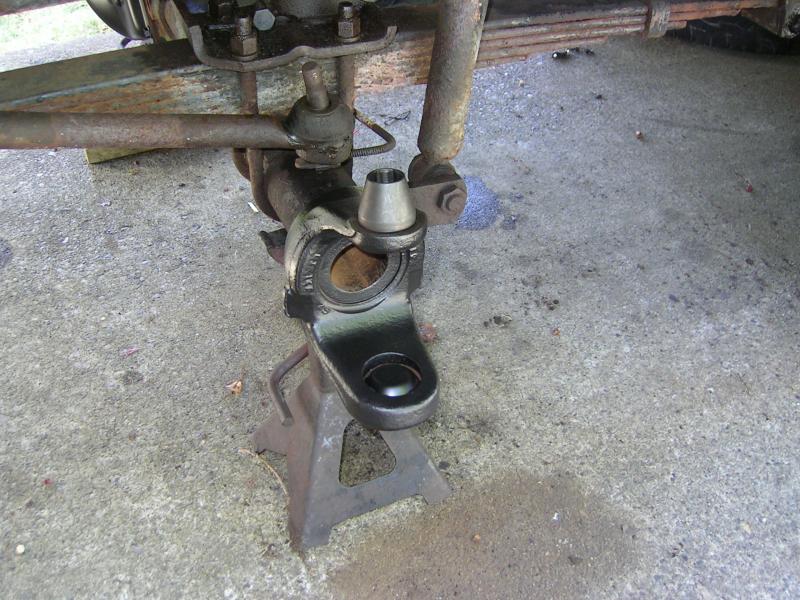
Here's what I did.
And installed....
And I too added the sealant to the lower cup. Not because I followed my FSM..but because there was residue on the cup, and in the casting. Plus the location simply screams water infiltration. I also painted mine to cut down on corrosion.
Here's what I did.


And installed....
