


my daily-driver Ramcharger build


Registered User


Joined: Mar 2010
Posts: 1,860
Likes: 425
From: BC
The small nuts are normally used to bolt the spacers to the hub. The countersunk holes in the spacer may not fit a bulge-style nut. That's how it was for the spacers I put on the wife's Jeep.

Thread Starter
Registered User
Joined: Sep 2013
Posts: 167
Likes: 7
From: Gilbert, AZ
So, my pedal pivot bushings finally showed up. So today between cycles, I cleaned the pedals up so I could swap them in. Upon doing so, I noticed that the pivot stud for the clutch rod was haggered. From the factory there is a plastic bushing there. Well, said bushing was long gone, and there was a pretty deep groove worn in the stud. Well crap! What to do?
Go to the junk drawer. Find a bronze bushing. Hey here is one that has an inside dia. that is only a few thousandths smaller than the stud. And I have a reamer that will put it right on size for a .002" press fit. PERFECT! The outside dia. of the bushing is .500". The inside dia. of the pivot on the clutch rod measured .487". I happen to also have a .501" reamer. PERFECT! I even found a couple bronze thrust washers in there! We are in business.
I drug the welder out and put a tack in the groove on the stud. Then filed it as close to round as I could get. Reamed the bushing, and cut to length. Pressed it on the stud with a generous serving of epoxy to fill any gaps to prevent the bronze from crushing:

Then I reamed the pivot hole, and checked the assembly:

Better than new!! Details, details, details. That's where all the time goes. And it is also what will make this rig a pleasure to drive. That's why I spent so much time/money on the steering column. I want this one to feel like a new truck!
Go to the junk drawer. Find a bronze bushing. Hey here is one that has an inside dia. that is only a few thousandths smaller than the stud. And I have a reamer that will put it right on size for a .002" press fit. PERFECT! The outside dia. of the bushing is .500". The inside dia. of the pivot on the clutch rod measured .487". I happen to also have a .501" reamer. PERFECT! I even found a couple bronze thrust washers in there! We are in business.
I drug the welder out and put a tack in the groove on the stud. Then filed it as close to round as I could get. Reamed the bushing, and cut to length. Pressed it on the stud with a generous serving of epoxy to fill any gaps to prevent the bronze from crushing:

Then I reamed the pivot hole, and checked the assembly:

Better than new!! Details, details, details. That's where all the time goes. And it is also what will make this rig a pleasure to drive. That's why I spent so much time/money on the steering column. I want this one to feel like a new truck!

Registered User
Joined: Dec 2010
Posts: 6,838
Likes: 1,683
From: Land of the Toxic Avenger
Steering column ? Did I miss that in this thread ?
YUP ! Post #13. I was so impressed with all the mechanical stuff, I missed completely the steering column shot.....
Duh !

Registered User
Joined: Mar 2010
Posts: 789
Likes: 0
Mopar, what a pretty rig!! Plain and simple, just how I like it.
It even looks like it sits like they did from the factory, a little lower in the rear.
Nice touch you're adding to it. Your work is awesome!
Keep it coming.
It even looks like it sits like they did from the factory, a little lower in the rear.
Nice touch you're adding to it. Your work is awesome!
Keep it coming.

Registered User
Joined: Aug 2013
Posts: 4,918
Likes: 603
From: Tulsa, OK
So, my pedal pivot bushings finally showed up. So today between cycles, I cleaned the pedals up so I could swap them in. Upon doing so, I noticed that the pivot stud for the clutch rod was haggered. From the factory there is a plastic bushing there. Well, said bushing was long gone, and there was a pretty deep groove worn in the stud. Well crap! What to do?
Go to the junk drawer. Find a bronze bushing. Hey here is one that has an inside dia. that is only a few thousandths smaller than the stud. And I have a reamer that will put it right on size for a .002" press fit. PERFECT! The outside dia. of the bushing is .500". The inside dia. of the pivot on the clutch rod measured .487". I happen to also have a .501" reamer. PERFECT! I even found a couple bronze thrust washers in there! We are in business.
I drug the welder out and put a tack in the groove on the stud. Then filed it as close to round as I could get. Reamed the bushing, and cut to length. Pressed it on the stud with a generous serving of epoxy to fill any gaps to prevent the bronze from crushing:
Then I reamed the pivot hole, and checked the assembly:
Better than new!! Details, details, details. That's where all the time goes. And it is also what will make this rig a pleasure to drive. That's why I spent so much time/money on the steering column. I want this one to feel like a new truck!
Go to the junk drawer. Find a bronze bushing. Hey here is one that has an inside dia. that is only a few thousandths smaller than the stud. And I have a reamer that will put it right on size for a .002" press fit. PERFECT! The outside dia. of the bushing is .500". The inside dia. of the pivot on the clutch rod measured .487". I happen to also have a .501" reamer. PERFECT! I even found a couple bronze thrust washers in there! We are in business.
I drug the welder out and put a tack in the groove on the stud. Then filed it as close to round as I could get. Reamed the bushing, and cut to length. Pressed it on the stud with a generous serving of epoxy to fill any gaps to prevent the bronze from crushing:
Then I reamed the pivot hole, and checked the assembly:
Better than new!! Details, details, details. That's where all the time goes. And it is also what will make this rig a pleasure to drive. That's why I spent so much time/money on the steering column. I want this one to feel like a new truck!
Looking good. Long cycles can be your friend

Where did you get the pivot bushings?

Thread Starter
Registered User
Joined: Sep 2013
Posts: 167
Likes: 7
From: Gilbert, AZ
Ebay. search "dodge truck pedal pivot bushings"
I picked up a new toy yesterday!
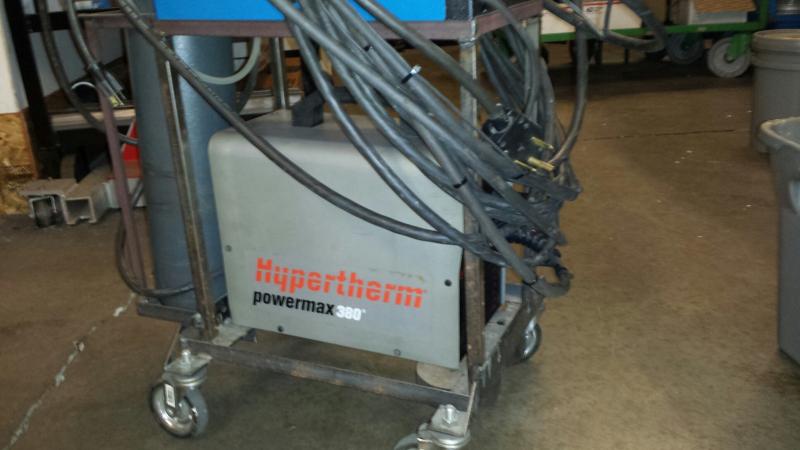
Hypertherm powermax380 plasma cutter. I have wanted one for a long time. Ever since selling my last truck, I knew that the next time I fabricated anything, it was not going to be out of round-tube. I don't like working with round tube one bit. The first thing I ever built from round-tube was the wife's Yamaha Rhino. That was fun, and I really enjoyed it. It turned out great. Then I built some really elaborate bumpers on my last truck. That, I did not enjoy one little bit! When that truck left, and I started this one, I knew I would be building the bumpers from square-tube and/or plate. I sold my bender and notcher a long time ago. Every now and then I cruise C'list looking for a plasma, and yesterday was the day! This will be a blessing when it comes time to cut up all that plate! I usually use a "death-wheel". We all know how little fun that is!
I picked up a new toy yesterday!

Hypertherm powermax380 plasma cutter. I have wanted one for a long time. Ever since selling my last truck, I knew that the next time I fabricated anything, it was not going to be out of round-tube. I don't like working with round tube one bit. The first thing I ever built from round-tube was the wife's Yamaha Rhino. That was fun, and I really enjoyed it. It turned out great. Then I built some really elaborate bumpers on my last truck. That, I did not enjoy one little bit! When that truck left, and I started this one, I knew I would be building the bumpers from square-tube and/or plate. I sold my bender and notcher a long time ago. Every now and then I cruise C'list looking for a plasma, and yesterday was the day! This will be a blessing when it comes time to cut up all that plate! I usually use a "death-wheel". We all know how little fun that is!
Registered User
Joined: Aug 2013
Posts: 4,918
Likes: 603
From: Tulsa, OK
You are going to really like it. If you are like I am it wont take long before you have a box of time saving guides spacers and such.
Just don't get the torch near a magnet. the flame can go right through the fiber part between the handle and the tip to get to the magnet.
Just don't get the torch near a magnet. the flame can go right through the fiber part between the handle and the tip to get to the magnet.
Thread Starter
Registered User
Joined: Sep 2013
Posts: 167
Likes: 7
From: Gilbert, AZ
You are going to really like it. If you are like I am it wont take long before you have a box of time saving guides spacers and such.
Just don't get the torch near a magnet. the flame can go right through the fiber part between the handle and the tip to get to the magnet.
Just don't get the torch near a magnet. the flame can go right through the fiber part between the handle and the tip to get to the magnet.
It did take me a while one time, when I was about 6 sheets to the wind, to figure out why I could not tack something together with my mig-welder. Finally realized that I was tacking very close to the really strong NEO-magnet I was using to hold the material. It was making the wire dance all over the place.

Registered User
Joined: Aug 2013
Posts: 4,918
Likes: 603
From: Tulsa, OK
Duly noted! I did not know that.
It did take me a while one time, when I was about 6 sheets to the wind, to figure out why I could not tack something together with my mig-welder. Finally realized that I was tacking very close to the really strong NEO-magnet I was using to hold the material. It was making the wire dance all over the place.
It did take me a while one time, when I was about 6 sheets to the wind, to figure out why I could not tack something together with my mig-welder. Finally realized that I was tacking very close to the really strong NEO-magnet I was using to hold the material. It was making the wire dance all over the place.
I think a lot of us have done things like that
Thread Starter
Registered User
Joined: Sep 2013
Posts: 167
Likes: 7
From: Gilbert, AZ
Had some time to tinker between cycles today. I managed to get the mount for the hydro-boost unit fabbed up. Get the push-rod cut and threaded. And, get it mounted to the fire-wall:
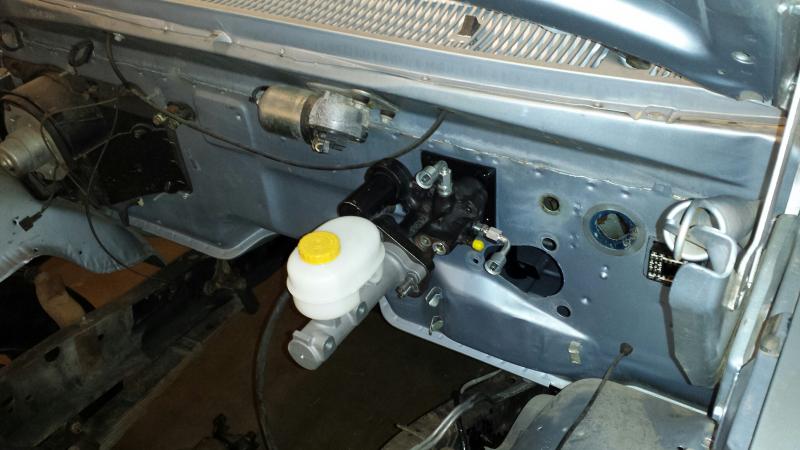
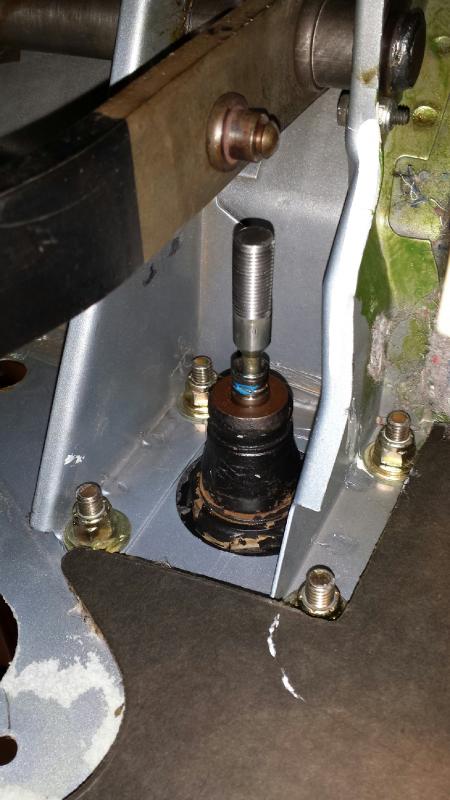
And I am trying something new! I found this stuff at the hardware store called "paint"! It seems it helps things that you work on look clean and finished, rather than rusty, and cobbled LOL!
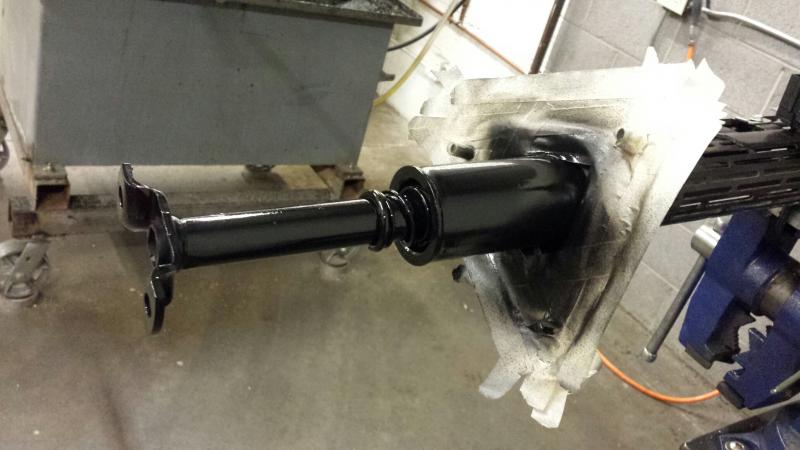
Figured I should paint the bottom of the column while it was out, clean, and easy. I have some pretty nice adhesive backed closed cell foam stashed away. So I also decided to cut some new gaskets for the column and the brake booster. I didn't take any pics of the booster gasket, but here is the new column gasket:

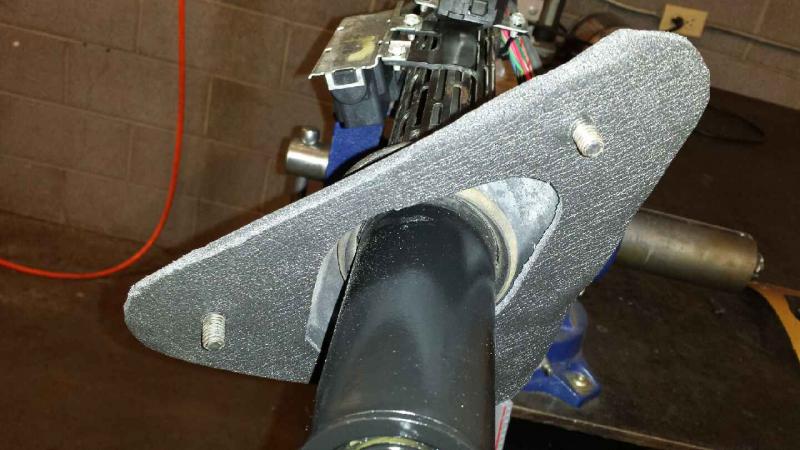
SO, yea, baby-steps. It might be slow, but it is progress. I cant wait to get the dash all buttoned up. Then the real work starts! Pull the core support, and start prepping to stab the motor! WOOT!


And I am trying something new! I found this stuff at the hardware store called "paint"! It seems it helps things that you work on look clean and finished, rather than rusty, and cobbled LOL!

Figured I should paint the bottom of the column while it was out, clean, and easy. I have some pretty nice adhesive backed closed cell foam stashed away. So I also decided to cut some new gaskets for the column and the brake booster. I didn't take any pics of the booster gasket, but here is the new column gasket:


SO, yea, baby-steps. It might be slow, but it is progress. I cant wait to get the dash all buttoned up. Then the real work starts! Pull the core support, and start prepping to stab the motor! WOOT!
Registered User
Joined: Aug 2013
Posts: 4,918
Likes: 603
From: Tulsa, OK
It's all the little stuff that takes the most time.
That "Paint" stuff looks pretty good maybe I will give it a try. was it hard to do?
Looks good! I think you are going to like the hydroboost. I put one on my 42 ****** jeep and it stops real good with good pedal feel. I went with stainless braided lines rather than hoses. I think that helps a lot.
That "Paint" stuff looks pretty good maybe I will give it a try. was it hard to do?
Looks good!
I think you are going to like the hydroboost. I put one on my 42 ****** jeep and it stops real good with good pedal feel. I went with stainless braided lines rather than hoses. I think that helps a lot.


Thread Starter
Registered User
Joined: Sep 2013
Posts: 167
Likes: 7
From: Gilbert, AZ
OHH! I almost forgot. There is a diamond shaped adapter between the M/C and booster. And a few other parts inside there (push-rod, retainer, something else I think LOL) None of that stuff comes with either part when you go to the parts store. I was lucky to find a wrecked truck in a scrap-yard to pirate that stuff from, and the junk booster to use for a core.
Registered User
Joined: Aug 2013
Posts: 4,918
Likes: 603
From: Tulsa, OK
It may be easier to adapt one from a Chevy Astro van.
It is the same hydro-boost unit with a pushrod that looks to be more easily adaptable. an older pre metric chevy master cylinder could be used. the flair nuts are odd ball for the tubing but Summit ,Jegs or Speedway sells them.
It is the same hydro-boost unit with a pushrod that looks to be more easily adaptable. an older pre metric chevy master cylinder could be used. the flair nuts are odd ball for the tubing but Summit ,Jegs or Speedway sells them.