kdp fix ?s
 02-10-2006, 08:46 AM
#1
Registered User
Thread Starter

Join Date: Jan 2006
Posts: 228
Likes: 0
Received 0 Likes
on
0 Posts
kdp fix ?s
Hello, now that I fixed the power steering and resealed the vacuum pump I plan on attempting the kdp fix. My ? is how tough of a job is this and what special tools if any will I need? Do I need to pull the radiator? Are there any sites with pics to show the process. And last but not least how long of a job is this, can I knock it out in a day? Thanks again for such a great site. LATER
 02-10-2006, 08:54 AM
#2
Registered User

It is not that bad of a job, the only special tool you will need acording to the "book" is a fan nut wrench, but you don't really need it. I use a big punch on the end of the nut, and give it a whack with a hammer and it generally loosens the nut. BEWARE it is a reverse thread. I never remove the radiator. It can be tight when removing the fan, but you can do it. There are 4 bolts holding the balancer on, then it just pulls off by hand-no puller needed. I have this down to a couple of hours. Some say they do it much faster, but I am ****. I would recommend a new crank seal. I am not sure about the first gen, but the 12 valve second gens have a crank sensor that has to have the gap set once you reassemble everything. Pictures?? Do a search on here, I don't know for sure.
Good luck and happy wrenching!!
Good luck and happy wrenching!!
02-10-2006, 10:22 AM
#3
Registered User

Join Date: Jan 2006
Posts: 402
Likes: 0
Received 0 Likes
on
0 Posts
All you need to remove is the fan shroud and unhook the top rad hose and push it toward the fire wall. (1 quart loss of antifreeze).
I know some leave the shroud on but why bother. It comes out easy and lets you have good access. Just remember the wire loom thats hooked to the middle of it on the bottom.
It took me an afternoon, and thats because I had trouble with the fan nut. A drift and big channel lock worked well for me there. The rest was cake. Making the tab took like 10 minutes. I re-used the cover gasket and added a very small bead of grey RTV to both sides.
Cleaning the area before I opened it took a while owing to the seeps from loose cover bolts. I wanted as little grime when I opened it up as I could. There was a lot less to worry about knowing a bit hunk of crud was not going in the gears when I pulled the cover. I think if you had a power washer you could shorten that process by a lot. (I bet the mechanics are laughing at this) That added some time.
Big Jimmy
02-10-2006, 11:12 AM
#4
Registered User

[QUOTE=big jimmy]All you need to remove is the fan shroud and unhook the top rad hose and push it toward the fire wall. (1 quart loss of antifreeze)./QUOTE]
Big Jim, that is not necessary on a 1st gen, I did what you did on my brothers 96, but not on my 93. Fan shroud is smaller and is held by 2 clips on top and 2 spots on the bottom where is slids into.
The kdp on a 1st gen actually sits sub-flush, the cover is a little thicker in that area. I peened mine over with a punch an a hammer, but a tab will work if you get creative. All the 2nd gen's I've seen were flush with the cover, making putting a tab very easy.
02-10-2006, 11:16 AM
#5
Registered User
Join Date: May 2005
Location: TN
Posts: 731
Likes: 0
Received 0 Likes
on
0 Posts
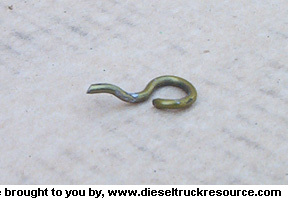
http://www.flex.net/%7Etriplem/new/dowelpin.htm this is not a 1st gen in the picture but it will give you the general idea.

 02-10-2006, 12:33 PM
#7
Registered User
I cleaned the threads on that bolt and ran a tap down the hole, then used a little high-temp lok-tite, just to be sure. I pulled the cover off a couple months later and the bolt head had not moved at all--I used my own pic for reference. As for seals and whatnot, I've had the front cover off 5 times and everything is still dry with the original gasket and crank seal, knock on wood 
Trending Topics


Thread
Thread Starter
Forum
Replies
Last Post
sootnsmoke
1st Gen. Ram - All Topics
11
01-05-2012 08:55 PM