
Cummins Ramcharger Build Thread

Thread Starter
Registered User
Joined: Jun 2014
Posts: 68
Likes: 2
Cummins Ramcharger Build Thread
Well, I started this build thread on another forum but came to the realization that the site is about as technical as a stone wheel. I won't drop any names, but it rhymes with "biesel dombers" 
Anyway, I should have started here in the first place, so here it is:
I'll document putting the engine and drive train from this '91.5 W250 (auto, 4x4, originally sold in Pittsburgh)...
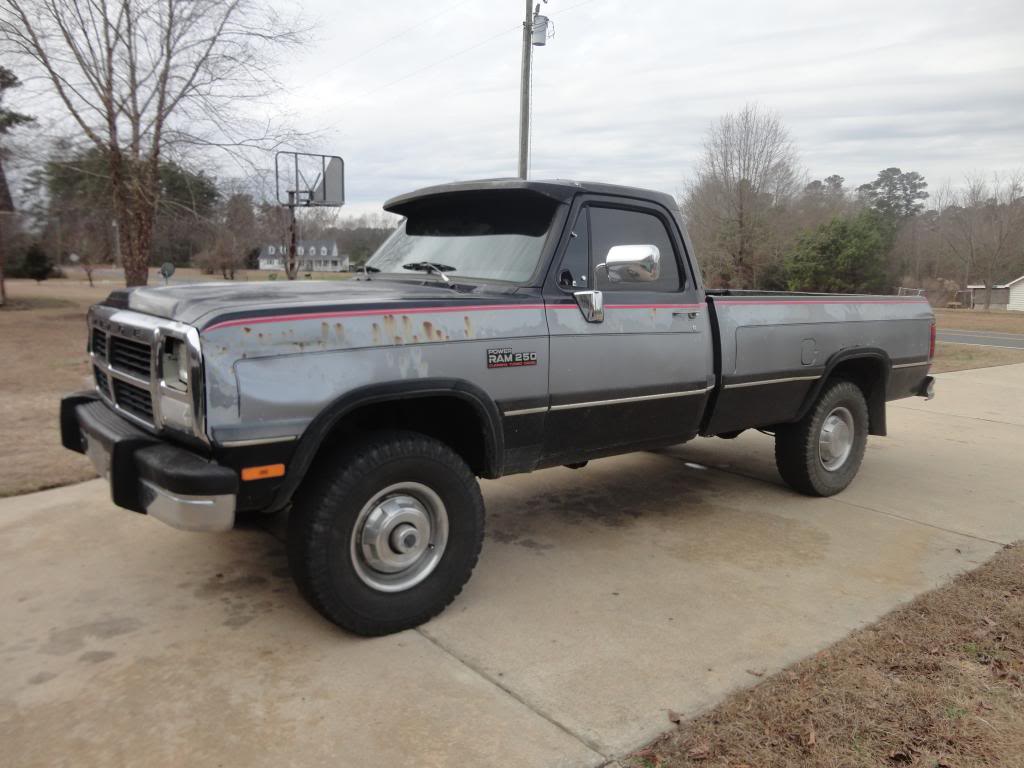
...into this '87 Ramcharger (318, auto, 4x4, originally sold in Charlotte).

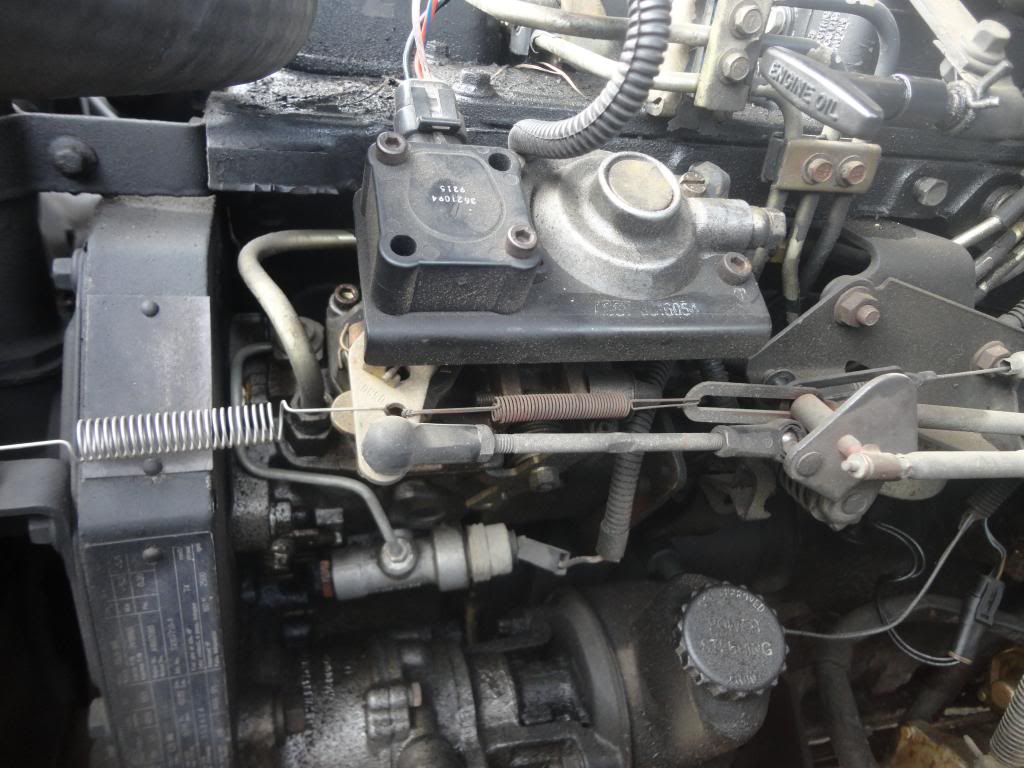
I've had the 1st gen for a few months and had plans to get it right, despite the rattling interior and rusted-beyond-redemption body. The odometer read 160k, the pump was unmolested, the engine was pretty clean and everything ran, shifted and worked perfectly.
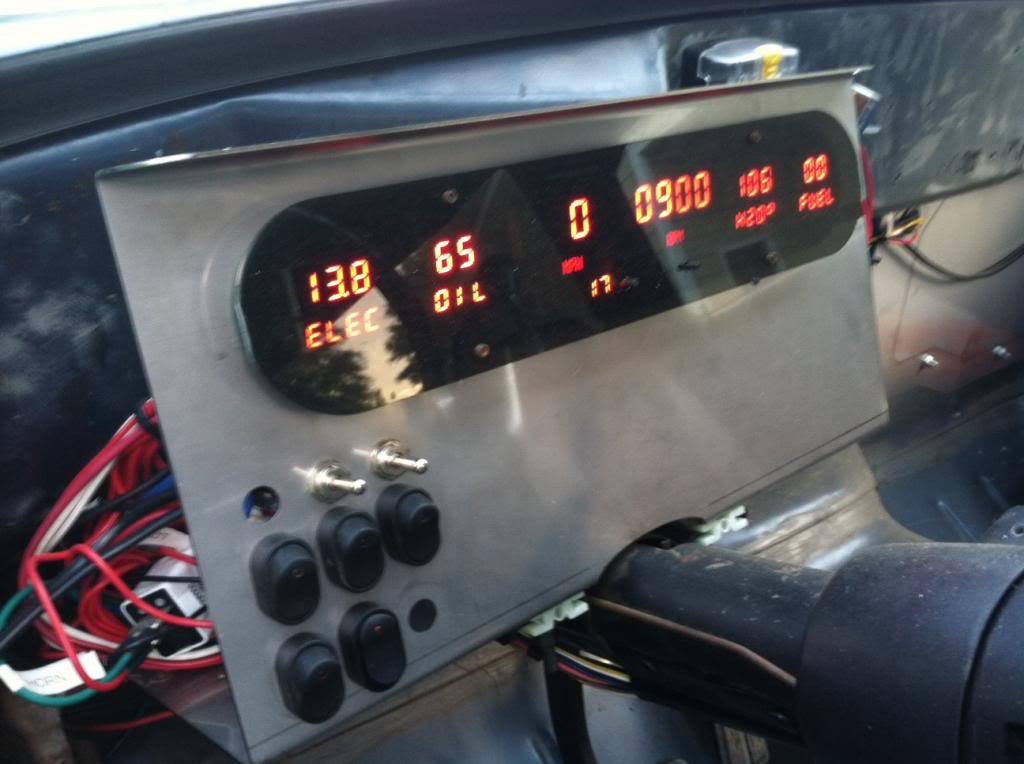
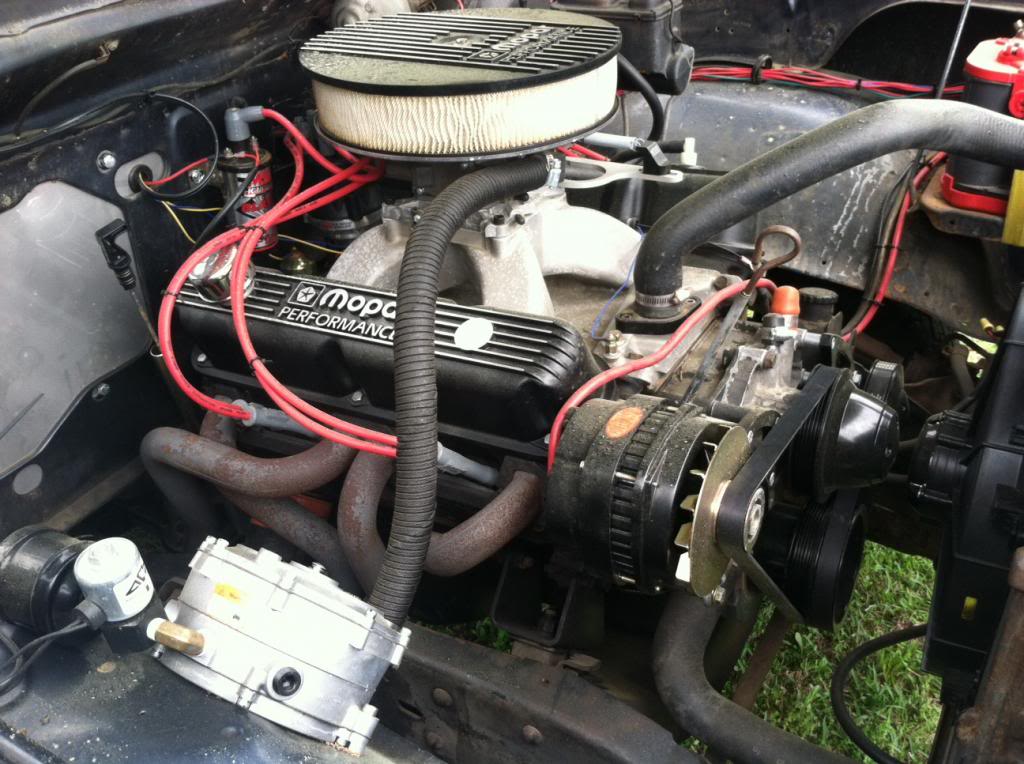
Then my little brother bought a new Jeep and dropped his Ramcharger in my lap. The interior was largely stripped, except for seats and the steering column by the previous owner, leaving only a silly aftermarket digital gauge cluster. There are rust holes in each rear quarter, between the rocker panels and the wheel wells, but that's going to be way easier to patch than the nightmare the W250 had for a body. The rest of the truck is completely rust-free. The tired 318 looked hopped up, but amounted to wasted money on parts that only look nice and a propane conversion.
So, here it is, my build thread. My main goal is to answer all the questions anyone who might want to do this swap might have in enough detail that they can go out there and do it themselves with confidence. Suggestions and tips are welcome. I'm not new to Cummins engines or Dodge trucks, but this is my first Cummins Ramcharger swap, so my ego is small on this one.
Anyway, I should have started here in the first place, so here it is:
I'll document putting the engine and drive train from this '91.5 W250 (auto, 4x4, originally sold in Pittsburgh)...

...into this '87 Ramcharger (318, auto, 4x4, originally sold in Charlotte).

I've had the 1st gen for a few months and had plans to get it right, despite the rattling interior and rusted-beyond-redemption body. The odometer read 160k, the pump was unmolested, the engine was pretty clean and everything ran, shifted and worked perfectly.

Then my little brother bought a new Jeep and dropped his Ramcharger in my lap. The interior was largely stripped, except for seats and the steering column by the previous owner, leaving only a silly aftermarket digital gauge cluster. There are rust holes in each rear quarter, between the rocker panels and the wheel wells, but that's going to be way easier to patch than the nightmare the W250 had for a body. The rest of the truck is completely rust-free. The tired 318 looked hopped up, but amounted to wasted money on parts that only look nice and a propane conversion.


So, here it is, my build thread. My main goal is to answer all the questions anyone who might want to do this swap might have in enough detail that they can go out there and do it themselves with confidence. Suggestions and tips are welcome. I'm not new to Cummins engines or Dodge trucks, but this is my first Cummins Ramcharger swap, so my ego is small on this one.
Registered User


Joined: Dec 2010
Posts: 6,838
Likes: 1,683
From: Land of the Toxic Avenger
Great Project you got going there. Something I would like to do myself, somewhere down the line before I become a dirt sleeper.
Moonshine and you should have a good time together when it's all over.
https://www.dieseltruckresource.com/...ight=Moonshine
Now that's something to try to emulate....
Moonshine and you should have a good time together when it's all over.
https://www.dieseltruckresource.com/...ight=Moonshine
Now that's something to try to emulate....
Registered User

Joined: Dec 2008
Posts: 7,288
Likes: 2,884
From: vermont
Looks like a sweet start to the project.
Are you planning on keeping the R.C. stock height, and re-using the diesel leaf springs?
Moonshine has diesel stock springs up front and the stock R.C springs in the rear.
I am thinking this will make for a smooth ride as I don't plan to load it or haul heavy with it.
I have CTD rear springs to install if it is too soft in the rear though.
My summer looks pretty full up, but I am getting my plans to finish up Moonshine dailed in, so I am ready to get on it this winter.
Lary - You may hear from me again for another South Bend clutch. The Con OFE I put in my black crew cab last month is really smooth and works great.
I have put about 1400 miles on it in the last several weeks and love it.
Registered User
Joined: Apr 2007
Posts: 1,260
Likes: 25
From: hesperia ca.
nice looking future oil burner, im in the middle of a '74 first year conversion as well, its going slow, but progressing in bits and replacement pieces, these light chassis rigs should bring a decent fuel consumption with the build, good job!

Registered User
Joined: Aug 2013
Posts: 4,918
Likes: 603
From: Tulsa, OK
Looks like a sweet start to the project.
Are you planning on keeping the R.C. stock height, and re-using the diesel leaf springs?
Moonshine has diesel stock springs up front and the stock R.C springs in the rear.
I am thinking this will make for a smooth ride as I don't plan to load it or haul heavy with it.
I have CTD rear springs to install if it is too soft in the rear though.
My summer looks pretty full up, but I am getting my plans to finish up Moonshine dailed in, so I am ready to get on it this winter.
Lary - You may hear from me again for another South Bend clutch. The Con OFE I put in my black crew cab last month is really smooth and works great.
I have put about 1400 miles on it in the last several weeks and love it.
Are you planning on keeping the R.C. stock height, and re-using the diesel leaf springs?
Moonshine has diesel stock springs up front and the stock R.C springs in the rear.
I am thinking this will make for a smooth ride as I don't plan to load it or haul heavy with it.
I have CTD rear springs to install if it is too soft in the rear though.
My summer looks pretty full up, but I am getting my plans to finish up Moonshine dailed in, so I am ready to get on it this winter.
Lary - You may hear from me again for another South Bend clutch. The Con OFE I put in my black crew cab last month is really smooth and works great.
I have put about 1400 miles on it in the last several weeks and love it.
Registered User
Joined: Dec 2008
Posts: 7,288
Likes: 2,884
From: vermont
I didn't know that.
Laying under Moonshine getting a plan of attack straight in my mind, I did notice that the rear springs looked a bit more rounded and tapered than I though they should.
I rarely own 2wd trucks
Thanks mknittle!
This is good info, as maybe a 4x4 set of RC rear springs could be a good option if I find the back too soft once I get it on the road with the power train in it.
Trending Topics
Registered User
Joined: Aug 2013
Posts: 4,918
Likes: 603
From: Tulsa, OK
I didn't know that.
Laying under Moonshine getting a plan of attack straight in my mind, I did notice that the rear springs looked a bit more rounded and tapered than I though they should.
I rarely own 2wd trucks
Thanks mknittle!
This is good info, as maybe a 4x4 set of RC rear springs could be a good option if I find the back too soft once I get it on the road with the power train in it.
Laying under Moonshine getting a plan of attack straight in my mind, I did notice that the rear springs looked a bit more rounded and tapered than I though they should.
I rarely own 2wd trucks
Thanks mknittle!
This is good info, as maybe a 4x4 set of RC rear springs could be a good option if I find the back too soft once I get it on the road with the power train in it.
Thread Starter
Registered User
Joined: Jun 2014
Posts: 68
Likes: 2
Mine's already finished. I've been driving it for a couple of weeks on the stock 3/4 ton front springs and shocks and the stock 1/2 ton rear springs and shocks. Rides nice but sags in the rear. I'll post pictures when I get that far in the thread. I've got a 2" 3/4 ton lift planned for the front and a 4" 1/2 ton and block delete in the rear.
Thread Starter
Registered User
Joined: Jun 2014
Posts: 68
Likes: 2
The first thing I did was strip the Ramcharger of everything I didn't need and clean things up.
Next thing I did, since the Ramcharger's interior was already mostly stripped, was gut the w250's interior, rebuild the dash wiring harness (the 14ga YL/BK wire was completely burned up from being overloaded by trailer lights) and swap it over.
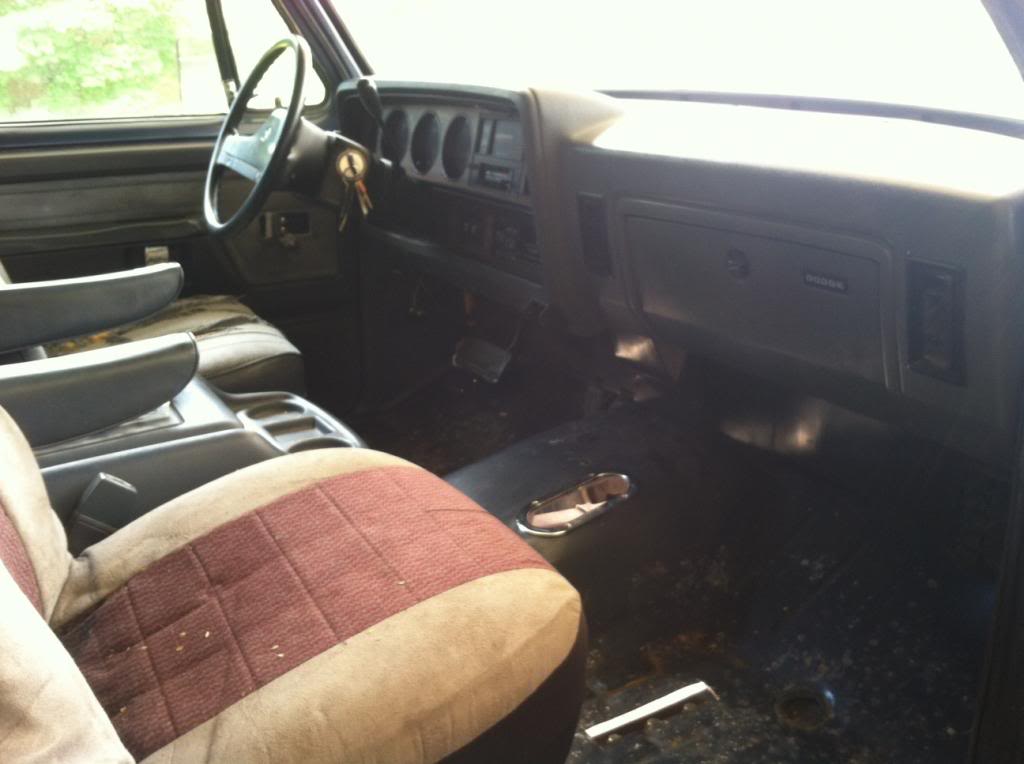
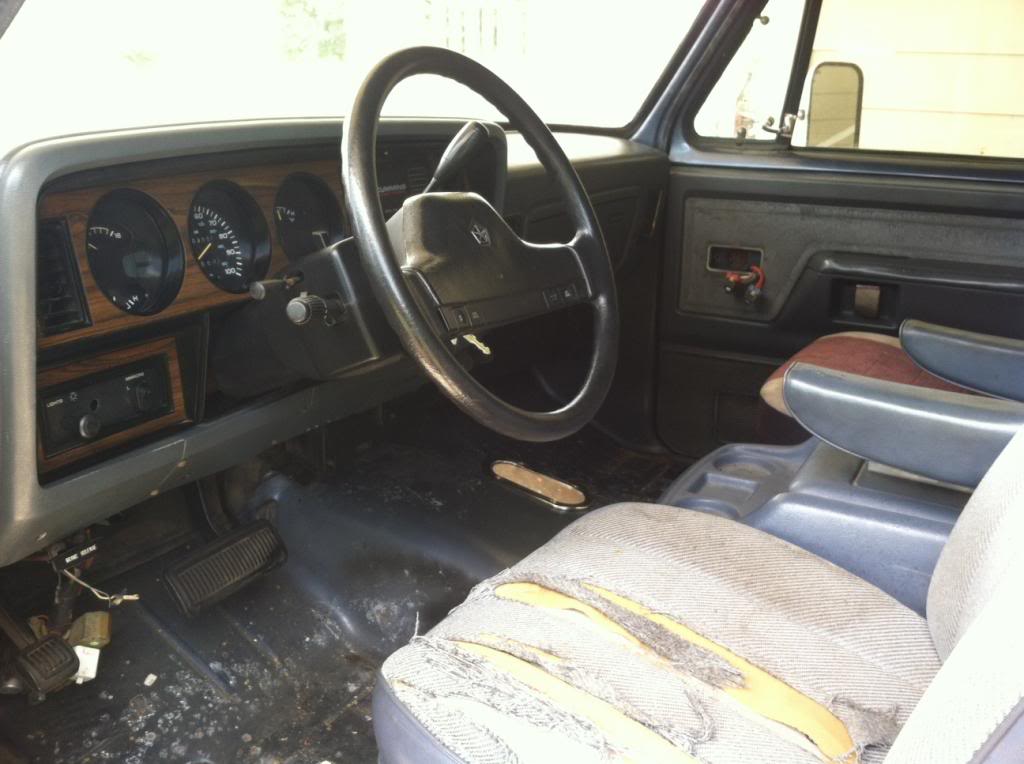
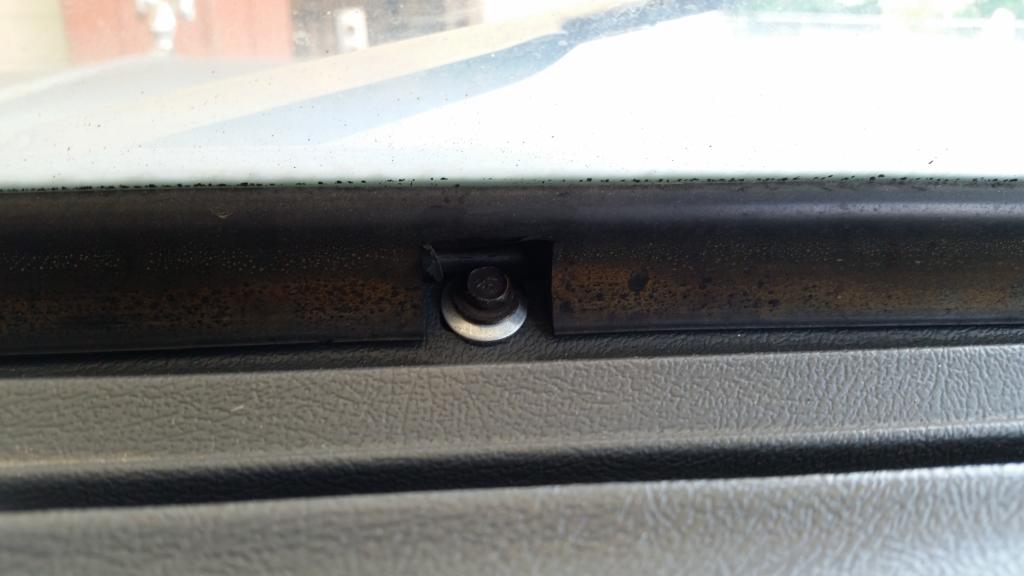
I used everything I could including door panels, window regulators, lock actuators and linkages, speakers and harnesses. The Steering column got swapped out, the Diesel firewall pad was used, the HVAC box, heater core, etc. Before the dash went in I liberally sprayed the inside firewall with rubberized undercoating. Most people remove the windshield to remove/install the dash but I just cut notches in the rubber seal to access the bolts since the Ramcharger's windshield is cracked and needs to be replaced, anyway.

Next thing I did, since the Ramcharger's interior was already mostly stripped, was gut the w250's interior, rebuild the dash wiring harness (the 14ga YL/BK wire was completely burned up from being overloaded by trailer lights) and swap it over.


I used everything I could including door panels, window regulators, lock actuators and linkages, speakers and harnesses. The Steering column got swapped out, the Diesel firewall pad was used, the HVAC box, heater core, etc. Before the dash went in I liberally sprayed the inside firewall with rubberized undercoating. Most people remove the windshield to remove/install the dash but I just cut notches in the rubber seal to access the bolts since the Ramcharger's windshield is cracked and needs to be replaced, anyway.

Registered User
Joined: Aug 2013
Posts: 4,918
Likes: 603
From: Tulsa, OK
Mine's already finished. I've been driving it for a couple of weeks on the stock 3/4 ton front springs and shocks and the stock 1/2 ton rear springs and shocks. Rides nice but sags in the rear. I'll post pictures when I get that far in the thread. I've got a 2" 3/4 ton lift planned for the front and a 4" 1/2 ton and block delete in the rear.


Thread Starter
Registered User
Joined: Jun 2014
Posts: 68
Likes: 2
Thanks, my dude.
Ok, movin' right along...
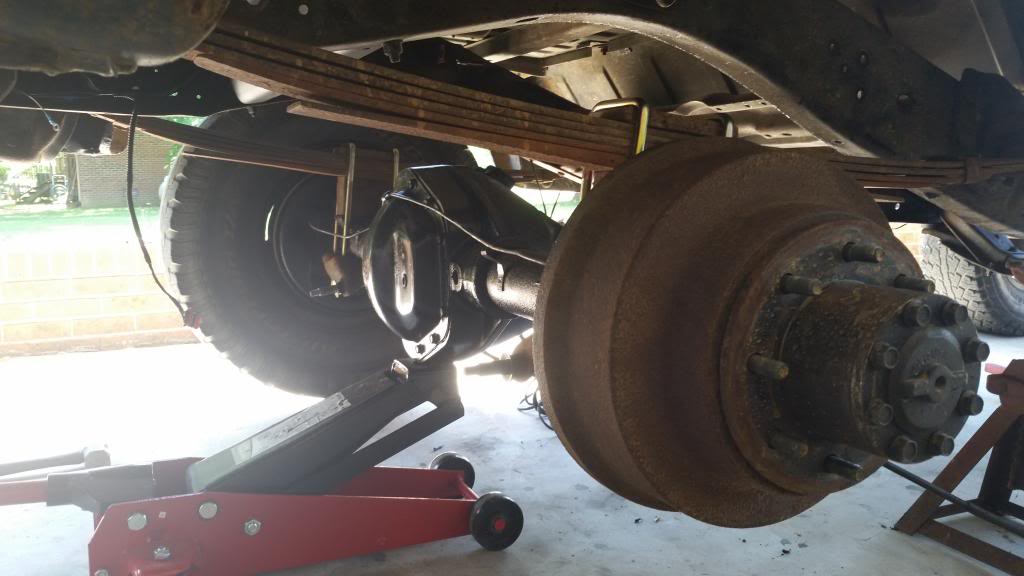
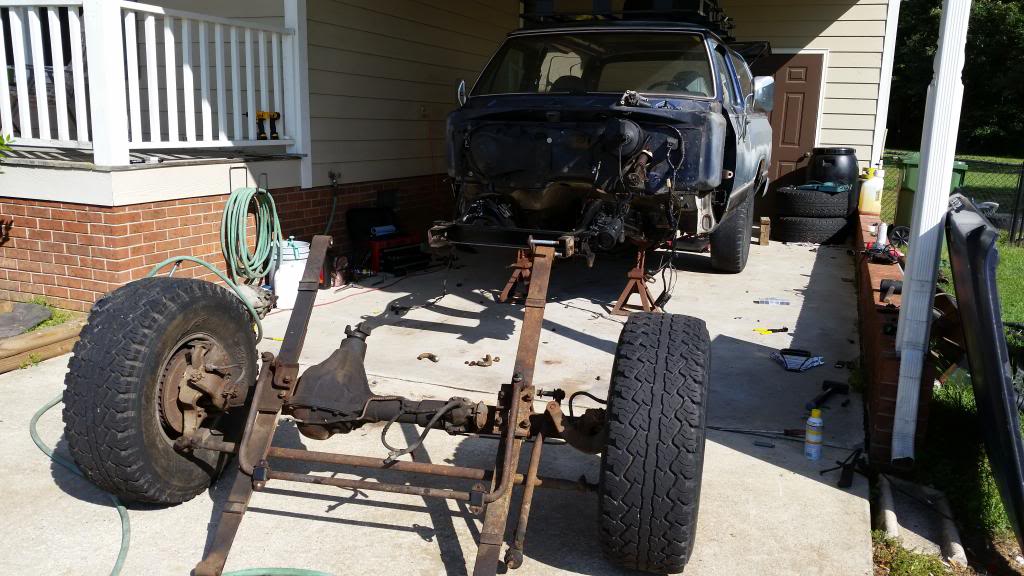
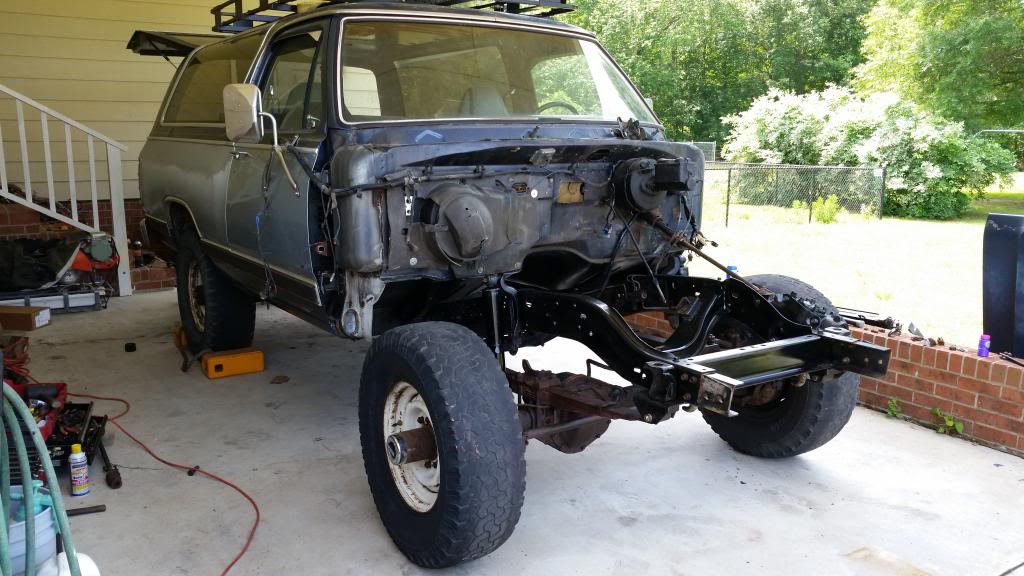
With the interior swapped over and nothing left to do in there but stow the fuse block and tuck a couple of test ports, I turned on the undercarriage. I removed the corporate 9.25 from the Ramcharger, leaving the half-ton springs, so I could clean and coat the sheet metal. Then, since the body on the W250 was shot, I lifted the bed and cab off and sold them on Craigslist. Once the D70 rear was removed from the frame, I cut the whole back half off and threw it in the scrap pile.
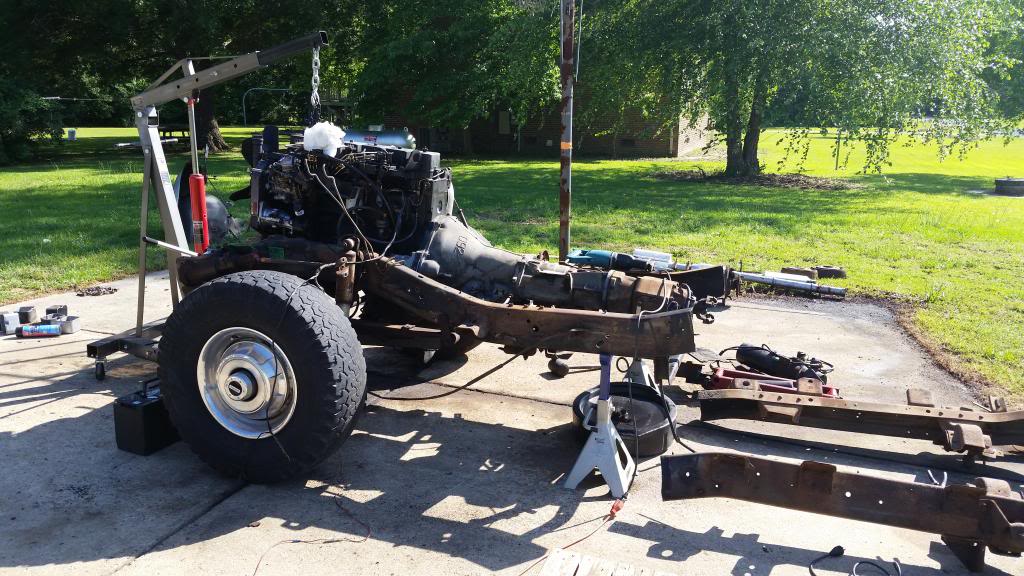
Once the rear axle was pressure washed and had a few coats of epoxy paint on it, it was ready to go in.
Ok, movin' right along...
With the interior swapped over and nothing left to do in there but stow the fuse block and tuck a couple of test ports, I turned on the undercarriage. I removed the corporate 9.25 from the Ramcharger, leaving the half-ton springs, so I could clean and coat the sheet metal. Then, since the body on the W250 was shot, I lifted the bed and cab off and sold them on Craigslist. Once the D70 rear was removed from the frame, I cut the whole back half off and threw it in the scrap pile.

Once the rear axle was pressure washed and had a few coats of epoxy paint on it, it was ready to go in.


Thread Starter
Registered User
Joined: Jun 2014
Posts: 68
Likes: 2
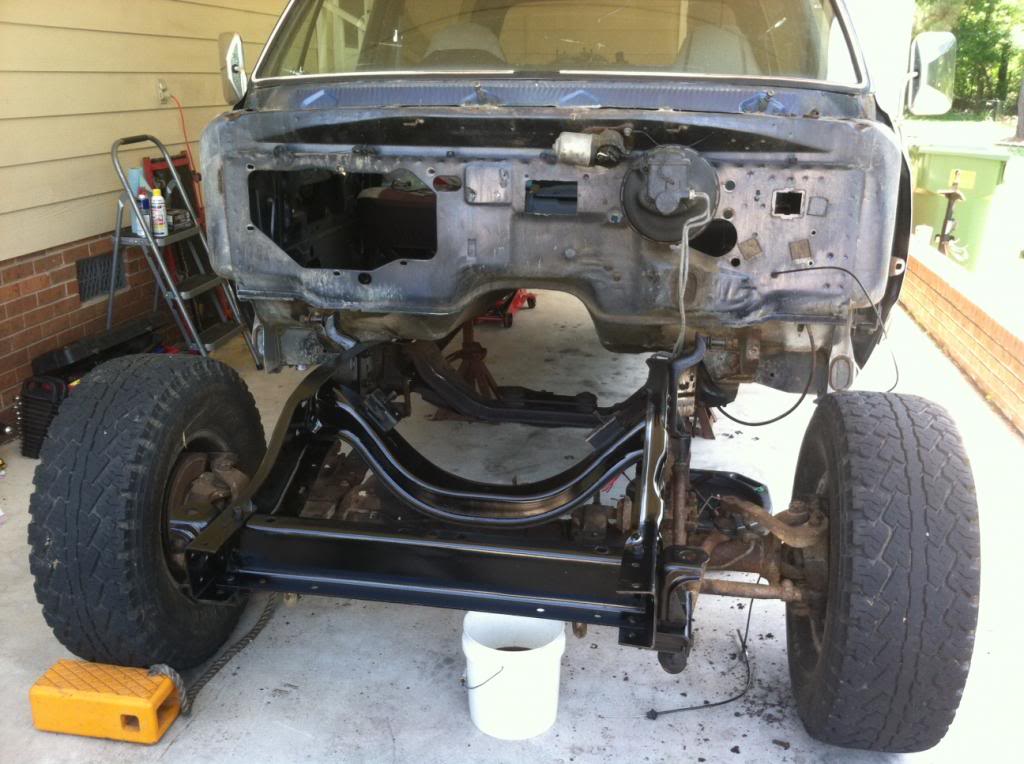
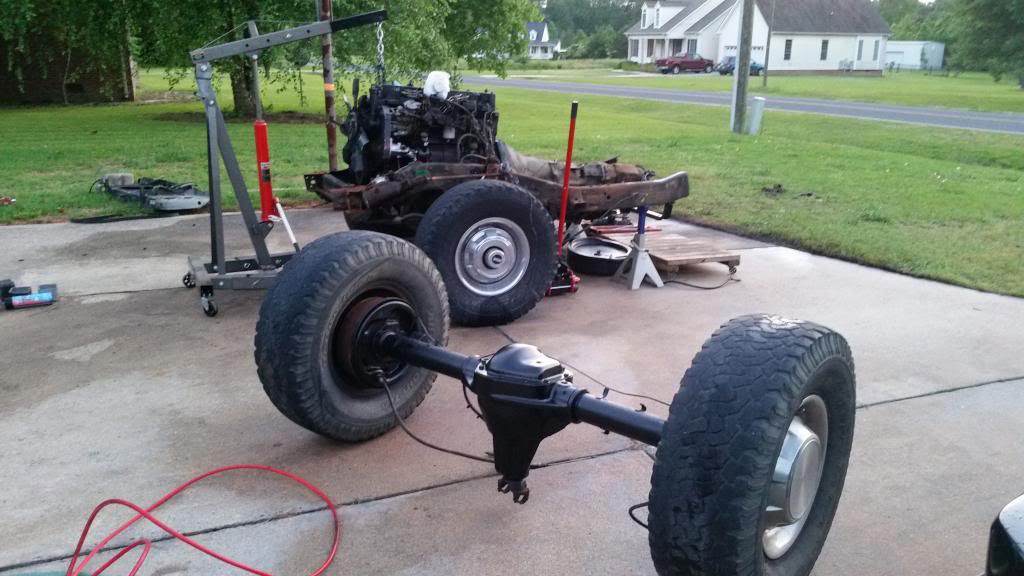
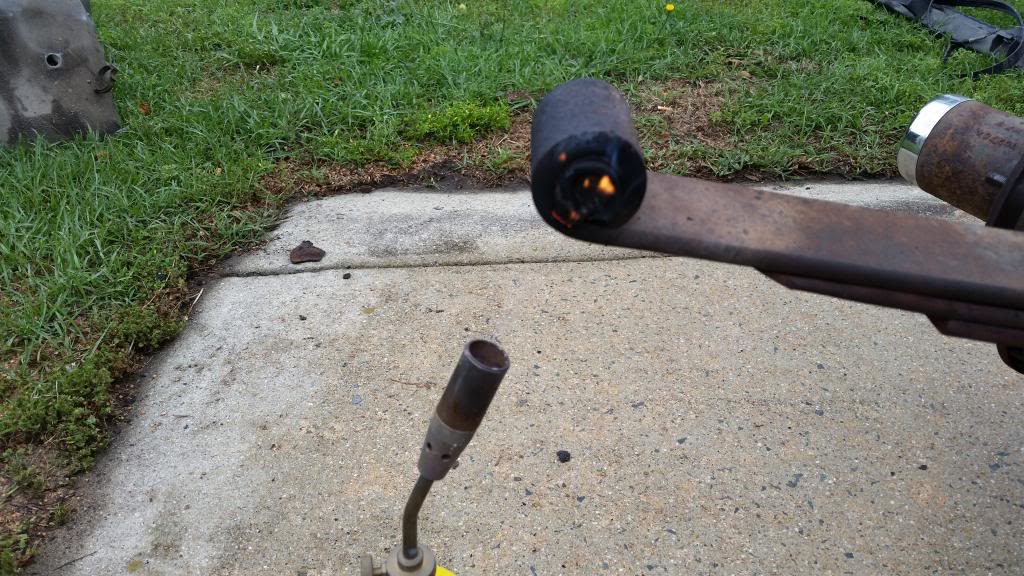
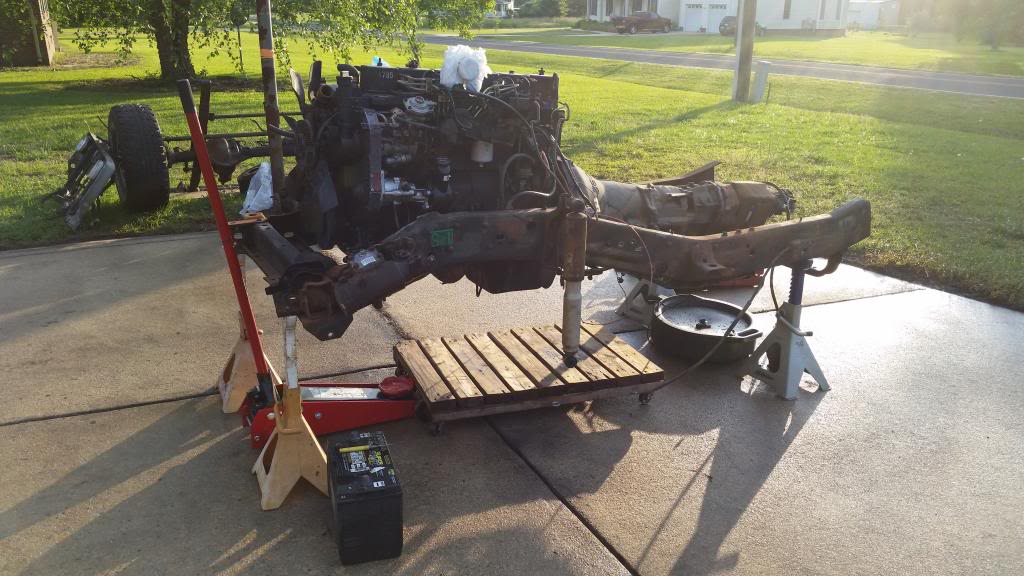
As expected, the front spring bolts were seized in the bushing sleeves, so they had to be cut and the bushings needed to be replaced. Since I'm going to put a whole new suspension on it soon, I decided not to use the Energy Suspension poly bushings I got for it yet. Instead, after having to use a torch to burn the old rubber out or the spring eyes and use a hammer and drift to punch out the outer sleeves, I threw some rubber Moogs in there an replaced the bolts.
After cutting the equally as sh***y Ramcharger front end out...
...and cleaning the 3/4-ton stuff up (sans epoxy paint, in case I had to remove anything later), it was ready to go in. Tied the pitman arm into the new steering gear box and we once again have a rolling chassis.
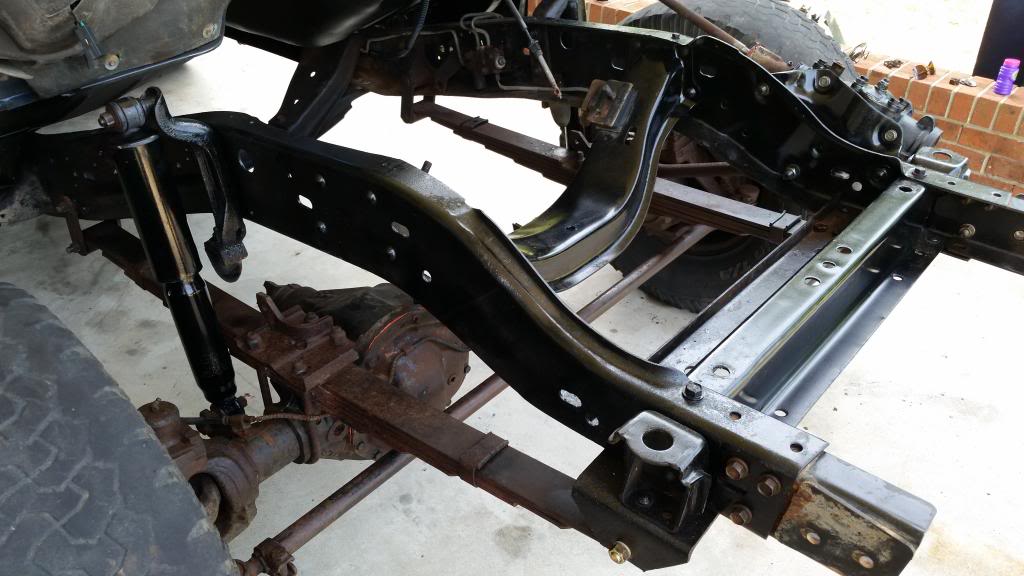
Just to give you an idea of how this got done, I did the entire swap, start to finish, out of that Craftsman tool box in the bottom left corner of the last photo. Other than the tools in that box, I used a jack and jack stands, cherry picker, angle grinder, MAP torch and a breaker bar. I did get an electric impact gun towards the end. Wish I'd had it the whole time, too.


After cutting the equally as sh***y Ramcharger front end out...

...and cleaning the 3/4-ton stuff up (sans epoxy paint, in case I had to remove anything later), it was ready to go in. Tied the pitman arm into the new steering gear box and we once again have a rolling chassis.


Just to give you an idea of how this got done, I did the entire swap, start to finish, out of that Craftsman tool box in the bottom left corner of the last photo. Other than the tools in that box, I used a jack and jack stands, cherry picker, angle grinder, MAP torch and a breaker bar. I did get an electric impact gun towards the end. Wish I'd had it the whole time, too.
Thread Starter
Registered User
Joined: Jun 2014
Posts: 68
Likes: 2
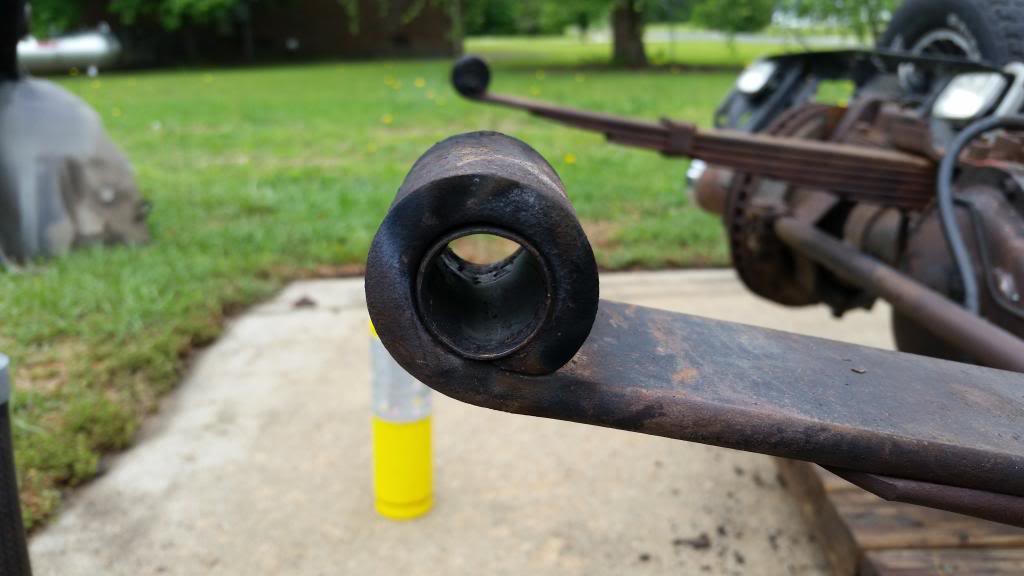
Also, notice the extension in the front of the frame where the bumper mounts. If you're going to do this swap using an intercooled 6bt and a '91.5+ grille, those extensions are a must or the bumper won't clear the bezel.
At this point, all that's left is a neglected lawn and this:
At this point, all that's left is a neglected lawn and this:
