Crewcab update...


Registered User


Joined: Jan 2007
Posts: 578
Likes: 145
From: Kelowna, BC
You ever going to get this ole girl in a matching colour, or just keep it mismatched?
It is wild what 1st gens are going for around BC these days, I even saw a crew diesel going for 35,000 recently.
It is wild what 1st gens are going for around BC these days, I even saw a crew diesel going for 35,000 recently.

Registered User

Joined: Oct 2019
Posts: 138
Likes: 76
From: East Central MO
Then I decided that the front RH fender needed some paint since it had been slowly getting worse every winter....so sanded it down quickly and got ready for paint.

Decided to try the roll on tremclad/rustoleum I'd come across on-line since I didn't really care to much how the paint turned out since anything would have been better then what was on there. I also had to fix some old body work filler that had cracked in the passenger side door, and a couple spotson the hood front edge that were rusting/pealing, so thought it was a good time to paint that as well.

Bought a can of gloss white tremclad and mixed it with mineral spirits until it was thick enough that when you pulled a metal spoon out it would take 3 seconds before a drip would start. Then it was use a small 3" foam roller and start getting it on. since it was on the truck I had to sit and keep rolling it until it started to set up and stopped running, even then I had some pretty big runs. Once dry I wet sanded it with some 400 grit and then put another coat on...think I did 3-4 coats and for crappy prep work and even worse wet sanding it actually all turned out much better then I had hoped, with a little more care I think you could get a pretty decent paint job done this way.


Decided to try the roll on tremclad/rustoleum I'd come across on-line since I didn't really care to much how the paint turned out since anything would have been better then what was on there. I also had to fix some old body work filler that had cracked in the passenger side door, and a couple spotson the hood front edge that were rusting/pealing, so thought it was a good time to paint that as well.
Bought a can of gloss white tremclad and mixed it with mineral spirits until it was thick enough that when you pulled a metal spoon out it would take 3 seconds before a drip would start. Then it was use a small 3" foam roller and start getting it on. since it was on the truck I had to sit and keep rolling it until it started to set up and stopped running, even then I had some pretty big runs. Once dry I wet sanded it with some 400 grit and then put another coat on...think I did 3-4 coats and for crappy prep work and even worse wet sanding it actually all turned out much better then I had hoped, with a little more care I think you could get a pretty decent paint job done this way.
I read about the roller Rustoluem process on a very lengthy post on a Mopar forum.
Looking forward to your progress.


Registered User
Joined: Nov 2006
Posts: 3,234
Likes: 573
From: Central KY
The men in my family tend to inherit a trait where if we get bugged enough about doing something or changing something we just dig in our heels and set our minds to never do it. I have a tendency that when I get dressed and wear long pants I'll pull my first boot on and pull the leg down over it. Then I pull the next boot on and let the pant leg fall how it may. Ends up looking Sheriff Andy Taylor style. Bugs the heck out of some people, even to the point they walk up and fix that pant leg. So now I make a conscious choice to leave one pant leg hung on my boot just to irritate folks.
Long way of saying that I been wondering when too but was afraid if I asked he'd never do it...
Registered User
Joined: Nov 2006
Posts: 3,234
Likes: 573
From: Central KY
Sheepherder: I'm going to try the roll-on method on my '77 M880 farm/wood truck, I did the doghouse with some leftover paint from doing our house floor 11 years ago. No prep just using up the leftover paint and it's still on there! But it seems every article I read either promotes it or poo-poos it. You have a link to that MOPAR thread?
Registered User
Joined: Oct 2019
Posts: 138
Likes: 76
From: East Central MO


Thread Starter
Registered User
Joined: Mar 2010
Posts: 7,265
Likes: 1,346
From: Prince George, BC
I will probably paint it one colour one day...it really needs to go into the shop for a complete tear down and redo again, the 6 years of Northern winter driving are starting to take a toll on it. Probably once I get the 85 Ramcharger converted to 1st gen running gear I will then get the crewcab into the shop for the refurb. I had planned to go all white one day but that is not working for me now, I'm leaning towards a flat military green or a saddle/tan colour.
Thread Starter
Registered User
Joined: Mar 2010
Posts: 7,265
Likes: 1,346
From: Prince George, BC
The only thing I'd play with for the roll on painting is the thickness of the paint mix...the article I used said to have it like a slightly thicker milk, but I found it pretty runny and had to spend a lot of time constantly rolling it to keep the paint where I put it. Also try to paint all the pieces when they are off the vehicle so you can lay them as flat as possible would help as well.


Thread Starter
Registered User
Joined: Mar 2010
Posts: 7,265
Likes: 1,346
From: Prince George, BC
That is most likely what it is...Calcium Chloride...they use it here on the roads when the temps are going to be around 0* and down to about -5*C....anything colder and it won't melt the ice and snow...horrible stuff that just eats away at the metal and undercarriage!


Registered User
Joined: Feb 2003
Posts: 788
Likes: 89
From: Nevada Co., CA
I read way too much of that moparts thread! Are there any examples of success that aren't buried in 85 pages that are 16 years old? There seemed to be a problem of Canadian Tremclad vs 'murican Rust-Oleum, not being the same. This poor old guy could use an inexpensive way to paint the "brick", otherwise I don't see it ever happening.
That ice melt is hell on metal, my poor frame.
That ice melt is hell on metal, my poor frame.
Thread Starter
Registered User
Joined: Mar 2010
Posts: 7,265
Likes: 1,346
From: Prince George, BC
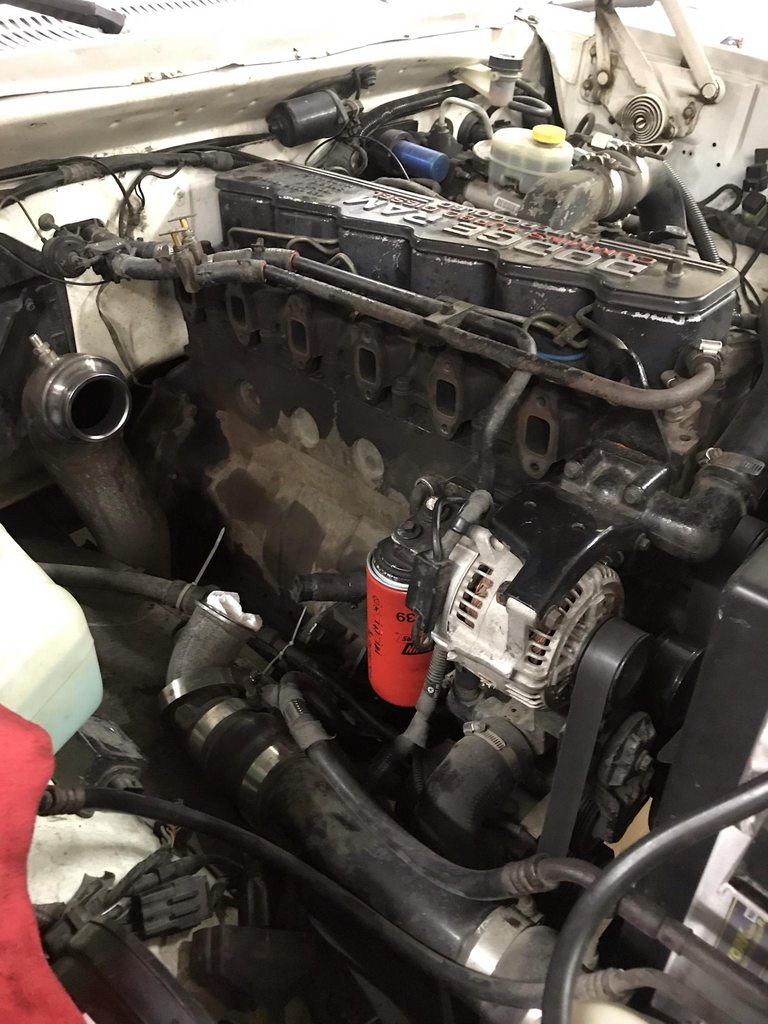
Well I guess with the 10 days we had in the -35*C to -49*C just before Christmas the exhaust manifold started to leak badly, was getting so much exhaust fumes into the cab I couldn't run the heater...thank goodness it had warmed up to -2*C to -6*C on the 2 days I had to work last week, so I only turned the defrost on for a few minutes here and there to clear the front windshield. So on my days off I knew I had to pull the manifold and get those exhaust leaks taken care of.
I was freaked out that a bunch of the bolts would snap, but anything that didn't loosen right away got a hefty dose of heat and more PB Blaster. And every one that was giving me grief about coming loose tightened just a hair and that was all it took to free them up and they all spun out safely. Then it was down to the industrial supply house for some new hardware...they didn't have any 10mm flange head bolts in Metric 9.8 with a 1.5" thread, but they did have Allen head bolts, 12.9 grade and then some beefy hardened washers.
Was surprised how easy pulling the manifold was....
I was freaked out that a bunch of the bolts would snap, but anything that didn't loosen right away got a hefty dose of heat and more PB Blaster. And every one that was giving me grief about coming loose tightened just a hair and that was all it took to free them up and they all spun out safely. Then it was down to the industrial supply house for some new hardware...they didn't have any 10mm flange head bolts in Metric 9.8 with a 1.5" thread, but they did have Allen head bolts, 12.9 grade and then some beefy hardened washers.
Was surprised how easy pulling the manifold was....

Thread Starter
Registered User
Joined: Mar 2010
Posts: 7,265
Likes: 1,346
From: Prince George, BC
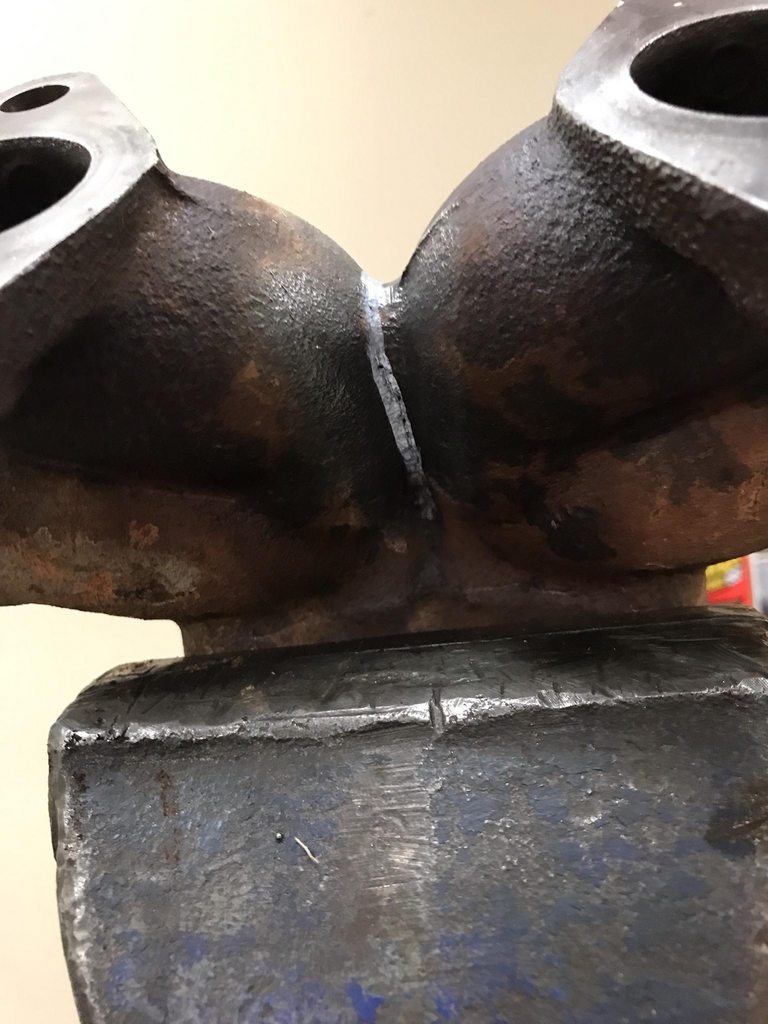
Since I had the manifold off I thought now would be the perfect time to swap on the 24Valve manifold I've had kicking around for close to 10 years. SO I dug it out of the shed and started cleaning it up so I could mark out the square gasket and transition the round ports to work better on the old 12V head.
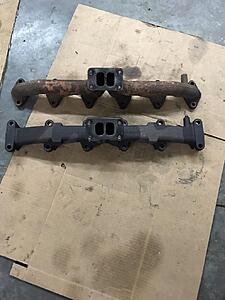
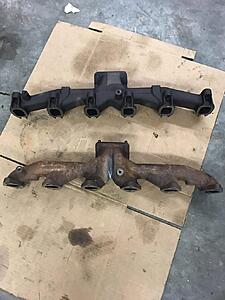
But during my clean up I noticed something that looked off...turned out the manifold was cracked right down the center of the manifold...
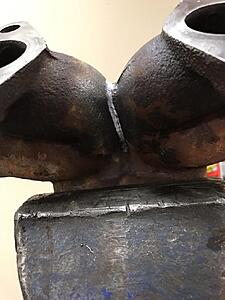
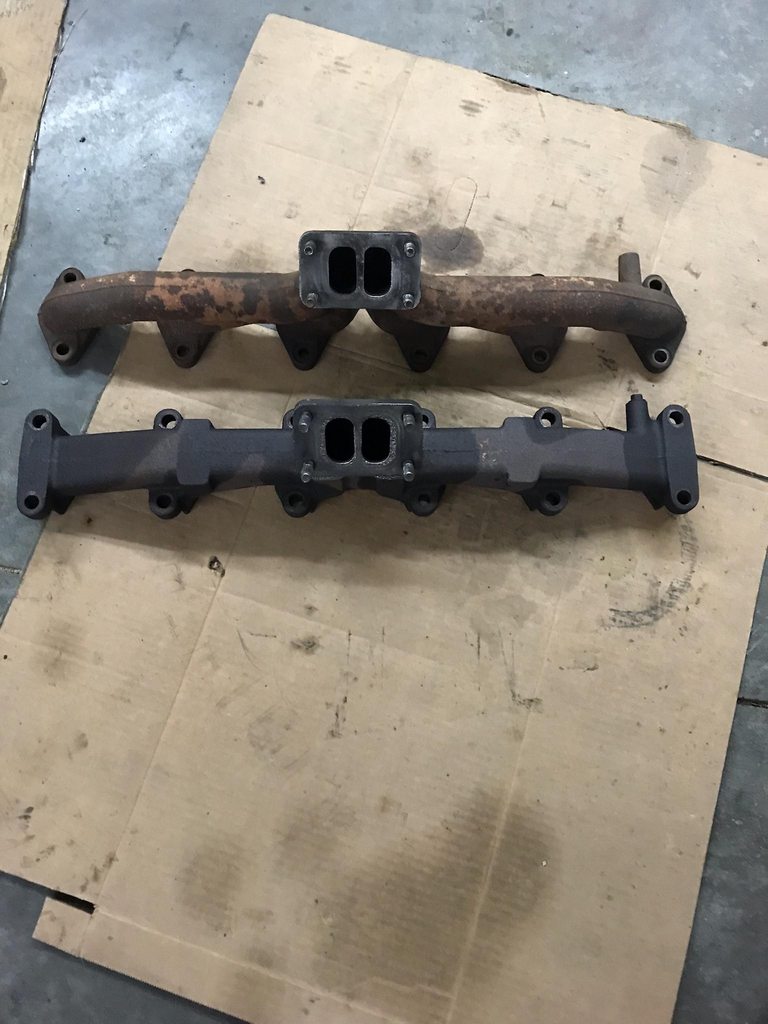
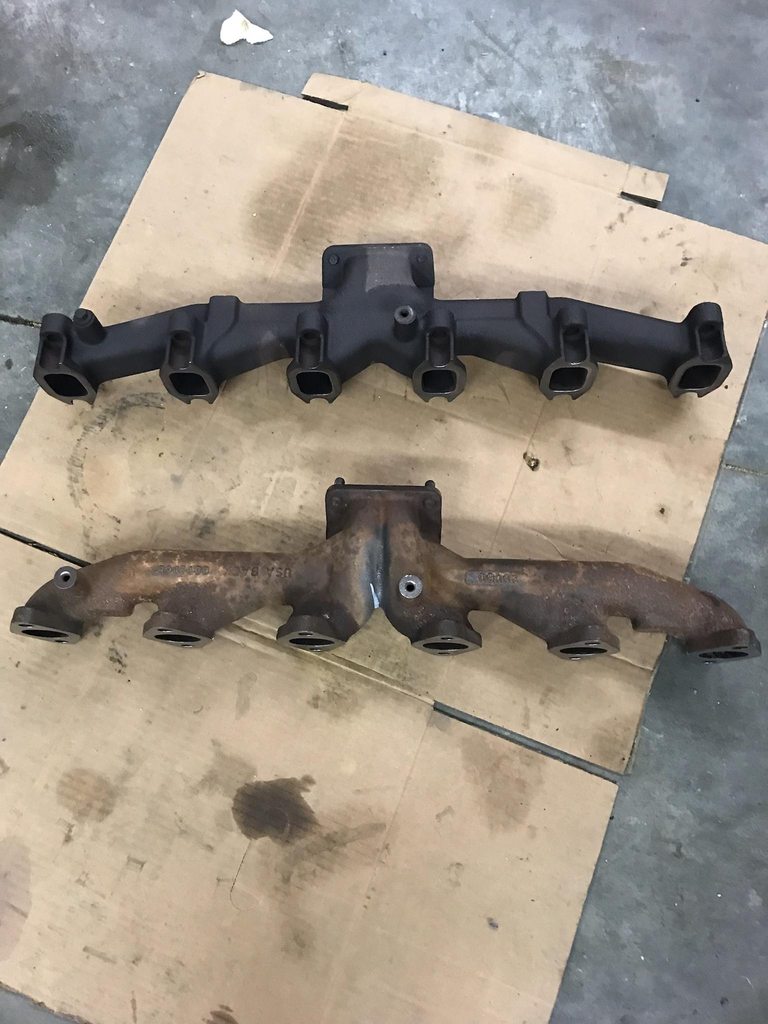
But during my clean up I noticed something that looked off...turned out the manifold was cracked right down the center of the manifold...