
CONVERSION: '89-'91 vacuum pump(s) to '91.5+ vacuum pump

Thread Starter
Registered User
Joined: Mar 2008
Posts: 4,389
Likes: 114
From: Orange County, California
CONVERSION: '89-'91 vacuum pump(s) to '91.5+ vacuum pump
Part 1
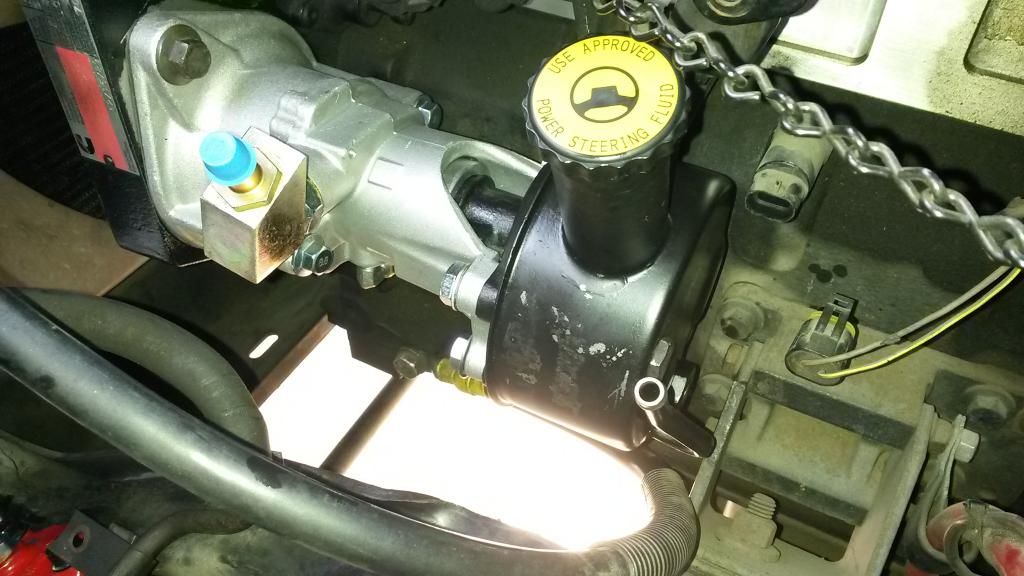
It all started when I ordered a Redhead steering gear and Borgeson steering shaft for The Beast. The input seal on the original gear was sweating some and I noticed that the PS reservoir was't keeping a level for very long. Once that order was placed, I then started to think, "well, since I'm going to replace the steering gear, I should replace the PS pump since it's probably run low on fluid enough that it could be a little worn." So I started looking at PS pump options on Rock Auto. Then, another thought. "Hell, now would be a good opportunity to get rid of the fuster cluck of a vacuum pump system with diaphragm pumps." Thus began a little research into the vein-type vacuum pumps. 3-piece, 2-piece, they both have ball-check valves in them, but the 2-piece pumps have a 90* fitting to further aid in preventing oil from entering the vacuum system, etc., etc. You've probably seen some of the discussion in a recent thread. I figured I'd throw this together to document what I did when I converted mine.
After a few days of gathering as much info possible to make a decision, I finally pulled the trigger. It was brought to my attention that the replacement pumps for later model trucks which have hydroboost, starting in '97, have a 2-piece vacuum pump and are the only ones that were offered as "new units" through Rock Auto. Not to mention, they were a little cheaper than the remanufactured 3-piece pumps.
Now, a little tip that was given to me about these 3-piece pumps. Part of their casting, the 4 "legs" at the aft end of the pump that mates to the PS pump is prone to cracking and ultimately, breaking. Surely, this seems like a rare occasion that one would break. Especially since there's a small support bracket for the PS/vacuum pump assemblies that bolts to the block. As the name implies, it should support the assembly, keeping it rigid and preventing any flexing or twisting motion. Mostly due to the fact that there's a lot of weight putting additional stresses on the vacuum pump casting. With all of this considered and as rare as the occasion seems, I didn't want to take a chance of it happening to me.
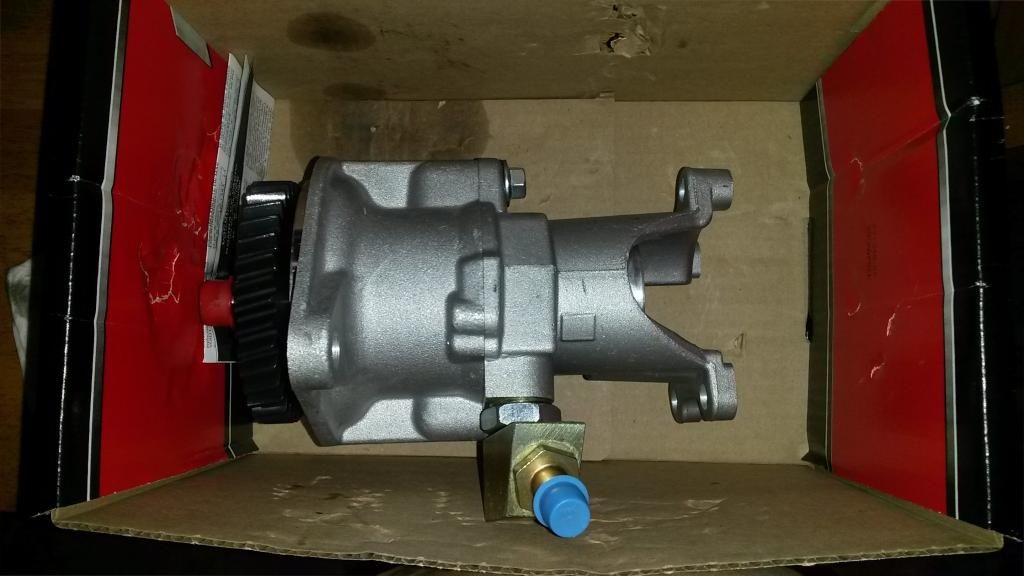
The two above facts are what swayed me. New and a less likely chance of breakage. So I wound up with a brand new, Cardone Select vacuum pump for a 2000 model truck (with a Cummins, of course).
For the conversion to be possible for an '89-'91 engine, you will need the following parts. If you're a Cummins nut like me and want Genuine Cummins stuff, go to or call the nearest one.
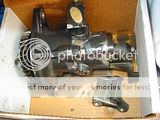
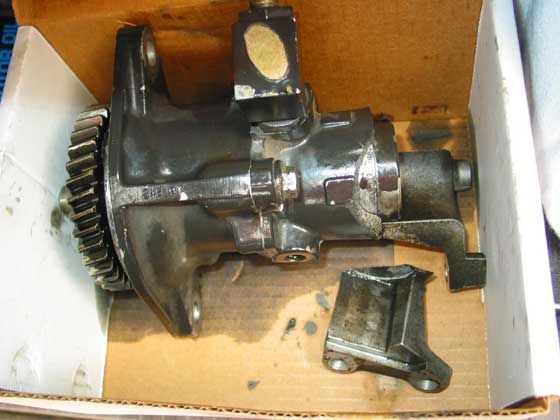
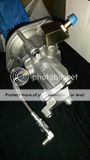
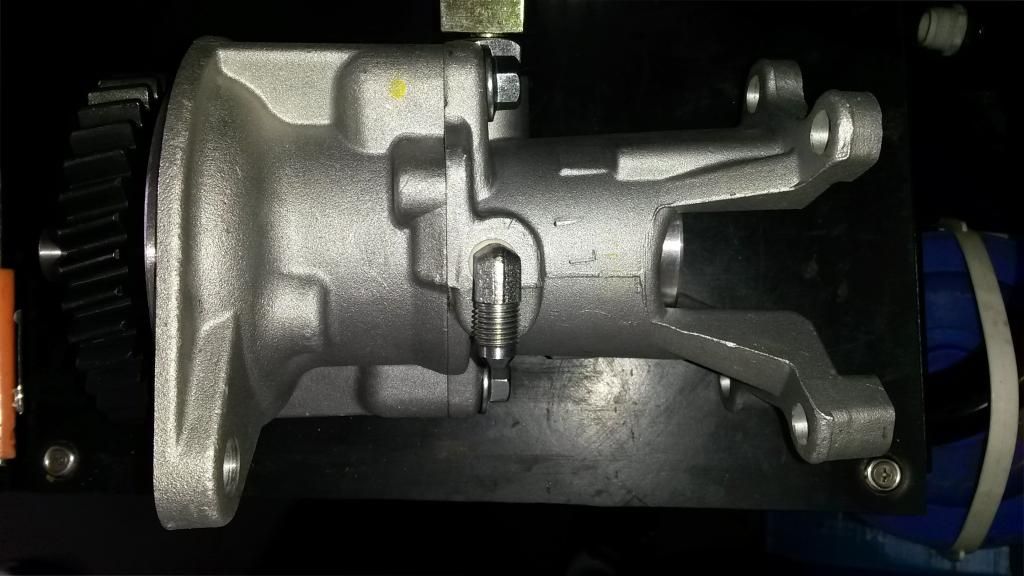
1. Injection pump support bracket - P/N: 3918949. This bracket is extended and has a third and threaded hole for the vacuum pump support bracket to bolt to. Seen in the picture below. Yours will more than likely not have this bracket. I must have swapped this at some point when swapping parts from the '91.5 donor truck I had.
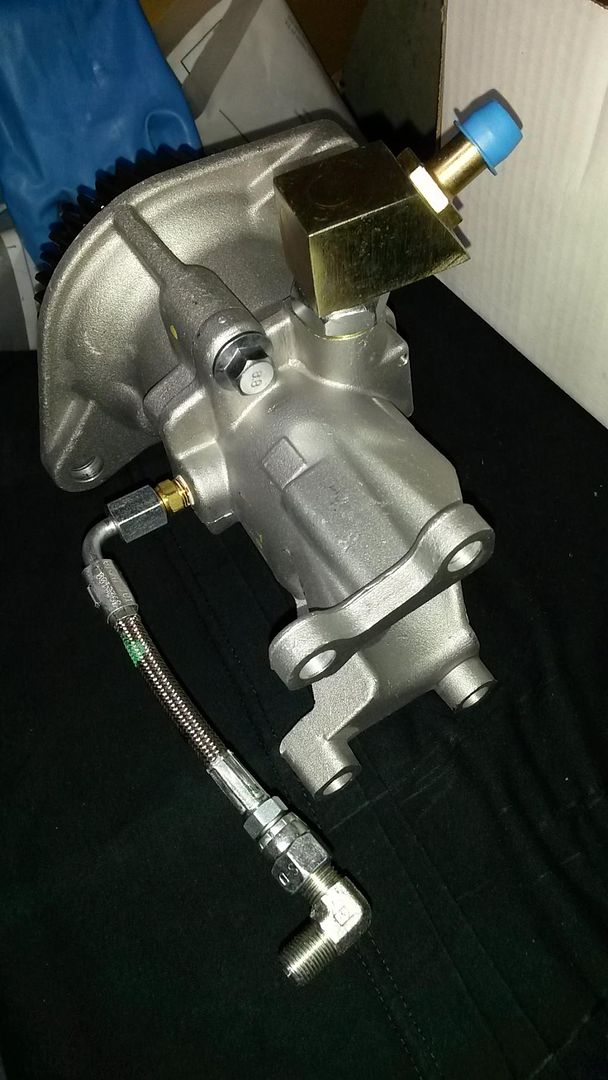
2. Accessory drive (PS/vacuum pump) support bracket. P/N: 3919619, Position 5. Pictured below.
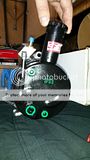
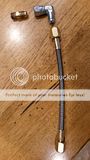
3. **Oil supply flex hose. P/N: 3925100. Position 14. Pictured below.** This is noted and I'll elaborate later in the post.
4. Male to male 1/8"-27 NPT x 5/16-24 SAE 45 fitting. P/N: 68138. Position 1. Pictured below.
5. M8x1.25x16 hex bolt. P/N: 3900629. Position 3. Pictured below.

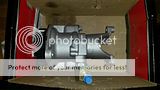
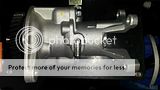
6. PS pump from a '96 Dodge 2500-3500 w/ the 5.9 Cummins. I ordered a remanufactured unit from Rock Auto. You may get one from a '97+ model. However, due to the hydroboost, there will be 2 return ports in the back of the pump. Since only one is necessary in this case, I went with the pump for the '96. The decision is yours, of course.
7. Vacuum pump from a '98-'02 Dodge 2500-3500 w/ the 5.9 Cummins. In this case, I got a 2000 model because it was a new unit, not remanufactured.
8. PS pump pressure/supply and return hoses for a '91.5-'93 truck. I ordered Gates hoses from Rock Auto.


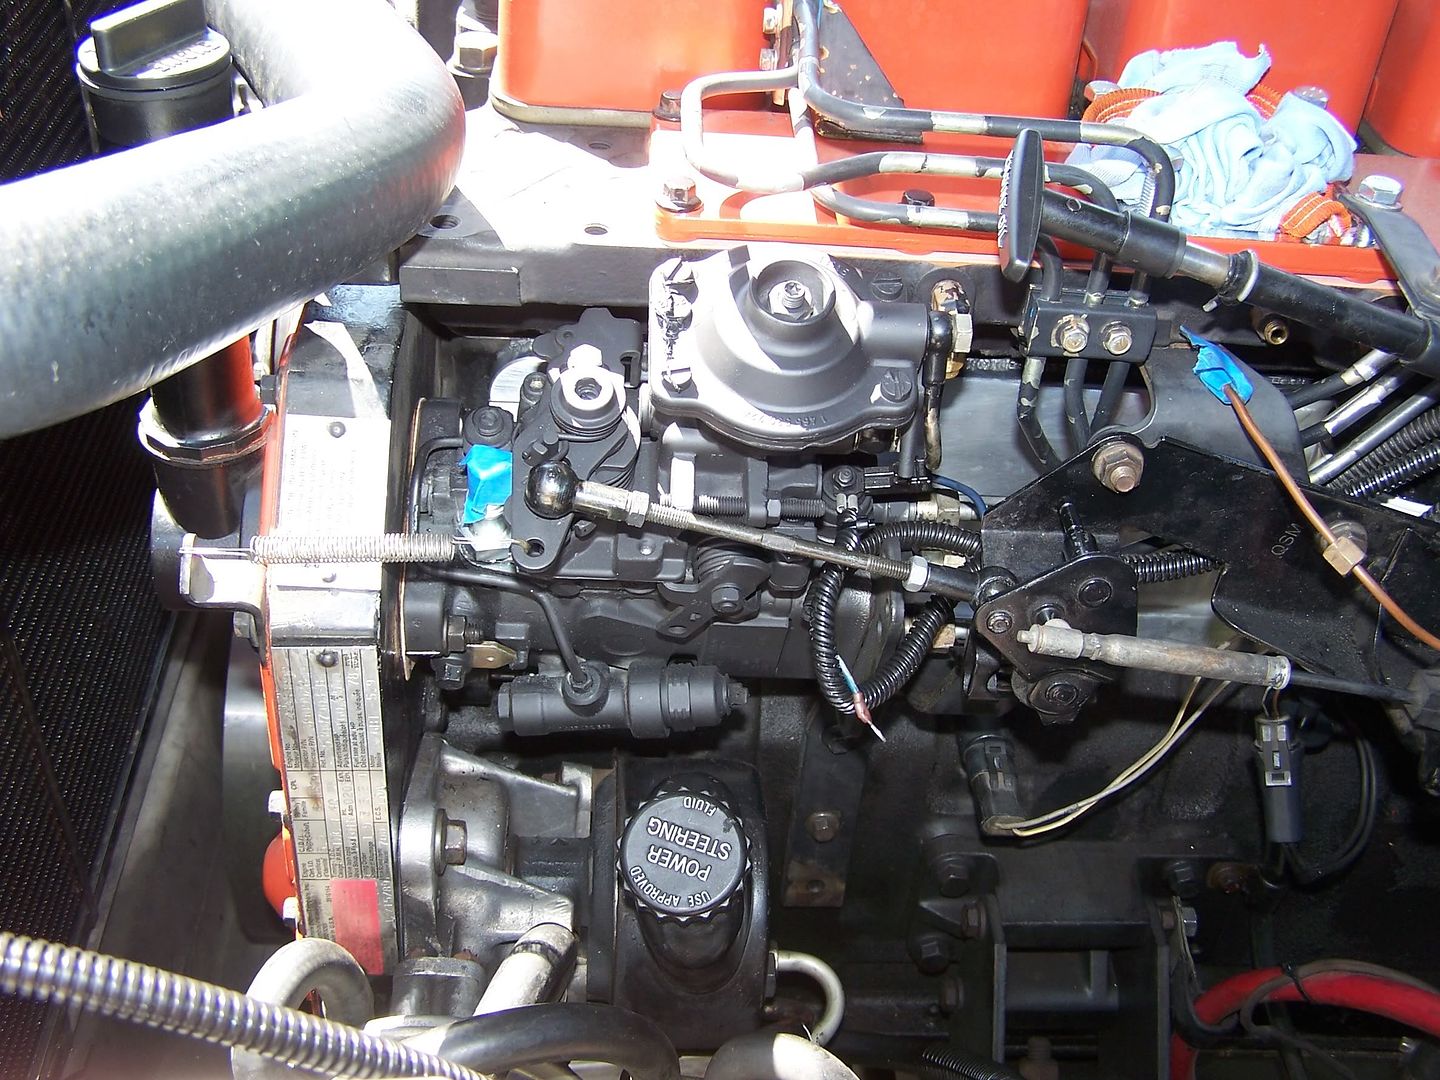
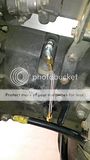
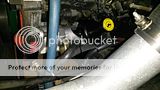
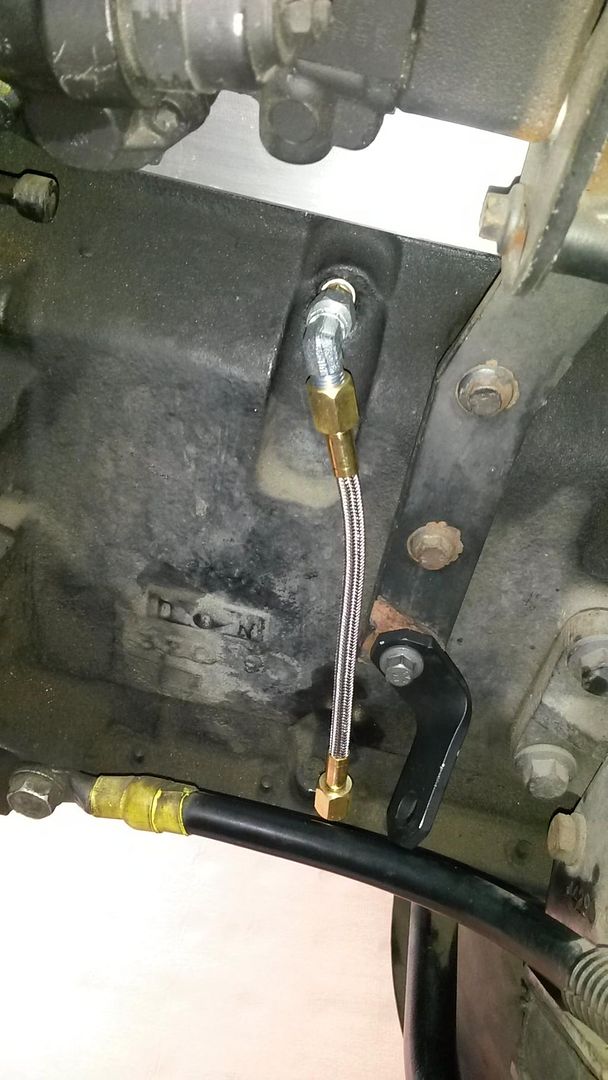
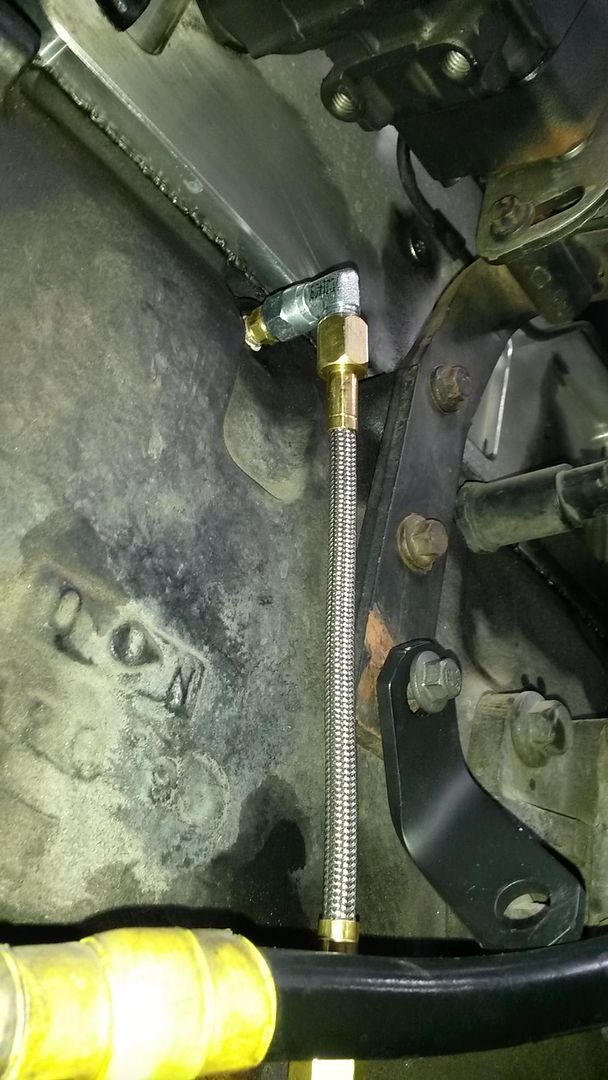
Through Cummins, I had no luck finding a 90* elbow that threads into the oil galley port in the block so I went to a local hose supply and picked up a steel elbow; 1/8"-27 NPT x 5/16-24 SAE 45. I couldn't even get 2 threads before the fitting hit the casting of the block. So instead, I installed the straight fitting in the block and 90* elbow in the bottom of the vacuum pump, as opposed to what is shown in the QuickServe diagram.
Continued...
It all started when I ordered a Redhead steering gear and Borgeson steering shaft for The Beast. The input seal on the original gear was sweating some and I noticed that the PS reservoir was't keeping a level for very long. Once that order was placed, I then started to think, "well, since I'm going to replace the steering gear, I should replace the PS pump since it's probably run low on fluid enough that it could be a little worn." So I started looking at PS pump options on Rock Auto. Then, another thought. "Hell, now would be a good opportunity to get rid of the fuster cluck of a vacuum pump system with diaphragm pumps." Thus began a little research into the vein-type vacuum pumps. 3-piece, 2-piece, they both have ball-check valves in them, but the 2-piece pumps have a 90* fitting to further aid in preventing oil from entering the vacuum system, etc., etc. You've probably seen some of the discussion in a recent thread. I figured I'd throw this together to document what I did when I converted mine.
After a few days of gathering as much info possible to make a decision, I finally pulled the trigger. It was brought to my attention that the replacement pumps for later model trucks which have hydroboost, starting in '97, have a 2-piece vacuum pump and are the only ones that were offered as "new units" through Rock Auto. Not to mention, they were a little cheaper than the remanufactured 3-piece pumps.
Now, a little tip that was given to me about these 3-piece pumps. Part of their casting, the 4 "legs" at the aft end of the pump that mates to the PS pump is prone to cracking and ultimately, breaking. Surely, this seems like a rare occasion that one would break. Especially since there's a small support bracket for the PS/vacuum pump assemblies that bolts to the block. As the name implies, it should support the assembly, keeping it rigid and preventing any flexing or twisting motion. Mostly due to the fact that there's a lot of weight putting additional stresses on the vacuum pump casting. With all of this considered and as rare as the occasion seems, I didn't want to take a chance of it happening to me.
The two above facts are what swayed me. New and a less likely chance of breakage. So I wound up with a brand new, Cardone Select vacuum pump for a 2000 model truck (with a Cummins, of course).
For the conversion to be possible for an '89-'91 engine, you will need the following parts. If you're a Cummins nut like me and want Genuine Cummins stuff, go to or call the nearest one.
1. Injection pump support bracket - P/N: 3918949. This bracket is extended and has a third and threaded hole for the vacuum pump support bracket to bolt to. Seen in the picture below. Yours will more than likely not have this bracket. I must have swapped this at some point when swapping parts from the '91.5 donor truck I had.
2. Accessory drive (PS/vacuum pump) support bracket. P/N: 3919619, Position 5. Pictured below.
3. **Oil supply flex hose. P/N: 3925100. Position 14. Pictured below.** This is noted and I'll elaborate later in the post.
4. Male to male 1/8"-27 NPT x 5/16-24 SAE 45 fitting. P/N: 68138. Position 1. Pictured below.
5. M8x1.25x16 hex bolt. P/N: 3900629. Position 3. Pictured below.

6. PS pump from a '96 Dodge 2500-3500 w/ the 5.9 Cummins. I ordered a remanufactured unit from Rock Auto. You may get one from a '97+ model. However, due to the hydroboost, there will be 2 return ports in the back of the pump. Since only one is necessary in this case, I went with the pump for the '96. The decision is yours, of course.
7. Vacuum pump from a '98-'02 Dodge 2500-3500 w/ the 5.9 Cummins. In this case, I got a 2000 model because it was a new unit, not remanufactured.
8. PS pump pressure/supply and return hoses for a '91.5-'93 truck. I ordered Gates hoses from Rock Auto.
Through Cummins, I had no luck finding a 90* elbow that threads into the oil galley port in the block so I went to a local hose supply and picked up a steel elbow; 1/8"-27 NPT x 5/16-24 SAE 45. I couldn't even get 2 threads before the fitting hit the casting of the block. So instead, I installed the straight fitting in the block and 90* elbow in the bottom of the vacuum pump, as opposed to what is shown in the QuickServe diagram.
Continued...
Thread Starter
Registered User
Joined: Mar 2008
Posts: 4,389
Likes: 114
From: Orange County, California
Part 2
Remember the noted red font above? Here we go...
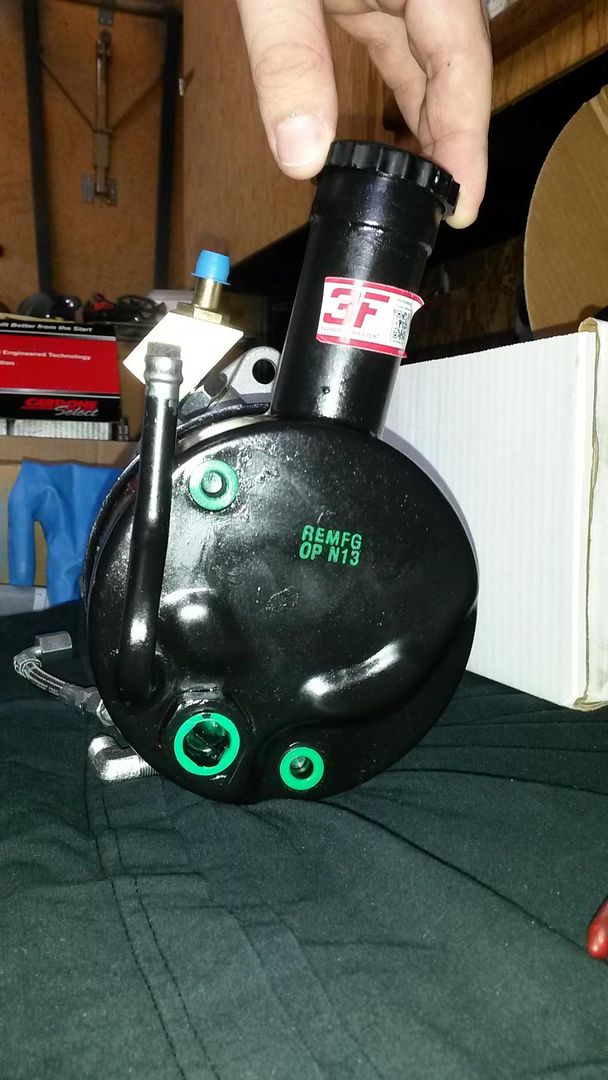
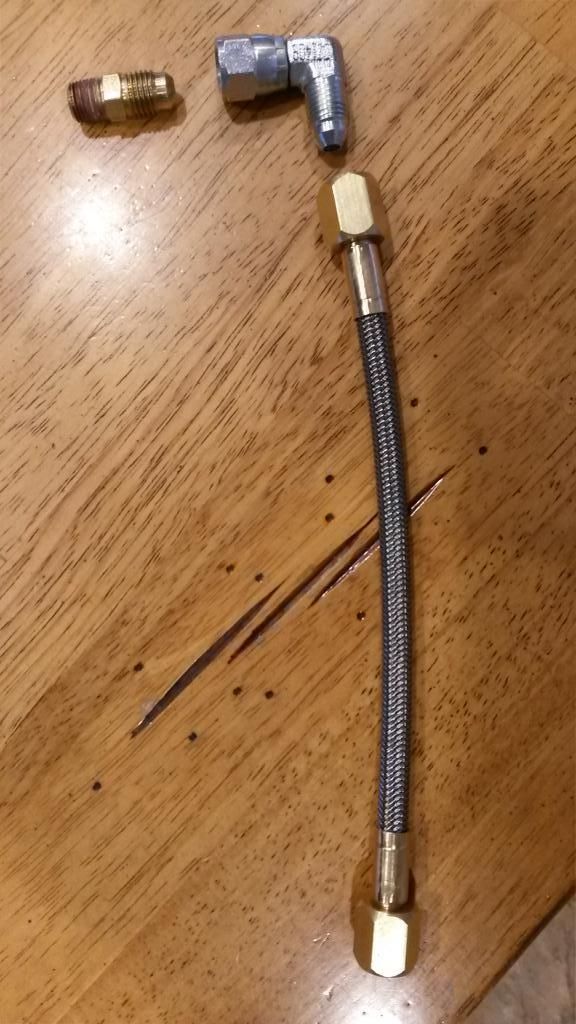
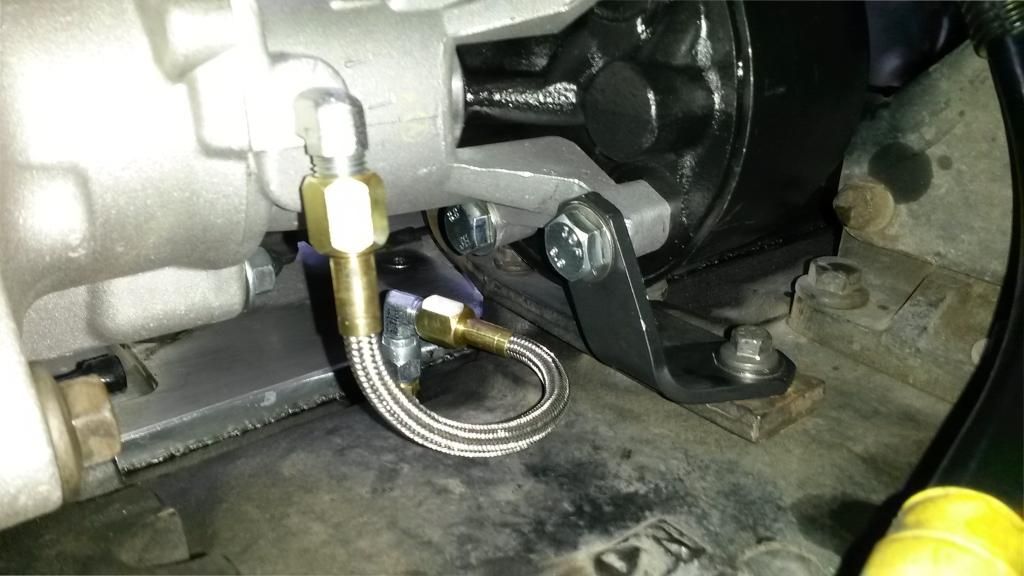
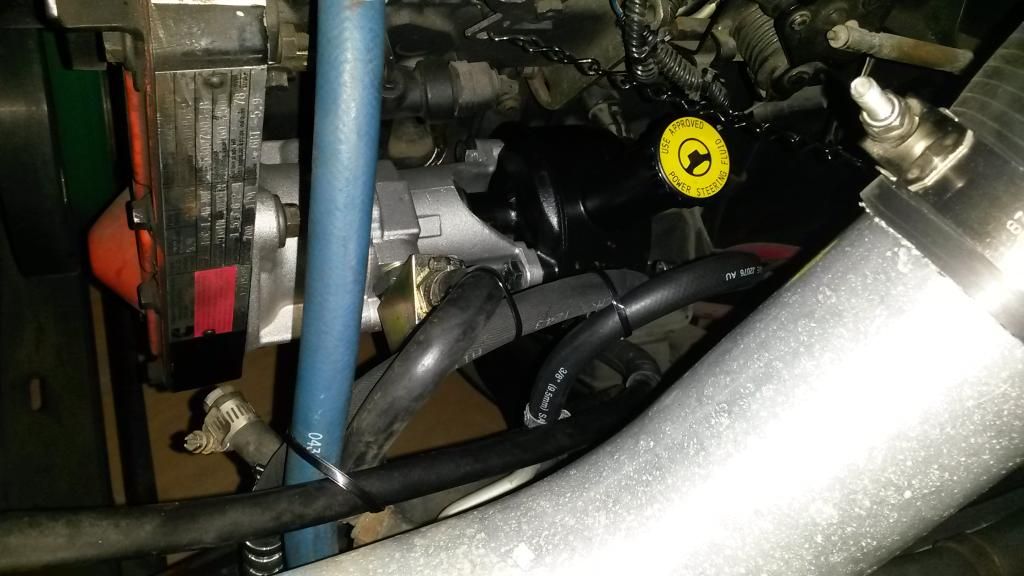
As I found out the hard way, using the 2-piece vacuum pumps from a '98-'02model truck, the flexible oil supply hose, P/N: 3925100, is TOO SHORT and will not make the run between the oil galley port and the pump Even having. assembled the fittings and hose as per the diagram from Cummins QuickServe.
I wonder if the 2-piece vacuum pumps could be shorter in length than the earlier 3-piece vacuum pumps which would have something to do with it but I don't have one of the 3-piece pumps to confirm. Regardless, I used the P/N that showed up on QuickServe using an ESN for a '91.5 model engine. Mind you, a $63.51 hose that I had overnighted ($30) from the factory in Indiana so that I would have it on-hand and ready to install with everything else. The only time Cummins has let me down but I didn't blame them because I mixed and matched. I returned it and explained why. They waived the 15% restocking fee and I got the $63.51 back plus tax. I'm happy.
Being that the supply hose was too short, I went back to the hose supplier and had a stainless braid hose made that would replicate the one from Cummins but would be approx. 2" longer overall. The hose from Cummins had an overall length of about 5.5". I went with 8" just for a round number. The shop couldn't get the specific 90* hose end to match the Cummins assembly so they gave me a 90* swivel fitting and made the hose with straight, brass ends. All for a whopping $17.
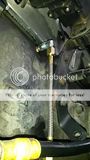
Now that I had that problem solved, it was time to marry the vacuum and PS pumps. Normally, on '91.5 and up motor, 1 of the 4 studs in the PS pump is slightly longer than the others. Allotting for an additional 3/16" of the support bracket. Since the '89-'91 motors' vacuum/PS pump assemblies don't need/have the support bracket, they also don't need the longer stud. That being the case, I could have reused 3 of the 4 studs but would've needed to find a 4th and longer stud to accommodate the bracket. I didn't bother trying to separate my existing vacuum and PS pumps from one another. I verified that one of the studs fit into the 'new' PS pump; Yep, fits. Next, I measure the depth of the threaded holes in the PS pump (minus roughly 1/8" so they won't bottom out) and added the thickness of the 'feet' on the vacuum pump. With those dimensions on paper, I ran off to Home Depot with one of the studs, checked shank diameter and thread pitch, found the proper length bolts (one being a hair over 3/16" longer) I needed and headed home.
The bolt specs I used are M10-1.50. I bought 2 - 25MM long, 1 - 30MM long and 1 - 35MM long. The 25MM bolts were used in the outside positions (driver side). the 30MM and 35MM bolts were used on the inside (next to the block). The longer, 35MM bolt was used in the bottom inside position. The extra length accounting for the 3/16" bracket. The 30MM bolt was used in the upper inside position. One quirk I discovered about the 4 bolts is that 3 of them had 17MM heads and 1 had a 16MM. I'll get a replacement for it that will match and get rid of the runt.
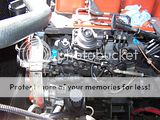
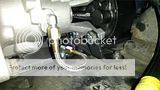
Now the final steps. Although the male to male fitting for the oil supply hose already had a sealant on the threads from the factory, I applied a conservative amount of plumbers dope just to have added assurance. Being NPT, it shouldn't need it. But, in other situations, I use teflon tape AND sealant. The fitting got snugged into the oil galley port in the block. I also applied sealant to the threads on the 90* fitting in the bottom of the vacuum pump and snugged it up until it was pointing towards the engine block. I tightened the straight hose onto the 90* fitting and threaded it onto the straight fitting in the block. I mocked up the vacuum/PS pumps to see how I was going to orient the oil supply hose. With the length of hose I had, I oriented and tightened the 90* fitting and let the hose hang. While the pumps were still mocked in place, I checked fitment of the support bracket and started the bolt into the injection pump support bracket. I pulled the pumps out for the last time and checked the fasteners holding the two together. Also, purposefully leaving out the lower inside bolt which would go through the support bracket.
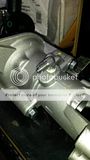
With the pumps now back in their final resting place, I tightened the bolts into the timing case. When it came to tightening the support bracket, I did my best to push it UP while tightening the bolts to insure that the pump wouldn't have the chance to flex or twist downward and also be fully support at both ends. With that done, I connected the oil supply hose and tightened that fitting to the 90* in the bottom of the vacuum pump.
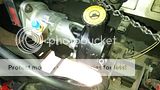
From here, I installed the PS pump pressure/supply and return hoses to both the steering gear and PS pump as well as reconnected the vacuum hose from the vacuum booster. I then secured the hoses together to prevent and chafing from general and/or engine vibrations. I plan to replace the vacuum hose soon with a shorter length hose. I'll also leave the 'T' in it as a test port for diagnosis purposes.
The steps beyond this will be to fill the PS pump reservoir with fluid and purge the system of any air. The way it was recommended by Redhead was as follows:
1. Jack-up the front end until the tires spin freely.
2. With one person inside the truck and one watching the fluid level in the reservoir, turn the wheel from lock to lock 7-10 times (or more if you still see some bubbles). The person outside should be sure that the fluid level stays above the pump to prevent more air from getting in.
3. Top off the reservoir to the proper level, 'full cold.' Allow the truck to sit for at least 2 hours. Overnight is the preferred and best amount of time if possible.
4. Once again, with the tires allowed to turn freely, repeat step 2 to verify the system is nearly 100% purged and keeping the level at 'full cold.'
5. Now, place the cap on the reservoir and again, have one person inside the truck and the other watching the fluid level in the reservoir. Start the engine and let it idle. Watch for the level in the reservoir to drop. If it does, top it off and keep the level above the pump to prevent it from sucking in more air. Once the level is stable and where it should be, install the cap. You're done.
Once again, I let everything sit overnight to allow for any sealant to set. I came out the next morning and took it for a drive around the block to let everything warm up some (which is usually when leaks appear). With the engine idling, I crawled under and checked all fittings and hoses. Everything was dry!
I hope I've provided you with enough information to be able to complete this job yourself. If I left something out or am incorrect with some information, feel free to bring it to light. Any other questions regarding this job that you might have, I'm happy to help.
Remember the noted red font above? Here we go...
As I found out the hard way, using the 2-piece vacuum pumps from a '98-'02model truck, the flexible oil supply hose, P/N: 3925100, is TOO SHORT and will not make the run between the oil galley port and the pump Even having. assembled the fittings and hose as per the diagram from Cummins QuickServe.
I wonder if the 2-piece vacuum pumps could be shorter in length than the earlier 3-piece vacuum pumps which would have something to do with it but I don't have one of the 3-piece pumps to confirm. Regardless, I used the P/N that showed up on QuickServe using an ESN for a '91.5 model engine. Mind you, a $63.51 hose that I had overnighted ($30) from the factory in Indiana so that I would have it on-hand and ready to install with everything else. The only time Cummins has let me down but I didn't blame them because I mixed and matched. I returned it and explained why. They waived the 15% restocking fee and I got the $63.51 back plus tax. I'm happy.
Being that the supply hose was too short, I went back to the hose supplier and had a stainless braid hose made that would replicate the one from Cummins but would be approx. 2" longer overall. The hose from Cummins had an overall length of about 5.5". I went with 8" just for a round number. The shop couldn't get the specific 90* hose end to match the Cummins assembly so they gave me a 90* swivel fitting and made the hose with straight, brass ends. All for a whopping $17.
Now that I had that problem solved, it was time to marry the vacuum and PS pumps. Normally, on '91.5 and up motor, 1 of the 4 studs in the PS pump is slightly longer than the others. Allotting for an additional 3/16" of the support bracket. Since the '89-'91 motors' vacuum/PS pump assemblies don't need/have the support bracket, they also don't need the longer stud. That being the case, I could have reused 3 of the 4 studs but would've needed to find a 4th and longer stud to accommodate the bracket. I didn't bother trying to separate my existing vacuum and PS pumps from one another. I verified that one of the studs fit into the 'new' PS pump; Yep, fits. Next, I measure the depth of the threaded holes in the PS pump (minus roughly 1/8" so they won't bottom out) and added the thickness of the 'feet' on the vacuum pump. With those dimensions on paper, I ran off to Home Depot with one of the studs, checked shank diameter and thread pitch, found the proper length bolts (one being a hair over 3/16" longer) I needed and headed home.
The bolt specs I used are M10-1.50. I bought 2 - 25MM long, 1 - 30MM long and 1 - 35MM long. The 25MM bolts were used in the outside positions (driver side). the 30MM and 35MM bolts were used on the inside (next to the block). The longer, 35MM bolt was used in the bottom inside position. The extra length accounting for the 3/16" bracket. The 30MM bolt was used in the upper inside position. One quirk I discovered about the 4 bolts is that 3 of them had 17MM heads and 1 had a 16MM. I'll get a replacement for it that will match and get rid of the runt.
Now the final steps. Although the male to male fitting for the oil supply hose already had a sealant on the threads from the factory, I applied a conservative amount of plumbers dope just to have added assurance. Being NPT, it shouldn't need it. But, in other situations, I use teflon tape AND sealant. The fitting got snugged into the oil galley port in the block. I also applied sealant to the threads on the 90* fitting in the bottom of the vacuum pump and snugged it up until it was pointing towards the engine block. I tightened the straight hose onto the 90* fitting and threaded it onto the straight fitting in the block. I mocked up the vacuum/PS pumps to see how I was going to orient the oil supply hose. With the length of hose I had, I oriented and tightened the 90* fitting and let the hose hang. While the pumps were still mocked in place, I checked fitment of the support bracket and started the bolt into the injection pump support bracket. I pulled the pumps out for the last time and checked the fasteners holding the two together. Also, purposefully leaving out the lower inside bolt which would go through the support bracket.
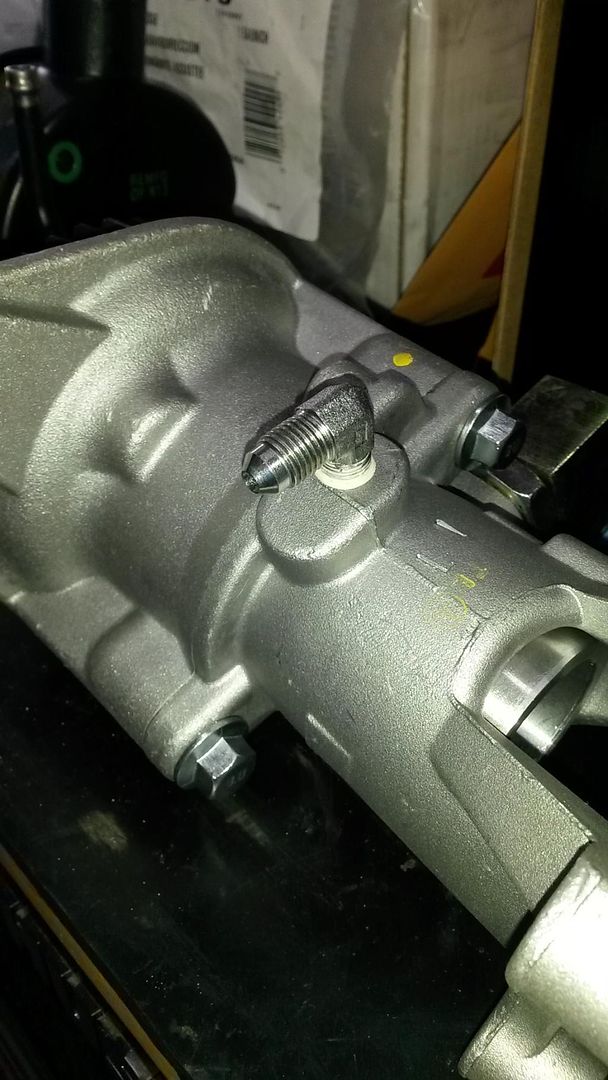
With the pumps now back in their final resting place, I tightened the bolts into the timing case. When it came to tightening the support bracket, I did my best to push it UP while tightening the bolts to insure that the pump wouldn't have the chance to flex or twist downward and also be fully support at both ends. With that done, I connected the oil supply hose and tightened that fitting to the 90* in the bottom of the vacuum pump.
From here, I installed the PS pump pressure/supply and return hoses to both the steering gear and PS pump as well as reconnected the vacuum hose from the vacuum booster. I then secured the hoses together to prevent and chafing from general and/or engine vibrations. I plan to replace the vacuum hose soon with a shorter length hose. I'll also leave the 'T' in it as a test port for diagnosis purposes.
The steps beyond this will be to fill the PS pump reservoir with fluid and purge the system of any air. The way it was recommended by Redhead was as follows:
1. Jack-up the front end until the tires spin freely.
2. With one person inside the truck and one watching the fluid level in the reservoir, turn the wheel from lock to lock 7-10 times (or more if you still see some bubbles). The person outside should be sure that the fluid level stays above the pump to prevent more air from getting in.
3. Top off the reservoir to the proper level, 'full cold.' Allow the truck to sit for at least 2 hours. Overnight is the preferred and best amount of time if possible.
4. Once again, with the tires allowed to turn freely, repeat step 2 to verify the system is nearly 100% purged and keeping the level at 'full cold.'
5. Now, place the cap on the reservoir and again, have one person inside the truck and the other watching the fluid level in the reservoir. Start the engine and let it idle. Watch for the level in the reservoir to drop. If it does, top it off and keep the level above the pump to prevent it from sucking in more air. Once the level is stable and where it should be, install the cap. You're done.
Once again, I let everything sit overnight to allow for any sealant to set. I came out the next morning and took it for a drive around the block to let everything warm up some (which is usually when leaks appear). With the engine idling, I crawled under and checked all fittings and hoses. Everything was dry!
I hope I've provided you with enough information to be able to complete this job yourself. If I left something out or am incorrect with some information, feel free to bring it to light. Any other questions regarding this job that you might have, I'm happy to help.
Thread Starter
Registered User
Joined: Mar 2008
Posts: 4,389
Likes: 114
From: Orange County, California
I'm actually glad I did this. As stated up top, all of this snowballed from simply installing a new steering gear. The plan was to install everything in the same day. However, with the hang-up of the supply hose from Cummins, I postponed the vacuum pump swap and finished up with the steering box and shaft. When I pulled the existing vacuum/PS pump assembly, I noticed that a clear-ish liquid ran out from behind the drive gear. I had the appearance and odor of PS fluid. I didn't like that. I hope it happened after I pulled it the first time and not months ago without my knowledge. It was about due for an oil change anyhow but I was still concerned with the possibility of PS fluid being in the oil. So I drove the truck around the block a couple of times to get things up to normal operating temperature, brought it back home and changed the oil. I also took a sample of this oil. I wanted to regardless but even more so since there could be some PS fluid in it. We'll see what the lab has to say about it. I did finally manage to get a Dimple Products magnetic drain plug (that I've had for a while) in the pan though.
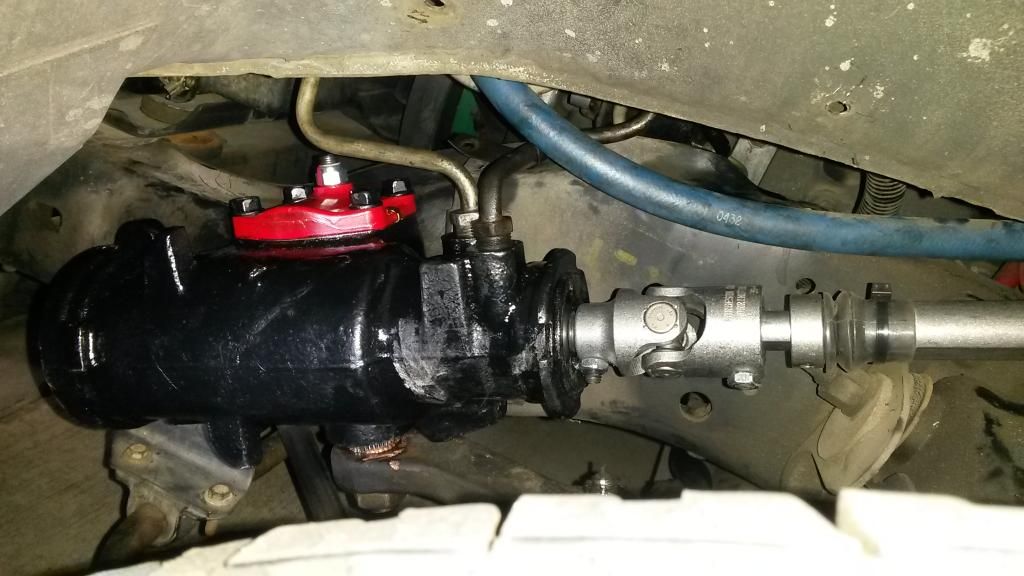
I ended up choosing a quick (high) ratio steering box. The factory ratio is lower at 18:1 or 4 turns from stop to stop (internal to the gear). The quick ratio box ratio is 15:1 or 3.5 turns from stop to stop. I'm having to get used to steering it again since it doesn't take much of a turn to actually OVERsteer in a turn. I'll be used to it in no time!
I ended up choosing a quick (high) ratio steering box. The factory ratio is lower at 18:1 or 4 turns from stop to stop (internal to the gear). The quick ratio box ratio is 15:1 or 3.5 turns from stop to stop. I'm having to get used to steering it again since it doesn't take much of a turn to actually OVERsteer in a turn. I'll be used to it in no time!


Registered User
Joined: Feb 2005
Posts: 2,658
Likes: 85
Thanks for this info, Jimbo. I returned my old style three piece pump to rock auto and have the new Cardone 2 piece in hand, but wondering if I'll have any issues with the older style PS pump or not. We'll see. (Had ordered a 1993 PS pump to replace the early pressed in style in the non i/c trucks with diaphragm pump)
Thread Starter
Registered User
Joined: Mar 2008
Posts: 4,389
Likes: 114
From: Orange County, California
Nick, I don't forsee you having any issues with any older style PS pump. The pump that I ordered was for a '96 and is identical to my original. It mated to the vacuum pump flawlessly and with no spacers required.
Jim,
Thanks! Yes, I do still have the LED headlights.
Jim,
Thanks! Yes, I do still have the LED headlights.


Trending Topics

Thread Starter
Registered User
Joined: Mar 2008
Posts: 4,389
Likes: 114
From: Orange County, California
I can't say for certain Warren. This may just be isolated to my particular situation. Which is why I made others aware that they, too, could run into the same problem. Although, I ordered the line from Cummins using a '91.5 ESN. I don't know if the later/newer, 2-piece vacuum pumps are a little shorter than the early, 3-piece pumps or if they're the same in that regard. The support bracket fit like a glove though. That was ordered using the '91.5 ESN as well. Looking at pictures, as best I can tell, it appears that the oil supply port in the bottom of the pumps is in the same location. But, that's only by looking at pictures. If I had both pumps next to each other, I could take dimensions to confirm.
If somebody wants to measure from the back of the timing case to the center of the oil supply port in theirs, I can do the same with mine and compare.
From the factory, the fitting in the engine oil galley port was a 90*. From there, the straight end of the hose threads onto that and the 90* of the hose onto the straight fitting in the bottom of the vacuum pump. I tried to replicate that but when trying to thread the 90* fitting I had into the block, it shouldered against the surrounding casting after only 2 threads, if that. So I put the straight fitting into the block and 90* in the vacuum pump and flipped the orientation of the hose. It's very possible that, that could be the only reason it came up short. But, again, I don't have anything to compare to.

Registered User
Joined: Jan 2016
Posts: 28
Likes: 6
Thread Starter
Registered User
Joined: Mar 2008
Posts: 4,389
Likes: 114
From: Orange County, California

Thread
Thread Starter
Forum
Replies
Last Post
coalburner_77
2nd Gen. Dodge Ram - No Drivetrain
17
Nov 7, 2018 07:36 PM
powerstrokin03
3rd Gen Engine and Drivetrain -> 2003-2007
2
Mar 19, 2007 01:00 PM
amartinson
24 Valve Engine and Drivetrain
0
May 4, 2003 01:55 PM