


Body work, prep, primer, paint....


Thread Starter
Registered User
Joined: Mar 2008
Posts: 4,389
Likes: 114
From: Orange County, California
Body work, prep, primer, paint....
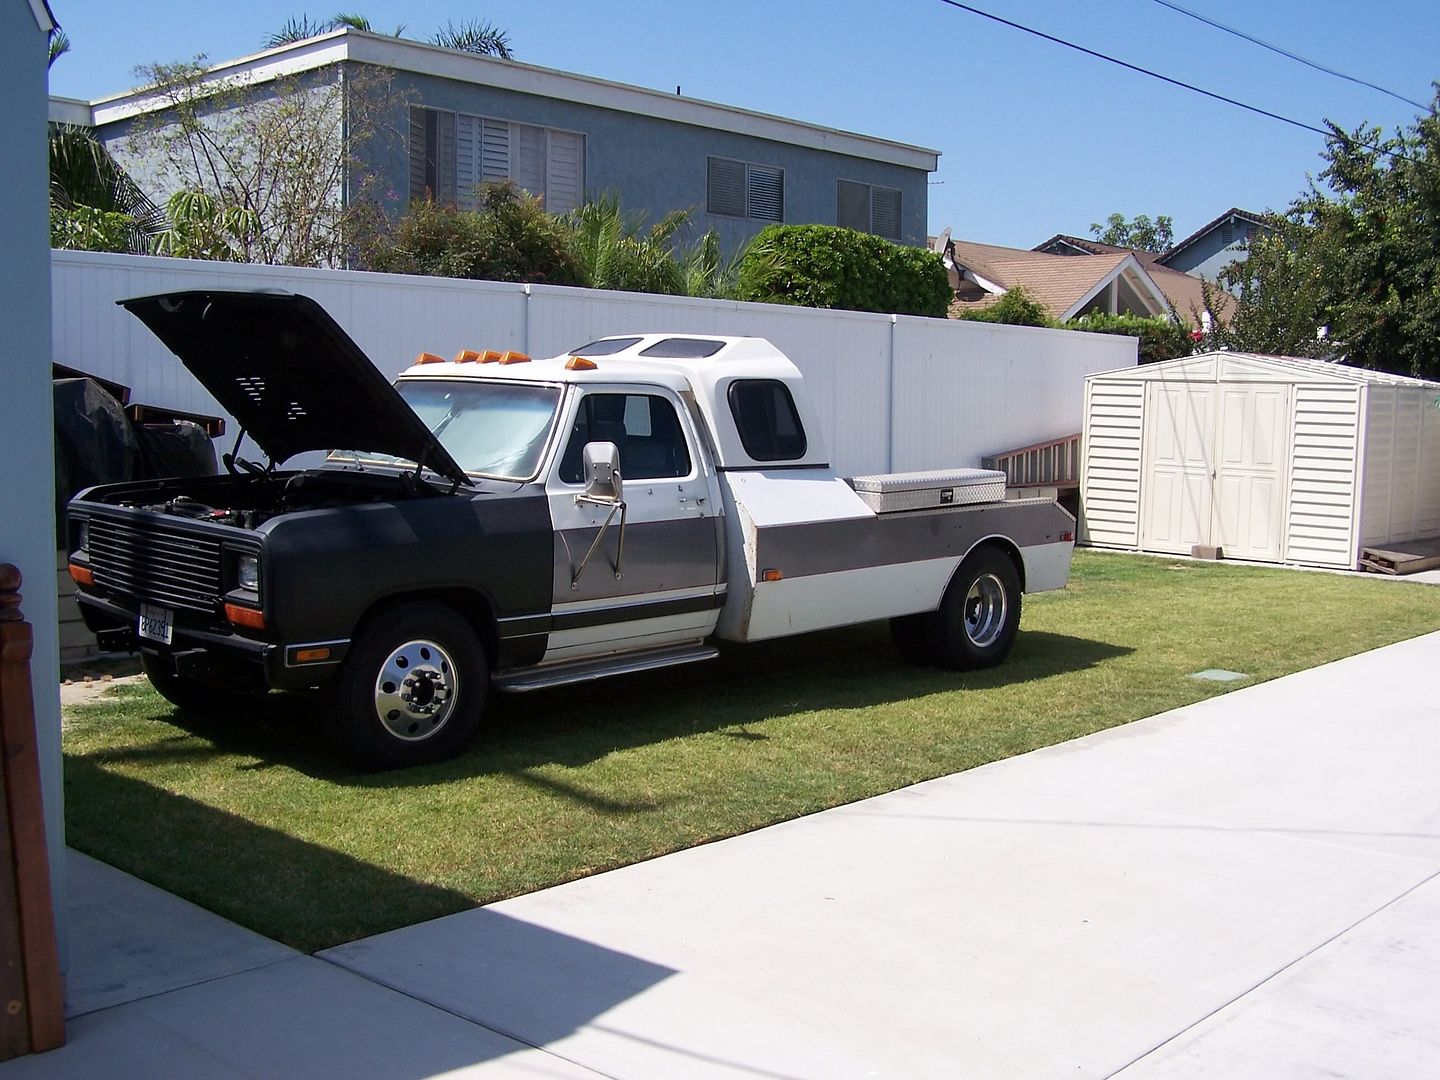
Alright fellas. I'm gonna pull the plug and get my pile looking like it should. It's been a goal of mine for as long as I can remember to get it looking good. My only thing, I'm hardly experienced other than your average spray paint job. I've done some very minor body filling on a friend's '63 Nova but we weren't exactly putting a show car together.
I've been needing to take care of the dreaded drip rail where it runs over the windshield. I can't tell just how bad the rust or rot is without pulling the windshield. Something else I need to figure out is if I can build a decent booth in my backyard that would keep dust and other contaminants out when it comes times to laying down some primer and color.
I know I've seen quite a few of you guys do your own work. I'm impressed with everything I've seen even if it's the smallest of tasks. I'd like to get some advice and pointers from those of you who have the experience in this field.
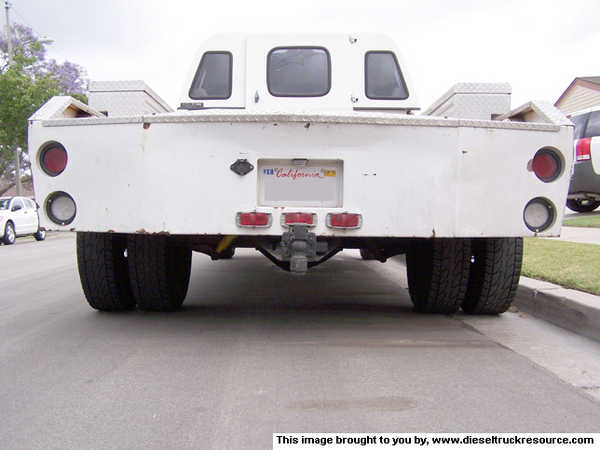
So, where to start? Straightening out all the panels? I have a hammer and dolly (?) set. I've only seen those used but never used them myself. They don't look terribly hard to handle. I need to straighten out the rear of my flat bed and a couple minor dings here and there. Also, with this parts truck I've got, I'm thinking of swapping axles and widening the bed to accommodate the wider pick-up axle assembly. Ride improvements are in the future and airbags will be much easier fitting if there is more room between the sidewall of the tire and the frame. Of course, I'd plan to R&R the axle and replace anything necessary or anything that looks close enough to the end of it's service life. Among all the changes, I'll be swapping my grill for an i/c grill.
Anybody, please chime in. Any thoughts you can provide will be appreciated!


I've been needing to take care of the dreaded drip rail where it runs over the windshield. I can't tell just how bad the rust or rot is without pulling the windshield. Something else I need to figure out is if I can build a decent booth in my backyard that would keep dust and other contaminants out when it comes times to laying down some primer and color.
I know I've seen quite a few of you guys do your own work. I'm impressed with everything I've seen even if it's the smallest of tasks. I'd like to get some advice and pointers from those of you who have the experience in this field.
So, where to start? Straightening out all the panels? I have a hammer and dolly (?) set. I've only seen those used but never used them myself. They don't look terribly hard to handle. I need to straighten out the rear of my flat bed and a couple minor dings here and there. Also, with this parts truck I've got, I'm thinking of swapping axles and widening the bed to accommodate the wider pick-up axle assembly. Ride improvements are in the future and airbags will be much easier fitting if there is more room between the sidewall of the tire and the frame. Of course, I'd plan to R&R the axle and replace anything necessary or anything that looks close enough to the end of it's service life. Among all the changes, I'll be swapping my grill for an i/c grill.
Anybody, please chime in. Any thoughts you can provide will be appreciated!



Registered User
Joined: Mar 2010
Posts: 416
Likes: 7
From: Monmouth, Oregon
I hired out the body work on my crew cab. For $3200 I had all the dents repaired, blocked, painted and glass set. I would never have gotten the same quality if i did it myself and I would probably spent close to that in materials.

Registered User
Joined: Mar 2010
Posts: 1,134
Likes: 139
From: extreem southern ILL
I think the first thing you need to purchase is an air in-line sander or air file as some call it. put some 80 or 60 grit on it to find all of the spots that need work.
of corse if you have a dent it's better to get it out as much as posible but not to far out, i like to use short strand fiberglass filler for the rough in stuff, then maybe a little plastic and spot putty to finnish.
i really like 3M 131 fil-n-sand primmer, when you think you have your pannels straight then spray a good coat or two on and wet block with 400 or 600 grit paper.
After you do that you can look down the side and see how straight you have it befor you paint, if it ain't straight enough for ya then shoot another coat of 131 on and wet block again.
This is where i am right now, i thought i was done untill i got finnished wet-blocking and gave it a look and it just don't quite sute me sooooooo back to the primmer and sanding.
as for a booth i have one of those cheap throw up steel frame with tarp top car ports and made it wider and longer put plastic all the way to the ground, cut a hole in one end and put a couple furnace filters in and on the other end a couple cheap box fans blowing out, that way your pulling air through the filters to purg your booth.
set off a bug bomb before you pull your truck in to paint and try to keep it sealed up untill you get done.
If it extreemly hot and humid you mite need to put a cheap little window unit in to keep the humidity out of your booth.
I did this when i painted a tractor in the dead of summer last year and it worked perfictly.
If you have a compressor that will handle air tools and your not buying fenders and large body pannels you shouldn't have over $1,000 in tools supplys and paint.
thats all i got for now.
Darwin
of corse if you have a dent it's better to get it out as much as posible but not to far out, i like to use short strand fiberglass filler for the rough in stuff, then maybe a little plastic and spot putty to finnish.
i really like 3M 131 fil-n-sand primmer, when you think you have your pannels straight then spray a good coat or two on and wet block with 400 or 600 grit paper.
After you do that you can look down the side and see how straight you have it befor you paint, if it ain't straight enough for ya then shoot another coat of 131 on and wet block again.
This is where i am right now, i thought i was done untill i got finnished wet-blocking and gave it a look and it just don't quite sute me sooooooo back to the primmer and sanding.
as for a booth i have one of those cheap throw up steel frame with tarp top car ports and made it wider and longer put plastic all the way to the ground, cut a hole in one end and put a couple furnace filters in and on the other end a couple cheap box fans blowing out, that way your pulling air through the filters to purg your booth.
set off a bug bomb before you pull your truck in to paint and try to keep it sealed up untill you get done.
If it extreemly hot and humid you mite need to put a cheap little window unit in to keep the humidity out of your booth.
I did this when i painted a tractor in the dead of summer last year and it worked perfictly.
If you have a compressor that will handle air tools and your not buying fenders and large body pannels you shouldn't have over $1,000 in tools supplys and paint.
thats all i got for now.
Darwin


Thread Starter
Registered User
Joined: Mar 2008
Posts: 4,389
Likes: 114
From: Orange County, California
Thanks for the advice, suggestions and pictures, Darwin! That's some good info! I should, hopefully, be able to start gathering all the supplies and materials I need soon. As for color, I'm thinking a dark gray would look really good. I haven't made up my mind whether I want to go with a flat/matte finish with the same clear coat for that hot rod look or if I should go with a gloss.
Trending Topics


Thread Starter
Registered User
Joined: Mar 2008
Posts: 4,389
Likes: 114
From: Orange County, California
I've been looking at Dupli-Color's Paint Shop Finish System. The kit comes with gray primer, a base coat color of your choice, a clear coat and a strainer kit. If I'm understanding the wording correctly, "32 oz. cans - Case Pack: 2," you get 2 - 1 quart cans of each primer, base color and clear (?). The appealing factor to me is that there's no mixing or reducing required and it dries quickly with no re-coat window so coats can be applied at anytime. I'm leaning towards the mineral gray metallic seeing as that's as close to the dark gray as I can probably get with this kit.
I couldn't find the kit on any retailer's website or any online parts stores but I was able to find individual prices of what comes in the kit. The quart cans are going to be about $20 per can. Figuring 6 cans in the kit (2 - primer, color and clear) at $20 each comes to $120. The strainer kit was only $3. Roughly $130 after it's all said and done. Sometimes buying kits will save you some coin so it may be a little less. I don't know just how many cans of each I'll need but I can get away with the kit at $130, I wouldn't complain. I might even get some primer sealer from them as well.
I couldn't find the kit on any retailer's website or any online parts stores but I was able to find individual prices of what comes in the kit. The quart cans are going to be about $20 per can. Figuring 6 cans in the kit (2 - primer, color and clear) at $20 each comes to $120. The strainer kit was only $3. Roughly $130 after it's all said and done. Sometimes buying kits will save you some coin so it may be a little less. I don't know just how many cans of each I'll need but I can get away with the kit at $130, I wouldn't complain. I might even get some primer sealer from them as well.

Registered User
Joined: Sep 2008
Posts: 139
Likes: 11
Jimbo you mentioned pulling the windshield. What I have found works best is to cut the old rubber seal off. This makes it easier to preserve the glass and the old one will never seal the same anyway. To replace it put the new seal on the glass, take some nylon rope(fine braided works best) place it in the seal where the channel goes, you want one piece with the ends overlapping about 6". Take some silicon spray and spray the area of the seal where the rope is.
Place the windshield and seal in place get it all squared up( you'll need 3 people to do this) keep light pressure against the glass and just start pulling one end of the rope from the inside. The flap that runs around the channel will just fold into place.
I've never done this on one of our trucks, but have done many datsun 510's and VW bugs this way, works slick.
Stu
Place the windshield and seal in place get it all squared up( you'll need 3 people to do this) keep light pressure against the glass and just start pulling one end of the rope from the inside. The flap that runs around the channel will just fold into place.
I've never done this on one of our trucks, but have done many datsun 510's and VW bugs this way, works slick.
Stu
Registered User
Joined: Mar 2010
Posts: 1,134
Likes: 139
From: extreem southern ILL
I priced all the paint for my truck friday.
2 qts color 1 green 1 silver
1 gal clear
all the activator
sealer
reducer
from a knock off of dupont, same paint just no warranty, even says on the back of the can made by dupont.
$300.00
Dar
2 qts color 1 green 1 silver
1 gal clear
all the activator
sealer
reducer
from a knock off of dupont, same paint just no warranty, even says on the back of the can made by dupont.
$300.00
Dar
