
Bellcrank bushing upgrade

Thread Starter
Registered User
Joined: May 2004
Posts: 2,867
Likes: 0
From: Golden, Colorado
Bellcrank bushing upgrade
Well here is what I did to upgrade my bell crank bushings after I found that the factory plastic ones are now $4.50 a piece. And if your bushings look like mine did then there's probably not much left of them. Here is a picture of some fairly new ones that I had installed in the w250 a couple years ago.
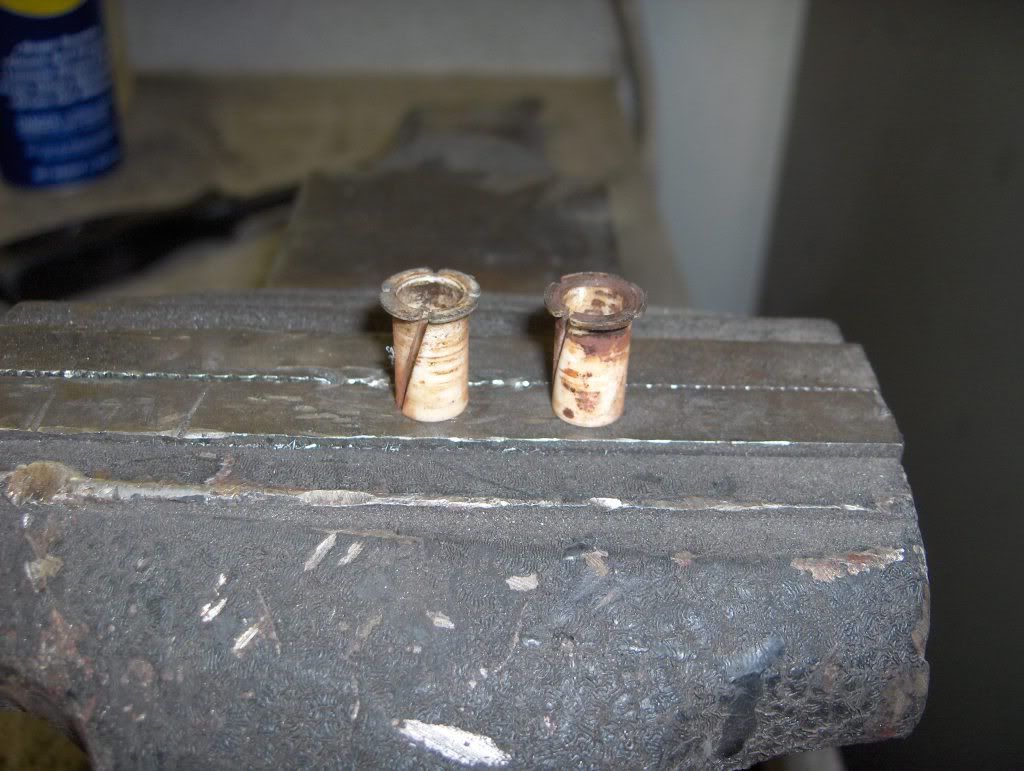
That is what they're supposed to look like. But even with these new ones there was still significant slop in the bellcrank.
So first I ordered these oilite bushings from mcmaster. Its the same material as the door bushings.
6338K454 This one has a flange
6391K166 This one is just a straight flange
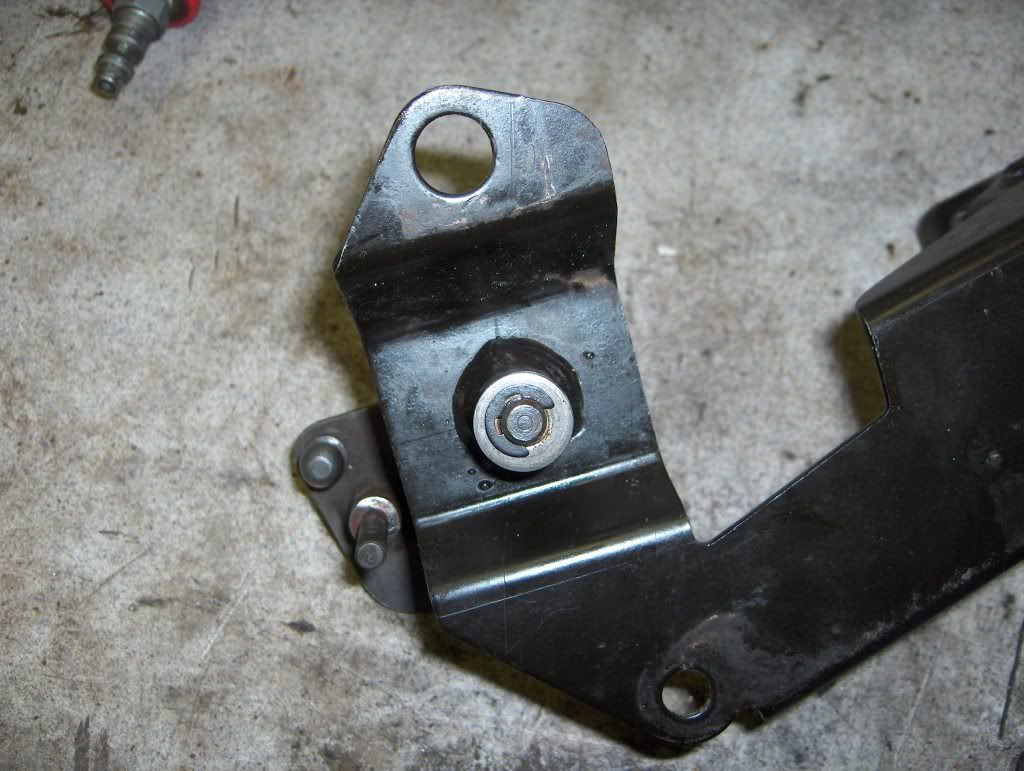
First thing you'll notice is that they have the right ID for the shaft of the crank, but the OD won't fit in the bracket. So the first step is to drill the bracket shown out to 7/16" diameter.
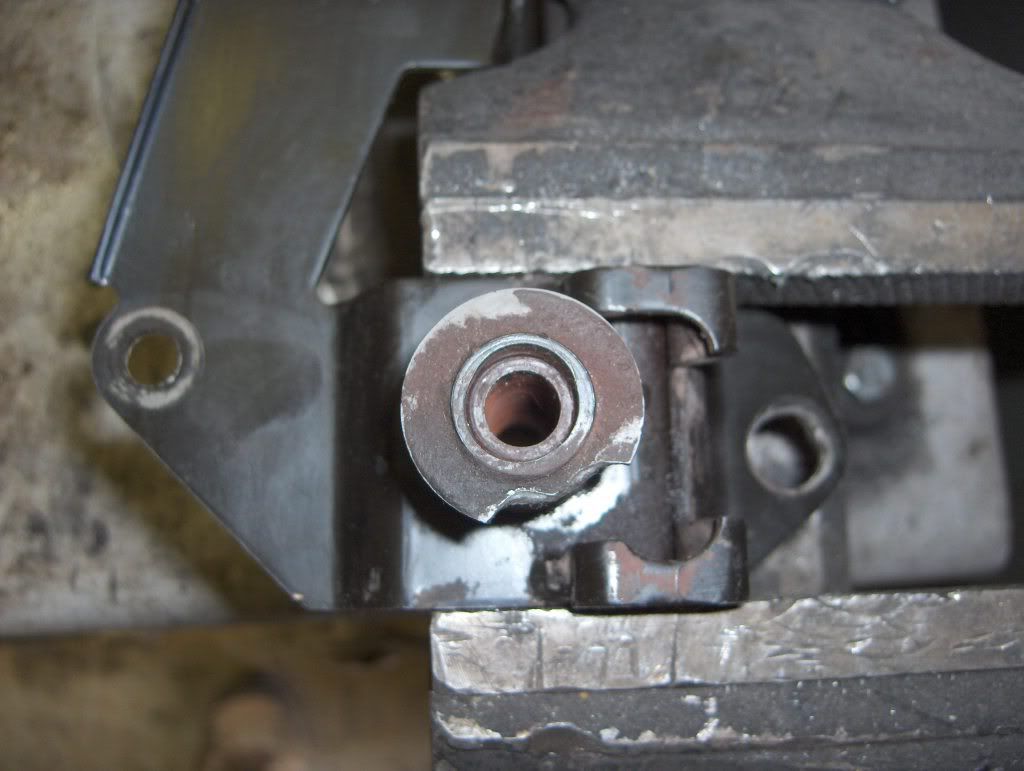
Now the recess shown in the above photo needs to be drilled out to 9/16" and about .180" deep, but I would recommend drilling and test fitting to make sure.
Next insert the bushings as shown:
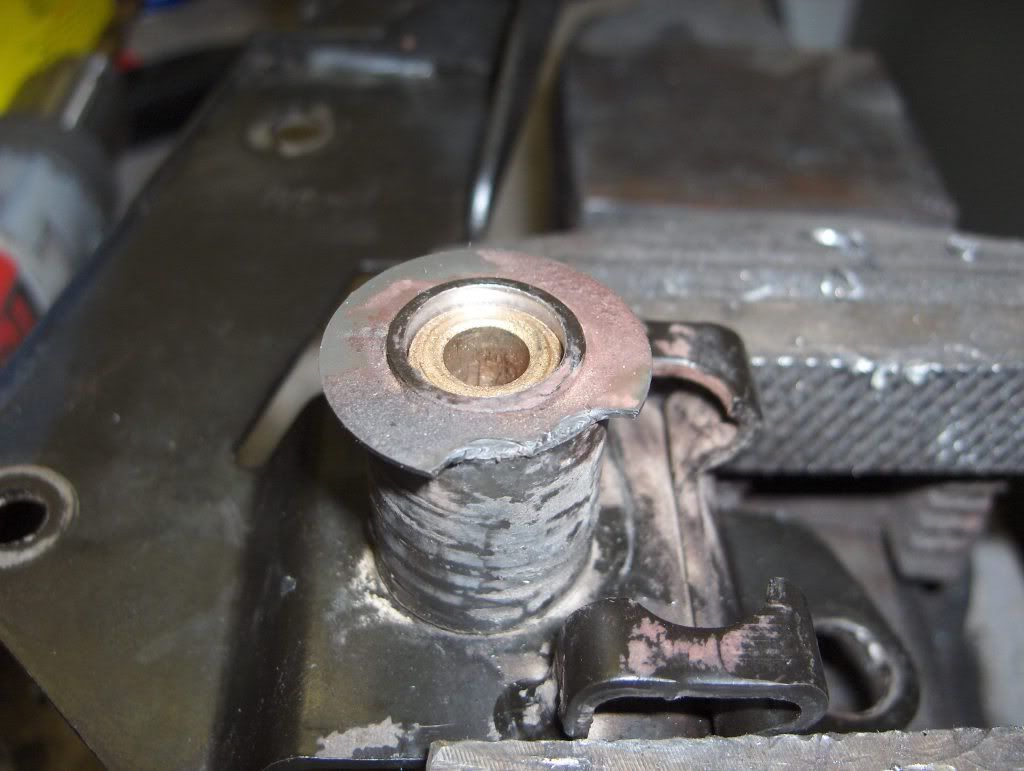
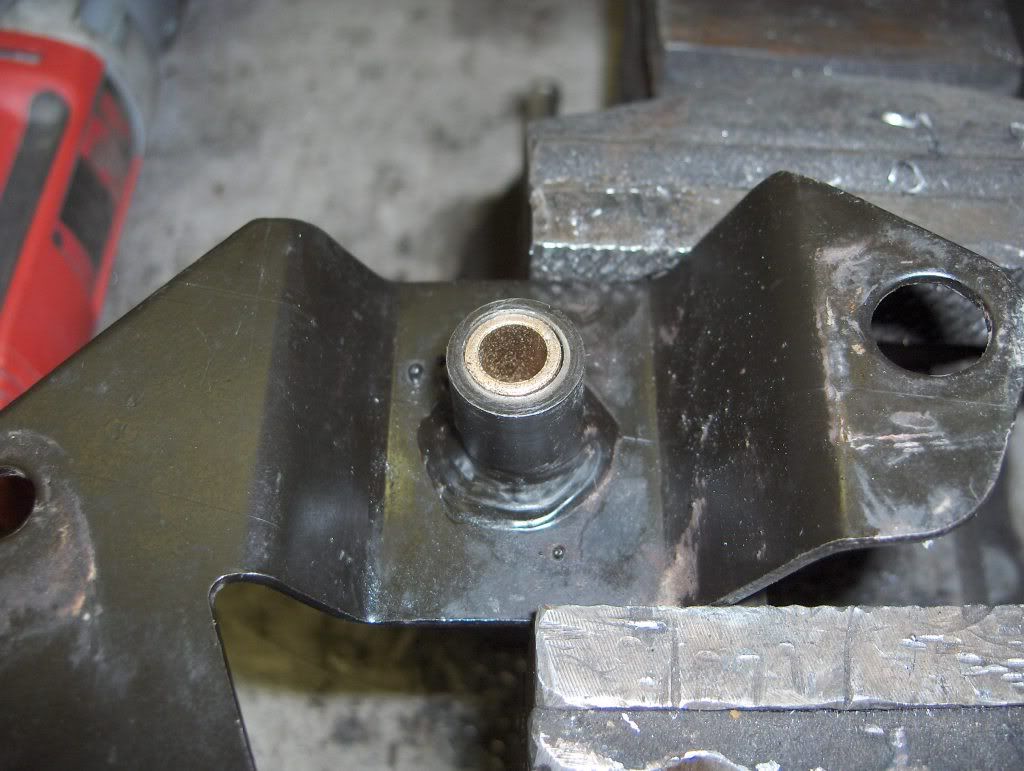
Then put a little motor oil or something for lubrication put the spring back on, and insert the bellcrank. Then I put a washer on the back side and a new e-clip.

And well that is it, you now will have a slack free bell crank assembly with bushings that will last at least another 20 years. haha
Its not quite a Jim Lane, or BC847 write up but hopefully someone will find it useful. If you have any questions just let me know.
Thanks, Aaron
That is what they're supposed to look like. But even with these new ones there was still significant slop in the bellcrank.
So first I ordered these oilite bushings from mcmaster. Its the same material as the door bushings.
6338K454 This one has a flange
6391K166 This one is just a straight flange
First thing you'll notice is that they have the right ID for the shaft of the crank, but the OD won't fit in the bracket. So the first step is to drill the bracket shown out to 7/16" diameter.
Now the recess shown in the above photo needs to be drilled out to 9/16" and about .180" deep, but I would recommend drilling and test fitting to make sure.
Next insert the bushings as shown:
Then put a little motor oil or something for lubrication put the spring back on, and insert the bellcrank. Then I put a washer on the back side and a new e-clip.
And well that is it, you now will have a slack free bell crank assembly with bushings that will last at least another 20 years. haha
Its not quite a Jim Lane, or BC847 write up but hopefully someone will find it useful. If you have any questions just let me know.
Thanks, Aaron


Thread
Thread Starter
Forum
Replies
Last Post
wannadiesel
1st Gen. Ram - All Topics
16
Jan 28, 2006 09:51 AM
dieselcrazy
Performance and Accessories 2nd gen only
4
Mar 29, 2004 02:25 AM
Dusty 96
Performance and Accessories 2nd gen only
0
Dec 1, 2002 07:01 PM