
4wd leaf spring (FRAME) Bushings

Thread Starter
Registered User


Joined: Dec 2010
Posts: 6,838
Likes: 1,683
From: Land of the Toxic Avenger
4wd leaf spring (FRAME) Bushings
Well, I can say that this was an interesting learning experience. Don't do this unless you have lots of time and patience, as the first try at removal was difficult to say the least.
You need to get the truck lifted, with several pairs of jack stands, at minimum two (5 ton) units at the frame just behind the trans crossmember, and two (two ton) up front under the front axle itself. You'll also need at a minimum a floor jack to maneuver the axle up and down, but for comfort level, I used two separate floor jacks on the axle to have maximum control over positioning and for safety sake of knowing there was extra support @ the front should the need arise.
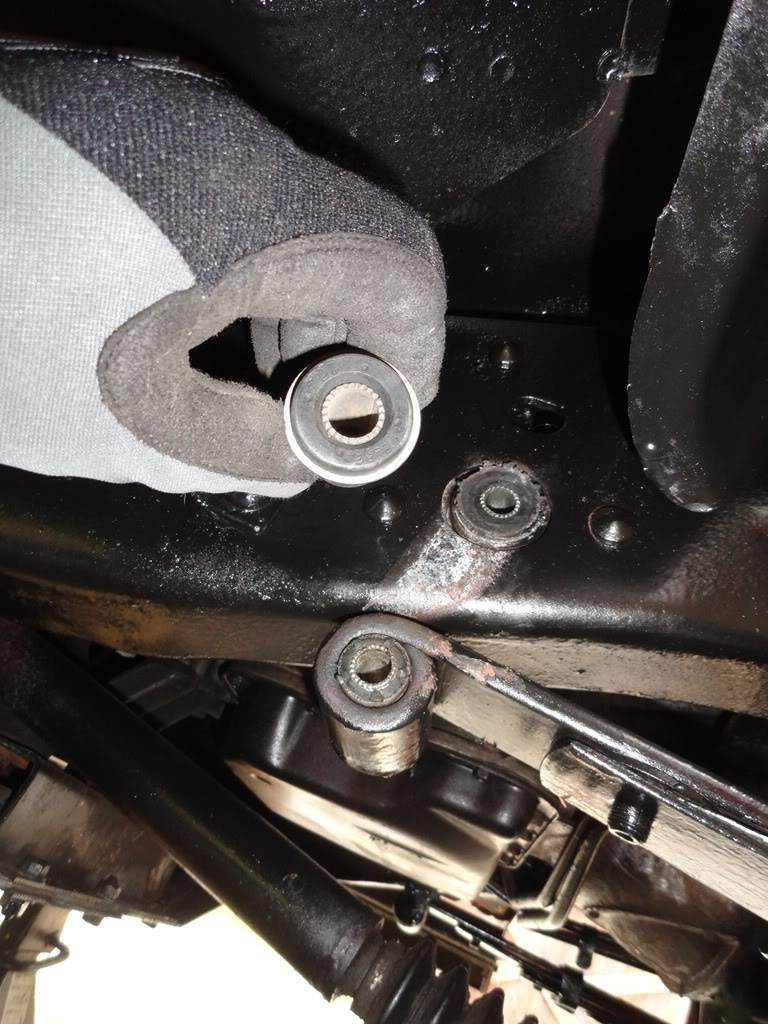
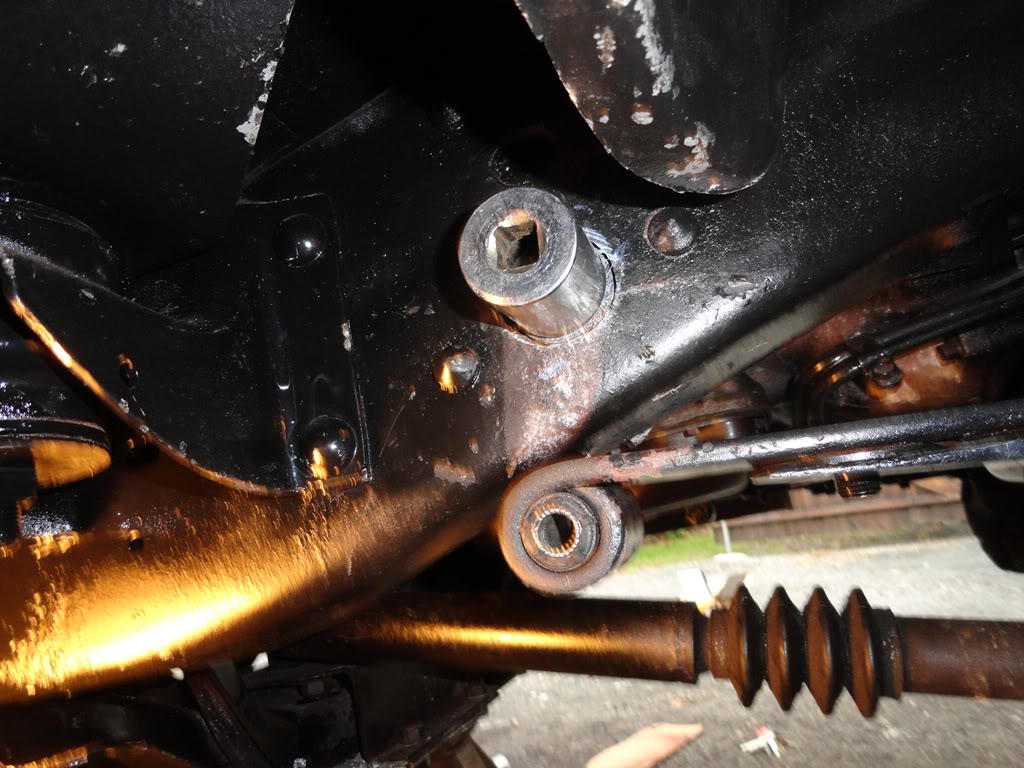
Once your truck is lifted up and the tires are removed, you can remove the rear shackle to access the frame bushing. Using a press won't work on these bushings, as they're shouldered on the outside and they can't be pressed through the frame. Each side has two bushings and they press in the tube towards each other with the flanges facing outwards They have to come out the same way they went in... and that's the difficult part.
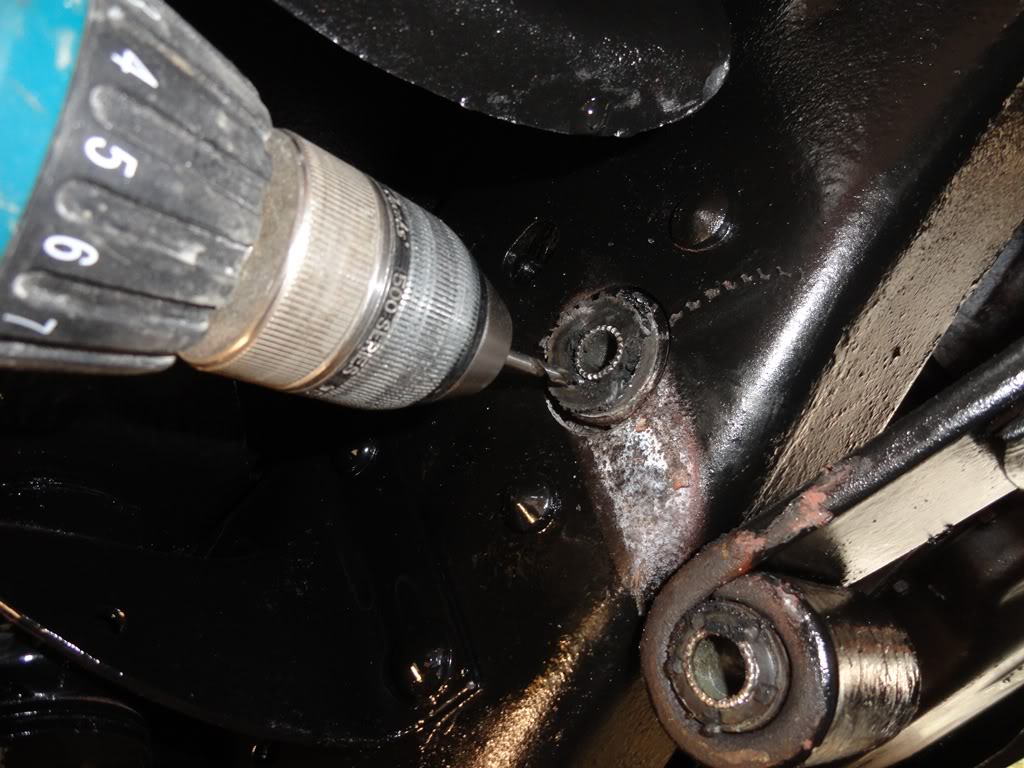
For the first hour, I tried a few different techniques I read here, and elsewhere on the net. None of them worked for me, and in reality it made it more difficult in the end to do the job. Using a drill bit to remove the rubber around the sleeve sort of helped, but for the most part, all I did was break lots of drill bits. The broken bits in the rubber made it 10 times more difficult to work on the bushing. Don't use drill bits unless you're willing to curse a few times more than you really need to.
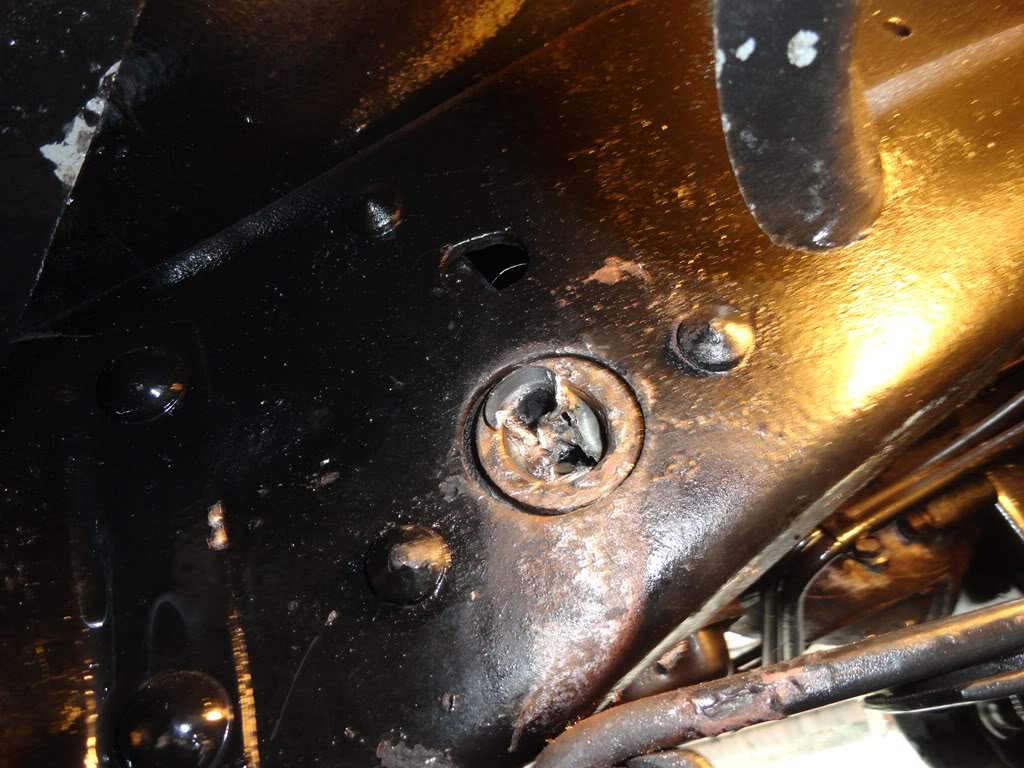
Being frustrated, with breaking all of my good drill bits, I decided to chisel away the outer flange of the bushing... Again, wrong move. All that happened was I made a bigger mess that what I started with, and this is what I wound up with. A mangled mess that seemed almost hopeless to get out. I had to take a rest and rethink this process.
Eventually, after wasting all that time trying brute force to beat the bushing out of the frame, I loosened it up enough to finally get the center ferrule out. Once cleaned out, I could then chisel the outer shell out of the frame which left me with the other side to contend with. With this experience I will tell you that this was NOT the right way of doing this job. You can't beat them out without wasting lots of time doing so. Lying on your back for 3 hours really gets old after a while
I tried removing the inner bushing by tapping it towards the transmission from the outer side of the frame. I wouldn't budge. Thinking of a new strategy, I remember reading that someone burned out the rubber which relieved the pressure of the bushing, and the sleeve just came out. So I did just that. I burned out the bushing from the inside of the frame.
Keeping a fire extinguisher and bottle of water, and a bunch of wet terry cloth towels nearby, I took my mini torch (used in plumbing repairs) and burned out the rubber part of the bushing. To my amazement, the center ferrule popped out on it's own !
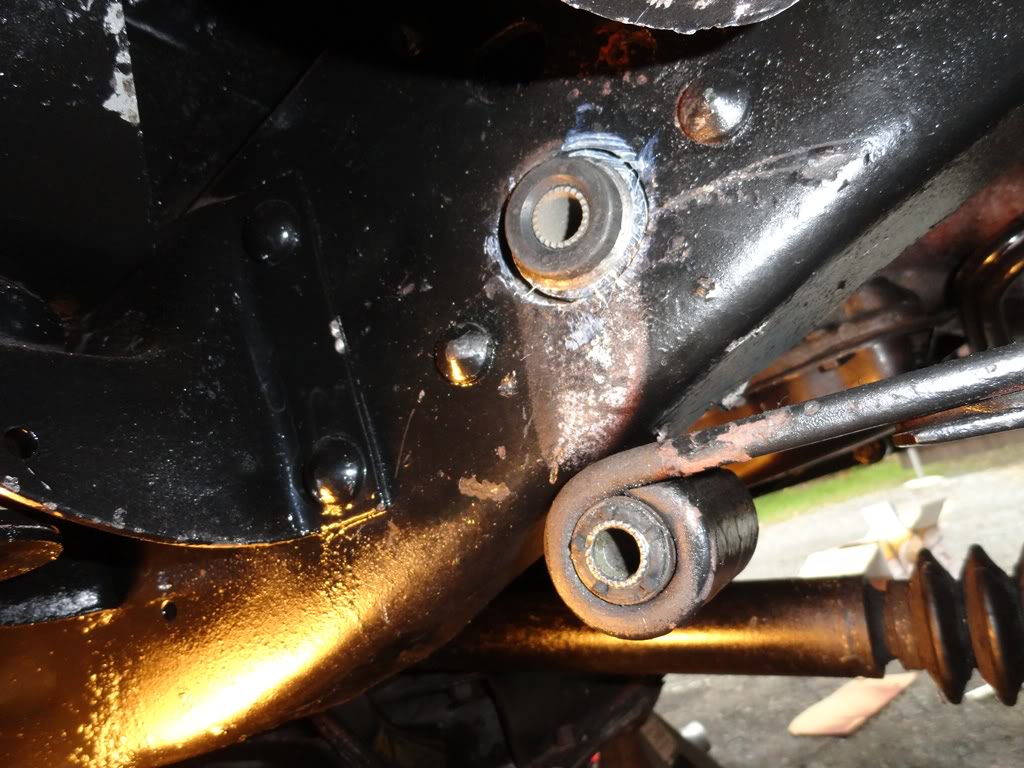
Make sure you have your glasses on and are ready for flying metal, as I wasn't expecting this to happen. After it cooled, I knocked out the outer shell of the inner bushing, from the outside of the frame with a few taps of a standard punch. Piece of cake with the other side removed, and the rubber bushing gone. Here's what was left of the shell and ferrule and the other side ferrule, I beat to get out

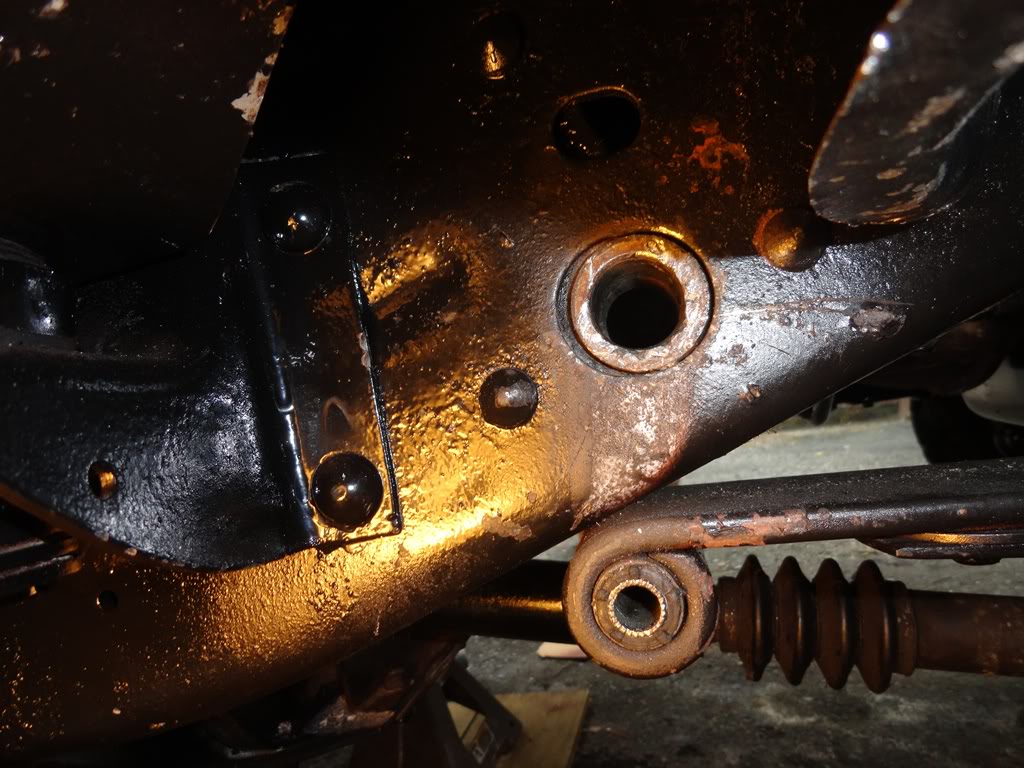
Now you have a nice clean receptor for your new bushings. I filed the distorted opening out a little bit to ease the installation of the new bushing. When you beat the daylights out of a bushing the receptor gets mangled a little bit. I filed the inside down to minimize resistance of the new bushing going in.
You need to get the truck lifted, with several pairs of jack stands, at minimum two (5 ton) units at the frame just behind the trans crossmember, and two (two ton) up front under the front axle itself. You'll also need at a minimum a floor jack to maneuver the axle up and down, but for comfort level, I used two separate floor jacks on the axle to have maximum control over positioning and for safety sake of knowing there was extra support @ the front should the need arise.
Once your truck is lifted up and the tires are removed, you can remove the rear shackle to access the frame bushing. Using a press won't work on these bushings, as they're shouldered on the outside and they can't be pressed through the frame. Each side has two bushings and they press in the tube towards each other with the flanges facing outwards They have to come out the same way they went in... and that's the difficult part.
For the first hour, I tried a few different techniques I read here, and elsewhere on the net. None of them worked for me, and in reality it made it more difficult in the end to do the job. Using a drill bit to remove the rubber around the sleeve sort of helped, but for the most part, all I did was break lots of drill bits. The broken bits in the rubber made it 10 times more difficult to work on the bushing. Don't use drill bits unless you're willing to curse a few times more than you really need to.
Being frustrated, with breaking all of my good drill bits, I decided to chisel away the outer flange of the bushing... Again, wrong move.
All that happened was I made a bigger mess that what I started with, and this is what I wound up with. A mangled mess that seemed almost hopeless to get out. I had to take a rest and rethink this process.Eventually, after wasting all that time trying brute force to beat the bushing out of the frame, I loosened it up enough to finally get the center ferrule out. Once cleaned out, I could then chisel the outer shell out of the frame which left me with the other side to contend with. With this experience I will tell you that this was NOT the right way of doing this job. You can't beat them out without wasting lots of time doing so. Lying on your back for 3 hours really gets old after a while
I tried removing the inner bushing by tapping it towards the transmission from the outer side of the frame. I wouldn't budge. Thinking of a new strategy, I remember reading that someone burned out the rubber which relieved the pressure of the bushing, and the sleeve just came out. So I did just that. I burned out the bushing from the inside of the frame.
Keeping a fire extinguisher and bottle of water, and a bunch of wet terry cloth towels nearby, I took my mini torch (used in plumbing repairs) and burned out the rubber part of the bushing. To my amazement, the center ferrule popped out on it's own !
Make sure you have your glasses on and are ready for flying metal, as I wasn't expecting this to happen. After it cooled, I knocked out the outer shell of the inner bushing, from the outside of the frame with a few taps of a standard punch. Piece of cake with the other side removed, and the rubber bushing gone. Here's what was left of the shell and ferrule and the other side ferrule, I beat to get out
Now you have a nice clean receptor for your new bushings. I filed the distorted opening out a little bit to ease the installation of the new bushing. When you beat the daylights out of a bushing the receptor gets mangled a little bit. I filed the inside down to minimize resistance of the new bushing going in.
Thread Starter
Registered User
Joined: Dec 2010
Posts: 6,838
Likes: 1,683
From: Land of the Toxic Avenger
Continued
I had to continue here due to picture limitations.....
Seems as though some sheepdog posted before I could..
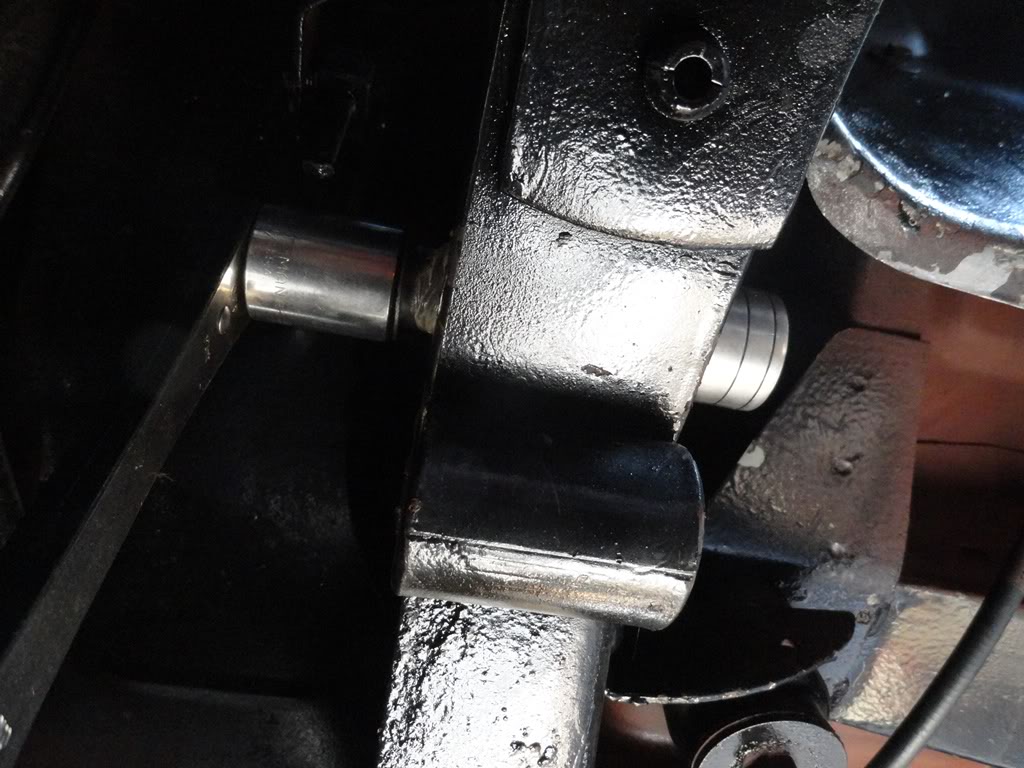
Using a 1 1/8" socket, I tapped in the new bushings into each side. The socket fit so well, that it actually held onto the rubber as I tapped it in with a 2lb mallet. I coated the inside of the tube, and the outside of the bushings with white lube for ease of installation. Took maybe a dozen taps and the new bushing was set in place.
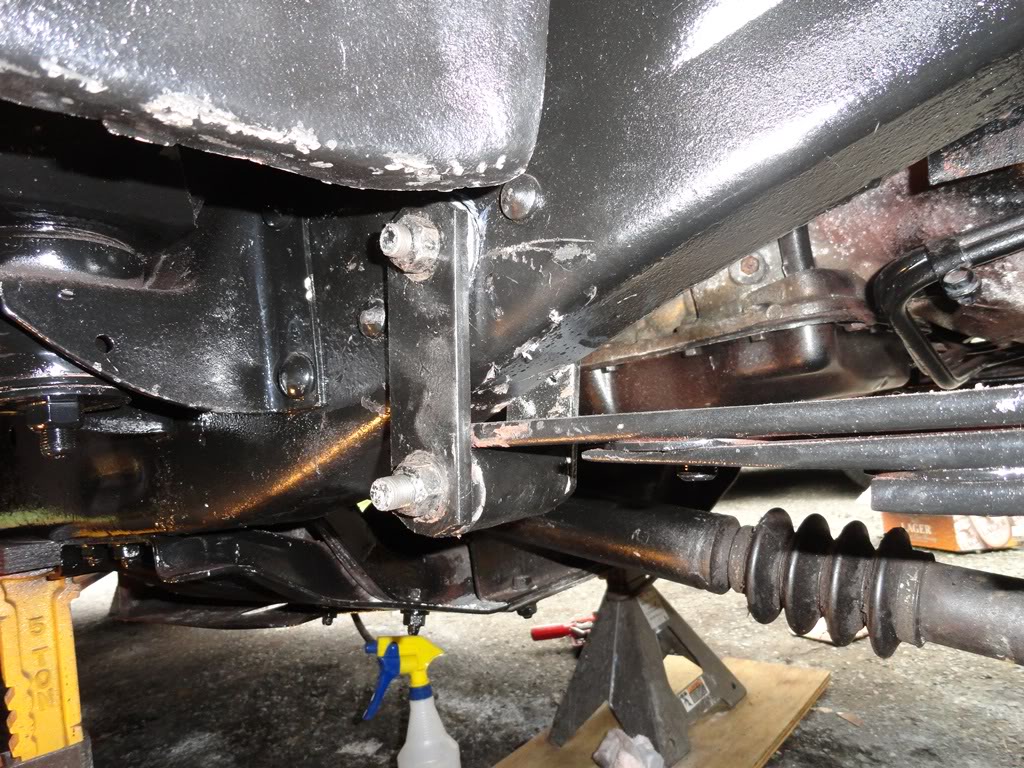
New bushings in place
Shackle put back into it's home, and torqued the bolts to 80 Ft Lbs as in the FSM
The other side will be much easier.
Seems as though some sheepdog posted before I could..
Using a 1 1/8" socket, I tapped in the new bushings into each side. The socket fit so well, that it actually held onto the rubber as I tapped it in with a 2lb mallet. I coated the inside of the tube, and the outside of the bushings with white lube for ease of installation. Took maybe a dozen taps and the new bushing was set in place.
New bushings in place
Shackle put back into it's home, and torqued the bolts to 80 Ft Lbs as in the FSM
The other side will be much easier.
Thread Starter
Registered User
Joined: Dec 2010
Posts: 6,838
Likes: 1,683
From: Land of the Toxic Avenger
This was the passenger side.
The drivers side has yet to be done.
I'll be tackling that today. and with the knowledge I gained from doing the passenger side, I'm hoping to cut 1/2 the time
Registered User
Joined: Dec 2009
Posts: 902
Likes: 0
From: Princeton, NJ
I'll expect a full report. 
Supposed to be nice after lunch. 60s and sunny.
I've got a little bubble of rust starting on a cab corner...that's my project today. Just got an order of POR15 in yesterday.
Nice writeup, btw!
Supposed to be nice after lunch. 60s and sunny.
I've got a little bubble of rust starting on a cab corner...that's my project today. Just got an order of POR15 in yesterday.
Nice writeup, btw!
Thread Starter
Registered User
Joined: Dec 2010
Posts: 6,838
Likes: 1,683
From: Land of the Toxic Avenger
Trending Topics

Registered User
Joined: Feb 2011
Posts: 207
Likes: 28
From: Maine
So I notice the spring eyes are touching the frame, just like mine, but you appear to have new springs. Did you find on that one side that spring eye was still touching the frame after the new bushings?
TY for posting this, very useful. It could have been worse: the shackle studs could have been seized in the bushings
TY for posting this, very useful. It could have been worse: the shackle studs could have been seized in the bushings
Thread Starter
Registered User
Joined: Dec 2010
Posts: 6,838
Likes: 1,683
From: Land of the Toxic Avenger
One hour and 20 minutes, start to finish, on the drivers side.
Now that's a little better.
HUGE ride difference..... Thank you Jim Lane for recommending the spring sliders that I had installed in the new springs.
Rides like a brand new CADDY !
Post pix a little later today.
T.
Now that's a little better.
HUGE ride difference..... Thank you Jim Lane for recommending the spring sliders that I had installed in the new springs.
Rides like a brand new CADDY !
Post pix a little later today.
T.
Registered User
Joined: Apr 2009
Posts: 3,317
Likes: 485
From: alaska
I cheated and drilled out the rivets that hold the bushing block to the frame. A good press made short work of the flanges on the bushings during removal. Pressing the bushings back in was easy in the press too. The blocks went back on the frame with nuts and bolts.


Registered User
Joined: Sep 2007
Posts: 1,090
Likes: 14
I did those bushings a while back when I installed my skyjoker springs.
Use a torch and heat the steel inner sleeve. That sleeve will just about pop out when it hits the correct temp. Then use a air chisel with a narrow chisel bit. Blow out the inner bushing. The do the outer bushing.
I used 1/2" bollts to pull the bushings into the bracket, one at a time. No beating with a hammer. Just use an impact wrench.
They are a pain. I had about 1.5 hours in both sides.
Thread Starter
Registered User
Joined: Dec 2010
Posts: 6,838
Likes: 1,683
From: Land of the Toxic Avenger
The driver's side took 2 hours less than the passenger side.... as with anything else, knowledge is power, and since the passenger side was my first time.... I was missing some power to do the work.
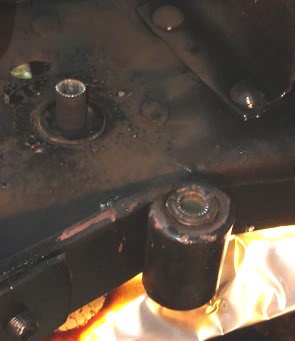
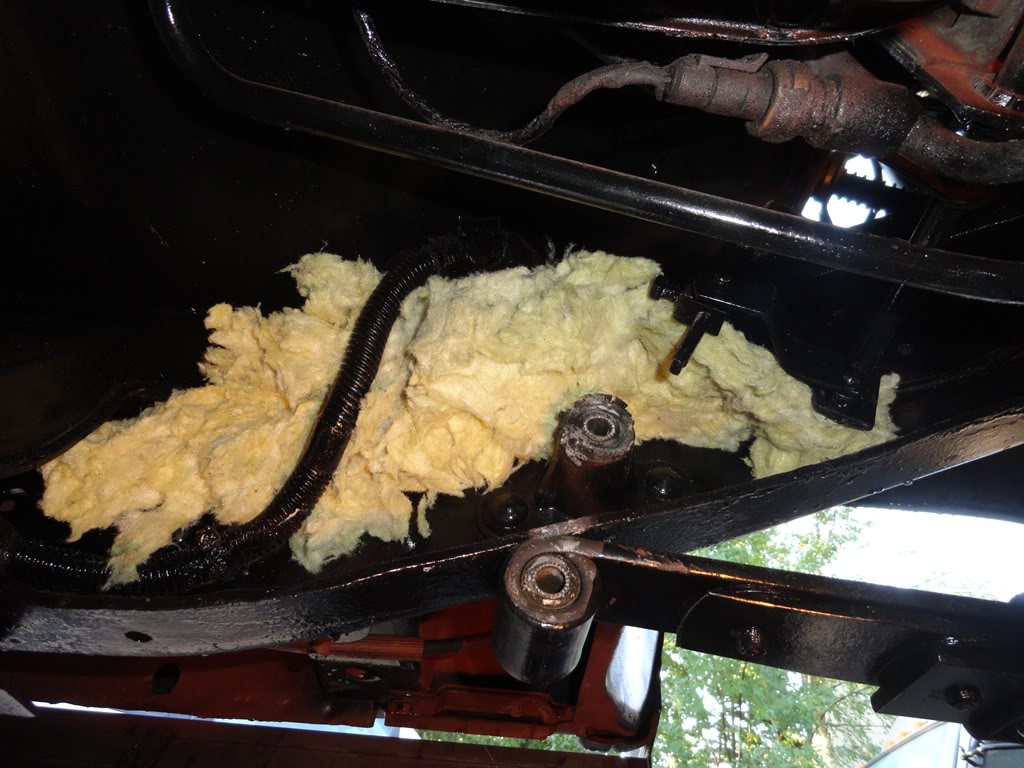
The bushings pop the ferrule right out when heated. as seen in this pic of the drivers side.. this one didn't hit me in the forehead, as it held on for dear life.
Once the outer bushing was out I could easily knock out the inner bushing with little or no hubub. The difficult part was removing the outer sleeve, as there are fuel lines just above, and I didn't feel comfortable with the torch near them as I didn't have a real accurate flame, such as a garage torch would have been. I used rotten cotton (known as firesafeing in the construction trades) which limited the amount of heat on the plastic lines, but I wasn't taking any chances otherwise. Plastic and heat don't go well together.
So I beat the outer sleeve out, and then knocked out the inner. once cleaned and reamed out, I reassembled the new bushings with the carriage bolt / socket trick. Worked out really good, as I didn't have to hit the bushings back in. Reality is, there isn't enough room on the drivers side anyway to do so, as the trans lines are blocking any access.
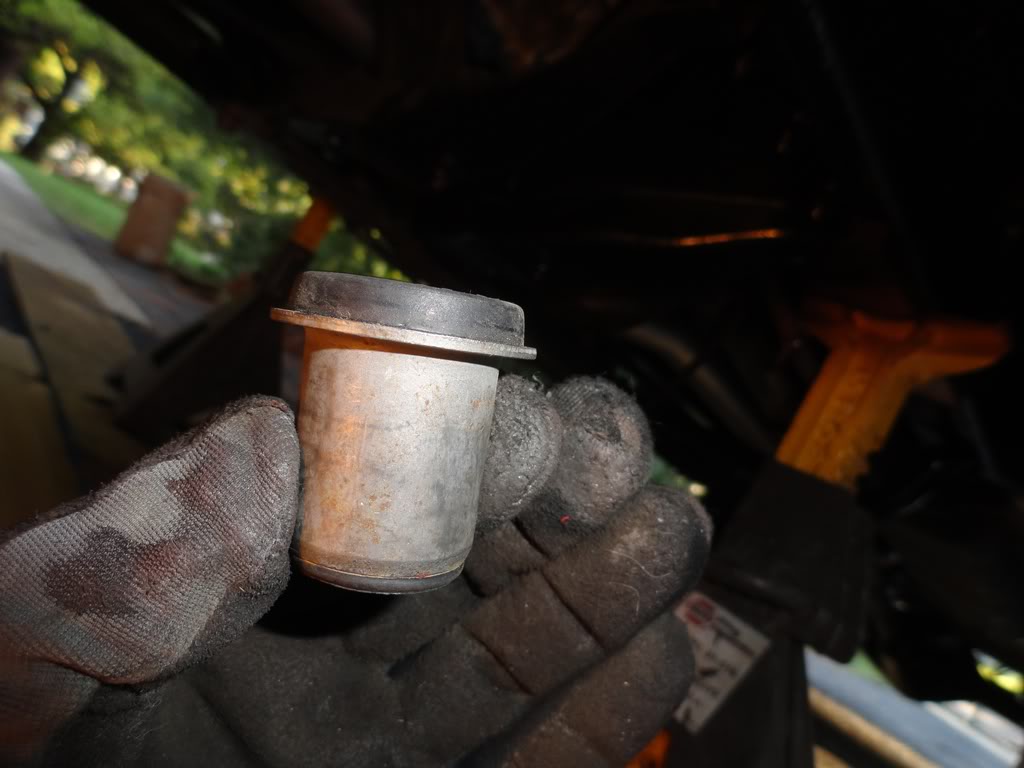
Here's what the bushings look like up close from the sideview and you can see why you need two of them.
I figured that if I ever had to do them again, with all of the information I learned here, and actually by doing. I think I could do each side in about an hour or so, taking my time.
The bushings pop the ferrule right out when heated. as seen in this pic of the drivers side.. this one didn't hit me in the forehead, as it held on for dear life.
Once the outer bushing was out I could easily knock out the inner bushing with little or no hubub. The difficult part was removing the outer sleeve, as there are fuel lines just above, and I didn't feel comfortable with the torch near them as I didn't have a real accurate flame, such as a garage torch would have been. I used rotten cotton (known as firesafeing in the construction trades) which limited the amount of heat on the plastic lines, but I wasn't taking any chances otherwise. Plastic and heat don't go well together.
So I beat the outer sleeve out, and then knocked out the inner. once cleaned and reamed out, I reassembled the new bushings with the carriage bolt / socket trick. Worked out really good, as I didn't have to hit the bushings back in. Reality is, there isn't enough room on the drivers side anyway to do so, as the trans lines are blocking any access.
Here's what the bushings look like up close from the sideview and you can see why you need two of them.
I figured that if I ever had to do them again, with all of the information I learned here, and actually by doing. I think I could do each side in about an hour or so, taking my time.