
2nd Gen seat install...start to finish

Thread Starter
Registered User


Joined: Mar 2010
Posts: 7,265
Likes: 1,346
From: Prince George, BC
2nd Gen seat install...start to finish
OK I'm going to post all this in one thread so others can follow from start to finish in one place.
Here's a rehash of my other thread...Aug 17/10
Here's a rehash of my other thread...Aug 17/10
I worked a bit over the weekend on getting the frame built for my 2nd gen 40/20/40 seat.

With me being 6'8" and 275lbs I wanted the seat as low as possible and set back to give me lots of leg room. I have read almost every thread I could find here on the DTR related to this subject, and decided, especially after I got my seat, that I wasn't going to use the factory 2nd gen seat tracks and brackets.
So I spent a fair amount of time trying to figure out what I wanted to do. Eventually I decide that I would do away with the dual tracks and make a solid bench seat style set-up. I also decided that I wanted to use that factory bench seat tracks.
I then took all the measurements from the 2nd gen seat, pulled the stock bench out, but took tons of measurement, and then spent some time with a pen and paper drawing up several different ideas on how to attack the situation.
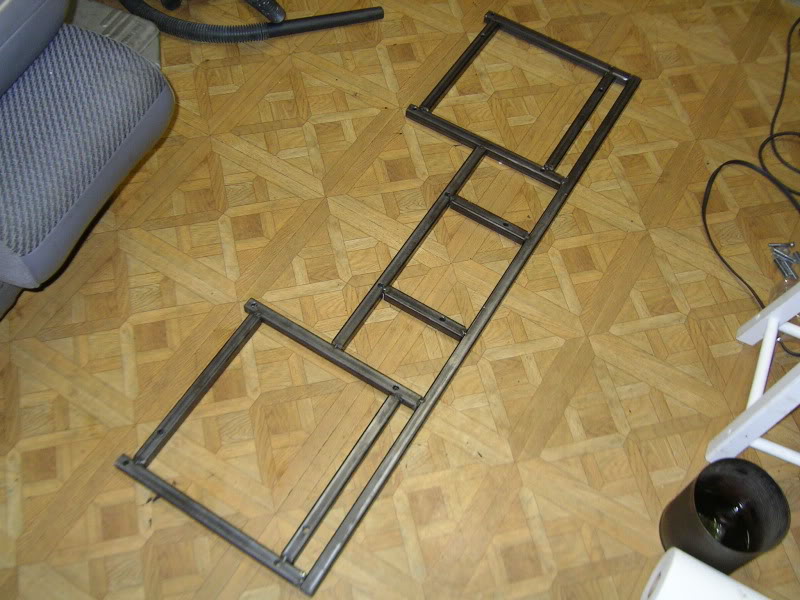
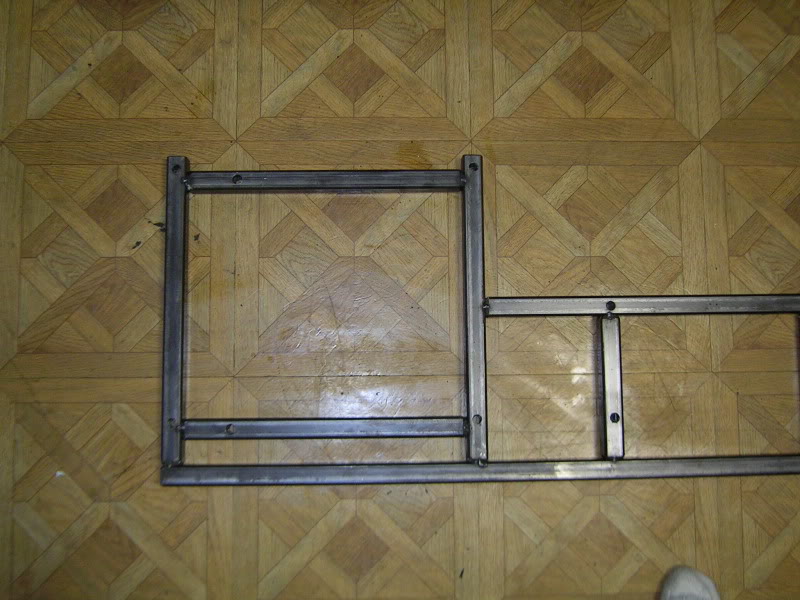
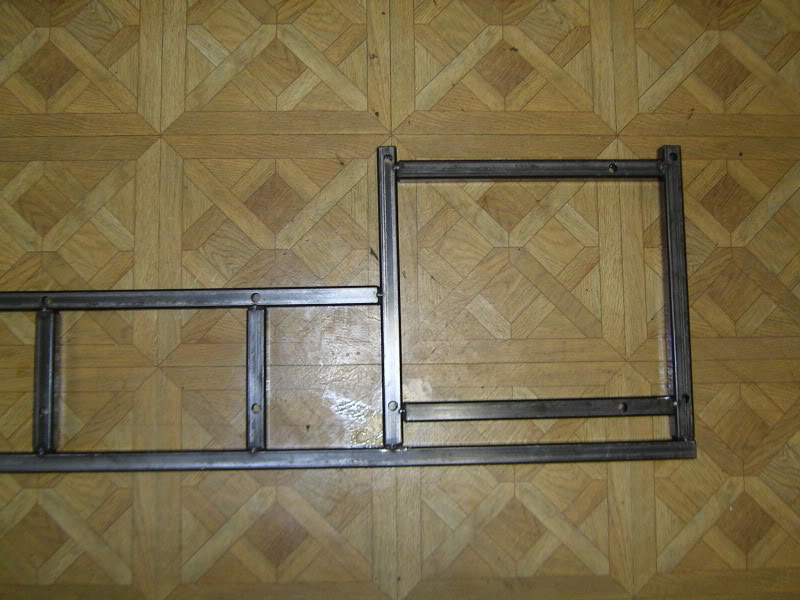
I decide that I would build the frame out of 1" square tubing, 1/8th wall, but wasn't sure exactly how things would work out in real life, since ideas and drawing can't always predict everything. So I came to the decision that I would build the frame, initially, from wood since it's cheap and easy to work with. So out came the table saw, and some 2x2's I had around, and I ripped me a bunch of 1"x1" wood. I then started cutting and then used my finishing nailer to piece it all together.
So after a few hours I think I have a final design, I had to modify it several times from my original drawings and ideas, the tranny tunnel for the transfer case posed the biggest problem.
Here are some current pics of the project....


Now I just need to build it from steel. Will update when I get it built and the new seat installed.
With me being 6'8" and 275lbs I wanted the seat as low as possible and set back to give me lots of leg room. I have read almost every thread I could find here on the DTR related to this subject, and decided, especially after I got my seat, that I wasn't going to use the factory 2nd gen seat tracks and brackets.
So I spent a fair amount of time trying to figure out what I wanted to do. Eventually I decide that I would do away with the dual tracks and make a solid bench seat style set-up. I also decided that I wanted to use that factory bench seat tracks.
I then took all the measurements from the 2nd gen seat, pulled the stock bench out, but took tons of measurement, and then spent some time with a pen and paper drawing up several different ideas on how to attack the situation.
I decide that I would build the frame out of 1" square tubing, 1/8th wall, but wasn't sure exactly how things would work out in real life, since ideas and drawing can't always predict everything. So I came to the decision that I would build the frame, initially, from wood since it's cheap and easy to work with. So out came the table saw, and some 2x2's I had around, and I ripped me a bunch of 1"x1" wood. I then started cutting and then used my finishing nailer to piece it all together.
So after a few hours I think I have a final design, I had to modify it several times from my original drawings and ideas, the tranny tunnel for the transfer case posed the biggest problem.
Here are some current pics of the project....
Now I just need to build it from steel. Will update when I get it built and the new seat installed.
Thread Starter
Registered User
Joined: Mar 2010
Posts: 7,265
Likes: 1,346
From: Prince George, BC
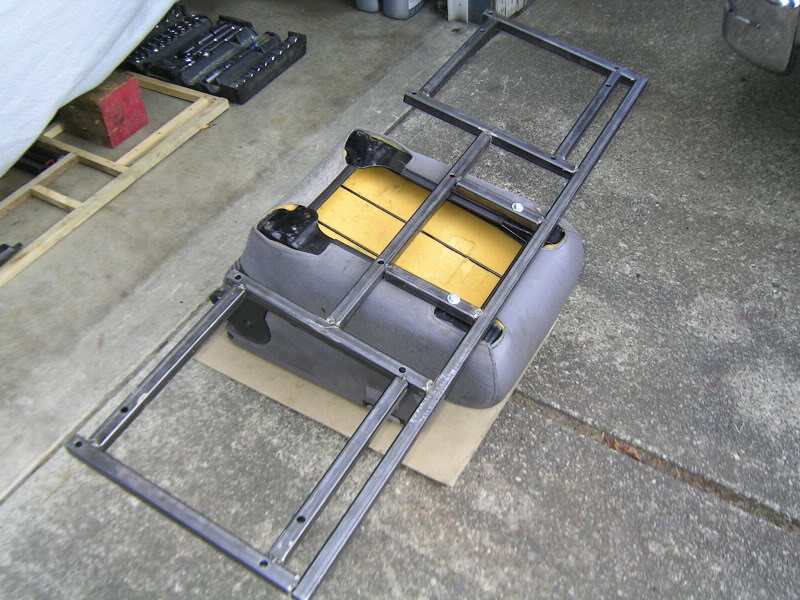
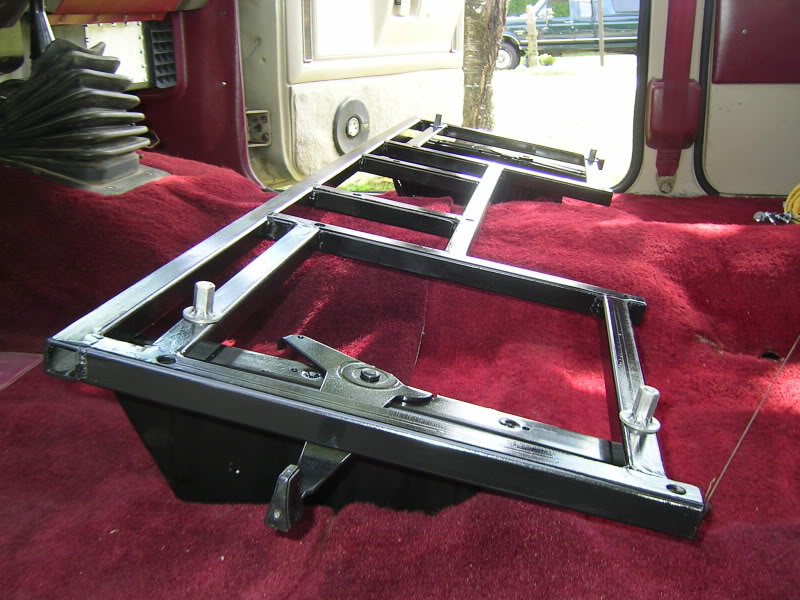
So the I built the frame out of steel. 1" square tubing by 1/8" wall. The holes I drilled at 7/16 for the 40/20/40 seat and then 1/2" to mount ot the original bracket.
And someone asked if I could post all the measurements and such in a drawing. I did one up in paint works last night. Not to scale but should have all the info for others to build there own.

And someone asked if I could post all the measurements and such in a drawing. I did one up in paint works last night. Not to scale but should have all the info for others to build there own.
Thread Starter
Registered User
Joined: Mar 2010
Posts: 7,265
Likes: 1,346
From: Prince George, BC
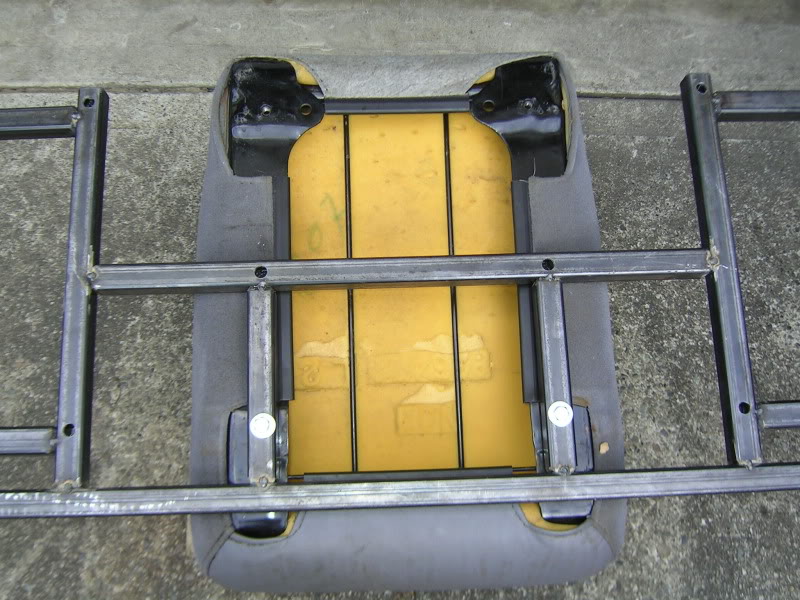
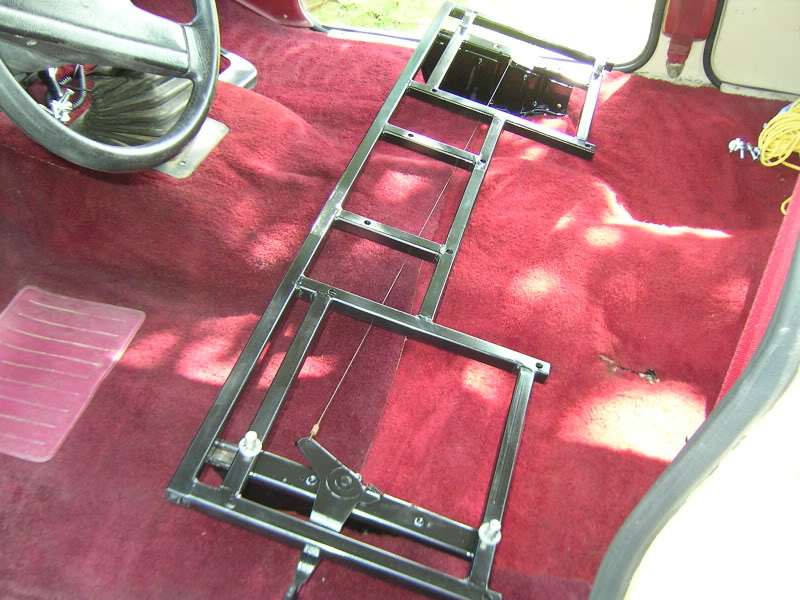
Next came the trial fit. I mounted everything on the frame, with only tack welds to hold it together. Then put it in the truck with the help of my neighbor.
It went in no problem and everything looked good. I had to also drill 2 new holes in the buddy seat since the frame did not extended to pick up the 2 rear mounts.
It went in no problem and everything looked good. I had to also drill 2 new holes in the buddy seat since the frame did not extended to pick up the 2 rear mounts.
Thread Starter
Registered User
Joined: Mar 2010
Posts: 7,265
Likes: 1,346
From: Prince George, BC
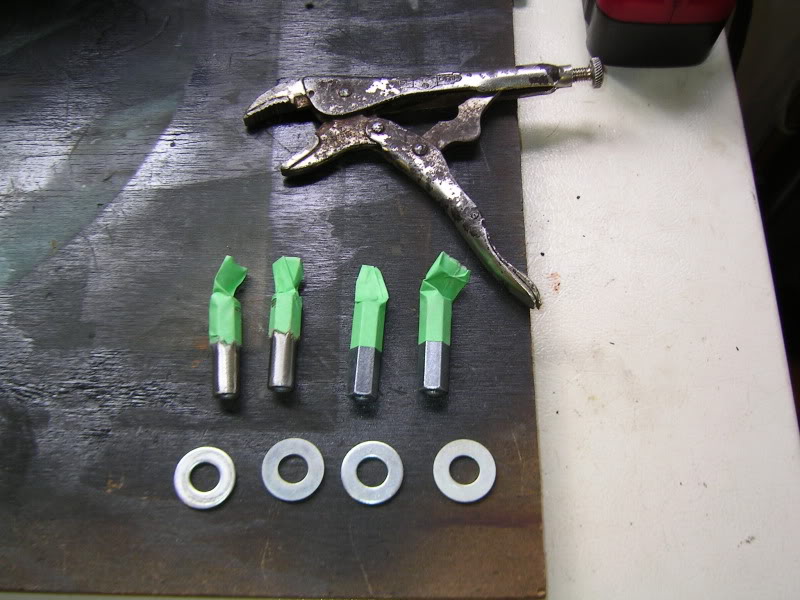
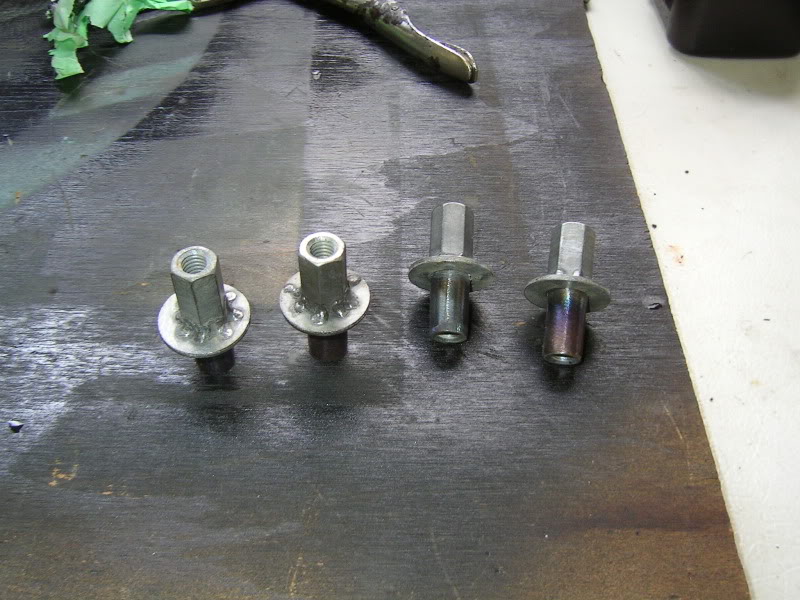
I ordered some special fasteners to secure the frame to the stock bench brackets, but they didn't arrive in time so I decided to make my own. I needed a deep socket type fastener to go down into the 1" tubing and fasten to the stock 5/16 NC thread stud.
Here's what I did.
Bought four 5/16" joiners, taped them off leaving just under 1" of metal showing.
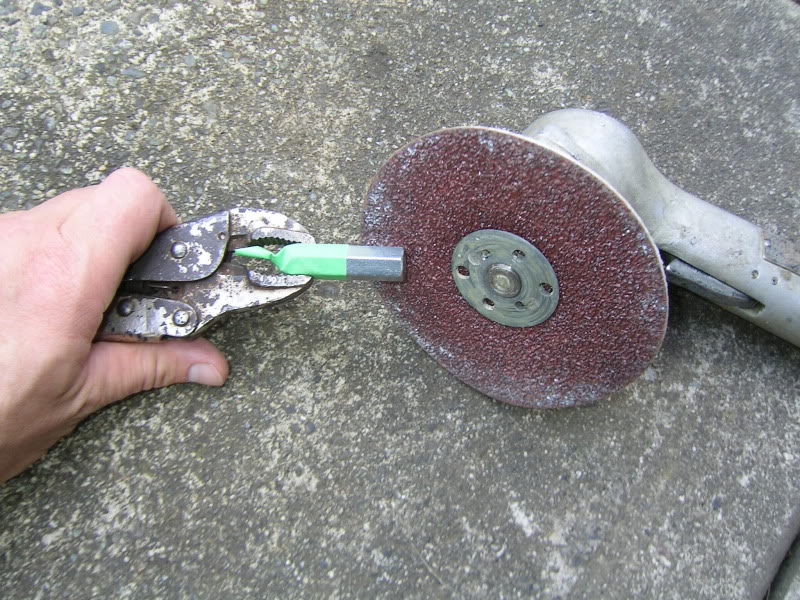
Then used my air sander to round off the exposed end to just under 1/2"
Once that was done rummaged through my tin of washers to find 4 that would work.
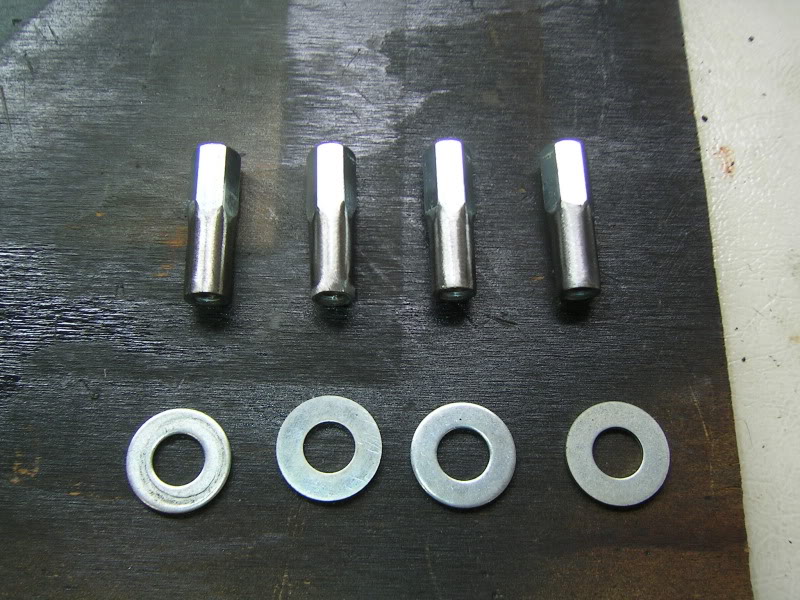
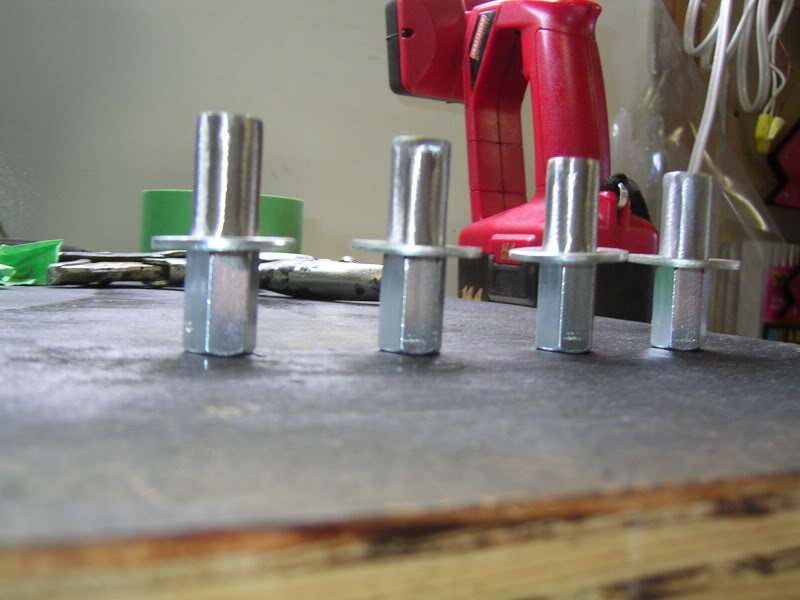
Then i had to figure out how to hold the washers secure and level while I tacked them in place with the welder. I have a few small but strong magnets and these did the job.
Few minutes with the welder and I was done.
Here's what I did.
Bought four 5/16" joiners, taped them off leaving just under 1" of metal showing.
Then used my air sander to round off the exposed end to just under 1/2"
Once that was done rummaged through my tin of washers to find 4 that would work.
Then i had to figure out how to hold the washers secure and level while I tacked them in place with the welder. I have a few small but strong magnets and these did the job.
Few minutes with the welder and I was done.
Thread Starter
Registered User
Joined: Mar 2010
Posts: 7,265
Likes: 1,346
From: Prince George, BC
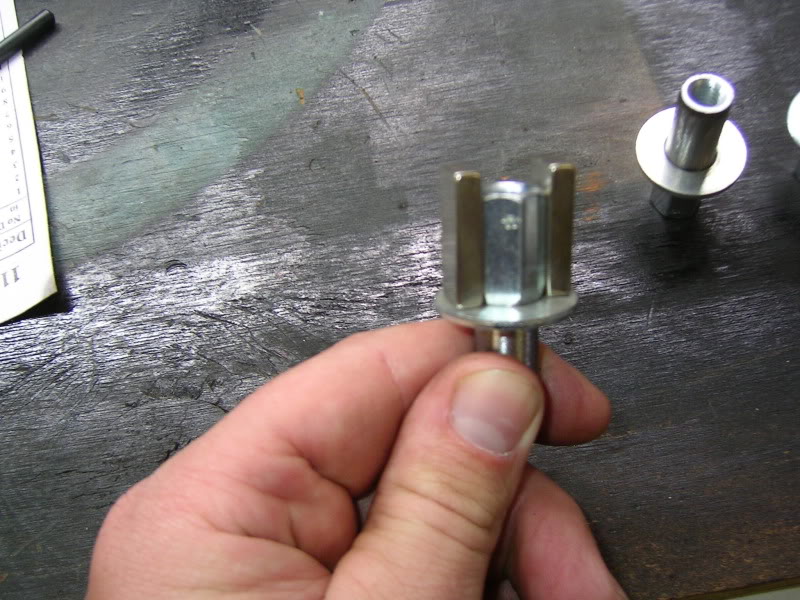
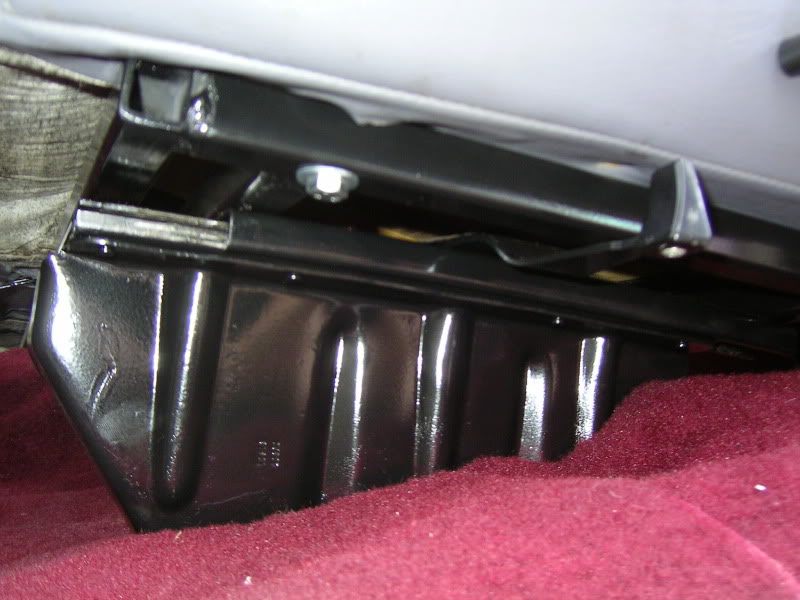
Here you can see how the new fasteners work.

Only problem I found was when I was doing my final install the rear fastener was too tall and was hitting the padding and would have dug into the seal when I sat in it. So I trimmed it down.
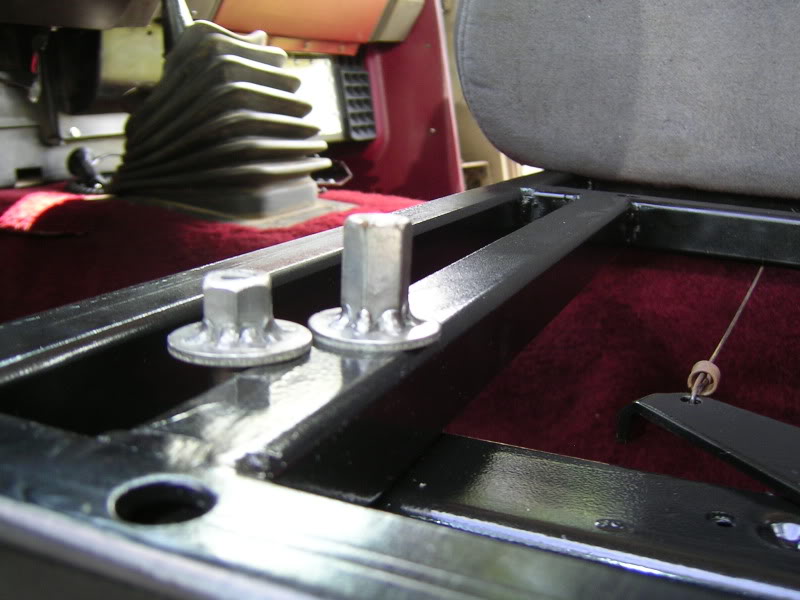
Only problem I found was when I was doing my final install the rear fastener was too tall and was hitting the padding and would have dug into the seal when I sat in it. So I trimmed it down.
Thread Starter
Registered User
Joined: Mar 2010
Posts: 7,265
Likes: 1,346
From: Prince George, BC
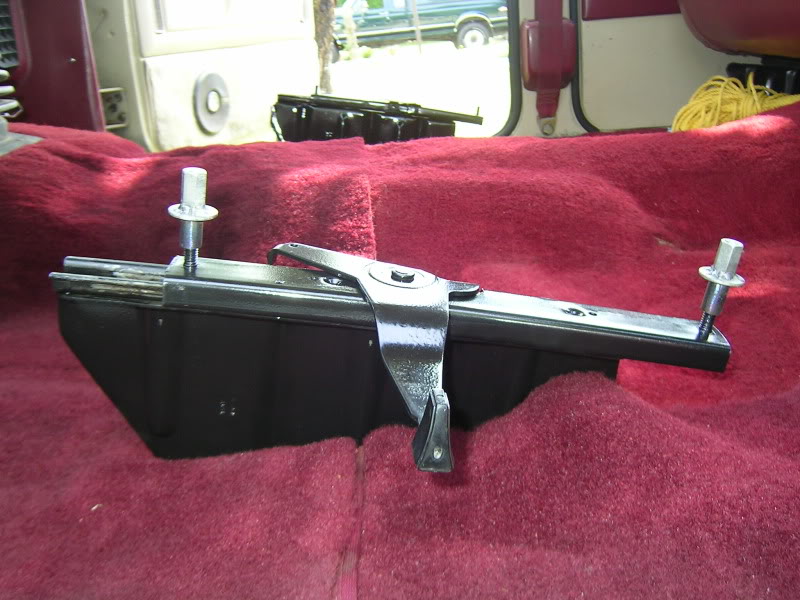
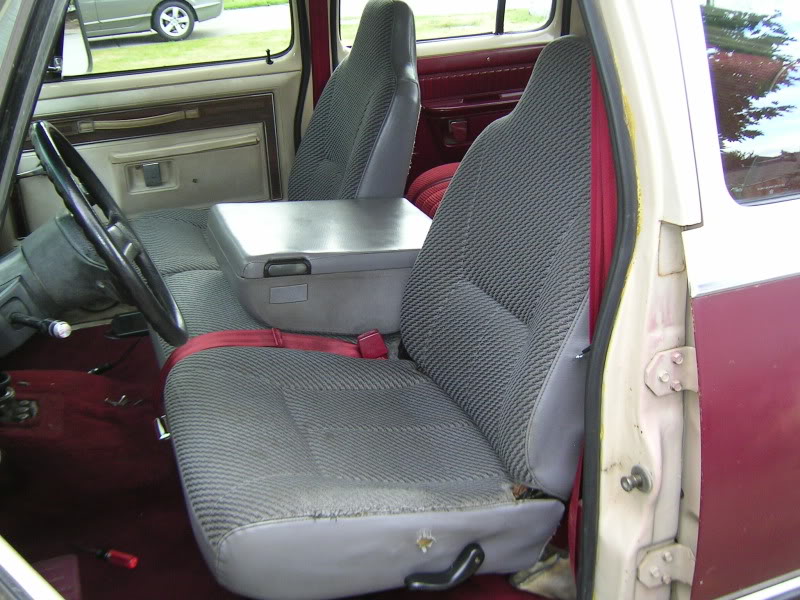
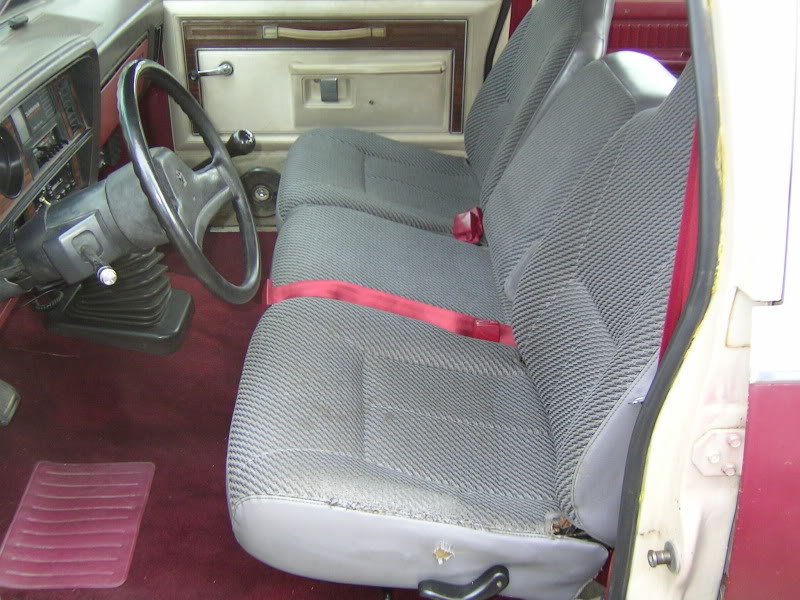
So here's the last trial fit before I started to install the seat.
So the buddy seat had to go on first before the bracket went into the truck. No room to get the bolts up and under the new bracket.
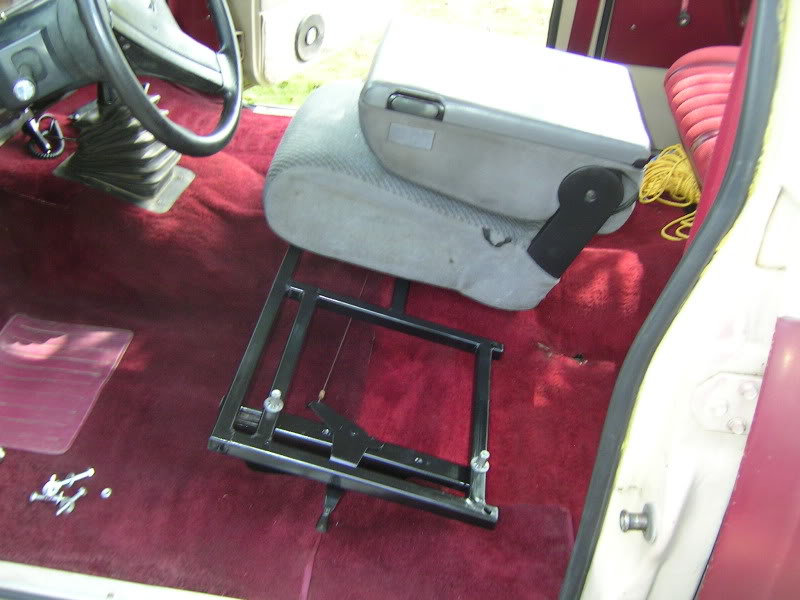
Here's a couple shots of the bracket bolted to the seats, from down low.

So the buddy seat had to go on first before the bracket went into the truck. No room to get the bolts up and under the new bracket.
Here's a couple shots of the bracket bolted to the seats, from down low.

Trending Topics
Thread Starter
Registered User
Joined: Mar 2010
Posts: 7,265
Likes: 1,346
From: Prince George, BC


 I really like your trick fasteners, backyard engineering at it's finest!
  I vote sticky!! You might want to copyright that diagram though...
 Registered User
Joined: Mar 2008
Posts: 4,389
Likes: 114
From: Orange County, California
Holy schnikees! I wanna find me a seat of the same type now! I've always wanted to have a flip up center console! Very nice work!! What year seat did you buy again? I believe the '98 trucks started the built-in seat belts.

Registered User
Joined: Jan 2008
Posts: 7,547
Likes: 2
From: Quinton, New Jersey (middle of nowhere)
the seats thrashingcows put in are actually SL seats, SLT ones are fancier and i think have thicker foam.

Registered User
Joined: Aug 2008
Posts: 1,450
Likes: 0
From: West Palm Beach, Florida