
1993 D250 Frame Off Build


Registered User
Joined: Aug 2013
Posts: 4,918
Likes: 603
From: Tulsa, OK
So I dropped a ton of small parts and brackets off to be powder coated; which left me with little to do on the truck, so I decided it was time to start to tackle the rat's nest in the front underhood wiring harness.
This is the main rats nest; about 13 years ago the triangular rubber junction that used to join the main power cable from the battery and all the fusible links together corroded and caught fire; the buss bar and the mess you see here was merely a quick fix to get the truck running again, as it was way up north in the dead of winter when it happened. I remember being in a parking lot of a restaurant and starting up the truck, turned on the headlights/heat and got a big puff of smoke from under the hood---I assume this was a fusible blowing---lost all power, hurried up and opened the hood to find a small fire on the wiring harness. I put it out with snow and we towed the truck back to the farm and rigged it up to run again with this mess; meaning to fix it as soon as the weather got warm....13 years later, still worked; just looks like :butt:. LOL.

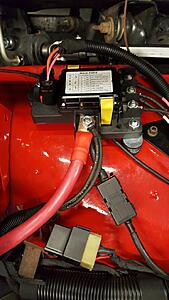
Here is the solution; a PNDB module from a late model Freightliner M2 truck. This will eliminate all the fusible links and provide midi fuse protection to the alternator and all of the circuits that used fusible links. This will be much safer and clean things up nicely. I will re-pin new wires in where the chopped ones are now and make a new power harness to the PNDB. It will also feed the glow plug relays on the main supply lug from the battery. I've got the cable ends and connectors/pins for the PNDB ordered up, just need to figure out the pin part numbers in the main cab connector and get a few of those ordered.


I'll be digging thru wiring diagrams here for the next couple hours so I can size the fuses (the ones included with the module are mostly too big) properly and plan out how to make the harness for it. Stay tuned.
This is the main rats nest; about 13 years ago the triangular rubber junction that used to join the main power cable from the battery and all the fusible links together corroded and caught fire; the buss bar and the mess you see here was merely a quick fix to get the truck running again, as it was way up north in the dead of winter when it happened. I remember being in a parking lot of a restaurant and starting up the truck, turned on the headlights/heat and got a big puff of smoke from under the hood---I assume this was a fusible blowing---lost all power, hurried up and opened the hood to find a small fire on the wiring harness. I put it out with snow and we towed the truck back to the farm and rigged it up to run again with this mess; meaning to fix it as soon as the weather got warm....13 years later, still worked; just looks like :butt:. LOL.
Here is the solution; a PNDB module from a late model Freightliner M2 truck. This will eliminate all the fusible links and provide midi fuse protection to the alternator and all of the circuits that used fusible links. This will be much safer and clean things up nicely. I will re-pin new wires in where the chopped ones are now and make a new power harness to the PNDB. It will also feed the glow plug relays on the main supply lug from the battery. I've got the cable ends and connectors/pins for the PNDB ordered up, just need to figure out the pin part numbers in the main cab connector and get a few of those ordered.
I'll be digging thru wiring diagrams here for the next couple hours so I can size the fuses (the ones included with the module are mostly too big) properly and plan out how to make the harness for it. Stay tuned.
Being a Frieghtliner part it probably isn't as pricey as some of the others.

Registered User
Joined: Feb 2010
Posts: 1,635
Likes: 59
From: New York
Hopefully you don't junk the metal on those rusted out parts. With some minor welding you can get things to look like new with time. The only tool I wish I had was a plasma cutter.. cut off wheels are becoming a paint to cut free forms. Looks good! What kind of primer is that? 2K?

Thread Starter
Registered User
Joined: Sep 2016
Posts: 110
Likes: 86
From: Zebulon, NC
 ...I also picked up a set of 1/0 battery cables with it; to properly install the 31 series battery I've had in it for years. They have the nice insulated ends with the rubber caps. They will look sharp and be a gauge thicker than the originals. I am going to cut them to proper length and solder ends on them to fit the starter and engine ground.
Now I need to find some striped wire to match the original wiring, and build a new harness to hook up to the PNDB.
Hopefully you don't junk the metal on those rusted out parts. With some minor welding you can get things to look like new with time. The only tool I wish I had was a plasma cutter.. cut off wheels are becoming a paint to cut free forms. Looks good! What kind of primer is that? 2K?
Epoxy primer/sealer. Just enough to get it to the body shop and let my buddy work his magic.
Thread Starter
Registered User
Joined: Sep 2016
Posts: 110
Likes: 86
From: Zebulon, NC


Thread Starter
Registered User
Joined: Sep 2016
Posts: 110
Likes: 86
From: Zebulon, NC
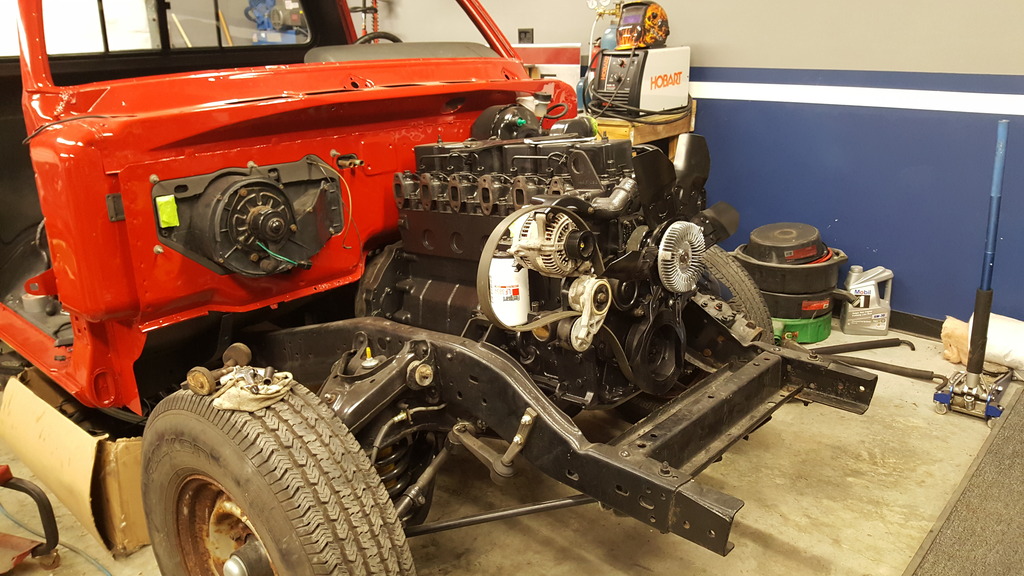
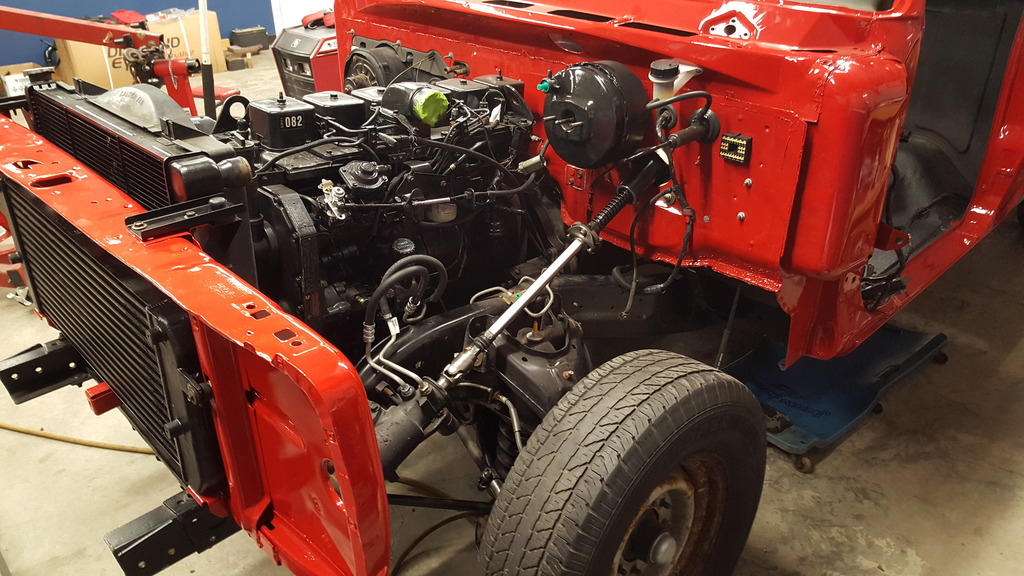
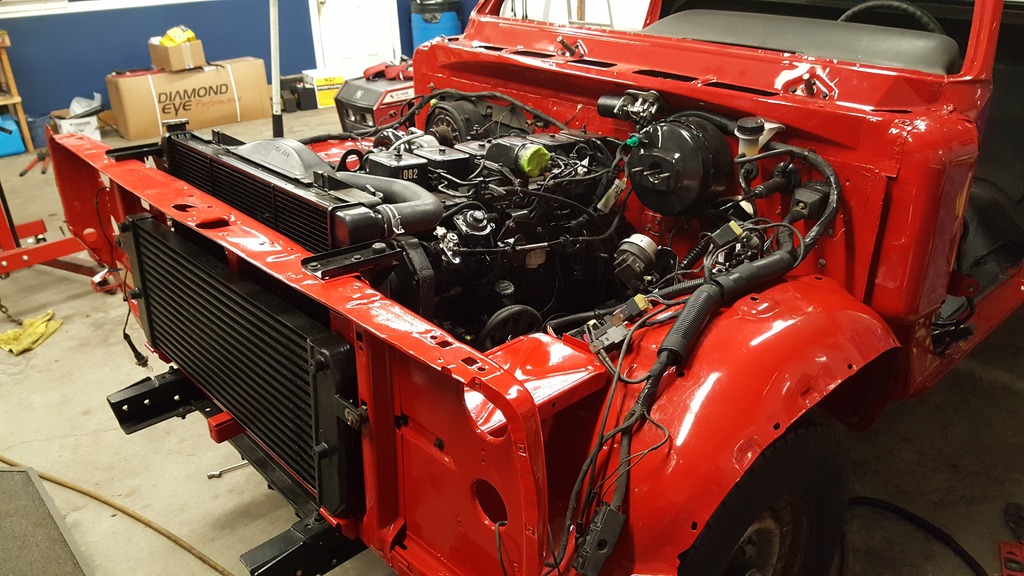
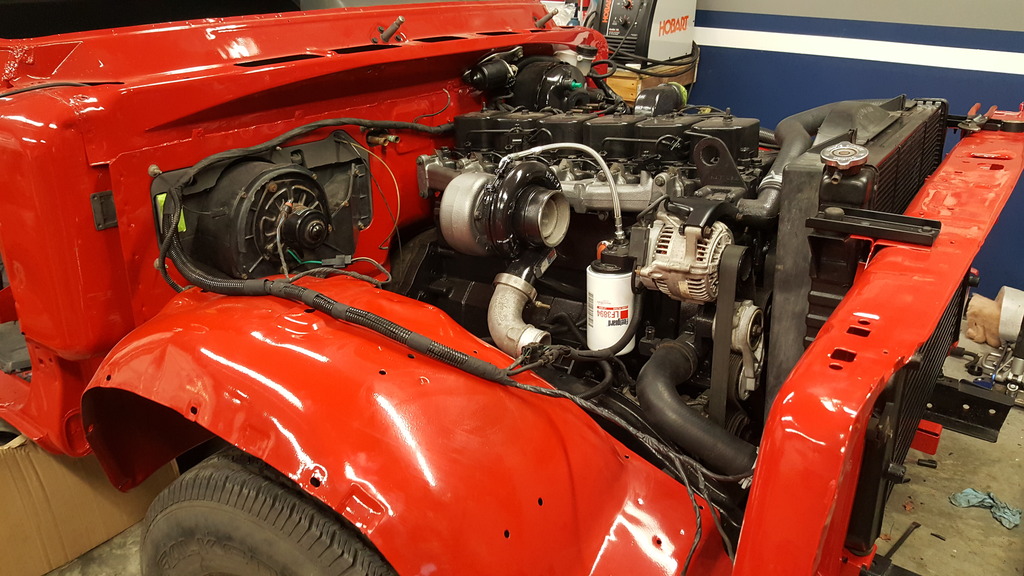
Got a few more things done. Got the engine and front wiring harness refurbished, new PNDB module installed, and all the fusible links gone. Installed new grid heater solenoids. Still waiting on parts for the battery cables, and isolators to mount the PNDB permanently where it sits; hopefully next week sometime they will be here so I can finish putting everything together.
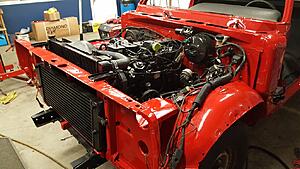
Also, turbo, exhaust manifold, wheel wells, and a ton of other small things went in. Exhaust going on Monday.

Need to find some CAC hoses. Found 2 of mine almost worn completely thru.
Also, turbo, exhaust manifold, wheel wells, and a ton of other small things went in. Exhaust going on Monday.

Need to find some CAC hoses. Found 2 of mine almost worn completely thru.

Thread Starter
Registered User
Joined: Sep 2016
Posts: 110
Likes: 86
From: Zebulon, NC
Thank you, lots of time and hard work into this thing!
Went to put on the 4" Diamond Eye exhaust today. I must say, I'm not too happy with it, mostly because of the lack of hangers. The original muffler uses 4 hangers--2 on each end, whereas this one only uses 2...this exhaust system is way too heavy to rely on just two right at the muffler, plus the factory one at the engine will no longer fit; so I've ordered two more hangers to install at the muffler, and will have to make a bracket for the one up by the engine. I didnt like the way they wanted you to drill a hole in the frame for the rear hanger either; so I will be using the original one there too. Tried it their way, (without drilling for a new hanger); couldn't get it to fit right, and I dont need to be breaking exhaust or turbo flanges due to the lack of support. Hopefully the 2 additional hangers I am adding will allow everything to center up and fit correctly.
Went to put on the 4" Diamond Eye exhaust today. I must say, I'm not too happy with it, mostly because of the lack of hangers. The original muffler uses 4 hangers--2 on each end, whereas this one only uses 2...this exhaust system is way too heavy to rely on just two right at the muffler, plus the factory one at the engine will no longer fit; so I've ordered two more hangers to install at the muffler, and will have to make a bracket for the one up by the engine. I didnt like the way they wanted you to drill a hole in the frame for the rear hanger either; so I will be using the original one there too. Tried it their way, (without drilling for a new hanger); couldn't get it to fit right, and I dont need to be breaking exhaust or turbo flanges due to the lack of support. Hopefully the 2 additional hangers I am adding will allow everything to center up and fit correctly.

Registered User
Joined: Oct 2002
Posts: 652
Likes: 5
From: Southern N.J.
Went to put on the 4" Diamond Eye exhaust today. I must say, I'm not too happy with it, mostly because of the lack of hangers. The original muffler uses 4 hangers--.[/QUOTE]
Ya, But hard to beat for the price especially if you try to build a system, **** those 4" elbows are high $$. I used a lot of the diamond eye. I throw away all but two of the 'crunch' clamps, those two I make weight support clamps out of them and just barely tighten them. I go on ebay and buy 4" stainless band clamps to put the system together with and smear all the joints with neverseez. TERRIFIC job on the truck and the pics. Crossy.
Ya, But hard to beat for the price especially if you try to build a system, **** those 4" elbows are high $$. I used a lot of the diamond eye. I throw away all but two of the 'crunch' clamps, those two I make weight support clamps out of them and just barely tighten them. I go on ebay and buy 4" stainless band clamps to put the system together with and smear all the joints with neverseez. TERRIFIC job on the truck and the pics. Crossy.
Thread Starter
Registered User
Joined: Sep 2016
Posts: 110
Likes: 86
From: Zebulon, NC
Ya, But hard to beat for the price especially if you try to build a system, **** those 4" elbows are high $$. I used a lot of the diamond eye. I throw away all but two of the 'crunch' clamps, those two I make weight support clamps out of them and just barely tighten them. I go on ebay and buy 4" stainless band clamps to put the system together with and smear all the joints with neverseez. TERRIFIC job on the truck and the pics. Crossy.
Registered User
Joined: Oct 2002
Posts: 652
Likes: 5
From: Southern N.J.
[QUOTE=. Might remove the hangers and just hold it up on jack stands to line everything up, snug it up, then mess with the hangers.[/QUOTE]
I put on one hanger loosely in front of the muffler(place) - ( which I usually replace with straight pipe) ,and then do exactly that with jackstands. I used to tack weld all of the slip joints once I got everything where I wanted it, but now I just run one small sheetmetal screw through the joints otherwise they kept slipping. Crossy
I put on one hanger loosely in front of the muffler(place) - ( which I usually replace with straight pipe) ,and then do exactly that with jackstands. I used to tack weld all of the slip joints once I got everything where I wanted it, but now I just run one small sheetmetal screw through the joints otherwise they kept slipping. Crossy
Thread Starter
Registered User
Joined: Sep 2016
Posts: 110
Likes: 86
From: Zebulon, NC
Got her fired up today!
Still waiting on my new CAC hoses, and the parts to finish up the battery cables. Installed temporary ones so I could power her up. Started right up like it had never been apart.
Still waiting on my new CAC hoses, and the parts to finish up the battery cables. Installed temporary ones so I could power her up. Started right up like it had never been apart.

