How to repair a leaking axle seal.
 01-13-2009, 05:50 AM
#1
Administrator
Thread Starter

Part-1
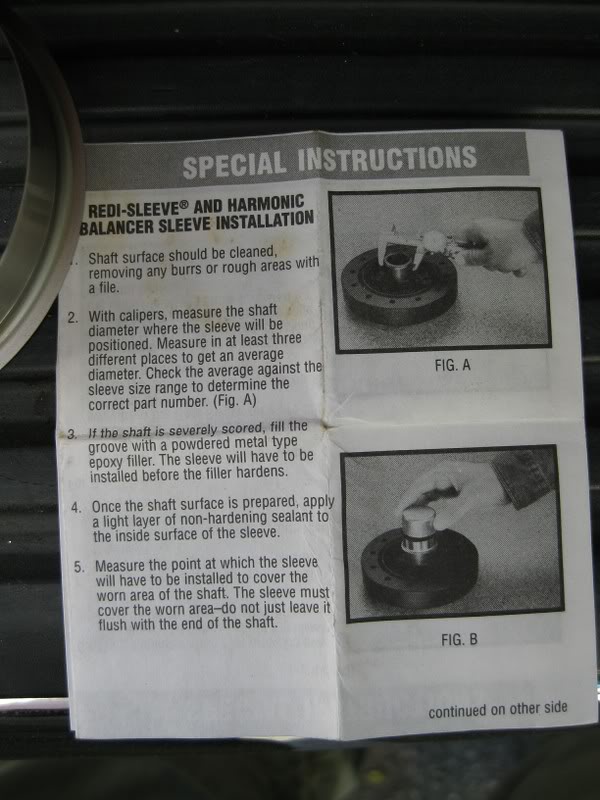
How to install a Redi-Sleeve.
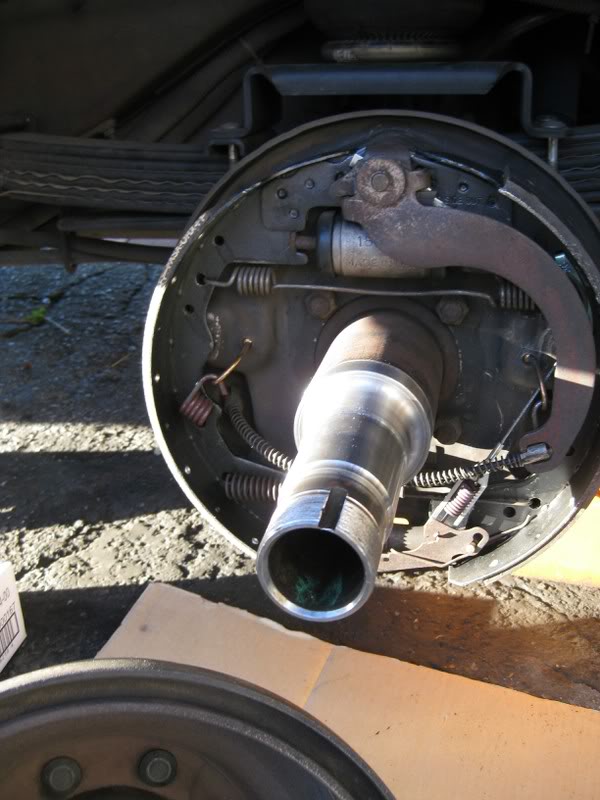
These instructions will start with front wheels chocked, the wheel and the rear drum already removed.
And the rear of the truck supported with adequate jack stands.
Remember Safety First.
You might find it helpful to print out these instructions so you can have them with you.
If you had axle lube leaking down the outside of your rear drums and replacing the inner seals did not fix the problem then you need to take a closer look at the sealing surface of the axle tube.
Sometimes when the old seal gets dried out the sealing lip can wear a grove into the hardened surface causing a leak even though you replaced the seal with a fresh one.
Sometimes you can successfully stop the leak by not seating the new seal in as deep into the hub thereby creating a new wear surface for the seal but this is difficult and if you do not seat the seal squarely in the hub it will wear unevenly as it rotates the axle tube only to cause another leak.
There is an easy fix for this,
And I am going to show you how to do it.
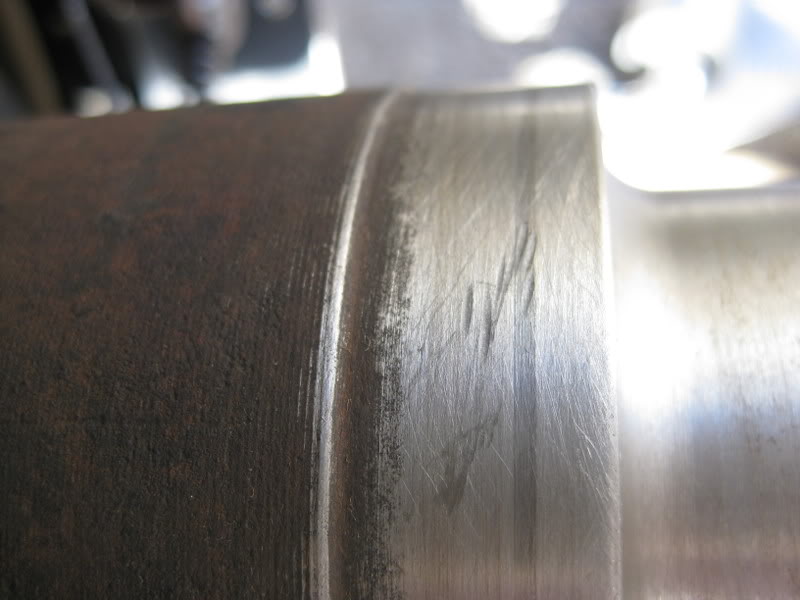
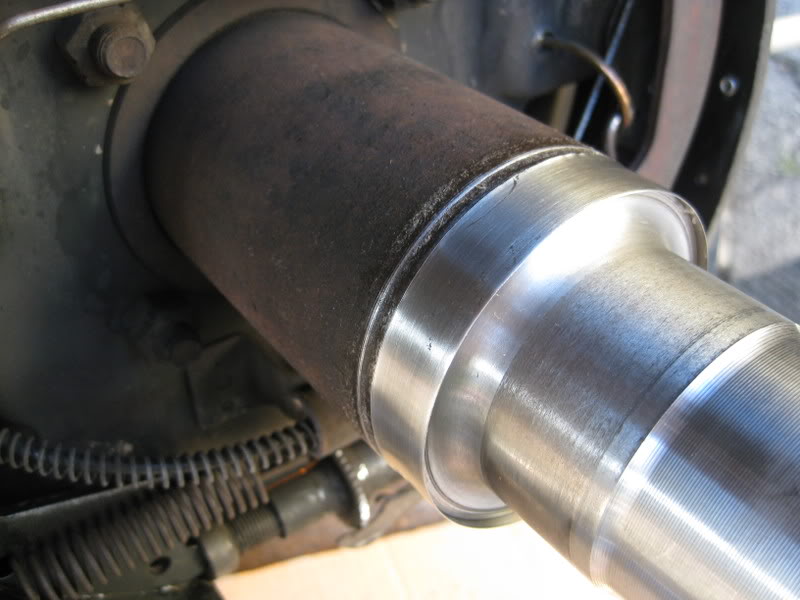
Once you have the rear drum off you need to take a look at the surface of the axle tube where the seal rides.
Here you can see there is a groove worn into the surface.
This is deep enough that you can feel it with your fingernail if you were to scrape it across the surface.
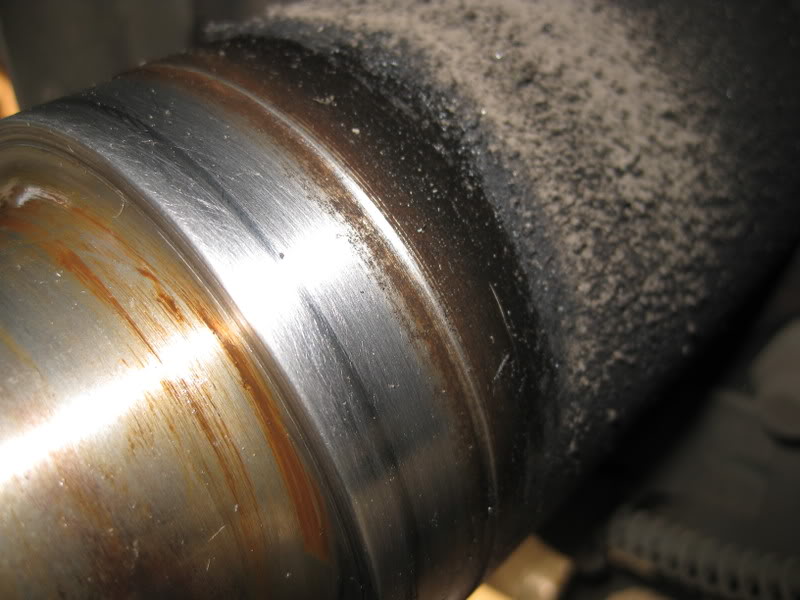
Here I used some 800-Grit Crocus Cloth and polished the surface to see how deep the grove was.
This was enough to cause a leak even with the installation of a new seal.
This is what I will use to repair the damaged surface and thereby creating a new sealing surface for the seal to ride.
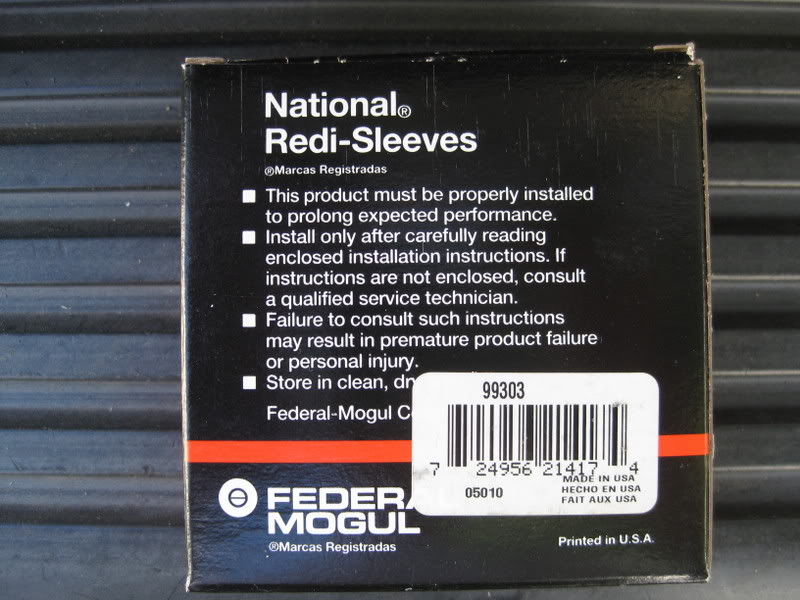
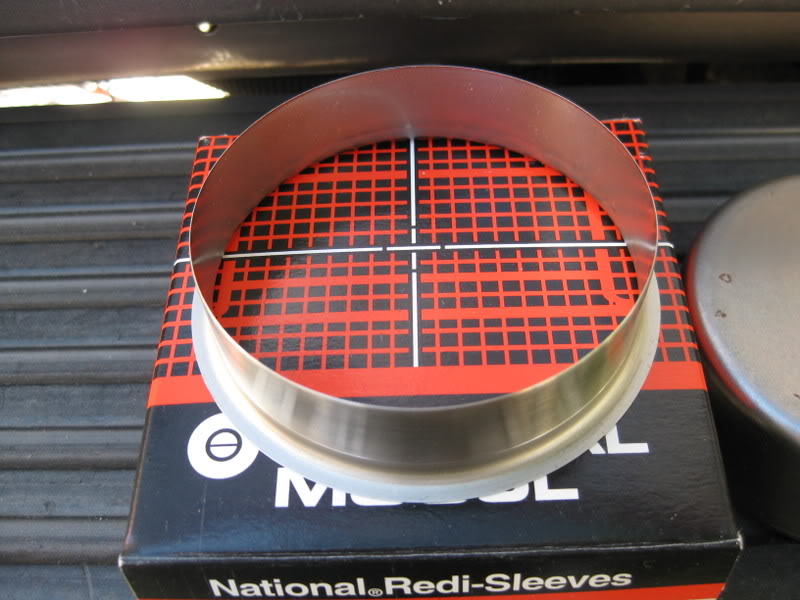
It is called a Redi-Sleeve.
This one is made by Federal Mogul,
There are others on the market by different manufactures and different names but they are all pretty much the same.
I have always used Federal Mogul Redi-Sleeve on all of my repairs on leaking axle seals and leaking Front Mains behind the Harmonic Balancer.
I am installing this sleeve on my 1991 D-350 Dana-70 with Dual rear wheels so this is the size I am using.
You need to check with your parts supplier but I am pretty certain all will use the same size axle tubes on the DRW or SRW Dana-70�s.
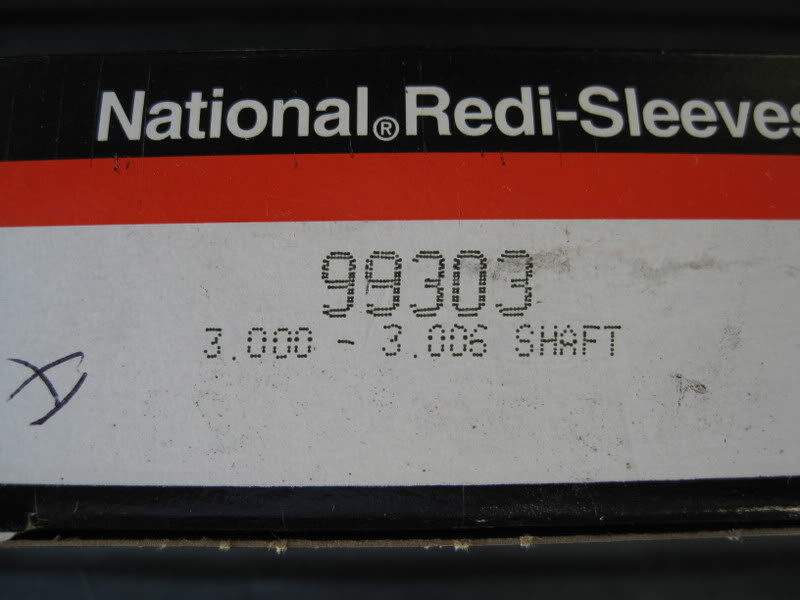
Here is the Part Number #99303
Ok here you can see what this sleeve looks like, Please handle this very carefully, it is very thin and is very sharp so gloves are advised.
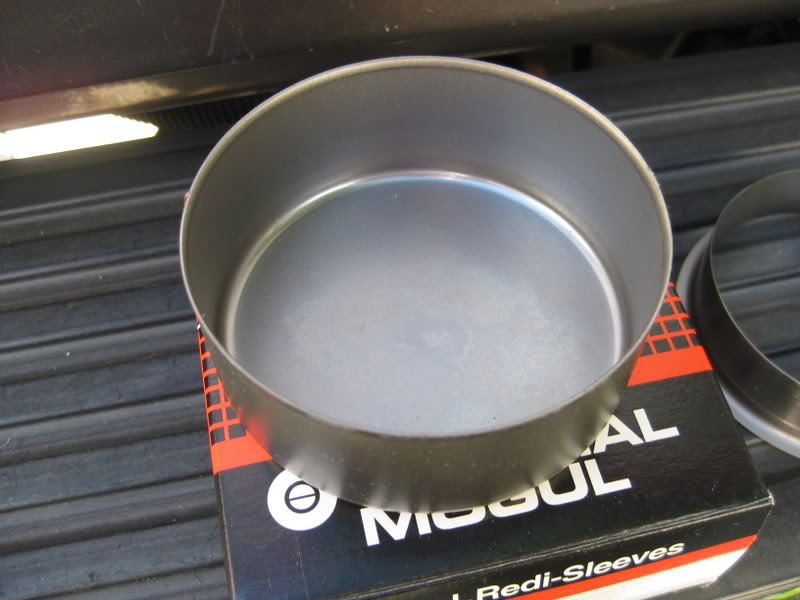
Even though this was ordered for an axle tube they still shipped the installation tool for the Harmonic Balancer, it will be completely useless for our installation but I found it is very useful around my garage.
I stick a small rare earth magnet into it and use it to keep track of small screws and bolts as I work on my truck.
Or you could use it for an ashtray if you so desired.
It also came with instructions for repair of a Harmonic Balancer which are completely useless today but there was some good reading.
Ok so let me show you how to repair a leaking axle tube.
First you want to clean up the surface, I used Lacquer Thinner and removed all of the grease, and then I polished the surface using fine Crocus Cloth.
Now you need to apply a film of a Non-Hardening Sealant to the surface of the axle tube.
I used some GE Silicone, you can also use Permatex.
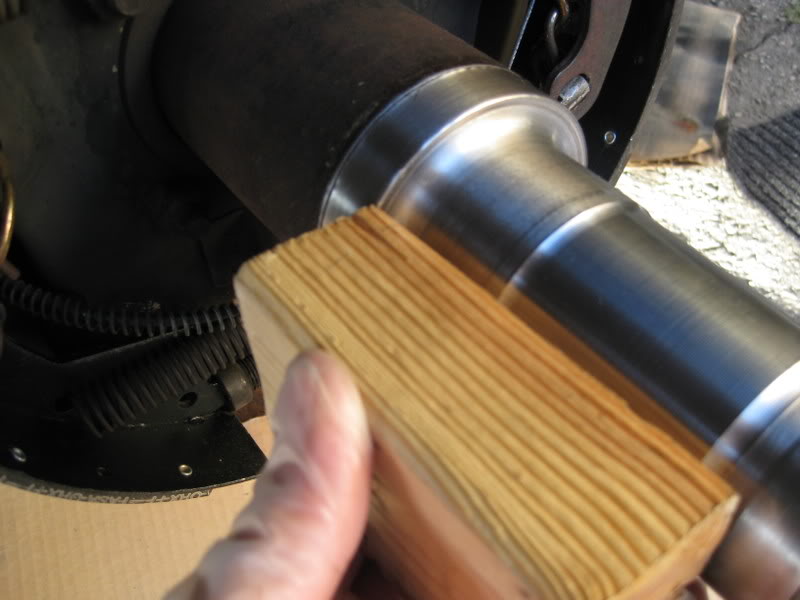
Now here is how you will drive this sleeve onto the axle tube.
By using a short section of 3� ABS sewer pipe.
By using a squarely cut end this piece of ABS will fit perfectly over the axle tube and engage onto the lip of the sleeve, now with a block of wood on the opposite end you can carefully tap this shell onto the tube taking care to keep it going on evenly.
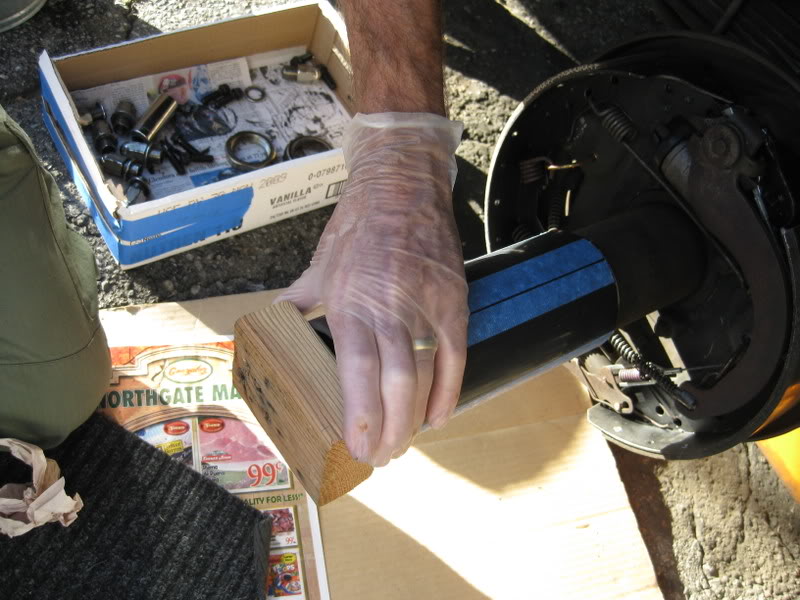
This new sleeve you are installing is actually several thousands smaller in diameter then the axle tube so you are actually stretching it over the larger tube creating a new surface.
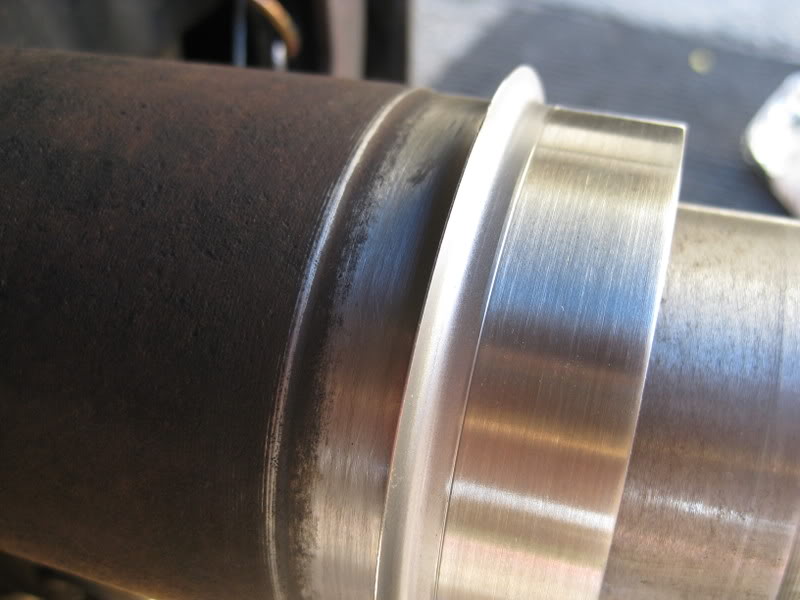
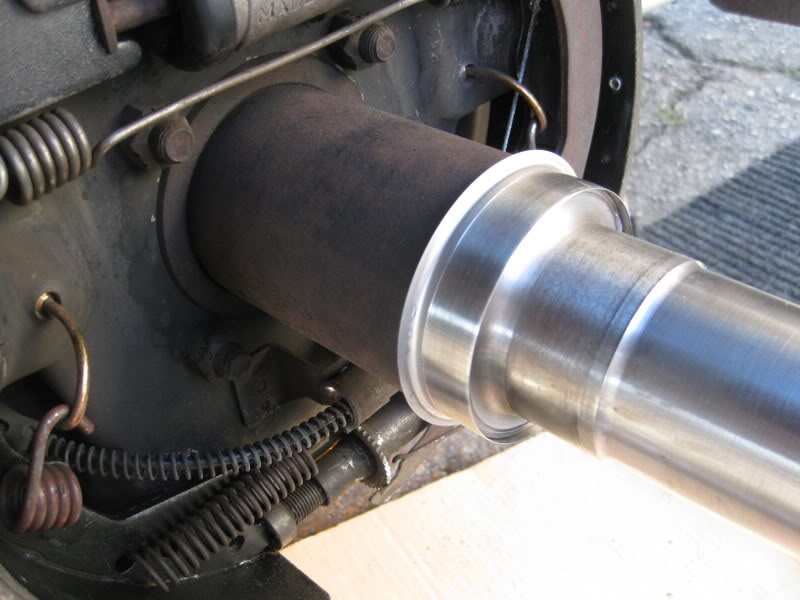
So here we have it on the tube but for some reason it is too long and it sticks over the end, it must be the wrong one.
How to install a Redi-Sleeve.
These instructions will start with front wheels chocked, the wheel and the rear drum already removed.
And the rear of the truck supported with adequate jack stands.
Remember Safety First.
You might find it helpful to print out these instructions so you can have them with you.
If you had axle lube leaking down the outside of your rear drums and replacing the inner seals did not fix the problem then you need to take a closer look at the sealing surface of the axle tube.
Sometimes when the old seal gets dried out the sealing lip can wear a grove into the hardened surface causing a leak even though you replaced the seal with a fresh one.
Sometimes you can successfully stop the leak by not seating the new seal in as deep into the hub thereby creating a new wear surface for the seal but this is difficult and if you do not seat the seal squarely in the hub it will wear unevenly as it rotates the axle tube only to cause another leak.
There is an easy fix for this,
And I am going to show you how to do it.
Once you have the rear drum off you need to take a look at the surface of the axle tube where the seal rides.
Here you can see there is a groove worn into the surface.
This is deep enough that you can feel it with your fingernail if you were to scrape it across the surface.
Here I used some 800-Grit Crocus Cloth and polished the surface to see how deep the grove was.
This was enough to cause a leak even with the installation of a new seal.
This is what I will use to repair the damaged surface and thereby creating a new sealing surface for the seal to ride.
It is called a Redi-Sleeve.
This one is made by Federal Mogul,
There are others on the market by different manufactures and different names but they are all pretty much the same.
I have always used Federal Mogul Redi-Sleeve on all of my repairs on leaking axle seals and leaking Front Mains behind the Harmonic Balancer.
I am installing this sleeve on my 1991 D-350 Dana-70 with Dual rear wheels so this is the size I am using.
You need to check with your parts supplier but I am pretty certain all will use the same size axle tubes on the DRW or SRW Dana-70�s.
Here is the Part Number #99303
Ok here you can see what this sleeve looks like, Please handle this very carefully, it is very thin and is very sharp so gloves are advised.
Even though this was ordered for an axle tube they still shipped the installation tool for the Harmonic Balancer, it will be completely useless for our installation but I found it is very useful around my garage.
I stick a small rare earth magnet into it and use it to keep track of small screws and bolts as I work on my truck.
Or you could use it for an ashtray if you so desired.
It also came with instructions for repair of a Harmonic Balancer which are completely useless today but there was some good reading.
Ok so let me show you how to repair a leaking axle tube.
First you want to clean up the surface, I used Lacquer Thinner and removed all of the grease, and then I polished the surface using fine Crocus Cloth.
Now you need to apply a film of a Non-Hardening Sealant to the surface of the axle tube.
I used some GE Silicone, you can also use Permatex.
Now here is how you will drive this sleeve onto the axle tube.
By using a short section of 3� ABS sewer pipe.
By using a squarely cut end this piece of ABS will fit perfectly over the axle tube and engage onto the lip of the sleeve, now with a block of wood on the opposite end you can carefully tap this shell onto the tube taking care to keep it going on evenly.
This new sleeve you are installing is actually several thousands smaller in diameter then the axle tube so you are actually stretching it over the larger tube creating a new surface.
So here we have it on the tube but for some reason it is too long and it sticks over the end, it must be the wrong one.
 01-13-2009, 05:51 AM
#2
Administrator
Thread Starter
Part-2
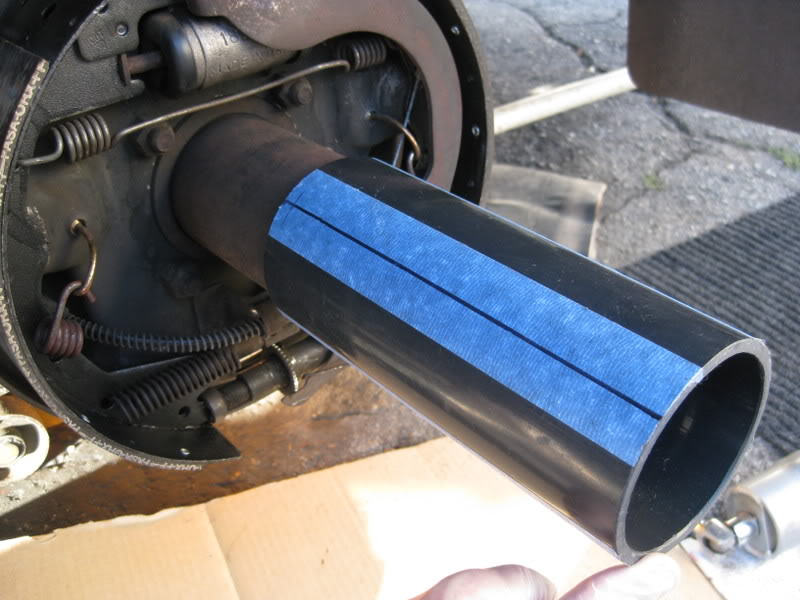
Here you can see how my custom installation tool looks, you can get this at Home Depot of any Hardware or Plumbing Supply for a few dollars if you don�t already have some lying around.
It is common 3� ABS Sewer Pipe
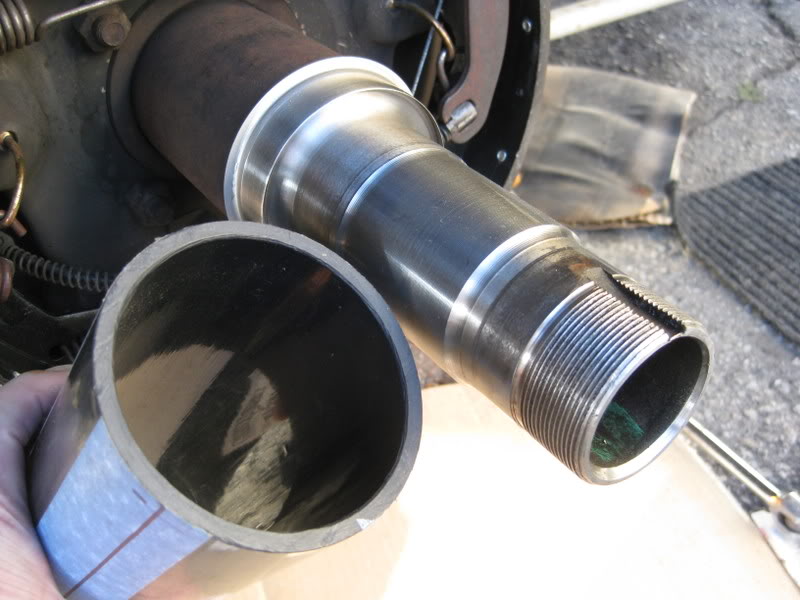
Cut yourself a piece long enough to extend a few inches past the end of the axle tube, this makes it easy to handle as you are installing it.
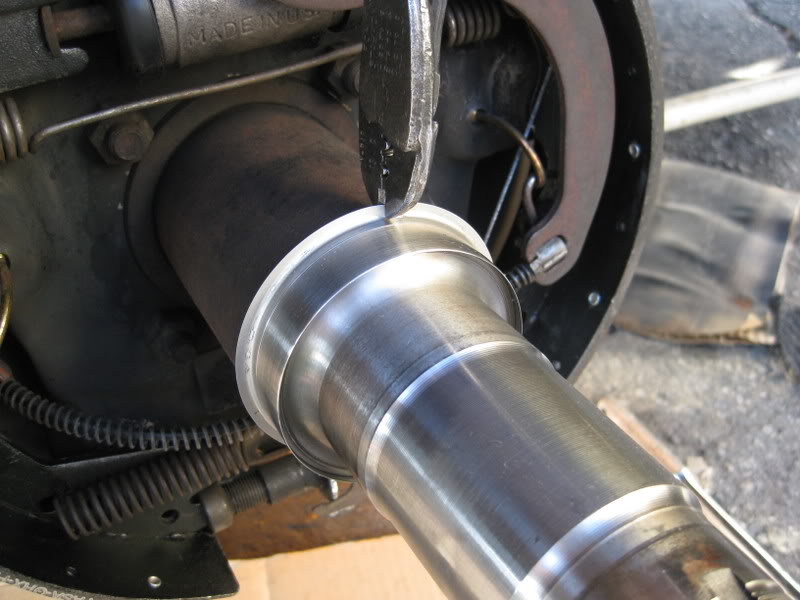
Ok back to the installation, it really isn�t the wrong part; we just need to finish the install.
Here you see the extended lip that was used to engage the driving tool.
It is no longer needed for anything and will get in the way if you left it there.
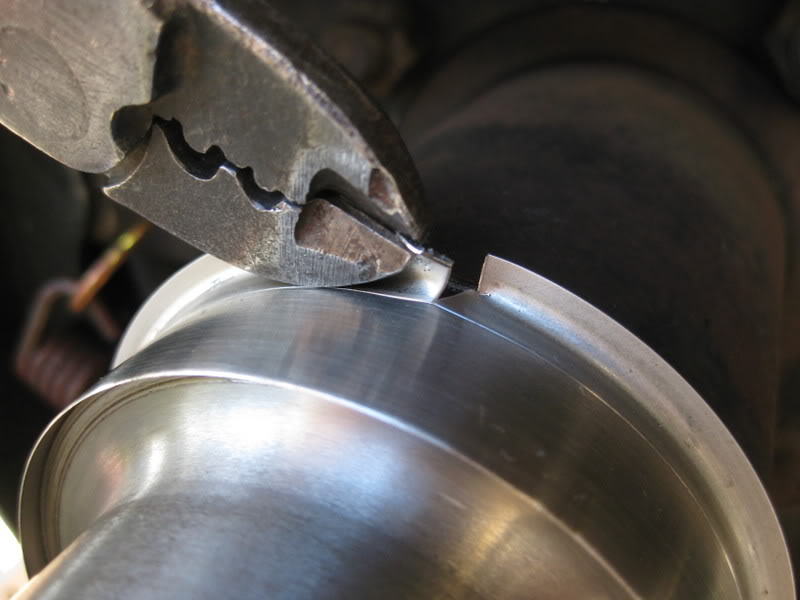
So now we can remove it by cutting through the edge with a good pair of high leverage cutters, I nipped through the rim in several places.
Then using the same I carefully peeled back the rim by twisting back till it broke through back to the score line.
Be very careful here because you don�t want to damage the new surface and this is very sharp.
After you have it peeled back using the heavy cutters.
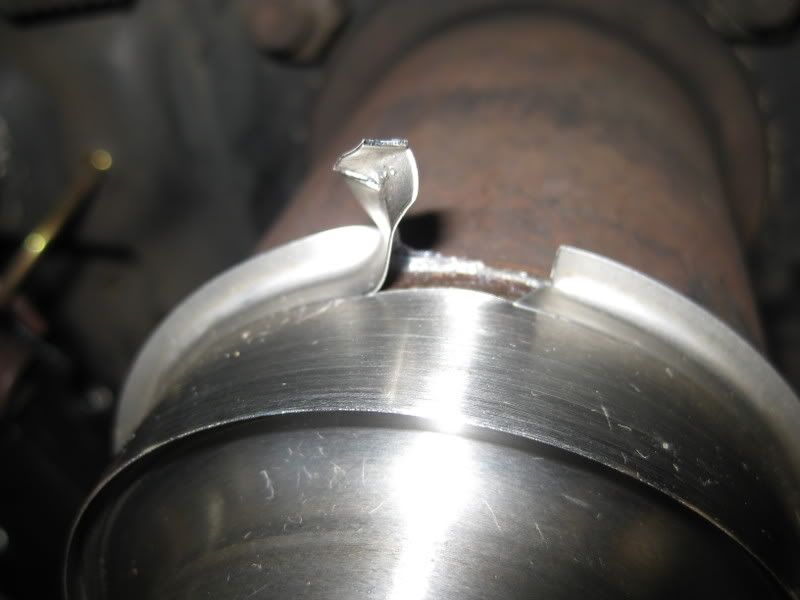
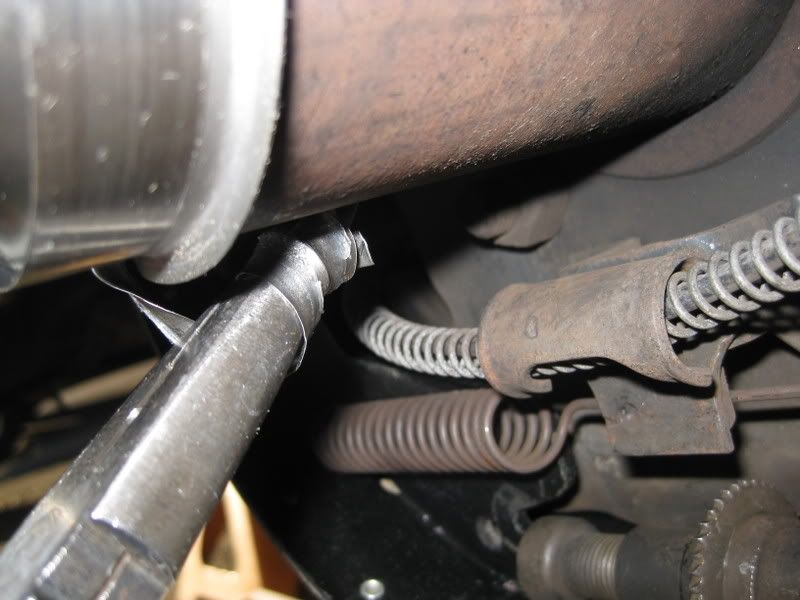
You can to continue to peel it off by using needle nose pliers, see how I am twisting I the metal off as I unwinding it from around the axle tube.
You need to take care to only peel off the rim and not the sleeve.
If you are old enough just imagine unwinding the seal from a can of SPAM and the pliers is the key.
Now that it is off you can see it looks to be about as much room we need to finish installing the sleeve.
Now how in the world will we do that?
This is not in any of the instructions; I figured this out on my own.
With a block of wood.
Here you need to be very careful as this is very this and very sharp, it is like playing with the sharp edge of a razor blade.
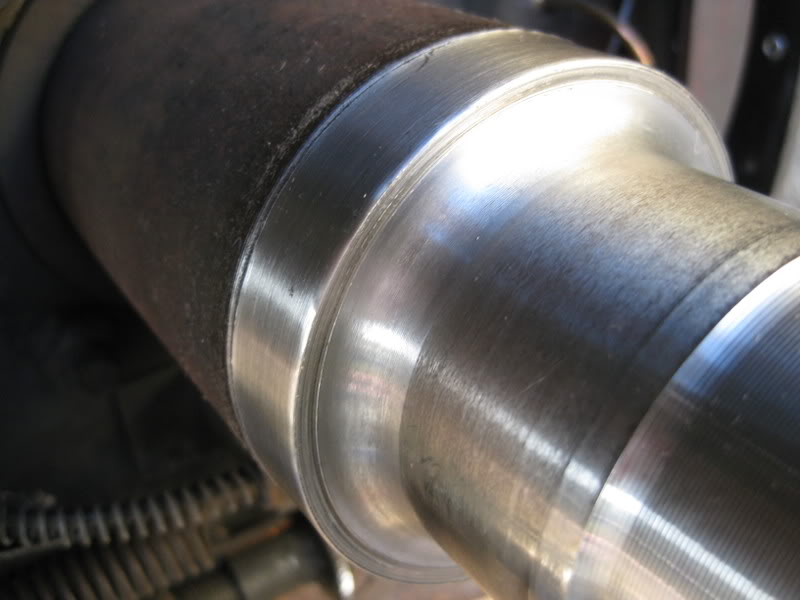
Use the end of the grain against the protruding edge and hold it flat against the tube then very gently tap the block with a hammer.
A tap at a time and then move the block about 90* and tap it again taking care not to collapse the sleeve as you go.
Soon it will be flush.
This is what it should look like when you are finished.
It will still have a very sharp edge so what I did was to very carefully dress the sharp edges with a small flat file.
What I did was take a piece of steel and smooth down the edge of the sleeve where it protruded over the end of the tube to mould it down to the tube and leave no sharp edges.
Wear heavy gloves if you do this.
Congratulations, you repaired your own damaged axle tube.
Now all you need to do is to reinstall your brake drum using your existing inner seal that has been driven to its proper depth.
Be sure to rubricate the lip of the seal using gear oil.
Materials needed:
1) Redi-Sleeve Federal Mogul Pn #99303 Cost about $25.00 from your local Auto Parts. Places like Auto Zone probably won�t have these, you need to go oh a real auto parts like Napa.
1)Length of 3� ABS Sewer Pipe from Plumbing supply.
Non-Hardening Sealant
Block of wood
I hope this will give you the confidence to repair your own leaking seal using common tools found in your shop.
Time to install this repair kit after you have the drum off is about 15 minuets.
Thanks for letting me share this bit of knowledge with you.
Jim
Here you can see how my custom installation tool looks, you can get this at Home Depot of any Hardware or Plumbing Supply for a few dollars if you don�t already have some lying around.
It is common 3� ABS Sewer Pipe
Cut yourself a piece long enough to extend a few inches past the end of the axle tube, this makes it easy to handle as you are installing it.
Ok back to the installation, it really isn�t the wrong part; we just need to finish the install.
Here you see the extended lip that was used to engage the driving tool.
It is no longer needed for anything and will get in the way if you left it there.
So now we can remove it by cutting through the edge with a good pair of high leverage cutters, I nipped through the rim in several places.
Then using the same I carefully peeled back the rim by twisting back till it broke through back to the score line.
Be very careful here because you don�t want to damage the new surface and this is very sharp.
After you have it peeled back using the heavy cutters.
You can to continue to peel it off by using needle nose pliers, see how I am twisting I the metal off as I unwinding it from around the axle tube.
You need to take care to only peel off the rim and not the sleeve.
If you are old enough just imagine unwinding the seal from a can of SPAM and the pliers is the key.
Now that it is off you can see it looks to be about as much room we need to finish installing the sleeve.
Now how in the world will we do that?
This is not in any of the instructions; I figured this out on my own.
With a block of wood.
Here you need to be very careful as this is very this and very sharp, it is like playing with the sharp edge of a razor blade.
Use the end of the grain against the protruding edge and hold it flat against the tube then very gently tap the block with a hammer.
A tap at a time and then move the block about 90* and tap it again taking care not to collapse the sleeve as you go.
Soon it will be flush.
This is what it should look like when you are finished.
It will still have a very sharp edge so what I did was to very carefully dress the sharp edges with a small flat file.
What I did was take a piece of steel and smooth down the edge of the sleeve where it protruded over the end of the tube to mould it down to the tube and leave no sharp edges.
Wear heavy gloves if you do this.
Congratulations, you repaired your own damaged axle tube.
Now all you need to do is to reinstall your brake drum using your existing inner seal that has been driven to its proper depth.
Be sure to rubricate the lip of the seal using gear oil.
Materials needed:
1) Redi-Sleeve Federal Mogul Pn #99303 Cost about $25.00 from your local Auto Parts. Places like Auto Zone probably won�t have these, you need to go oh a real auto parts like Napa.
1)Length of 3� ABS Sewer Pipe from Plumbing supply.
Non-Hardening Sealant
Block of wood
I hope this will give you the confidence to repair your own leaking seal using common tools found in your shop.
Time to install this repair kit after you have the drum off is about 15 minuets.
Thanks for letting me share this bit of knowledge with you.
Jim
The following users liked this post:
grwynn5592 (11-18-2022)
01-13-2009, 06:10 AM
#3
Thank you Jim.
This was an enjoyable read.
This was an enjoyable read.

Trending Topics
01-13-2009, 05:08 PM
#8
Registered User
Awesome write up! I am the type of guy who learns better by doing then reading but pics really helped on this one! I hope I dont sound stupid! Can you do another on installing a 60mm pinwheel and a 16cm housing in our first gens? I have never messed with a turbo, I do know the clearences are a big issue! Can anyone tell me how long should it take someone who knows what they are doing to do this? Saying they dont run into problems like breaking off a housing bolt!
 01-14-2009, 02:34 AM
#12
Administrator
Thread Starter
Awesome write up! I am the type of guy who learns better by doing then reading but pics really helped on this one! I hope I dont sound stupid! Can you do another on installing a 60mm pinwheel and a 16cm housing in our first gens? I have never messed with a turbo, I do know the clearences are a big issue! Can anyone tell me how long should it take someone who knows what they are doing to do this? Saying they dont run into problems like breaking off a housing bolt!
Upgrading the compressor side of the turbo was incredibly simple, everything came apart with a gentle tap to the housing, maybe I was just lucky but I think a clean engine is allot easier to work on.
Building my crossover pipe is what took the time.
I could have simply bent the pipe but I wanted to at least try something different.
The trick is to have the proper tools, don't have parts lying all over the engine bay and don't forget the compressor nut is a LEFT hand thread.
Jim
08-31-2009, 09:30 PM
#13
Registered User

Join Date: Jan 2003
Location: Minneapolis, MN
Posts: 219
Likes: 0
Received 0 Likes
on
0 Posts
FYI, I have a 1993 SRW W250 w/ Dana 70. I purchased a 3-3.006 sleeve and it is too large. I need to determine what size the axle is, once I do I will be certain to add this info here.
05-01-2011, 06:55 PM
#14
Registered User

For those of you with single rear wheel axles (Dana 70), the sleeve that fit my 93 was Napa/SKF part number 99287. The last 3 numbers are the diameter of the surface, also useful in getting the right seals. Also, since the catalogs are so horrible for these trucks, the proper bearing part numbers for the SRW trucks are Timken: Outer LM 104949 (Set 38). Inner 28682 for the bearing, 28622 for the race. These numbers cross reference to National also.
05-02-2011, 05:13 AM
#15
hey-Hey!!!,
Just like jerseybud I also have an axle with 2.875" seal journals. They were very badly pitted with rust and I spead some JBWeld on before driving on the SpeediSleeve; I wanted the sleeve supported under the pits...and for it not to leak under the sleeve.
cheers,
Douglas
Just like jerseybud I also have an axle with 2.875" seal journals. They were very badly pitted with rust and I spead some JBWeld on before driving on the SpeediSleeve; I wanted the sleeve supported under the pits...and for it not to leak under the sleeve.
cheers,
Douglas

Thread
Thread Starter
Forum
Replies
Last Post