How I installed a 2nd gen intercooler into a non-IC truck, with basic hand tools
 01-21-2008, 12:01 AM
#16
Registered User
Thread Starter
Join Date: Mar 2006
Location: WY
Posts: 2,319
Likes: 0
Received 0 Likes
on
0 Posts
..........(99-02)
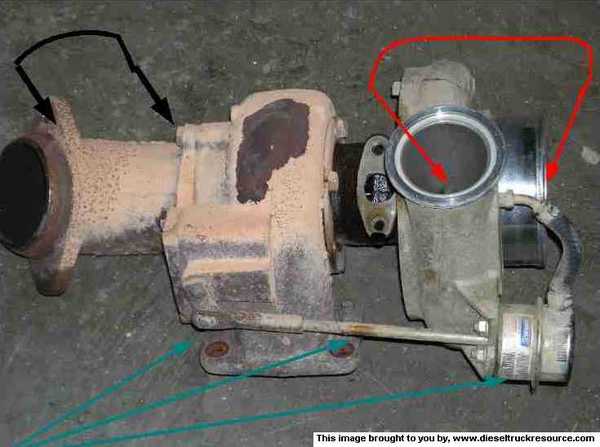
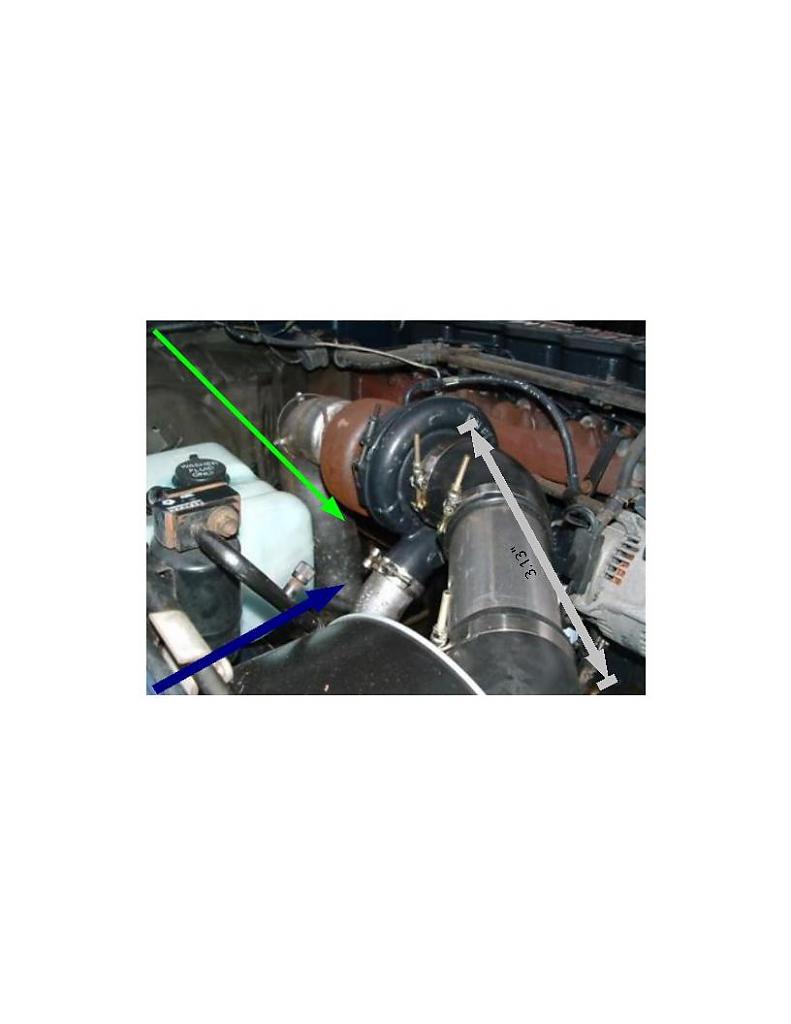
HX35 (24V): Black, arrow= bolt on elbow or down pipe (no clamp) Red arrow= V clamp outlet and 4" inlet of Compressor side of turbo. Turquoise arrows show the different way the waste gate attach's to the compressor housing
All so, note, the flange that bolts to the exhaust manifold has 2 stud and to holes..........
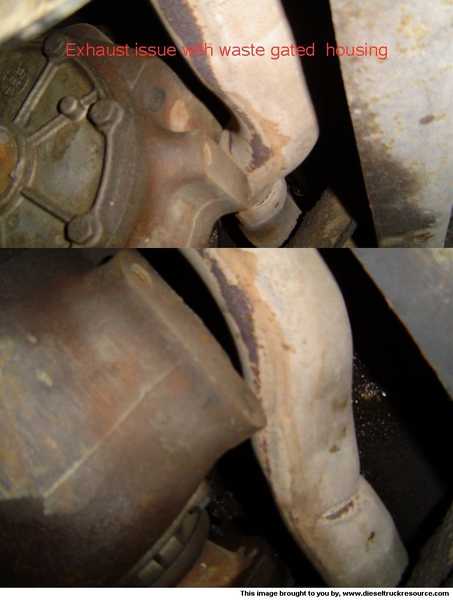
This will be the most difficult of all the previous turbos to install on our trucks.
You will have to deal with the same issues with the exhaust PLUS!
#1: you will need to remove the two studs in the turbo and, A, Remove 2 studs in the exhaust manifold, install 2 smaller diameter bolt and nuts or,... B, Drill the threads out of the flange of the turbo so, our 4 studded manifold will bolt up!
#2: The waste gate rod will get in the way, when you try to installing the oil drain tube back on the turbo.
You can A, bend the tube to fit or clear the waste gate rod....or.... B, my preferred way to deal with it...........simply buy the 2nt gen drain tube and install it!!!!!!
If you want to go with a different turbo then the one's i have suggested .........Why Not, Go for it,....
I Just have no knowledge on the bigger turbos..........so your on your own there.
As the picture said.......................
here, and or, the fire wall is the most common places for clearance issues
here, and or, the fire wall is the most common places for clearance issues
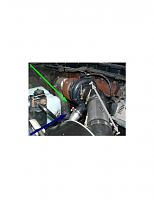
As you can see here I'm using and �2nt gen exhaust brake� on mine,and its on the tight side
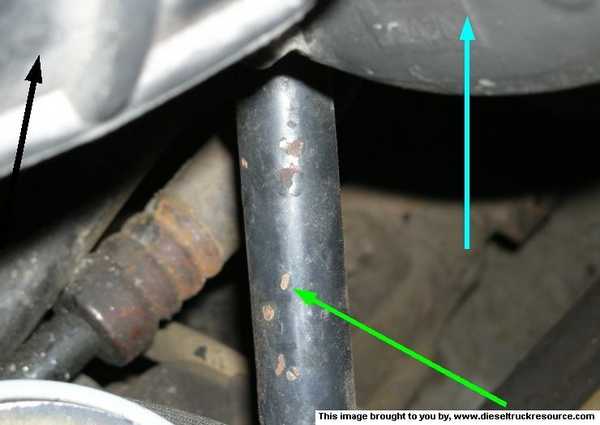
Green arrow=turbo drain tube. Black= tube from air filter to turbo. Blue=Compressor housing were waste gate actuator would be if it was a (24V)HX35 Only 24v HX35 will have a problem with the factory drain tube.
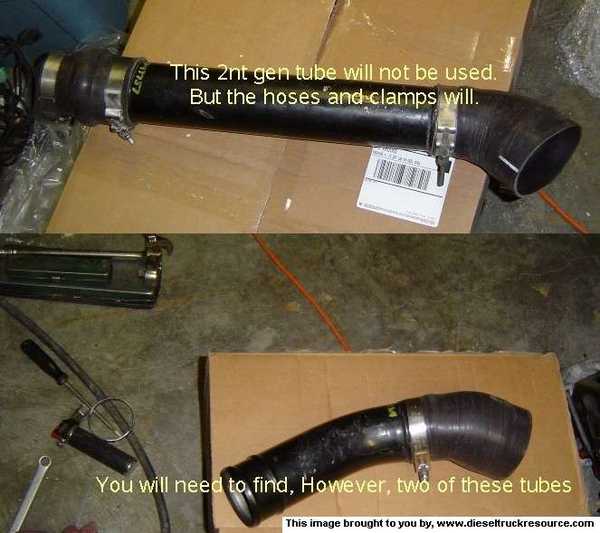
The lower tube in the picture above, will be used on the R or passenger side, HOWEVER, this metal tube will be used on the L or drivers side also. All factory 2nt gen part will be use......Except the intake air horn and the long tube above....Yes that means you will need to get (2) of the lower metal tube to complete this project as well as a intake air horn that will fit this combo
The hard ( and most likely, more expensive in the end!!!) way to make the "cool" or drivers side piping work!!!!
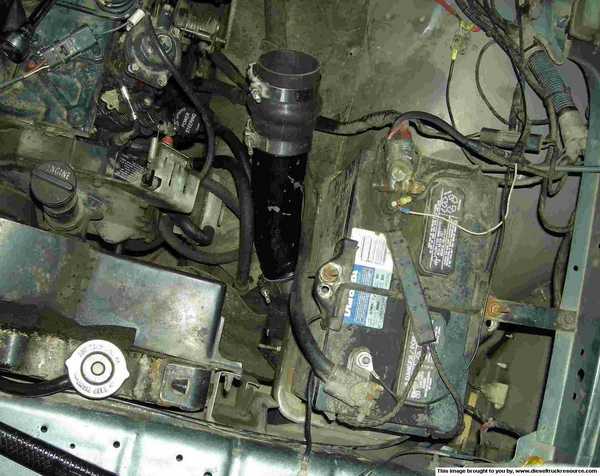
The battery and tray, must be removed (and relocated) for the large tube and 2nt get air horn to work............and then you need the intake plate off of a 1st gen intercooled Eng..............then you need injector lines off of a 1st gen intercooled truck. Because they have to be routed differently, to make it around the new intake air heater position.................................Hmmmmmm, now that reinforcement off of the 2nt gen air horn,........Yeah it will have to be cut off. (You can't us the injector lines off of a 2nt gen (because they us a different injection pump) then theres the spacing problem between the air horn and the tube.................
") for a simple bolt on project, it's not that simple now is it
for a simple bolt on project, it's not that simple now is it
You could us a 1st gen intake plate, Inj likes, air horn and tube.......then get a 4" to 2.5 reducer hose. and you still have a length Issue to deal with.
Unless you have a donor truck.....this could get real expencive.............just to add a bottle neck in you intercooler system

THERE IS A MUCH BETTER WAY TO DO THIS!!!!!!!!
AND I WILL GET TO IT IN JUST A MINUTE!
 01-21-2008, 12:45 AM
#17
Registered User
Thread Starter
Join Date: Mar 2006
Location: WY
Posts: 2,319
Likes: 0
Received 0 Likes
on
0 Posts
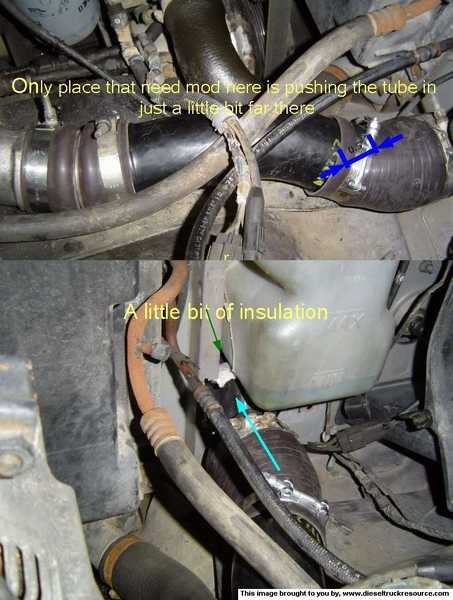
Hot side done with vary little modification required! Were indicated, need to be push into the boot �" further then stock
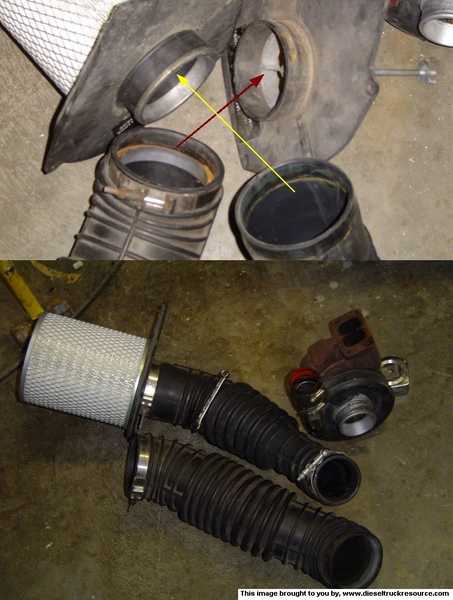
Now for the filtered air..........the factory air box can be use..........However the part that the filter hooks on to, will need to be swamped out for the intercooled version, as well as the rubber tube that go's from the air filter to turbo. If you want to "delete" this step and go directly to a �BHAF�(instruction found in Sticky) then non of this, is of impotence.
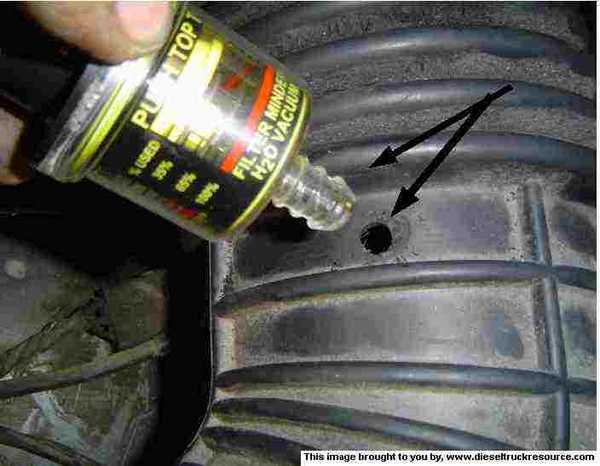
This next step is PURELY Optional!
But, is what i did to mine.
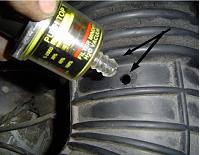
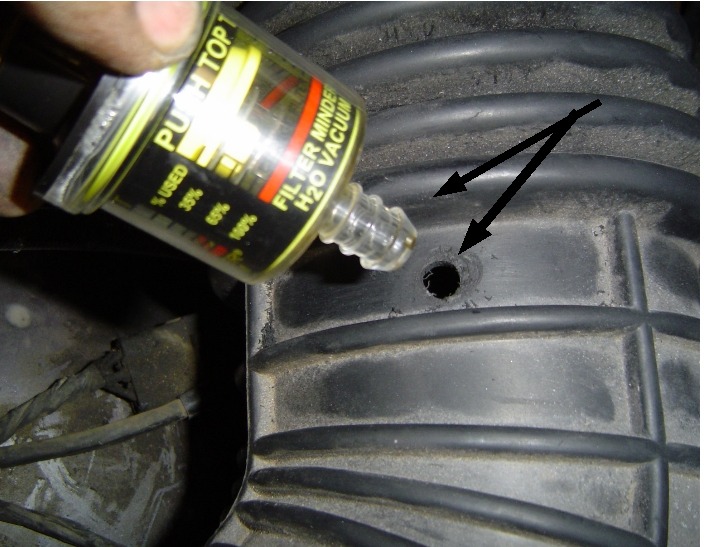
Get a drill bit about half the size of a filterminder nipple, then drill it out, lube it well and push it in with a twisting motion.
You want the hole small enough that you don't have to worry about air(and dirt) getting past, if your filter get plugged up before you notates the filter minder is telling you it is dirty!
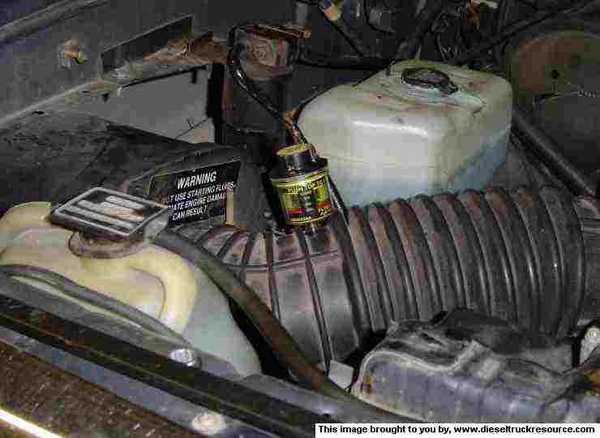
Finished product!
Now the driver side.........How are we going to avoid all the work it is going to require to get it from the intercooler to the heat grid or intake.................................
Well if you use the factory boots, clamps and a second (R) tube, you're half way there. The right side tube is shaped perfectly to maneuver around the battery tray on the (L) side or drivers side. The factory upper boot go's on top of that.............................................. .................Now how do we get it from there to the intake
Well, i don't have pic of the final product..............so your just going to have to wait.......
 01-22-2008, 02:12 PM
#18
Registered User
Thread Starter
Join Date: Mar 2006
Location: WY
Posts: 2,319
Likes: 0
Received 0 Likes
on
0 Posts
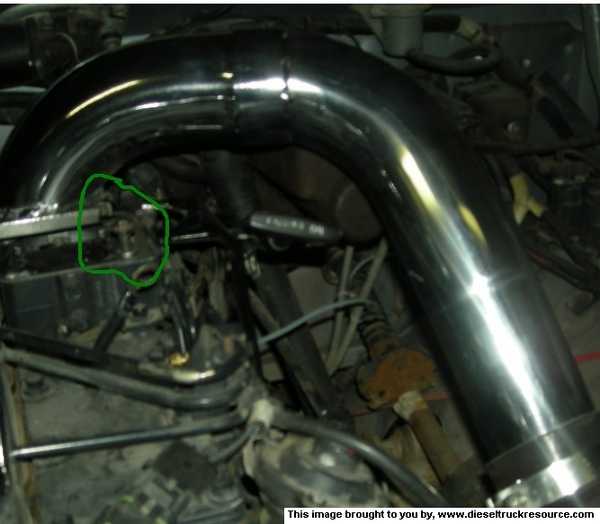
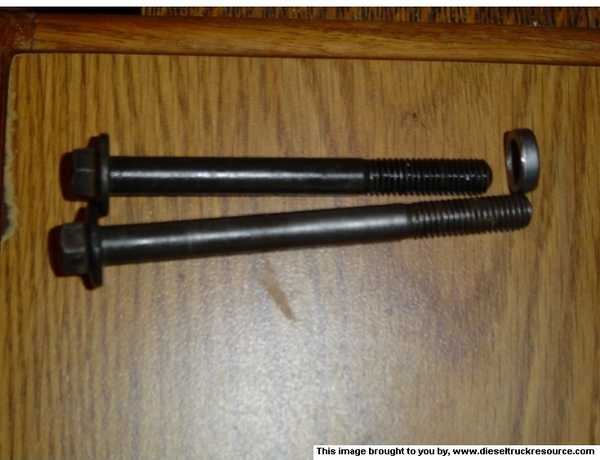
This picture, I forgot to put in above, for the right side, or passenger side, lower mount.
The lower mount will need a couple of washer to keep it square, as it start to curve at this point!
A picture of the hole size
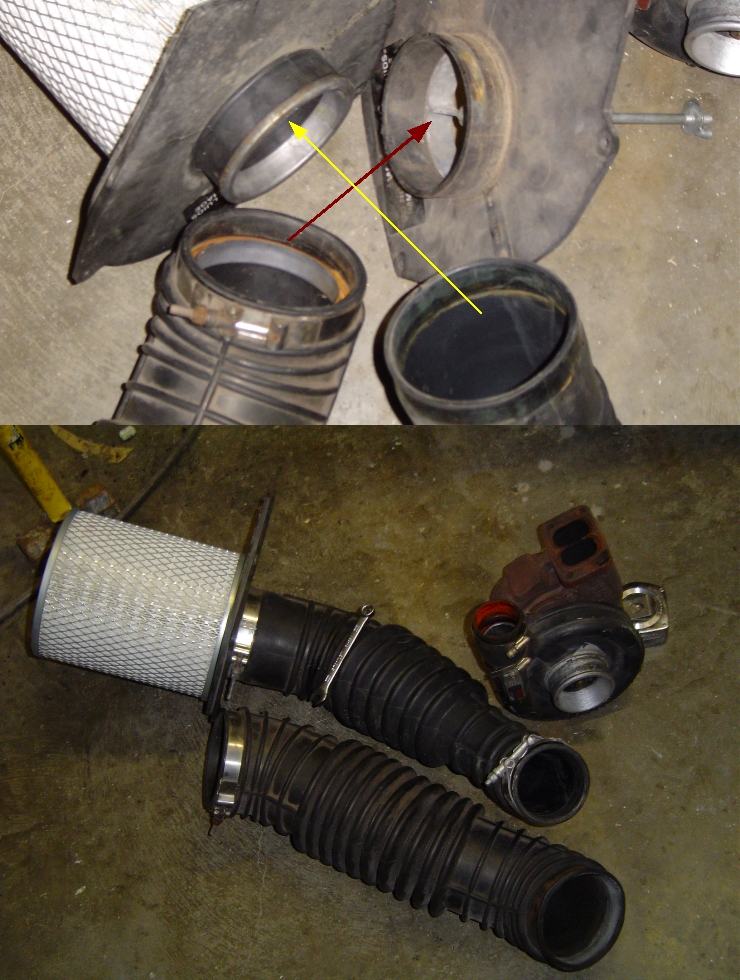
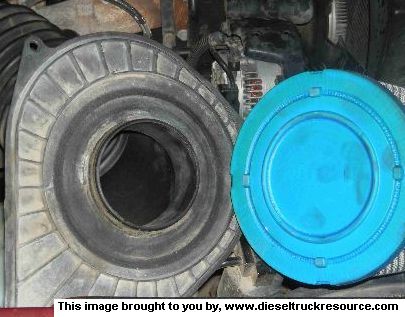
Some more pictures of the differences between non and intercooled air filter housing.
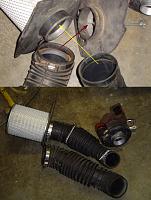
Note: the lip that the non intercooled housing has, that the intercooled one Don't............and the insert that the intercooled tube has.
Thats why you have to have Both Pieces!
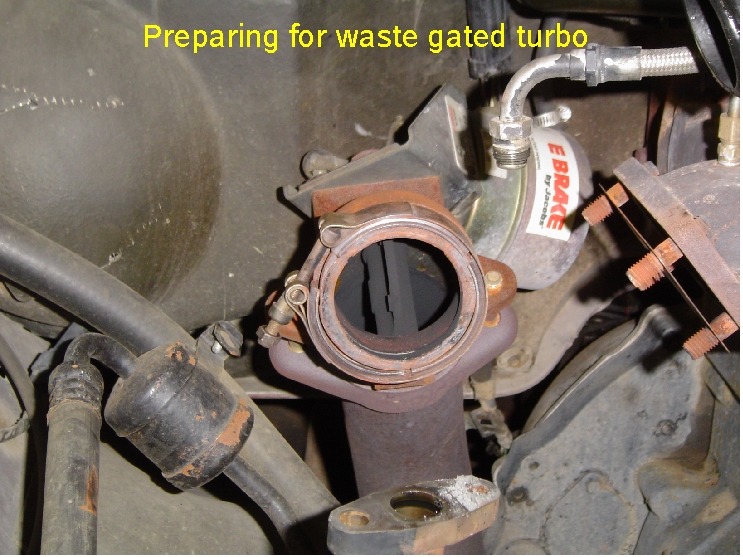
A picture of my turbo removed

And the inside of a Jacobs Exhaust Brake Elbow.
1st gen, intercooled h1c turbo
This is the one that will take no mod's. "Just bolt it on!!!!!"
To identify it: No waste gate on turbin. or hot side= Green. V clamp on the compressor outlet= Blue
and if you click on it, so it get bigger. you will see the custom air intake..........THE NON INTERCOOLED FILTER HOUSING WILL WORK MUCH BETTER WITH THIS STYLE, THEN THE INTERCOOLED ONE THAT HAS NO BEAD ON IT.= Gray
-----------------------------------------------------------------------

The lower mount will need a couple of washer to keep it square, as it start to curve at this point!
A picture of the hole size
Some more pictures of the differences between non and intercooled air filter housing.
Note: the lip that the non intercooled housing has, that the intercooled one Don't............and the insert that the intercooled tube has.
Thats why you have to have Both Pieces!
A picture of my turbo removed
And the inside of a Jacobs Exhaust Brake Elbow.
1st gen, intercooled h1c turbo
This is the one that will take no mod's. "Just bolt it on!!!!!"
To identify it: No waste gate on turbin. or hot side= Green. V clamp on the compressor outlet= Blue
and if you click on it, so it get bigger. you will see the custom air intake..........THE NON INTERCOOLED FILTER HOUSING WILL WORK MUCH BETTER WITH THIS STYLE, THEN THE INTERCOOLED ONE THAT HAS NO BEAD ON IT.= Gray
-----------------------------------------------------------------------
 01-30-2008, 11:49 PM
#21
Registered User
Thread Starter
Join Date: Mar 2006
Location: WY
Posts: 2,319
Likes: 0
Received 0 Likes
on
0 Posts

As you can see the blue backing of the 93 has no hole for a wing nut were as the 92 and older (chrome) has a hole were a rod go's thru the filter and is held in place with a wing nut.
The 93 requires the force of the outer shell and 3 plastic wing nut to seal filter.
As you can see here, there is no cross section or long rod sticking out the air cleaner lid.
OK final step and a much easier way of doing it!
First a little story

Tim Worline and I have been playing Mail tag with a custom special design intake tube(CoolerTubz) to make life easier for YOU!!!!!!

We have whent thu a lot of trial and errors and even one miss-hap that required a new slate, to make this a simple, nice fit. And as little modification as possible.
Tim makes several of these custom 3" stainless steel CoolerTubz. that fit first, 2nt and even 3nt gen engs.......he's even makes one for the intercooler guys that have installed the P/S intercooler.
But unfortunately NUN of these designs would work for my application.
So fast forward to today. I have a beautifully polished stainless steel "CoolerTubz" for my application and Tim has a template to make More!!!!!
Note: I'm in no way part of Tim's CoolerTubz, Nora have I, or will I be receiving any benefit there of. I am simply showing you how i did it. and giving you a avenue to do the same, if you wish.
 01-31-2008, 11:28 AM
#23
Registered User
Thread Starter
Join Date: Mar 2006
Location: WY
Posts: 2,319
Likes: 0
Received 0 Likes
on
0 Posts
Yes, 89-92 has a wingnut..............93 only...... is the only one that does not have a wingnut.............and there is no hole in the back of it..........See picture above.
I put theses pic up because if you were not paying attention and the parts guy gave you a 92 or older filter for a 93..................You would have a big hole in the back to let ALL the dirt in
The old filter was a 92 or older and the one i put back in was a 93.......for a 93 truck................this is some thing that could be over look vary easy on 93..........
02-03-2008, 11:54 PM
#24
Registered User
Thread Starter
Join Date: Mar 2006
Location: WY
Posts: 2,319
Likes: 0
Received 0 Likes
on
0 Posts
Here is a pic of one of the proto types that shows just how much bigger Tim's CoolerTubz is compared to the stock cross over tube.
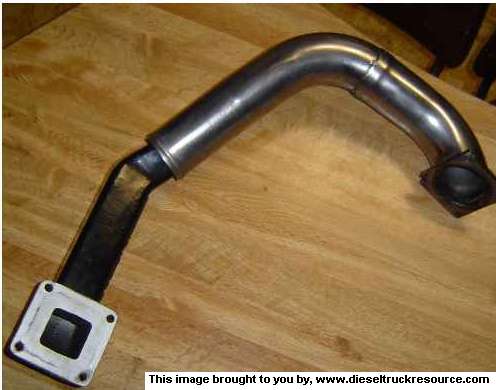
And another close up, of just how much bigger, this CoolerTubz is.
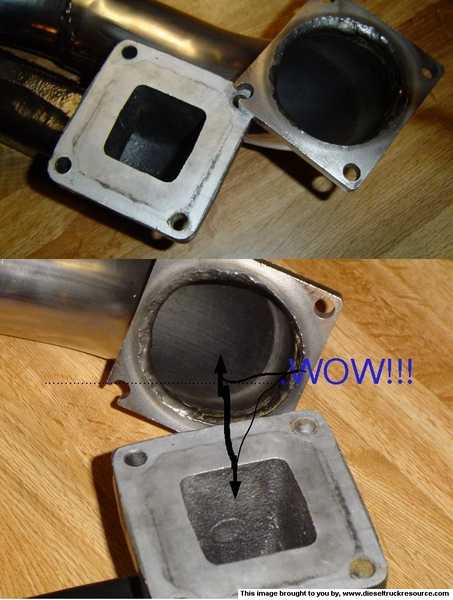
All tho, Tim's CoolerTubz, was designed so you could just bolt it onl.................there is a couple of thing that will need to be done to attach it!
First off, you will notice that one of the bolt holes that attach's the CoolerTubz to the intake heater isn't a hole,...... but a slot instead.
In order to make a nice air entry.......and still clear the master cylinder, as well as the hood. The tube needed to be layed forward, toward the front of the truck more then all of the other tube that Tim had made previously.
The big problem was that Tim and i live a grate distance apart and hence required the mail back and forth of this produce before a final weld and polish could be done........Getting off track here..............
To install the air horn, you will need to install one of the bolt before you install Tim's Intake Air Horn "CoolerTubz"
then just slip it underneath it. Don't forget the gasket!
then just slip it underneath it. Don't forget the gasket!
But there is more, the stock air horn has a thicker flange then the new Air Horn.
For the back bolts,(next to the head) this is not a problem as the bolt go thru the intake into the head. or into the intake its self(recommend using thread sealer here)
the outer ones(toward L fender) do not go all the way thru, and the bolt will bottom out before it gets tight. you can us a shorter bolt on these two but the throttle linkage is also attached to these same bolts........................... So you could cut the ears off of here and us shorter bolts( not advised as that would only leave one bolt at the bottom)
Note yellow, black, and orange circles below
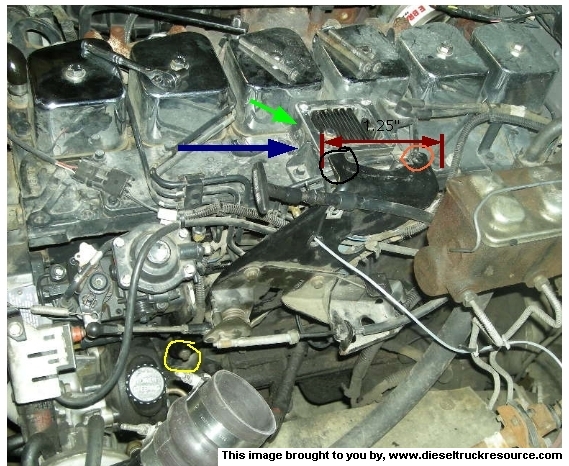
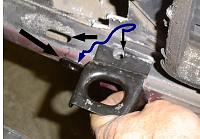
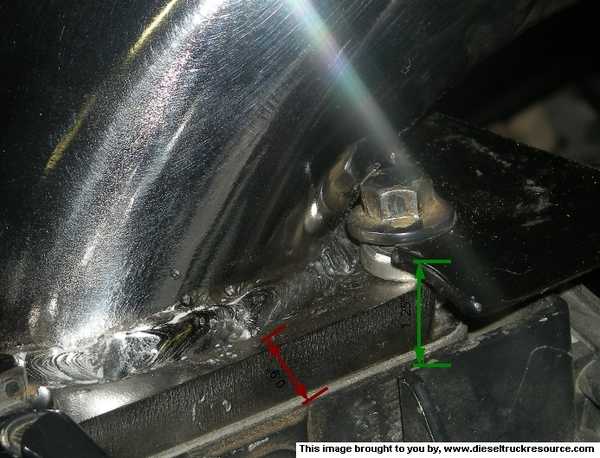
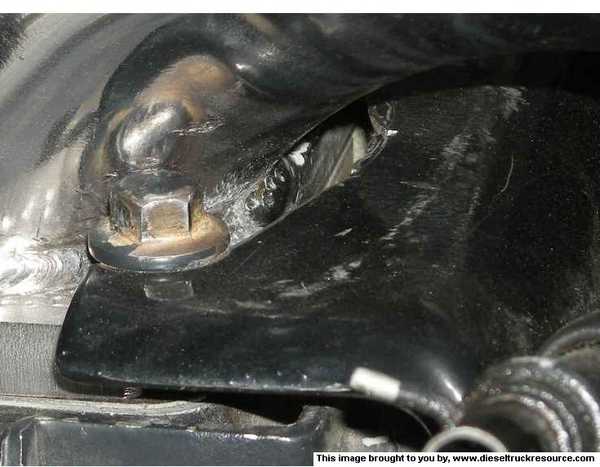
The Red is trying to represent the u shape that you need to grind on this bracket to clear the large 3" tube. the blue arrow is pointing to the washer that you can't see here but you will as the pic are added.
Note: If I was going to do it again.... i would remove every thing in side the black circle and us a shorter bolt..........this means that there would only be two bolt holding the throttle bracket(yellow and orange) but i thing that is enough to hold the bracket solidly................and would allow much more ease, of bolt aboves tightening
Have no idea why i put the green arrow in above
Have no idea why i put the green arrow in above
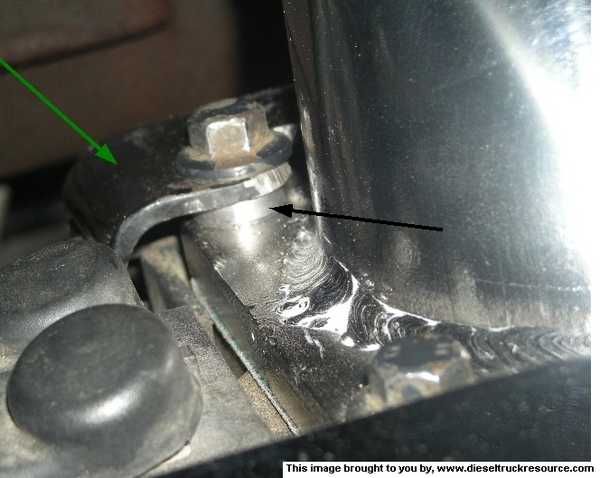
This green arrow above represent the bracket and the spacer that i installed under it.
And as you can see, three (3) picture up or above^^^ is the spacer i use on the other side.......If i had to do it again i would us a shorter bolt there.
Below is a picture of the stock bolt and spacer, i use on both sides.........and the shorter bolt that i will use with out a spacer on the next one or, if i ever need to remove the air heater or something
02-04-2008, 12:28 AM
#25
Registered User
Thread Starter
Join Date: Mar 2006
Location: WY
Posts: 2,319
Likes: 0
Received 0 Likes
on
0 Posts
Stay tune an pic will be add as thy are approved
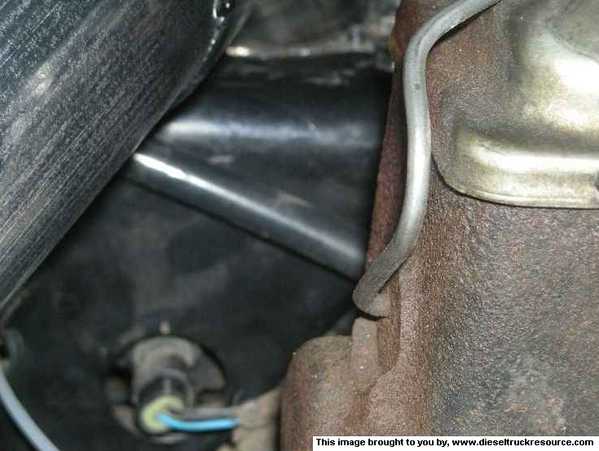
looking over the left fender, you can see the angle and clearance that was created by this tube,,,,,,My even be able to put a Hydo boost in there now???????????????????
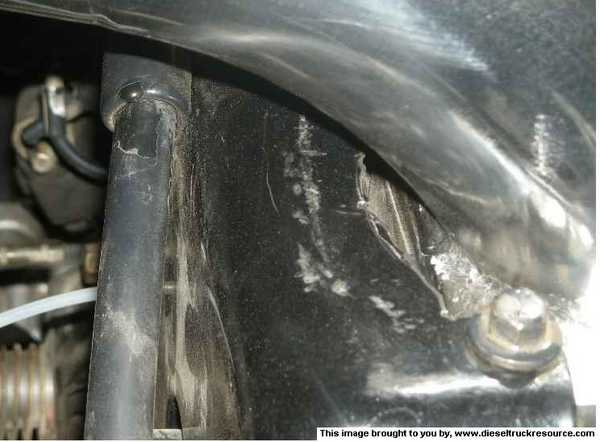
And Left side of bracket.
Note, the grinding required so the tube will clear the throttle bracket.
And Left side of bracket.
Note, the grinding required so the tube will clear the throttle bracket.
I did the grinding before i got the CoolerTubz..........kinda when over kill.
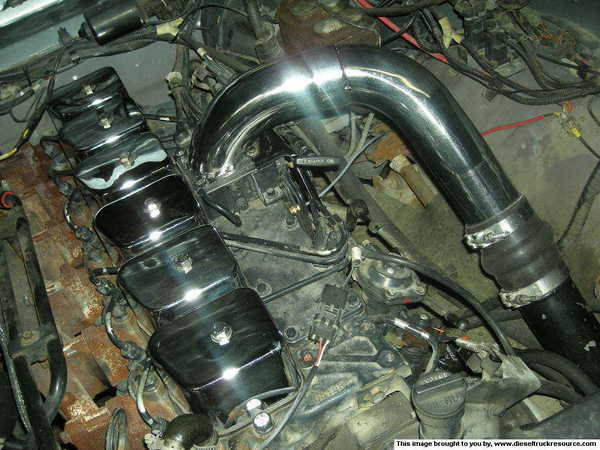
same view But, "Right" side of bracket
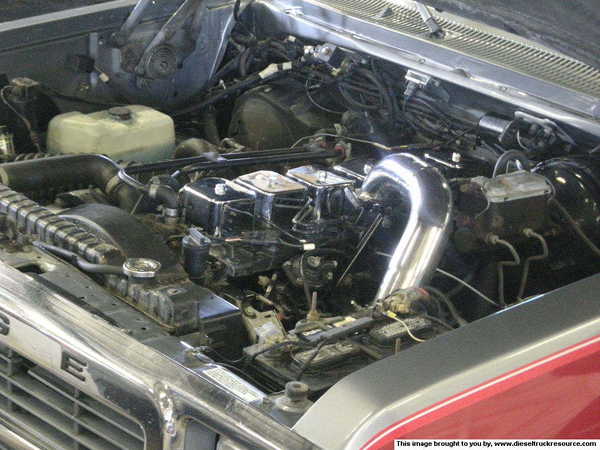
Final install
- You did tighten up that boot clamp..........and double check all the rest Right?
turbo to exhaust pipe tight?
turbo oil feed and drain tube?
turbo to manifold
Boost line hooked up to waste gate actuator?
BHAF or air clean tube clamps tight?
Start and check for oil pressure and then oil leaks(Mine leaked out of the drain tube, were it gos into the block)
turbo oil feed and drain tube?
turbo to manifold
Boost line hooked up to waste gate actuator?
BHAF or air clean tube clamps tight?
Start and check for oil pressure and then oil leaks(Mine leaked out of the drain tube, were it gos into the block)
Now take it out and see if you can here any boost leaks, i had to find mine by pressurizing the induction system (bad AFC diaphragm)
)You have changed a lot here, and there is bound to be some problem that may sneak up on you.
I started this project the week before thanks giving.............yeah that 2-1/2 mounts.
No it wouldn't take that long:-)
No it wouldn't take that long:-)
With the parts list I'm preparing and all the tools ready, such as hole saw, drill, hack saw(Sawzall or preferably a jig saw) and basic hand tools.............You should be able to install you intercooler in a long day.......two days max. if you want yours to look a hole lot better then mind
I will make up two lists........
first one will be what it cost me, collecting part for the past two years!!!!!!
And the 2nt will be if, you were to go to your local Chry Dealer, and gave the parts guy my list + the extra parts you may or may not already have................. like 4 1/2" hole saw.
02-05-2008, 11:57 PM
#26
Registered User
Thread Starter
Join Date: Mar 2006
Location: WY
Posts: 2,319
Likes: 0
Received 0 Likes
on
0 Posts
Intercooler (used) .................................................. .............$140.00
All 2nt gen tubes, clamps, hoses............................................. $100.00
Beat up old Hx35 with elbo.............................................. .......$100.00
Lower Bracket........................................... ...........................R $6.20
.................................................. .......................................L $7.10
Rubber mounts for above bracket.................4.85 X 2.......... .........$9.40
Tim's Intake Air Horn "CoolerTubz"...................................... .....$160.00
__________________________________________________ ____________
TOTAL............................................. .......................................$522.70
52028 724AC COOLER, Charge Air...(INTERCOOLER)............................... .................................................. .......$800.00
52027 724 R BRACKET, Cooler (Intercooler lower bracket R)............... .................................................. ...............$6.20
52027 725 L BRACKET, Cooler (" " L )........................................... .................................................. .................$7.10
52027 814 CLAMP, Hose......(This is the large intercooler inlet/ outlet
Clamp) 12.85 X 2................................................. .................................................. .....................................25.70
52027 813 CLAMP, Hose..............(smaller diameter boot clamps)....
13.20 X 6................................................. .................................................. ...............................................79. 20
52027 815AB............(This will be used at the turbo elbow to pipe conection......................................... ....................73.00
52027 516AB HOSE, Duct to cooler...(large boot for intercooler....Drivers Side)............................................. ...........$156.00
52027 990AB hose, Duct to cooler Inlet......(large boot for Intercooler.... Passenger Side)...........................................$1 62.00
52027 515 HOSE, Duct to Engine (The hose that connects Tim's CoolerTubz to the stock hose.....L or Drivers
side.............................................. .................................................. .................................................. ........$73.00
52027 502 ISOLATOR, Cooler Mounting (Isolator for 724 and 725 above..lower mount, rubber) 4.85 X 2 .........................$9.70
52027 827 ISOLATOR, Cooler Mounting.... (Isolator mount for the side of the cooler.........If your using the 24v intercooler)..6.75 X 2................................................. .................................................. .................................................. ...........$13.50
52027 987 DUCT,Rt, Charge Air Cooler Inlet......( this is the right side tube or pipe that you will be using on the other side also!!!)35.00 X 2................................................. .................................................. .................................................. ..............$70.00
4746 644 PIPE, Air Transfer.......(Turbo elbo)............................................. .................................................. .............$70.00
R5010278AA Reman Turbo............................................. .................................................. ....................................$1320.00
__________________________________________________ __________________________________________________ __________
TOTAL: .................................................. .................................................. .................................................. ......$2,865.40
+ TIM WORLINE'S CUSTOM INTAKE ARE HORN("CoolerTubz")................................ .................................................. ....$160.00
Now, I don't thing any body is going to run to the Dealer with this list...........But you could.................
It gives you the part ######s for the parts you can't find else where.
BUT, If your going to pay that kind of cash for the intercooler or the turbo.......Do your self a favor, and call PDR, Htt or one of the other performance shops.........You will get a lot more performance for sim-miler $$$$$$.$$
Note: these numbers, are as of, 2/1/2008.........And they are list prices.....so they can be had for less...............But Even at $1,055.00(good guy discount) you can buy a much better turbo then a stock 2nt gen turbo.........As of today, all of these parts are still available!!!!!!!!!!!
NO NS1 STATUES YET

NEXT.......My last two picture....................
And how to Reach TIM, and order one of his "CoolerTubz" Designed specifically for this conversion
Now you now as much as i have learn on this project!
Good luck, and I hope yours turn out EVEN better them Mine
02-07-2008, 10:49 PM
#27
Registered User
Thread Starter
Join Date: Mar 2006
Location: WY
Posts: 2,319
Likes: 0
Received 0 Likes
on
0 Posts
YOU CAN FIND "TIM WORLINE" AT 1stgen.org, or E-mail him at.....................
TNTSound@tds.net Just tell him Flash sent ya............He will fix you right up!
He has the spec's now, and will fit as my pic have showed.......vary nicely
And now, I leave you with my final 2 pic'........good luck and have fun!!!!!!!!

TNTSound@tds.net Just tell him Flash sent ya............He will fix you right up!
He has the spec's now, and will fit as my pic have showed.......vary nicely
And now, I leave you with my final 2 pic'........good luck and have fun!!!!!!!!
03-17-2008, 12:57 AM
#28
Registered User
Thread Starter
Join Date: Mar 2006
Location: WY
Posts: 2,319
Likes: 0
Received 0 Likes
on
0 Posts
I just pulled this link of another thread here.........Could be vary valuable for those of you with a 89-90 that want to put the 91+grill in with out trying to find the proper radiator support
http://www.moparmusclemagazine.com/p...lle/index.html
Flash
http://www.moparmusclemagazine.com/p...lle/index.html
Flash
05-18-2008, 07:01 PM
#29
Registered User
Join Date: Feb 2008
Location: Everett,Wash. U.S.A.
Posts: 81
Likes: 0
Received 0 Likes
on
0 Posts
very interesting read just one question I own a 93 dodge and I'm thinking about running a p.s. innercooler are there any link's you can pm me on what I need to do to get this done?
Again thank's for the write up.
Again thank's for the write up.