


Tightening Up Driver's Side Mirror


Thread Starter
Registered User
Joined: Jun 2002
Posts: 1,125
Likes: 20
From: Missouri
Tightening Up Driver's Side Mirror
What's the best way to tighten up the driver's side door mirror on my '95? It is just a manually adjusted mirror--not heated, no remote adjustment thingy, but in hot weather at 60 mph and up, the wind blows it back toward me, and I lose my vision to the rear on that side.

Registered User
Joined: Jan 2007
Posts: 470
Likes: 1
same problem with mine both sides. take off door panel, take off mirror, inside you will find the shaft being held in place with a plastic clamp half with screws, tighten the screws but don't strip them. test it out before you put panels back on. if that does not work you might try adding a thin layer of friction tape under the clamp and do over. pain in the butt but only way i know of.

Registered User
Joined: Nov 2009
Posts: 191
Likes: 0
From: Florence, AL
Mine done the same thing especially when towing but I had to findly replace them. First I pull the top of the door panel lose so I could get to the screws and did as Joseph did. The second time I made some thin metal shims and put around the tube and then tighten. They were good for about a year. My mirrors are manuel also and I orderd the flip up manuel mirrors from fenderworld.com so far they have worked great.



Cummins Guru


Joined: Feb 2008
Posts: 4,191
Likes: 65
From: Sunny Southern California Land of Fruits and Nuts
There is a TSB that might be of some help.
NO: 08-09-98
SUBJECT: Driver Side Power Mirror Vibrates While Driving
DATE: Mar. 13, 1998
THIS BULLETIN SUPERSEDES TECHNICAL SERVICE BULLETIN 23-39-97, DATED JUN 27, 1997, WHICH SHOULD BE REMOVED FROM YOUR FILES AND NOTED IN THE 1997 TECHNICAL SERVICE BULLETIN MANUAL (PUBLICATION NO. 81-699-98004). 1998 MODELS HAVE BEEN ADDED ALONG WITH A UNIQUE 1998 REPAIR PROCEDURE. ALL CHANGES ARE HIGHLIGHTED WITH **ASTERISKS**.
SYMPTOM/CONDITION:
Driver side power mirror vibrates or blurred images in driver side mirror while driving.
DISCUSSION:
It has been identified that installation of aftermarket bugscreen deflectors can affect mirror vibration and other components. The Dodge Ram Truck is a highly developed aerodynamic design to minimize wind drag and noise, improved ride, and increased fuel economy. Current bugscreen deflectors are designed to disrupt the air flow in front of the vehicle to keep the windshield clear of bugs and debris (See Figure 1 and Figure 2).
Depending on how this airflow is deflected, a number of potential undesirable side effects can occur, such as:
Mirror Vibration
Reduced Fuel Economy
Increased Wind Noise
Erratic Windshield Washer Spray
Excessive Antenna Movement
Booming Noise at Air Intake for Heater/Air Conditioning System
If the vehicle is equipped with a bugscreen deflector, perform Diagnosis One. If the vehicle is not equipped with a bugscreen deflector, perform Diagnosis Two.
DIAGNOSIS ONE:
Test drive the vehicle at freeway speeds to decide if the left (driver side) outside power rear view mirror vibrates or the images are blurred.
Remove Bugscreen Deflector.
Test drive the vehicle to determine that mirror vibration is gone. If vibration is still present, perform the following Repair Procedure. If the vibration is no longer present, the root cause of the vibration is the airflow turbulence caused from the bugscreen deflector.
NOTE: INSTALLING BUGSCREEN DEFLECTORS MAY CAUSE MIRROR SHAKE THAT WILL NOT BE RESOLVED BY MIRROR REPLACEMENT OR INSTALLING THE MIRROR REINFORCEMENT BRACKET.
If it has been determined that the bugscreen is the root cause of the mirror vibration, the bugscreen should be removed. A Mopar bugscreen is available, p/n 82202559, that helps reduce air turbulence around the power mirrors.
DIAGNOSIS TWO:
Test drive the vehicle at freeway speeds. If the left (driver side) outside power rear view mirror vibrates or the images are blurred, perform the following Repair Procedure.
PARTS REQUIRED:
Qty Part No. Description
1(AR) 05010901AA Reinforcement Bracket, Left (Driver Side) Outside Power Mirror
3(AR) 00153912 Screw, 0.190-16 X 0.50 in. Self Tapping
1(AR) 82300234 Mopar RTV Sealant
**1(AR) 55076489AB Mirror, Power Outside**
REPAIR PROCEDURE:
This bulletin involves installing a power mirror support bracket onto the driver side mirror flag **or installing a revised power mirror assembly**.
Release the door latch and open the door.
Roll the window down.
Remove the window crank (Figure 3) if equipped.
Remove the screws holding the door trim panel to the door from inside armrest pull cup (Figure 4).
If equipped, disengage the clips that hold the power window/lock switch panel to the door trim panel (Figure 5). Disengage wire connectors from the switch panel.
Remove screw holding the door trim to the outside mirror frame.
Using a trim panel removal tool, disengage the clips that hold the door trim to door around the perimeter of the trim panel.
While holding the bottom of the trim panel away from the door, simultaneously lift upward and forward to separate the door trim panel from the door.
Separate the door trim panel from the inner belt weatherstrip.
Disengage the power outside mirror wire connector from the control switch.
Remove the door trim panel.
**NOTE: PROCEED TO STEP 12 FOR 1994 THROUGH 1997 VEHICLES. PROCEED TO STEP 18 FOR 1998 VEHICLES.**
Remove the foam seal from the mirror flag.
Remove the bottom two nuts and washers attaching the mirror to the door.
Place reinforcement bracket, p/n 05010901AA, in position as shown in Figure 6 and install the washers and nuts. Only hand tighten the nuts at this time.
NOTE: THE REINFORCEMENT BRACKET MAY REQUIRE SOME FORCE TO INSTALL DUE TO THE LACK OF CLEARANCE PROVIDED.
Drill three (3) 3mm (1/8 in.) pilot holes into door that correspond with the holes in the bracket (Figure 6).
Tighten the two bottom mirror attaching nuts to 7.3 Nm (65 in. lbs.). Apply a small amount of RTV to the three self tapping screws, p/n 00153912, then install the screws.
Install the foam seal.
**NOTE: STEPS 18 THROUGH 26 ARE FOR REPAIRING 1998 VEHICLES ONLY. PROCEED TO STEP 27 FOR 1994 THROUGH 1997 RAM TRUCKS.
Remove the mirror flag seal from the inner door panel (Figure 7).
Unplug the wire harness connector from the power mirror (Figure 8).
Remove the three nuts that secure the power mirror to the inner door panel.
Unseat the power mirror wire harness grommet by pushing it out through the hole in the door flag from inside the vehicle.
Pull the mirror from the outside of the door while feeding the wire harness, grommet, and connector out through the hole from the inside of the door.
Feed the wire harness, grommet, and connector of the new power mirror, p/n 55076489AB into the hole from the outside of the door.
Secure the grommet into the hole.
Secure the mirror to the door with three nuts and tighten the nuts to 7.5 N•m (65 in. lbs.).
Connect the wire harness connector to the power mirror.**
Attach the mirror flag seal onto the inner door panel.
Connect the power mirror wire connector to the control switch.
Attach the door trim panel to the door installing all retainer clips.
Install the screw securing the door trim to the mirror frame.
If equipped, connect the wire harness connector to the power window/lock switch and install the power window/lock switch into the door trim panel.
Install the screws that secure the door trim panel to the door from inside the arm rest pull cup.
If equipped, install the window crank.
NO: 08-09-98
SUBJECT: Driver Side Power Mirror Vibrates While Driving
DATE: Mar. 13, 1998
THIS BULLETIN SUPERSEDES TECHNICAL SERVICE BULLETIN 23-39-97, DATED JUN 27, 1997, WHICH SHOULD BE REMOVED FROM YOUR FILES AND NOTED IN THE 1997 TECHNICAL SERVICE BULLETIN MANUAL (PUBLICATION NO. 81-699-98004). 1998 MODELS HAVE BEEN ADDED ALONG WITH A UNIQUE 1998 REPAIR PROCEDURE. ALL CHANGES ARE HIGHLIGHTED WITH **ASTERISKS**.
SYMPTOM/CONDITION:
Driver side power mirror vibrates or blurred images in driver side mirror while driving.
DISCUSSION:
It has been identified that installation of aftermarket bugscreen deflectors can affect mirror vibration and other components. The Dodge Ram Truck is a highly developed aerodynamic design to minimize wind drag and noise, improved ride, and increased fuel economy. Current bugscreen deflectors are designed to disrupt the air flow in front of the vehicle to keep the windshield clear of bugs and debris (See Figure 1 and Figure 2).
Depending on how this airflow is deflected, a number of potential undesirable side effects can occur, such as:
Mirror Vibration
Reduced Fuel Economy
Increased Wind Noise
Erratic Windshield Washer Spray
Excessive Antenna Movement
Booming Noise at Air Intake for Heater/Air Conditioning System
If the vehicle is equipped with a bugscreen deflector, perform Diagnosis One. If the vehicle is not equipped with a bugscreen deflector, perform Diagnosis Two.
DIAGNOSIS ONE:
Test drive the vehicle at freeway speeds to decide if the left (driver side) outside power rear view mirror vibrates or the images are blurred.
Remove Bugscreen Deflector.
Test drive the vehicle to determine that mirror vibration is gone. If vibration is still present, perform the following Repair Procedure. If the vibration is no longer present, the root cause of the vibration is the airflow turbulence caused from the bugscreen deflector.
NOTE: INSTALLING BUGSCREEN DEFLECTORS MAY CAUSE MIRROR SHAKE THAT WILL NOT BE RESOLVED BY MIRROR REPLACEMENT OR INSTALLING THE MIRROR REINFORCEMENT BRACKET.
If it has been determined that the bugscreen is the root cause of the mirror vibration, the bugscreen should be removed. A Mopar bugscreen is available, p/n 82202559, that helps reduce air turbulence around the power mirrors.
DIAGNOSIS TWO:
Test drive the vehicle at freeway speeds. If the left (driver side) outside power rear view mirror vibrates or the images are blurred, perform the following Repair Procedure.
PARTS REQUIRED:
Qty Part No. Description
1(AR) 05010901AA Reinforcement Bracket, Left (Driver Side) Outside Power Mirror
3(AR) 00153912 Screw, 0.190-16 X 0.50 in. Self Tapping
1(AR) 82300234 Mopar RTV Sealant
**1(AR) 55076489AB Mirror, Power Outside**
REPAIR PROCEDURE:
This bulletin involves installing a power mirror support bracket onto the driver side mirror flag **or installing a revised power mirror assembly**.
Release the door latch and open the door.
Roll the window down.
Remove the window crank (Figure 3) if equipped.
Remove the screws holding the door trim panel to the door from inside armrest pull cup (Figure 4).
If equipped, disengage the clips that hold the power window/lock switch panel to the door trim panel (Figure 5). Disengage wire connectors from the switch panel.
Remove screw holding the door trim to the outside mirror frame.
Using a trim panel removal tool, disengage the clips that hold the door trim to door around the perimeter of the trim panel.
While holding the bottom of the trim panel away from the door, simultaneously lift upward and forward to separate the door trim panel from the door.
Separate the door trim panel from the inner belt weatherstrip.
Disengage the power outside mirror wire connector from the control switch.
Remove the door trim panel.
**NOTE: PROCEED TO STEP 12 FOR 1994 THROUGH 1997 VEHICLES. PROCEED TO STEP 18 FOR 1998 VEHICLES.**
Remove the foam seal from the mirror flag.
Remove the bottom two nuts and washers attaching the mirror to the door.
Place reinforcement bracket, p/n 05010901AA, in position as shown in Figure 6 and install the washers and nuts. Only hand tighten the nuts at this time.
NOTE: THE REINFORCEMENT BRACKET MAY REQUIRE SOME FORCE TO INSTALL DUE TO THE LACK OF CLEARANCE PROVIDED.
Drill three (3) 3mm (1/8 in.) pilot holes into door that correspond with the holes in the bracket (Figure 6).
Tighten the two bottom mirror attaching nuts to 7.3 Nm (65 in. lbs.). Apply a small amount of RTV to the three self tapping screws, p/n 00153912, then install the screws.
Install the foam seal.
**NOTE: STEPS 18 THROUGH 26 ARE FOR REPAIRING 1998 VEHICLES ONLY. PROCEED TO STEP 27 FOR 1994 THROUGH 1997 RAM TRUCKS.
Remove the mirror flag seal from the inner door panel (Figure 7).
Unplug the wire harness connector from the power mirror (Figure 8).
Remove the three nuts that secure the power mirror to the inner door panel.
Unseat the power mirror wire harness grommet by pushing it out through the hole in the door flag from inside the vehicle.
Pull the mirror from the outside of the door while feeding the wire harness, grommet, and connector out through the hole from the inside of the door.
Feed the wire harness, grommet, and connector of the new power mirror, p/n 55076489AB into the hole from the outside of the door.
Secure the grommet into the hole.
Secure the mirror to the door with three nuts and tighten the nuts to 7.5 N•m (65 in. lbs.).
Connect the wire harness connector to the power mirror.**
Attach the mirror flag seal onto the inner door panel.
Connect the power mirror wire connector to the control switch.
Attach the door trim panel to the door installing all retainer clips.
Install the screw securing the door trim to the mirror frame.
If equipped, connect the wire harness connector to the power window/lock switch and install the power window/lock switch into the door trim panel.
Install the screws that secure the door trim panel to the door from inside the arm rest pull cup.
If equipped, install the window crank.
Trending Topics
Thread Starter
Registered User
Joined: Jun 2002
Posts: 1,125
Likes: 20
From: Missouri
Thanks Big Iron.
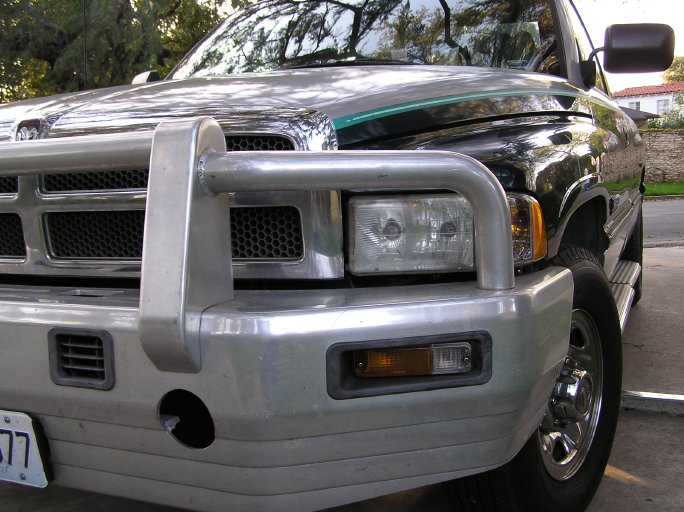
Joseph, that bumper was mostly paid for by a Mexican guy who tried to make a very stupid left hand turn, from the curb, across 5 lanes of traffic in Los Angeles. I T-boned him going about 3 mph, but that was enough to trash my original bumper. Miracle of miracles he had insurance! I got the ins. check, ordered the UTE Bullbar and stuck it on myself.
Joseph, that bumper was mostly paid for by a Mexican guy who tried to make a very stupid left hand turn, from the curb, across 5 lanes of traffic in Los Angeles. I T-boned him going about 3 mph, but that was enough to trash my original bumper. Miracle of miracles he had insurance! I got the ins. check, ordered the UTE Bullbar and stuck it on myself.

Thread
Thread Starter
Forum
Replies
Last Post
Glass
3rd Gen High Performance and Accessories (5.9L Only)
5
Jan 25, 2011 07:13 PM
RSOPNCO1
3rd Generation Ram - Non Drivetrain - All Years
9
Aug 27, 2007 05:21 AM
vanwinkl
3rd Generation Ram - Non Drivetrain - All Years
2
Jan 31, 2007 06:20 PM
Mark Hodowanec
3rd Generation Ram - Non Drivetrain - All Years
7
Jan 31, 2006 08:23 AM