
My injector swap....

Thread Starter
Registered User


Joined: Mar 2010
Posts: 7,265
Likes: 1,346
From: Prince George, BC
My injector swap....
Well today was the day. I finally decided to swap in my NOS 9mm Bosch injectors into my motor. The truck has been progressively smoking more and more since I started driving it 18 months ago. And with the help of the DTR I was hoping it was leaking injectors.
I have never done an injector swap..diesel or any other type of motor. So I was researching, and trying to make sure I had everything I needed before I started. I made the injector removal tool from the sticky last week...turned out great and worked even better!!
Here's my removal tool...into it for about $7....

I had to remove all the lines...right from the injector pump to the injectors. I tried doing it with them just pushed aside but it just wasn't working.
The 24mm nuts all came out with little to no problems. I had been soaking them in PB Blaster every night when I came home for the last week or so.
Lines and nuts removed ready for pulling....
So on went the removal tool and they popped out with no problems.
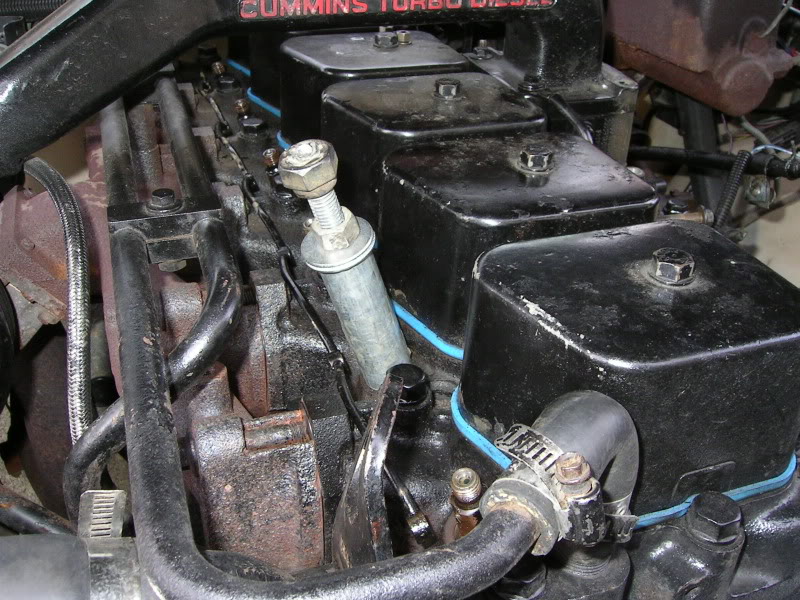
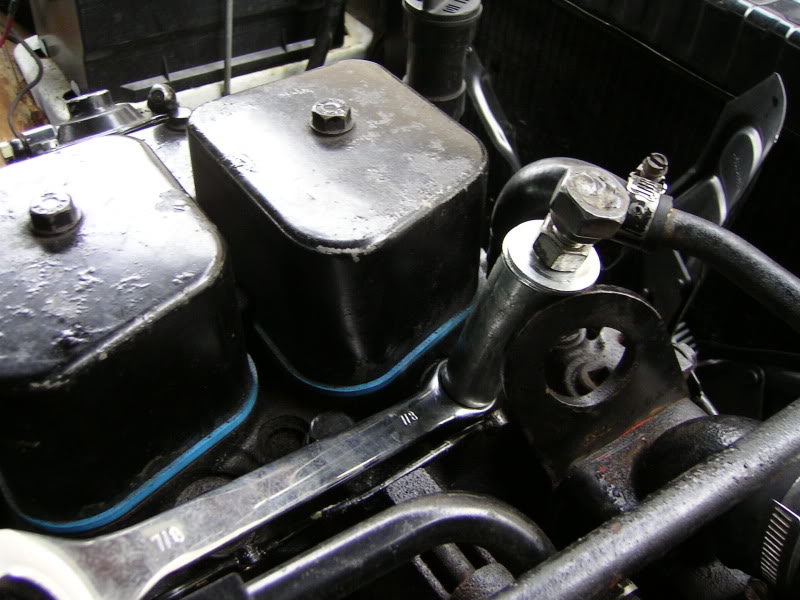
The only problem I had was with clearance. #1 injector I couldn't get the washers past the lifting hook so I had to figure out a way around that. I finally decided on using a 7/8 box end wrench on the base, then putting the removal tool on top of that. That gave me just enough clearance to get the injector out.
#4 injector was tight to get out too, but that was due to the top nut on the removal tool hitting the air horn.
I have never done an injector swap..diesel or any other type of motor. So I was researching, and trying to make sure I had everything I needed before I started. I made the injector removal tool from the sticky last week...turned out great and worked even better!!
Here's my removal tool...into it for about $7....
I had to remove all the lines...right from the injector pump to the injectors. I tried doing it with them just pushed aside but it just wasn't working.
The 24mm nuts all came out with little to no problems. I had been soaking them in PB Blaster every night when I came home for the last week or so.
Lines and nuts removed ready for pulling....
So on went the removal tool and they popped out with no problems.
The only problem I had was with clearance. #1 injector I couldn't get the washers past the lifting hook so I had to figure out a way around that. I finally decided on using a 7/8 box end wrench on the base, then putting the removal tool on top of that. That gave me just enough clearance to get the injector out.
#4 injector was tight to get out too, but that was due to the top nut on the removal tool hitting the air horn.
Thread Starter
Registered User
Joined: Mar 2010
Posts: 7,265
Likes: 1,346
From: Prince George, BC
Once I got all the injectors out I could see that they were in rough shape. Every one had crud caked onto the tips, with some of the orifices plugged right up. They were all never seized so I guess someone must have had them out, or swapped at some time.
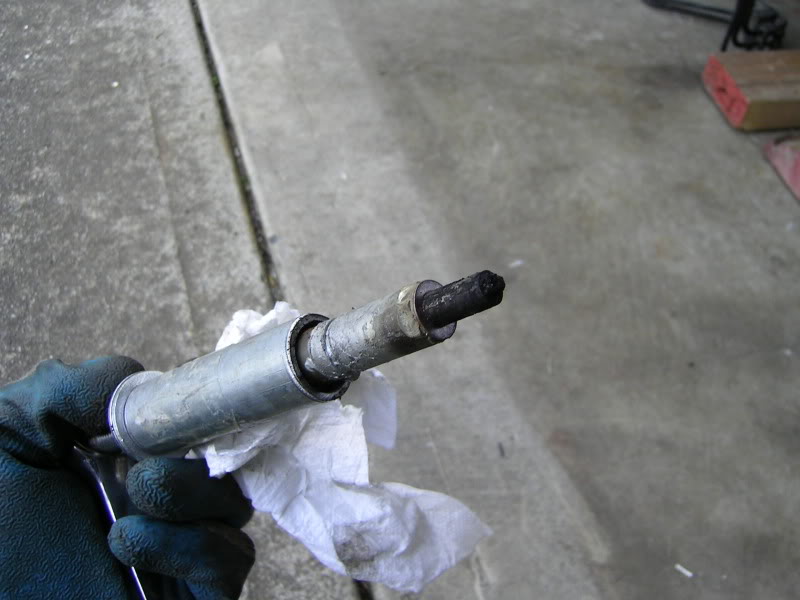
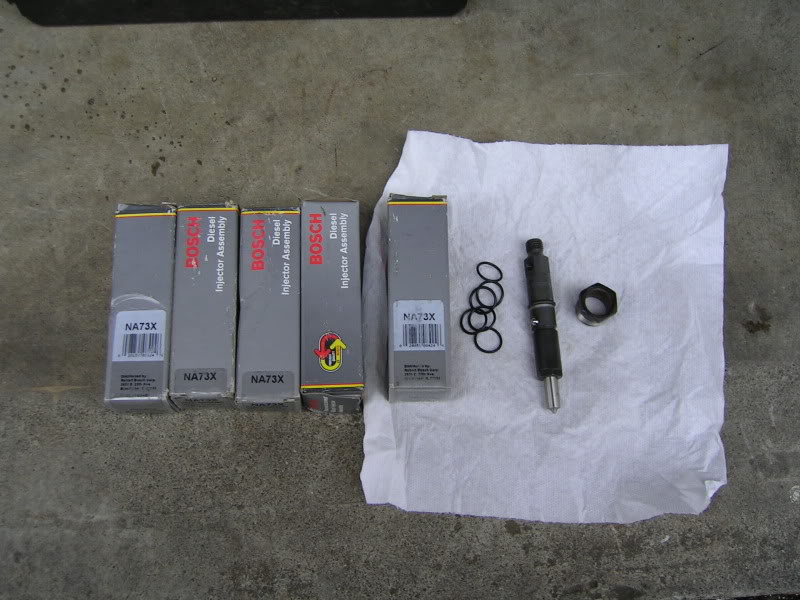
I think #4 and #5 injectors were not sealed tight. There was a lot of crud and oil in the bores. The rest were all fairly clean. So here are my new old stock injectors.
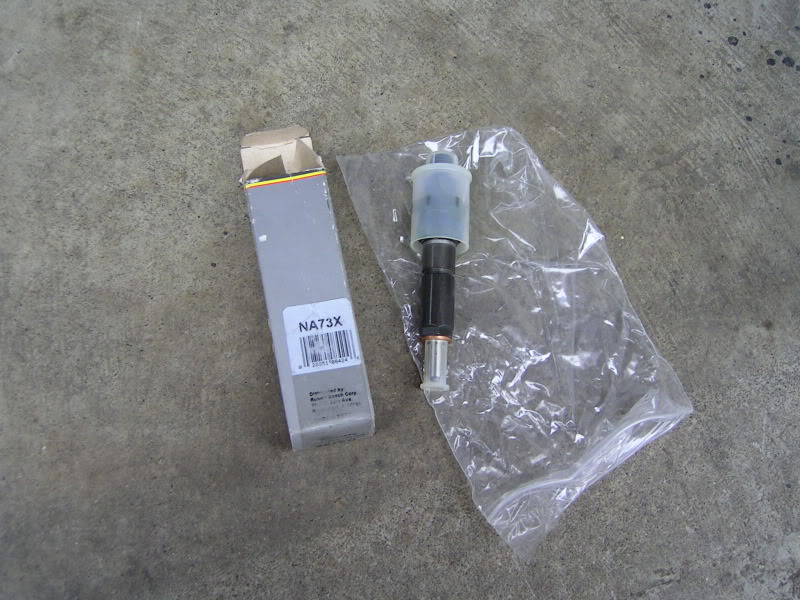
One didn't come in the original box and was missing the nut, so I had to re-use one of the originals....no biggie. The only other thing I had to go get was the O-rings to seal the nut to the injector body. I walked up to my parts store with one of the injectors and found that an o-ring, 5/8" ID x 3/4" OD x 1/8 dia were a darn near perfect fit.
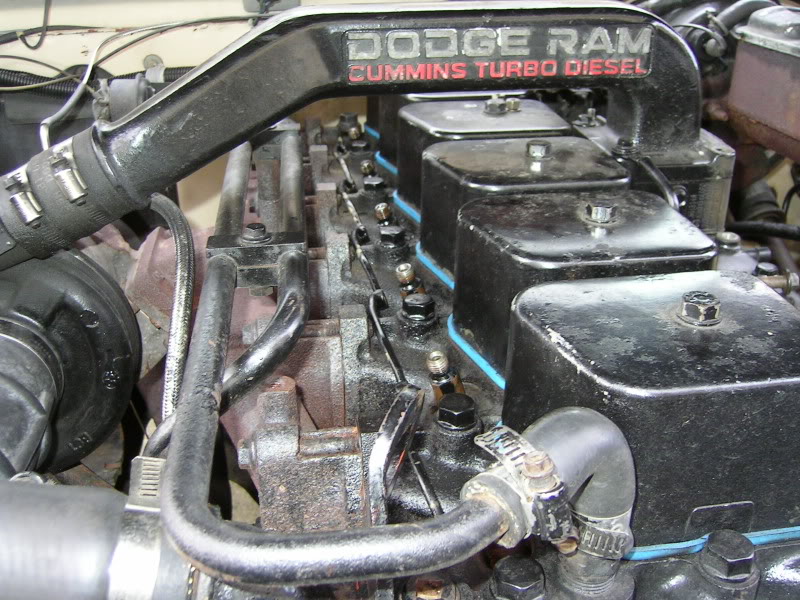
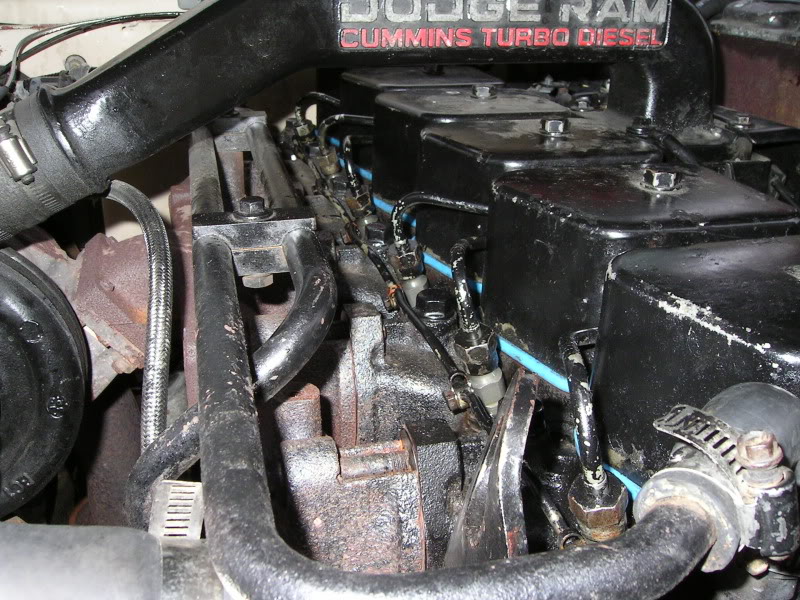
Here they all are installed and ready to button it up. I never seized all the bodies, and nuts when I re-installed them. Torqued them up to 44ftlbs and called it done.
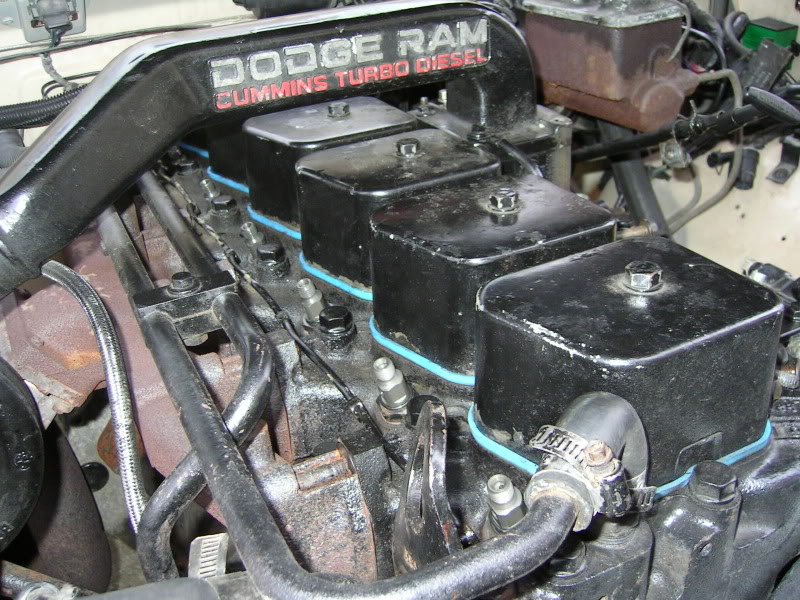
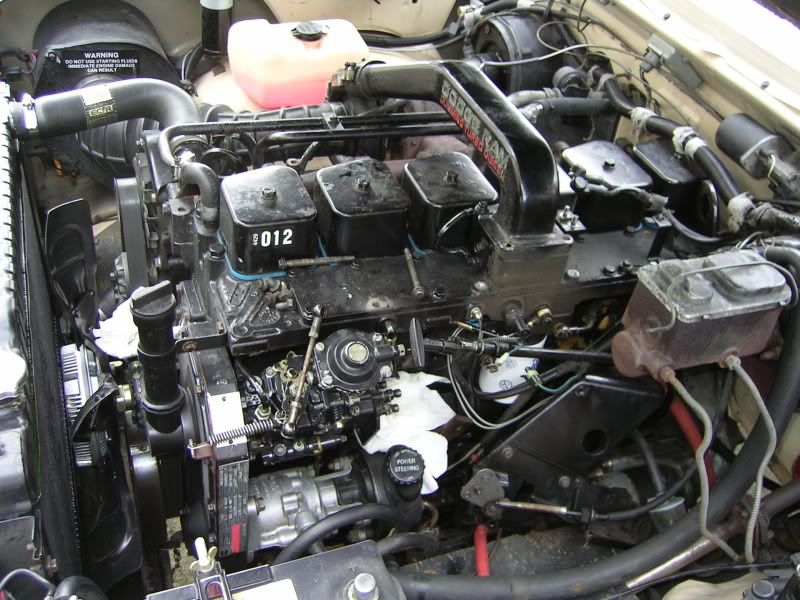
Here it is all buttoned up and ready to fire.
Took a lot of hand pumping on my piston lift pump to prime the lines, but #6 line just would not prime. SO I hooked up all the other lines and started cranking. Eventually it bleed out. I then had to crank for probably 15-20 seconds before it finally started to catch and fired.
I think #4 and #5 injectors were not sealed tight. There was a lot of crud and oil in the bores. The rest were all fairly clean. So here are my new old stock injectors.
One didn't come in the original box and was missing the nut, so I had to re-use one of the originals....no biggie. The only other thing I had to go get was the O-rings to seal the nut to the injector body. I walked up to my parts store with one of the injectors and found that an o-ring, 5/8" ID x 3/4" OD x 1/8 dia were a darn near perfect fit.
Here they all are installed and ready to button it up. I never seized all the bodies, and nuts when I re-installed them. Torqued them up to 44ftlbs and called it done.
Here it is all buttoned up and ready to fire.
Took a lot of hand pumping on my piston lift pump to prime the lines, but #6 line just would not prime. SO I hooked up all the other lines and started cranking. Eventually it bleed out. I then had to crank for probably 15-20 seconds before it finally started to catch and fired.
Thread Starter
Registered User
Joined: Mar 2010
Posts: 7,265
Likes: 1,346
From: Prince George, BC
First thing I noticed after it fired up was the lack of smoke. I had it plugged in the whole time I was working so it was warm. I took it for a run around the block and I noticed no smoke. Let it idle for a while and it still did not start smoking, before I would have had a big blue/white cloud forming.
I re-used the little copper washers on the return lines. I forgot to mark and orient them before I removed them so I had to just throw them in any which way. So I had a few leaks from those that required a little tightening here and there.
I also had a few bubble coming up from around the nut on #1 injector. I re-torqued that one to 55ftlbs and it seems to have sealed up.
So all in all I think it was a very good day. Will drive it for a few days and post an update then.


Registered User
Joined: Jan 2011
Posts: 40
Likes: 0
From: Mesa, AZ
Great write up sir!
What tool did you use for removing the injector lines from the back of the VE pump? When I took mine off, I had ordered the wrong tool (for later model cummins) so I had to scramble and bought a crows foot wrench set. Really didn't like doing it that way, was a pain.
James
What tool did you use for removing the injector lines from the back of the VE pump? When I took mine off, I had ordered the wrong tool (for later model cummins) so I had to scramble and bought a crows foot wrench set. Really didn't like doing it that way, was a pain.
James
Last edited by BC847; Nov 17, 2011 at 11:27 PM. Reason: Language
Registered User
Joined: May 2007
Posts: 1,159
Likes: 7
From: Maryland
Very good, I'm about to do this same thing. Do You happen to have a pic on how to seat the o-rings? I sent mine to get rebuilt and asked for a set of o-rings and copper washers but the ones on mine where gone and I would like to know if there is anything to it.
Btw, where Yours Wet? Mine doesn't smoke much but I could hear a little knock and 2 of the injectors were really wet while the other only had carbon buildup.
Thanks for the info and pics.
Btw, where Yours Wet? Mine doesn't smoke much but I could hear a little knock and 2 of the injectors were really wet while the other only had carbon buildup.
Thanks for the info and pics.
Trending Topics
Thread Starter
Registered User
Joined: Mar 2010
Posts: 7,265
Likes: 1,346
From: Prince George, BC
Great write up sir!
What tool did you use for removing the injector lines from the back of the VE pump? When I took mine off, I had ordered the wrong tool (for later model cummins) so I had to scramble and bought a crows foot wrench set. Really didn't like doing it that way, was a pain.
James
What tool did you use for removing the injector lines from the back of the VE pump? When I took mine off, I had ordered the wrong tool (for later model cummins) so I had to scramble and bought a crows foot wrench set. Really didn't like doing it that way, was a pain.
James
To remove the lines from the back of the IP I use a regular 17mm, and a 11/16 brake line wrench (should be 17mm but don't have a 17mm brake line wrench). I use the 11/16 brake line wrench on the 3 on the front half, top, middle and lower front half. Then hold the lines that are now loose back and start with the open 17mm on the fitting on the bottom back, loosen and remove the nut. Now hold it back as well and do the fitting on the top back. Again holding everything out of the may...as best you can you can now get the center back fitting with the open 17mm.
Very good, I'm about to do this same thing. Do You happen to have a pic on how to seat the o-rings? I sent mine to get rebuilt and asked for a set of o-rings and copper washers but the ones on mine where gone and I would like to know if there is anything to it.
Btw, where Yours Wet? Mine doesn't smoke much but I could hear a little knock and 2 of the injectors were really wet while the other only had carbon buildup.
Thanks for the info and pics.
Btw, where Yours Wet? Mine doesn't smoke much but I could hear a little knock and 2 of the injectors were really wet while the other only had carbon buildup.
Thanks for the info and pics.
I'll take a pic of two of how I did and post it up.
Are you asking about my injector tips, and what they looked like? #4 injector was gooey and oily, with carbon build up. All the others were badly built up with carbon and crud. Most of the crud wouldn't come loose unless I chipped it off with a blade.
Registered User
Joined: May 2007
Posts: 1,159
Likes: 7
From: Maryland
Thank You, I'll wait for the picture. I didn't have much of the old O-rings in the nut when I removed My injectors, I believe I know where they go but not sure about the procedure. Normally I use a little vaseline to help push it in, it keeps it nice and sealed then it melts away.
My injectors had plenty of carbon on the tips but a couple where very wet and I think that is what was causing the knock I hear.
Btw I thought the nut was torqued down to 36 ft/pounds, is it 44 instead?
My injectors had plenty of carbon on the tips but a couple where very wet and I think that is what was causing the knock I hear.
Btw I thought the nut was torqued down to 36 ft/pounds, is it 44 instead?
Thread Starter
Registered User
Joined: Mar 2010
Posts: 7,265
Likes: 1,346
From: Prince George, BC
Been working the last few days, and put on about 150 miles so far. All I can say is WOW...what a difference!!
The motor is waaaay smoother. Before the roof panels vibrated so loud that I almost had to wear ear protection. Now it's smooth like silk. Also a lot of the unknown clicks, rattle and bangs I used to hear are gone. The smoke problem is pretty much all gone...turbo upgrade will help the rest. Also the exhaust note of the motor has changed as well...sounds much better. Cruising down the Hwy I'm also running at least 100 deg cooler on my EGT's. And my turbo cool down times has decreased as well.
I loved driving my cummins crew before...now I love it even more!!
Exekiel69...I'll get those pics of the o-rings taken and up in a day or two.

Thread Starter
Registered User
Joined: Mar 2010
Posts: 7,265
Likes: 1,346
From: Prince George, BC
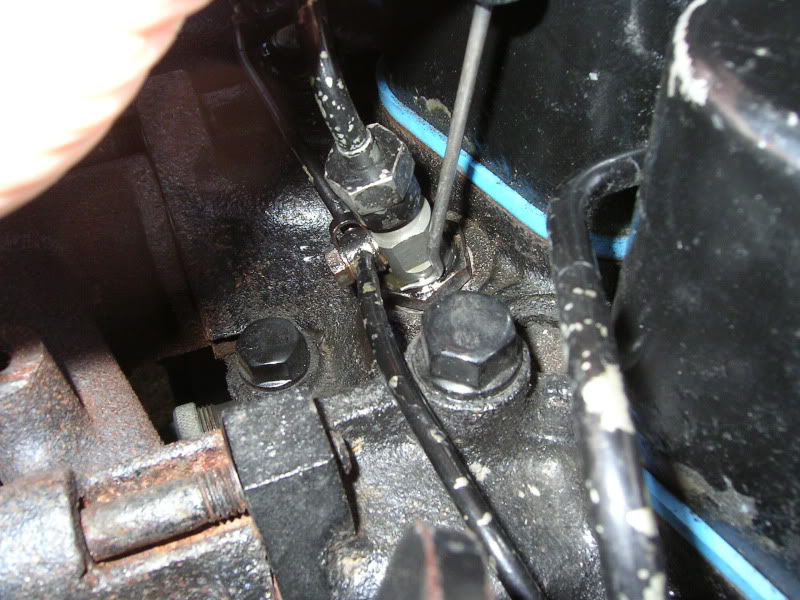
Alright here's a pic of how I installed the O-rings that goes between the body of the injector, and the nut that holds them down.
What I did was as soon as I torqued the hold down nuts on the injectors (44 ftlbs) I slipped an o-ring over and down just below the return line fitting area. Then once I had everything installed I sprayed a bit of silicon fluid around the seat where the o-ring was going to sit. Then I just pushed the o-ring down as far as I could with my fingers and then finished pushing it into the groove with the back side of one of my picks.
Just slowly work your way around the nut and make sure the o-ring is fully seated.
Thread Starter
Registered User
Joined: Mar 2010
Posts: 7,265
Likes: 1,346
From: Prince George, BC