KDP in my 92
 08-26-2012, 06:18 AM
#1
Registered User
Thread Starter
Join Date: Dec 2010
Location: Land of the Toxic Avenger
Posts: 6,770
Received 1,637 Likes
on
1,112 Posts
KDP in my 92
Well, I finally took the time to disassemble my dodge for KDP. Never looking forwards to this, I quickly realized how simple it really was. If I had all the parts in hand, I would have been done already. Since I didn't realize certain issues would show up during dis-assembly, as I have to go parts searching now.
Taking the truck apart was relatively simple except for two things..... the fan clutch and the harmonic balancer removal. Since I've never taken one of these engines apart in any way, the learning curve was minor, but still a couple things to notice.
Started out with draining the coolant, and removing the radiator and fan shroud. I'm replacing all the coolant hoses, so cutting them off was the quickest way of removal. I'm replacing the hoses to the piping which leads to the heater core and the trans cooler canister on the passenger side of the block under the turbo Figured I'd do them all .
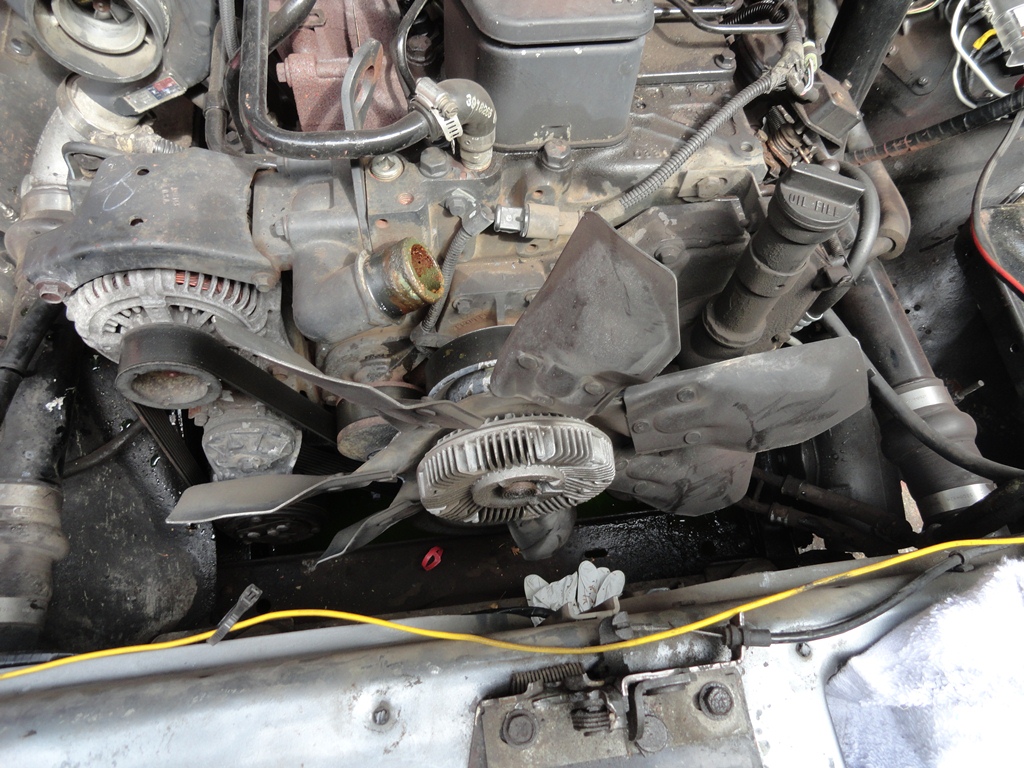
My truck is inter-cooled, and the clutch fan threads were unknown to me. I called Onemoparnut (THANKS BUDDY !) and he explained the easiest way to remove the clutch (without the tool) is to use an air chisel. Worked very quickly, and in less than 30 seconds I had the clutch off. While Looking down on the clutch, you turn the threads clockwise towards the drivers side, and it simply unscrews. Since I have to replace the fan clutch (it's leaking oil) I didn't care about damaging the housing.

Turns out my fan idler bearing is shot, so I'll be replacing it as I put it all back together. It didn't make any noise while running, but when the fan belt was removed, it wobbled around big time. There's a sticky about the replacement of the bearing, and Jim lane posted some pix. I guess I'll call cummins on Monday to see if they stock it locally.
I have a new cummins thermostat and gasket which I never installed some months ago when I was up there. That goes in too....
While I'm in there, the water pump bearing felt a little like a growling cat when spun, so I guess it's time for a replacement as well. Cummins pumps are about $150, and the after market ones are about $100 less. I wonder how much better the cummins pumps are comparatively
Thoughts on this ? I don't want to put a cheap pump on there only to have to re- do this again.
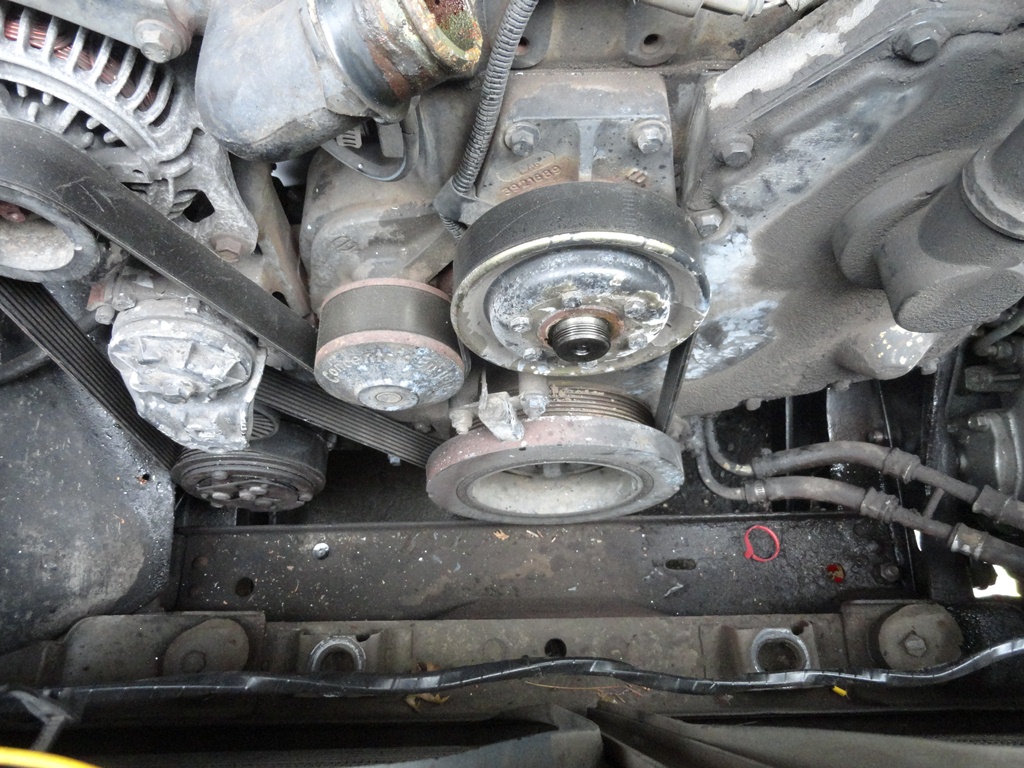
The harmonic balancer seems fine, but the rubber has hairline cracks in the rubber section. They look like surface only cracks, so I guess it's fine to re-install. I had to use a "strap wrench" on the balancer in order to get the bolts loose to remove it. My air gun was too long to fit between the radiator support and the front of the engine, so I bought an $8 strap wrench, locked it on the balancer, and the bolts loosened right up without a slip. Without that strap wrench, I don't now how I would have been able to get that sucker off..
The crank position sensor is original so I'm probably going to replace it, as it's so simple to do now. Have to see how much they are....
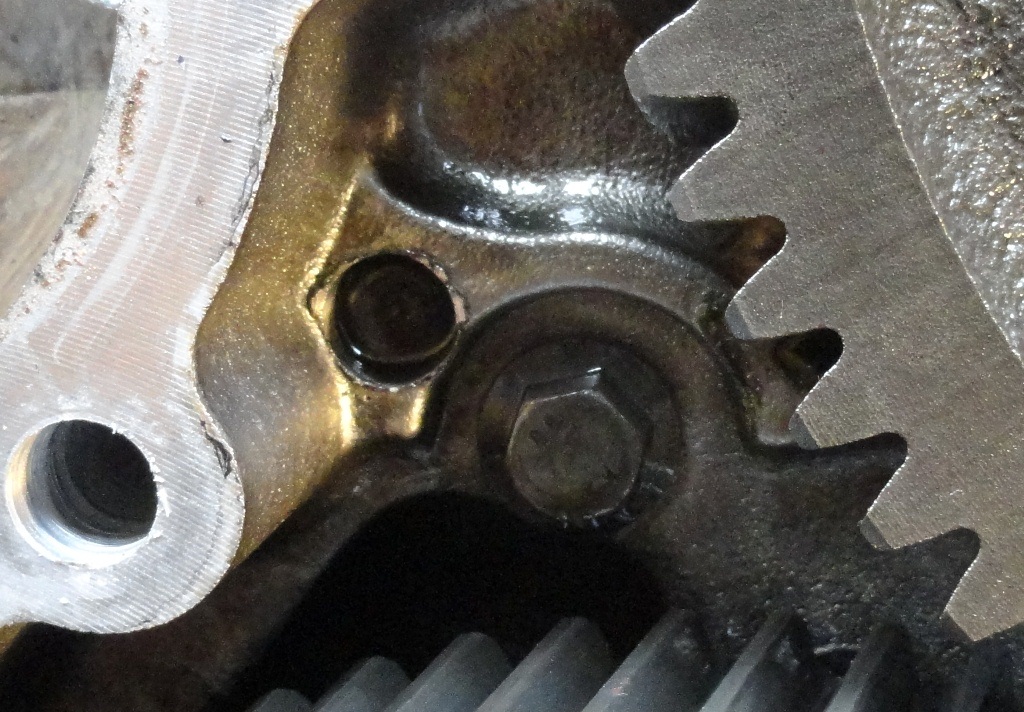
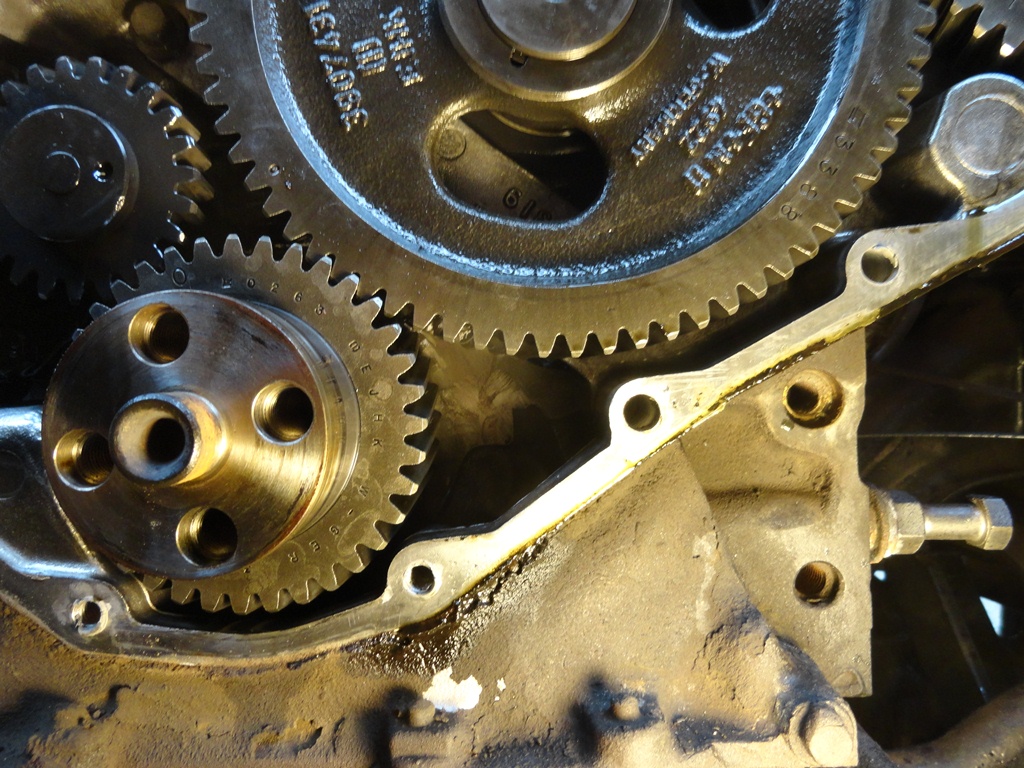
Here's the famous KDP pin. Still snug as a bug in a rug....
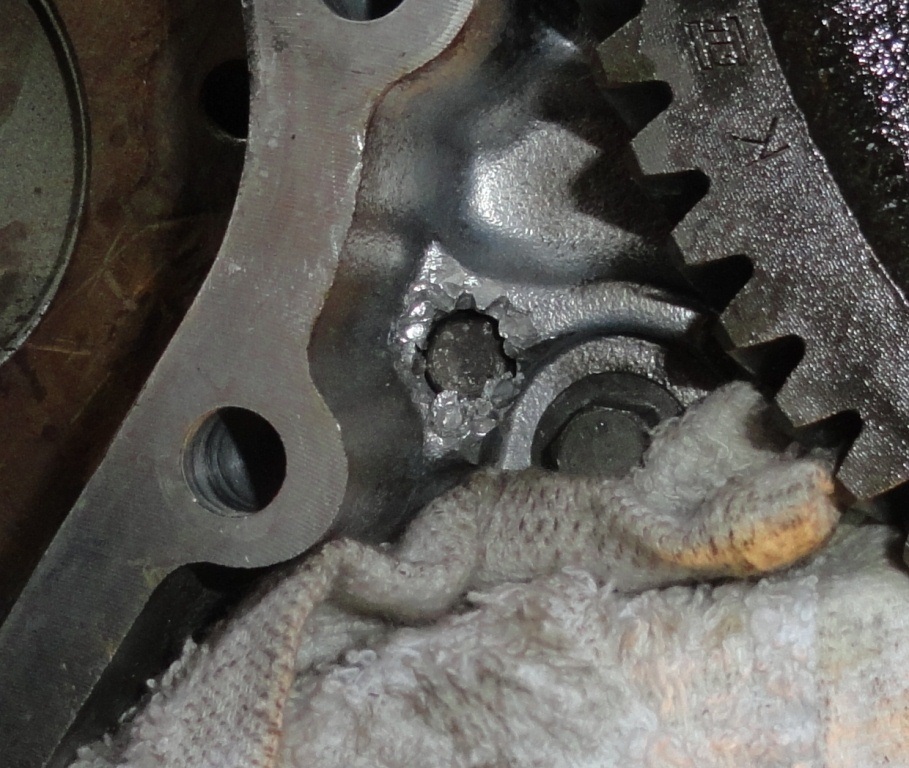
Here's what it looks like after I beat the snot out of the casing to hold it in place. I guess I could have purchased one of those kits, but after talking to a few local guys here, this seemed a more convenient choice, and I don't have to worry about the tab and bolt loosening up later on. I was thinking of putting some kind of epoxy on there, but I figured it would be something else to just work itself loose and fall off, so I opted not to.
All the other bolts that were accessible were removed, cleaned with brake cleaner, air dried with compressed air, and slathered in blue locktite. Once torqued to factory 18 ft lbs (plus a smidge), I'm hoping to never have to look inside this engine timing cover again... I do have a small seepage going on, but I think it may have to do with removing the bolts and pressure being released from the housing...... or at least I'm hoping so.
I'll be replacing the front TCS gasket and main seal as well. Do you guys have any experience with the aftermarket seal sets from Fel Pro ? The fel pro gasket set comes with all the gaskets required including the front seal, for about $35... otherwise, cummins will cost me about double.
Jim Lane's "alternator ground" is something that I'm doing as well. There already is a ground wire from the alternator to the engine block that I had to remove to get the thermostat housing off, so it's easy to just extend another ground wire to the battery negative side to complete the circuit..... (THANKS JIM...... as usual)
I have to get the required parts I need to finish the job, so I'll be without a CTD for a few days while doing so... I hate looking for parts....
Any other issues you've had doing this procedure ?
Taking the truck apart was relatively simple except for two things..... the fan clutch and the harmonic balancer removal. Since I've never taken one of these engines apart in any way, the learning curve was minor, but still a couple things to notice.
Started out with draining the coolant, and removing the radiator and fan shroud. I'm replacing all the coolant hoses, so cutting them off was the quickest way of removal. I'm replacing the hoses to the piping which leads to the heater core and the trans cooler canister on the passenger side of the block under the turbo Figured I'd do them all .
My truck is inter-cooled, and the clutch fan threads were unknown to me. I called Onemoparnut (THANKS BUDDY !) and he explained the easiest way to remove the clutch (without the tool) is to use an air chisel. Worked very quickly, and in less than 30 seconds I had the clutch off. While Looking down on the clutch, you turn the threads clockwise towards the drivers side, and it simply unscrews. Since I have to replace the fan clutch (it's leaking oil) I didn't care about damaging the housing.
Turns out my fan idler bearing is shot, so I'll be replacing it as I put it all back together. It didn't make any noise while running, but when the fan belt was removed, it wobbled around big time. There's a sticky about the replacement of the bearing, and Jim lane posted some pix. I guess I'll call cummins on Monday to see if they stock it locally.
I have a new cummins thermostat and gasket which I never installed some months ago when I was up there. That goes in too....
While I'm in there, the water pump bearing felt a little like a growling cat when spun, so I guess it's time for a replacement as well. Cummins pumps are about $150, and the after market ones are about $100 less. I wonder how much better the cummins pumps are comparatively
Thoughts on this ? I don't want to put a cheap pump on there only to have to re- do this again.
The harmonic balancer seems fine, but the rubber has hairline cracks in the rubber section. They look like surface only cracks, so I guess it's fine to re-install. I had to use a "strap wrench" on the balancer in order to get the bolts loose to remove it. My air gun was too long to fit between the radiator support and the front of the engine, so I bought an $8 strap wrench, locked it on the balancer, and the bolts loosened right up without a slip. Without that strap wrench, I don't now how I would have been able to get that sucker off..
The crank position sensor is original so I'm probably going to replace it, as it's so simple to do now. Have to see how much they are....
Here's the famous KDP pin. Still snug as a bug in a rug....
Here's what it looks like after I beat the snot out of the casing to hold it in place. I guess I could have purchased one of those kits, but after talking to a few local guys here, this seemed a more convenient choice, and I don't have to worry about the tab and bolt loosening up later on. I was thinking of putting some kind of epoxy on there, but I figured it would be something else to just work itself loose and fall off, so I opted not to.
All the other bolts that were accessible were removed, cleaned with brake cleaner, air dried with compressed air, and slathered in blue locktite. Once torqued to factory 18 ft lbs (plus a smidge), I'm hoping to never have to look inside this engine timing cover again... I do have a small seepage going on, but I think it may have to do with removing the bolts and pressure being released from the housing...... or at least I'm hoping so.
I'll be replacing the front TCS gasket and main seal as well. Do you guys have any experience with the aftermarket seal sets from Fel Pro ? The fel pro gasket set comes with all the gaskets required including the front seal, for about $35... otherwise, cummins will cost me about double.
Jim Lane's "alternator ground" is something that I'm doing as well. There already is a ground wire from the alternator to the engine block that I had to remove to get the thermostat housing off, so it's easy to just extend another ground wire to the battery negative side to complete the circuit..... (THANKS JIM...... as usual)
I have to get the required parts I need to finish the job, so I'll be without a CTD for a few days while doing so... I hate looking for parts....
Any other issues you've had doing this procedure ?
 08-26-2012, 07:57 AM
#2
Adminstrator-ess
That'll do just fine.  Theres nothing pushing the Dowell pin out, so a little Burr is enough to hold it in place.
My Chinese after market water pump is holding up just fine after five years. If you haven't scraped the gasket off the timing cover yet, don't bother. As long as it's in one piece, a bead of RTV will seal the cover just fine. I would not be afraid of the Fel-pro seal.
Sent from my HD2 using Tapatalk 2
Theres nothing pushing the Dowell pin out, so a little Burr is enough to hold it in place.My Chinese after market water pump is holding up just fine after five years. If you haven't scraped the gasket off the timing cover yet, don't bother. As long as it's in one piece, a bead of RTV will seal the cover just fine. I would not be afraid of the Fel-pro seal.
Sent from my HD2 using Tapatalk 2
08-26-2012, 08:50 AM
#3
Administrator
Hey T,wazup? Just a comment about replacing those heater hoses. I believe that they are silicone and designed to last forever. If you replace them, I would try to find silicone hose...Mark
 08-26-2012, 12:22 PM
#5
Registered User
Thread Starter
Join Date: Dec 2010
Location: Land of the Toxic Avenger
Posts: 6,770
Received 1,637 Likes
on
1,112 Posts
That'll do just fine. Theres nothing pushing the Dowell pin out, so a little Burr is enough to hold it in place.
My Chinese after market water pump is holding up just fine after five years. If you haven't scraped the gasket off the timing cover yet, don't bother. As long as it's in one piece, a bead of RTV will seal the cover just fine. I would not be afraid of the Fel-pro seal.
2
Theres nothing pushing the Dowell pin out, so a little Burr is enough to hold it in place.My Chinese after market water pump is holding up just fine after five years. If you haven't scraped the gasket off the timing cover yet, don't bother. As long as it's in one piece, a bead of RTV will seal the cover just fine. I would not be afraid of the Fel-pro seal.
2
I guess "your mileage will vary" depending on whom made that offshore waterpump, as I've heard both ends of the stick are common..... lasts forever.... lasts 6 months.... Oh, well...
The gasket broke when I pulled the tc cover off, so I have to replace it. The fel pro gasket and crank seal are the price of just the seal, so I guess it's worth it....
Gracias !
Those hoses lasted 20 years. I bet the new ones don't. I have no idea where to get silicone hoses, and I already have the new ones.... so I guess in a couple years, when I change hoses again, I should be able to find them by then....
They're simply just 5/8" 90* elbows, and a couple straight pieces of 5/8" inch.
Next time.... but good tip, otherwise.
 08-26-2012, 12:24 PM
#6
Registered User
Thread Starter
Join Date: Dec 2010
Location: Land of the Toxic Avenger
Posts: 6,770
Received 1,637 Likes
on
1,112 Posts
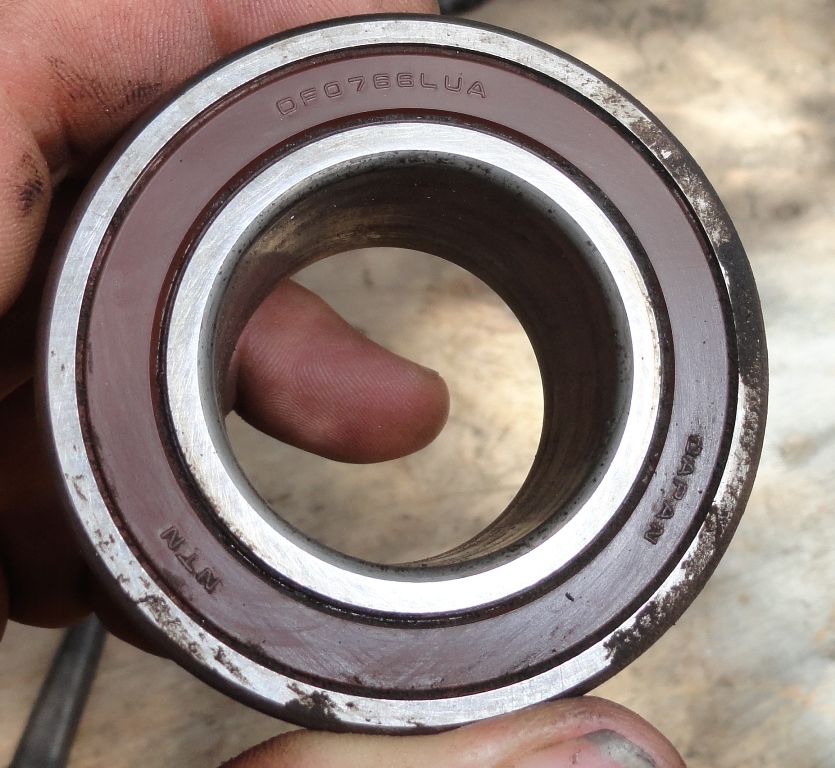
Here's the bearing, BTW for the fan clutch idler... I just smacked the hub out of the bearing, then I used my press to press out the bearing. Nothing better than finding an old press on CL for next to nothing, and using it now and then.
08-26-2012, 12:40 PM
#7
Registered User
Did You order one with wear sleeve or with out? I had to order one with it after I installed the first one and still leaked.
The way I install the sleeve is, I put a bit of permatex black on the crank where the sleeve will go and then push the sleeve with a flat chuck of wood and a hammer then clean the excess gasket maker from the crank then install the cover with gasket and seal already on it. I say this bc I was once told by the cummins rep that I should just clean the crank and drive the sleeve IN, then discovered I should have done different.
Just My $.2c
Trending Topics
08-26-2012, 01:35 PM
#8
Registered User
Thread Starter
Join Date: Dec 2010
Location: Land of the Toxic Avenger
Posts: 6,770
Received 1,637 Likes
on
1,112 Posts
The crank seal never leaked..... or at least until I put a new seal on it 
My crank was not damaged / grooved, but just a little polished where the seal rode
Crank seals must be installed DRY, as any type of lubricant negatively affects the seal. It's made from teflon and doesn't need lubricant.
My crank was not damaged / grooved, but just a little polished where the seal rode
Crank seals must be installed DRY, as any type of lubricant negatively affects the seal. It's made from teflon and doesn't need lubricant.
08-26-2012, 03:04 PM
#9
Registered User
Yes, what I meant was about the wear sleeve type of seal where if You install the sleeve dry it Will leak. Now the seal just needs to in there nice and slow... and dry  .
.
.
08-26-2012, 06:15 PM
#10
Registered User
I'm running a Duralast water pump on mine. Been there for 3 years now. As easy as it is to change and for $50, I had no problem with that.
 08-26-2012, 08:14 PM
#12
Registered User
Thread Starter
Join Date: Dec 2010
Location: Land of the Toxic Avenger
Posts: 6,770
Received 1,637 Likes
on
1,112 Posts
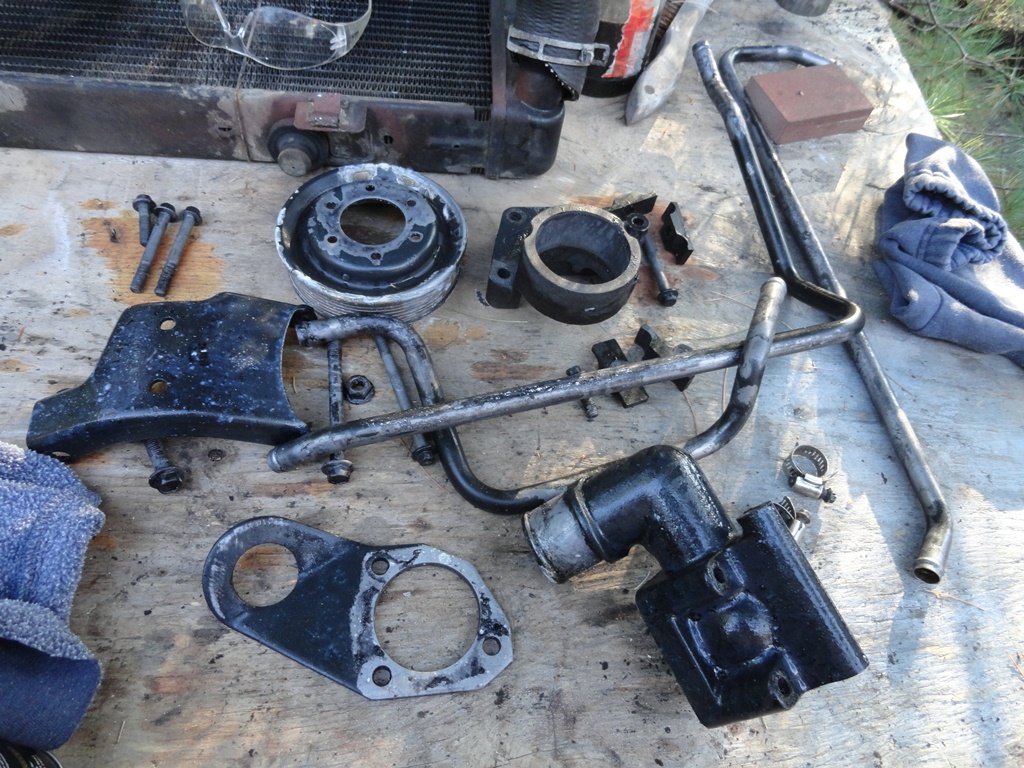
The tranny cooler lines on the right hand side have been seeping for years before I bought the truck. Today, I removed that "assembly" where you see the hoses / piping on the right hand side, and disassembled it. I'm replacing the lines with new hoses / clamps and re-configuring it to accept a 1/2" magnefine tranny filter up under the hood. This will extend the times I need to dump the pan.....
 08-27-2012, 11:24 AM
#14
Registered User
Thread Starter
Join Date: Dec 2010
Location: Land of the Toxic Avenger
Posts: 6,770
Received 1,637 Likes
on
1,112 Posts
Paul,
While you're in there, might as well de-rust all of your soon to be rusted ....or currently rusted... parts.
These sat overnight in a rust converter, and are ready to be washed, primed and painted. Stops that "R" word right in it's tracks...
While you're in there, might as well de-rust all of your soon to be rusted ....or currently rusted... parts.
These sat overnight in a rust converter, and are ready to be washed, primed and painted. Stops that "R" word right in it's tracks...

