
KSB (dynamic timing) Spacer Installation Thread

Thread Starter
Registered User
Joined: Jun 2014
Posts: 68
Likes: 2
KSB (dynamic timing) Spacer Installation Thread
A quick Google search for "KSB spacer installation" yielded me no [easy to find] results in the way of installation threads, so I decided to document this very simple, 30 minute job. If there's already a good thread out there, that's my bad.
Before you start, it's much easier on the hands if the engine is cool enough to touch without burning yourself. Common sense applies.
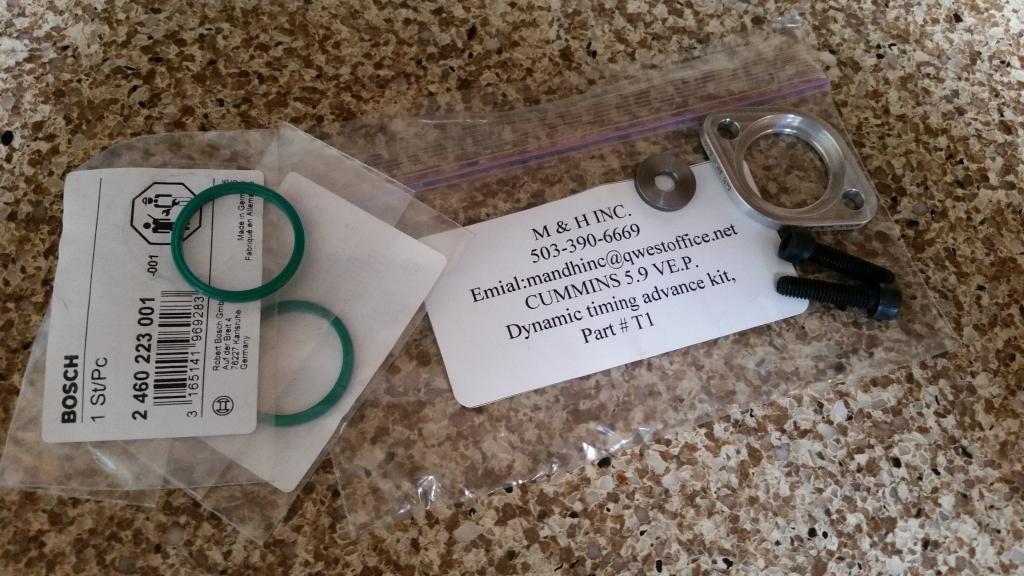
Of course you'll need M&H Inc.'s Dynamic Timing Advance Kit (M&H p/n: T1). As of the time of this write-up, they're about $125.
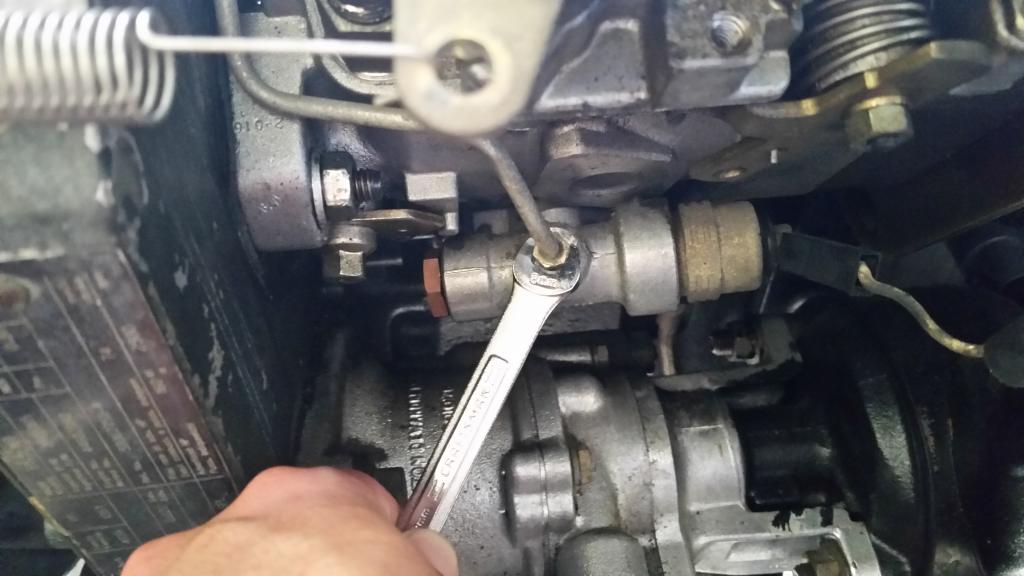
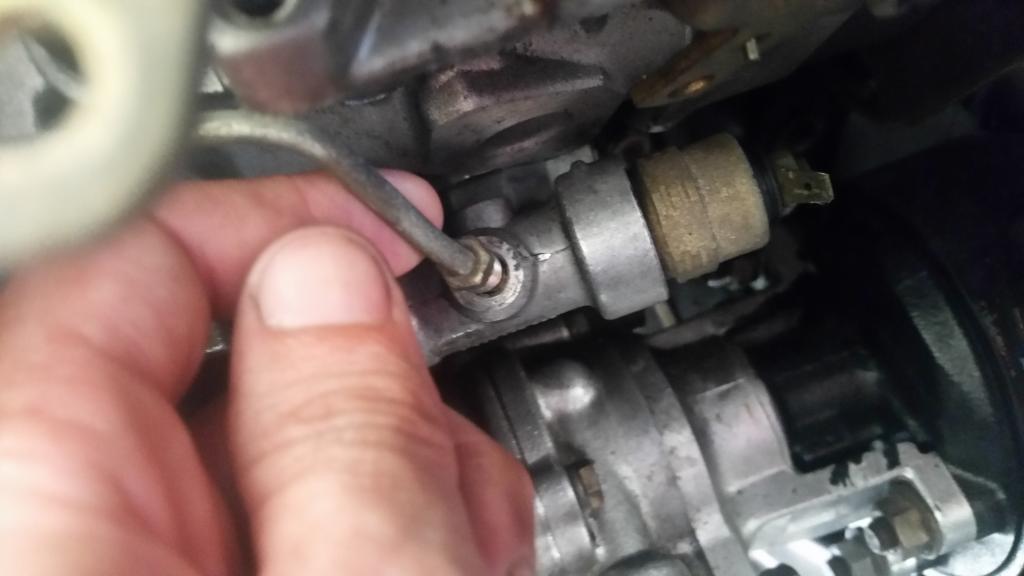
First, I started by using an 8mm wrench to break the line fitting on top of the KSB loose. Mine happened to come right apart without twisting the line, itself. A line wrench is preferable, but I don't own any metric line wrenches, so I ran with the open end of a regular hand wrench. Don't forget to disconnect the wire and get it out of the way.
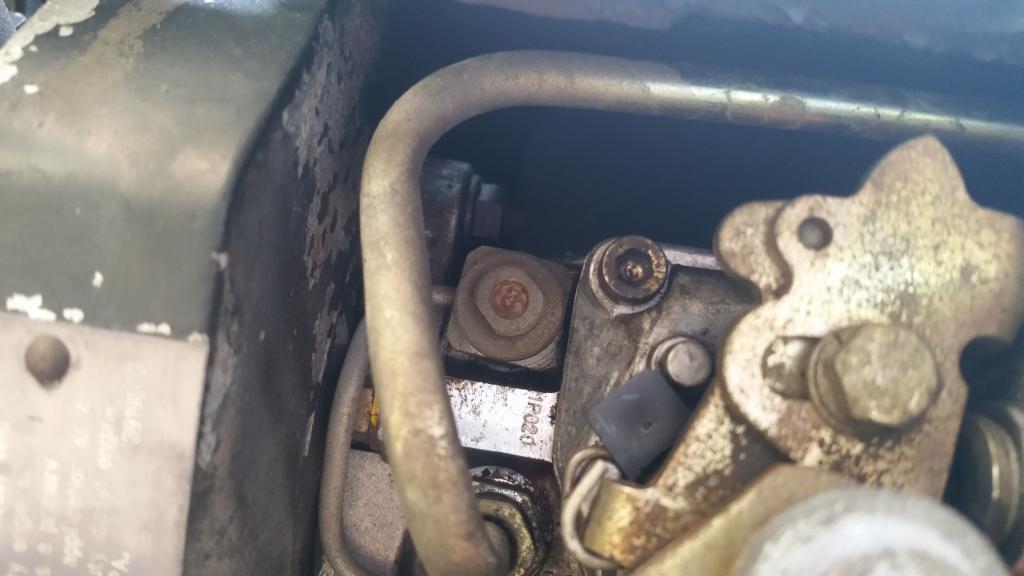
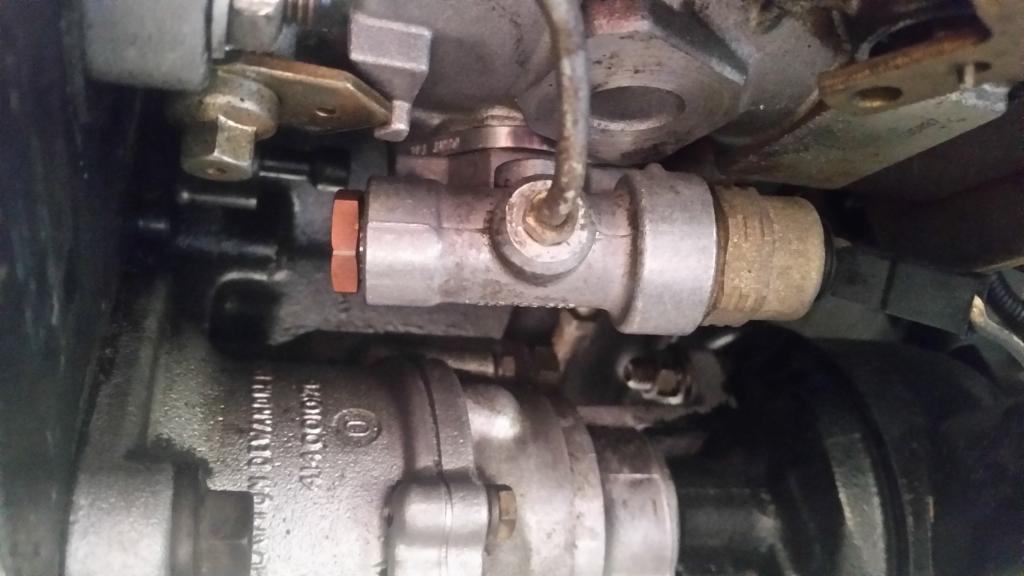
In the event you start to twist the small line while you're trying to disconnect the fitting, you may want to opt for the solenoid-removal route. Completely loosen the part shown below (center) and it'll come out with the line intact when the KSB is finally removed. It may be a good policy to also have a pump seal kit handy as I have it on very good authority that the o-rings are frequently damaged during removal of this particular part.
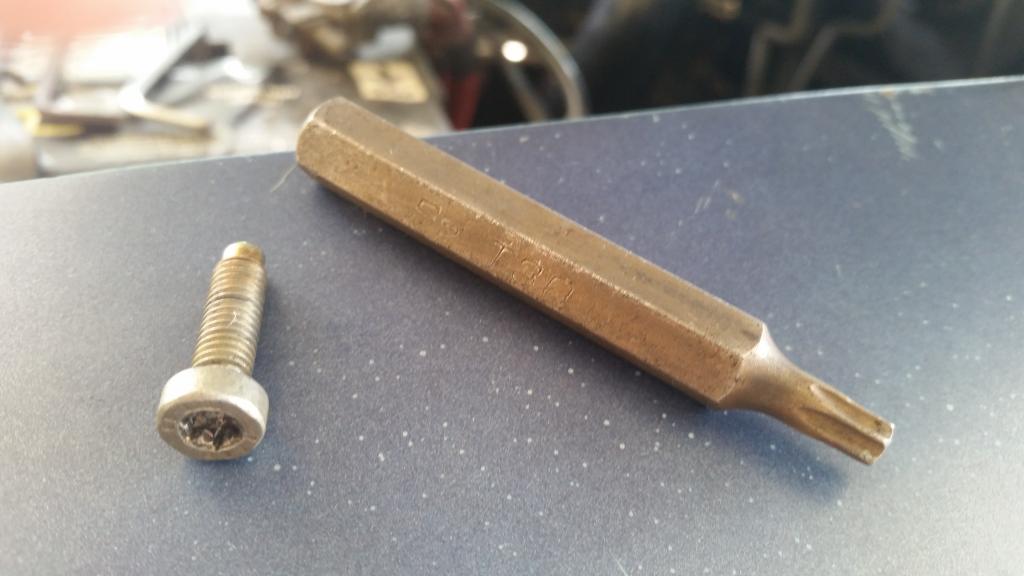
Next, use a T30 torx bit to remove the two bolts holding the KSB to the pump. They're on there pretty snug, so seat the bit as far into the screw head as possible and use even pressure until they break loose to avoid stripping these out.
Once you've got the screws out, hold the KSB with one hand and cup your other hand under it to catch the pieces that fall out. You need to reinstall them so dropping them will cause you a headache. I also used my pocket knife to very carefully snag the green o-ring that seals the KSB-pump joint. This is the order that everything came out of my particular pump:

As for the number of shims that fall from your pump, your mileage may vary. I'm told there are one, two and even sometimes three shims in there.
This is the order in which I'll be putting the new (and old) parts back in:
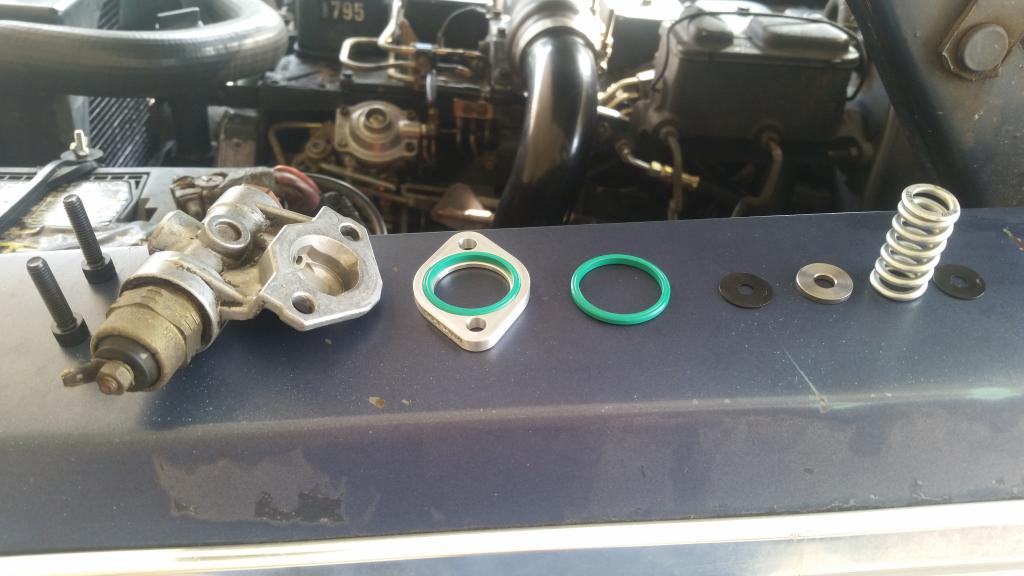
Note: The machined spacer side with the new green o-ring (you'll need to install this in the recess yourself) faces the KSB. The thick washer that comes in the kit can go on either end of the spring. I understand that its purpose is only to maintain factory spring preload (somebody correct me if I'm wrong), so its position isn't critical.
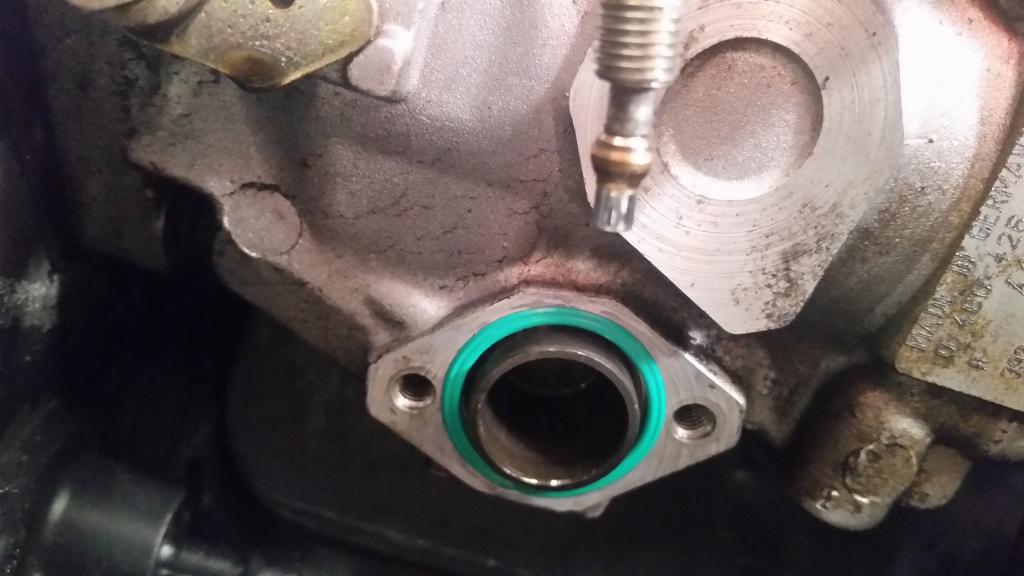
The other green o-ring in the kit goes in the groove on the pump housing.
In order to install the parts into the pump, I followed a tip given to me by David (BC847). I just put them on a T15 torx driver and fed it into the cylinder that houses the piston.
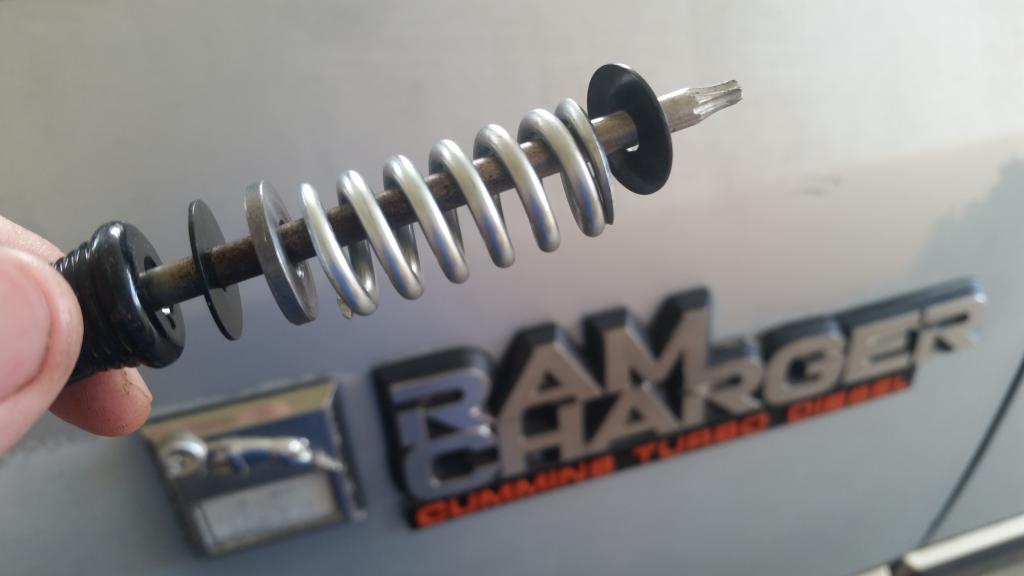
Before feeding the washer, shims and spring into the pump, I arranged the KSB and spacer like so:
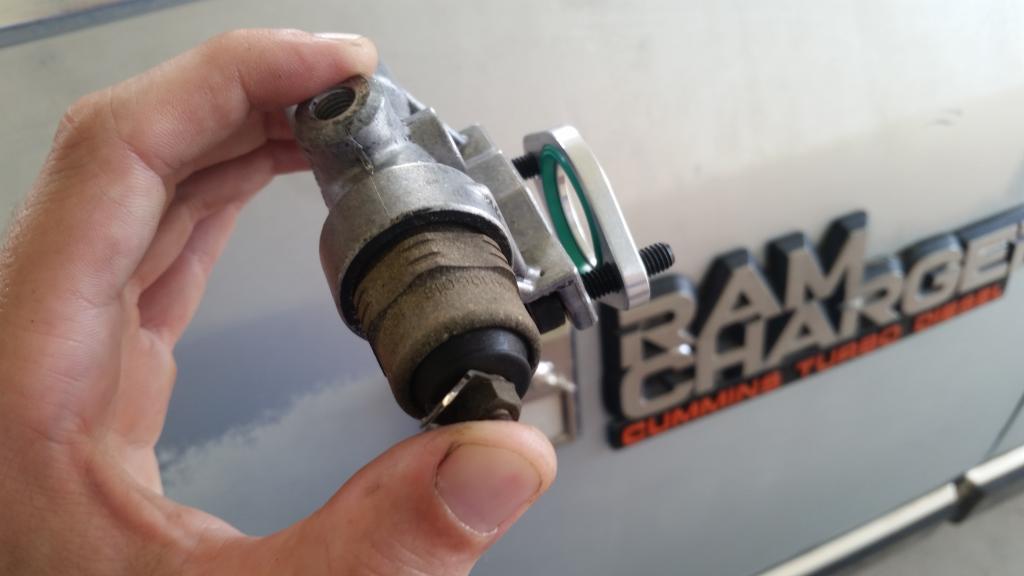
Holding the shims and spring in the pump with one hand, you can cover them, holding them in, with the KSB in the other hand. press the KSB into the pump, compressing the spring, and use your fingers to start threading the new, longer screws into their respective holes.
Once you've got them started, use a ball head 5mm allen wrench to tighten them up, rotating between the two every few turns to ensure everything seats correctly. Once mine were snugged up, I used the box end of my 8mm wrench to gain the leverage needed to tighten them properly. No need to go all Hulk-smash and break them off; just get them tight enough they won't leak.
Now you can carefully manipulate the small metal line into position so that the fitting may be reinstalled. Don't be afraid to move it around a bit and get it where you need it. Just take care not to pinch it shut.
Finally, tighten the fitting and reattach your wire. Done.
Before you start, it's much easier on the hands if the engine is cool enough to touch without burning yourself. Common sense applies.
Of course you'll need M&H Inc.'s Dynamic Timing Advance Kit (M&H p/n: T1). As of the time of this write-up, they're about $125.

First, I started by using an 8mm wrench to break the line fitting on top of the KSB loose. Mine happened to come right apart without twisting the line, itself. A line wrench is preferable, but I don't own any metric line wrenches, so I ran with the open end of a regular hand wrench. Don't forget to disconnect the wire and get it out of the way.

In the event you start to twist the small line while you're trying to disconnect the fitting, you may want to opt for the solenoid-removal route. Completely loosen the part shown below (center) and it'll come out with the line intact when the KSB is finally removed. It may be a good policy to also have a pump seal kit handy as I have it on very good authority that the o-rings are frequently damaged during removal of this particular part.

Next, use a T30 torx bit to remove the two bolts holding the KSB to the pump. They're on there pretty snug, so seat the bit as far into the screw head as possible and use even pressure until they break loose to avoid stripping these out.

Once you've got the screws out, hold the KSB with one hand and cup your other hand under it to catch the pieces that fall out. You need to reinstall them so dropping them will cause you a headache. I also used my pocket knife to very carefully snag the green o-ring that seals the KSB-pump joint. This is the order that everything came out of my particular pump:

As for the number of shims that fall from your pump, your mileage may vary. I'm told there are one, two and even sometimes three shims in there.
This is the order in which I'll be putting the new (and old) parts back in:

Note: The machined spacer side with the new green o-ring (you'll need to install this in the recess yourself) faces the KSB. The thick washer that comes in the kit can go on either end of the spring. I understand that its purpose is only to maintain factory spring preload (somebody correct me if I'm wrong), so its position isn't critical.
The other green o-ring in the kit goes in the groove on the pump housing.

In order to install the parts into the pump, I followed a tip given to me by David (BC847). I just put them on a T15 torx driver and fed it into the cylinder that houses the piston.

Before feeding the washer, shims and spring into the pump, I arranged the KSB and spacer like so:

Holding the shims and spring in the pump with one hand, you can cover them, holding them in, with the KSB in the other hand. press the KSB into the pump, compressing the spring, and use your fingers to start threading the new, longer screws into their respective holes.
Once you've got them started, use a ball head 5mm allen wrench to tighten them up, rotating between the two every few turns to ensure everything seats correctly. Once mine were snugged up, I used the box end of my 8mm wrench to gain the leverage needed to tighten them properly. No need to go all Hulk-smash and break them off; just get them tight enough they won't leak.
Now you can carefully manipulate the small metal line into position so that the fitting may be reinstalled. Don't be afraid to move it around a bit and get it where you need it. Just take care not to pinch it shut.

Finally, tighten the fitting and reattach your wire. Done.
Thread Starter
Registered User
Joined: Jun 2014
Posts: 68
Likes: 2
This is all you're left with:
I started the truck (no need to prime) and let it idle for a bit to make sure I had no leaks. My test run went well. With my timing at the factory position, I've retained all of my bottom end torque and gained a very noticeable amount of power up top as my dynamic timing window is wider.
This is a perfect addition to a governor spring upgrade if your truck is stock/near stock like mine is at the moment.

Registered User


Joined: Dec 2008
Posts: 7,293
Likes: 2,884
From: vermont
I see the sticky in this threads future.
Nice work.
Being able to access things on your pump, like the idle screw gets pretty hard with the timing bumped 1/8 inch to the head.
This looks like an interesting mod.
Nice work.
Being able to access things on your pump, like the idle screw gets pretty hard with the timing bumped 1/8 inch to the head.
This looks like an interesting mod.

Trending Topics
Thread Starter
Registered User
Joined: Jun 2014
Posts: 68
Likes: 2
I'm psyched about it. It's common to advance the static timing to prevent that premature drop in the power up top. The only problem is that often you sacrifice low-end torque. The way I understand it, with this the static timing can remain stock, retaining the low-end power you're used to while allowing case pressures at higher RPMs to push the piston behind the KSB farther, advancing the injection event and eliminating the power loss common at that range. It pulls noticeably harder up top now. More than $125 and 30 minutes worth of "work" harder. With my truck's current configuration, I love this mod. I'm also under the impression that once I upgrade to bigger injectors and need a static timing advancement, this part won't necessarily advance the dynamic timing so much as to cause the engine to fight itself because of an injection event that's too early. We'll have to test that theory when the time comes.
Thread Starter
Registered User
Joined: Jun 2014
Posts: 68
Likes: 2