
89-91 Voltage "pulsing" issue solved!

Thread Starter
Registered User
Joined: Mar 2008
Posts: 69
Likes: 0
From: Wilton, IA
89-91 Voltage "pulsing" issue solved!
I wrote this up on another site, but I figured I would share it with you all too...
Like many of you guys with NON-IC trucks, my 91 had the voltage "pulse" when running. It was really noticeable at night at idle, as the headlights would slightly dim about two to three times a second. This condition is caused by the voltage regulator (V/R), but, not because it is faulty. The key on circuit that the V/R gets its input voltage from, has a slight drop in it, so when it senses the lower voltage it tells the alternator to charge. It charges till it reaches the correct voltage, then drops off. This condition will occur several times a second. Well, I was tired of it and wanted to finally do something about it. I had already cleaned all the grounds, added a separate ground from the alternator case to the block, and upgraded to the "Blue V/R". I spent a little time looking at the FSM and this is what I came up with.
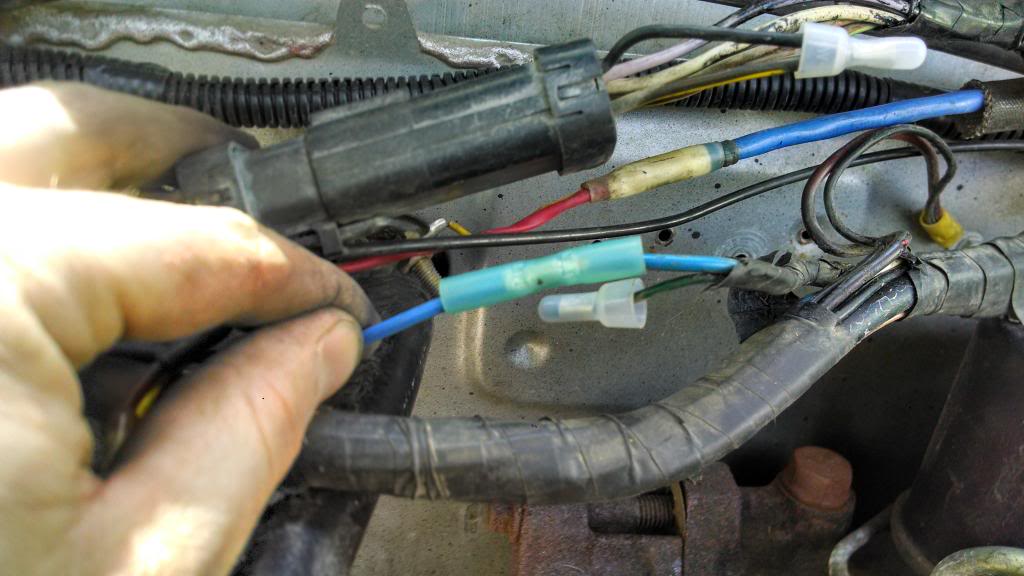
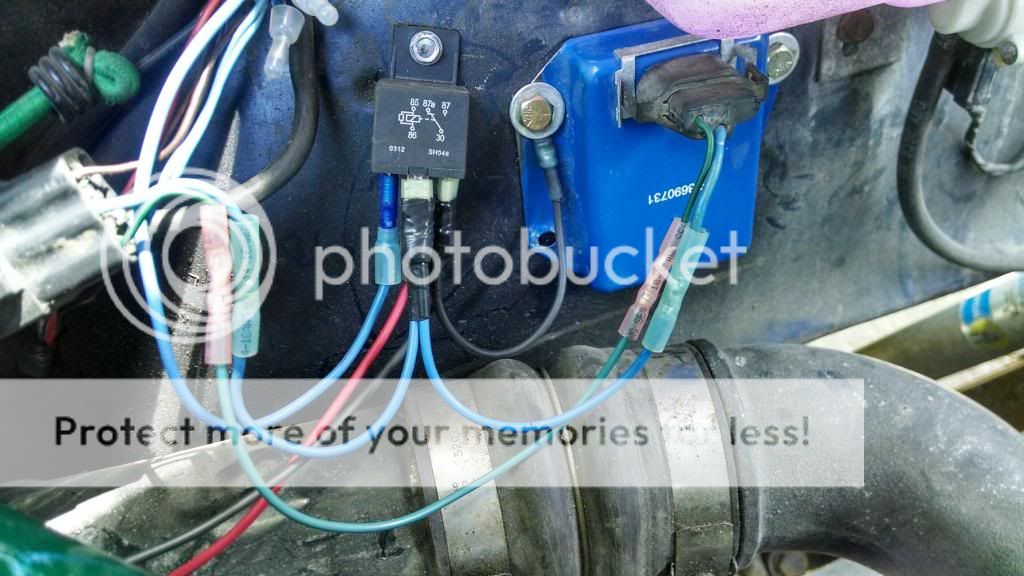
This is the final result. Don't pay any attention to my use of shrink type connectors, as my micro torch ran out of gas when I went to use it.

And here is how we get there!
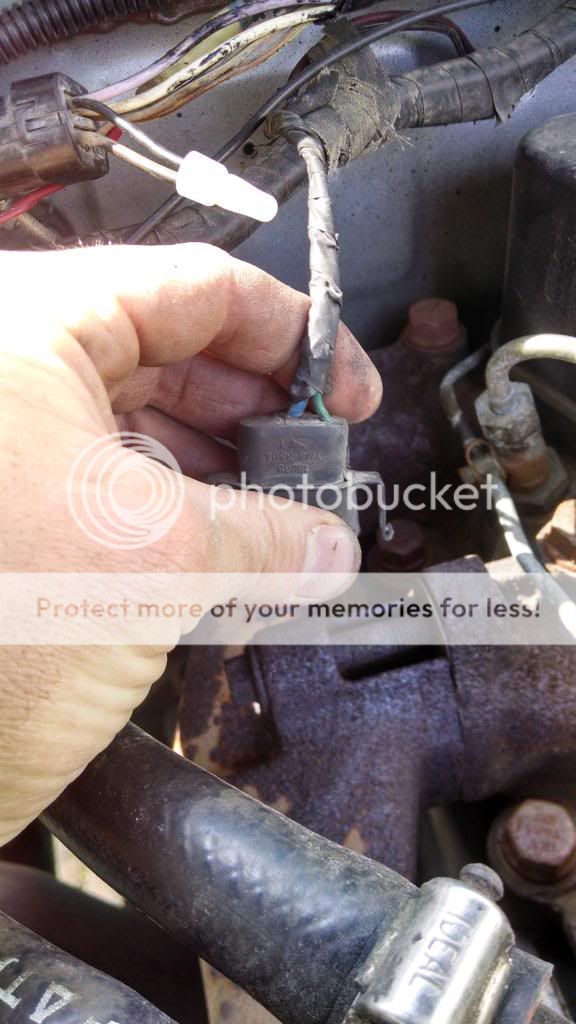
First, remove the V/R from it's original location. This is the plug you will cut from the harness.
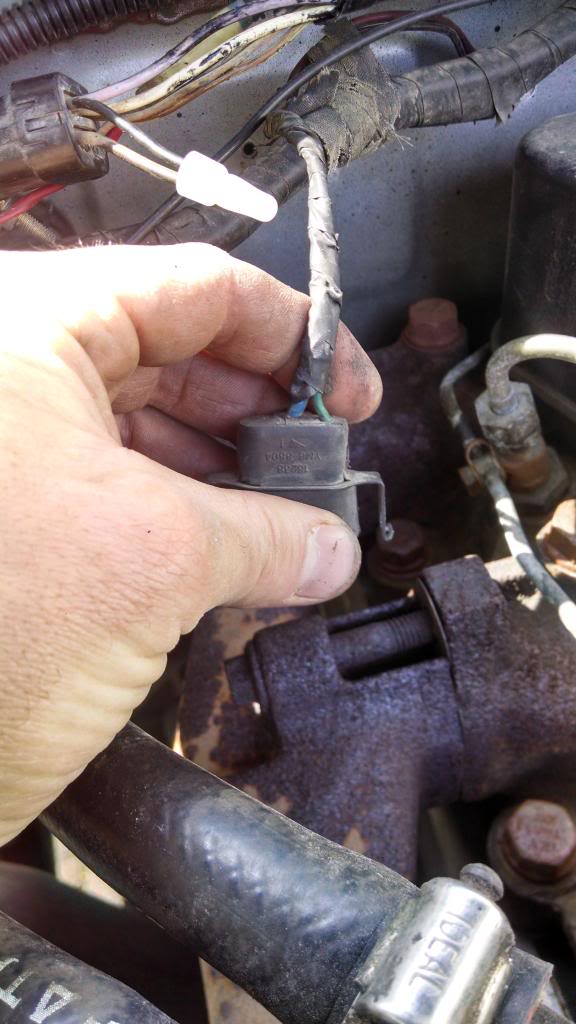
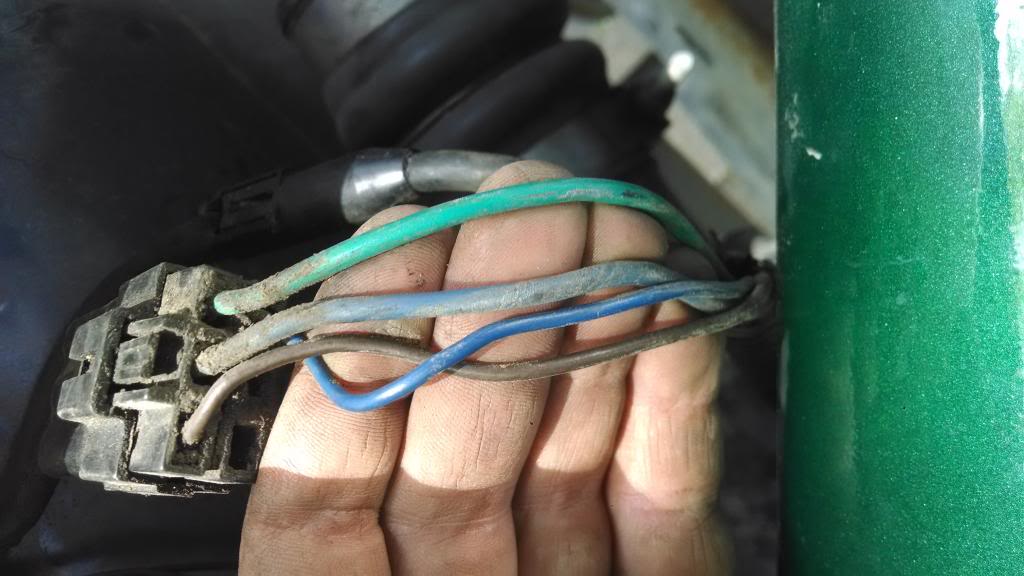
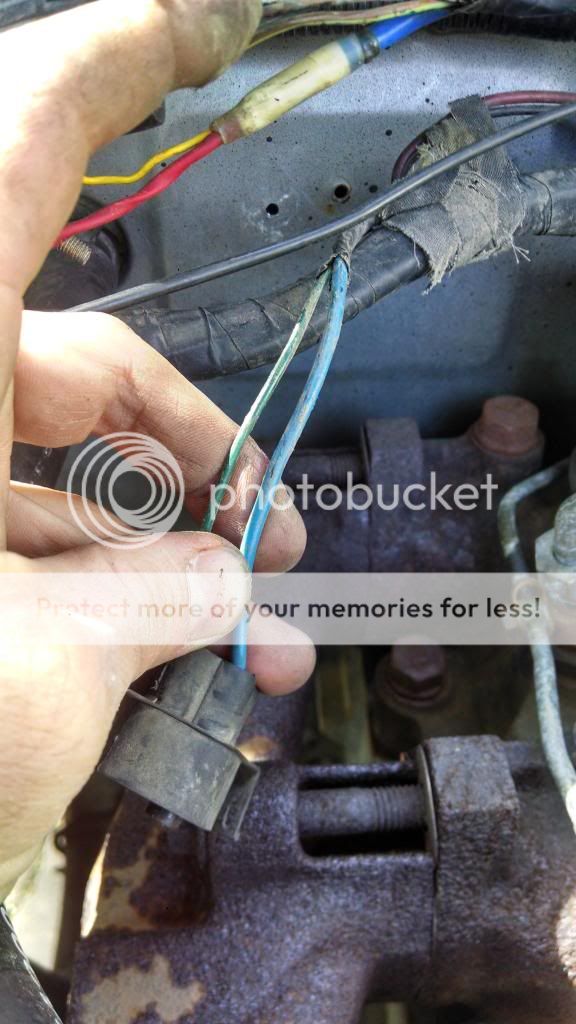
Here are the wires with the tape cut off. You need about two plus inches of wires off the V/R connector. The blue wire is key on and this is where the V/R gets its feed from, where it reads the system voltage.
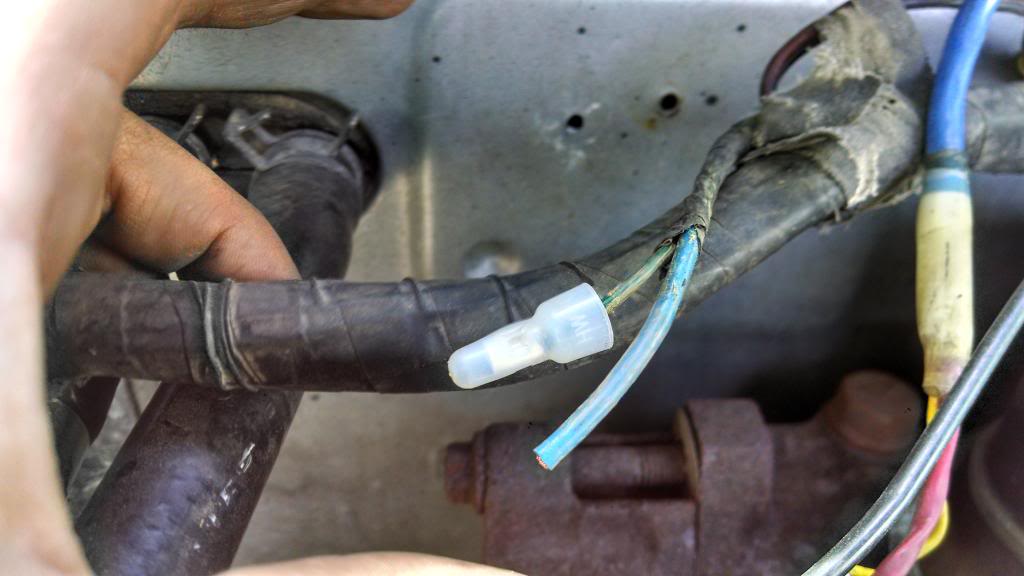
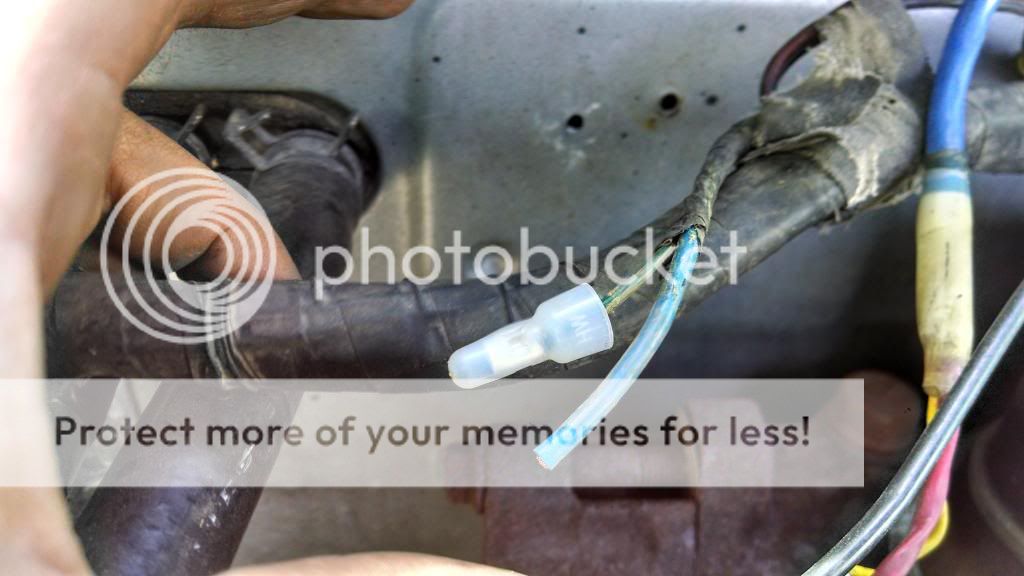
I like to cap off the unused wires, just so I know in the future that it isn't being used. I have a bad case of CRS (can't remember ****)
I used some blue 14 gauge wire I had, so I could keep the correct colors that were used originally. Use whatever you want or what will work. Run it inside the split loom down to where the ALT A/C connector is.
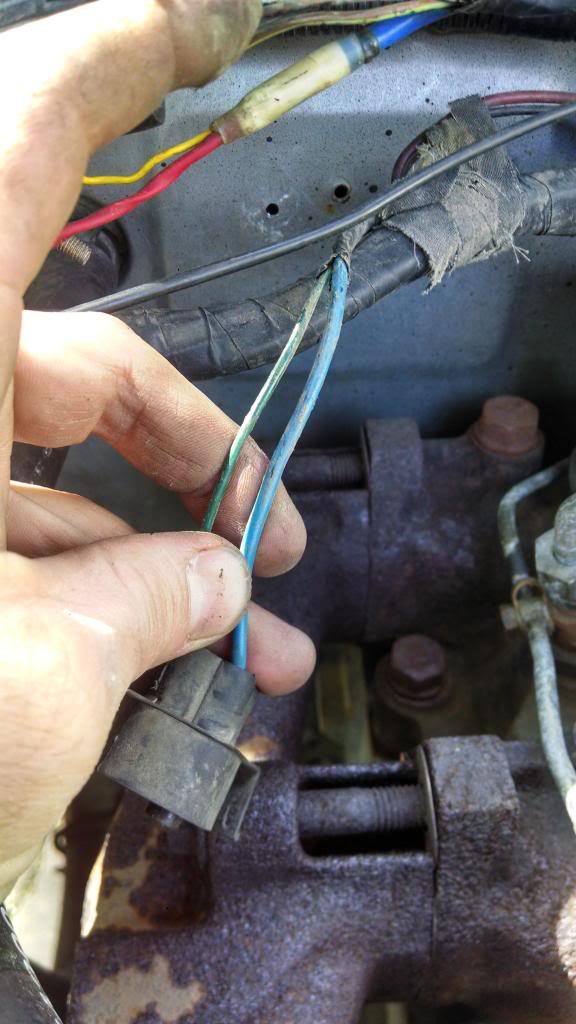
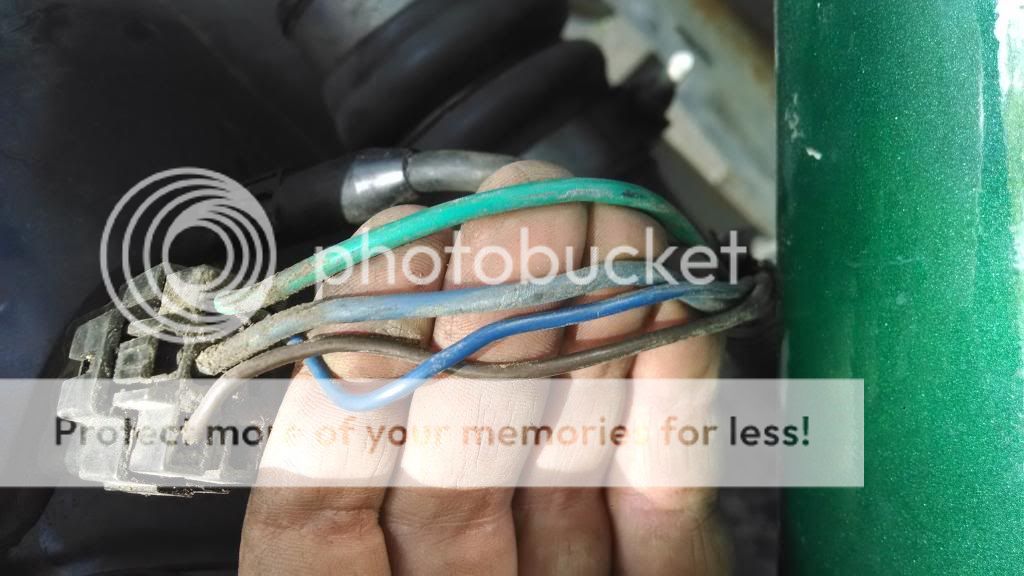
Next, take a look at the wiring on the connector down by the ALT. You'll see two small blue 16/18 gauge wires, one blue 12/14 gauge wire, and the other end of the small green wire that was capped at the original V/R location. This picture is on the ALT side of the connector, but use I used the other side as the wire on the truck harness side felt like it was in better condition, as the ALT side felt like it was made of the same stuff as the fusible links.
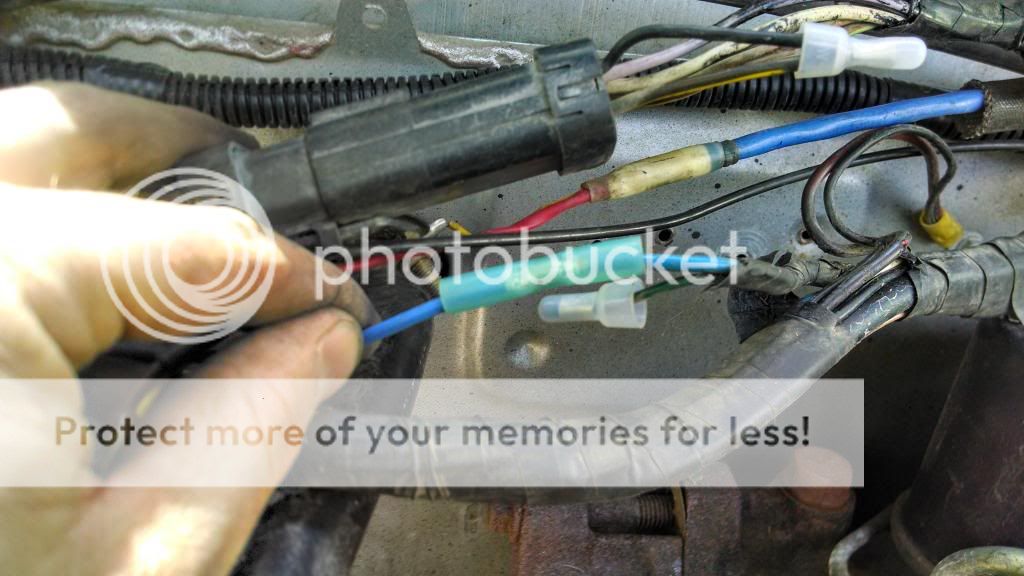
Cut the large blue wire and the small green wire about two plus inches from the connector. Cap the blue wire, as this one won't be used. Make a 12 inch run of wire and connect it to the green wire. I used green here also to keep with the original colors. Connect the other end of it to the V/R plug.
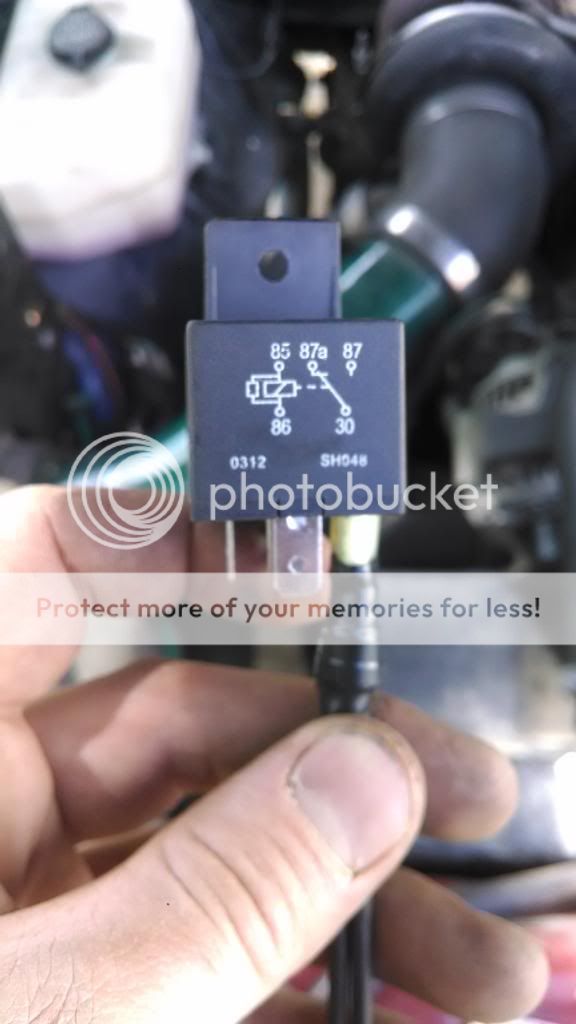
Next, get yourself a relay. I had one of these so I used it.

Make two leads for the ground, one short one to a ring terminal, and the other will go to a chassis ground or battery. The switched power will come directly from the battery, instead of through the key on circuit. Make another 12" or so lead, connect it to the blue wire on the V/R plug and hook it to the switched terminal on the relay, and make another blue lead and connect it to the blue wire on the ALT A/C connector. Take the blue wire that was connected at the original V/R location and connect it at the trigger location on the relay.
Install it all, clean the paint off one of the sides if the V/R, and hook the ring terminal up there, just so the V/R case is grounded.
This is the finished product.
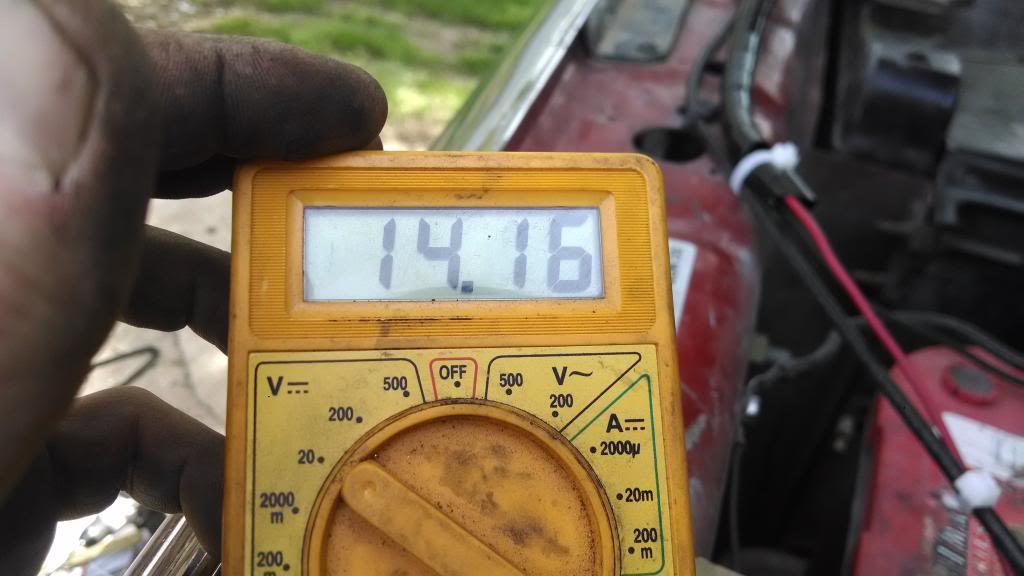
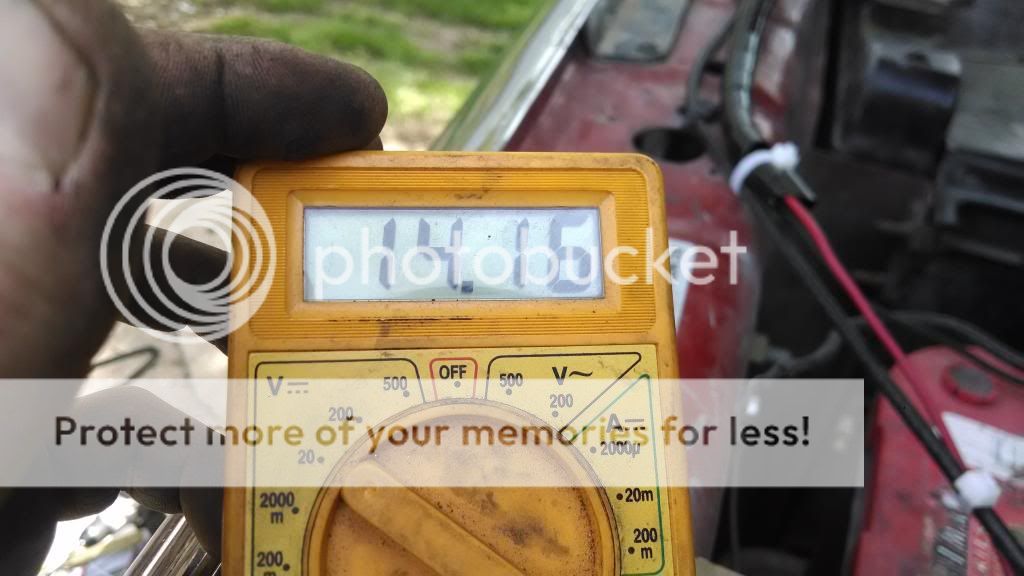
No more wiggle wiggle of the voltage gauge and no more pulsing of the lights. Works very well. I am going to go back and heat shrink everything and clean it all up proper.
Like many of you guys with NON-IC trucks, my 91 had the voltage "pulse" when running. It was really noticeable at night at idle, as the headlights would slightly dim about two to three times a second. This condition is caused by the voltage regulator (V/R), but, not because it is faulty. The key on circuit that the V/R gets its input voltage from, has a slight drop in it, so when it senses the lower voltage it tells the alternator to charge. It charges till it reaches the correct voltage, then drops off. This condition will occur several times a second. Well, I was tired of it and wanted to finally do something about it. I had already cleaned all the grounds, added a separate ground from the alternator case to the block, and upgraded to the "Blue V/R". I spent a little time looking at the FSM and this is what I came up with.
This is the final result. Don't pay any attention to my use of shrink type connectors, as my micro torch ran out of gas when I went to use it.

And here is how we get there!
First, remove the V/R from it's original location. This is the plug you will cut from the harness.

Here are the wires with the tape cut off. You need about two plus inches of wires off the V/R connector. The blue wire is key on and this is where the V/R gets its feed from, where it reads the system voltage.

I like to cap off the unused wires, just so I know in the future that it isn't being used. I have a bad case of CRS (can't remember ****)

I used some blue 14 gauge wire I had, so I could keep the correct colors that were used originally. Use whatever you want or what will work. Run it inside the split loom down to where the ALT A/C connector is.

Next, take a look at the wiring on the connector down by the ALT. You'll see two small blue 16/18 gauge wires, one blue 12/14 gauge wire, and the other end of the small green wire that was capped at the original V/R location. This picture is on the ALT side of the connector, but use I used the other side as the wire on the truck harness side felt like it was in better condition, as the ALT side felt like it was made of the same stuff as the fusible links.

Cut the large blue wire and the small green wire about two plus inches from the connector. Cap the blue wire, as this one won't be used. Make a 12 inch run of wire and connect it to the green wire. I used green here also to keep with the original colors. Connect the other end of it to the V/R plug.
Next, get yourself a relay. I had one of these so I used it.

Make two leads for the ground, one short one to a ring terminal, and the other will go to a chassis ground or battery. The switched power will come directly from the battery, instead of through the key on circuit. Make another 12" or so lead, connect it to the blue wire on the V/R plug and hook it to the switched terminal on the relay, and make another blue lead and connect it to the blue wire on the ALT A/C connector. Take the blue wire that was connected at the original V/R location and connect it at the trigger location on the relay.
Install it all, clean the paint off one of the sides if the V/R, and hook the ring terminal up there, just so the V/R case is grounded.
This is the finished product.

No more wiggle wiggle of the voltage gauge and no more pulsing of the lights. Works very well. I am going to go back and heat shrink everything and clean it all up proper.

Thread Starter
Registered User
Joined: Mar 2008
Posts: 69
Likes: 0
From: Wilton, IA
Just a regular relay should work, I just used what I had. All I really did besides moving the regulator off the firewall was set it up so it reads voltage directly from the battery, instead of through the ignition on circuit, where there is a little resistance because of the nature of a long run of wires, multiple connections and what not. All the little wiring and connections have a very, very small resistance to them, but even miniscule amounts at each will add up just enough for the regulator to do the charge "wiggle wiggle" of the gauge and lights, etc. Clear as mud? 
Trending Topics

Registered User


Joined: Apr 2009
Posts: 3,317
Likes: 485
From: alaska
Something I posted a while back.
https://www.dieseltruckresource.com/...alternator+101
https://www.dieseltruckresource.com/...alternator+101
1st Generation Admin
Joined: Jan 2005
Posts: 4,601
Likes: 118
From: Buies Creek, NC
Something I posted a while back.
https://www.dieseltruckresource.com/...-t307266.html?
https://www.dieseltruckresource.com/...-t307266.html?


Registered User
Joined: Nov 2009
Posts: 1,955
Likes: 2
From: McCook, Nebraska
Just a regular relay should work, I just used what I had. All I really did besides moving the regulator off the firewall was set it up so it reads voltage directly from the battery, instead of through the ignition on circuit, where there is a little resistance because of the nature of a long run of wires, multiple connections and what not. All the little wiring and connections have a very, very small resistance to them, but even miniscule amounts at each will add up just enough for the regulator to do the charge "wiggle wiggle" of the gauge and lights, etc. Clear as mud?

Registered User
Joined: Jan 2011
Posts: 301
Likes: 1
From: ragland,wv
I wrote this up on another site, but I figured I would share it with you all too...
Like many of you guys with NON-IC trucks, my 91 had the voltage "pulse" when running. It was really noticeable at night at idle, as the headlights would slightly dim about two to three times a second. This condition is caused by the voltage regulator (V/R), but, not because it is faulty. The key on circuit that the V/R gets its input voltage from, has a slight drop in it, so when it senses the lower voltage it tells the alternator to charge. It charges till it reaches the correct voltage, then drops off. This condition will occur several times a second. Well, I was tired of it and wanted to finally do something about it. I had already cleaned all the grounds, added a separate ground from the alternator case to the block, and upgraded to the "Blue V/R". I spent a little time looking at the FSM and this is what I came up with.
This is the final result. Don't pay any attention to my use of shrink type connectors, as my micro torch ran out of gas when I went to use it.
And here is how we get there!
First, remove the V/R from it's original location. This is the plug you will cut from the harness.
Here are the wires with the tape cut off. You need about two plus inches of wires off the V/R connector. The blue wire is key on and this is where the V/R gets its feed from, where it reads the system voltage.
I like to cap off the unused wires, just so I know in the future that it isn't being used. I have a bad case of CRS (can't remember ****)
I used some blue 14 gauge wire I had, so I could keep the correct colors that were used originally. Use whatever you want or what will work. Run it inside the split loom down to where the ALT A/C connector is.
Next, take a look at the wiring on the connector down by the ALT. You'll see two small blue 16/18 gauge wires, one blue 12/14 gauge wire, and the other end of the small green wire that was capped at the original V/R location. This picture is on the ALT side of the connector, but use I used the other side as the wire on the truck harness side felt like it was in better condition, as the ALT side felt like it was made of the same stuff as the fusible links.
Cut the large blue wire and the small green wire about two plus inches from the connector. Cap the blue wire, as this one won't be used. Make a 12 inch run of wire and connect it to the green wire. I used green here also to keep with the original colors. Connect the other end of it to the V/R plug.
Next, get yourself a relay. I had one of these so I used it.
Make two leads for the ground, one short one to a ring terminal, and the other will go to a chassis ground or battery. The switched power will come directly from the battery, instead of through the key on circuit. Make another 12" or so lead, connect it to the blue wire on the V/R plug and hook it to the switched terminal on the relay, and make another blue lead and connect it to the blue wire on the ALT A/C connector. Take the blue wire that was connected at the original V/R location and connect it at the trigger location on the relay.
Install it all, clean the paint off one of the sides if the V/R, and hook the ring terminal up there, just so the V/R case is grounded.
This is the finished product.
No more wiggle wiggle of the voltage gauge and no more pulsing of the lights. Works very well. I am going to go back and heat shrink everything and clean it all up proper.

Administrator

Joined: Nov 2004
Posts: 4,084
Likes: 235
From: Southern California
Mopar charging systems have pulsed and waivered as far back as the late 60's and probably beyond, 383, 426 and 440's ammeters would wander at discharge until you step on it then it would peg themselves to the full charge, you would think the ammeter was the tach.
Registered User
Joined: Nov 2011
Posts: 4,479
Likes: 211
From: Isanti, MN
I raised a pile of kids and traveled some. We used Dodge vans of the 70's and 80's variety. Coupla things I did.
1. If it came with a Thermoquad, it got changed out to a Quadrajet.
2. I always carried a spare voltage regulator. Usually carried a water pump also.
Those old 318 and 360 engines were tough.......for gassers. Brings back fond memories.
Lost an alternator in Northern Michigan once. Saw a junky yard with Dodges in it. Stopped there. The guy sold me an alternator for 20 bucks and helped me install it, while his wife cooked up a meal for the whole tribe.
Registered User
Joined: Apr 2009
Posts: 3,317
Likes: 485
From: alaska
Of all the Dodges I've had, and there has been quite a few, the only ones I've ever had an unusual alternator problem with was the 91 and 92 W250 Cummins. The rest where normal wear outs.
J, my preference was the AFB.
J, my preference was the AFB.