


More guages installed...


Thread Starter
Registered User
Joined: Nov 2007
Posts: 4,737
Likes: 4
From: Kuna, Idaho
More guages installed...
Over the last few weeks I went from 2 gauges, boost and EGT, to 6... I also made my dual a-pillar a single a-pillar.. The visibility is much better now.
I added Rail Pressure (for fun, I don't mess with pressure), fuel pressure, oil pressure, and drive pressure (mainly for exhaust brake pressure). I also moved my pryo probe to the collector and put the drive pressure in the old pyro hole..
I have played with the drive pressure a little, but nothing too much.. I will be curious how it runs when towing.. It gets to about 40 and holds with the WG on... over 55 with the WG off and stock fueling.
The Fuel Pressure sender. I "T"ed into the line after the Cat 2 mic and before the CP3.

The new pyro location and DP hookup.

6' of copper tubing to dissipate the DP heat.

Inline filter to keep any soot (in case of an air leak) from getting to the gauge.

Where I tapped into the oil.. On the drivers side above the ECM.

Rail, Fuel, Oil

EGT

Boost, Drive

I added Rail Pressure (for fun, I don't mess with pressure), fuel pressure, oil pressure, and drive pressure (mainly for exhaust brake pressure). I also moved my pryo probe to the collector and put the drive pressure in the old pyro hole..
I have played with the drive pressure a little, but nothing too much.. I will be curious how it runs when towing.. It gets to about 40 and holds with the WG on... over 55 with the WG off and stock fueling.
The Fuel Pressure sender. I "T"ed into the line after the Cat 2 mic and before the CP3.
The new pyro location and DP hookup.
6' of copper tubing to dissipate the DP heat.
Inline filter to keep any soot (in case of an air leak) from getting to the gauge.
Where I tapped into the oil.. On the drivers side above the ECM.
Rail, Fuel, Oil
EGT
Boost, Drive


Registered User
Joined: Nov 2006
Posts: 795
Likes: 0
From: Southern Maryland
Very nice install. How did the windshield pod mount and how do you like it? Also, I was just reading the thread on your Amsoil bypass install and noticed that you put a "T" on top of the OEM oil filter housing for a possible pressure gauge there in the future. How come you didn't end up going with that route for your gauge?
Thread Starter
Registered User
Joined: Nov 2007
Posts: 4,737
Likes: 4
From: Kuna, Idaho
Very nice install. How did the windshield pod mount and how do you like it? Also, I was just reading the thread on your Amsoil bypass install and noticed that you put a "T" on top of the OEM oil filter housing for a possible pressure gauge there in the future. How come you didn't end up going with that route for your gauge?
I didn't use the T because the sender wire is too short (and the way the harness works I couldn't route it down the pass side) to reach, so I could either splice the wires or move the sender. Thanks to the OE port above the ECM I just went that route. It was a PITA to get it installed behind the wiring, but its done.

Thread Starter
Registered User
Joined: Nov 2007
Posts: 4,737
Likes: 4
From: Kuna, Idaho
Thread Starter
Registered User
Joined: Nov 2007
Posts: 4,737
Likes: 4
From: Kuna, Idaho
Update:
I got tired of the overhead pod falling off on hot days, and didn't want to have to do the major mounting I have read about on here. So a change was in order.
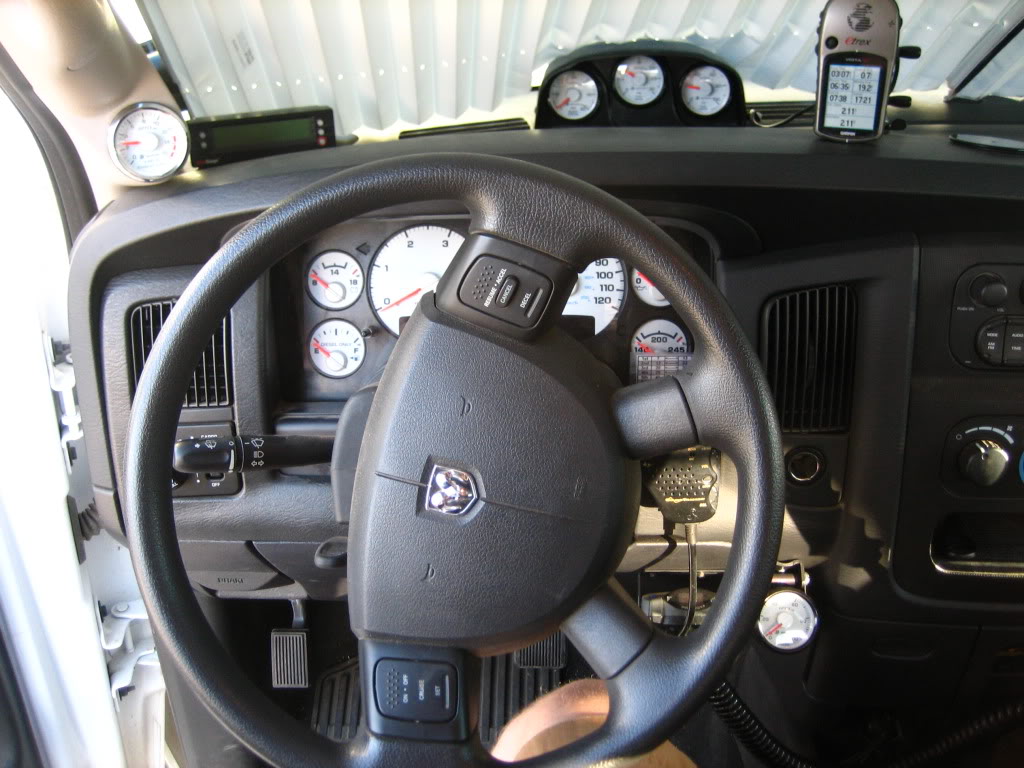
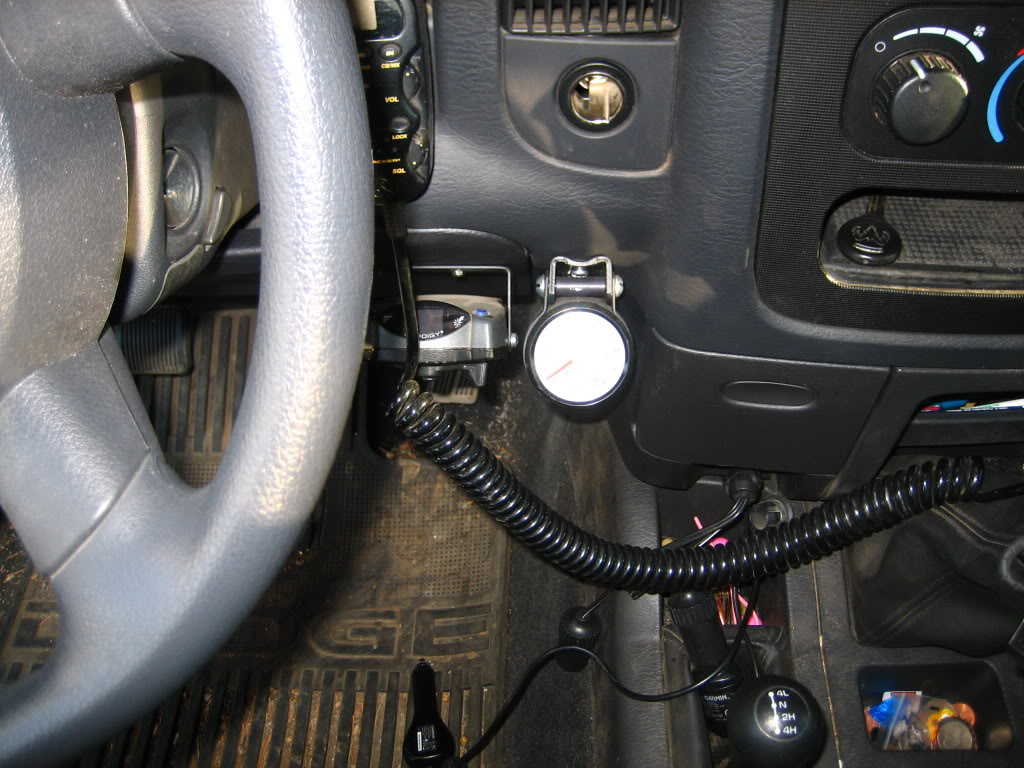
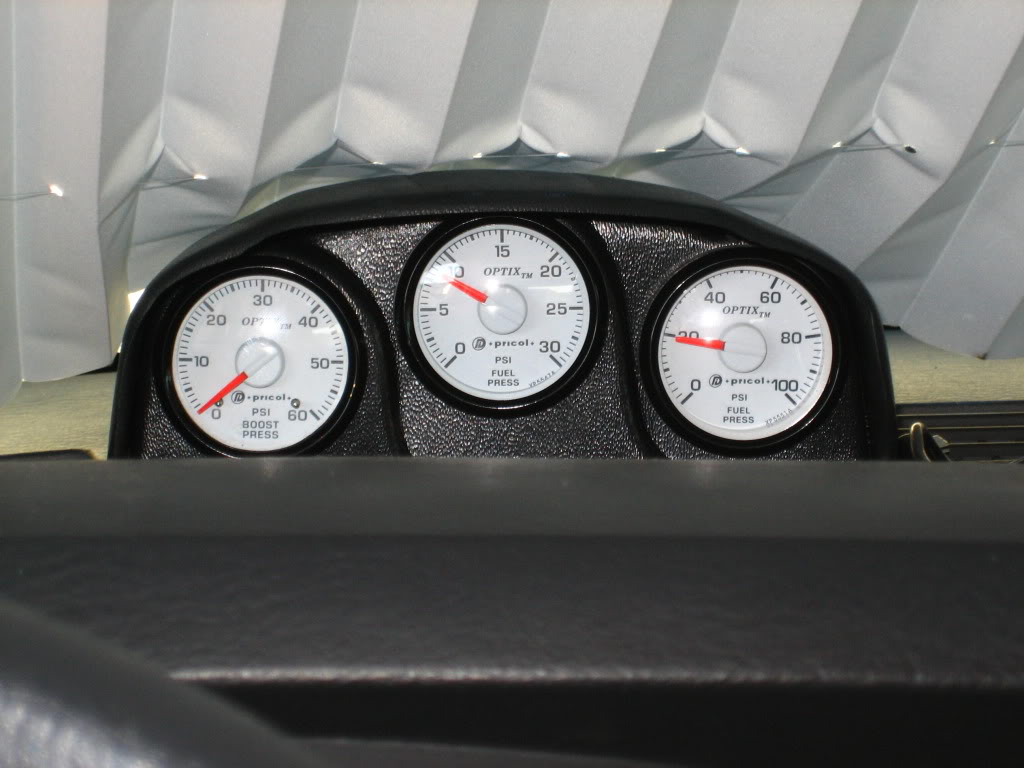
I went with a tripple dash pod, ditched the mickey mouse, and put a single pod down by my trailer brake controller.
I ended up keeping EGT in the A-Pillar, put boost, fuel pressure, and oil pressure in the tripple dash mount, and put drive pressure down by the trailer brake (as my primary use is exhaust brake pressure). Rail pressure was removed and sold (wasn't really needed with my setup and couldn't find a home for it in the truck)
I have about 8K miles on the new setup and a few tows, I really like it. There is a little more glare on the gauges on the dash, but nothing crazy.
I also removed the DP filter, it froze in winter and plugged the rest of the time. mech boost gauges are cheap, if the gauge gets plugged i'll get a new one.
How she looks now.
I got tired of the overhead pod falling off on hot days, and didn't want to have to do the major mounting I have read about on here. So a change was in order.
I went with a tripple dash pod, ditched the mickey mouse, and put a single pod down by my trailer brake controller.
I ended up keeping EGT in the A-Pillar, put boost, fuel pressure, and oil pressure in the tripple dash mount, and put drive pressure down by the trailer brake (as my primary use is exhaust brake pressure). Rail pressure was removed and sold (wasn't really needed with my setup and couldn't find a home for it in the truck)
I have about 8K miles on the new setup and a few tows, I really like it. There is a little more glare on the gauges on the dash, but nothing crazy.
I also removed the DP filter, it froze in winter and plugged the rest of the time. mech boost gauges are cheap, if the gauge gets plugged i'll get a new one.
How she looks now.
Trending Topics


Registered User
Joined: Jan 2004
Posts: 2,342
Likes: 1
From: Wet Coast, Canada
I have had all the different mounts in the various trucks and have finally settled on the dash pod and srt pillar the same as you have.
The dash pod seems the most convenient to look at and I can kinda keep one eye on the road.
I found with the overhead it was hard to focus on the gauges and I had to take my eyes off the road, the pillar was the same though not quite as bad.
The dash pod seems the most convenient to look at and I can kinda keep one eye on the road.
I found with the overhead it was hard to focus on the gauges and I had to take my eyes off the road, the pillar was the same though not quite as bad.
Thread Starter
Registered User
Joined: Nov 2007
Posts: 4,737
Likes: 4
From: Kuna, Idaho
Bringing back an old thread...
My Pricol pyro started acting up this past winter, and after a few tows with it acting funny it was time to give it the boot. I really wanted a matched set, so I sold the other 4 Pricol's and ordered up a set of 5 ISSPRO EV2's.
I have been wanting to change the locations of my a couple gauges and add a time delay relay for a while, so this worked out well.
I had the alarms set to where I want them, which is a GREAT feature of the EV2.
Boost 0-40, warning > 38 psi
EGT 0-1600°, warning >1300°
Fuel Pressure 0-20, warning <3 psi
Oil Pressure 0-100, warning <15 psi
Exhaust Backpressure 0-100, warning >65 psi
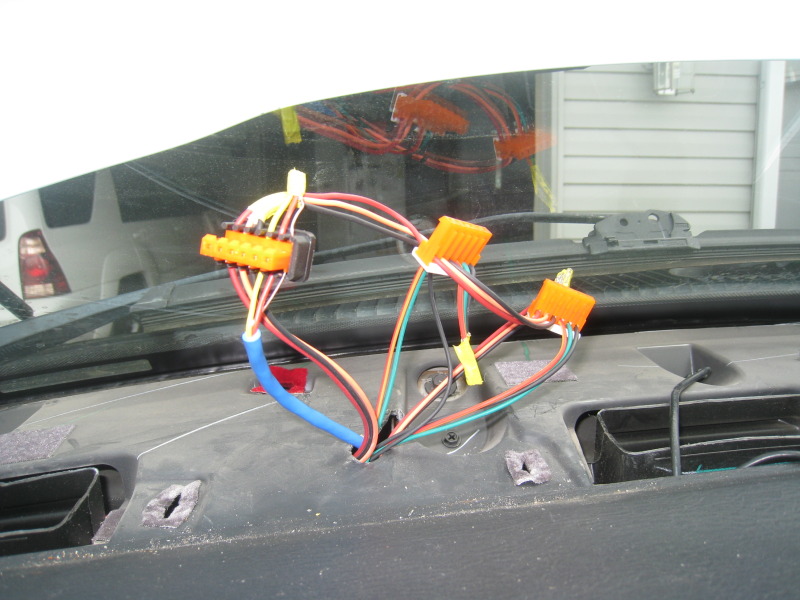
The gauges came with the dimmer and that made install VERY easy. You are able to daisy chain them, and I was able to route the wiring from the dimmer **** to the Oil in the A-Pillar, to EGT, Boost, Fuel on the dash and down to DP by the trailer brake controller.
Previouslly the EGT was in the A-Pillar, and Boost/Fuel/Oil were on the dash, with DP down by the brake controller. I liked DP by the controller as I mainly use it for the exhaust brake, and next to the brake controller made sense. What I wanted to do was put Boost/EGT next to each other on the dash and move oil to the A-Pillar.
Additionally I have been wanting to add a time delay relay to the gauges. I don't like how when you start the truck the gauges reset and readings have to wait on the gauge to power back up. I got a TDR from a friend of mine, and wired all 5 EV2 to it. Now the ignition has to be off for about 2 minutes before the gauges shutoff. This does 2 things I like, it allows quicker and more accurate oil/fuel pressure readings during and after start and it lets me monitor EGT's after shutting the motor off. If they really climb I can tell I didn't allow enough cooling time.
All in all I like the EV2's. I still think some of the markings on the Pricol's were better, and a mechanical boost gauge is much smoother than an electric one. The boost gauge does read about 1 psi lower than the ECM sees, but I think that's due to being at 3K feet elevation. But overall these are great gauges, and very precise!
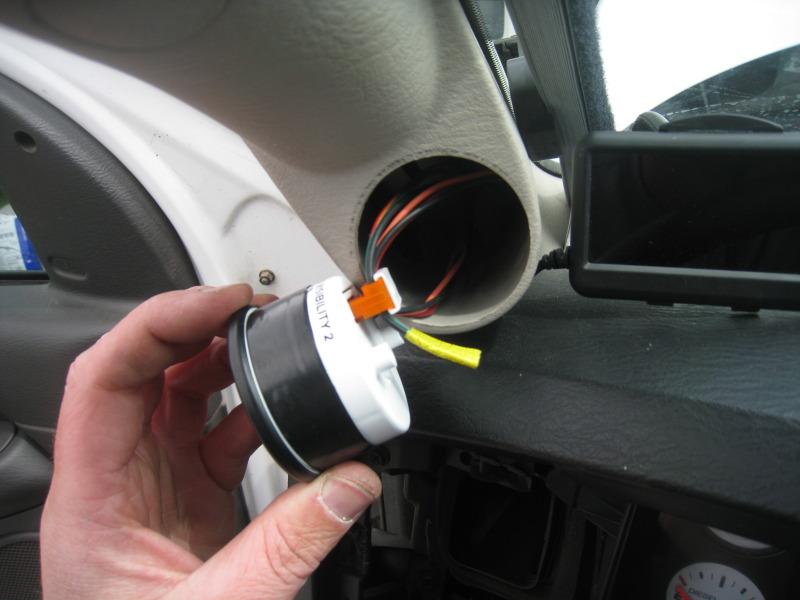
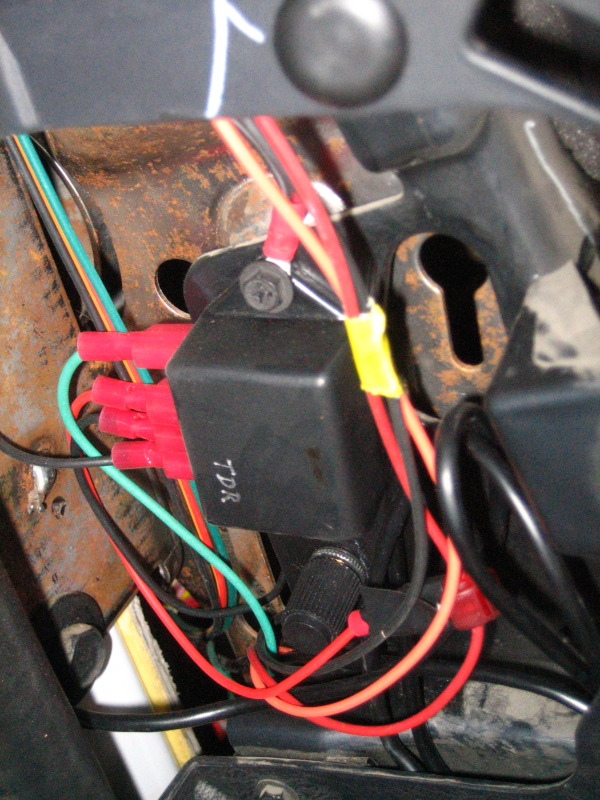
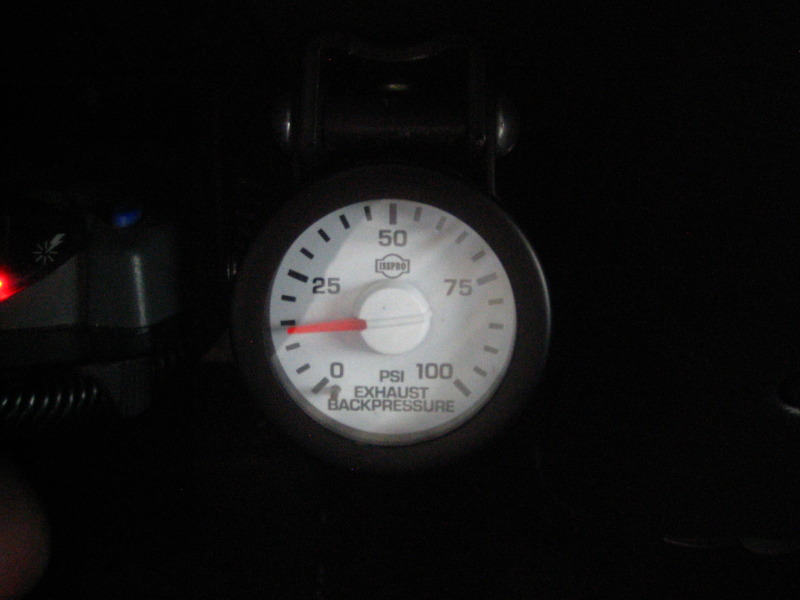
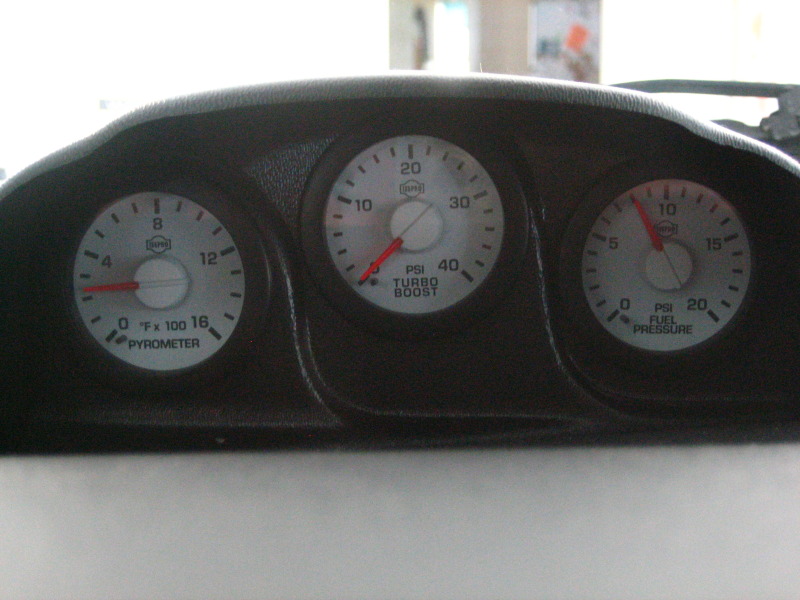
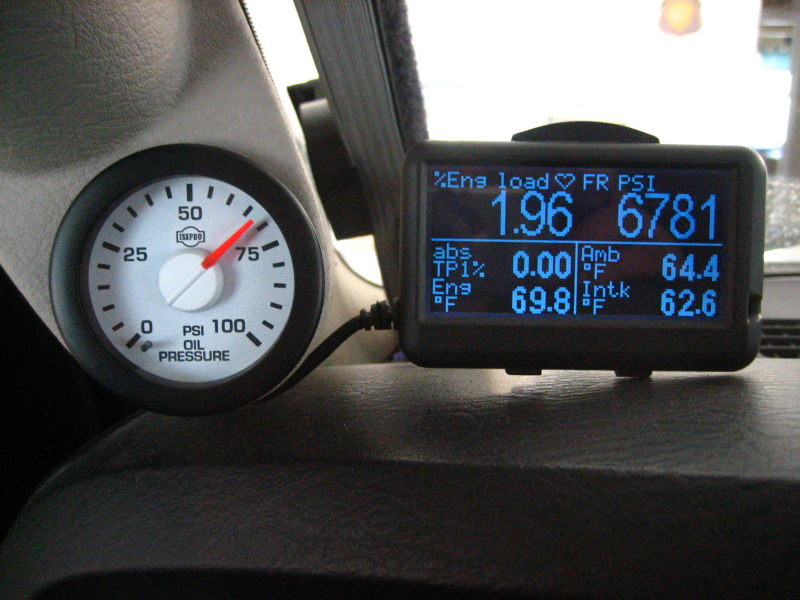
My Pricol pyro started acting up this past winter, and after a few tows with it acting funny it was time to give it the boot. I really wanted a matched set, so I sold the other 4 Pricol's and ordered up a set of 5 ISSPRO EV2's.
I have been wanting to change the locations of my a couple gauges and add a time delay relay for a while, so this worked out well.
I had the alarms set to where I want them, which is a GREAT feature of the EV2.
Boost 0-40, warning > 38 psi
EGT 0-1600°, warning >1300°
Fuel Pressure 0-20, warning <3 psi
Oil Pressure 0-100, warning <15 psi
Exhaust Backpressure 0-100, warning >65 psi
The gauges came with the dimmer and that made install VERY easy. You are able to daisy chain them, and I was able to route the wiring from the dimmer **** to the Oil in the A-Pillar, to EGT, Boost, Fuel on the dash and down to DP by the trailer brake controller.
Previouslly the EGT was in the A-Pillar, and Boost/Fuel/Oil were on the dash, with DP down by the brake controller. I liked DP by the controller as I mainly use it for the exhaust brake, and next to the brake controller made sense. What I wanted to do was put Boost/EGT next to each other on the dash and move oil to the A-Pillar.
Additionally I have been wanting to add a time delay relay to the gauges. I don't like how when you start the truck the gauges reset and readings have to wait on the gauge to power back up. I got a TDR from a friend of mine, and wired all 5 EV2 to it. Now the ignition has to be off for about 2 minutes before the gauges shutoff. This does 2 things I like, it allows quicker and more accurate oil/fuel pressure readings during and after start and it lets me monitor EGT's after shutting the motor off. If they really climb I can tell I didn't allow enough cooling time.
All in all I like the EV2's. I still think some of the markings on the Pricol's were better, and a mechanical boost gauge is much smoother than an electric one. The boost gauge does read about 1 psi lower than the ECM sees, but I think that's due to being at 3K feet elevation. But overall these are great gauges, and very precise!


