


installed my injector nozzles today heres your write up


Thread Starter
Registered User
Joined: Jun 2007
Posts: 266
Likes: 0
From: Connecticut.
installed my injector nozzles today heres your write up
i installed my injector nozzles today brand new Bosio 10 hole 120hp nozzels took me about 3 and a half hours took my time and took some pics to do a write up for you guys.
hope you like it!!!!
Tools needed/ used
hope you like it!!!!
Tools needed/ used
- 13mm wrench
- 15mm wrench and socket
- 19mm wrench
- 10mm wrench and socket
- 11mm wrench and socket
- 8mm socket
- torque wrench
- 24mm wrench
- disconnect negative battery cables
- remove 10mm bolts that hold down intake horn and dipstick and wiring
- remove 11mm intercooler boot clamp
- remove 10mm bolts on plastic valve cover
- remove 10mm bolts on valve cover
- disconnect the 2 tubes that go into the box ontop of the valve cover
- disconnect the wiring to the inkectors 8mm nuts
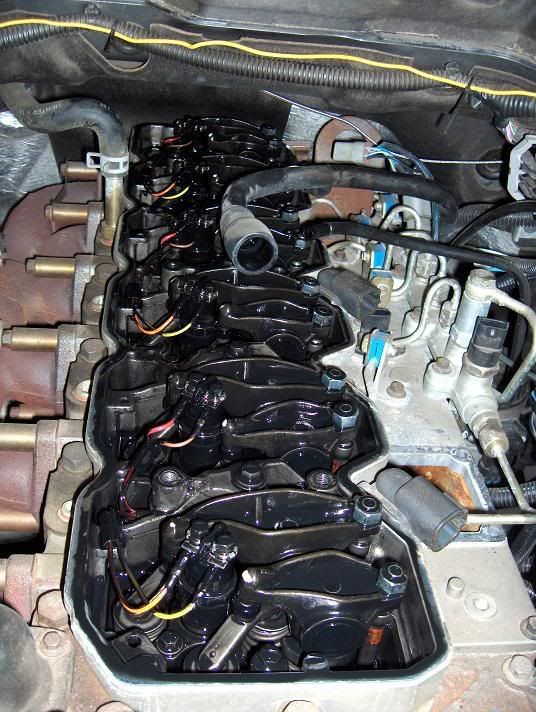
- remove 10mm bolts up the center of the riser box
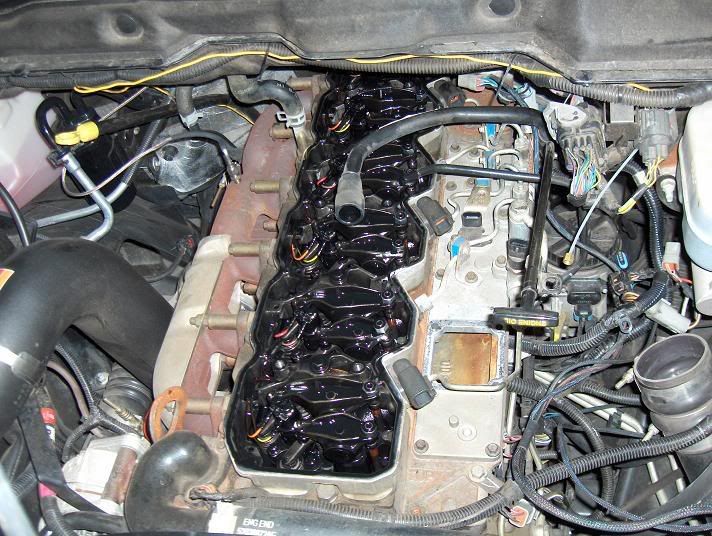
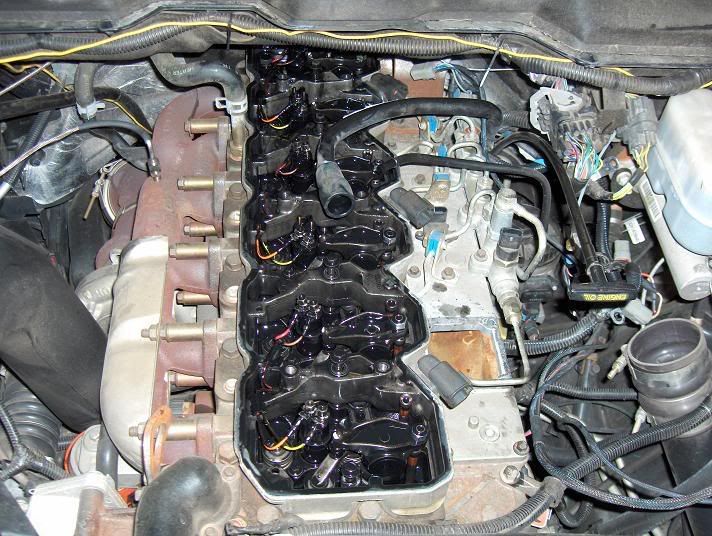
- remove riser box
- remove 10mm bolts holding down the exhaust rocker arms, they are in the middle of the rockers make sure each rocker goes back to its cylender do not mix them up
- remove exhaust rocker cross overs, keep in to same cylender as well
- disconnect 19mm fuel rail supply line (bottom of rail)
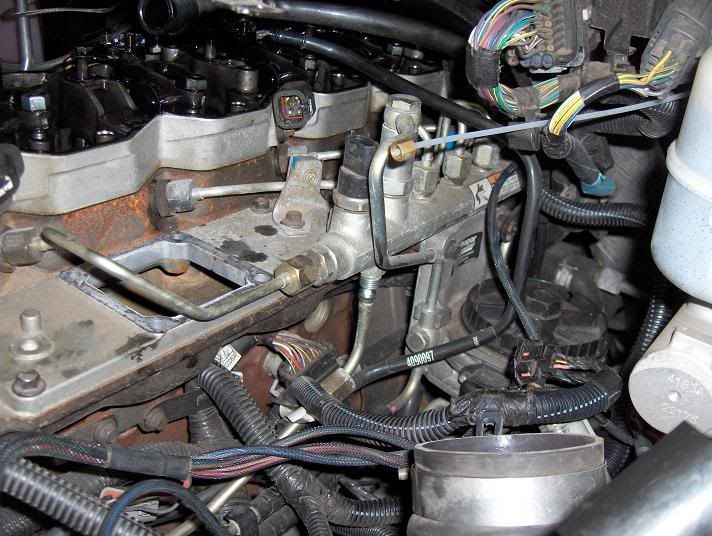
- dissconnect 19mm fuel return line from pressure limiting valve, gently bend out of the way
- dissconnect 19mm high pressure lines from injector connector tubes
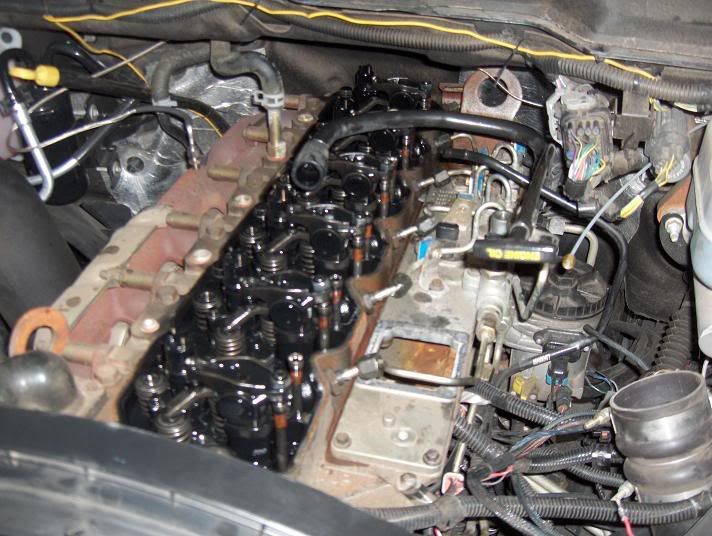
- keep everthing clean and organized
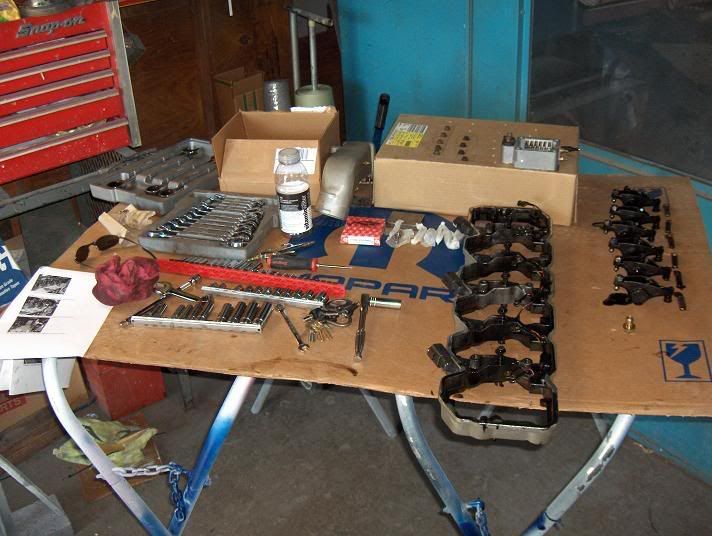
- remove 10mm bolts that hold all the fuel lines down
- remove 10mm bolts holdin fuel rail down
- remove fuel rail assembly
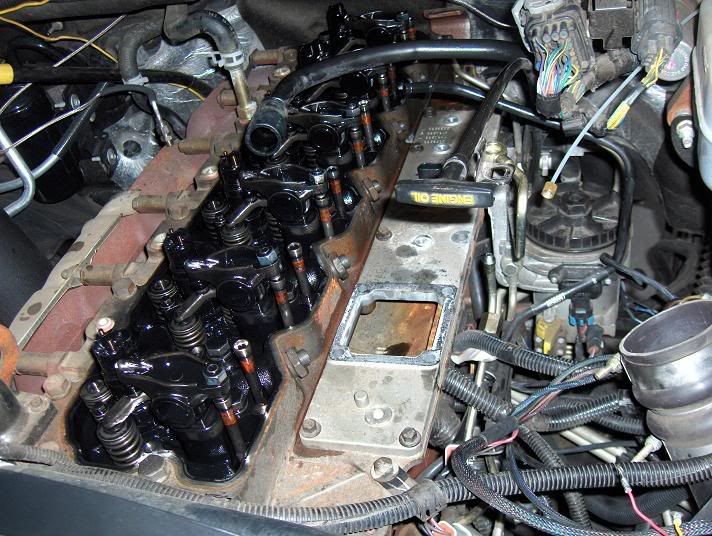
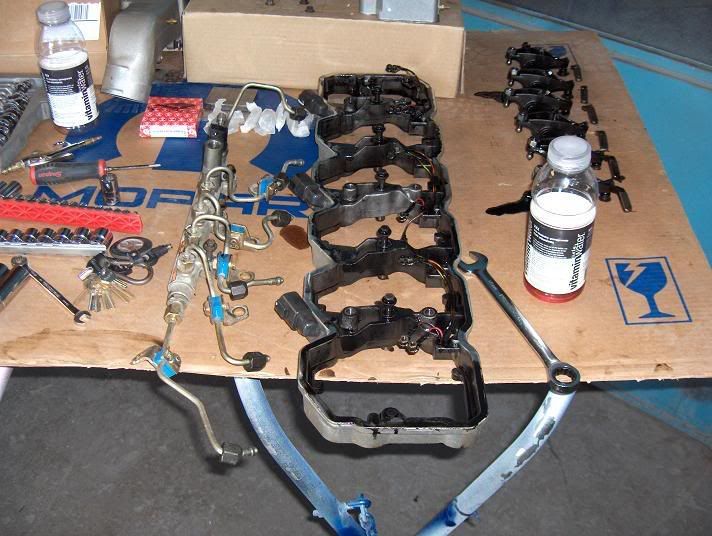
- remove 15mm bolts for rear engine lift bracket and remove bracket
- remove 24mm nuts holding down high pressur connector tubes
- remove connector tubes
- remove 8mm injector hold down bolts
- remove injectors out of injector bore carefully pry
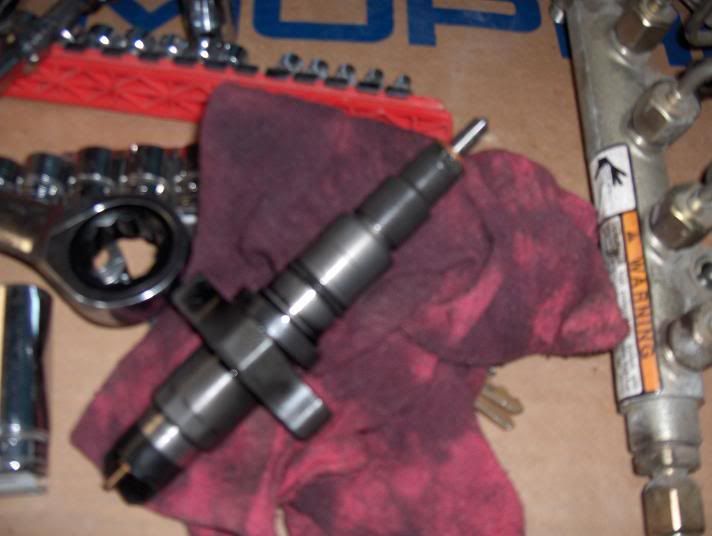
- hold injector hold tool to secure injector in a vise
- remove copper washer from old injectorwith a set of pliers
Last edited by 3500_CTD; Sep 23, 2007 at 10:47 PM. Reason: didnt finish


Thread Starter
Registered User
Joined: Jun 2007
Posts: 266
Likes: 0
From: Connecticut.
26. remove nozzle cone with a 15mm wrench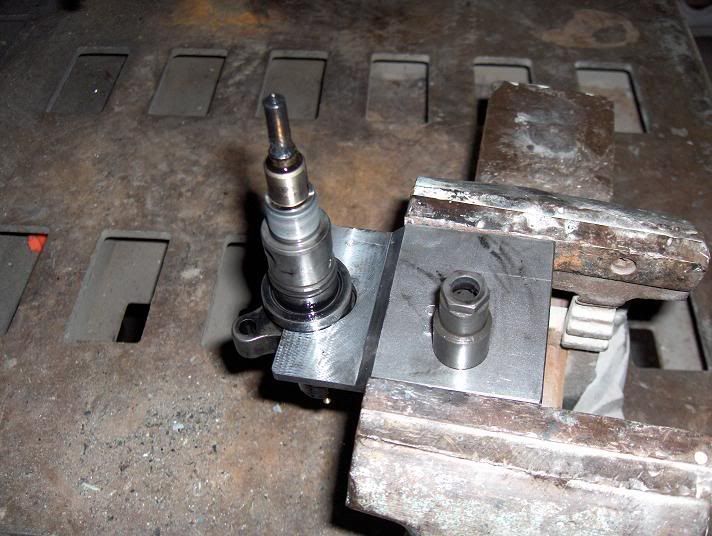
27. remove injector nozzle
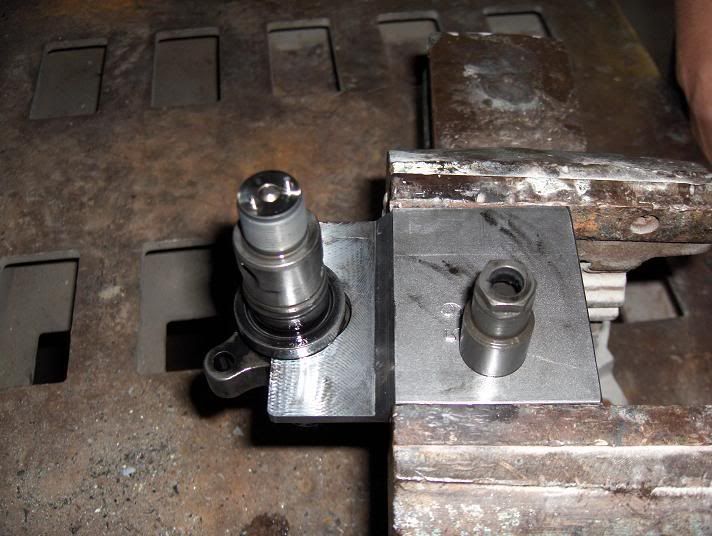
28. install new injector nozzle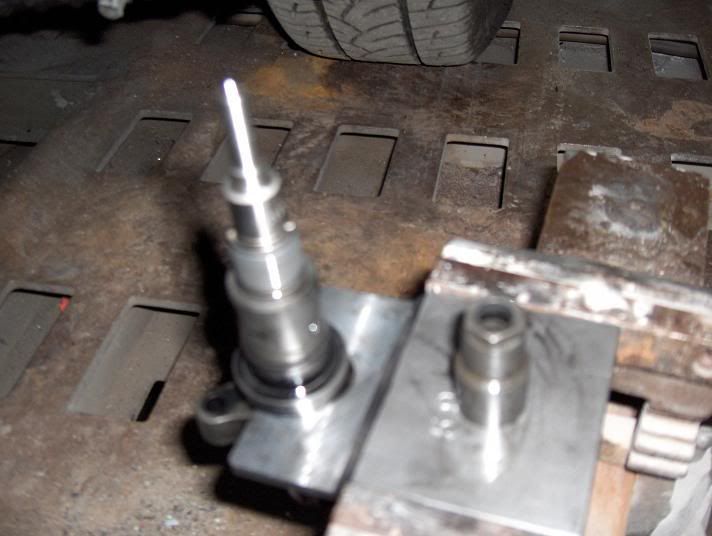
29. reinstall nozzle cone.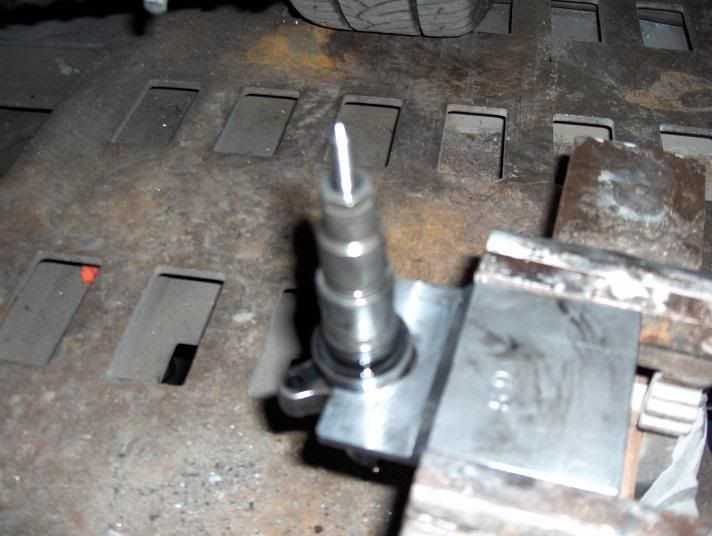
30. repeat for the other 5 injectors
31. install injectors back into bore (it will "click" down when in place) and bolt down with the 8mm bolts
32. install connector tubes (***** up) make sure these also click into place 33. reconect connector tube nuts
34.install fuel rail assembly connect high pressure injector supply lines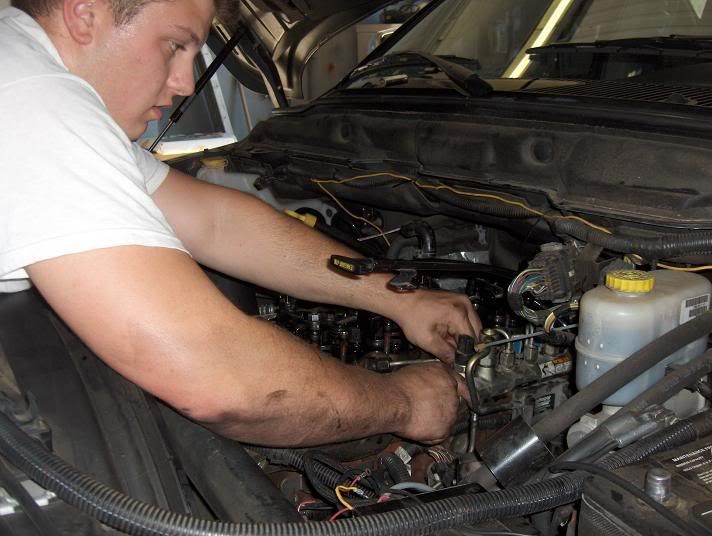
34. tighten high pressure supply lines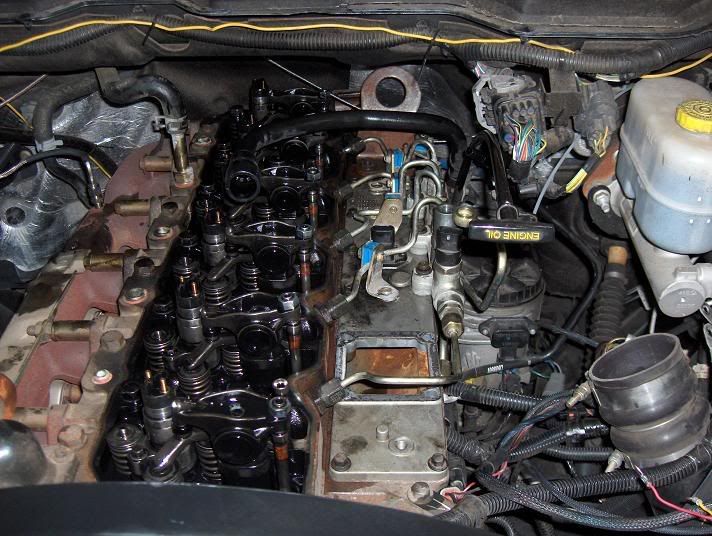
35. install exhaust valve crossovers
36. install exhaust valve rockers and torque to 27ft lbs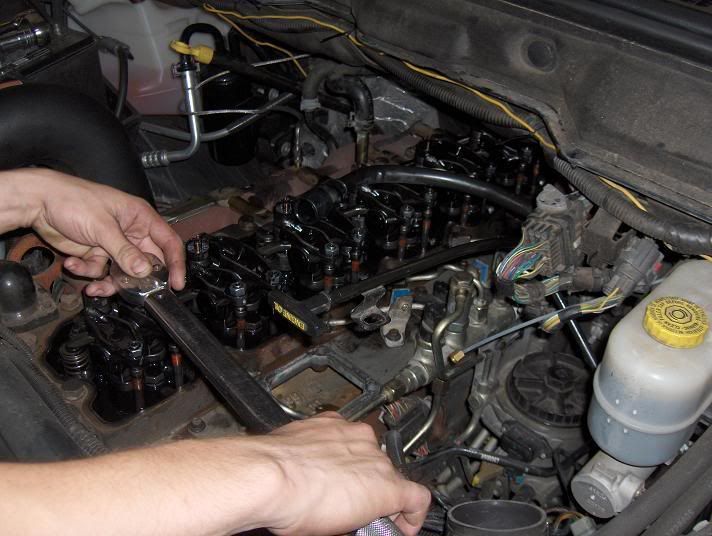
37. install riser box and torque down to 18ft lbs
38. install wiring on injectors and plug main harnesses in do not over tighten nuts on top of injectors
39. install rear engine lift mont bracket install upper valve cover
40. install intake horn and heater
41. retighten intercooler bolt
42. bolt down dipstick
43.install plastic valve cover
44.reconnect the negative cables on the batteries and start truck it smokes quite a bit at start up goes away in a minute
45. go take it for a ride
27. remove injector nozzle
28. install new injector nozzle
29. reinstall nozzle cone.
30. repeat for the other 5 injectors
31. install injectors back into bore (it will "click" down when in place) and bolt down with the 8mm bolts
32. install connector tubes (***** up) make sure these also click into place 33. reconect connector tube nuts
34.install fuel rail assembly connect high pressure injector supply lines
34. tighten high pressure supply lines
35. install exhaust valve crossovers
36. install exhaust valve rockers and torque to 27ft lbs
37. install riser box and torque down to 18ft lbs
38. install wiring on injectors and plug main harnesses in do not over tighten nuts on top of injectors
39. install rear engine lift mont bracket install upper valve cover
40. install intake horn and heater
41. retighten intercooler bolt
42. bolt down dipstick
43.install plastic valve cover
44.reconnect the negative cables on the batteries and start truck it smokes quite a bit at start up goes away in a minute
45. go take it for a ride
Trending Topics
Thread Starter
Registered User
Joined: Jun 2007
Posts: 266
Likes: 0
From: Connecticut.

Banned
Joined: Jan 2007
Posts: 1,616
Likes: 0
From: Cleveland, Tx/ Huntsville, Tx
Ok few things i noticed in your write up you may want to include as they are a few things we have noticed over the past few installs we have done.
First thing i noticed was you didnt mention what to torque nozzle cone back down to its 55ftlbs.
Next a little white grease and new copper washers put grease on washer slide down onto nozzle will hold it into place when reinstalling into injector bore.
I know they dont say this but the feed tubes and injector connections are supper sensitive and the smallest little mistake and they will leak and they ussually leak good when they do and just get worse and worse. Keep the injector feed tube and injector they came with together and go back together doesnt matter which cylinder like the exhaust rockers do but they seem to match up better if you do it this way.
Also when you go to reinstall the injectors in the bore and put the 8mm hold downs back in and just hand tighten them down and then back them back out to finger tight then slide in the feed tubes and torque them down then back them out dont take out just loosen nut back up this makes sure they are seated together well then torque the hold down bolts to 89inlbs which i dont think you mentioned and then torque the tube nuts to 33ftlbs which you did. But other then that good right up man and the pictures will help people alot.
First thing i noticed was you didnt mention what to torque nozzle cone back down to its 55ftlbs.
Next a little white grease and new copper washers put grease on washer slide down onto nozzle will hold it into place when reinstalling into injector bore.
I know they dont say this but the feed tubes and injector connections are supper sensitive and the smallest little mistake and they will leak and they ussually leak good when they do and just get worse and worse. Keep the injector feed tube and injector they came with together and go back together doesnt matter which cylinder like the exhaust rockers do but they seem to match up better if you do it this way.
Also when you go to reinstall the injectors in the bore and put the 8mm hold downs back in and just hand tighten them down and then back them back out to finger tight then slide in the feed tubes and torque them down then back them out dont take out just loosen nut back up this makes sure they are seated together well then torque the hold down bolts to 89inlbs which i dont think you mentioned and then torque the tube nuts to 33ftlbs which you did. But other then that good right up man and the pictures will help people alot.
Thread Starter
Registered User
Joined: Jun 2007
Posts: 266
Likes: 0
From: Connecticut.
Ok few things i noticed in your write up you may want to include as they are a few things we have noticed over the past few installs we have done.
First thing i noticed was you didnt mention what to torque nozzle cone back down to its 55ftlbs.
Next a little white grease and new copper washers put grease on washer slide down onto nozzle will hold it into place when reinstalling into injector bore.
I know they dont say this but the feed tubes and injector connections are supper sensitive and the smallest little mistake and they will leak and they ussually leak good when they do and just get worse and worse. Keep the injector feed tube and injector they came with together and go back together doesnt matter which cylinder like the exhaust rockers do but they seem to match up better if you do it this way.
Also when you go to reinstall the injectors in the bore and put the 8mm hold downs back in and just hand tighten them down and then back them back out to finger tight then slide in the feed tubes and torque them down then back them out dont take out just loosen nut back up this makes sure they are seated together well then torque the hold down bolts to 89inlbs which i dont think you mentioned and then torque the tube nuts to 33ftlbs which you did. But other then that good right up man and the pictures will help people alot.
First thing i noticed was you didnt mention what to torque nozzle cone back down to its 55ftlbs.
Next a little white grease and new copper washers put grease on washer slide down onto nozzle will hold it into place when reinstalling into injector bore.
I know they dont say this but the feed tubes and injector connections are supper sensitive and the smallest little mistake and they will leak and they ussually leak good when they do and just get worse and worse. Keep the injector feed tube and injector they came with together and go back together doesnt matter which cylinder like the exhaust rockers do but they seem to match up better if you do it this way.
Also when you go to reinstall the injectors in the bore and put the 8mm hold downs back in and just hand tighten them down and then back them back out to finger tight then slide in the feed tubes and torque them down then back them out dont take out just loosen nut back up this makes sure they are seated together well then torque the hold down bolts to 89inlbs which i dont think you mentioned and then torque the tube nuts to 33ftlbs which you did. But other then that good right up man and the pictures will help people alot.

