


Interior Update - Phase I


Thread Starter
Registered User
Joined: Sep 2015
Posts: 31
Likes: 13
From: North Dallas, TX
Interior Update - Phase I
96 chevy Rear Seat Install
Goal - Provide a safe seat that will handle a car seat or two. And, for very short trips allow for a third person to sit in the middle if NEEDED. Make no mistake, I completely understand that there will not be space for a cross country trip.
Here is where I started, the Interior out of a '96 Chevy from PnP for about $95, both front and a rear seat and a center seatbelt.


The original plan was to run square tube across the JumpSeat brackets, then square tube across the bottom of the seat, and then bolt the two together. But, too many nights looking at pics of others like 9297oldram's install had me thinking there had to be an easier way. After about an hour of backing out of the original plan's progress and an hour into the new plan I was further along with sturdier design.
Brackets - for the original Chevy mount points
1.25" square steel tubing will fit in that joint of the seat, and line up as it pressed in with a c-clamp.

Started out with two pieces 6" long, and pre-drilled them to the JS brackets to test fit.

by making the tubing a little longer than needed for the seat, I was about to tie in the stock seat belts, with a little modification.

Additionally, I moved the seatbelt female ends to the center, drilled through the floor, and mounted them with the chevy center seatbelt. On that angle up at the back of the cab, you are right over the drive shaft, with room between the ds and fuel tank on one side and exhaust on the other. (2" x 1/2" Grade 8 bolts and hardware, with 2" washers aiding in the reinforcement for the belts.)
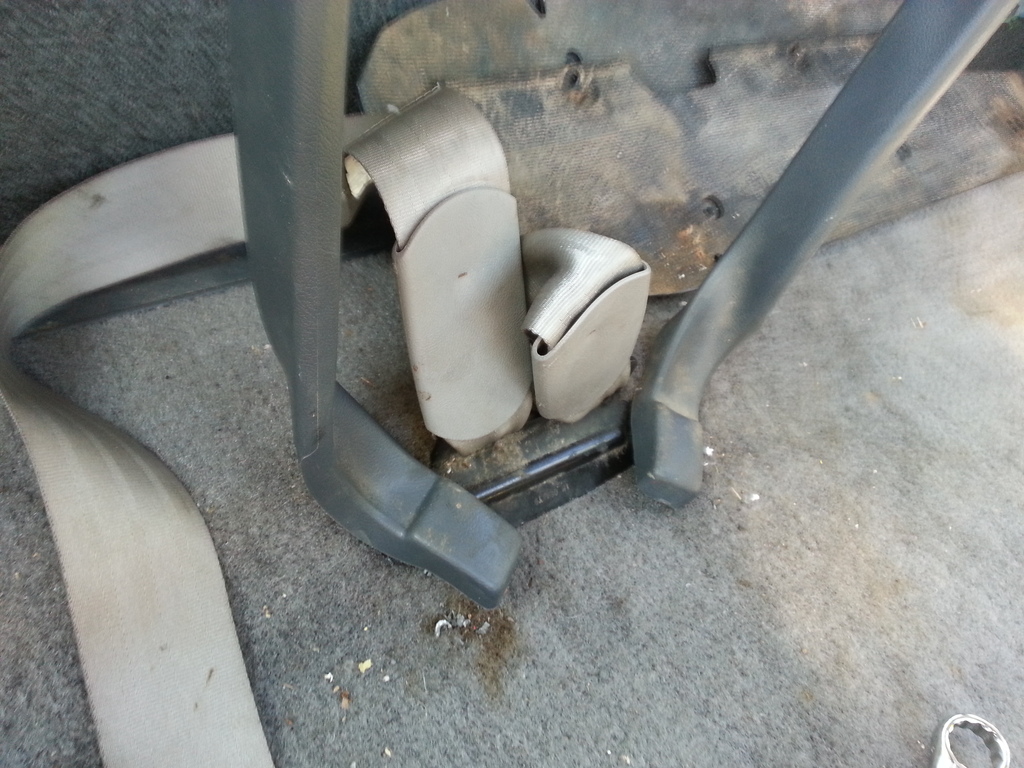
Small modification to the seat, was to take a tailgate cable from a newer truck that I had laying around, and replicate the "Latch System" for the top lattch of kids seats.
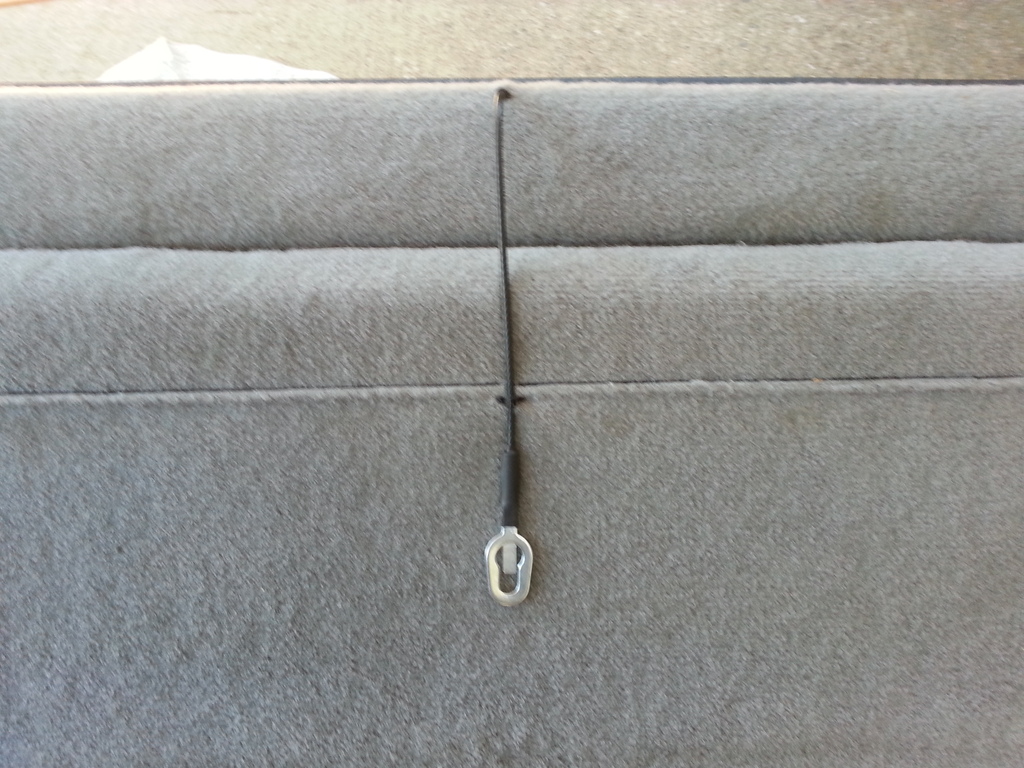
- This will have to be changed, as once the seat was installed, I realized that I could not reach this location. The seat folds up, not down, and I got that bad boy in tight so I will have to make a change in my thinking for this need.
Goal - Provide a safe seat that will handle a car seat or two. And, for very short trips allow for a third person to sit in the middle if NEEDED. Make no mistake, I completely understand that there will not be space for a cross country trip.
Here is where I started, the Interior out of a '96 Chevy from PnP for about $95, both front and a rear seat and a center seatbelt.


The original plan was to run square tube across the JumpSeat brackets, then square tube across the bottom of the seat, and then bolt the two together. But, too many nights looking at pics of others like 9297oldram's install had me thinking there had to be an easier way. After about an hour of backing out of the original plan's progress and an hour into the new plan I was further along with sturdier design.
Brackets - for the original Chevy mount points
1.25" square steel tubing will fit in that joint of the seat, and line up as it pressed in with a c-clamp.

Started out with two pieces 6" long, and pre-drilled them to the JS brackets to test fit.

by making the tubing a little longer than needed for the seat, I was about to tie in the stock seat belts, with a little modification.

Additionally, I moved the seatbelt female ends to the center, drilled through the floor, and mounted them with the chevy center seatbelt. On that angle up at the back of the cab, you are right over the drive shaft, with room between the ds and fuel tank on one side and exhaust on the other. (2" x 1/2" Grade 8 bolts and hardware, with 2" washers aiding in the reinforcement for the belts.)

Small modification to the seat, was to take a tailgate cable from a newer truck that I had laying around, and replicate the "Latch System" for the top lattch of kids seats.

- This will have to be changed, as once the seat was installed, I realized that I could not reach this location. The seat folds up, not down, and I got that bad boy in tight so I will have to make a change in my thinking for this need.
Thread Starter
Registered User
Joined: Sep 2015
Posts: 31
Likes: 13
From: North Dallas, TX
Mounting the seat:
The seat bottom reclines....a lot. And when flush with the square tubing, it rocks the seat back a bit. It helps to make the seat take less space, but causes it to bounce without some front enforcement. I took some aluminum 1" square stock I had, and stacked it, ended up going 3" high, but pic shows 2".
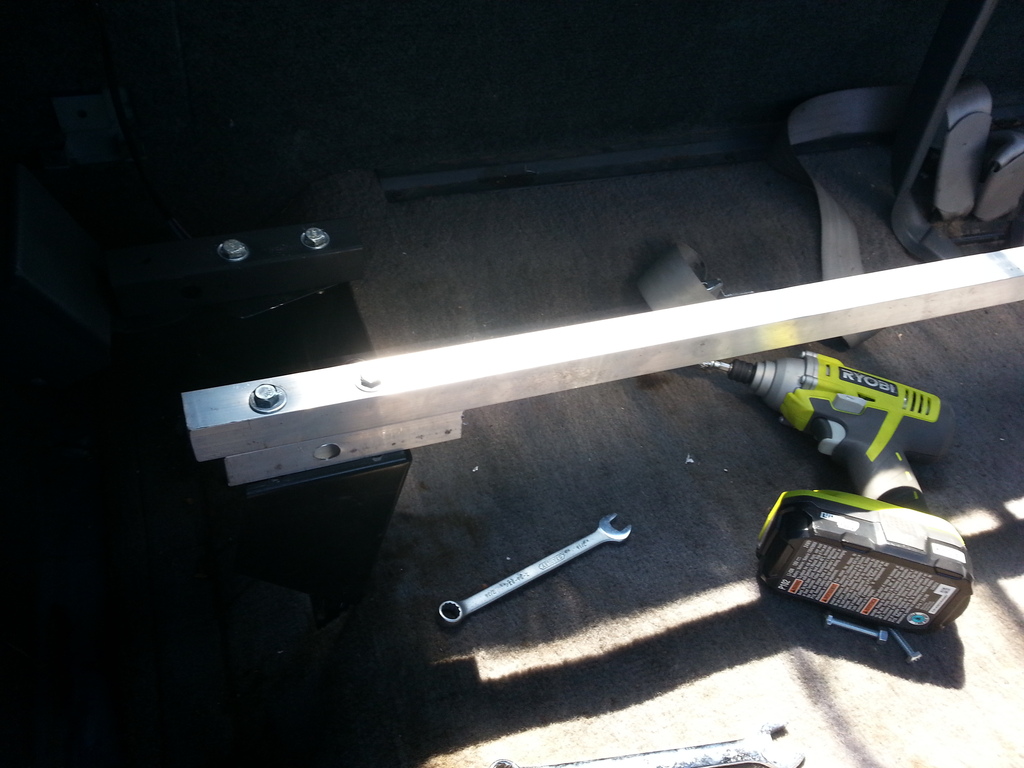 (this top one goes all the way acorss, but it does not have too, but it made install easier holding the JS brackets in place. And only reason I left is for "tie up storage" under the seat.
Install the Steel Tubing with the seatbelt already bolted on.

"Drop the seat into position"

I did have to use a clamp to squeeze the Seat Bracket on the tubing to match up the holes, but it squared everything up when doing so.
Reach through and pull the seatbelts through:

I really like the look
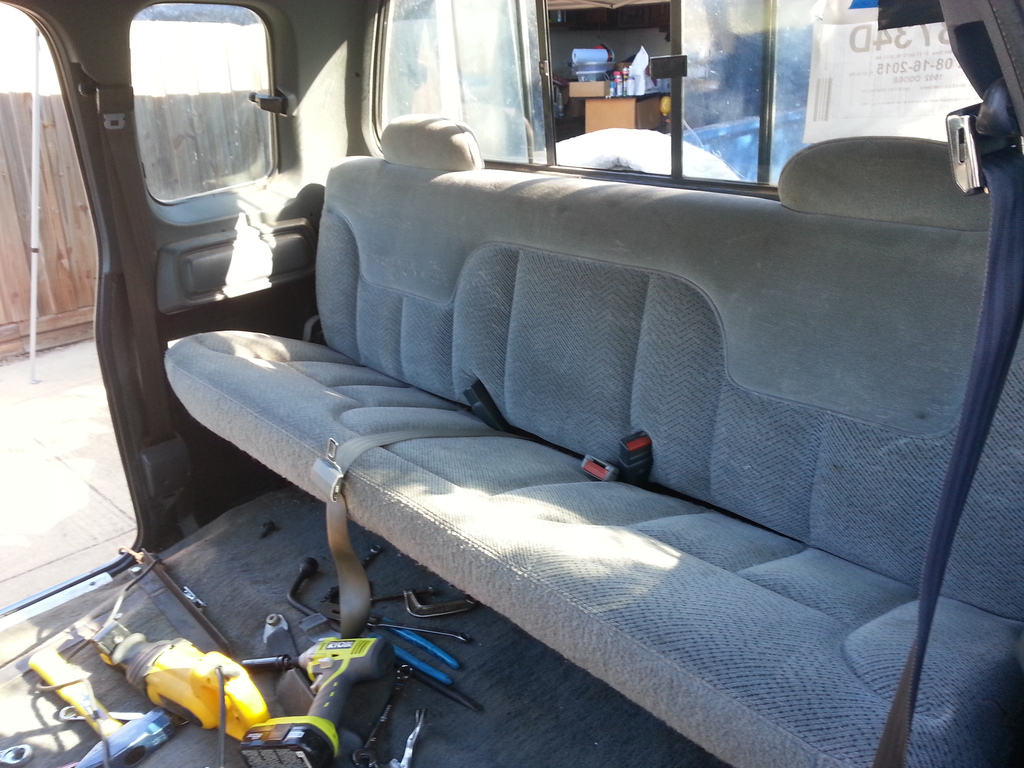

Again, I do not pity the adult that POs me enough for me to make them ride back there. But, for my little one, and my four legged friend, they will think it is the best seat ever. It sits higher than I would have liked, and if I have to take it out I will look at putting the Steel square "inside" the JumpSeat bracket. This would lower it by over an inch, with little to no modification of the design.
I will be installing the front seats out from this chevy as well and will document that, but not sure how much it will help anyone else as the seats that I have are not stock and have modified frames to start with. Current mock up has the seat sitting about an inch to two inches too high. I have a plan, but that is next weekend.

The key is to keep all functionality of the tilt and slide forward for access. And at some point run power to the built in air compressor for the lumbar support.
The seat bottom reclines....a lot. And when flush with the square tubing, it rocks the seat back a bit. It helps to make the seat take less space, but causes it to bounce without some front enforcement. I took some aluminum 1" square stock I had, and stacked it, ended up going 3" high, but pic shows 2".
 (this top one goes all the way acorss, but it does not have too, but it made install easier holding the JS brackets in place. And only reason I left is for "tie up storage" under the seat.
Install the Steel Tubing with the seatbelt already bolted on.

"Drop the seat into position"

I did have to use a clamp to squeeze the Seat Bracket on the tubing to match up the holes, but it squared everything up when doing so.
Reach through and pull the seatbelts through:

I really like the look


Again, I do not pity the adult that POs me enough for me to make them ride back there. But, for my little one, and my four legged friend, they will think it is the best seat ever. It sits higher than I would have liked, and if I have to take it out I will look at putting the Steel square "inside" the JumpSeat bracket. This would lower it by over an inch, with little to no modification of the design.
I will be installing the front seats out from this chevy as well and will document that, but not sure how much it will help anyone else as the seats that I have are not stock and have modified frames to start with. Current mock up has the seat sitting about an inch to two inches too high. I have a plan, but that is next weekend.

The key is to keep all functionality of the tilt and slide forward for access. And at some point run power to the built in air compressor for the lumbar support.

Thread Starter
Registered User
Joined: Sep 2015
Posts: 31
Likes: 13
From: North Dallas, TX

Thread
Thread Starter
Forum
Replies
Last Post
04ctd
3rd Generation Ram - Non Drivetrain - All Years
14
Apr 20, 2009 09:07 PM