
Emergency Hood Release


Thread Starter
Administrator


Joined: Nov 2004
Posts: 4,084
Likes: 233
From: Southern California
Emergency Hood Release
Part-1
Disclaimer:
As I have installed on my 1991 NON-intercooled truck.
NOTE An Intercooled truck may have parts installed where I have this, simply move this release for the proper clearance.
Now that our trucks are getting older there are unfortunately more and more parts that are going to start to break down, not all of the parts of our truck were built as well as the Cummins engine was, lots of disposable plastic parts.
As the parts fail we will fix them but how about if you were to open the hood and it did not open, now what?
There are ways to get it to unlatch but most of them will require you do some cosmetic repairs when you are through.
As you all know me by now, I always think with a “What if” and not “Oh Well” mentality, so I will show you how to build an Emergency Release that will just sit there and hopefully never have to be used but if it is then you will be glad you spent the time to install one.
Materials List:
1) 24” of �” nylon Air Brake Line (I use Synflex or Nyflex brand)
2) 2’ 10” of 1/16 stainlees steel aircraft type cable; I bought 50’ for other projects.
3) 1 package containing 2 Ferrules.
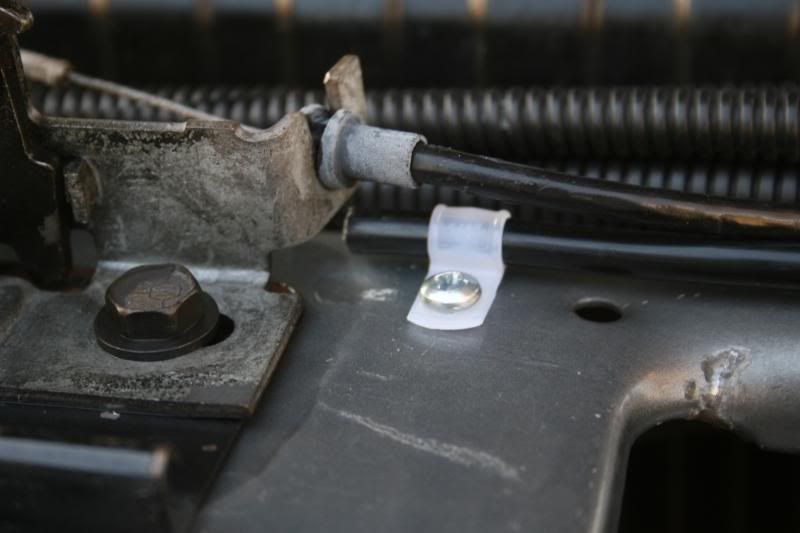
4) 2- �” nylon clamps.
5) 2- #8 stainless steel sheet metal screws.
6) 1/8” heat shrink tubing
7) 5/16” heat shrink tubing.
Tools Required:
Electric Drill
�”drill bit.
Diagonal cutting pliers
StaKon or crimping pliers.
#2 Phillips screwdriver.
Heat Gun or alternate heat source.
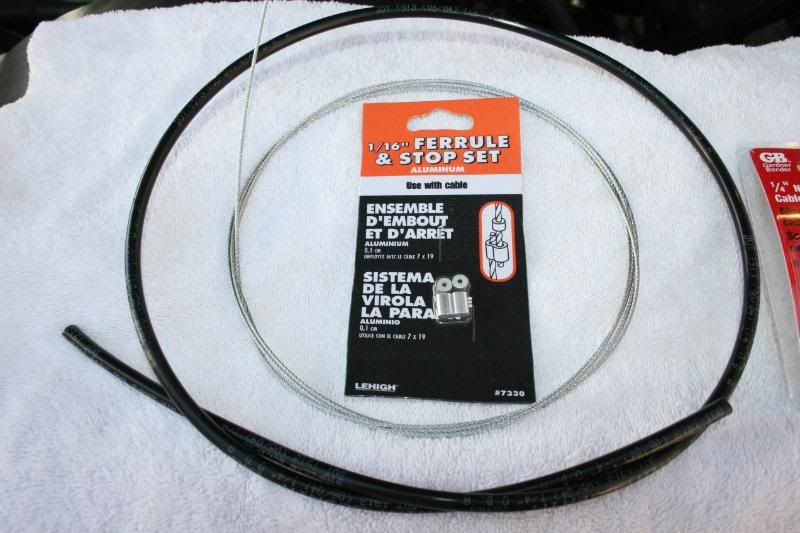
This is a collection of the parts we will be using.
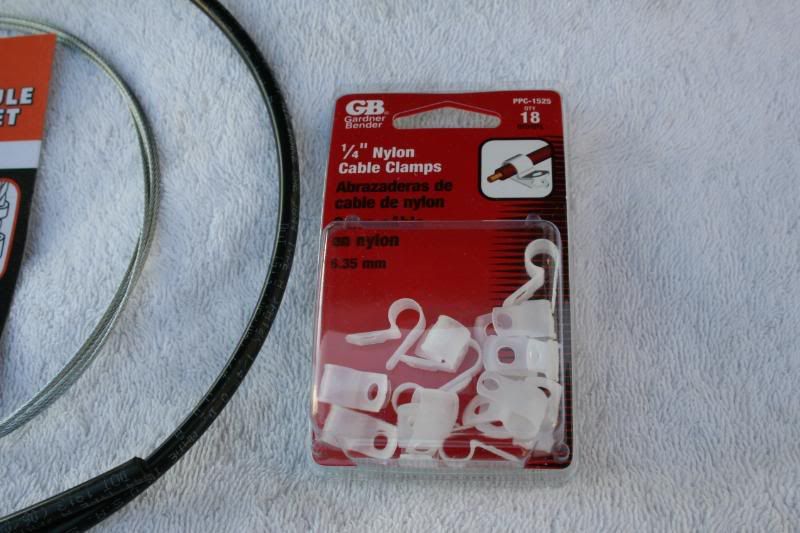
Here are the clamps that we will use, get good ones because we want them to last.
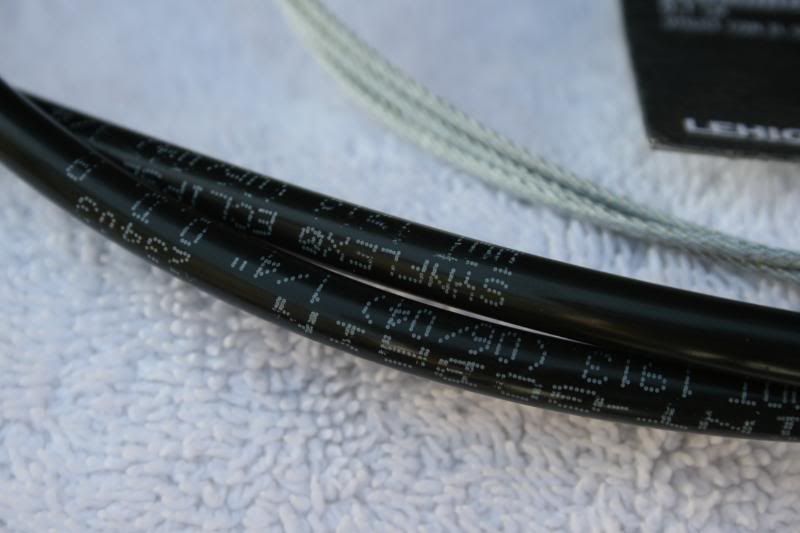
This is the Air Brake Tubing, we want to GOOD Nylon and not Plastic or PVC.
You can get this at any truck parts.
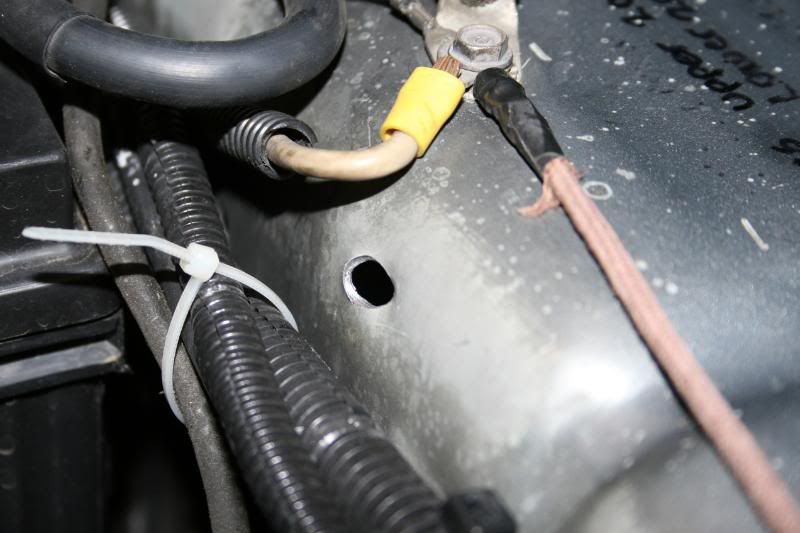
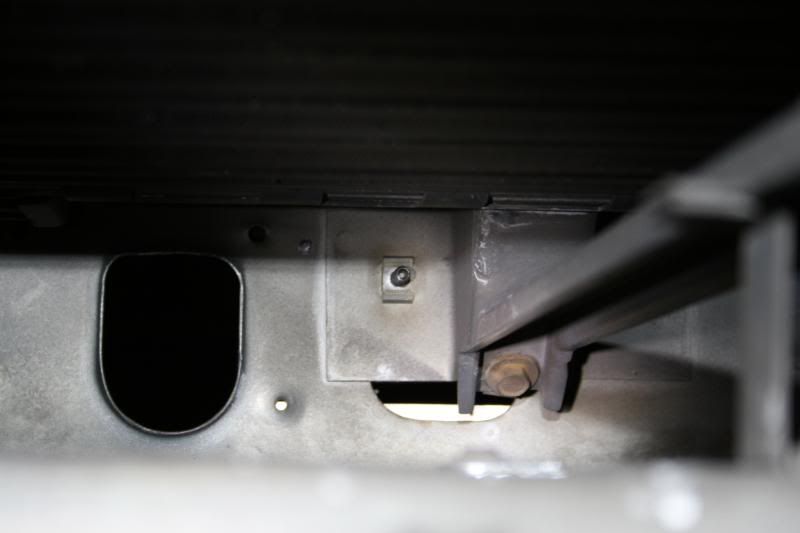
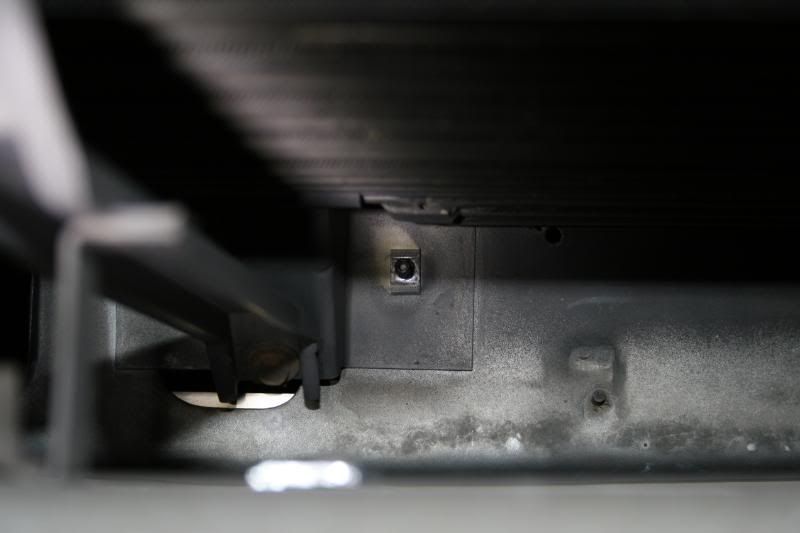
We will first start by locating and drilling this hole, make sure there is nothing behind it, there should be nothing there.
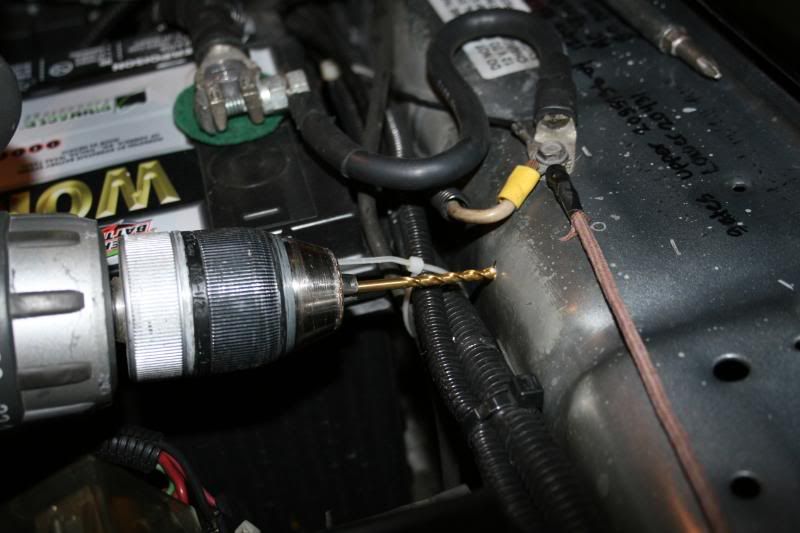
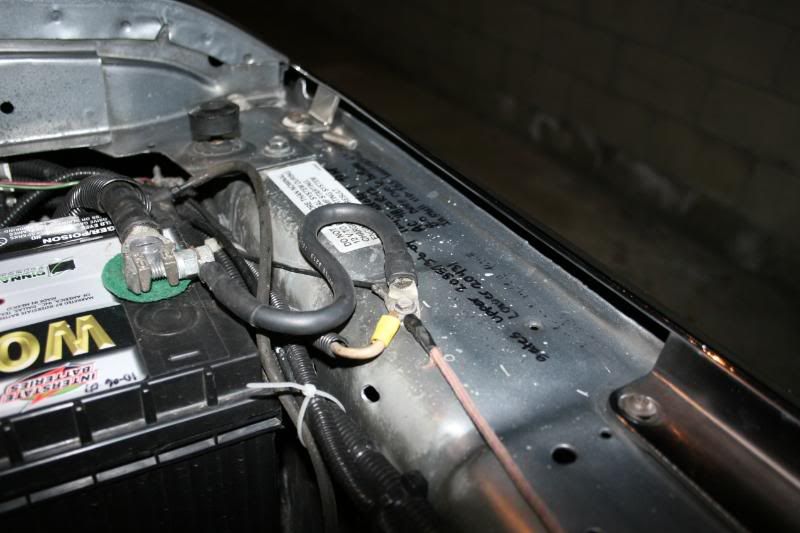
To enable the tubing to enter on an angle, using your #2 Phillips screwdriver inserted into the hole, carefully elongate it by pulling it with the screwdriver blade. (This really hurt me to drill a new hole in my truck but it was necessary)
This is what it should look like, deburr the edges.
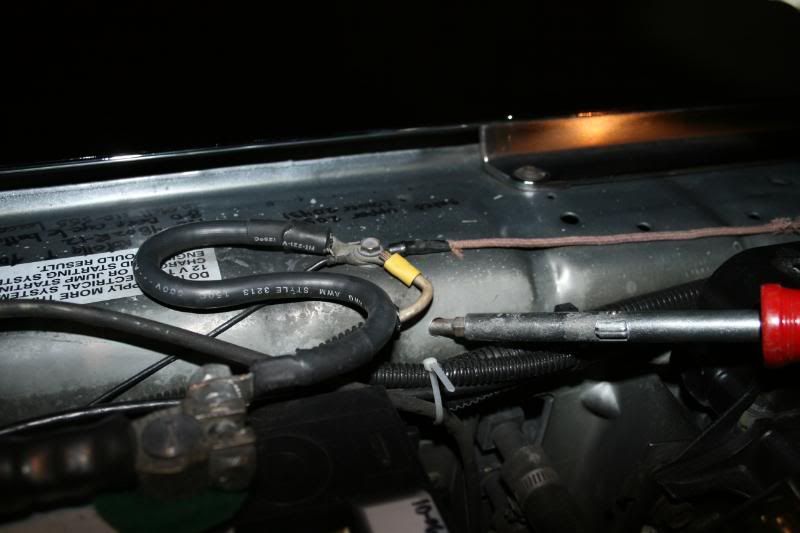
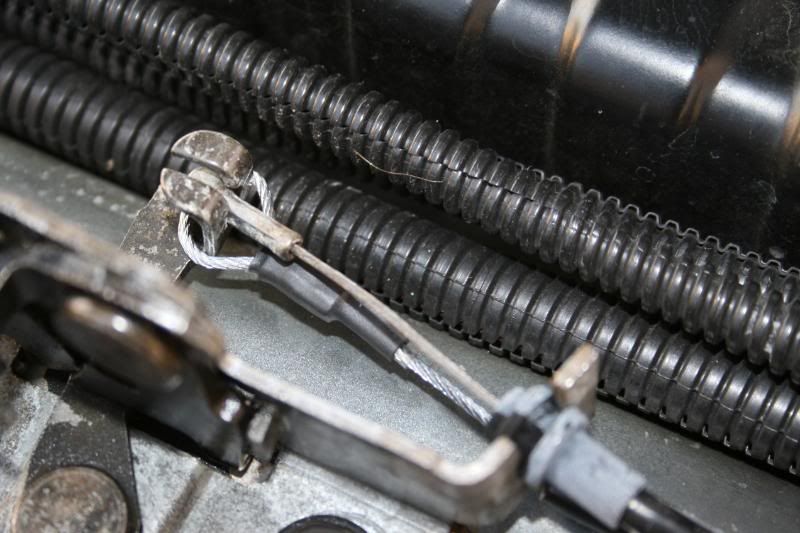
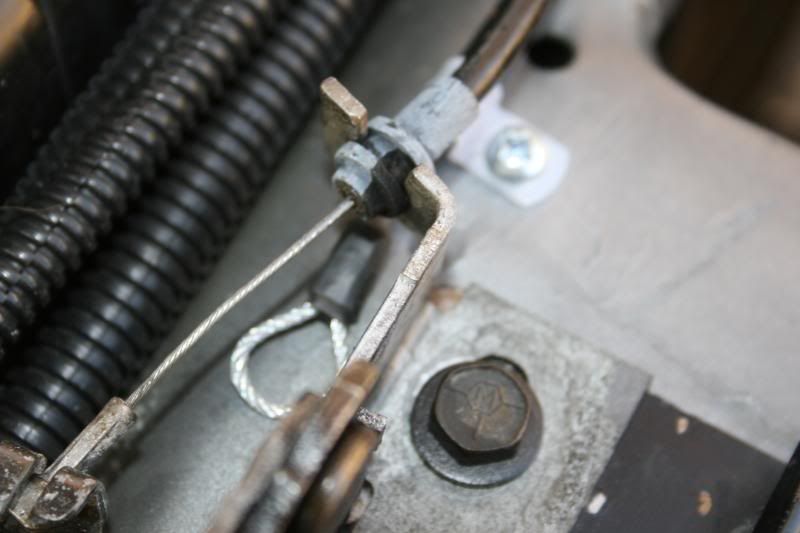
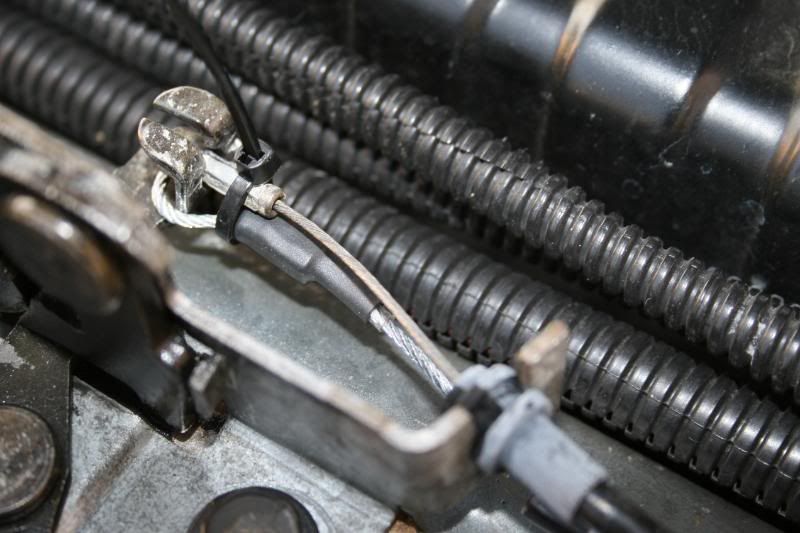
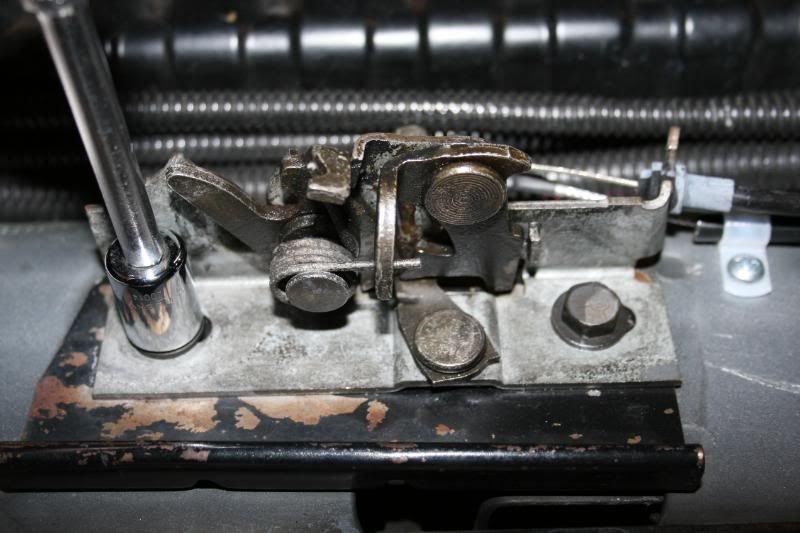
Starting at the latch side, start the tubing even with the edge of the latch; install the first clamp and sheet metal screw.
Next clear anything that might interfere and gracefully arch it into the hole, it needs to lie flat on the core support.
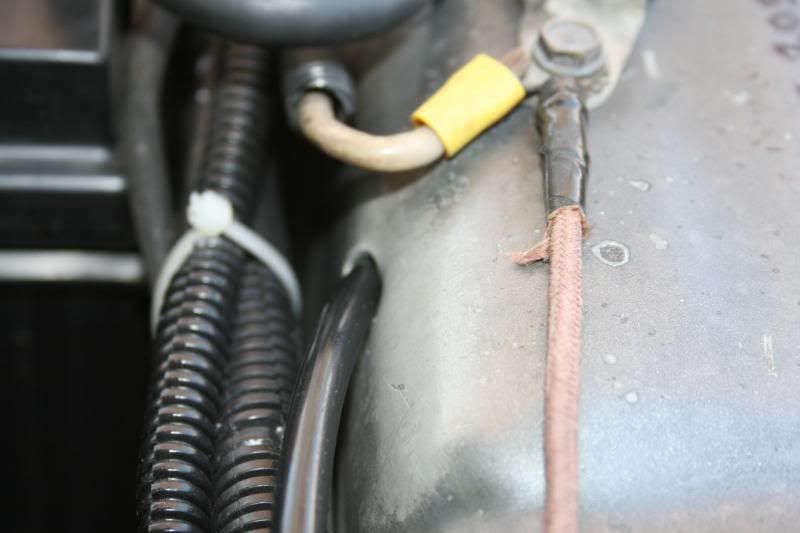
Temporarily route it out through an opening in the grille, again this is only temporary.
Part-1
Disclaimer:
As I have installed on my 1991 NON-intercooled truck.
NOTE An Intercooled truck may have parts installed where I have this, simply move this release for the proper clearance.
Now that our trucks are getting older there are unfortunately more and more parts that are going to start to break down, not all of the parts of our truck were built as well as the Cummins engine was, lots of disposable plastic parts.
As the parts fail we will fix them but how about if you were to open the hood and it did not open, now what?
There are ways to get it to unlatch but most of them will require you do some cosmetic repairs when you are through.
As you all know me by now, I always think with a “What if” and not “Oh Well” mentality, so I will show you how to build an Emergency Release that will just sit there and hopefully never have to be used but if it is then you will be glad you spent the time to install one.
Materials List:
1) 24” of �” nylon Air Brake Line (I use Synflex or Nyflex brand)
2) 2’ 10” of 1/16 stainlees steel aircraft type cable; I bought 50’ for other projects.
3) 1 package containing 2 Ferrules.
4) 2- �” nylon clamps.
5) 2- #8 stainless steel sheet metal screws.
6) 1/8” heat shrink tubing
7) 5/16” heat shrink tubing.
Tools Required:
Electric Drill
�”drill bit.
Diagonal cutting pliers
StaKon or crimping pliers.
#2 Phillips screwdriver.
Heat Gun or alternate heat source.
This is a collection of the parts we will be using.
Here are the clamps that we will use, get good ones because we want them to last.
This is the Air Brake Tubing, we want to GOOD Nylon and not Plastic or PVC.
You can get this at any truck parts.
We will first start by locating and drilling this hole, make sure there is nothing behind it, there should be nothing there.
To enable the tubing to enter on an angle, using your #2 Phillips screwdriver inserted into the hole, carefully elongate it by pulling it with the screwdriver blade. (This really hurt me to drill a new hole in my truck but it was necessary)
This is what it should look like, deburr the edges.
Starting at the latch side, start the tubing even with the edge of the latch; install the first clamp and sheet metal screw.
Next clear anything that might interfere and gracefully arch it into the hole, it needs to lie flat on the core support.
Temporarily route it out through an opening in the grille, again this is only temporary.
Thread Starter
Administrator
Joined: Nov 2004
Posts: 4,084
Likes: 233
From: Southern California
Emergency Hood Release
Part-2
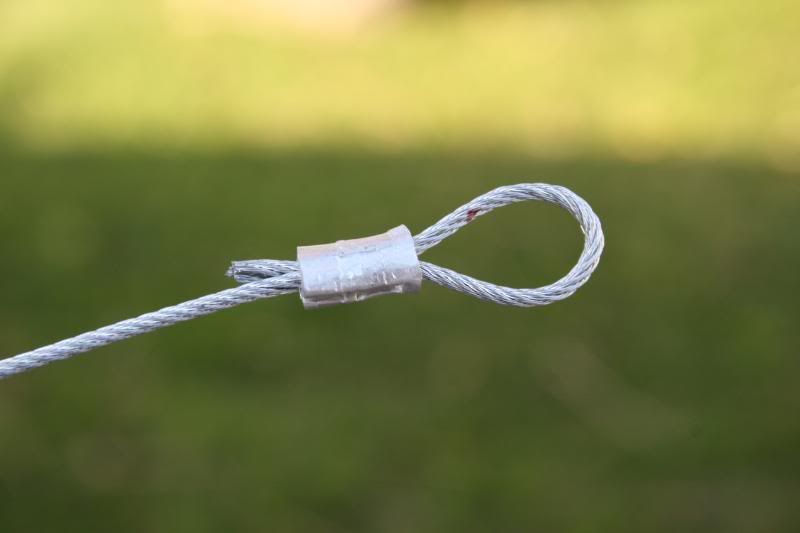
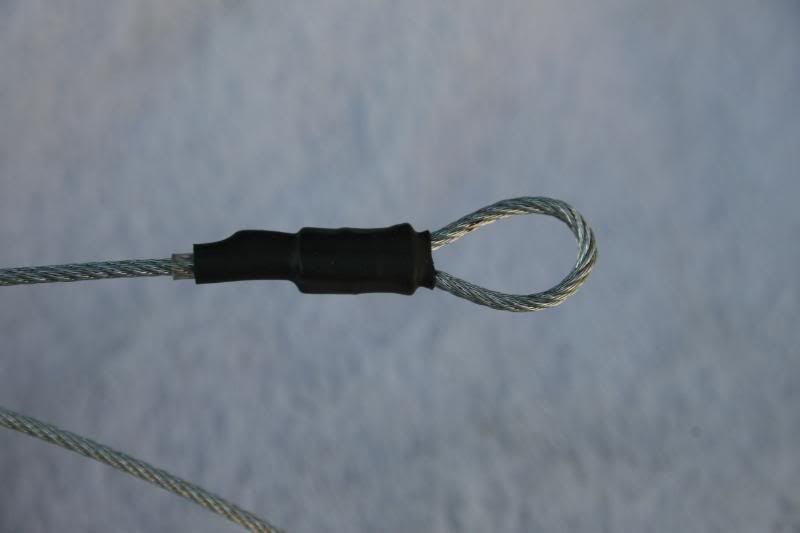
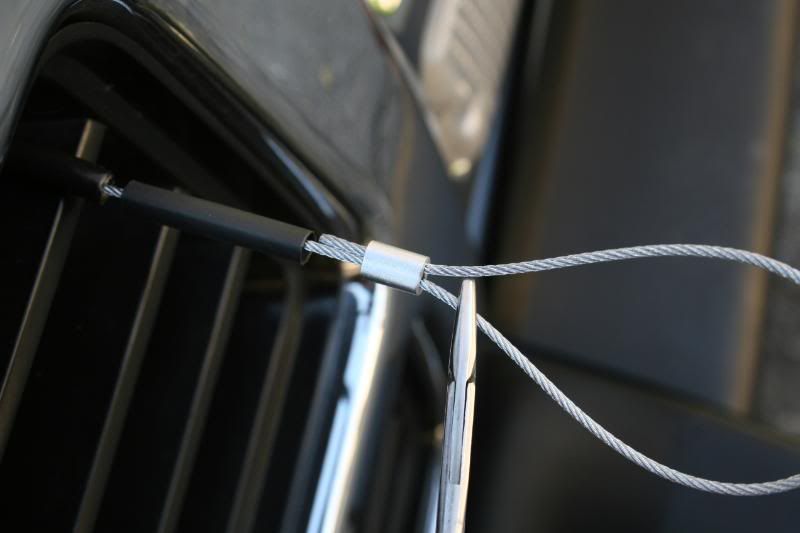
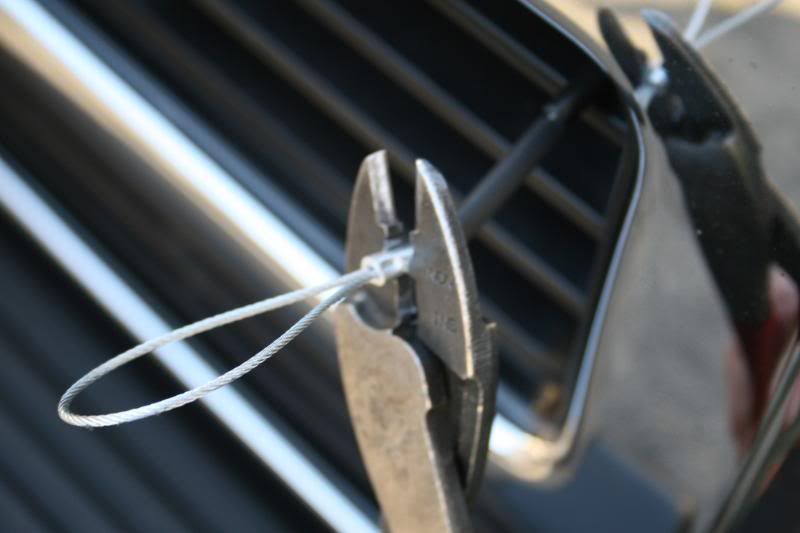
Now taking one free end of the 1/16� cable feed it through the ferrule and then loop it back on itself, as a guide wrap it around a 3/8� drill bit and be sure to leave about 1/8� or so out the end.
Now using your crimping pliers crimp it with several dimples.

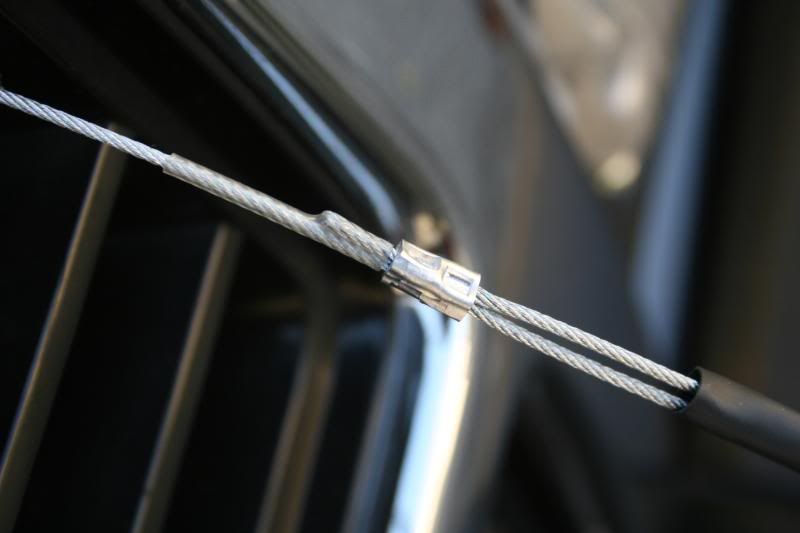
This is what it should look like; you want to keep it about those dimensions to fir properly.
Now slip onto the cable about a �� of the 1/8� heat shrink tubing and carefully work it up onto both pieces of the cable, using your heat gun shrink it down nice and snug.
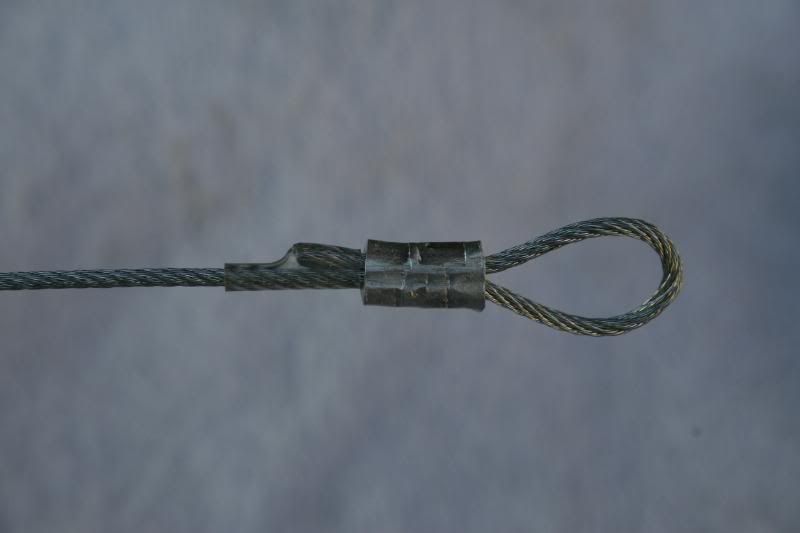
Then slip on a piece of the 3/16 shrink tubing and again shrink it on the cover the connections.
Now taking the free end carefully feed it into the open end of the tubing starting at the latch.
And then allow the free end to exit out of the tubing through the opening in the grille.
Temporarily we are going to connect it to the latch for the next step.
Slip the original cable back on for this measurement.
At the free end you want to have about 8� of the cable from the end of the tubing.
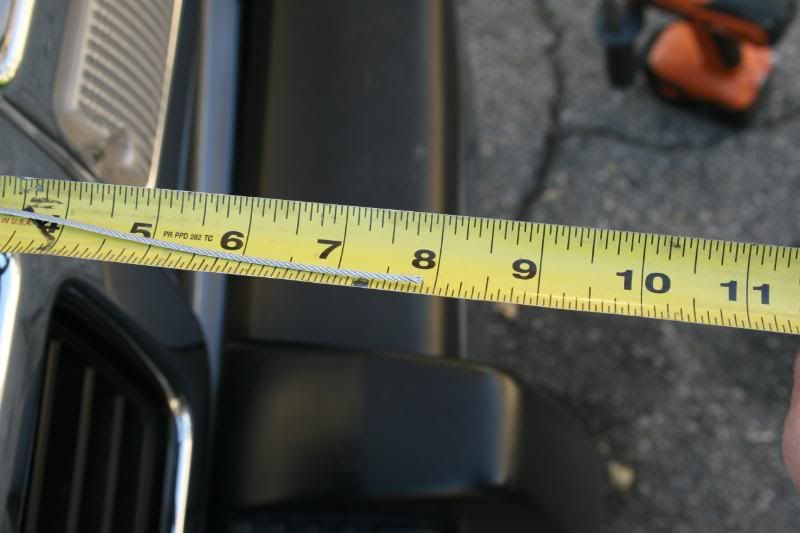
Now before you forget, slip on the 1/8� and the 3/16� heat shrink tubing NOW.
Part-2
Now taking one free end of the 1/16� cable feed it through the ferrule and then loop it back on itself, as a guide wrap it around a 3/8� drill bit and be sure to leave about 1/8� or so out the end.
Now using your crimping pliers crimp it with several dimples.
This is what it should look like; you want to keep it about those dimensions to fir properly.
Now slip onto the cable about a �� of the 1/8� heat shrink tubing and carefully work it up onto both pieces of the cable, using your heat gun shrink it down nice and snug.
Then slip on a piece of the 3/16 shrink tubing and again shrink it on the cover the connections.
Now taking the free end carefully feed it into the open end of the tubing starting at the latch.
And then allow the free end to exit out of the tubing through the opening in the grille.
Temporarily we are going to connect it to the latch for the next step.
Slip the original cable back on for this measurement.
At the free end you want to have about 8� of the cable from the end of the tubing.
Now before you forget, slip on the 1/8� and the 3/16� heat shrink tubing NOW.
Thread Starter
Administrator
Joined: Nov 2004
Posts: 4,084
Likes: 233
From: Southern California
Emergency Hood Release
Part-3
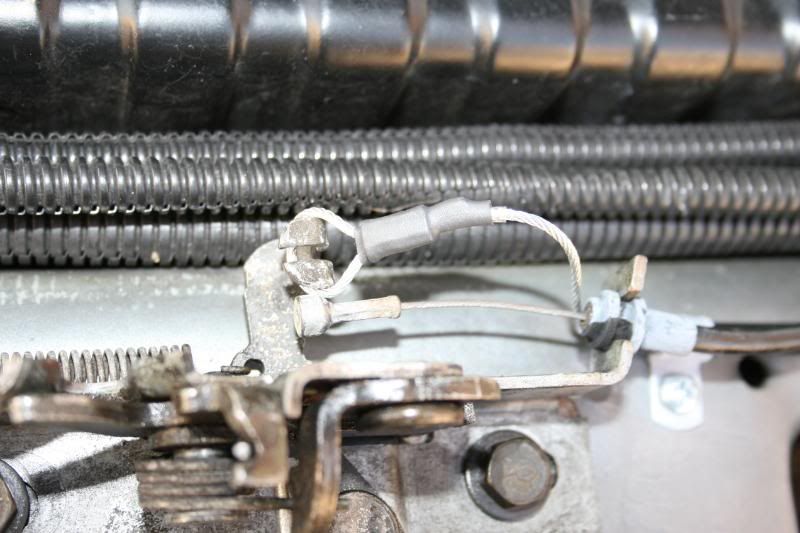
Here we go, Take the last ferrule and thread it onto the cable and then loop it back and feed it into the second hole to create your handle.
The size of the handle should take about 5� of the cable; use the remaining space to the end of the tubing as a guide, there should be about 1�.
You can lightly crimp this to hold the mark.
Go back to the latch and release the cable from the latch and allow it to enter the tubing. This will give you the needed cable length so you can finish the handle.
Now you can securely crimp the ferrule with several dimples.
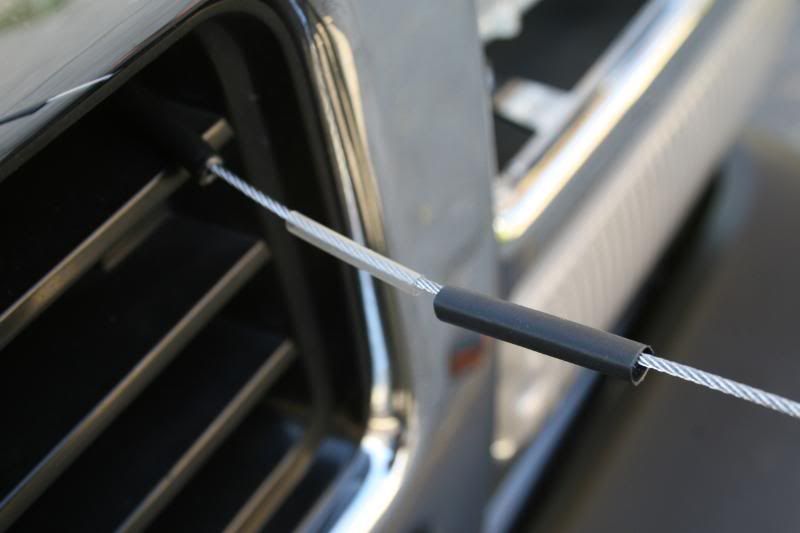
First slip the 3/16 heat shrink into the handle to protect it and then pull up the 1/8� onto both ends and shrink it.
After it is cool then slip down the 3/16� heat shrink over the ferrule and the tail and shrink to make a good seal.
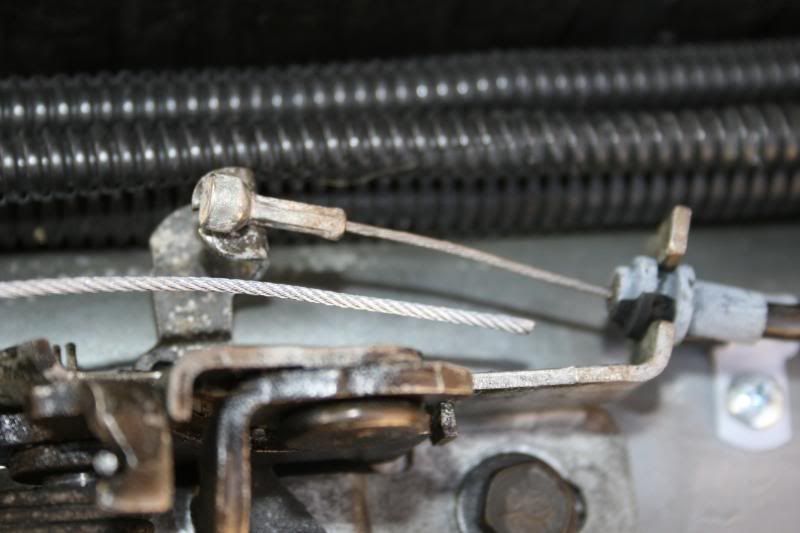
At the latch, pull the cable back up and
MAKE SURE IT MOVES IN AND OUT FREELY, (this is very important).
Then install it onto the latch, be sure it is seated at the bottom of the lever and then replace the original pull cable on top of it.
Secure them together with t small Ty-Rap so the move together.
This is why the cable must move freely in the tubing.
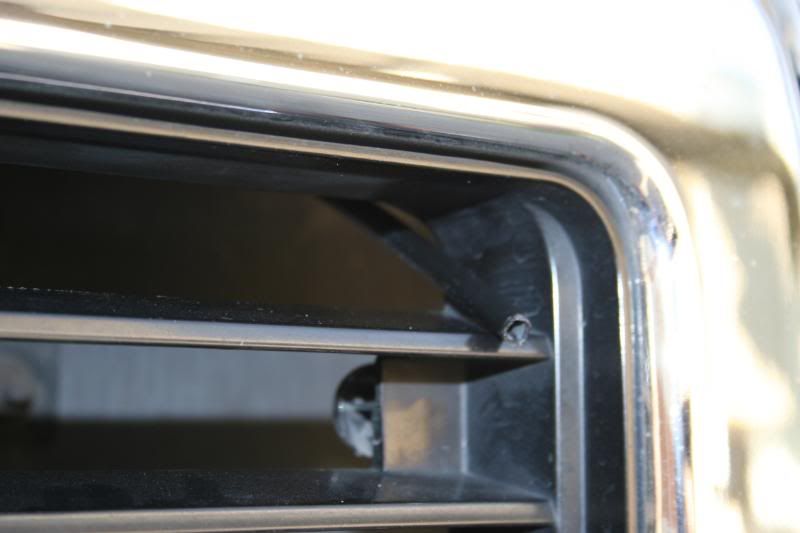
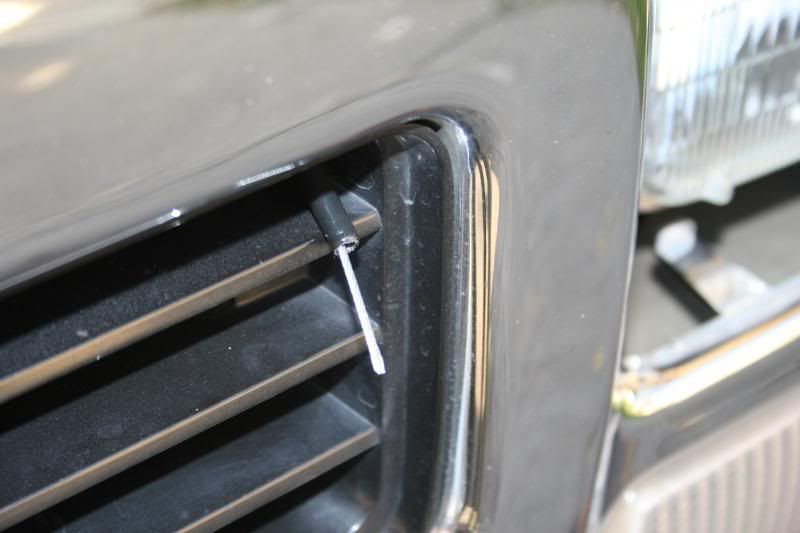
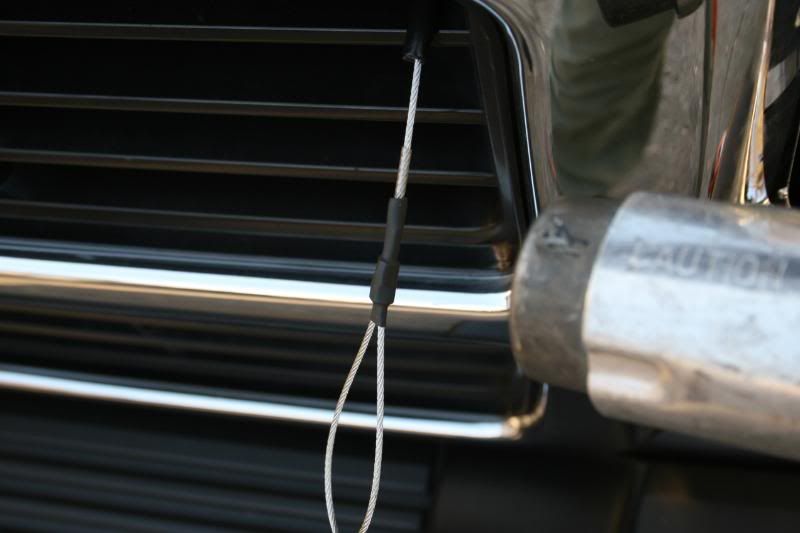
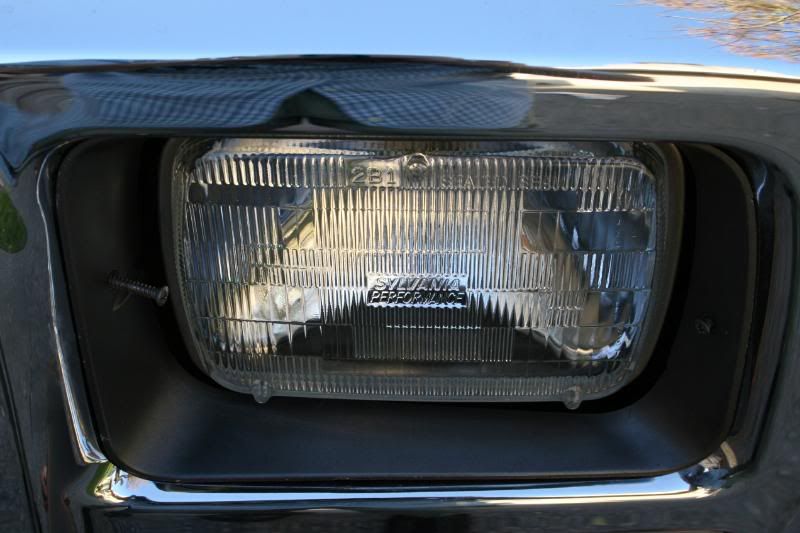
Looking at the grille carefully poke the entire assembly back through and work it so the cable is pointing gracefully downward behind the grille next to the headlight.
It needs to be pointed down so it will not collect and road debris and should be protected from water and ice if it is in your climate.
You could even protect it in a loosely placed Ziploc bag.
At this time you need to check all of your work and then after making sure it will open the latch with the hood open, check it again and then close the hood and check its operation.

If it is working then you are finished. Tuck it out of the way so there is no interference and it can move in and out and then reinstall the headlight trim.
Part-3
Here we go, Take the last ferrule and thread it onto the cable and then loop it back and feed it into the second hole to create your handle.
The size of the handle should take about 5� of the cable; use the remaining space to the end of the tubing as a guide, there should be about 1�.
You can lightly crimp this to hold the mark.
Go back to the latch and release the cable from the latch and allow it to enter the tubing. This will give you the needed cable length so you can finish the handle.
Now you can securely crimp the ferrule with several dimples.
First slip the 3/16 heat shrink into the handle to protect it and then pull up the 1/8� onto both ends and shrink it.
After it is cool then slip down the 3/16� heat shrink over the ferrule and the tail and shrink to make a good seal.
At the latch, pull the cable back up and
MAKE SURE IT MOVES IN AND OUT FREELY, (this is very important).
Then install it onto the latch, be sure it is seated at the bottom of the lever and then replace the original pull cable on top of it.
Secure them together with t small Ty-Rap so the move together.
This is why the cable must move freely in the tubing.
Looking at the grille carefully poke the entire assembly back through and work it so the cable is pointing gracefully downward behind the grille next to the headlight.
It needs to be pointed down so it will not collect and road debris and should be protected from water and ice if it is in your climate.
You could even protect it in a loosely placed Ziploc bag.
At this time you need to check all of your work and then after making sure it will open the latch with the hood open, check it again and then close the hood and check its operation.
If it is working then you are finished. Tuck it out of the way so there is no interference and it can move in and out and then reinstall the headlight trim.
Thread Starter
Administrator
Joined: Nov 2004
Posts: 4,084
Likes: 233
From: Southern California
Emergency Hood Release
Part-4
This is the last part of my Emergency Hood Release modification, I always like to than an option to my options incase it fails.
Again this might not work depending on your particular truck however is does work on mine.
Materials List:
2, ��-20X 1�� threaded studs. WITH 1/8� Allen socket.
2, 1/4X20 Nylock nuts.
2, �� washers.
See if you can figure out what I am going to do..
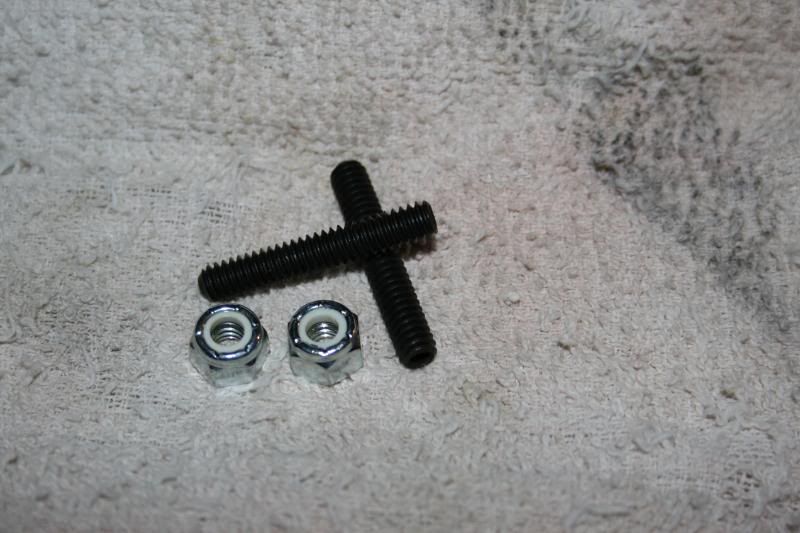
Holding the suds using the 1/8� Allen key, screw on the nylock nut onto the opposite end and have about 2 threads exposed.
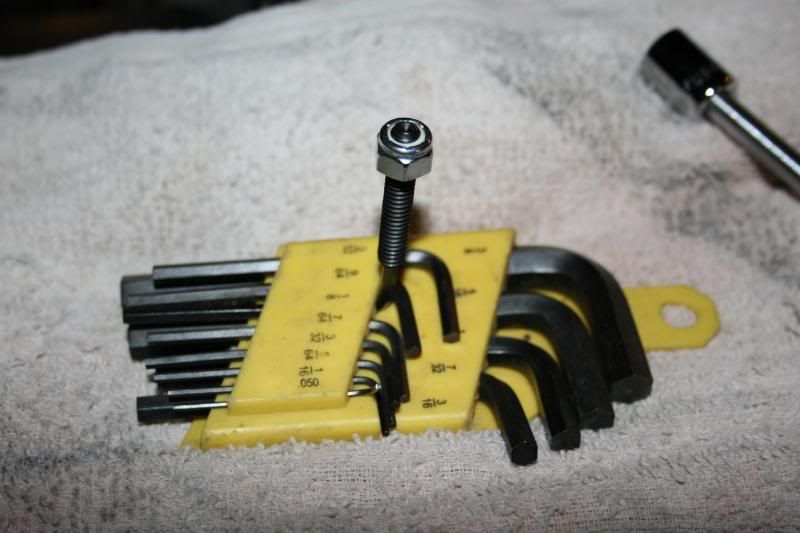
Now one at a time remove each bolt from the hood latch, at this time it is suggested to run the nutsert with a �-20 tap and clean out the threads.
One at a time replace each mounting bolt with the new stud and nut.
Lubricate the threads and then SUNG them down.

You are finished.
You ask why did I ask you to do this??
Simple, if your pull cable ever broke and for some reason you forgot to install the second Emergency Hood Release.
You can reach up from under the bumper and with difficultly but surely screw the mounting bolts back up from the underside using a 1/8� Allen key releasing the entire hood latch assembly.
I hope some of the ideas I have put into use on my truck will benefit any of these who care to use them.
Let me know if you have any questions and feel free to modify this idea to suit your needs.
This is one of my simpler ideas I have put into use.
Thanks.
Jim in Southern California.
Part-4
This is the last part of my Emergency Hood Release modification, I always like to than an option to my options incase it fails.
Again this might not work depending on your particular truck however is does work on mine.
Materials List:
2, ��-20X 1�� threaded studs. WITH 1/8� Allen socket.
2, 1/4X20 Nylock nuts.
2, �� washers.
See if you can figure out what I am going to do..
Holding the suds using the 1/8� Allen key, screw on the nylock nut onto the opposite end and have about 2 threads exposed.
Now one at a time remove each bolt from the hood latch, at this time it is suggested to run the nutsert with a �-20 tap and clean out the threads.
One at a time replace each mounting bolt with the new stud and nut.
Lubricate the threads and then SUNG them down.
You are finished.
You ask why did I ask you to do this??
Simple, if your pull cable ever broke and for some reason you forgot to install the second Emergency Hood Release.
You can reach up from under the bumper and with difficultly but surely screw the mounting bolts back up from the underside using a 1/8� Allen key releasing the entire hood latch assembly.
I hope some of the ideas I have put into use on my truck will benefit any of these who care to use them.
Let me know if you have any questions and feel free to modify this idea to suit your needs.
This is one of my simpler ideas I have put into use.
Thanks.
Jim in Southern California.


Registered User


Joined: Oct 2005
Posts: 6,457
Likes: 95
From: KENTUCKY
Very NICE.
I have been meaning to do this myself on four trucks.
The son's hood-cable is a loop of cable, hanging through the grille, with no connection to the handle in the cab.
His actually works better than any of the others.
https://www.dieseltruckresource.com/...24&postcount=4
^^^^Here^^^^ is a recent post I had made on the subject.
Do you have a brand/part-number for the Allen-keyed 1/4" studs ??
Thanks.

Trending Topics
Chapter President
Joined: Feb 2002
Posts: 6,102
Likes: 2
From: Red Deer, Alberta Canada
Wow, good idea. My 89 broke off on the handle in the cab one day.. Some vice grips and a little foul words and I got it open.. That would have been a life saver.. Good writeup too.. 

Registered User
Joined: Feb 2003
Posts: 788
Likes: 89
From: Nevada Co., CA
Very clever, especially them allen head studs! A bicycle cable with it's cover(can't think of what it's called) could be used for the emergency cable - that would be pretty bomb proof - I think I may have one or two I've been dragging around in my stuff for 30 years!

Thread
Thread Starter
Forum
Replies
Last Post
2-Stroke
3rd Gen Engine and Drivetrain -> 2003-2007
3
Mar 11, 2013 12:42 PM