What did you do to your Gen 1 today?
 05-06-2016, 08:50 AM
#2536
Registered User

 Seems several projects got started but never finished. Too bad there were some good ideas.
All the better for you though

 05-06-2016, 12:26 PM
#2537
Registered User
Join Date: Dec 2010
Location: Land of the Toxic Avenger
Posts: 6,770
Received 1,637 Likes
on
1,112 Posts
NO FREAKING WAY !

Man, that's funny..... or sad, depending on how you look at it.
I thought the management here discouraged having "multiple screen names".
They can figure out who / what you are by your computer's ID, from what I understand. A guy I know got banned from another website forum, and came back as a different name. The "watchers" figured it out from his IP address, and re banned him....
05-06-2016, 12:37 PM
#2538
Registered User
Wheelieking was his E-mail address and he also lived in Gilbert AZ.
Sounds like the same pink panties to me.
He is banned around here too since he owes me $2000+ in parts that where missing from the Gauntlet project I bought from him.
Sounds like the same pink panties to me.
He is banned around here too since he owes me $2000+ in parts that where missing from the Gauntlet project I bought from him.
05-06-2016, 02:54 PM
#2539
Registered User
Ugh...that's sux that you got ripped off. I hate it when people do that type of stuff. Especially in a sort of small community like 1st gen owners.
I knew a guy years ago that built a 71 Challenger R/T clone. He did a decent job on it but was kind of a shyster. I found out later that he sold it as a factory R/T car and may have pulled some shenanigans with the paperwork. I was going to try to find out who he sold it to and let them know but 3 people had already beaten me to it.
I knew a guy years ago that built a 71 Challenger R/T clone. He did a decent job on it but was kind of a shyster. I found out later that he sold it as a factory R/T car and may have pulled some shenanigans with the paperwork. I was going to try to find out who he sold it to and let them know but 3 people had already beaten me to it.
The following users liked this post:
mknittle (05-06-2016)
05-06-2016, 04:09 PM
#2540
Registered User
Yeah I was really angry for a while [a year].
Now I am just looking at what is really important.
I have a cool rig that my daughter and I dig and we want to drive it.
So the heck with that loser. I can fix any problem he has made for me.
Maybe we can have a beer on the "tailgate" of it this summer at Carlisle, MrFusion.
I have my work cut out to pull that off but that is the ultimate goal.
I picked up the freshly painted core support for it today and the South Bend clutch is sitting next to it as well.
The following users liked this post:
mknittle (05-06-2016)
05-06-2016, 10:55 PM
#2541
Registered User
I wanted to tease myself by putting on the AFC top. So I did. Then ruined my day.
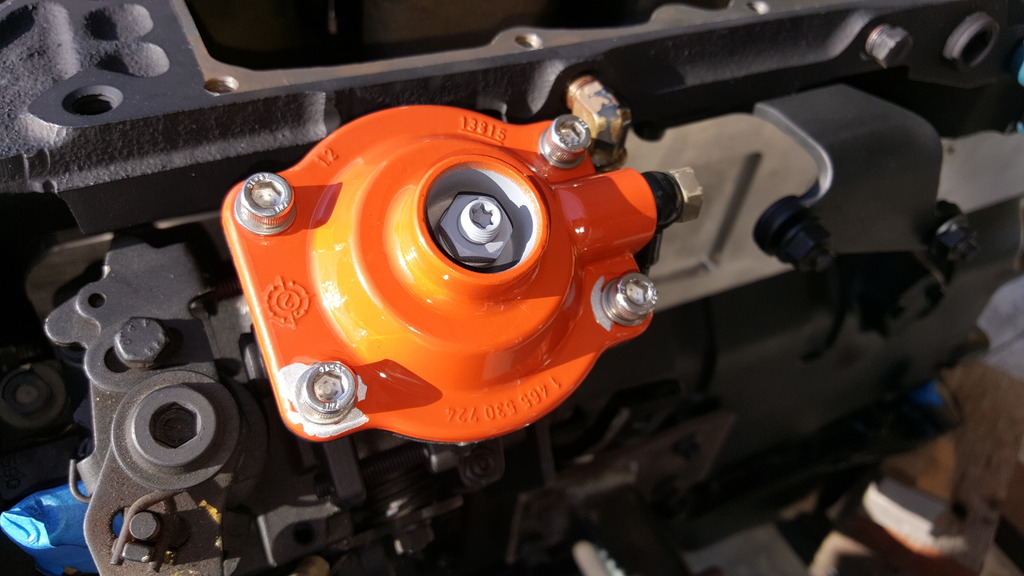
I figured this engine enamel would be pretty solid after curing in the oven. I probably needed to scuff the surface a bit before even the primer. The primer and base appear to have adhered to one another but not the primer to the surface. This has me worried about the other parts now. It was mentioned that a little dab of petroleum jelly might help. Gotta start over with it.
Anyhow. I had some more fun with the bead blaster. I need me a cabinet at home. But why bother when I can use one at work?

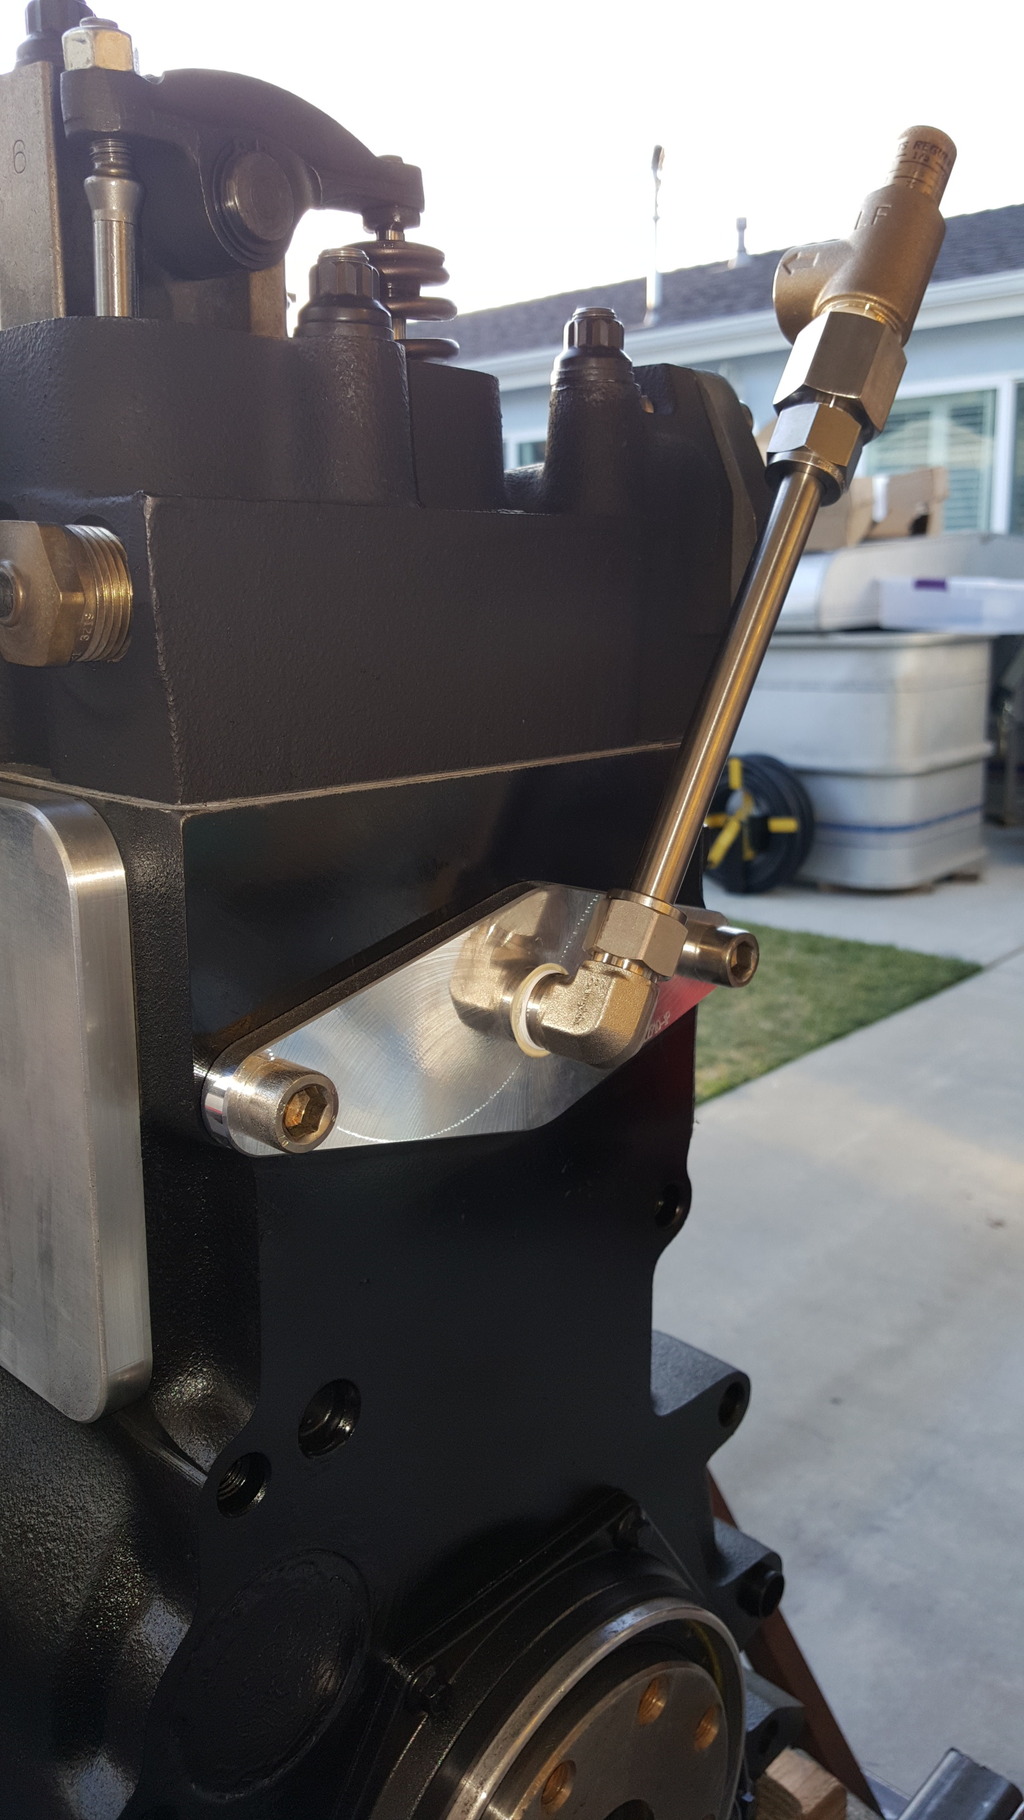
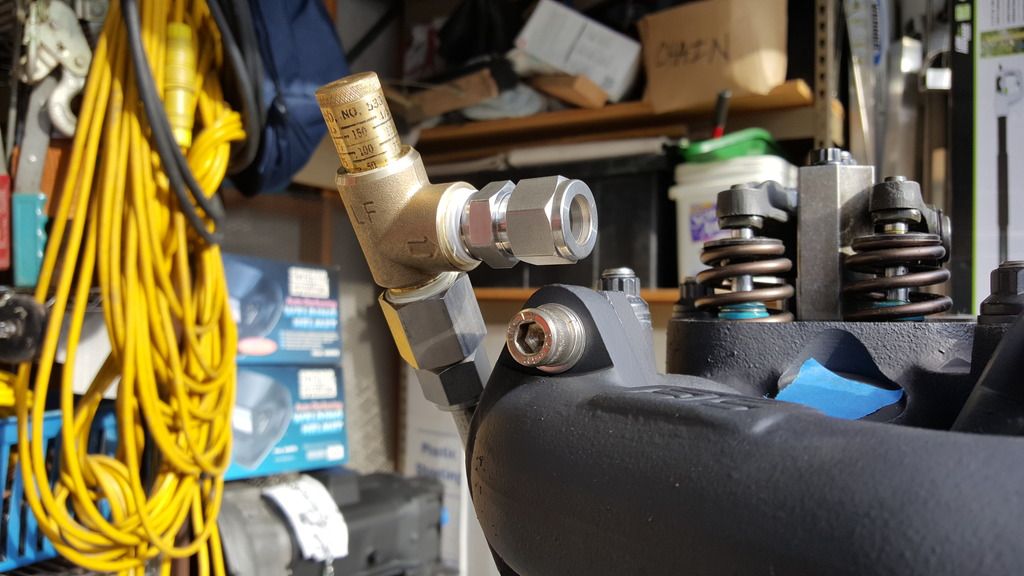
Wednesday, I started mocking up the coolant bypass. Overall protrusion beyond the block is only 1.75" but a buddy of mine took a dimension for me and came up with around 1" of clearance between the block/head and firewall. I may have to massage the firewall a little bit to clearance the fittings, tubing and PRV.
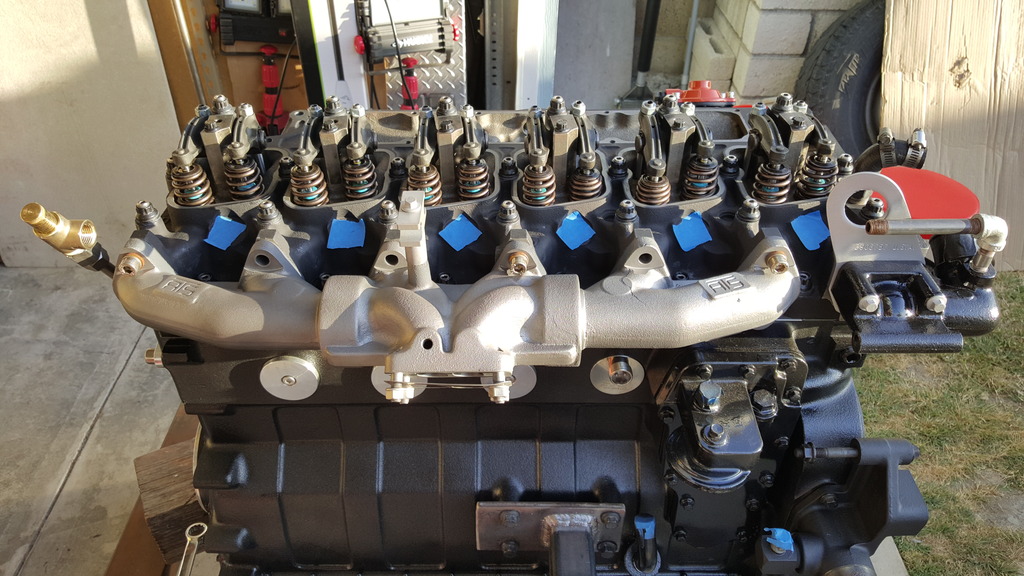
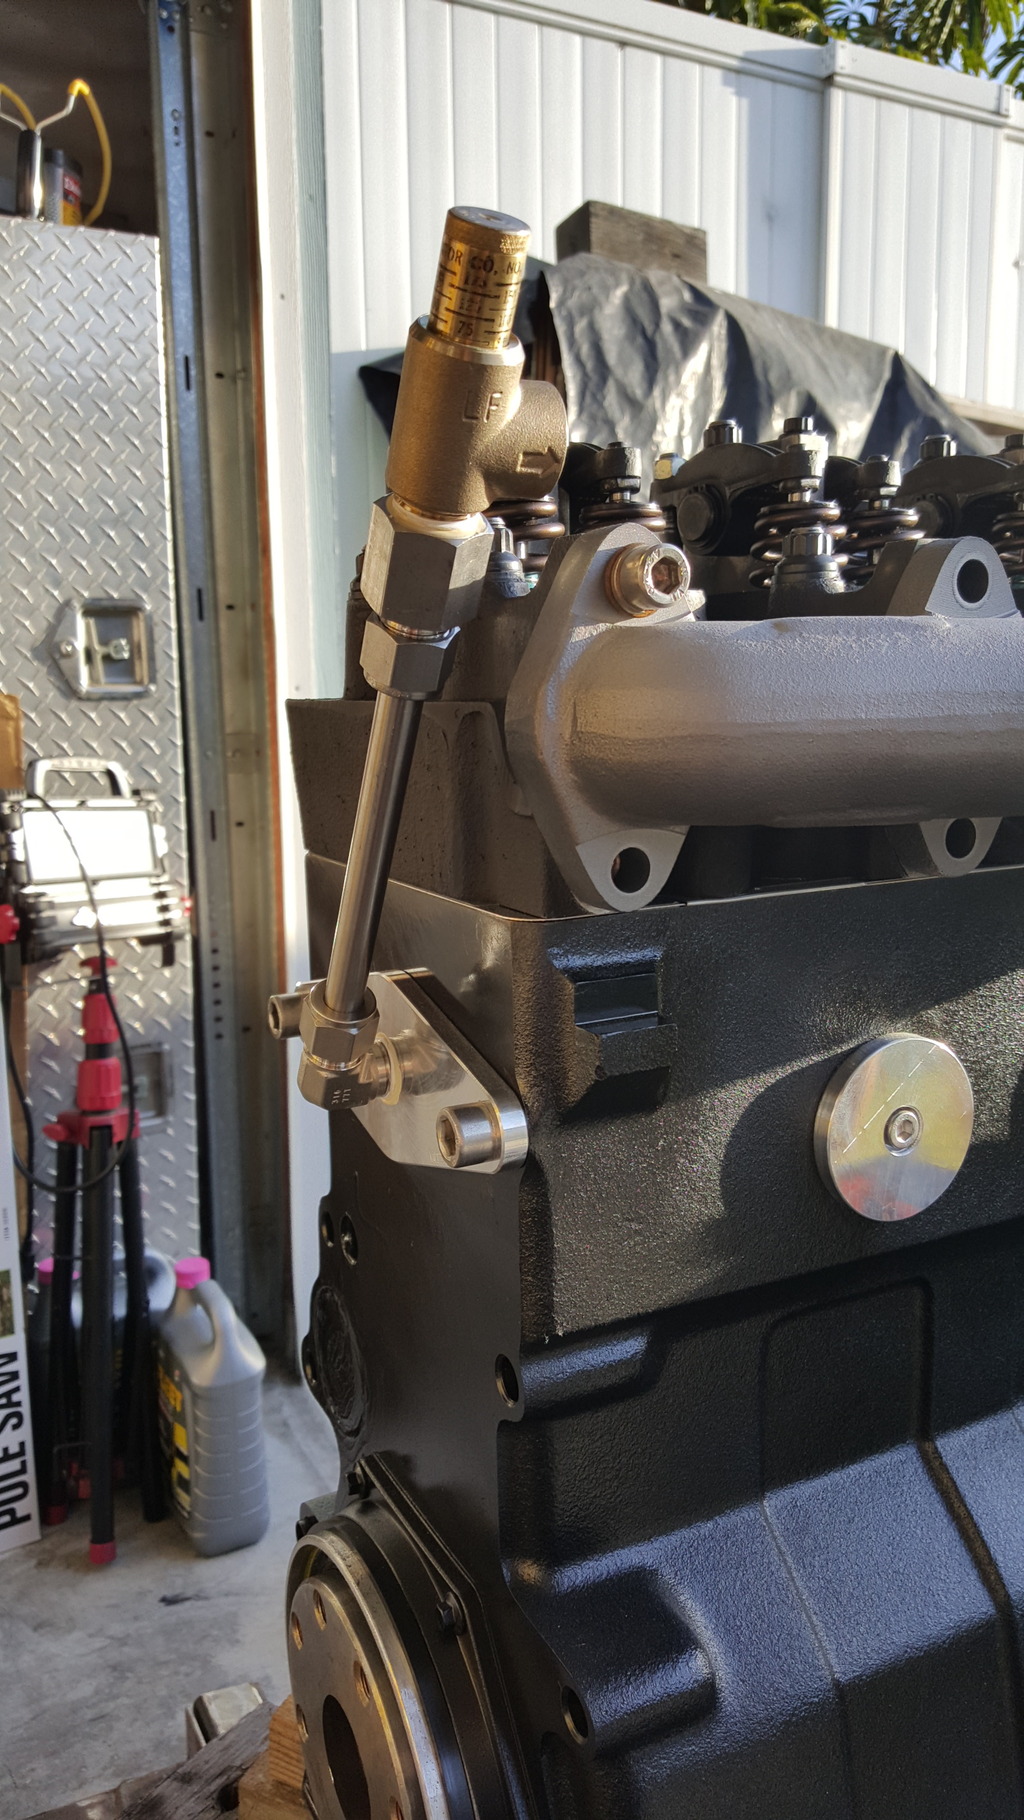
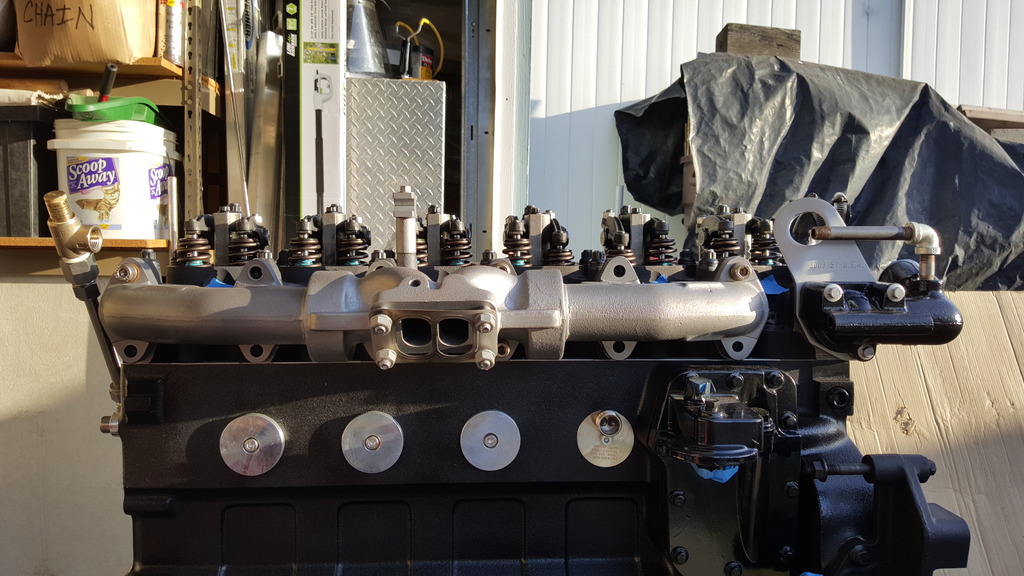
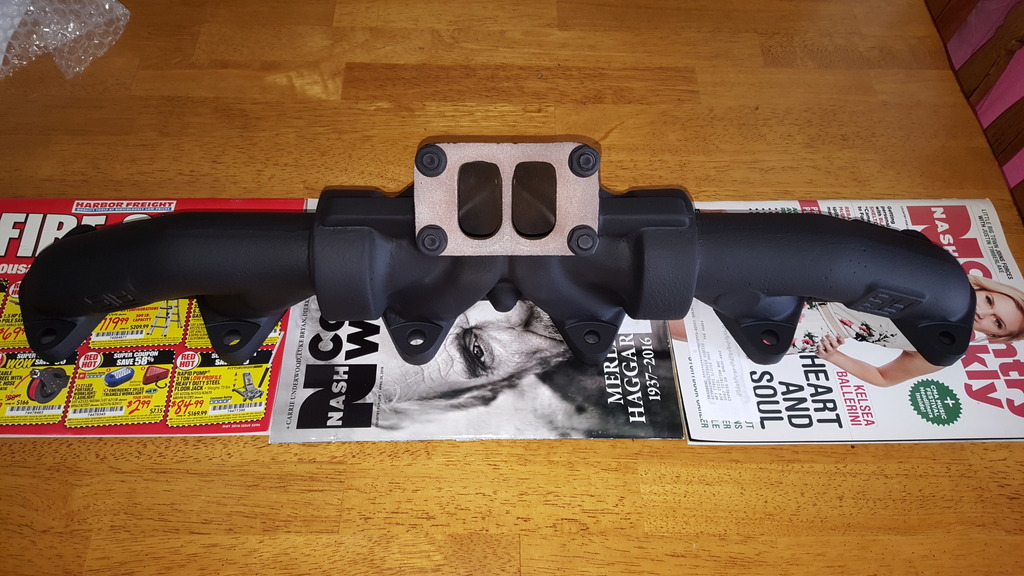
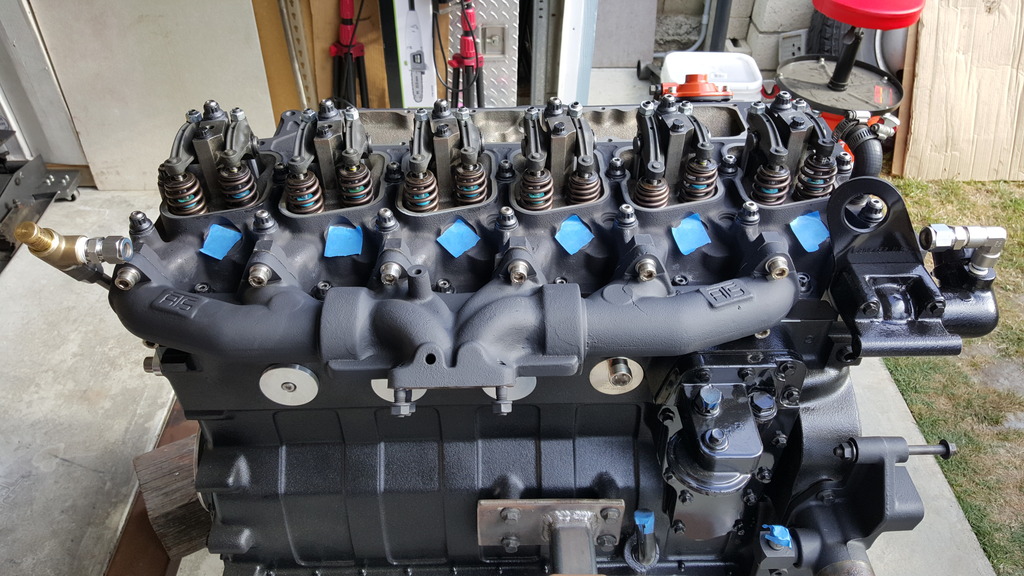
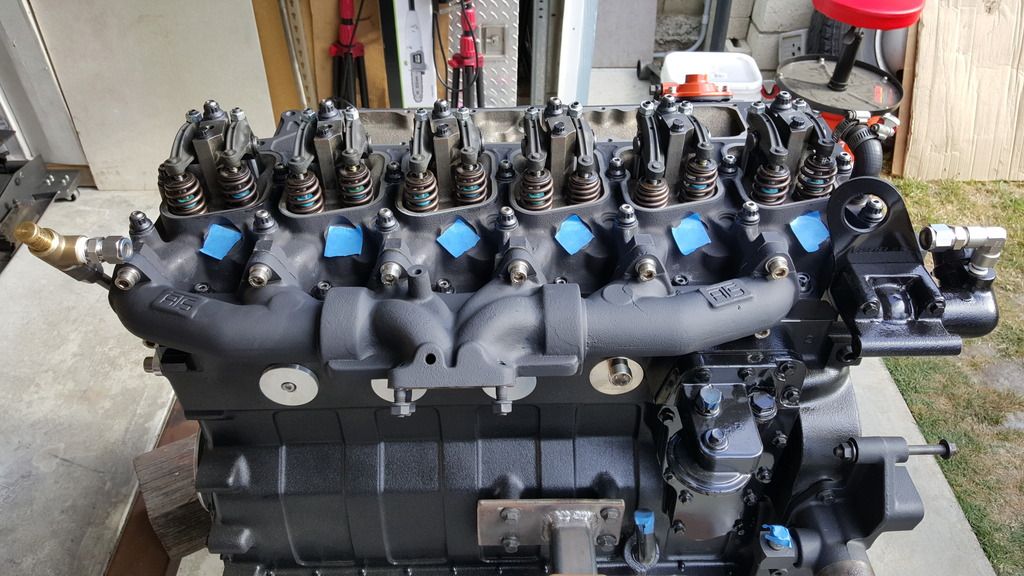
Yesterday I painted the ATS manifold, let it dry overnight and then baked it this morning. The directions on the can called for a 600* baking for 30 minutes as the last step. My oven didn't quite make it but got surprisingly close at 550*. I baked it twice with a 30 minute cool-down between. The first run after start-up will get it to 600*.
I figured this engine enamel would be pretty solid after curing in the oven. I probably needed to scuff the surface a bit before even the primer. The primer and base appear to have adhered to one another but not the primer to the surface. This has me worried about the other parts now. It was mentioned that a little dab of petroleum jelly might help. Gotta start over with it.
Anyhow. I had some more fun with the bead blaster. I need me a cabinet at home. But why bother when I can use one at work?
Wednesday, I started mocking up the coolant bypass. Overall protrusion beyond the block is only 1.75" but a buddy of mine took a dimension for me and came up with around 1" of clearance between the block/head and firewall. I may have to massage the firewall a little bit to clearance the fittings, tubing and PRV.
Yesterday I painted the ATS manifold, let it dry overnight and then baked it this morning. The directions on the can called for a 600* baking for 30 minutes as the last step. My oven didn't quite make it but got surprisingly close at 550*. I baked it twice with a 30 minute cool-down between. The first run after start-up will get it to 600*.
05-06-2016, 10:57 PM
#2542
Registered User
Continued due to 10 picture per post limitation.
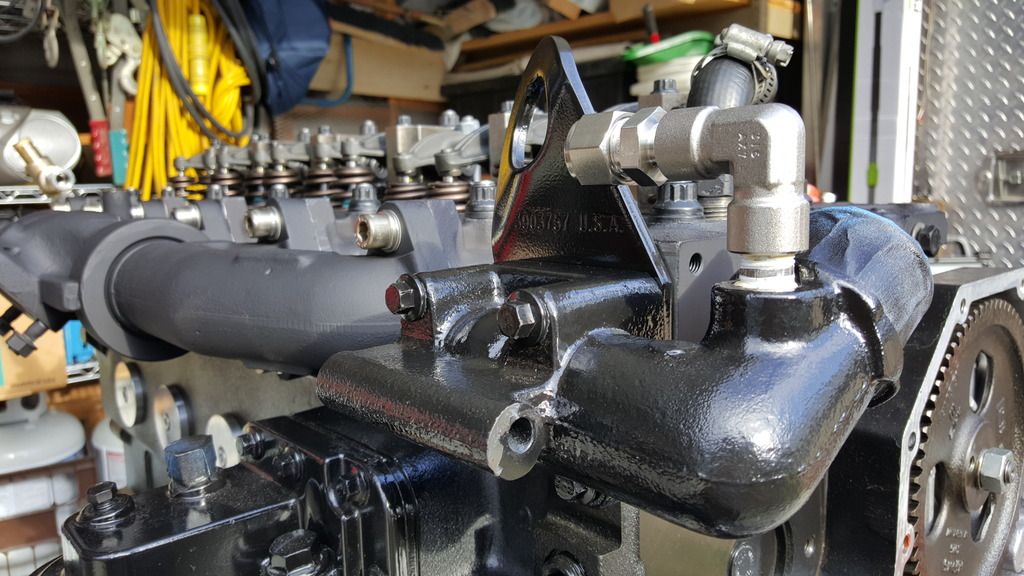
Later on, I mounted the manifold and torqued the fasteners. After playing around with fittings and such, I found what should work well for the bypass. A couple Swagelok tubing adapters, a little teflon tape and pipe thread sealant...
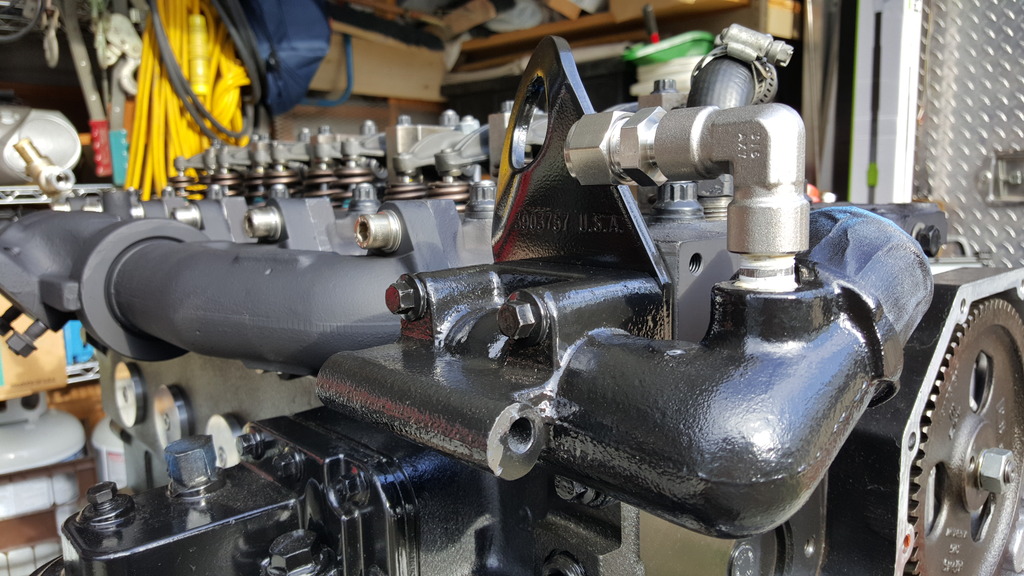

Being that the thermostat housing will need to come off at times, the connection between the 2 points will need to be flexible. As well, running along the exhaust manifold, it will also need to withstand some heat. Once the fittings were in their final resting place, I came up with a dimension of 29.875 between them. This couldn't have worked out better because Swagelok has a pre-made 30" length of PTFE core, smooth bore 304 stainless braided hose with tubing adapter hose ends. Order to be placed on Monday.
This hose will run just below the steel heater core tubing and inside of the stand-off for the clamp that bolts to the manifold.

Later on, I mounted the manifold and torqued the fasteners. After playing around with fittings and such, I found what should work well for the bypass. A couple Swagelok tubing adapters, a little teflon tape and pipe thread sealant...
Being that the thermostat housing will need to come off at times, the connection between the 2 points will need to be flexible. As well, running along the exhaust manifold, it will also need to withstand some heat. Once the fittings were in their final resting place, I came up with a dimension of 29.875 between them. This couldn't have worked out better because Swagelok has a pre-made 30" length of PTFE core, smooth bore 304 stainless braided hose with tubing adapter hose ends. Order to be placed on Monday.
This hose will run just below the steel heater core tubing and inside of the stand-off for the clamp that bolts to the manifold.
05-06-2016, 10:58 PM
#2543
Banned

Didn't you media blast the parts prior to prime and paint? I learned that is the only way. Media blast, then engine enamel primer, then the color while the primer is still tacky. Mine seem to be holding up ok
05-06-2016, 11:01 PM
#2544
Registered User
I did exactly that. Followed the directions on the can precisely.
05-06-2016, 11:18 PM
#2546
Registered User
^^^^X2 on powder coating.
Is the AFC top aluminum? I've never had much luck getting primer and paint to stick to aluminum well. I've bead blasted small aluminum parts and it hasn't made much difference.
Did you prime the ATS manifold prior to painting? I primed and painted my ATS manifold then cooked it through the 3 cycles on my gas grill using a touchless thermometer aimed through an opening in the side of the grill hood. I got to around 550 on the last stage and left it in for 45 mins.
05-07-2016, 08:33 AM
#2547
Registered User
Continued due to 10 picture per post limitation.
Later on, I mounted the manifold and torqued the fasteners. After playing around with fittings and such, I found what should work well for the bypass. A couple Swagelok tubing adapters, a little teflon tape and pipe thread sealant...
Being that the thermostat housing will need to come off at times, the connection between the 2 points will need to be flexible. As well, running along the exhaust manifold, it will also need to withstand some heat. Once the fittings were in their final resting place, I came up with a dimension of 29.875 between them. This couldn't have worked out better because Swagelok has a pre-made 30" length of PTFE core, smooth bore 304 stainless braided hose with tubing adapter hose ends. Order to be placed on Monday.
This hose will run just below the steel heater core tubing and inside of the stand-off for the clamp that bolts to the manifold.
An overdose of fun can get ugly.
05-07-2016, 08:41 AM
#2548
Registered User
I have used it on aluminum truck body panels. Otherwise paint won't stick worth beans.
05-07-2016, 12:13 PM
#2549
Registered User
Join Date: Dec 2010
Location: Land of the Toxic Avenger
Posts: 6,770
Received 1,637 Likes
on
1,112 Posts
One of youus guys have a $3.5 million cuda sitting in your garage?
I wish I did
http://http://autoweek.com/article/c...ngs-35-million
I wish I did
http://http://autoweek.com/article/c...ngs-35-million
05-07-2016, 02:15 PM
#2550
Registered User
An adjustable boost elbow plumbed into the AFC boost line makes sense
Larger tubing/more air/less smoke makes no sense.
You likely fixed a boost leak while doing the mod.
This has nothing to do with volume, only pressure.
Larger tubing/more air/less smoke makes no sense.
You likely fixed a boost leak while doing the mod.
This has nothing to do with volume, only pressure.
. I have the exact mods to the pump as you do, except for the fuel pin. I am using the original Smokey pin from back in the mid 2000's. Hungry Diesel stronger AFC spring, KSB timing spacer, all that. I believe the star wheel adjustments may be close to yours, as well.
I recently got the DAP 5x12 VCO's in, in exchange for those Lucas POD's, and those still haze ever so slightly, but way better than the POD's. My goal was better MPG's, with a touch of power still. One of the things I did that made a big difference in idle haze clean up was to change out my AFC boost line to 1/4", using Parker push to connect DOT fittings. Had to drill out and retap my AFC top to 1/8" NPT. Used (2) 90* elbows and about 6" of heavy wall tubing. The port at the engine already is 1/8" NPT.
Originally my goals for doing this was to ease the removal of the AFC top when tuning the star wheel settings, and be rid of that whole banjo bolt mess and the two gaskets which are easily dropped and lost. The end results were a clean mod, along with more boost air driving down that diaphragm faster. Definitely could feel a difference performance wise. Maybe why any haze I have cleans up real quick upon acceleration