
1st Gen Bench to 1st Gen Buckets Swap Finished

Thread Starter
Registered User
Joined: Mar 2008
Posts: 194
Likes: 0
From: Tennessee
1st Gen Bench to 1st Gen Buckets Swap Finished
Hey guys heres a quick write up of how i swapped my 1st gen bench seat out for a pair of 1st gen buckets/captains chairs w/ console. For the most part it was a pretty simple and straight forward procedure. I was able to use 3 of the existing holes from the bench seat for mounting the new seats.
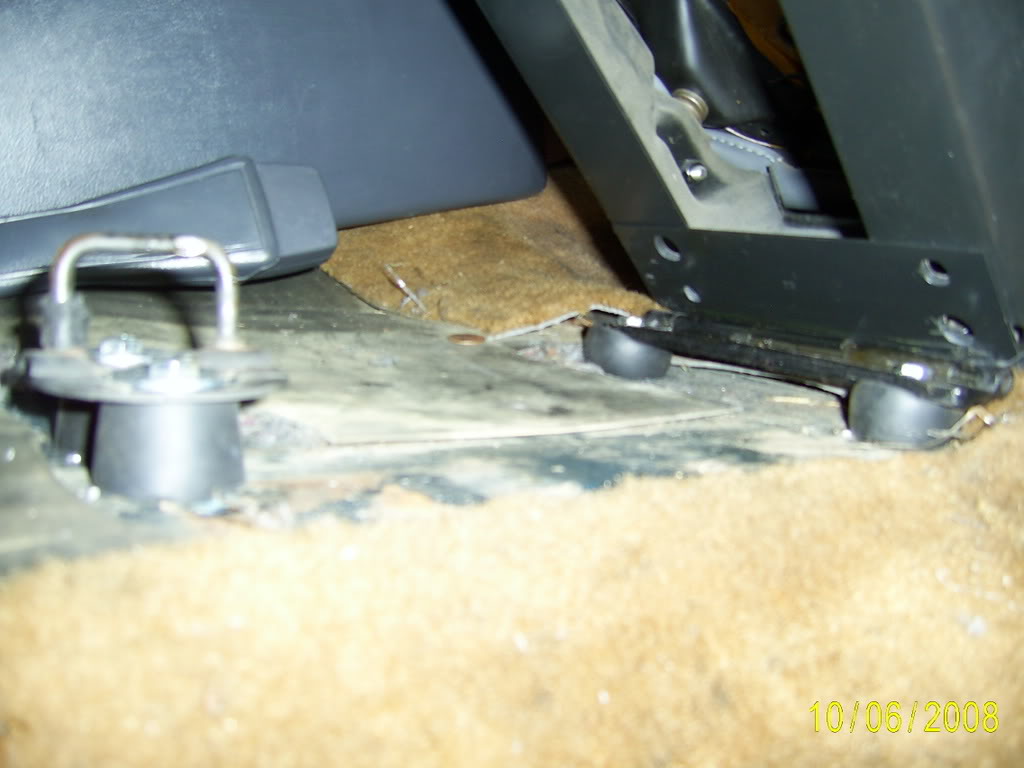
First I removed the base from the bottom of the drivers side seat and set it in the cab where i wanted to mount it. I was able to utilize the 2 holes already there from the bench seat mount for the 2 left side holes for the new bucket base. With those lined up i used a sharpie to mark the other two holes and then drilled them.
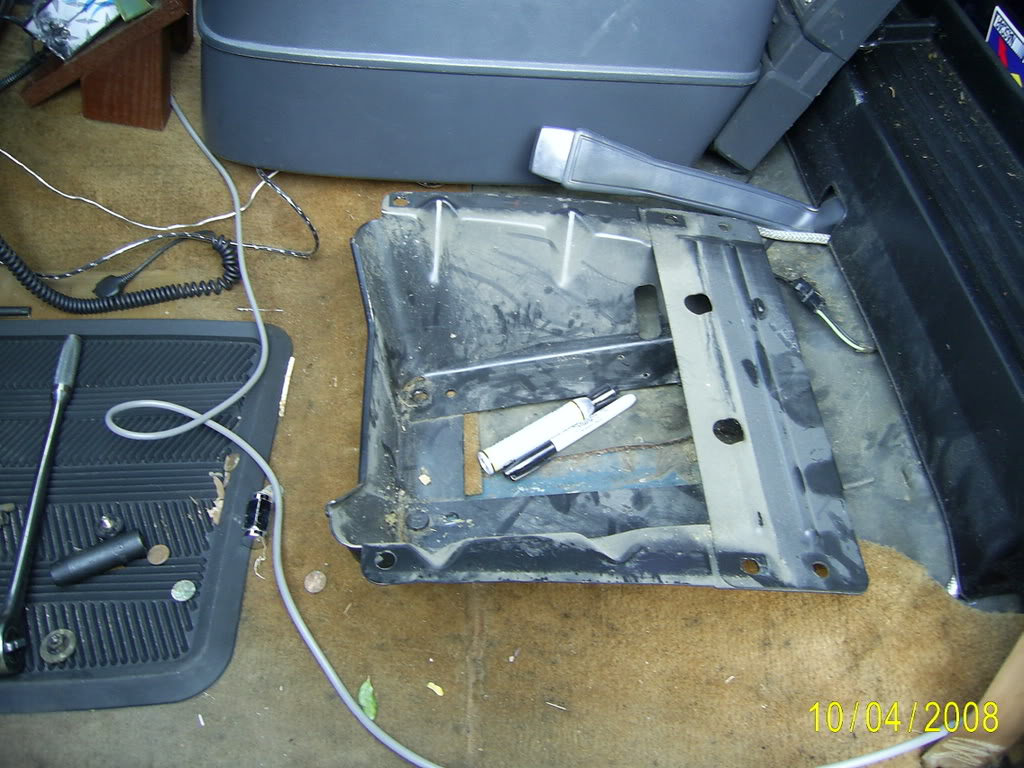
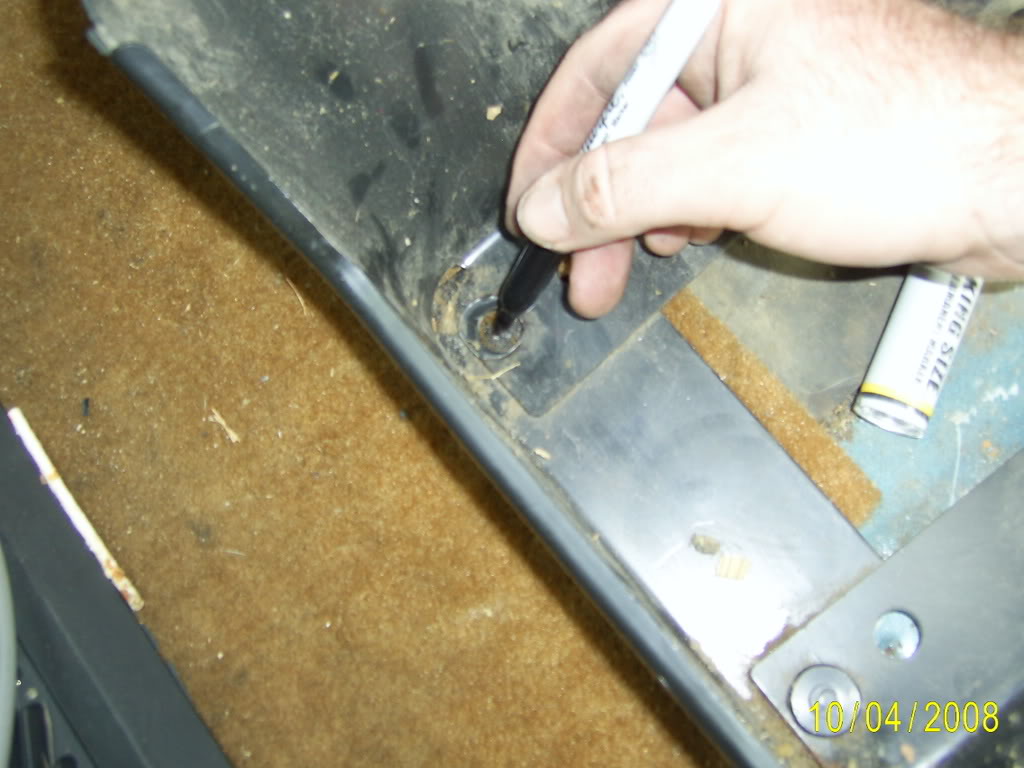
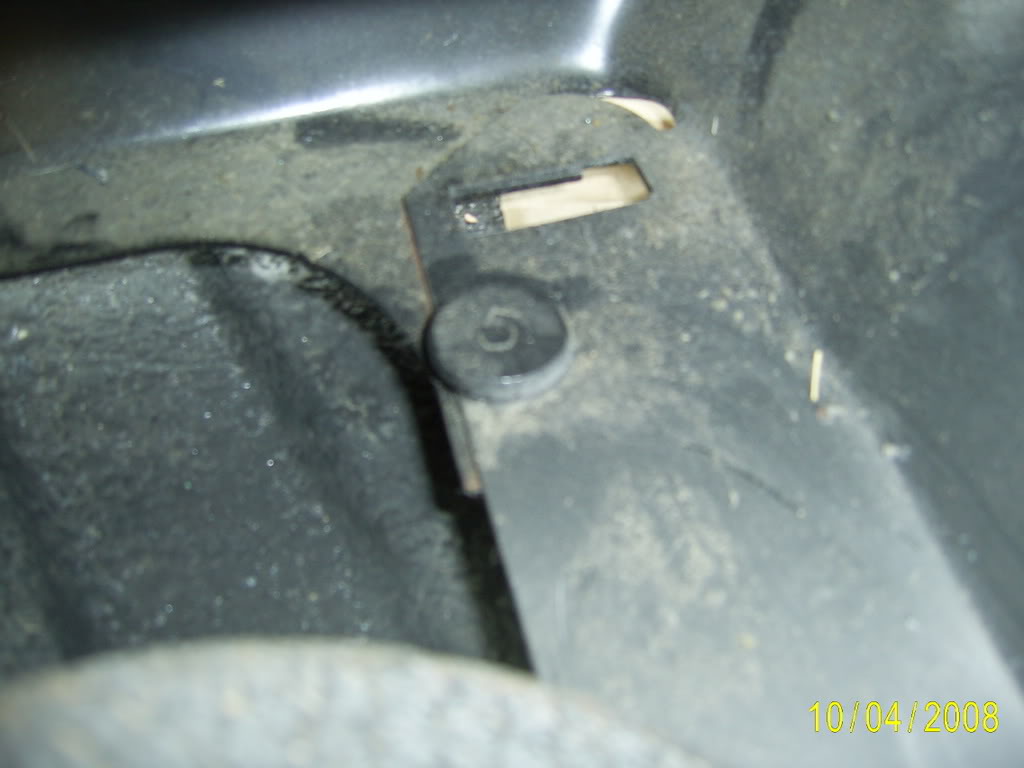
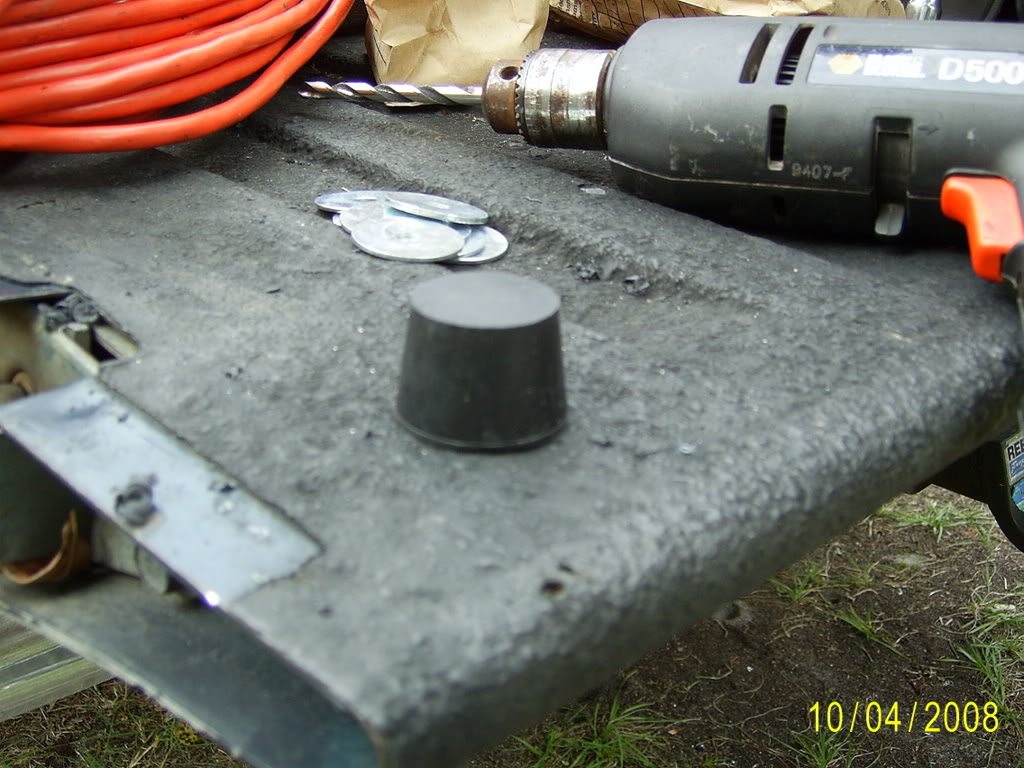
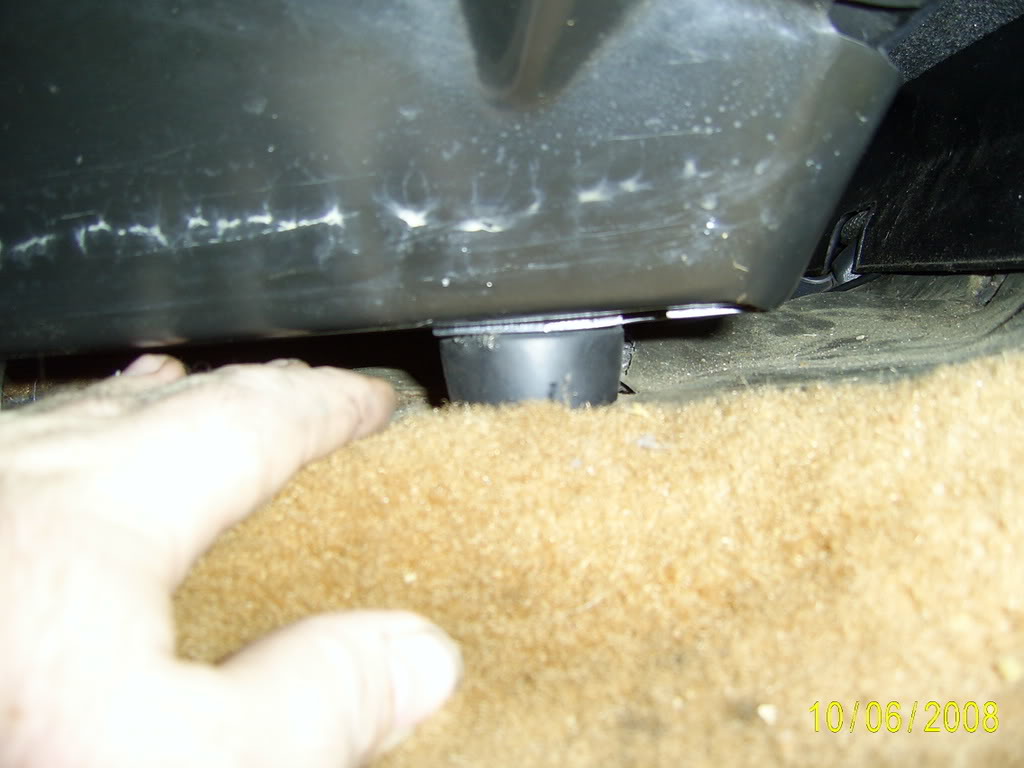
The next step can be skipped depending if you plan to mount them with the stock height of the base or not. I chose to use some solid rubber stops on all mounting locations for a little more ride comfort and i looked for a little more height than they offered stock. I used an angle grinder to grind of the studs that were tack welded for the two left side mounting bolts. This is the only seat this applies to as the rest of the mounts are through bolted including the two on the right side of the drivers seat. I just ground the heads of the studs flat and punched the threads out. Make sure if you do this you get it pretty good and flat so your new bolt sits flush against the base.
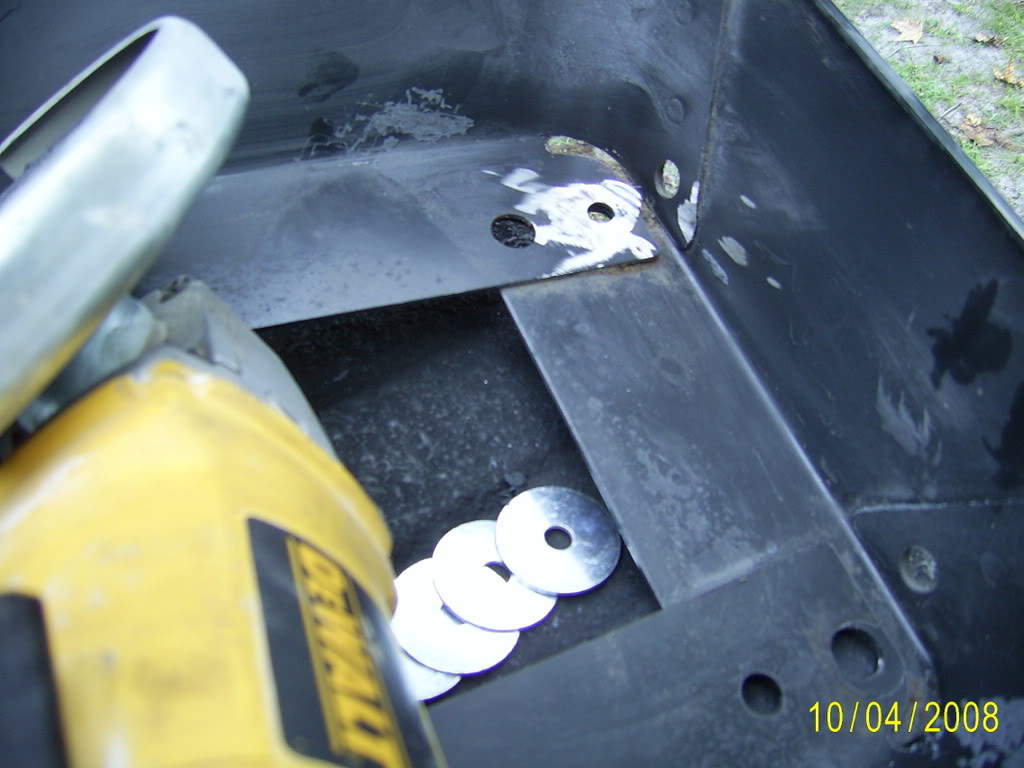
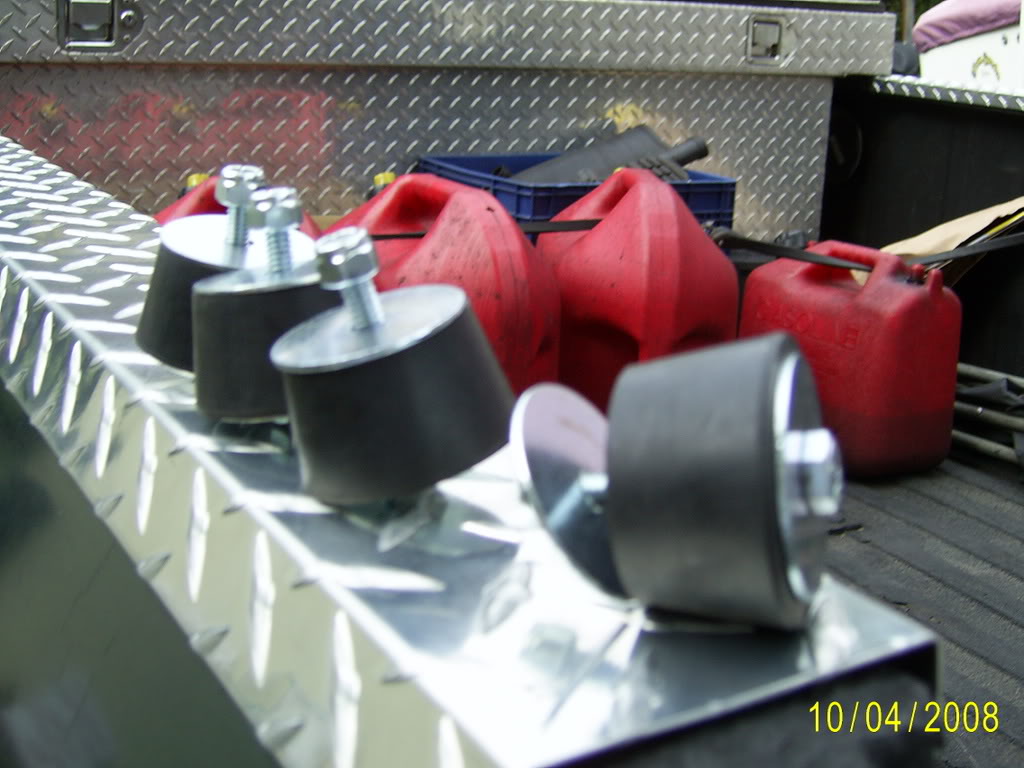
The rubber stops i used were just basic solid rubber stops i found at Ace hardware, attainable at any local hardware store. I had pondered using rubber expansion plugs from work but the parts store gets more for those that i got the stops and fender washers and bolts all together for. I drilled the stops through. This is a before and after look of my "Seat supressors" as i call them and man does this help the ride quality.
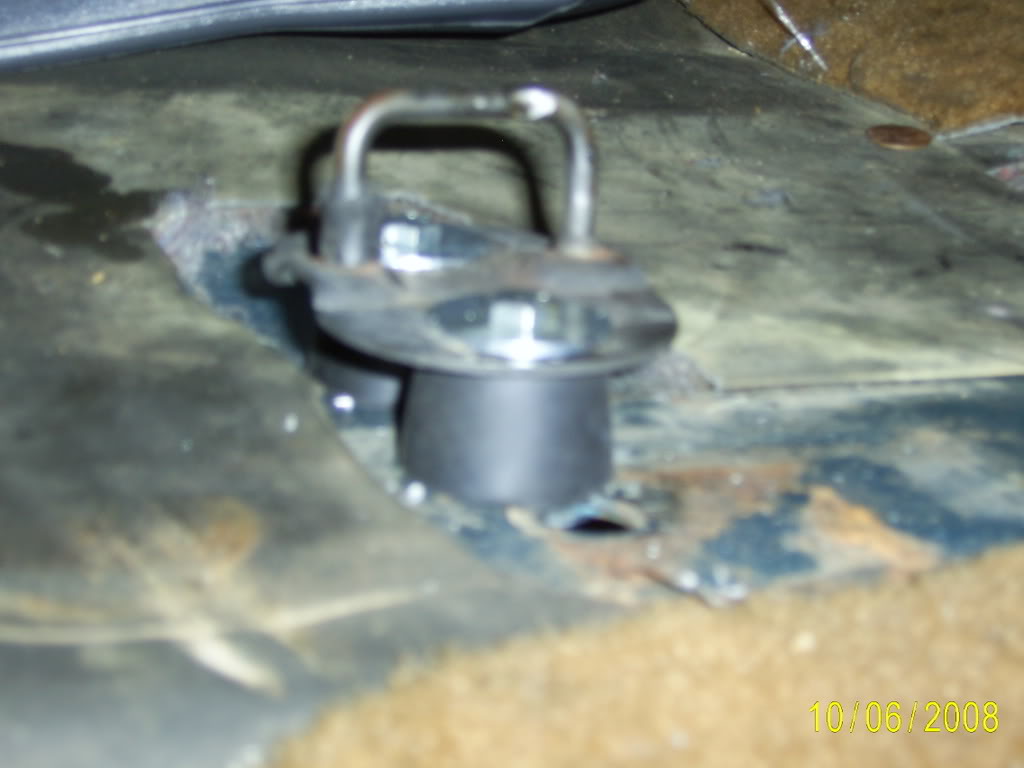
For the passenger side i used the existing hole from the front passenger side bolt that was in the bench seat. Plug the rear one with a grommet as it is not needed. Simply remove the hinge from the base of your passenger side bucket seat. Measure the distance from hole to hole on the hinge using it for a template of where the left bolt hole will need to be drilled. Once you have the seat base hinge mounted and the seat installed. Lower the seat and you can get a pretty good idea where the loop for the latch on the rear of the seat base should be mounted and drill your holes accordingly.
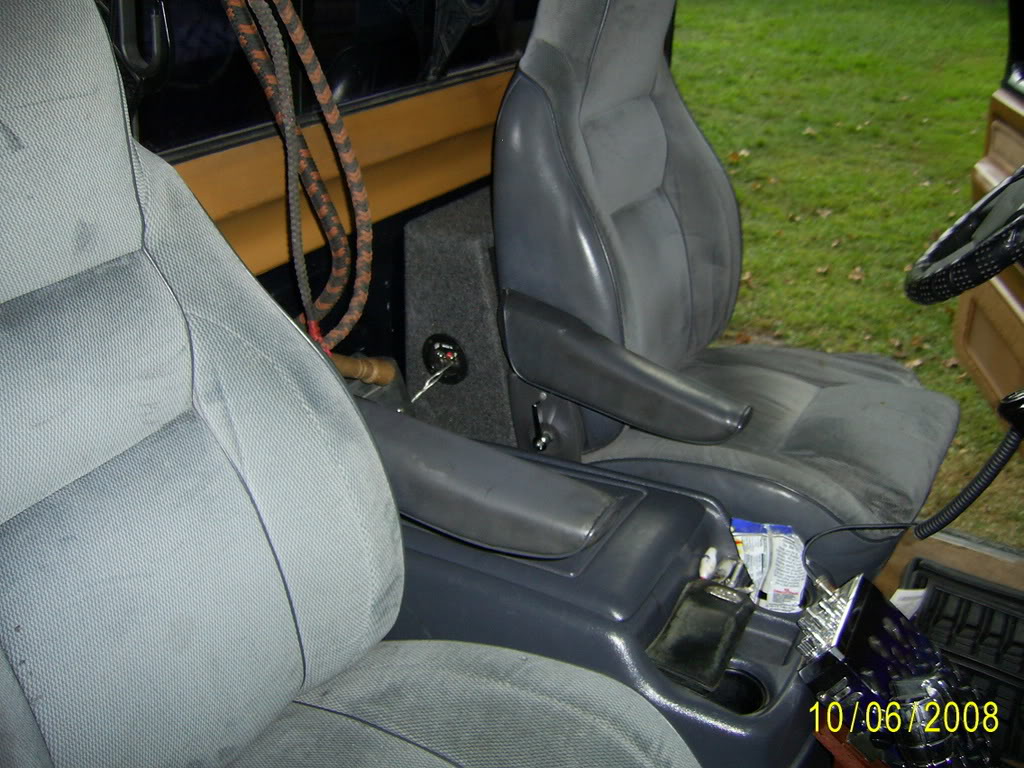
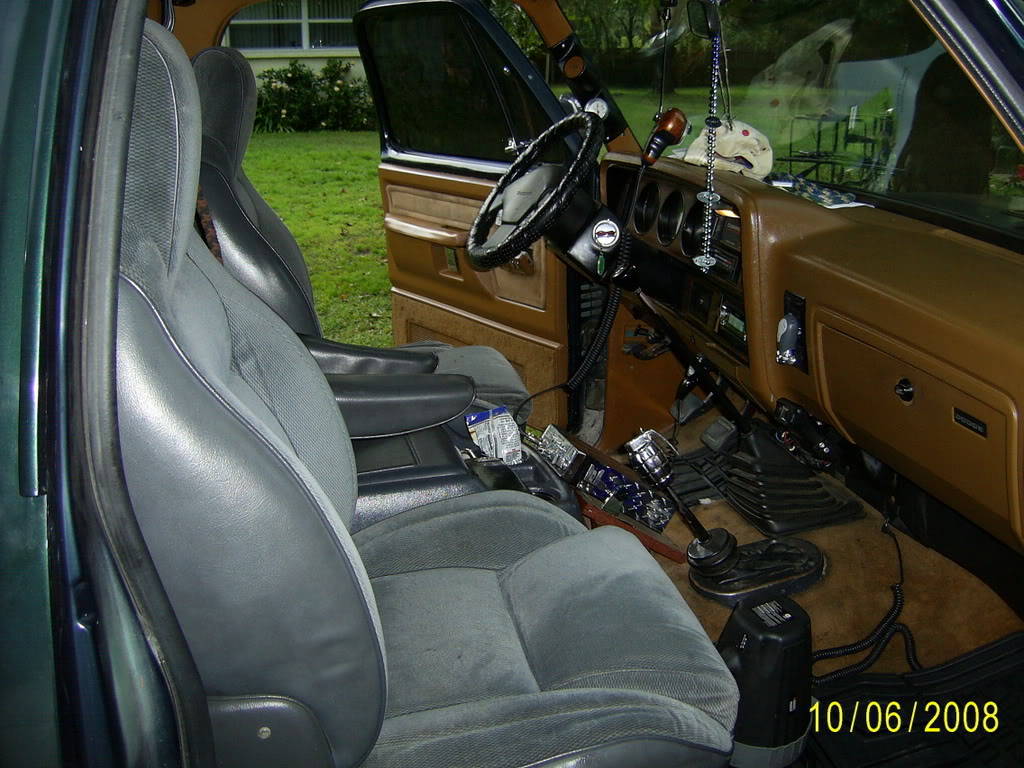
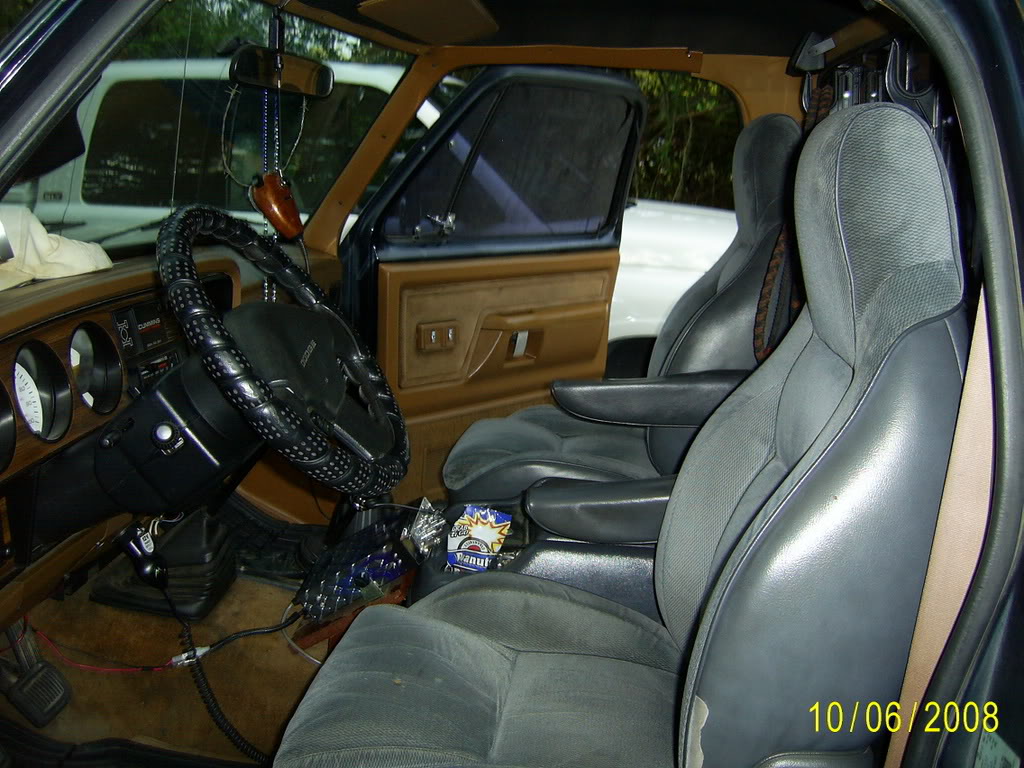
Heres some pics of the final install and the look of the cab and the mounts installed.

If ive left anything out or any of you have any questions let me know.
First I removed the base from the bottom of the drivers side seat and set it in the cab where i wanted to mount it. I was able to utilize the 2 holes already there from the bench seat mount for the 2 left side holes for the new bucket base. With those lined up i used a sharpie to mark the other two holes and then drilled them.
The next step can be skipped depending if you plan to mount them with the stock height of the base or not. I chose to use some solid rubber stops on all mounting locations for a little more ride comfort and i looked for a little more height than they offered stock. I used an angle grinder to grind of the studs that were tack welded for the two left side mounting bolts. This is the only seat this applies to as the rest of the mounts are through bolted including the two on the right side of the drivers seat. I just ground the heads of the studs flat and punched the threads out. Make sure if you do this you get it pretty good and flat so your new bolt sits flush against the base.
The rubber stops i used were just basic solid rubber stops i found at Ace hardware, attainable at any local hardware store. I had pondered using rubber expansion plugs from work but the parts store gets more for those that i got the stops and fender washers and bolts all together for. I drilled the stops through. This is a before and after look of my "Seat supressors" as i call them and man does this help the ride quality.
For the passenger side i used the existing hole from the front passenger side bolt that was in the bench seat. Plug the rear one with a grommet as it is not needed. Simply remove the hinge from the base of your passenger side bucket seat. Measure the distance from hole to hole on the hinge using it for a template of where the left bolt hole will need to be drilled. Once you have the seat base hinge mounted and the seat installed. Lower the seat and you can get a pretty good idea where the loop for the latch on the rear of the seat base should be mounted and drill your holes accordingly.
Heres some pics of the final install and the look of the cab and the mounts installed.
If ive left anything out or any of you have any questions let me know.

Thread Starter
Registered User
Joined: Mar 2008
Posts: 194
Likes: 0
From: Tennessee
Well to be truthful i got lucky a buddy of mine had a club cab gen 1 and was looking for a bench so we just even swapped. Im sure you can find some at a local boneyard/salvage yard. Keep your eyes open in the classifieds section on DTR and other forums, some guys that part these trucks out might have some spare seats too.
Trending Topics


Thread Starter
Registered User
Joined: Mar 2008
Posts: 194
Likes: 0
From: Tennessee
Yeah the seat is a bit far forward, I had my subs in and im thinkin about taking them out. I pulled the one out from behind the drivers seat today before i went to work i really like the big difference in room in the cab. The extra room is the main reason i switched from a bench to a bucket. Good luck on the swap guys trust me you will enjoy it, its a big difference in feeling. They buckets seem to sit a tad higher than the bench and definately do now with my addition to the base. I like it make ya feel like you have better visibility looking out over that big ole' hood.
I got the Chrome grenade 4x4 shifter in TN at an Autozone made by the accesory company "Pilot". I love it, that sucker is solid and real heavy so its perfect for the 4wd shifter.
I got the Chrome grenade 4x4 shifter in TN at an Autozone made by the accesory company "Pilot". I love it, that sucker is solid and real heavy so its perfect for the 4wd shifter.
Thread Starter
Registered User
Joined: Mar 2008
Posts: 194
Likes: 0
From: Tennessee
Oh yeah they are very comfortable compared to the bench and there is actually so much more room in the cab with these seats i love my setup now. Just need to get those colors matched lol

Registered User
Joined: Aug 2004
Posts: 128
Likes: 0
From: Woodbridge Virginia
Great pics thanks. I just reinstalled my bucket seats a month or so ago. My truck orginally had them but needed the bench so we would have room for my chilrdren. kids older now and at college so it was time to put the buckets back in. I still need to get the passenger seat rear hold down (loop) bracket though. Any idea on where I can get one would be appreciated.
thanks,
John
thanks,
John
Registered User
Joined: Apr 2006
Posts: 703
Likes: 0
From: Austin, Tx
Just playing devils advocate, I would think twice about the rubber mounts between the seat base and floor. Only because if you got in an accident, the force could literal rip the mounts in half and possibly dislodge the seat. I know you wanted better ride quality but I might consider using a solid mount for saftey reasons.
Other than that, they look nice.
Other than that, they look nice.